Dynamic Model
Dynamic Model lets you extend the data model of a running application: you can add attributes to existing entities and define entirely new entities without changing source code or restarting the application. The extension can include runtime UI such as views and menu items.
Key capabilities:
-
Add dynamic attributes to existing (static) entities and define new dynamic entities.
-
Store the extended data in dedicated database tables — side tables for static entities and dedicated tables for dynamic entities — for good performance.
-
Customize the runtime UI by declaring new views and menu items.
-
Define validation, attribute uniqueness, and security based on resource roles.
-
Use dynamic enumerations, references, collections, and calculated attributes.
-
Provide localized names and messages for the dynamic model.
-
The model is edited in a graphical admin UI and stored as a versioned YAML definition.
| The Dynamic Model add-on is currently in the experimental state and can change significantly in the next Jmix release. |
Dynamic Model vs. Dynamic Attributes
Jmix offers two different add-ons to extend the data model at runtime.
Dynamic Attributes store extra values in an Entity-Attribute-Value structure. They are a good fit for admin-defined custom fields added to existing entities.
Dynamic Model adds real attributes and new entities backed by dedicated database tables. In addition to data, it can define runtime views and menu items, and its model definition is editable and versioned. Choose Dynamic Model when you need new entities, dedicated tables, runtime UI, or a managed, versioned model definition.
Installation
|
This add-on requires the Enterprise subscription. If you don’t have the subscription, see the Enterprise Trial section for how to get a trial version. |
For automatic installation through Jmix Marketplace, follow instructions in the Add-ons section.
For manual installation, follow the steps below.
-
Configure access to the premium repository.
-
Add the premium repository to your
build.gradle:repositories { // ... maven { url = 'https://global.repo.jmix.io/repository/premium' credentials { username = rootProject['premiumRepoUser'] password = rootProject['premiumRepoPass'] } } } -
Add premium repository credentials to
~/.gradle/gradle.properties:premiumRepoUser=123456123456 premiumRepoPass=abcdefabcdefGet the repository credentials from your license key: the first part of the key before dash is the repository user name, the part after dash is the password. For example, if your key is
123456123456-abcdefabcdef, then the user name is123456123456and the password isabcdefabcdef.
-
-
Add dependencies to your
build.gradle:implementation 'io.jmix.dynmodel:jmix-dynmodel-starter' implementation 'io.jmix.dynmodel:jmix-dynmodel-flowui-starter'
|
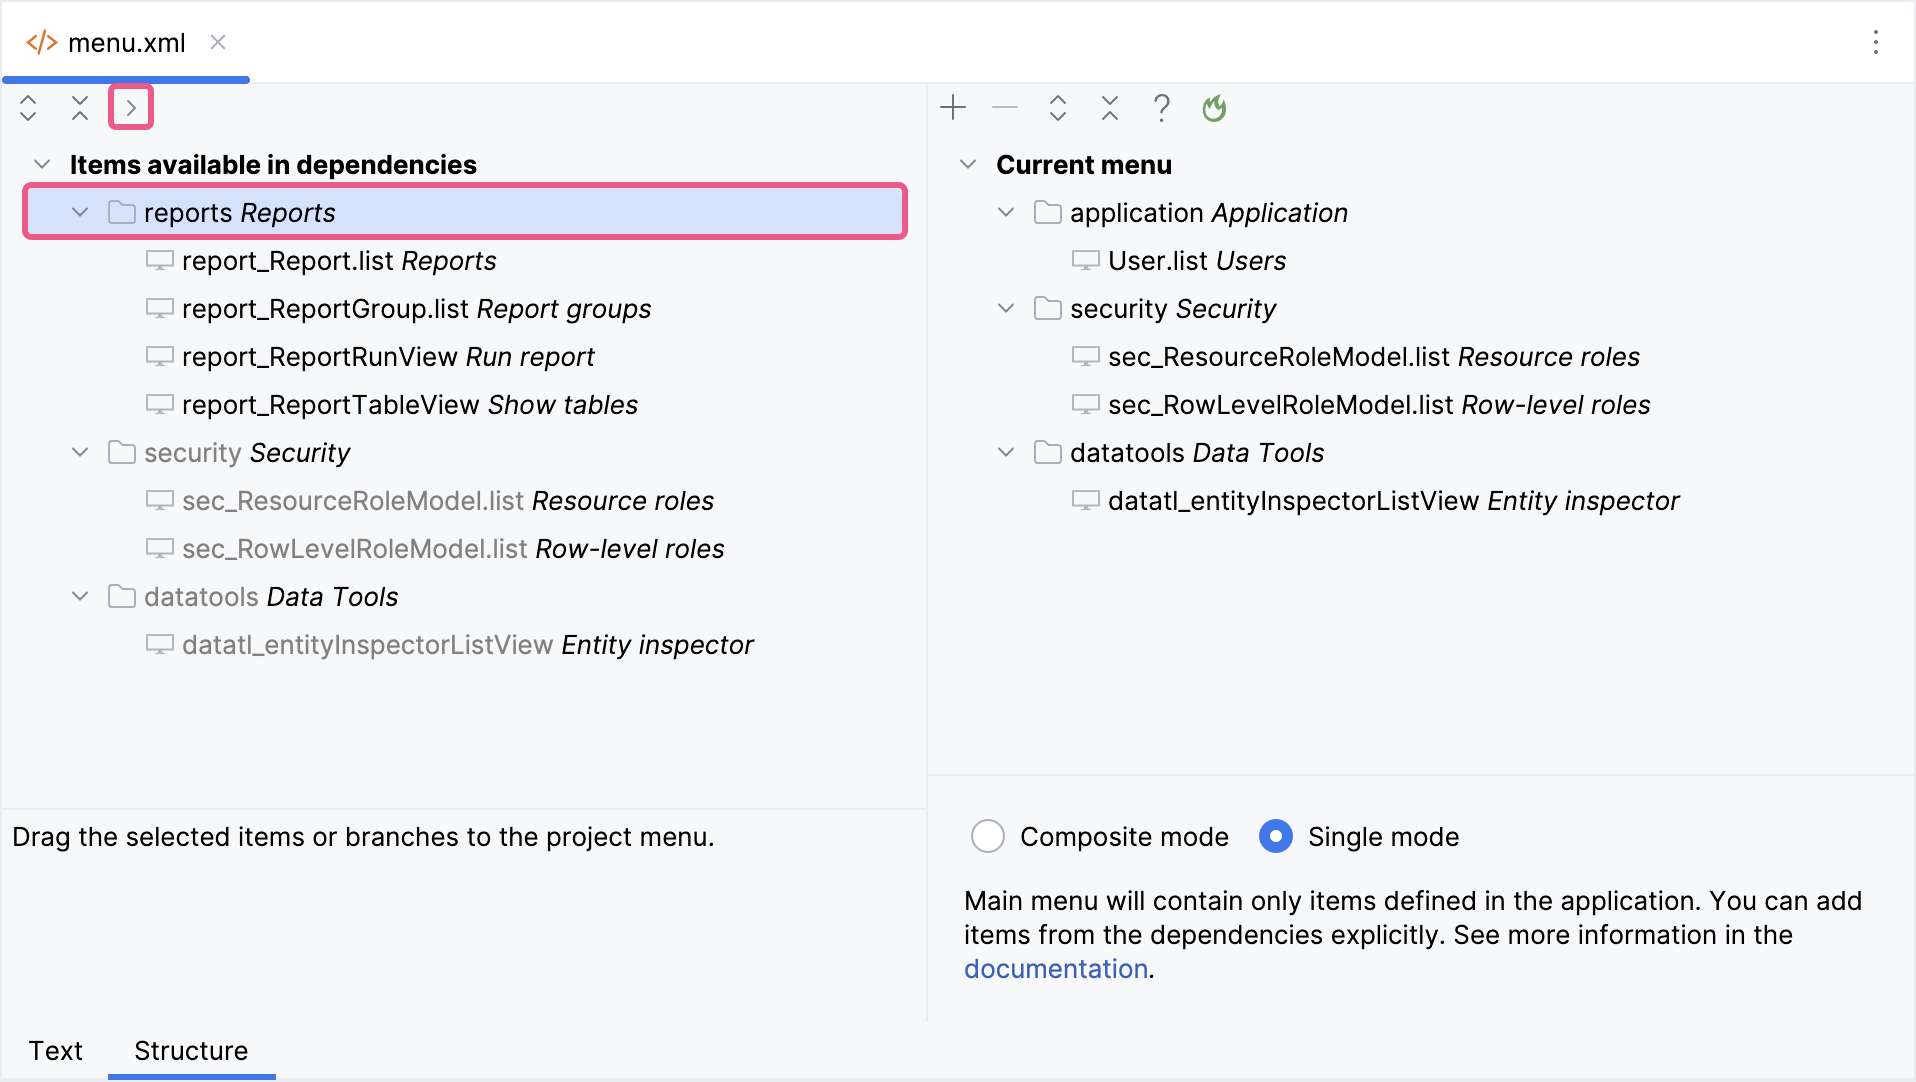
Important Note for Single Menu Mode Applications If your application uses Single menu mode, you should manually add menu items after installing an add-on.
This step is required because applications in Single menu mode do not automatically merge add-on menus with the existing structure. |