User Task
Overview
A User Task is a type of task that is assigned to a user or a group for manual completion within a business process. User tasks are integral to the workflow, allowing human participants to interact with the process by performing specific actions, making decisions, or providing input.
|
Single performer vs. group In BPMN can be the only performer of the task. When we say "the task is assigned to group", it means there is a list of potential performers, not a UserGroup object. One of them must become an actual task performer by claiming the task on himself. |
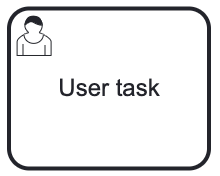
A user task is visualized as a typical task (rounded rectangle), with a small user icon in the left upper corner.
A user task is defined in XML as follows.
The id attribute is required, the name attribute is optional.
<userTask id="user-task-01" name="User task" />Properties
In addition to general properties, user task has the following specific properties:
-
Due Date to inform the performer when the task must be completed.
-
Assignee, where you can assign a single task performer or potential performers (candidates);
-
Form, where you can define a user interface for the task;
-
Task Listeners, where you can add listeners triggered by task lifecycle events.
Due Date
The due date parameter in a user task specifies the deadline by which the task must be completed. This parameter is crucial for managing time-sensitive activities within a business process.
| Setting a due date does not start any automatic actions. It is necessary to manually configure any subsequent actions. |
Setting Due Date
The Due date parameter can be set in two variants:
-
Fixed date: Some date in the future that means a deadline. (The date in the past will be ignored, the task will be shown as overdue.)
-
Duration: A period of time started from the moment when the task is created.
Actually, due date is a text field that will be interpreted by the process engine at runtime. The following variants are available:
-
Literal string in ISO8601 format, representing fixed date or duration.
-
Process variable of the type:
-
java.lang.String— must contain a value in ISO8601 format. -
java.util.Date— must contain date value.
-
-
Expression that must be resolved at runtime as one of the above variants, for example
$/{someDateVariable/}.
|
ISO 8601 examples
-
Fixed date:
-
2024-02-01T08:40:37
-
2050-01-01
-
-
Duration:
-
PT20M - in 20 minutes
-
PT5H - in 5 hours
-
PT3D - in 3 days
-
Accessing Due Date Programmatically
It is possible to manipulate due date parameter using Task class methods:
Task task = taskService.createTaskQuery()
                .taskId("taskId").singleResult(); (1)
task.getDueDate(); (2)
task.setDueDate(null); (3)
taskService.saveTask(task); (4)| 1 | — get task by id |
| 2 | — get the current value of due date |
| 3 | — set new due date value equals 'null' |
| 4 | — save task object |
So, you can change due dates dynamically depending on your business logic. For example, the assignee can ask for additional time to complete the task.
Using Business Calendar
When you have a Business Calendars add-on installed, the corresponding field appears in the General properties section in the Web BPM Modeler:
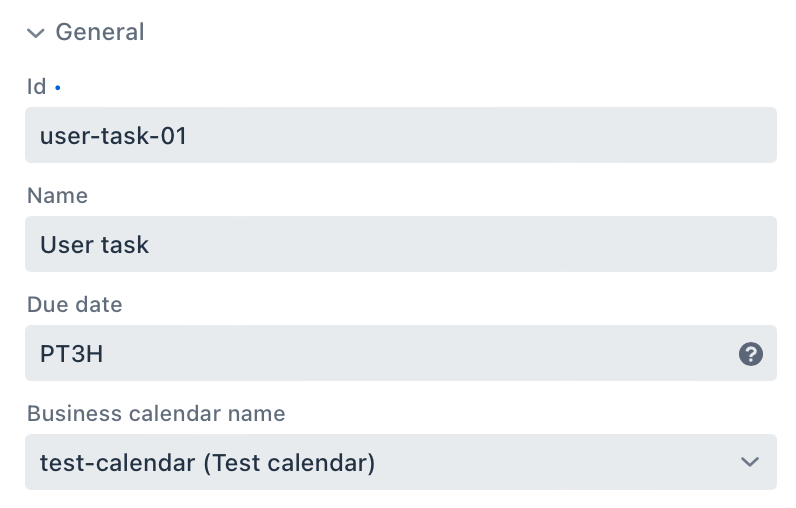
Here you can select one of preconfigured business calendars from the pull-down list. In this case, the due date can be set only as duration, and the elapsed time will be calculated taking into account the business calendar.
For example, the user received the task at 04:00 PM.
In the business calendar standard working time is set from 10:00 AM till 06:00 PM,
and a due date parameter is set for 3 hours (PT3H).
The deadline will be set not at 07:00 PM right after 3 hours but at 11:00 AM the next working day. With business calendar, only working hours are counted.
|
With business calendar duration can be set in hours and minutes, not in days. |
XML representation A user task with due date:
<userTask id="Activity_0gsy9yk" name="User task"
    flowable:dueDate="PT3H" (1)
    flowable:businessCalendarName="test-calendar"> (2)
. . .
</userTask>| 1 | — Due date as duration |
| 2 | — Business calendar attribute |
See details in Business Calendars add-on.
User Assignment
In order for a task to be ultimately completed, it must be assigned a performer. Only one user can be assigned as the human performer for the task, this user is called an assignee.
The assignee attribute can be empty. It means there is no user who sees this task in his task list.
Such a task usually is considered as a group task, when there is a list of potential performers or candidates.
As well, you can set the assignee at runtime — by using administrative functions or programmatically.
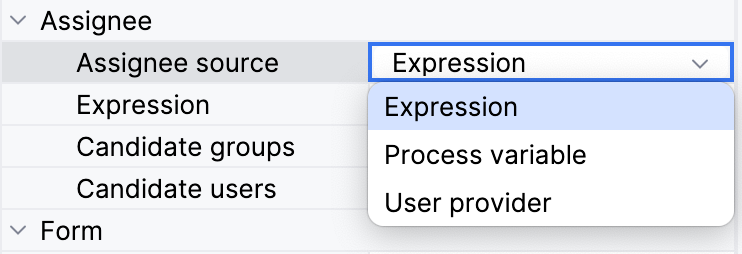
Assignee Sources
In Jmix BPM, the assignee source refers to the mechanism used to determine which way the user will be selected to be an assignee for a specific user task in a business process. There are three options, how to do that:
| Expression |
– an expression that result is a String containing username. |
| Process variable |
– a variable that refers to User entity. |
| User provider |
– a Java class with the method returning a username. |
Assigning Task by Expression
Expression is a default assignee source.
You will need to write an expression that evaluates a username of an assignee.
For example, if the User entity is stored in a process variable called manager, then the expression will be ${manager.username}:

XML representation
<userTask id="user-task-01" name="User task"
    flowable:assignee="${manager.username}"
    jmix:assigneeSource="expression"
    jmix:assigneeValue="${manager.username}" />
If you want to assign a task to a specific user, you can write a username directly:

Also, you can invoke Spring bean method that returns username:
${smpl_MyBean.evaluateManager(methodParam1, 'methodParam2')}
Assigning Task by Process Variable
If you select the Process variable assignee source, the ComboBox component will be displayed in the properties panel. This field displays those fields and process variables that are of the Entity type, and their entity class implements the UserDetails interface.
Built-in initiator variable
The build-in initiator process variable is available for assigning tasks while modeling a process. It contains an entity of the user that started the process:

XML representation
A user task with the performer assigned by process variable:
<userTask id="user-task-01" name="User task"
    camunda:assignee="${initiator.username}"
    jmix:assigneeSource="processVariable"
jmix:assigneeValue="initiator" />|
If the process was started via API or by message/signal, |
You can disable the initiator process variable using the following property:
jmix.bpm.process-initiator-variable-enabled=falseAlso, you can change the name of the initiator property:
jmix.bpm.process-initiator-variable-name=managerAssigning Task by User Provider
If you need to apply a complicated business logic to define a task performer, better to choose a User provider option. In this case, the system offers to select an existing user provider Java class:
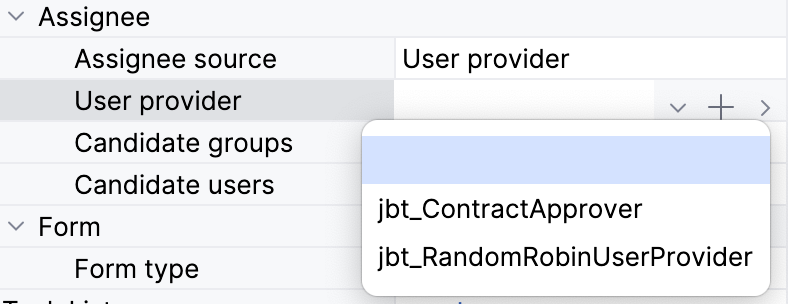
The user provider class needs to implement one or more methods with the String return type.
A method gets parameter values that are specified in the modeler and returns a username of the user that becomes a task assignee.
XML representation
A user task with performer assigned by User Provider:
<userTask id="user-task" name="User task" jmix:assigneeSource="userProvider" jmix:assigneeValue="smpl_MyUserProvider">
  <extensionElements>
    <jmix:springBean beanName="smpl_MyUserProvider" methodName="getUser" />
  </extensionElements>
</userTask>
User provider class is a common Spring bean, annotated by @UserProvider annotation.
Here is an example of the user provider that reads a process variable with the user email and finds the user in the database.
@UserProvider(value = "smpl_MyUserProvider", description = "Returns a user with the specified email")
public class MyUserProvider {

    @Autowired
    private DataManager dataManager;

    public String getUserByEmail(String parameter) {
        return dataManager.load(User.class)
                .query("select u from smpl_User u where u.email = :email")
                .parameter("email", parameter)
                .one()
                .getUsername();
    }
}
You can implement any business rules in UserProvider class.
For example, select the less busy user from the role or from the department; select next in turn; at least, select a random user from the group.
Assigning Task Programmatically
To set the task assignee programmatically, you can use the setAssignee method on the TaskService. Here’s an example:
Task task = taskService.createTaskQuery()
                       .taskId("taskId")
                       .singleResult(); (1)

taskService.setAssignee(task.getId(), "jane"); (2)| 1 | getting task object by Query API |
| 2 | setting assignee by username |
Tasks assigned to the certain user can be retrieved through the TaskService as follows:
List<Task> tasks = taskService.createTaskQuery()
    .taskAssignee("jane") (1)
.list();| 1 | username |
Task Candidate Users and Groups
Candidates refer to users or groups who are eligible to claim and complete a task. When a task has multiple candidates assigned to it, the task appears in the task lists of all the candidates. The first candidate who claims the task becomes the assignee and can then complete the task. After that, the task becomes not visible to other candidates.
|
The term "groups" here technically means a list of User group codes. |
Claiming Group Tasks
It often happens that we don’t need it a certain user performs the task. For example, it doesn’t matter for a manager who from two accountants make a decision about his order.
In this case, Jmix BPM allows assigning the task to candidates list — and any of its members can become a performer. But previously he or she must claim the task. Claiming is an action of taking task ownership by user.
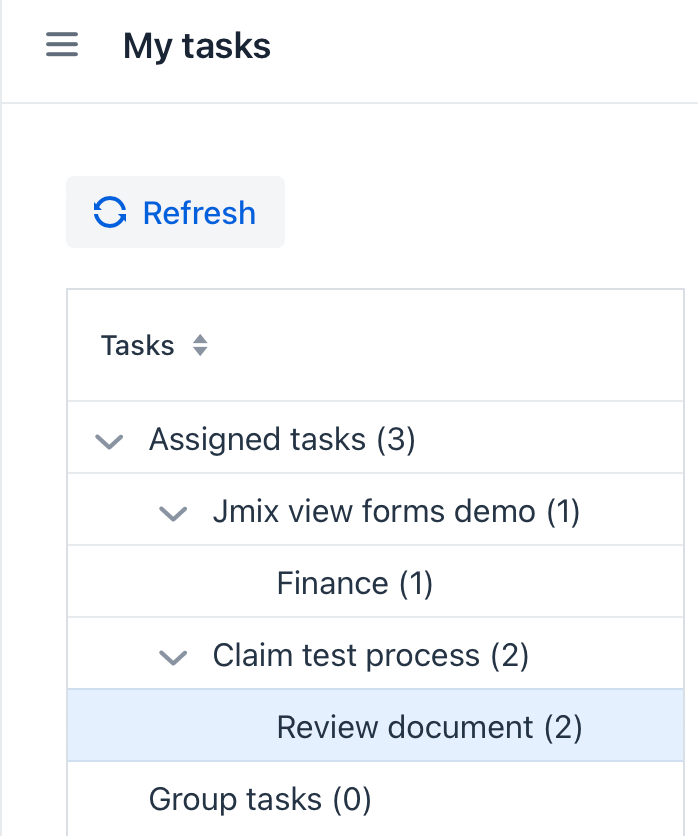
The task with candidates appears in My tasks view in the Group tasks section for each candidate.

After any of the candidates claims the task, the task moves to the Assigned tasks list for this user and disappears from the Group tasks list of other candidates.
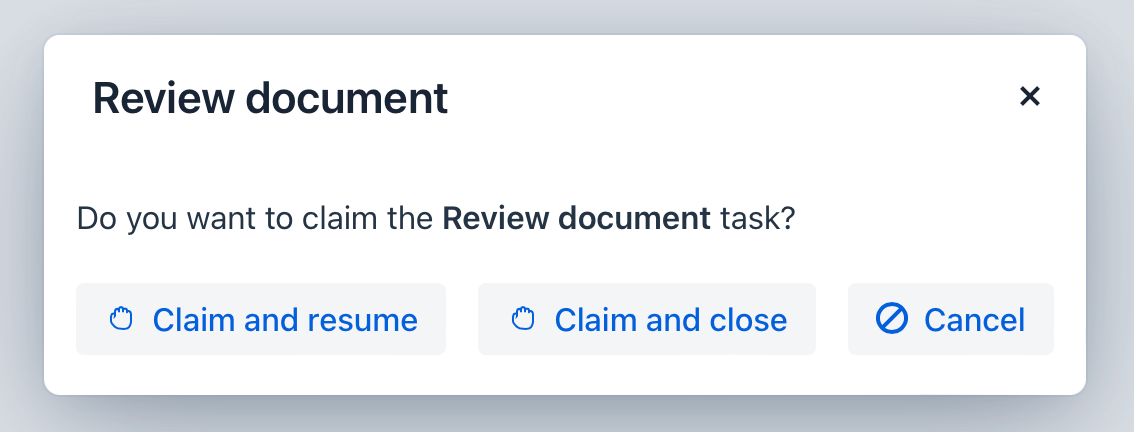
To claim the task user must open it and take one of the actions:
-
Claim and resume — the user becomes a task assignee, the task form will be reopened in normal mode, and he or she can continue to work with it.
-
Claim and close — the user becomes a task assignee, the task form will be closed; he or she can find it later in the Assigned tasks section of a task list:
Claiming Task Programmatically
It’s possible to claim the task on the specified user via API:
taskService.claim("taskId", "userId");Setting Candidates in Modeler
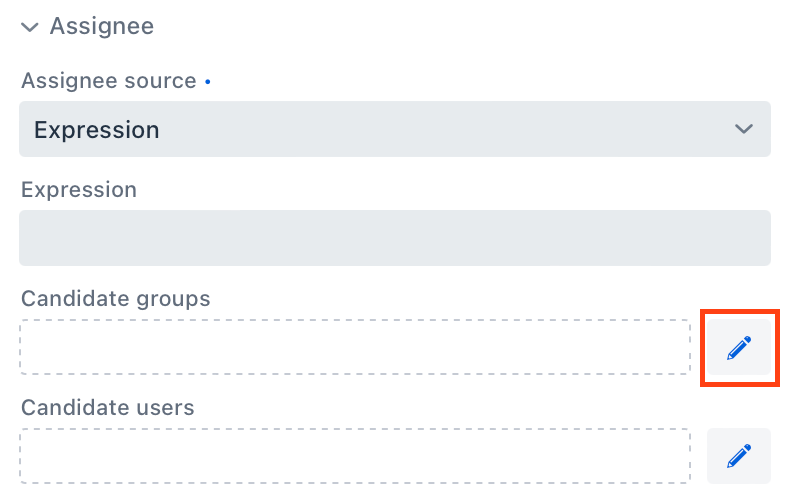
For setting candidate groups, click the Edit button:
Then the Candidate groups editor window will be opened where you’d be able to select the candidate groups source:
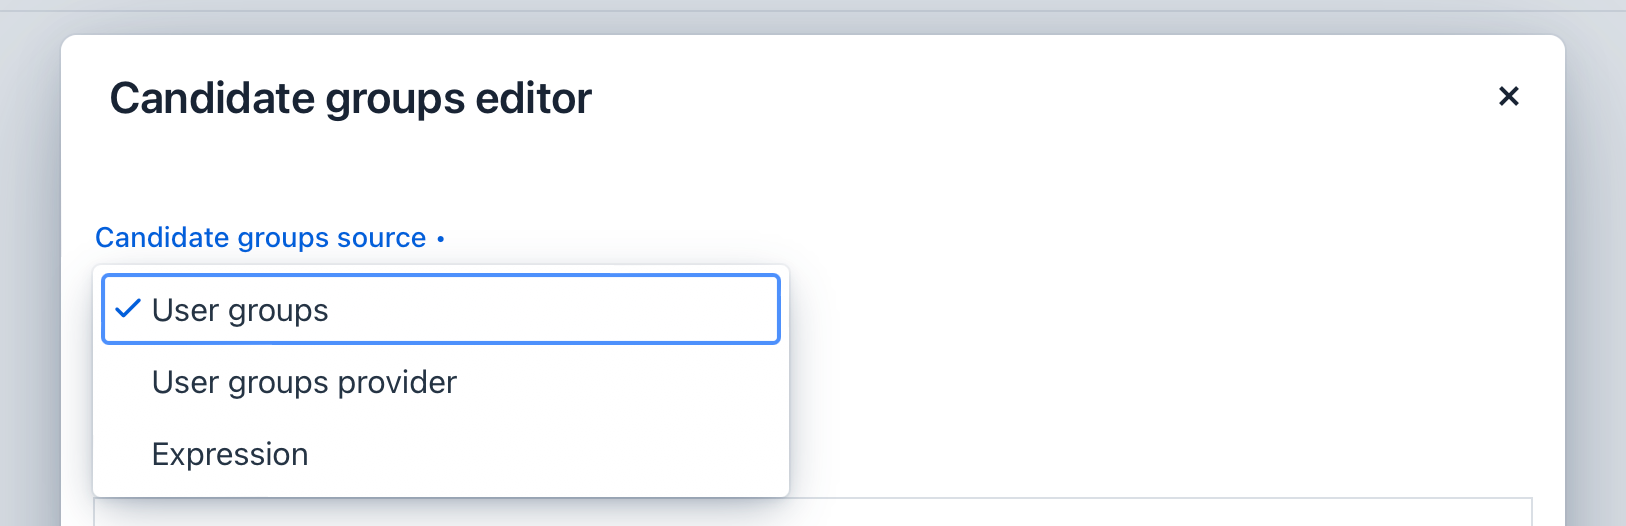
-
User groups — pick user groups from the list.
-
User groups provider — select a special Java class that returns a list of user groups.
-
Expression — get a list of user groups from expression, for example, from the process variable defined earlier in the process.
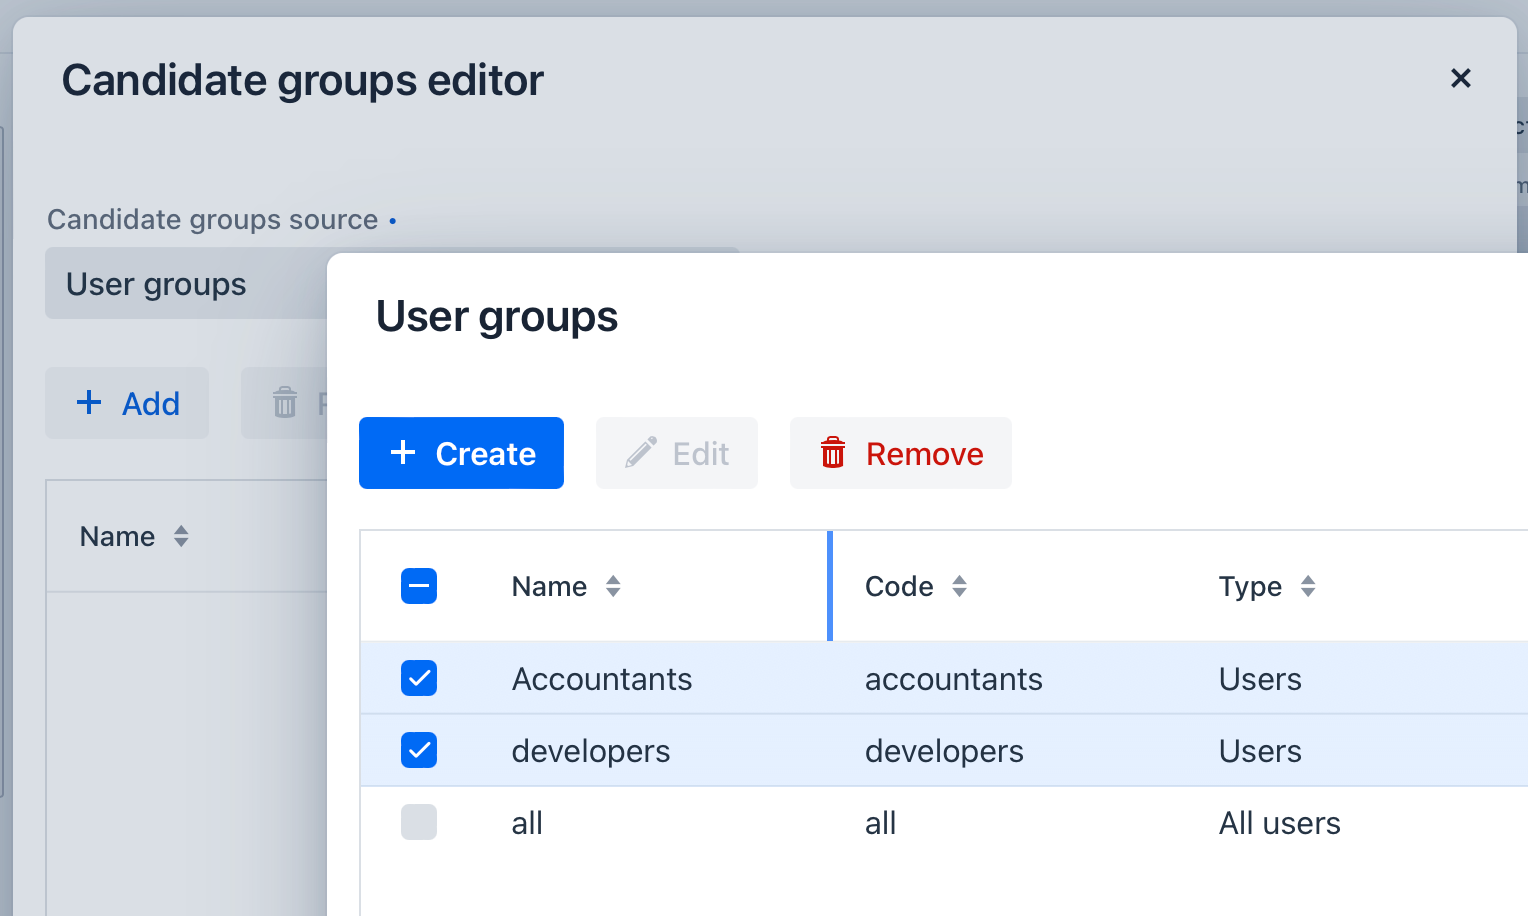
Set Candidates by User Groups
If you have chosen a User groups option as a source, you can select any from existing user groups:
User Groups Provider
If you need to implement a complicated logic when setting candidate groups, better choose the User groups provider option.
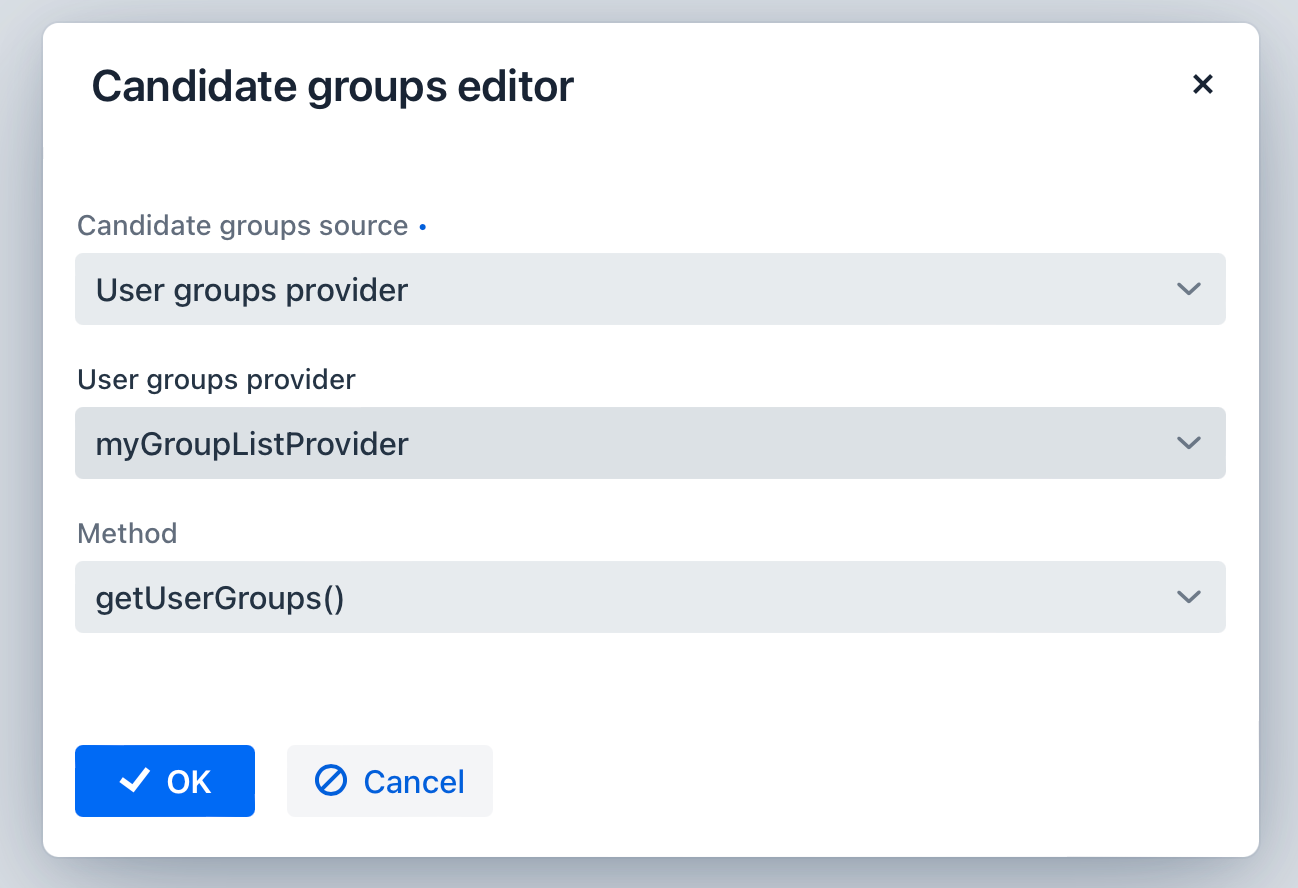
It allows you to select one of the previously created Java beans provided with the @UserGroupListProvider annotation.
This bean must implement one or more methods returning List<String> containing user group codes.
The @UserGroupListProvider annotation has two attributes:
-
value — a name that will be displayed in the modeler.
-
description — an explanation of the method’s purpose, optional.
Here is an example:
@UserGroupListProvider(value="allGroups",
                       description = "Returns a list of all groups")
public class MyGroupListProvider {

    @Autowired
    private UserGroupService userGroupService;

    public List<String> getAllUserGroups() {
        List<UserGroup> allUserGroups = userGroupService.getAllUserGroups();
        if (!allUserGroups.isEmpty()) {
            return allUserGroups.stream().map(UserGroup::getCode).toList();
        } else {
            return Collections.emptyList();
        }
    }
}
See the User groups section for more information.
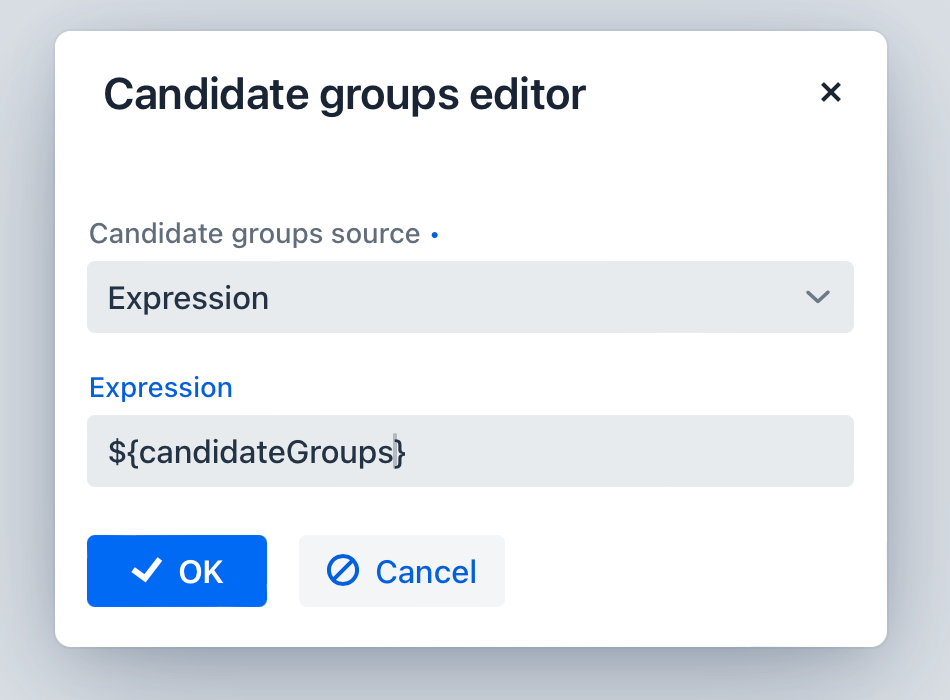
Set Candidate Groups by Expression
The most general way of setting BPMN parameters is expression. For candidate groups, it is also available:
Candidate Users Options
Setting candidate users in the Web BPM Modeler is very similar to setting candidate groups. Here are sources you can choose from:
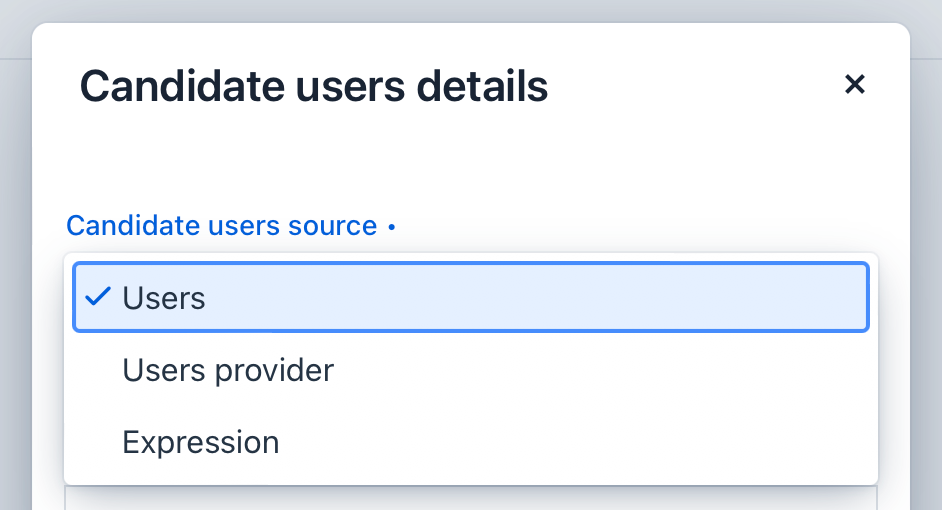
-
User groups — pick usernames from the list.
-
User groups provider — select a special Java class that returns a list of usernames.
-
Expression — get a list of usernames from expression.
User List Provider
Similar to User Groups Provider, you can get a list of candidate users programmatically
via calling a method of the Spring bean annotated by @UserListProvider annotation:
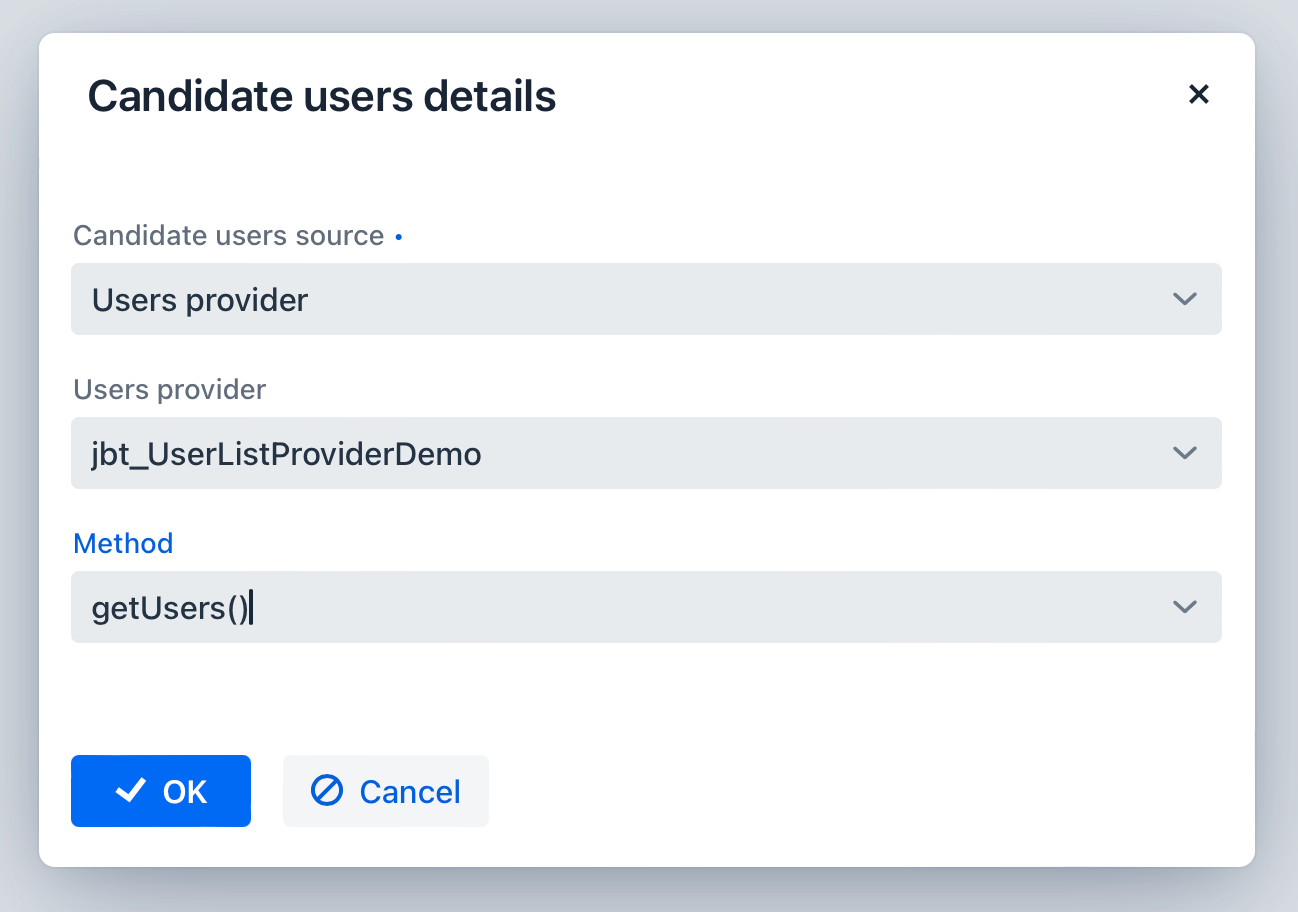
Here is an example:
@UserListProvider(value = "smpl_UserListProviderDemo",
                  description = "Get all users")
public class UserListProviderDemo {

    @Autowired
    private DataManager dataManager;
    @Autowired
    private SystemAuthenticator authenticator;

    public List<String> getAllUsers() {
        authenticator.begin();
        try {
            List<User> users = dataManager.load(User.class).all().list();
            return users.stream().map(User::getUsername).toList();
        } finally {
            authenticator.end();
        }
    }
}
Set Candidate Users by Expression
As well, you can use the most common way of setting parameter of the process model — by expression:
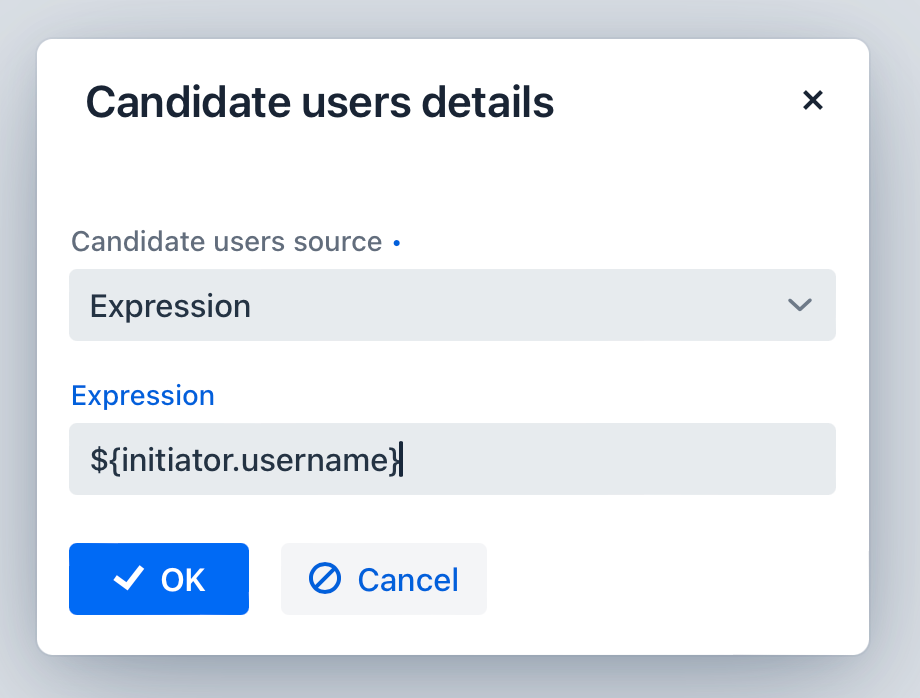
For example, this way you can refer to the username of the User entity variable:
${initiator.username}
CandidateUsers and candidateGroups can both be defined on the same user task.
User Task Process Forms
User task can be configured with a process form to assist the performer in entering data required for this task. The collected data can then be passed along in the process.
Multi Instance
User tasks can be multi-instanced. See details on this mode in the Multi-Instance section.
Setting Task Listeners
User tasks in Jmix BPM support the use of task listeners to execute custom logic in response to specific events. Task listeners allow you to define Java classes or expressions that will be triggered when certain events occur related to the user task.
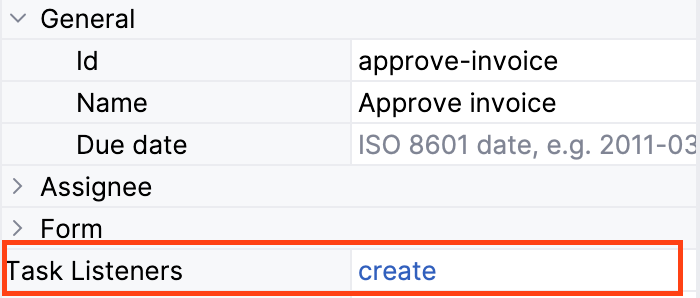
Available events for task listeners on user tasks include:
-
create: Triggered when the user task is created
-
assignment: Triggered when the user task is assigned to a user or group
-
complete: Triggered when the user task is completed
-
delete: Triggered when the user task is deleted
To configure a task listener for a user task, you can use the flowable:taskListener extension element in the BPMN XML
or the addTaskListener method in the Java API.
Task listeners provide a powerful mechanism to extend the behavior of user tasks and integrate custom logic into your processes. They allow you to perform actions such as sending notifications, updating external systems, or performing additional validations based on the events that occur during the lifecycle of a user task.
XML representation
<userTask id="approve-invoice" name="Approve invoice" jmix:assigneeSource="expression">
  <extensionElements>
    . . .
    <flowable:taskListener class="com.company.demo.listener.ApproverAssignment" (1)
                           event="assignment" /> (2)
  </extensionElements>
 . . .
</userTask>| 1 | Task listener class |
| 2 | Task event |
See details in the Task Listeners section.
Documentation
To provide user with additional information, we have parameter documentation like it named in BPMN, or description as it is named in API. It can be no more than 4000 characters long.
Originally documentation field was intended to document a process model by analytics. But in the case of User task it can be considered as instruction for user, explaining what to do.
You can find this field at the very end of the properties panel.
| You can update the documentation field every time you change your process. Thus, it’s the easiest and effective way to provide users with actual information. |
