Themes
Themes are used to manage the visual presentation of the application.
A theme consists of CSS files and other resources like images and fonts.
Jmix provides jmix-lumo theme built on top of Vaadin’s Lumo theme.
Applying a Theme
The application theme is applied using the @Theme annotation with the name of the theme folder as a parameter. The @Theme annotation must be placed on the class that implements the AppShellConfigurator interface, which is usually the main application class.
@Theme(value = "my-theme")
public class MyProjectApplication implements AppShellConfigurator {
    ...
}
A theme variant can be specified as an additional parameter, such as dark or light.
@Theme(value = "my-theme", variant = "dark")
public class MyProjectApplication implements AppShellConfigurator {
    ...
}| Themes cannot be switched at runtime. Although a project may have multiple themes, only one can be applied for the UI. However, there are ways to switch between variants of the same theme and load dynamically additional styles on top of a theme. |
Application Theme
Themes, available to the application, are located inside the src/main/frontend/themes folder. Jmix application projects created using Studio have a predefined theme folder with the same name as the project itself.
For example:
src
└── main
    └── frontend
        └── themes
            └── my-project
                ├── my-project.css
                ├── styles.css
                ├── theme.json
                └── view
                    ├── login-view.css
                    ├── main-view-top-menu.css
└── main-view.css-
my-project- the theme folder. Its name is used as the theme name for the @Theme annotation. -
my-project.css- a stylesheet for custom styles of this theme. -
styles.css- the main stylesheet, which is the entry point to the styles of this theme. -
theme.json- the theme configuration file. By default, it defines jmix-lumo as the parent theme. -
view- this folder contains CSS files that define styles for the login and main views provided by the project template.
All CSS, including CSS variable values and custom component styles, can be included in the main styles.css file. However, by default, this file contains only import directives, with the actual CSS organized into separate files to make it easier to handle:
@import url('my-project.css');
@import url('view/main-view.css');
@import url('view/main-view-top-menu.css');
@import url('view/login-view.css');
Place your project’s CSS in the <theme_name>.css file (in this example, it’s my-project.css).
|
Use Vaadin’s online Lumo theme editor to quickly customize the theme of your application. To select the desired appearance of UI-components, use the controls in the right-side panel. Then, click Download and insert the generated CSS code, located within the |
Reusable Theme
An application theme can be used in multiple applications by packaging it as a JAR dependency.
The theme project’s structure looks as follows:
src
└── main
    └── resources
        └── META-INF
            └── resources
                └── themes
                    └── cobalt
                        ├── styles.css
└── theme.json-
cobalt- the theme folder, also used as theme name. -
styles.css- the main stylesheet. Can contain custom styles and imports, for example:html { --lumo-border-radius: calc(var(--lumo-size-m) / 2); --lumo-primary-color: rgb(0, 85, 166); --lumo-primary-color-50pct: rgba(0, 85, 166, 0.5); --lumo-primary-color-10pct: rgba(0, 85, 166, 0.1); --lumo-primary-text-color: rgb(0, 85, 166); } -
theme.json- a theme configuration file. It’s recommended to define jmix-lumo as the parent theme, so your custom theme includes jmix-lumo styles required for proper work of Jmix UI components and views. For example:{ "parent": "jmix-lumo", "lumoImports":["typography","color","spacing","badge","utility"] }
The build.gradle file of the theme add-on project may look as follows:
plugins {
    id 'java'
    id 'com.gradle.plugin-publish' version '1.2.1'
}

group = 'com.company'
version = '0.0.1-SNAPSHOT'

repositories {
    mavenCentral()
    maven {
        url 'https://global.repo.jmix.io/repository/public'
    }
}

dependencies {
    implementation 'io.jmix.flowui:jmix-flowui-themes:2.4.0' (1)
}| 1 | Dependency to jmix-flowui-themes that contains jmix-lumo theme. |
After the theme JAR is added as a dependency to the project, the packaged theme can be used as a standalone theme:
@Theme(value = "cobalt")
public class MyProjectApplication implements AppShellConfigurator {
    ...
}
or as a parent for the project’s themes, for example:
{
  "parent": "cobalt",
  "lumoImports":["typography","color","spacing","badge","utility"]
}
In this case, the project’s theme will load on top of the base theme, extending it.
Pluggable Styles
When developing a custom add-on, you can create a file with custom styles in the src/main/resources/META-INF/resources/ directory. To add these styles to the resulting application, define the jmix.ui.export-styles property in the module.properties file. The value of this property is a path relative to src/main/resources/META-INF/resources/, for example, jmix.ui.export-styles = addon-styles/my-addon-styles.css:
.test {
    color: red;
}
Custom styles are added as <style type="text/css"> to the <head> element:
<style type="text/css">
.test {
    color: red;
}
</style>| Use this approach only for a small number of styles that cannot be applied to a particular UI component. For example, for CSS utility classes of views inside an add-on. |
Changing Theme Variants at Runtime
To switch between theme variants, e.g. light and dark, the framework provides a static helper class that works in conjunction with the JavaScript file.
The ThemeUtils class provides methods for switching theme variants, which effectively means setting the theme variant in Web Local Storage and invoking JavaScript code to apply it.
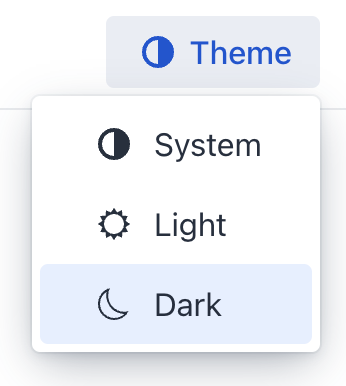
For example, you can add a dropdownButton to the main view and switch between theme variants:
<dropdownButton id="themeSwitcher"
                text="Theme" icon="ADJUST"
                classNames="ms-auto me-m"
                dropdownIndicatorVisible="false">
    <items>
        <actionItem id="systemThemeItem">
            <action id="systemThemeAction"
                    text="System" icon="ADJUST"/>
        </actionItem>
        <actionItem id="lightThemeItem">
            <action id="lightThemeAction"
                    text="Light" icon="SUN_O"/>
        </actionItem>
        <actionItem id="darkThemeItem">
            <action id="darkThemeAction"
                    text="Dark" icon="MOON_O"/>
        </actionItem>
    </items>
</dropdownButton>@Subscribe("themeSwitcher.systemThemeItem.systemThemeAction")
public void onThemeSwitcherSystemThemeItemSystemThemeAction(final ActionPerformedEvent event) {
ThemeUtils.applySystemTheme();
}
@Subscribe("themeSwitcher.lightThemeItem.lightThemeAction")
public void onThemeSwitcherLightThemeItemLightThemeAction(final ActionPerformedEvent event) {
ThemeUtils.applyLightTheme();
}
@Subscribe("themeSwitcher.darkThemeItem.darkThemeAction")
public void onThemeSwitcherDarkThemeItemDarkThemeAction(final ActionPerformedEvent event) {
ThemeUtils.applyDarkTheme();
}
The JavaScript file provides code that applies a theme variant to an HTML document depending on the value in the Web Local Storage and subscribes to the prefers-color-scheme to update the theme variant if the user indicates their preference through an operating system setting (e.g., light or dark mode) or the user agent’s settings.
You need to import it into the main application class:
@JsModule("./src/theme/color-scheme-switching-support.js")
@SpringBootApplication
@StyleSheet(Lumo.UTILITY_STYLESHEET)
public class OnboardingApplication implements AppShellConfigurator {
Customizing Component Styles for Theme Variants
When you allow users to switch between light and dark theme variants at runtime (as described above), you may need to define specific styles for each variant to ensure proper contrast and visual appearance.
To apply styles conditionally based on the active theme variant, use the theme attribute on the html element in your CSS. When a theme variant is applied, Jmix adds a corresponding theme attribute to the root html element.
-
For the light variant, the attribute is
theme="light". -
For the dark variant, the attribute is
theme="dark".
You can use these selectors in your theme’s CSS files (for example, in my-project.css or styles.css) to override component styles for a specific variant.
Suppose you have a button with the custom style name my-button and you want it to have different text colors in light and dark modes.
/* Default style for light mode */
vaadin-button.my-button {
    color: navy;
}

/* Override for dark mode */
html[theme='dark'] vaadin-button.my-button {
    color: lightskyblue;
}
You can also override Lumo’s built-in CSS properties (variables) for specific variants. This provides a way to consistently change the appearance of many components at once.
For example, to change the primary color for the dark variant only:
html[theme='dark'] {
    --lumo-primary-color: rgb(100, 200, 255);
    --lumo-primary-text-color: rgb(100, 200, 255);
}
|
