Installation
Installation Instructions
Jmix Studio is implemented as a plugin for IntelliJ IDEA. See installation instructions of stable versions in the setup section.
Working Behind Proxy
In order to configure Jmix Studio to access the internet via a proxy server, you need to configure IntelliJ IDEA and Gradle settings. Configuring Git settings is optional.
Configure IDEA Proxy Settings
-
Open Settings dialog from the main menu: File → Settings.
-
Choose Appearance & Behavior → System Settings → HTTP Proxy section.
-
Set necessary setting values and press Check connection to test them.
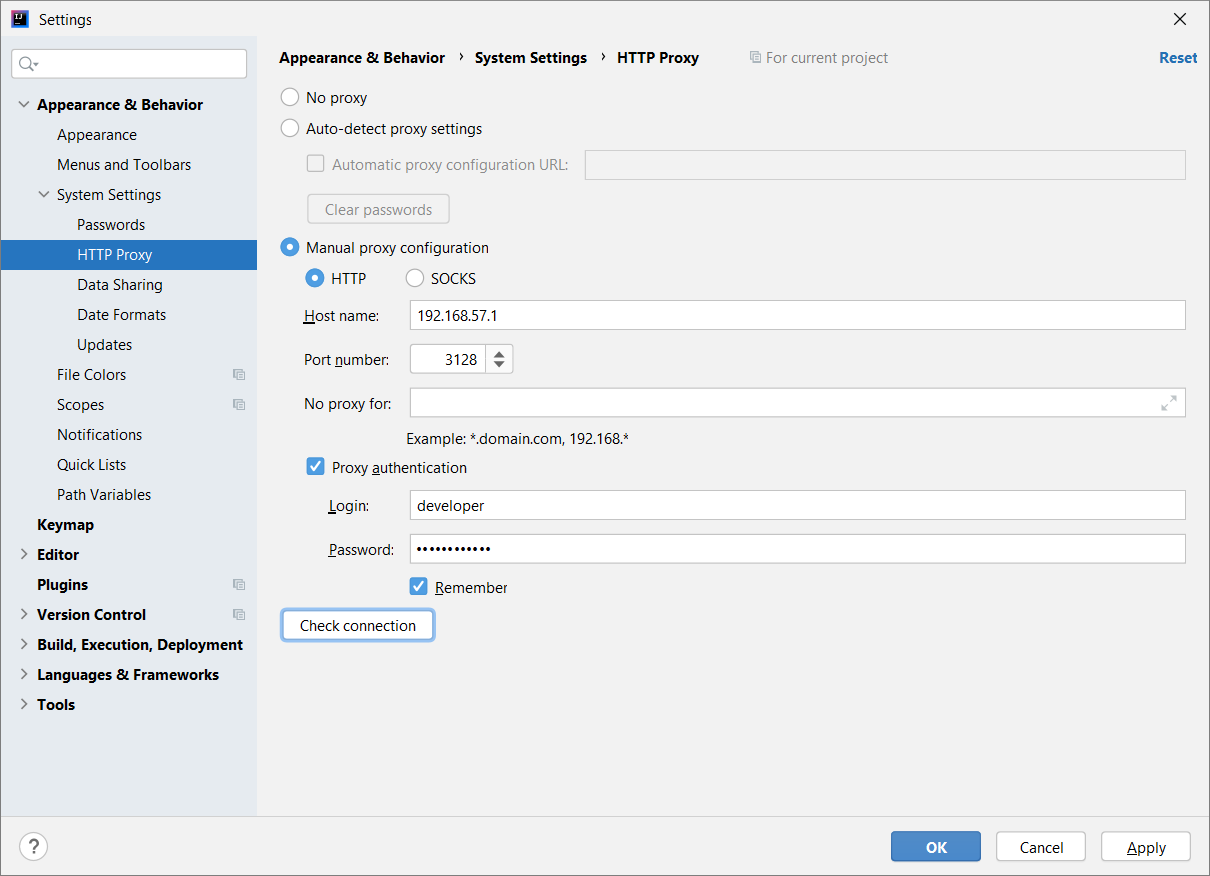
For more information, go to IntelliJ IDEA documentation.
Configure Gradle Proxy Settings
-
Find the
~/.gradle/gradle.propertiesfile in the user home directory. -
Edit this file and add the required proxy parameters as described in the Gradle documentation:
systemProp.http.proxyHost=192.168.57.1
systemProp.http.proxyPort=3128
systemProp.http.proxyUser=developer
systemProp.http.proxyPassword=Df887..33
systemProp.http.nonProxyHosts=*.nonproxyrepos.com|localhost
Configure Git Proxy Settings
If you want to download projects, for example, from GitHub repositories, configure proxy settings for the Git version control tool as well.
Run the command:
git config --global http.proxy http://proxyUsername:proxyPassword@proxy.server.com:portFor more details, see Git documentation.
Working Offline
You can develop projects using Studio without an internet connection. In this case, all project dependencies must already be loaded, that is, the project must have already been opened and assembled by this Studio installation. Some Studio features are not available in offline mode, for example, you cannot change the framework version or browse Jmix Add-Ons Marketplace.
To start working offline, open the Gradle tool window on the right side of the IDE and click the Toggle Offline Mode button:
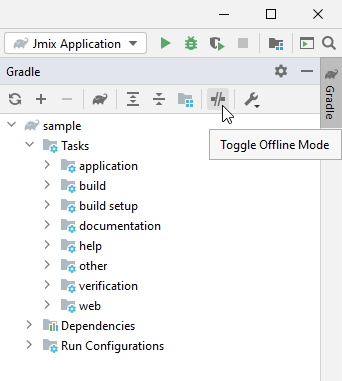
In offline mode, Gradle uses dependencies from the cache when executing all project build tasks. Gradle does not attempt to access the network to perform dependency resolution. If the required dependencies are not present in the cache, build execution will fail.
Non-Standard Studio Builds
Sometimes you might need to use one of the non-standard Studio builds in your IDE, for example, to get early access to the newest Studio features. Using a non-standard Studio build requires installation of a specific plugin version into the IntelliJ IDEA.
| Keep in mind that non-standard Studio builds have the same subscription requirements as stable releases. |
Nightly Builds
Nightly Studio builds are published every night as part of the continuous integration process. These builds contain the latest changes implemented by the Jmix Studio team. You can switch to nightly builds if you want to get the newest features, improvements, and support for upcoming Jmix framework versions.
| Nightly builds contain changes that have not passed through the quality assurance process. Therefore, they can contain severe functionality defects. |
To use nightly builds, do the following:
-
Open the Main Menu → File → Settings → Plugins dialog.
-
Click the gear icon and select Manage Plugin Repositories.

-
Click
+and enter the following path:https://plugins.jetbrains.com/plugins/jmix_nightly/list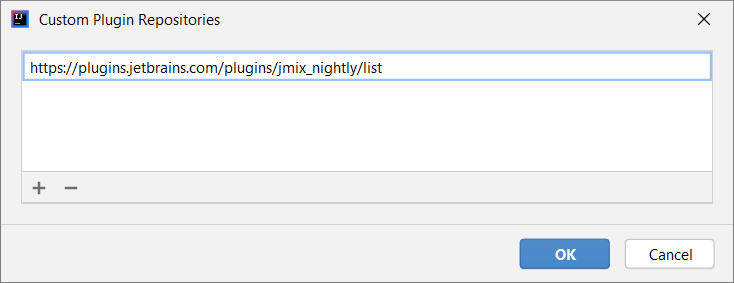
-
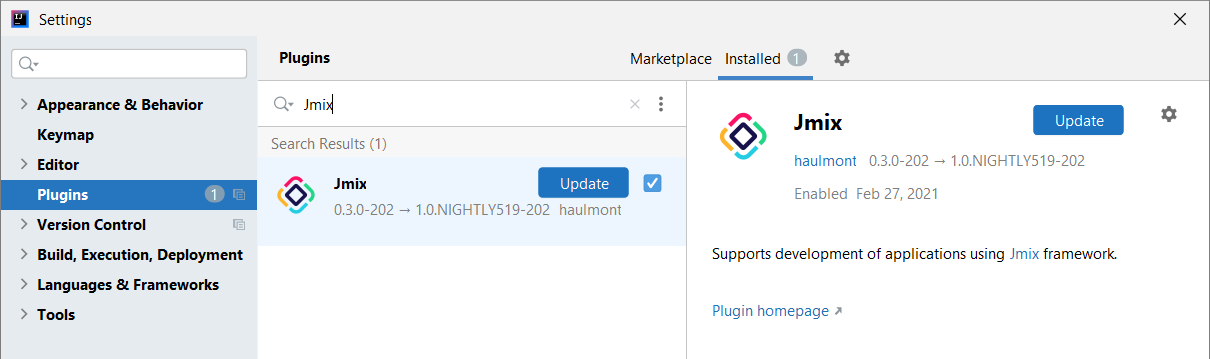
You should immediately see that Jmix plugin requests for update to the NIGHTLY version.
-
Click Update and restart IDE.
As new nightly builds are published every night, you need to update Jmix plugin on a daily basis to get the latest changes.
If you need to return to the stable plugin version, do the following:
-
Open the Main Menu → File → Settings → Plugins dialog.
-
Go to the Installed tab.
-
Uninstall Jmix plugin.
-
Click the gear icon and select Manage Plugin Repositories.
-
Remove "nightly" repository from the list.
-
Install Jmix plugin again, it will come from the stable plugins channel.
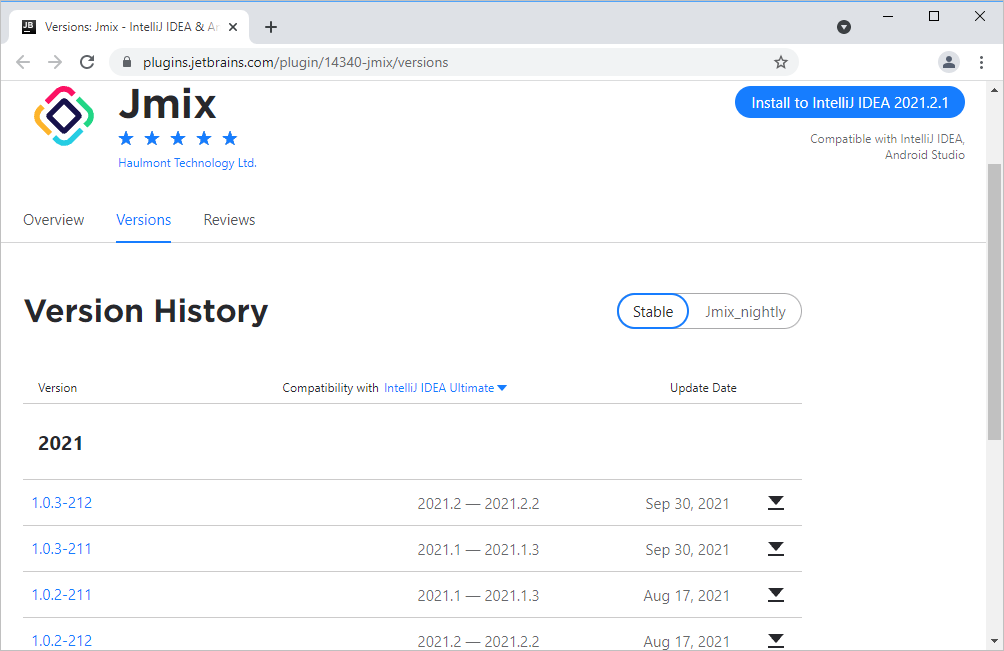
Install Plugin from Disk
You can download any release of the Studio plugin from the plugin repository site and install it into the IntelliJ IDEA. Follow these steps:
-
Open Jmix Plugin page in the JetBrains Plugin Repository.
-
Select the channel you need to download a release from: Stable or Nightly.
-
Find the required build in the Version History list and download it.
-
Open the Main Menu → File → Settings → Plugins dialog in IntelliJ IDEA.
-
Click the gear icon and select Install Plugin from Disk.
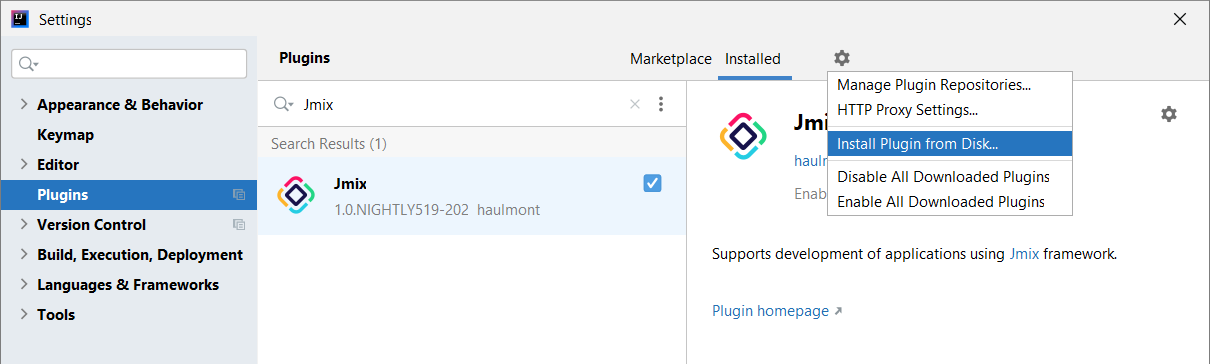
-
Select the downloaded ZIP file in the file tree and press OK.
-
Restart IDE.
