Tutorial
This tutorial introduces you to the essentials of Jmix by walking you through building a simple full-stack web application. It covers the entire development process, from data modeling to creating UI and managing access rights.
To get the most out of this tutorial, you should be familiar with Java and relational databases.
|
Instead of the tutorial, you can take our free Full Stack Java Web Development course on Udemy. Both the course and the tutorial cover the same product concepts. |
Installation
Check system requirements and install Jmix Studio and Java Development Kit (JDK) as described in the Setup section.
About the Sample Application
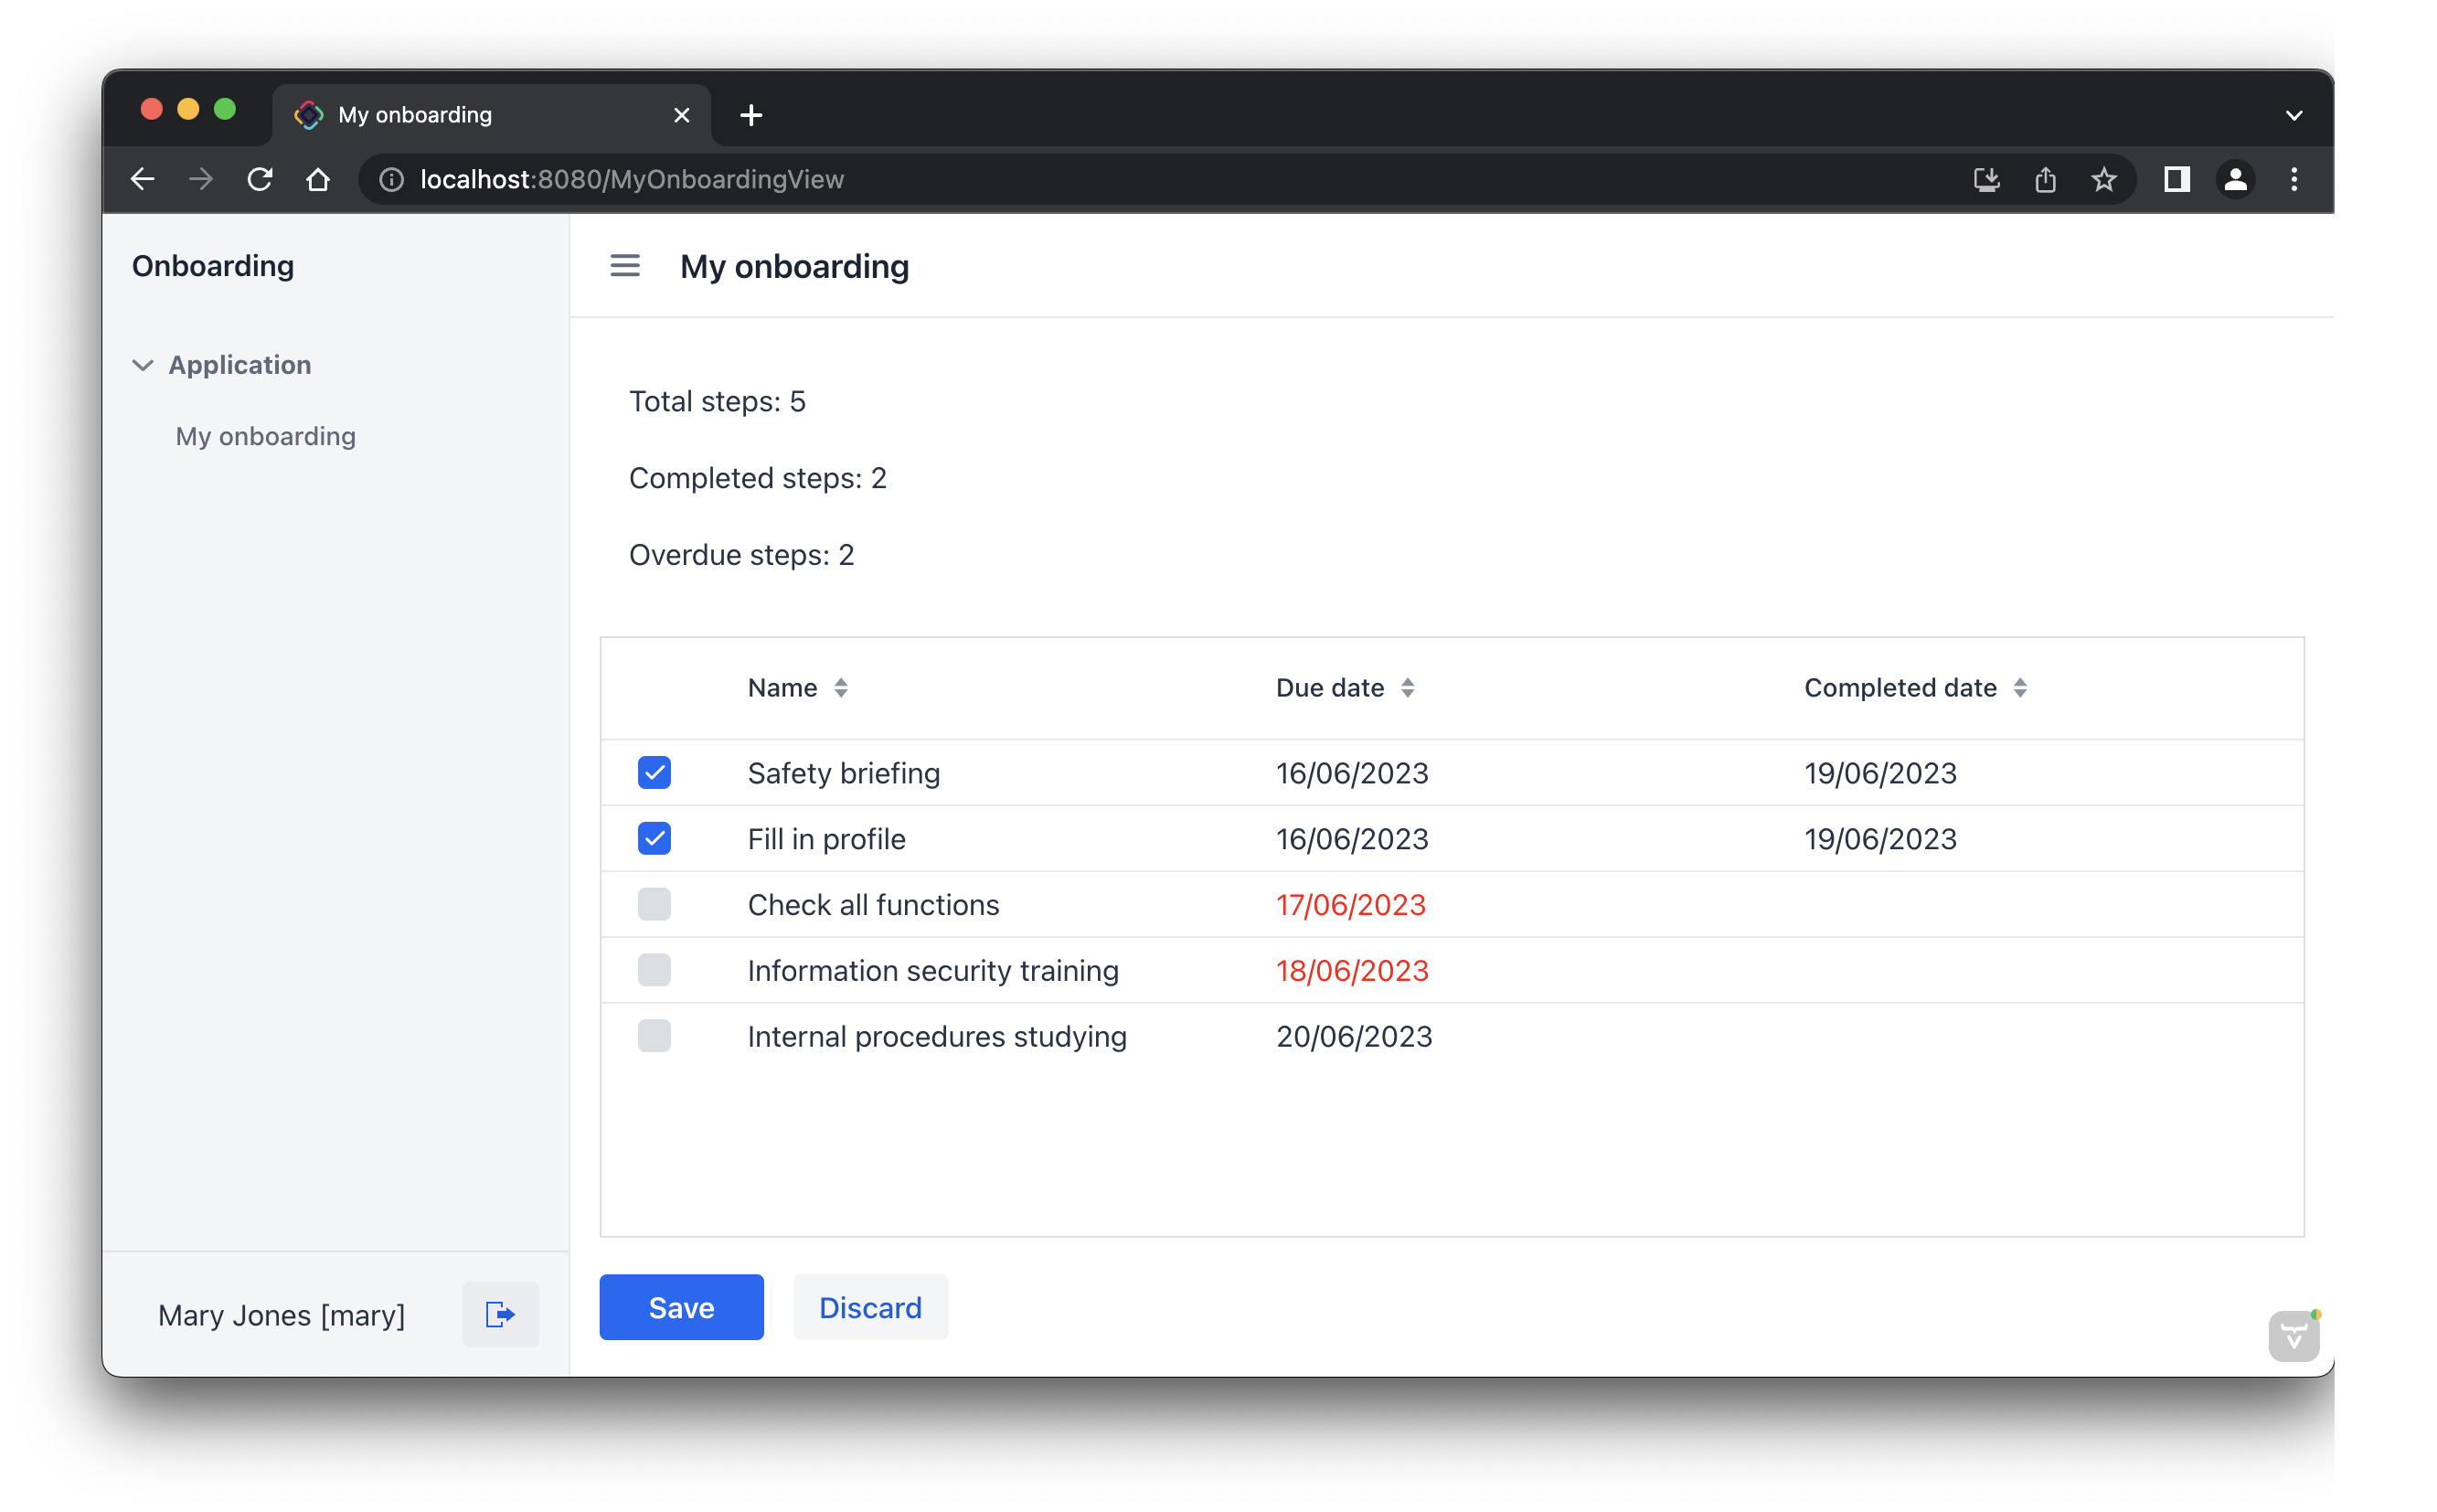
You will build an application that automates the employee onboarding process. Each company department has an HR manager who is responsible for registering new employees and assigning them a set of onboarding tasks. The new hire can then view and mark these tasks as completed.
The complete application source code is available in the jmix-framework/jmix-onboarding GitHub repository. We recommend following instructions of this tutorial to create the application step by step, but if you want to just investigate the completed example, clone the repository and open it in Jmix Studio as described in the Opening Existing Project section.
Below we will take a closer look at the data model, user roles and get familiar with the user interface that we are going to build.
Data Model
Creating an application with Jmix often starts from designing the data model. Let’s look at the model of the sample onboarding application.

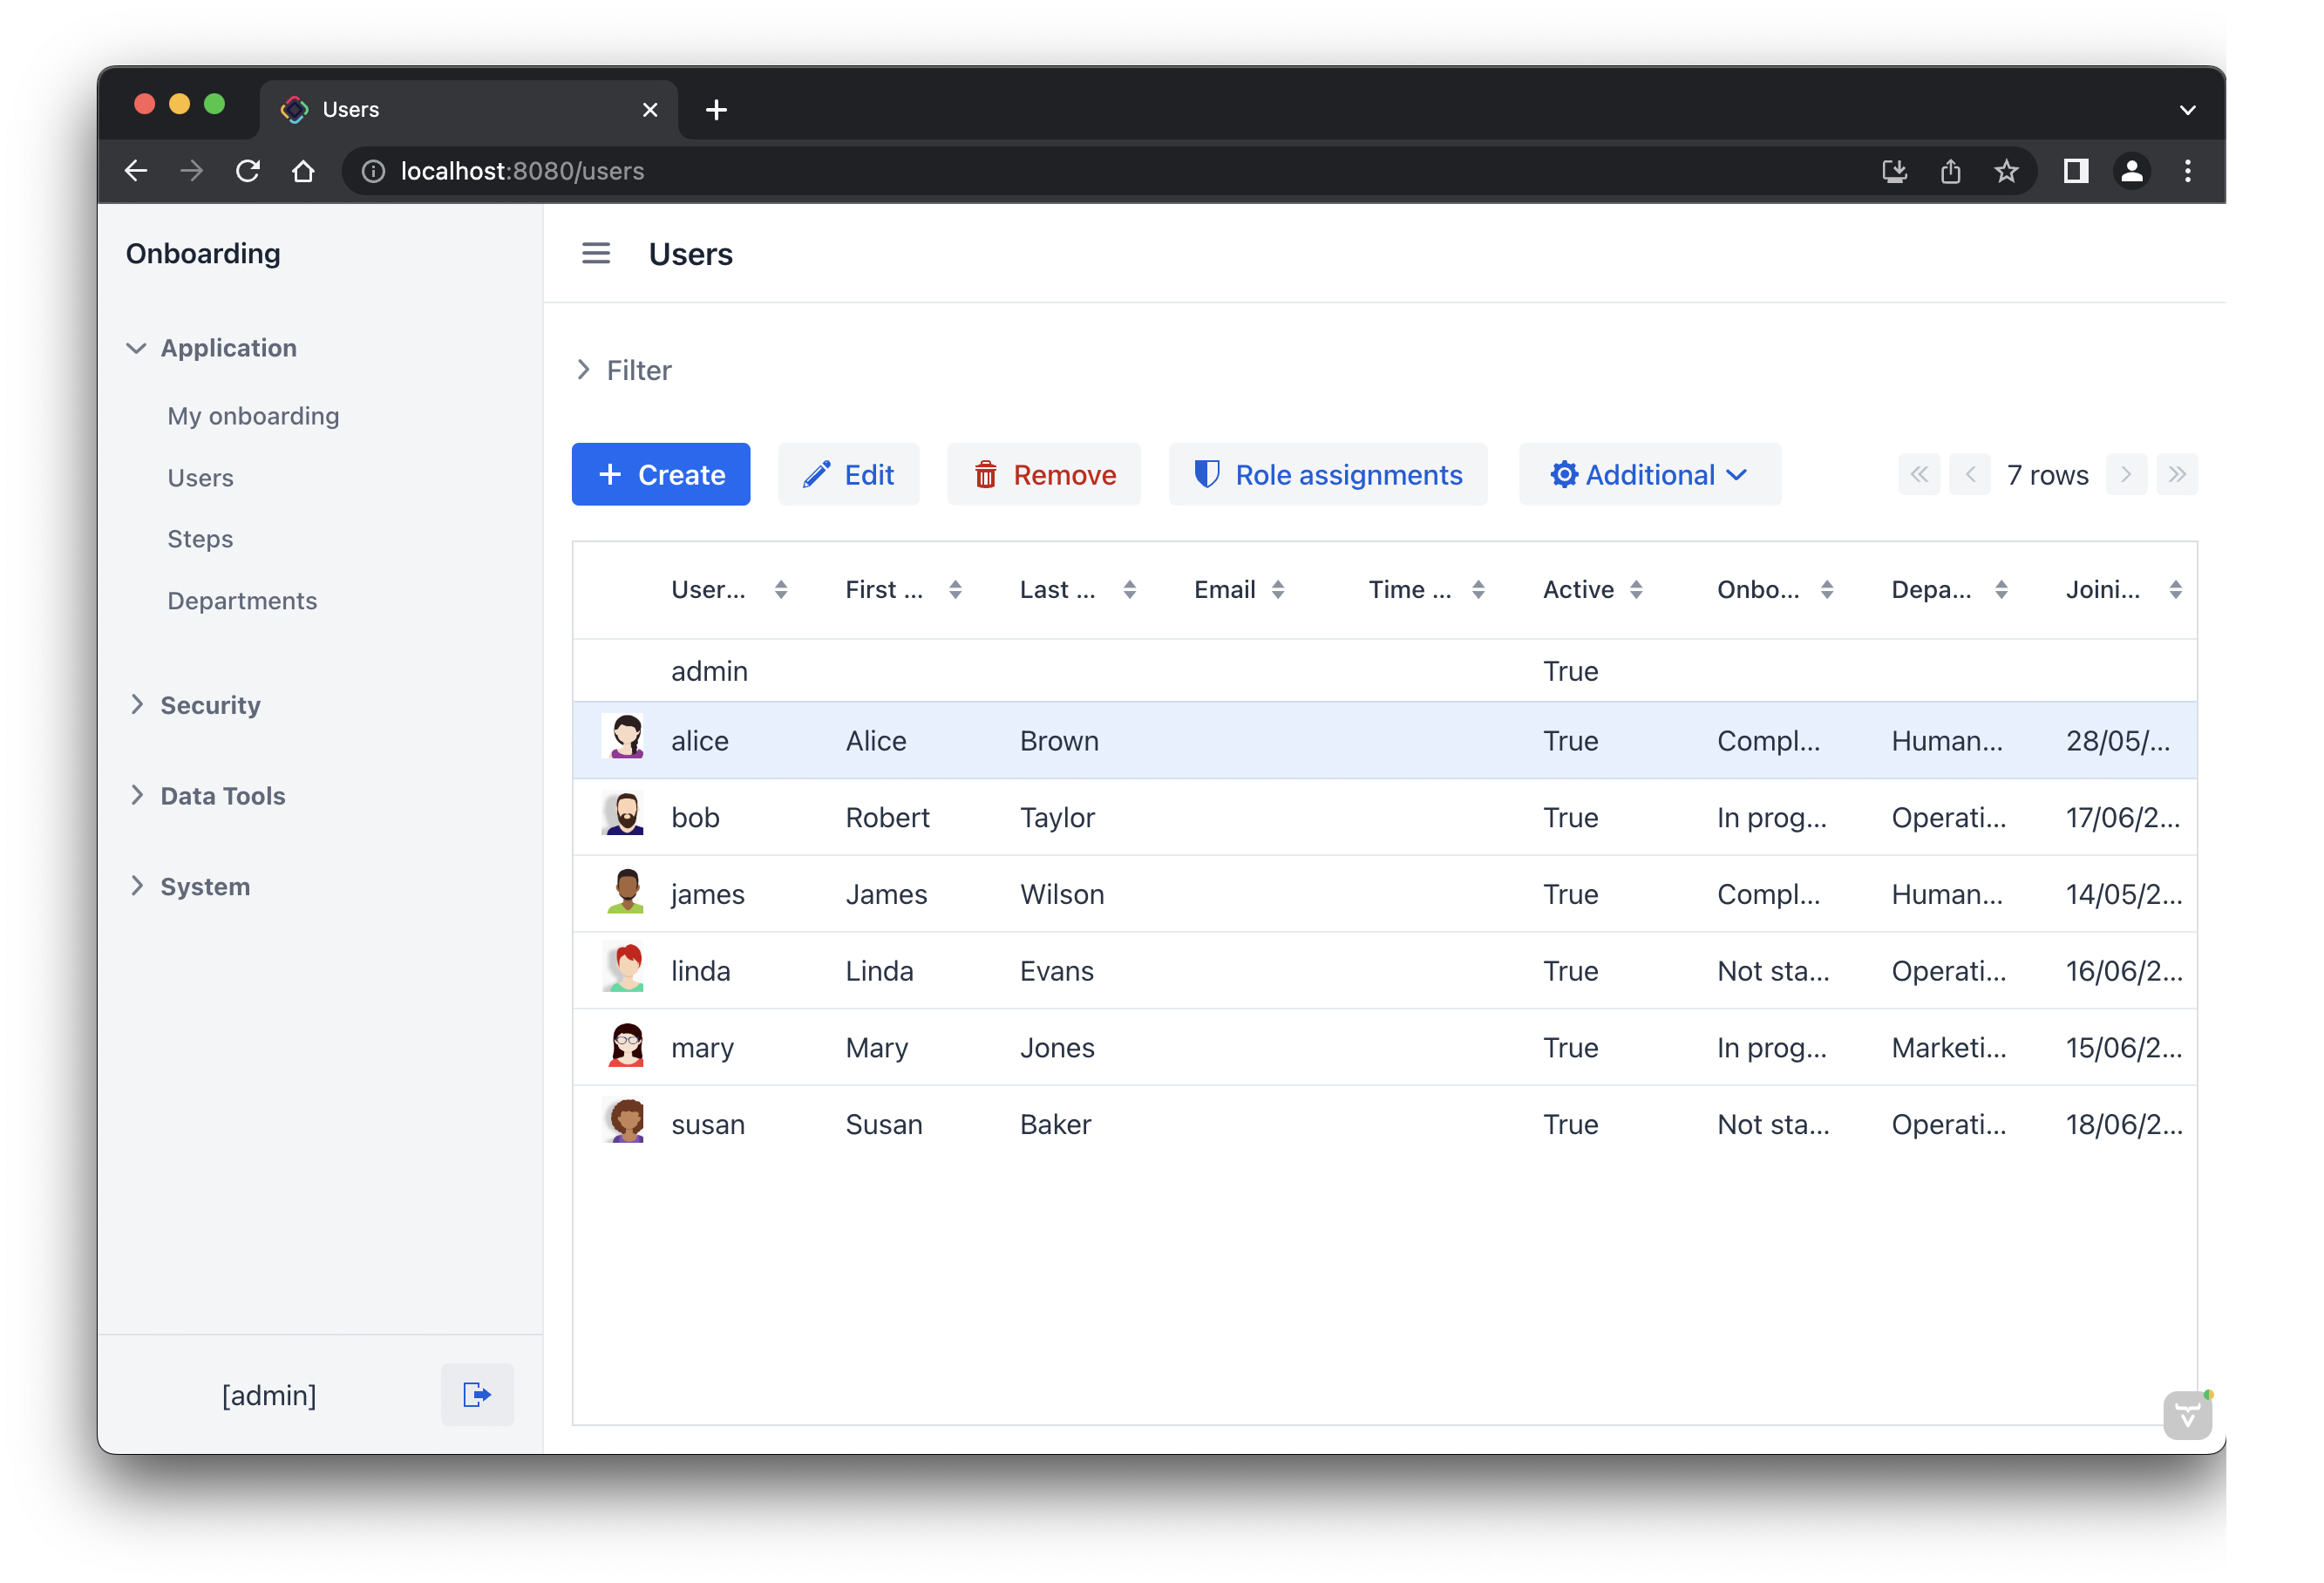
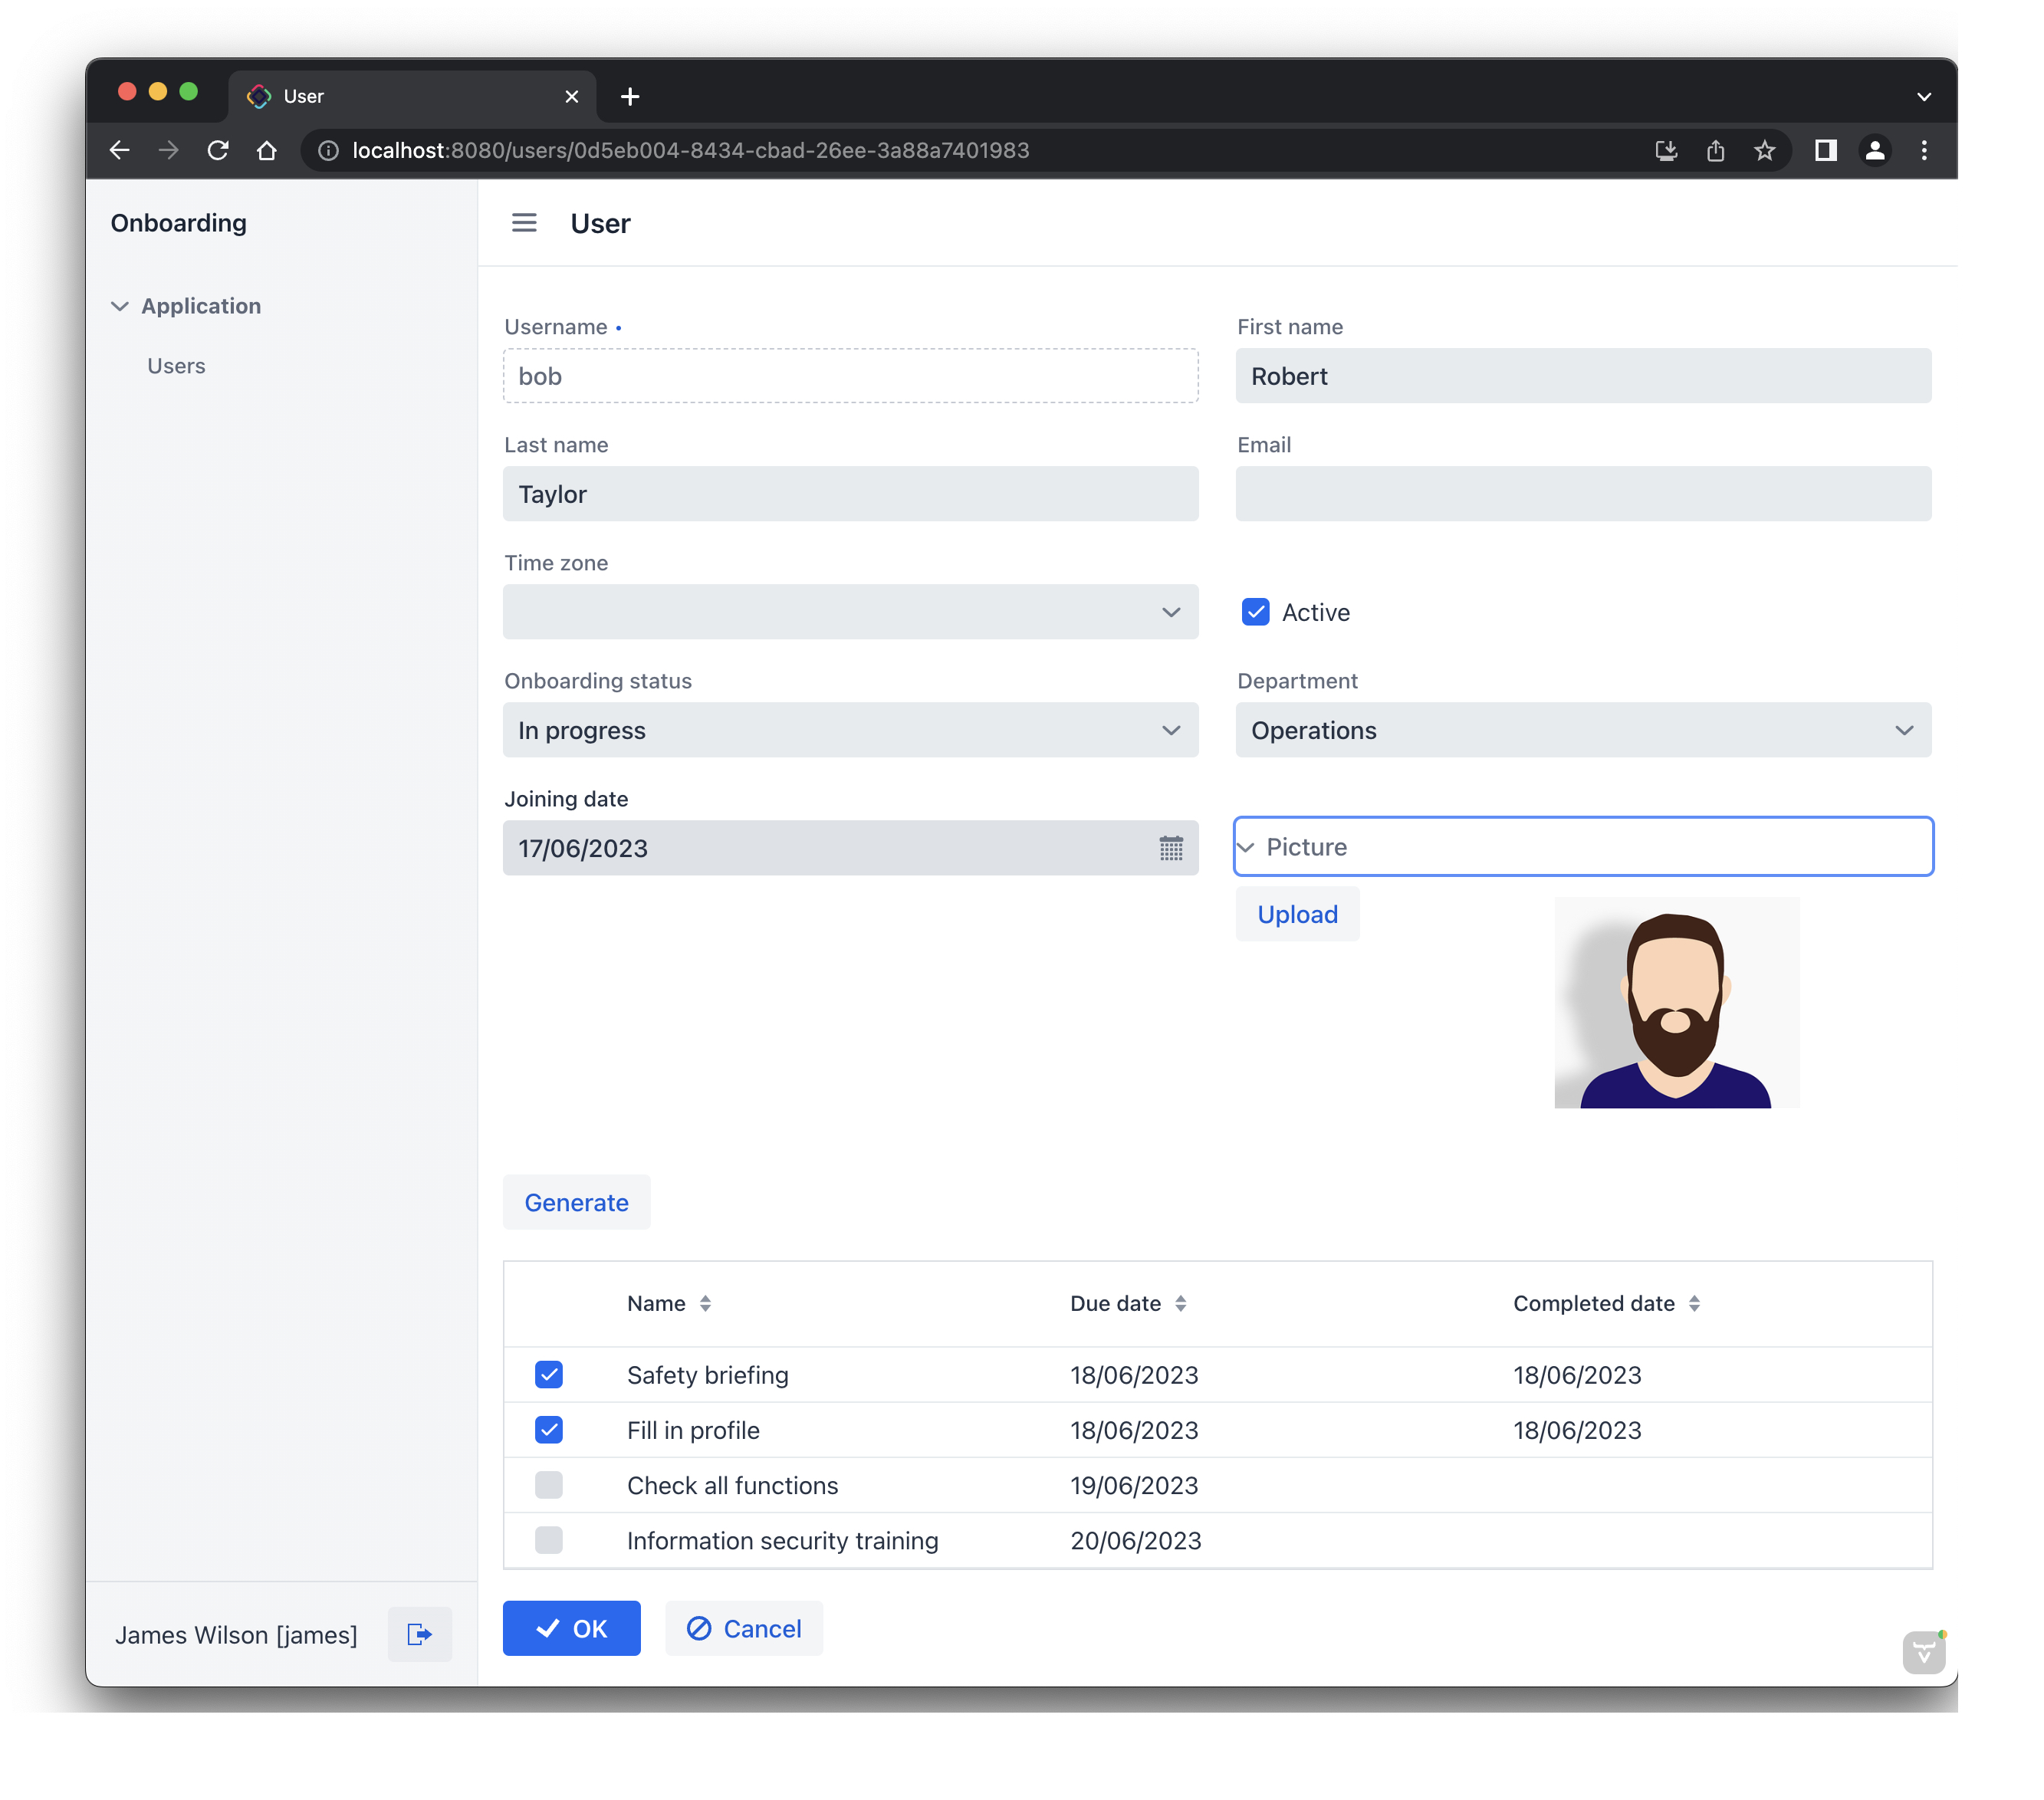
The central entity in the application is User. It contains the user login name and other attributes, as well as their joining date and the onboarding process status. The user belongs to a department, which is designated by the link to the Department entity.
The Deparment entity defines a company department. It has a name and an HR manager - a user who registers new employees belonging to the department.
The Step entity defines an onboarding step like "Safety briefing", "Fill in profile", etc. A step has a name and a duration - a period of time in days after joining the organization when the employee should complete the step. The sortValue attribute sets the order of the step in a list of steps.
The UserStep entity is an onboarding step of a particular user. It links the User and Step entities and adds dueDate and completedDate attributes. The due date is calculated as a user’s joining date plus the step duration. The completed date is set to the current date when the user marks the step done.
User Roles
The sample application supports the following user roles:
-
Administrators have full control of the application. They see all users, set up onboarding steps, departments and assign HR managers.
-
HR Managers register new employees within their departments and start the onboarding process by generating steps for a particular user. They can also track the onboarding process of their department employees.
-
Employees can see their own onboarding steps and mark the completed steps.