Custom Form
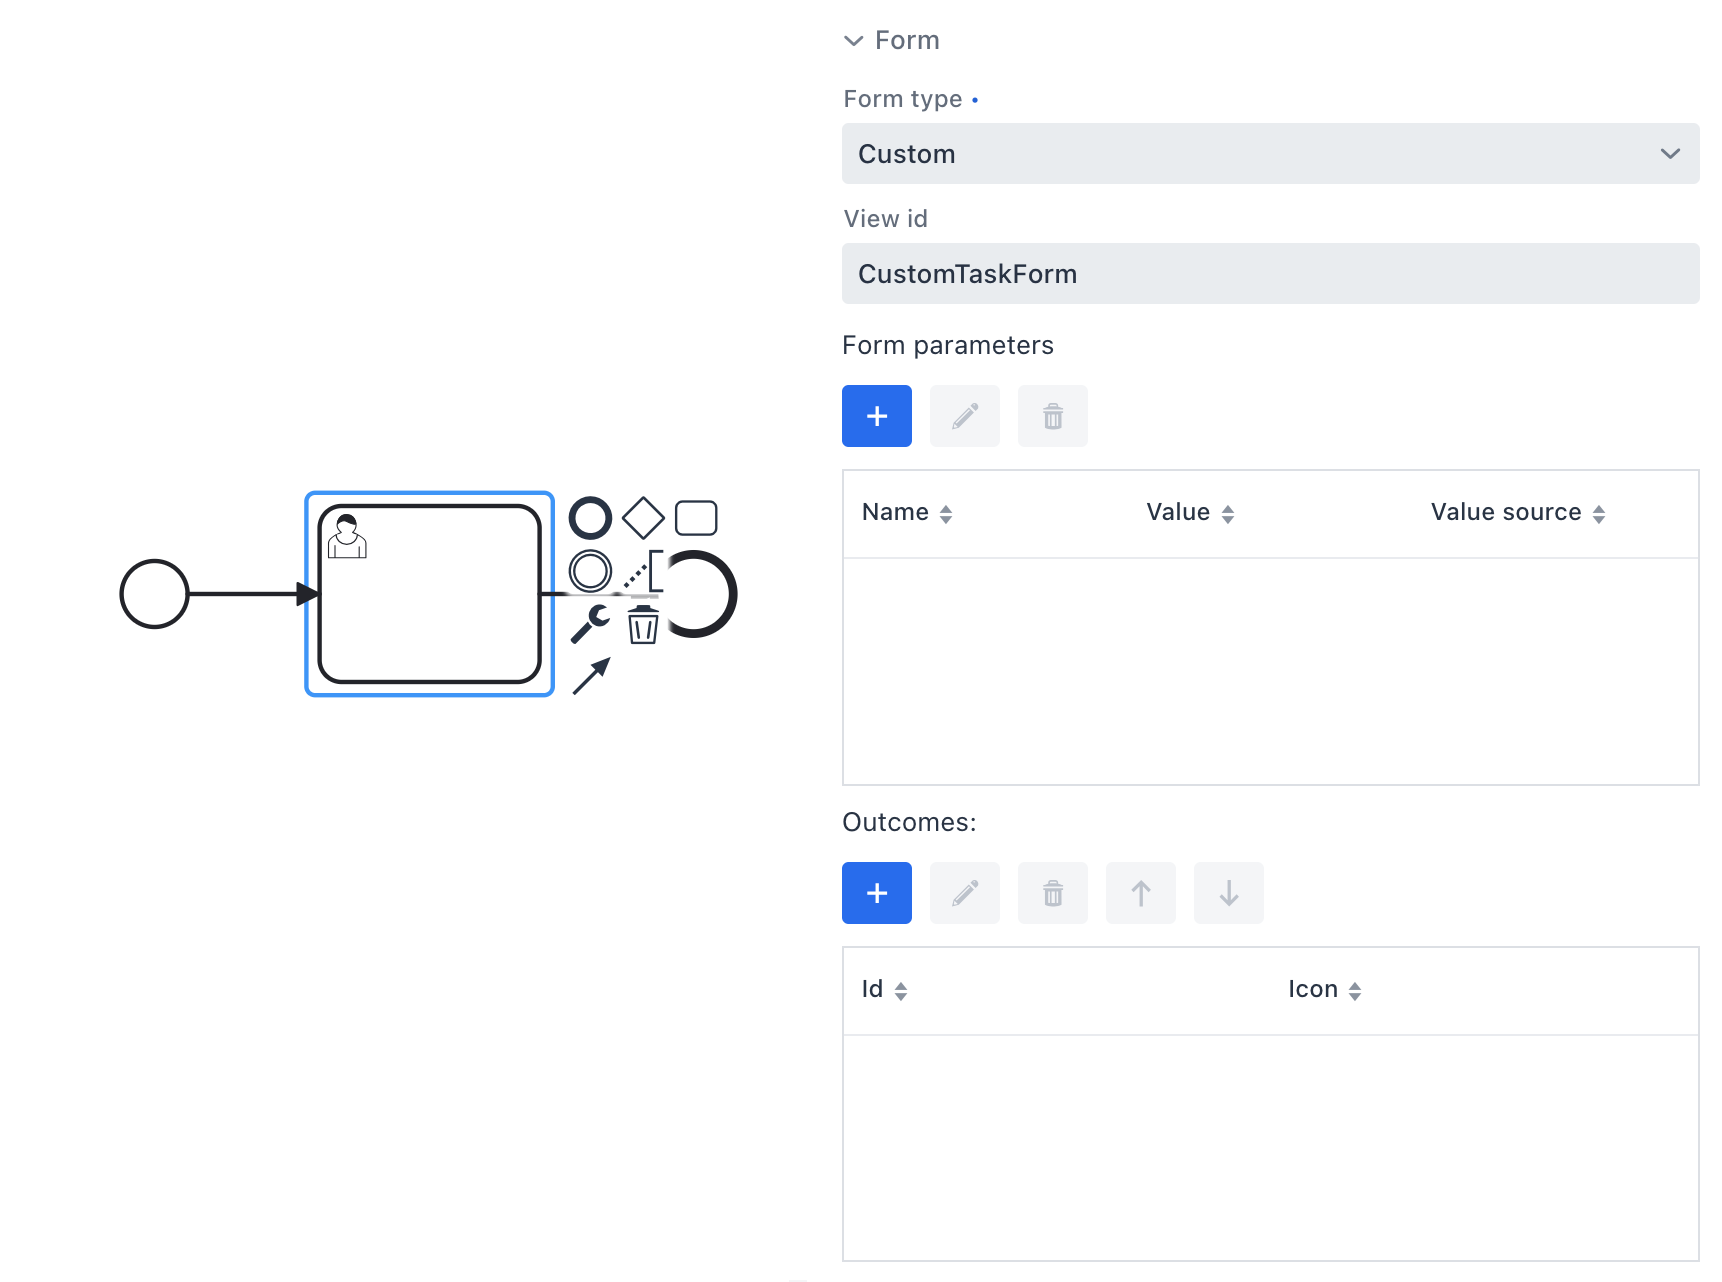
When an element needs a form that cannot be shown as a simple Input Dialog and cannot use the usual Jmix View annotation-driven approach, you can supply a custom form. This form may still be a Jmix view, or it can be built with an alternative UI technology (e.g., React).
In the modeler, you will need to provide an id for this form. The custom form must read the supplied input parameters and return the outcomes.
Custom Jmix Form
To render custom forms in the Start process or My tasks views, implement the ProcessFormViewCreator interface and register it for the custom form type.
Let’s look at the example of MyCustomProcessFormViewCreator that implements ProcessFormViewCreator:
@Component("MyCustomProcessFormViewCreator")
@Order(1) (1)
public class MyCustomProcessFormViewCreator implements ProcessFormViewCreator {

    @Autowired
    private DialogWindows dialogWindows;

    @Override
    public String isApplicableFor() {
        return "custom";
    }

    @Override
    public DialogWindow<?> createStartProcessView(CreationContext creationContext) { (2)
        FormData formData = creationContext.getFormData();
        View origin = creationContext.getOrigin();
        String viewId = formData.getScreenId();

        DialogWindow dialog = dialogWindows
                .view(origin, viewId)
                .open();

        if (dialog.getView() instanceof AcceptsProcessDefinition) { (3)
            ((AcceptsProcessDefinition) dialog.getView())
                    .setProcessDefinition(creationContext.getProcessDefinition());
        }
        return dialog;
    }

    @Override
    public DialogWindow<?> createUserTaskView(CreationContext creationContext) { (4)
        FormData formData = creationContext.getFormData();
        View origin = creationContext.getOrigin();

        String viewId = formData.getScreenId();
        DialogWindow dialog = dialogWindows
                .view(origin, viewId)
                .build();

        if (dialog.getView() instanceof AcceptsTask) { (5)
            ((AcceptsTask) dialog.getView())
                    .setTask(creationContext.getTask());
        }
        return dialog;
    }
}| 1 | The @Order annotation makes this implementation the first one the framework will consider. |
| 2 | Overrides the method for creating a start process form. |
| 3 | Checks if the view implements AcceptsProcessDefinition. In this case, it is necessary to set ProcessDefiniton to the view. |
| 4 | Overrides the method for creating a task process form. |
| 5 | Checks if the view implements AcceptsTask. In this case, it is necessary to set Task to the view. |
The code above uses two supporting interfaces. An example of AcceptsProcessDefinition interface:
public interface AcceptsProcessDefinition {
    void setProcessDefinition(ProcessDefinition processDefinition);
}
An example of AcceptsTask interface:
public interface AcceptsTask {
    void setTask(Task task);
}
These interfaces must be implemented by the custom start and task forms.
Custom Start Form
XML descriptor for a custom start form that has only a Start process button:
<view xmlns="http://jmix.io/schema/flowui/view"
      title="msg://customStartForm.title">
    <layout>
        <button id="startProcessBtn" text="msg://startProcessBtn.caption"/>
    </layout>
</view>
View controller for the custom start form:
@ViewController(id = "CustomStartForm")
@ViewDescriptor(path = "custom-start-form.xml")
public class CustomStartForm extends StandardView implements AcceptsProcessDefinition {

    private ProcessDefinition processDefinition;

    @Autowired
    private RuntimeService runtimeService;

    @Override
    public void setProcessDefinition(ProcessDefinition processDefinition) {
        this.processDefinition = processDefinition;
    }

    @Subscribe(id = "startProcessBtn", subject = "clickListener")
    public void onStartProcessBtnClick(final ClickEvent<JmixButton> event) {
        runtimeService.startProcessInstanceByKey(processDefinition.getKey());
        closeWithDefaultAction();
    }
}
Custom Task From
XML descriptor for a custom task form that has only Task complete button:
<view xmlns="http://jmix.io/schema/flowui/view"
      title="msg://com.company.bpmex1.view.forms/customTaskForm.title">
    <layout>
        <button id="completeTaskBtn" text="msg://com.company.bpmex1.view.forms/completeTaskBtn.text"/>
    </layout>
</view>
View controller of the custom task form:
@ViewController("CustomTaskForm")
@ViewDescriptor("custom-task-form.xml")
public class CustomTaskForm extends StandardView implements AcceptsTask {

    private Task task;

    @Autowired
    private TaskService taskService;

    @Subscribe("completeTaskBtn")
    public void onCompleteTaskBtnClick(ClickEvent<JmixButton> event) {
        taskService.complete(task.getId());
        closeWithDefaultAction();
    }

    @Override
    public void setTask(Task task) {
        this.task = task;
    }
}
Using Alternative UI Technology
It is possible to create forms with an alternative UI technology (e.g., React) that talk to Jmix BPM via REST. You can obtain form information directly from the engine using Flowable’s FormService, that provides the following methods:
-
StartFormData getStartFormData (String processDefinitionId) -
TaskFormData getTaskFormData (String taskId)
Or, expose form metadata using ProcessFormDataExtractor in Jmix. See the Getting Process Form Data section for example.
