View Creation Wizard
Studio provides a wizard that helps you to create views from templates. To create a new view, click New → View in the Jmix Tool Window.
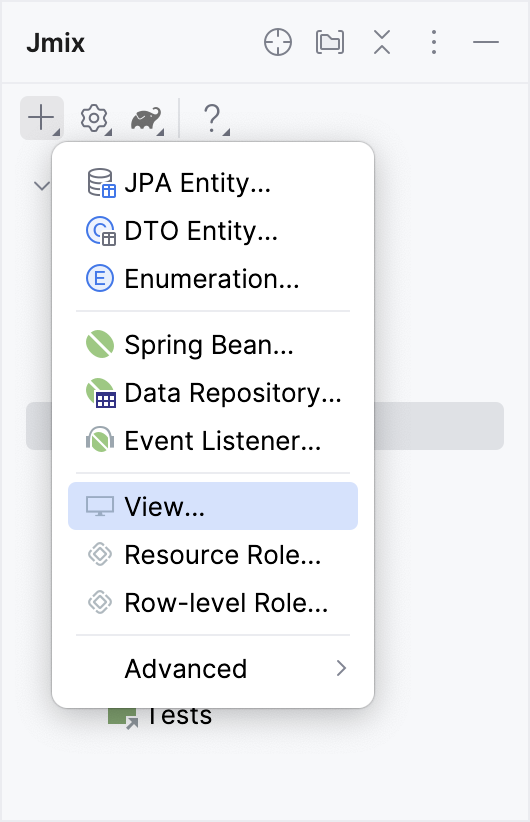
The wizard generates basic code for your view, including necessary components and configuration, saving you time and effort. It offers templates for various view types, including:
Creating Entity-based Views
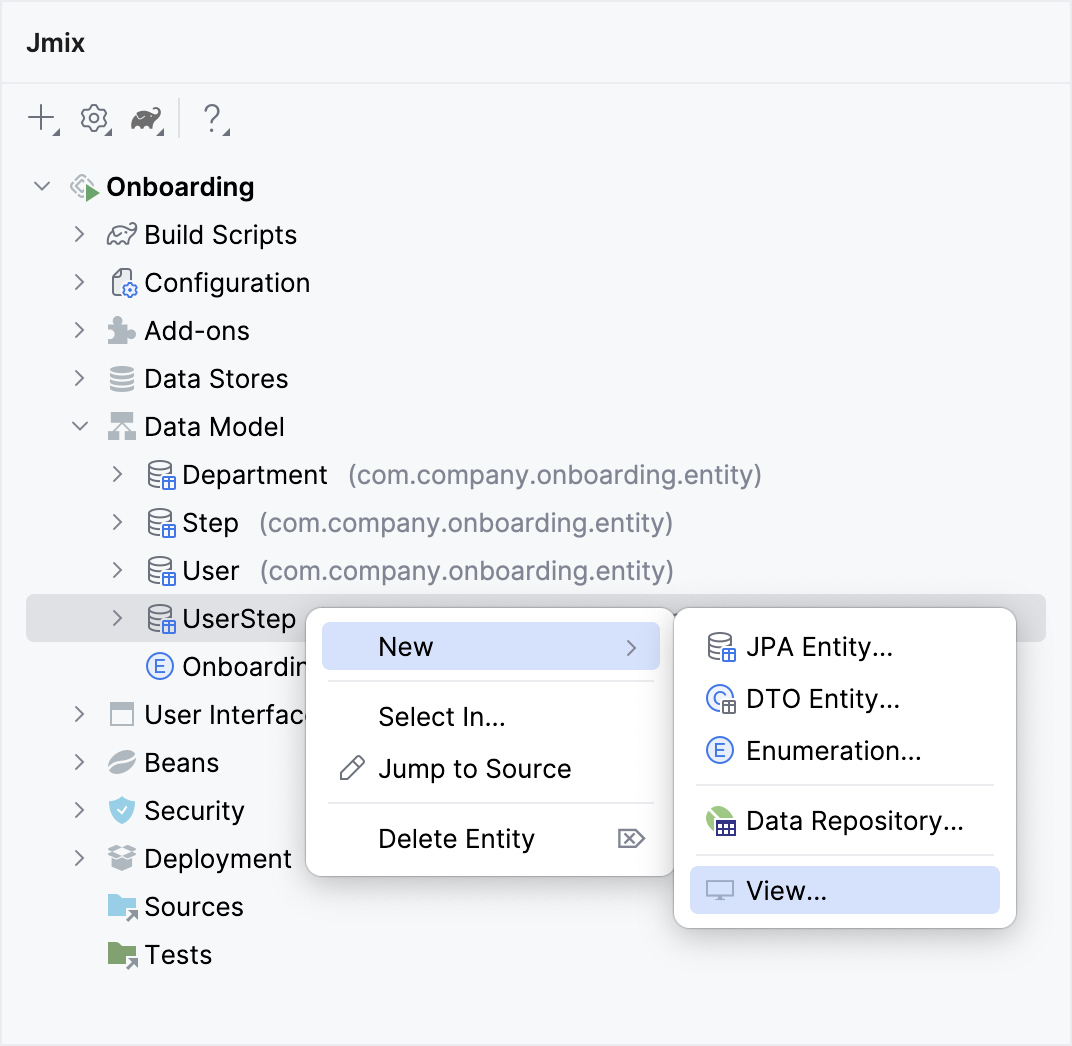
If you want to create CRUD views for an entity, you can select the entity in the tree and right-click New → View.
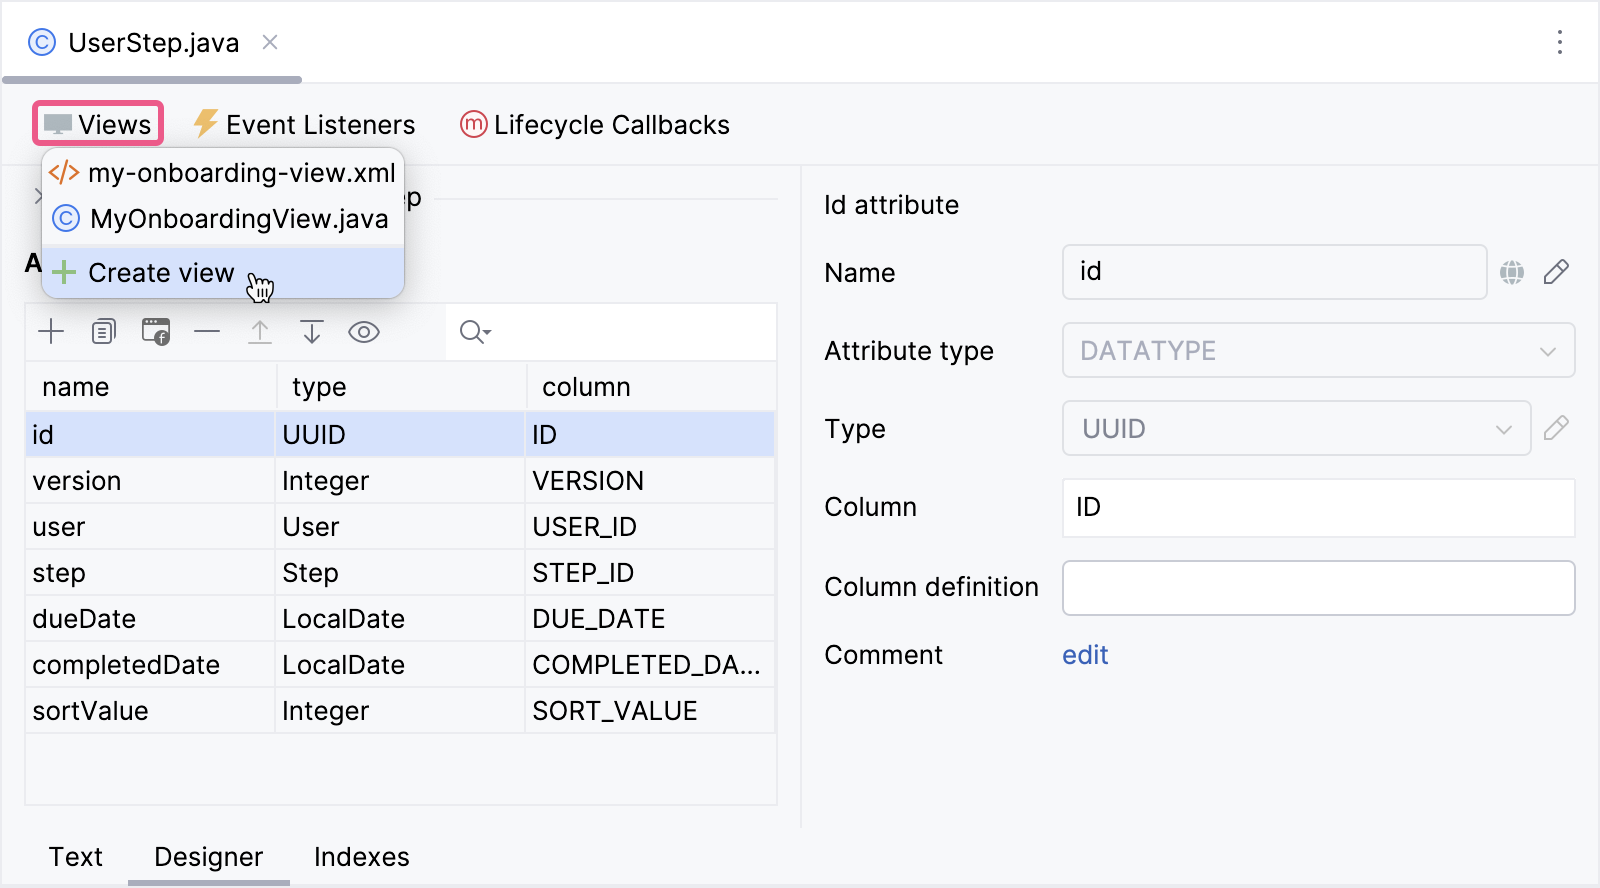
Another way is to click Views → Create View on the actions panel of the Entity Designer.
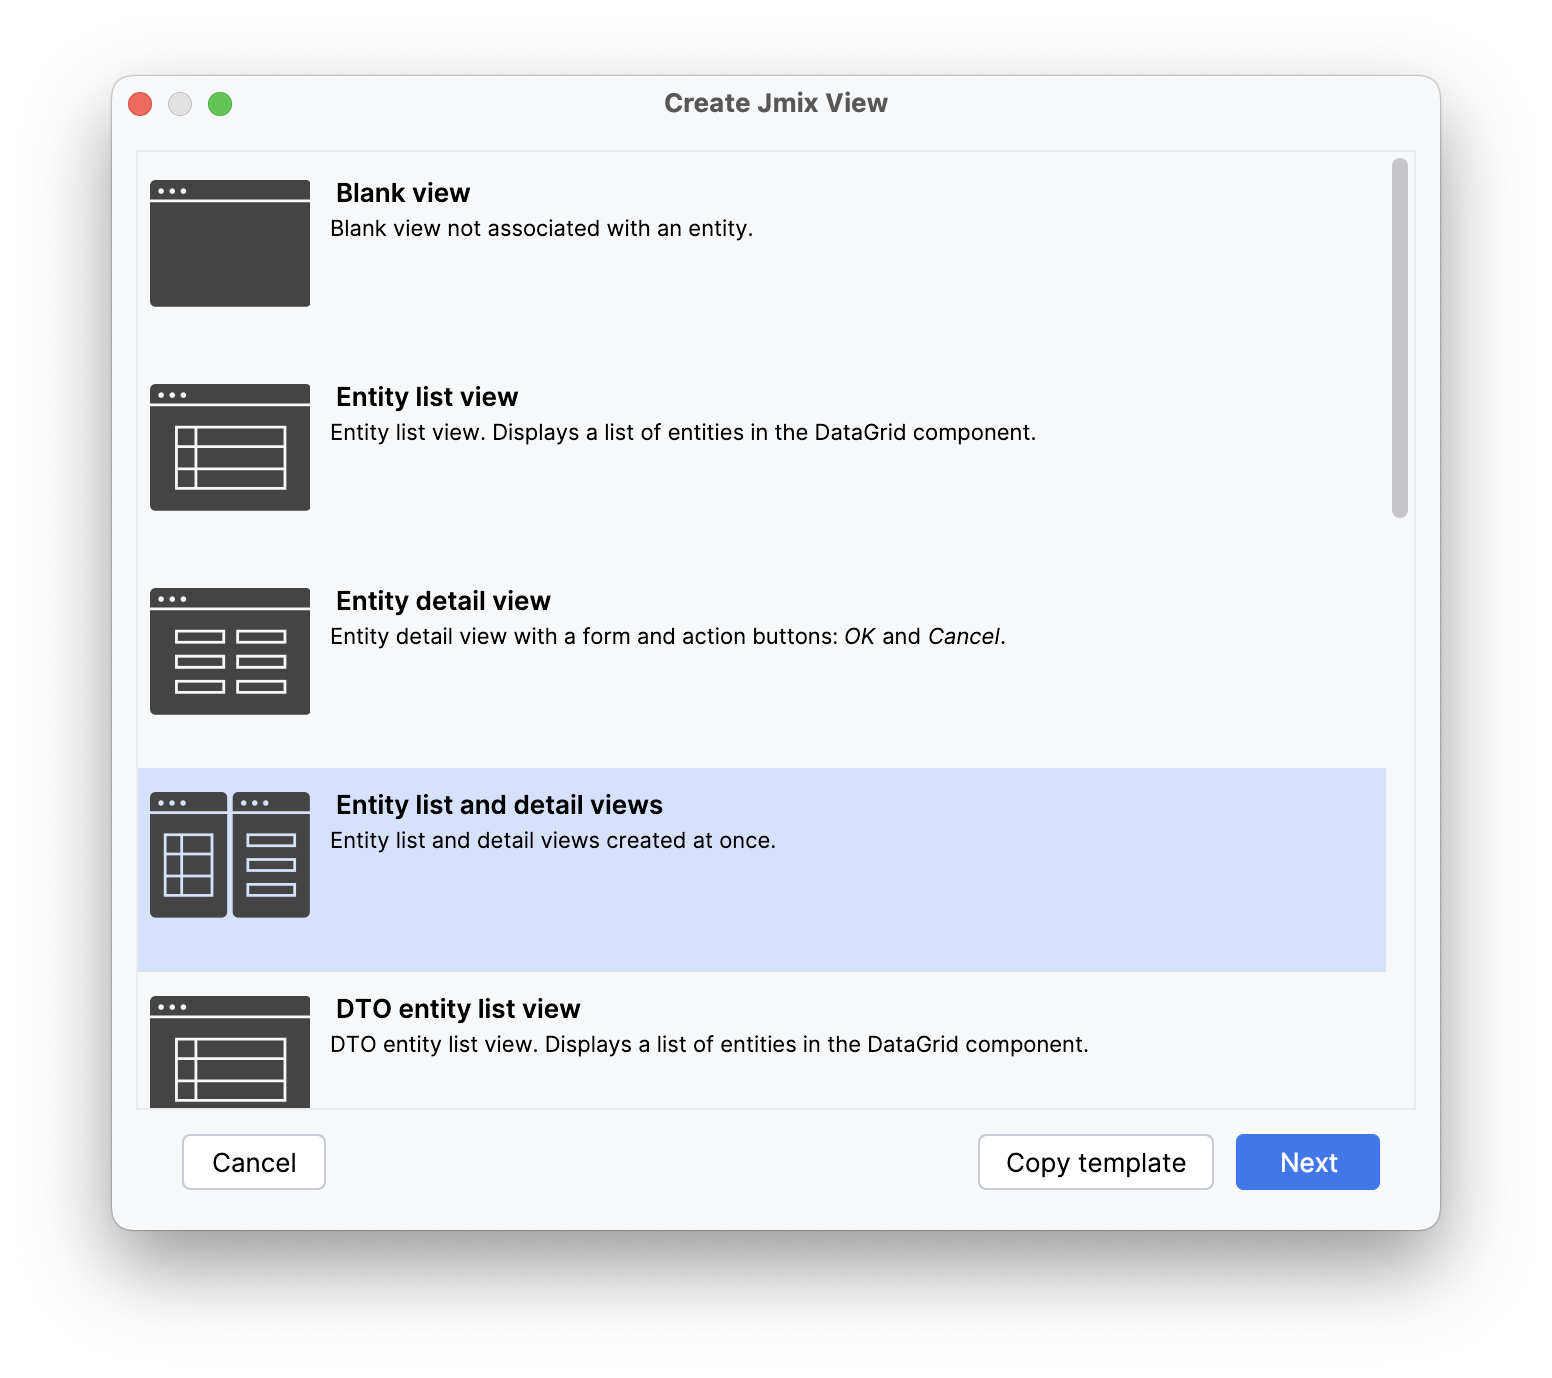
On the Create Jmix View page of wizard, select the desired template from the list provided by Jmix Studio.
Available templates:
-
Entity list view
Creates a view displaying a list of entities with filtering, and action capabilities. See StandardListView.
Key components: dataGrid, action buttons (Create, Edit, Remove), genericFilter.
-
Entity detail view
Creates a form-based view for creating, viewing, and editing individual entity instances. See StandardDetailView.
Key components: formLayout with field bindings, OK and Cancel action buttons.
-
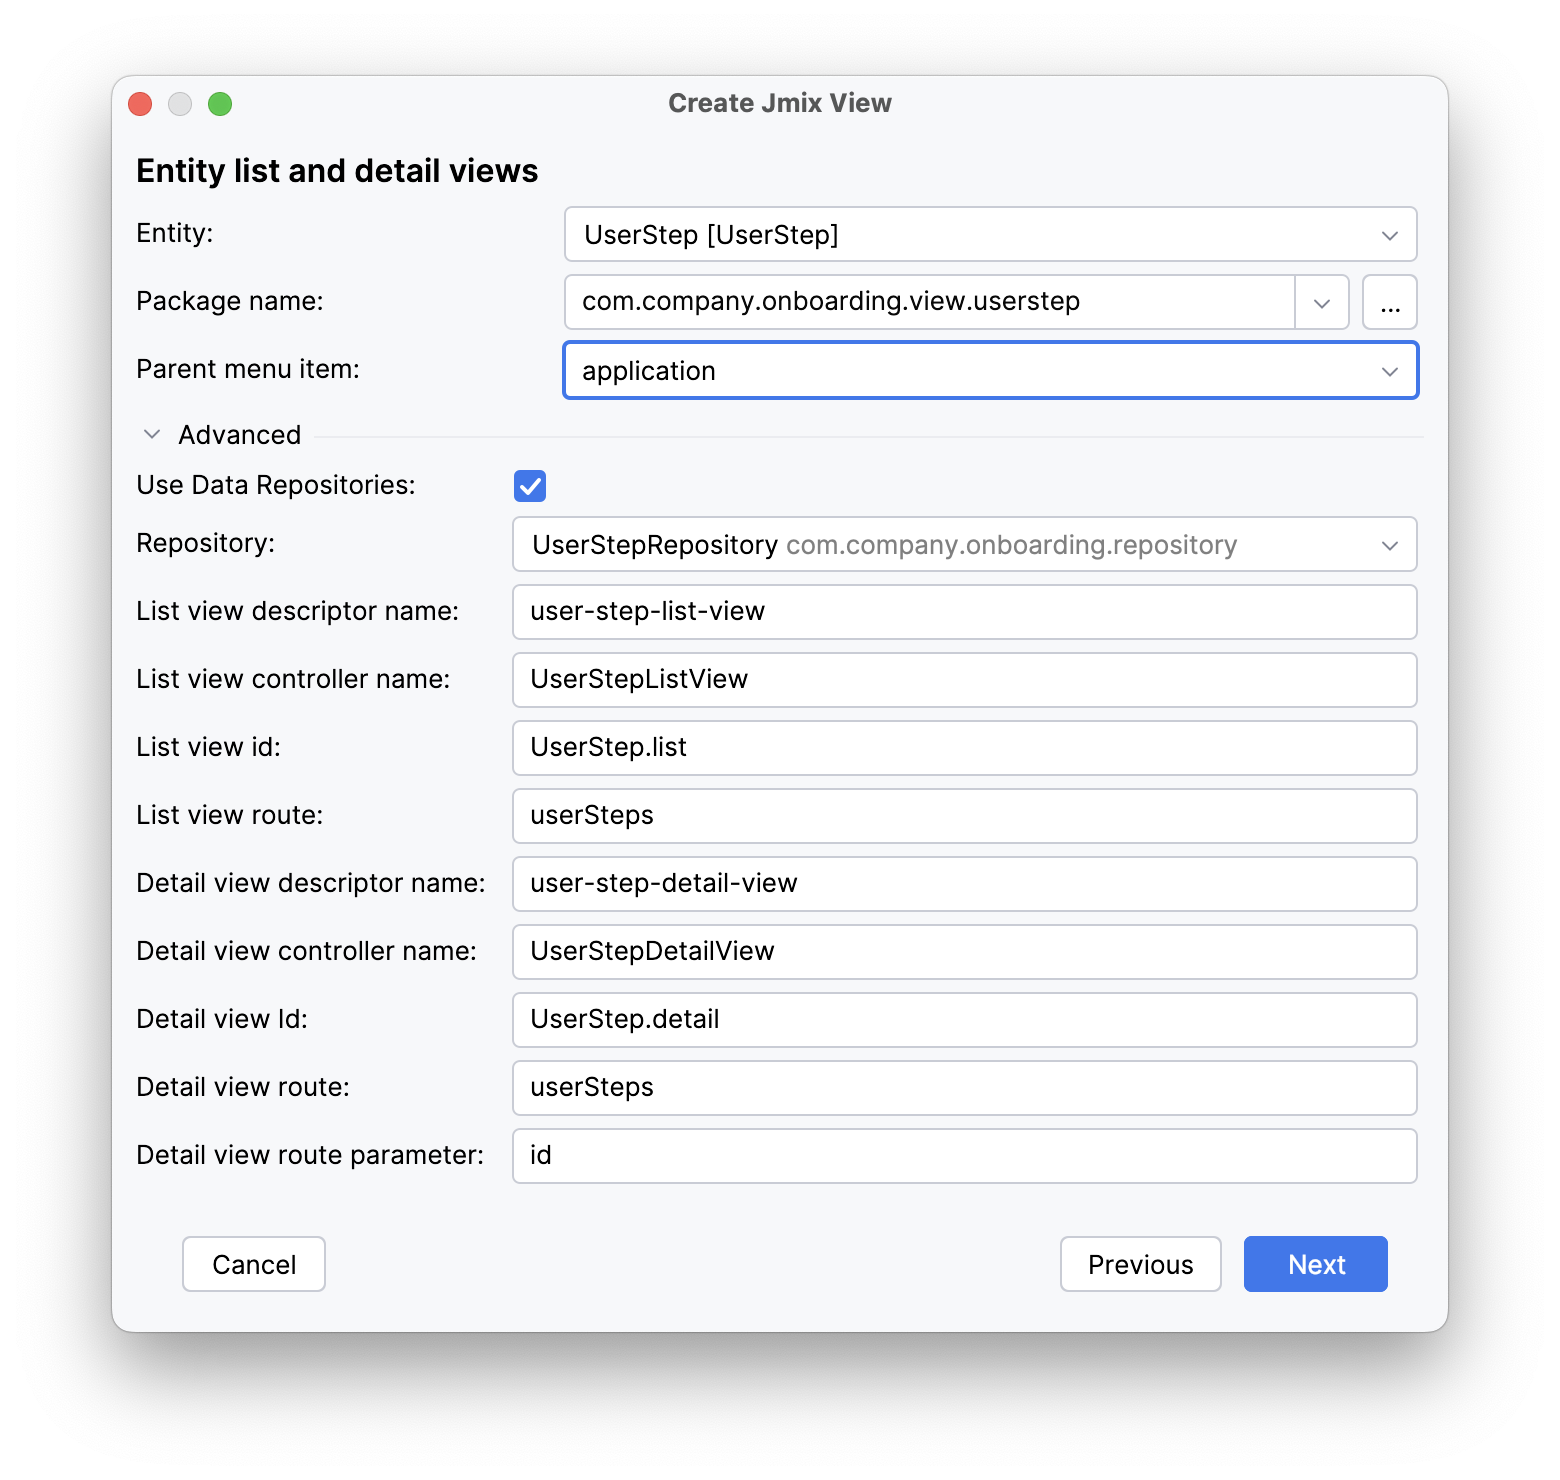
Entity list and detail views
Generates both a list view and a detail view as separate but connected views.
-
Master-detail view
Creates a combined interface with an entity list on the left and a detail form on the right. The detail form fields are disabled until the user clicks Create or selects an entity to Edit. The view controller is complex. It extends
StandardListView.Key components: layout containing both
dataGridandformLayout.
On the next step, you can modify the automatically generated view properties.
|
Select the Use Data Repositories checkbox in the Advanced section, and choose an existing data repository from the dropdown. The wizard will generate the load and save delegates that invoke appropriate repository methods. |
On the Entity list and detail options step, you can configure how your views display and interact with data from an entity.
For example, you can set up data grid actions, which will be displayed on the list view. DataGrid configurations like multi-select, column reordering, column resizing are also enabled.
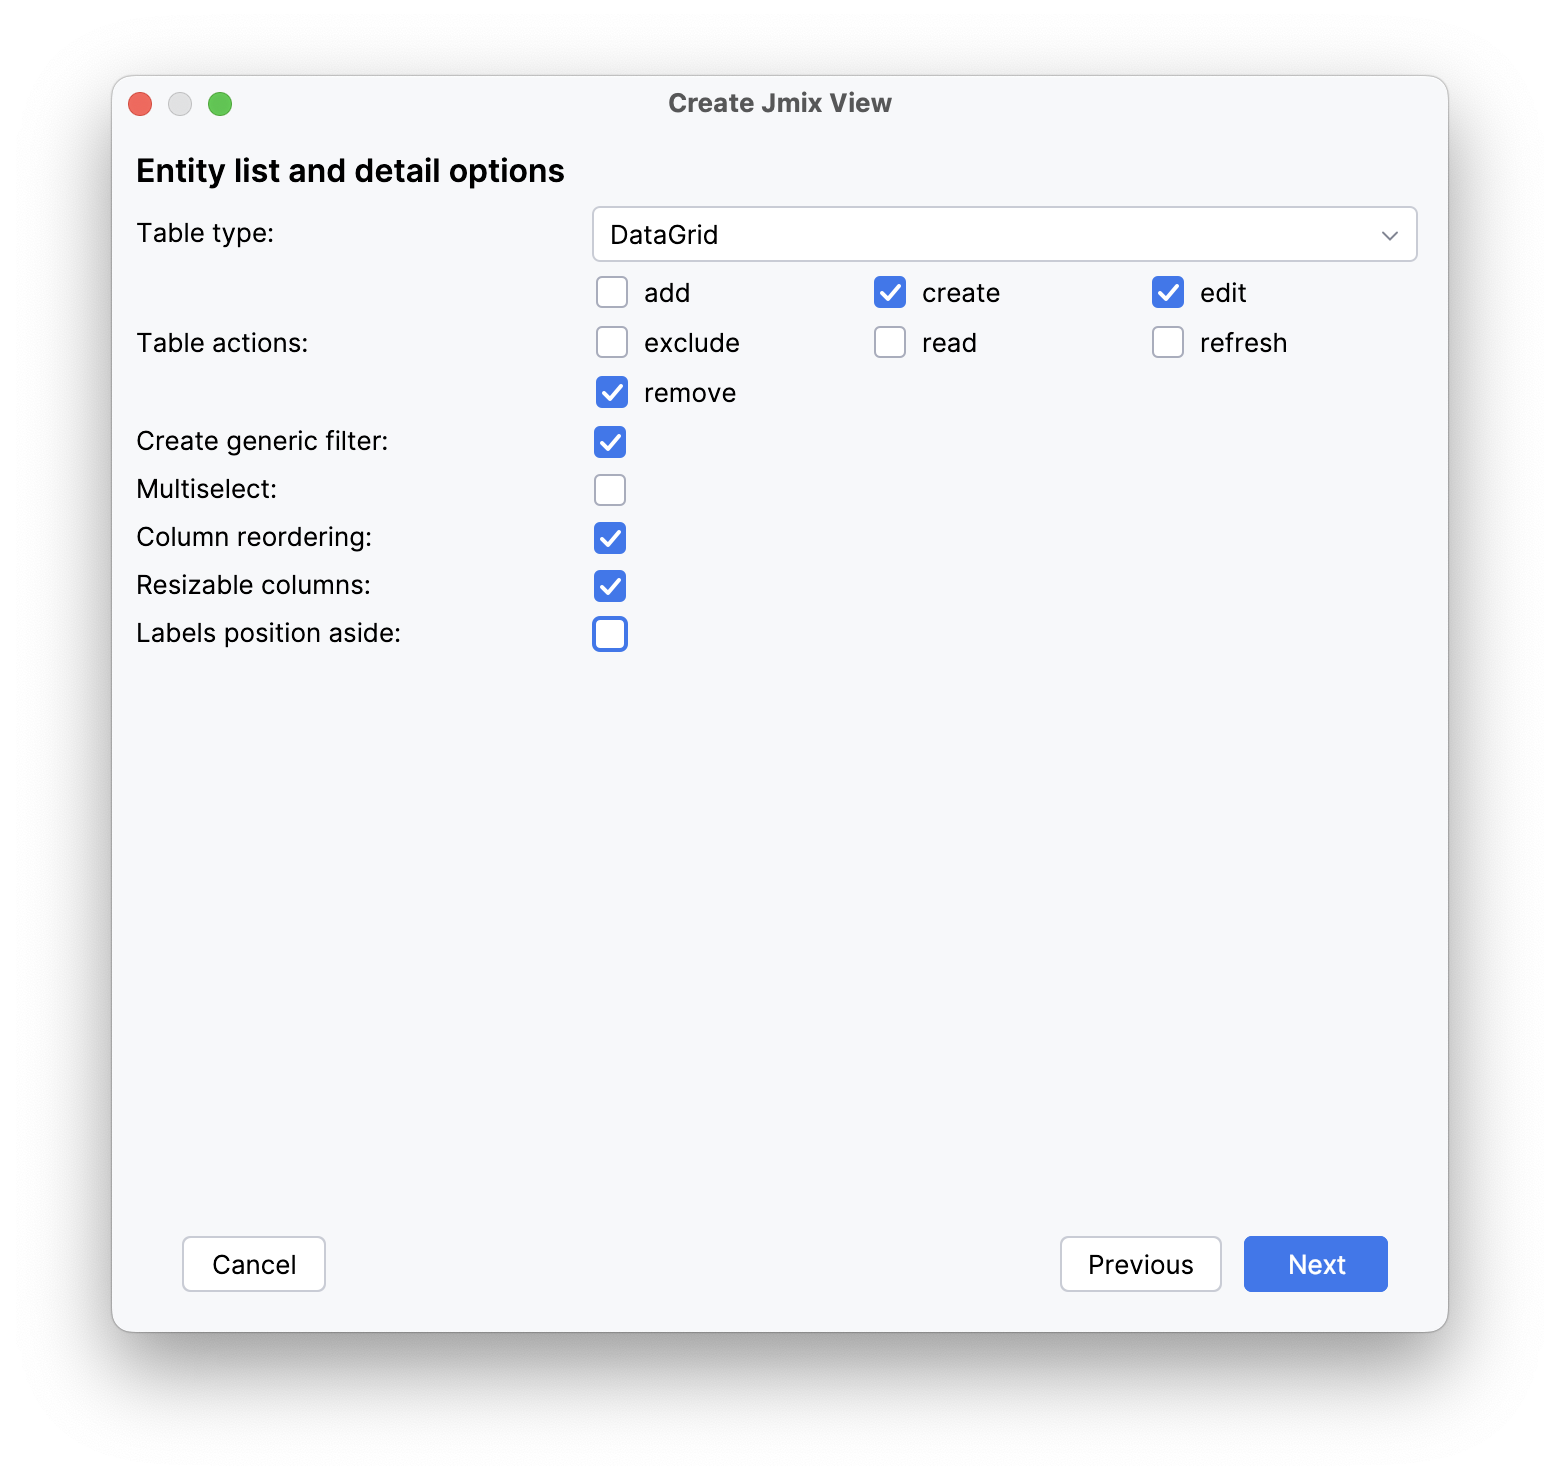
Click Next.
At the Entity list view fetch plan and Entity detail view fetch plan steps, you can select the amount of data that will be displayed in the views. You can use one of the built-in fetch plans or create your own with the help of Fetch Plan Designer or programmatically.

Click Next.
The final step of the wizard allows you to set titles for the views.
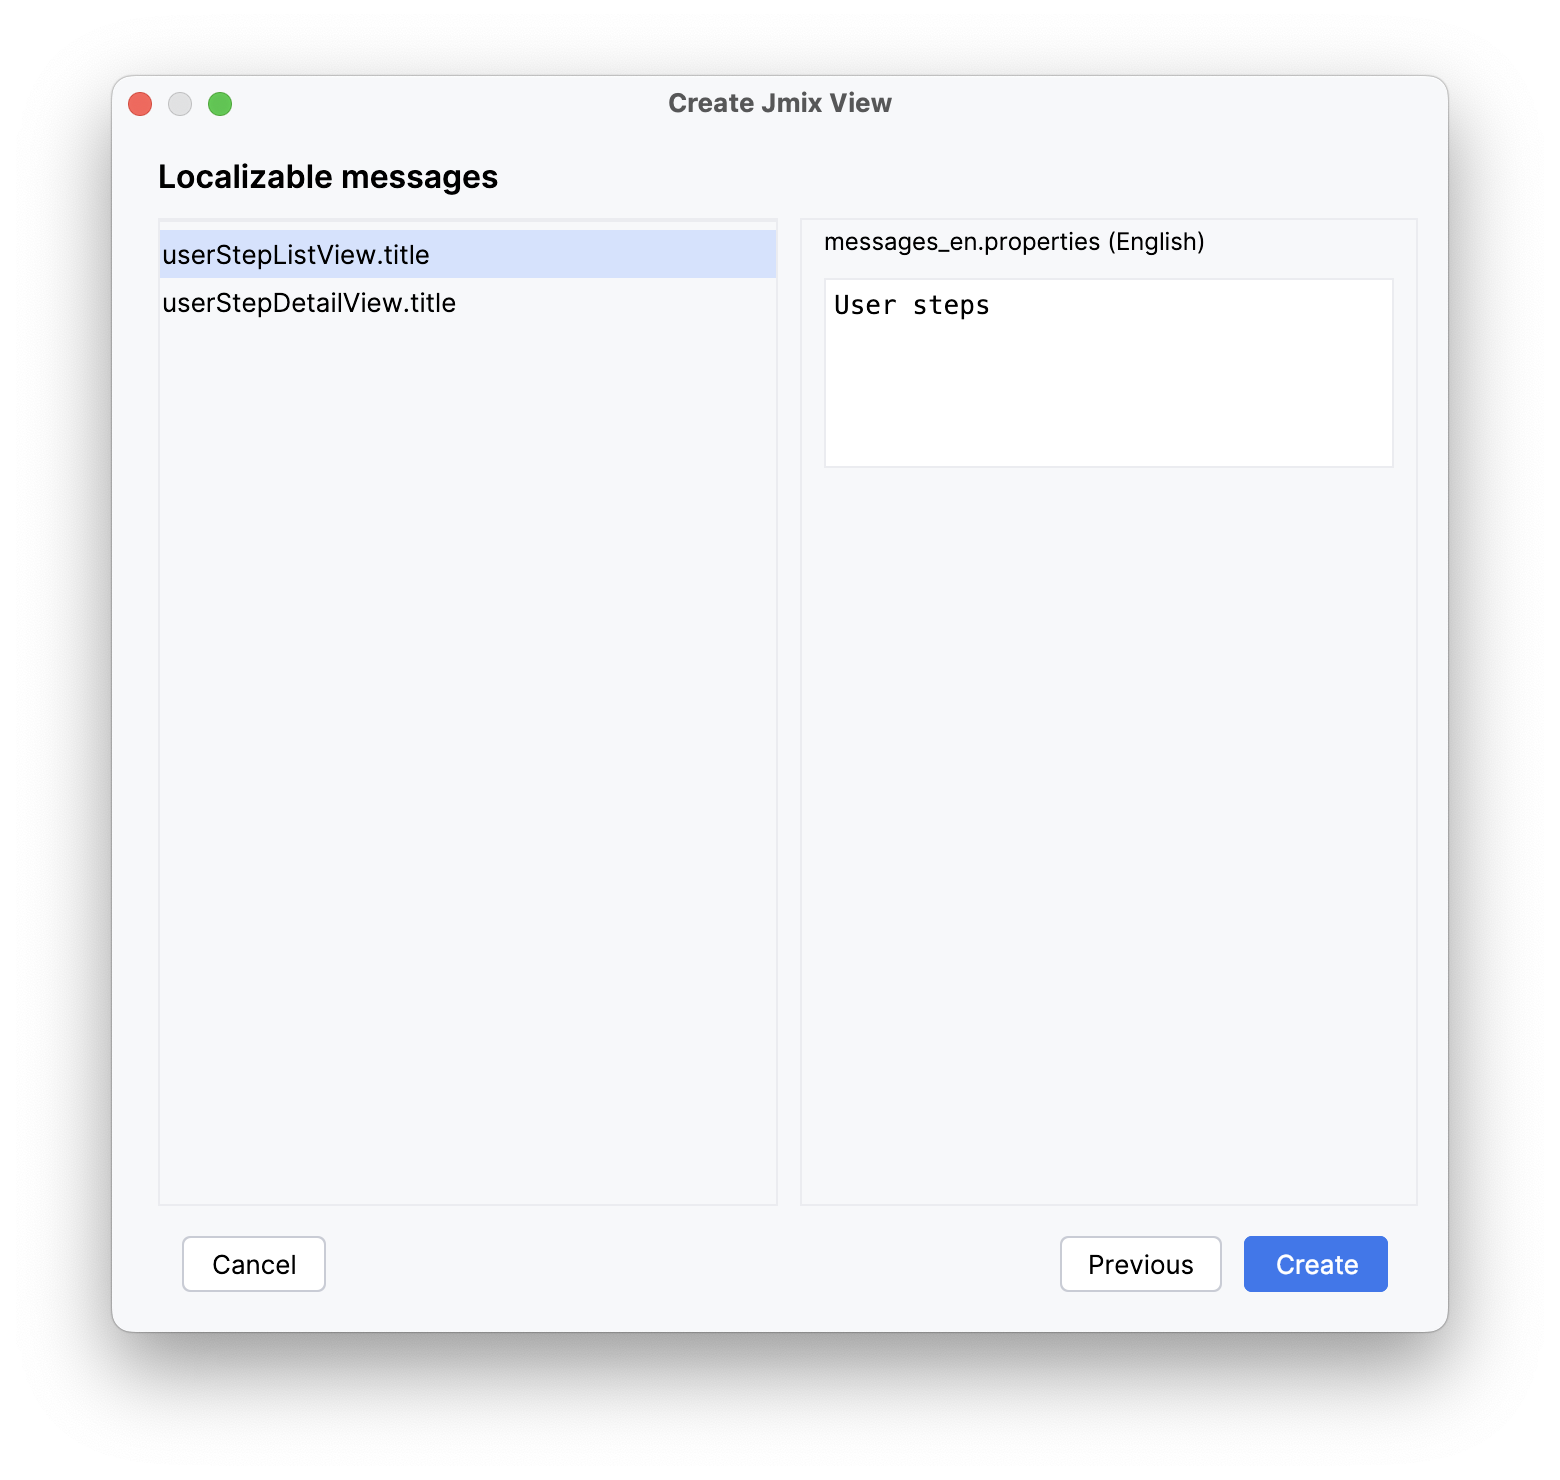
After clicking the Create button, the view XML descriptor and view controller will be generated. The Message Bundle file will be updated. In case of creating a list view, a new menu item will be added to the main menu.
Use the View designer to set up your views.
Creating DTO-based Views
The steps in the view creation wizard for DTO are similar to steps described in Creating Entity-based Views.
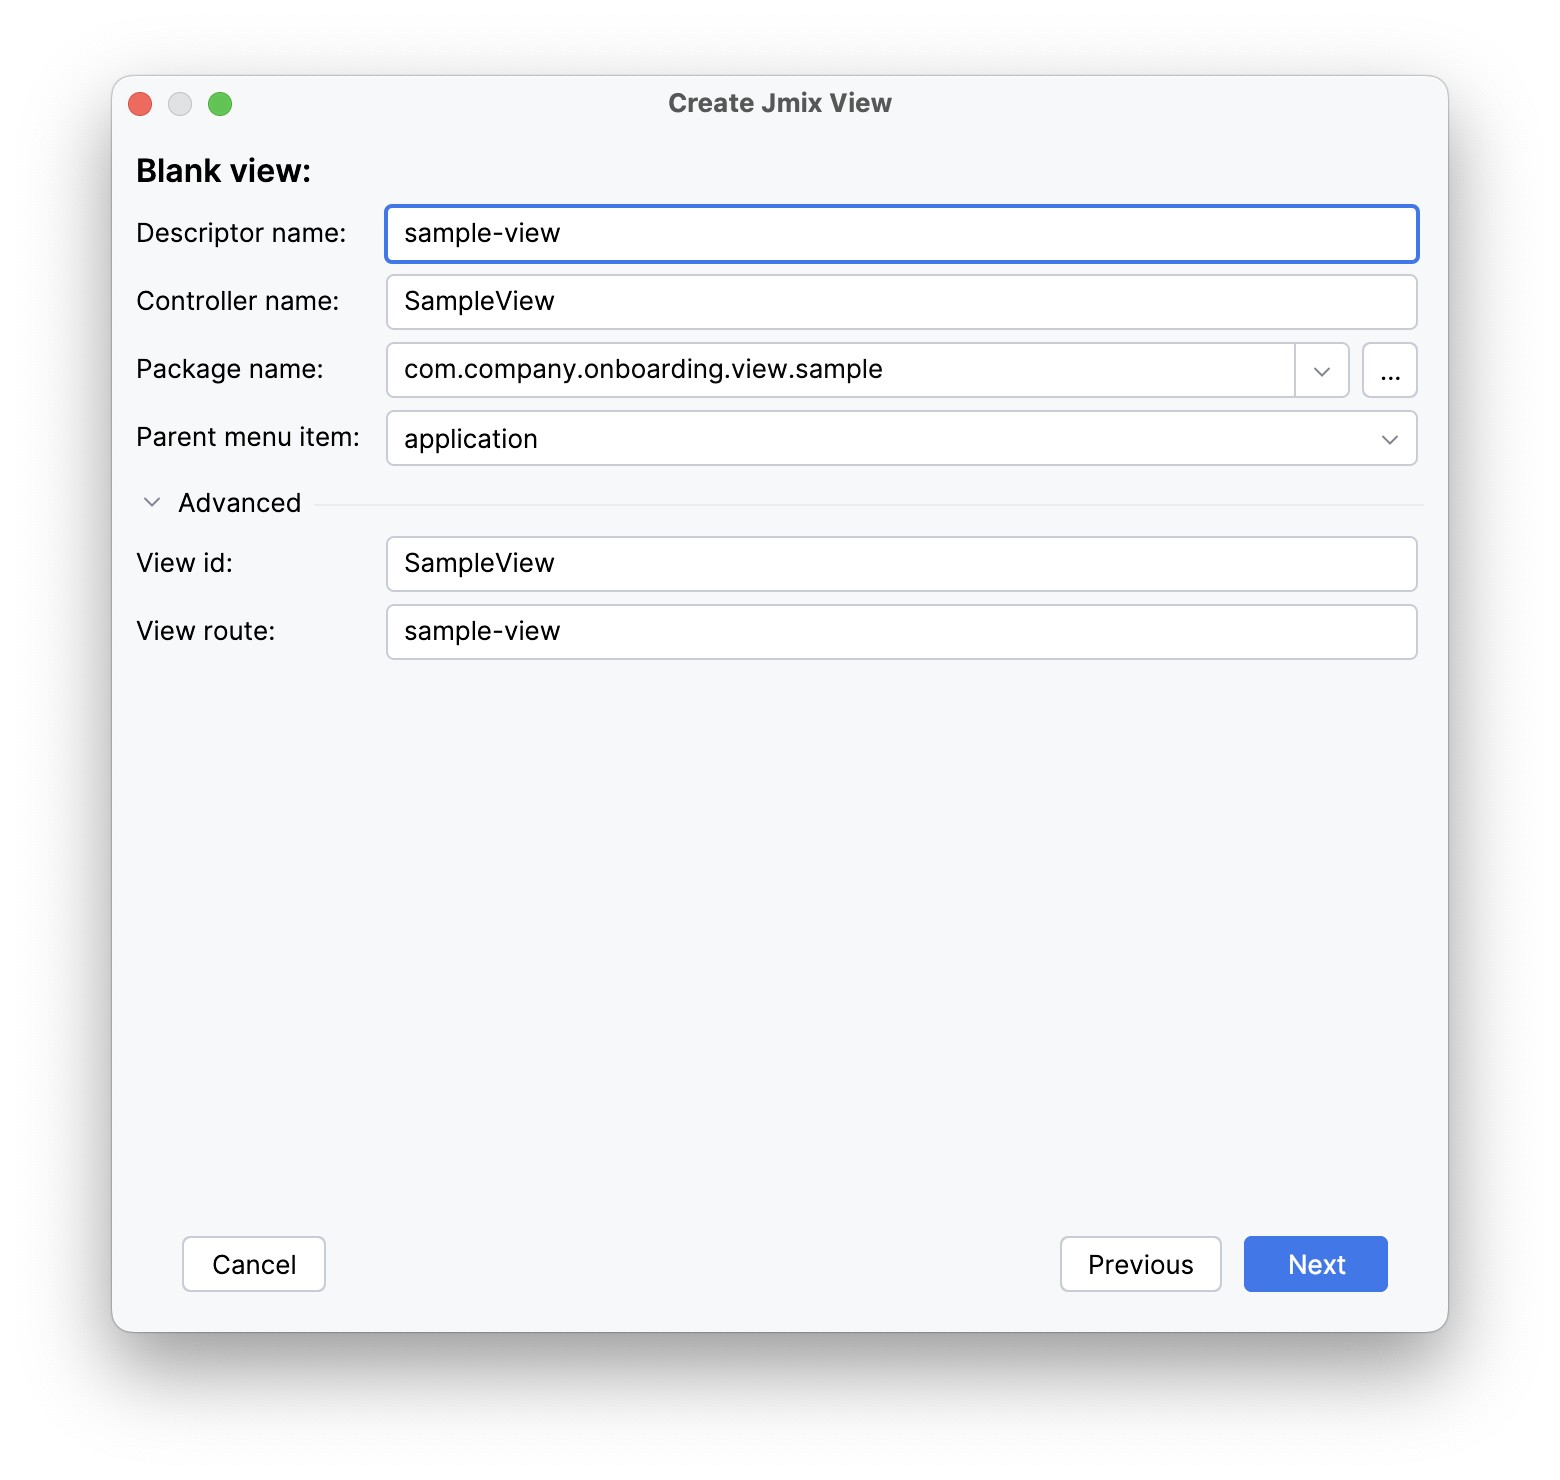
Creating Blank View
The Blank View template provides a starting point for creating a custom view. It provides a basic structure with minimal pre-generated components and logic.
Use this template when you need complete control over every aspect of the view’s design and behavior. You’ll be responsible for adding all the necessary components, layouts, data binding, and event handling manually.
Use the View designer to set up your view.
Creating Blank Fragment
The Blank Fragment template is designed for creating reusable view fragments that can be embedded within other views or fragments.
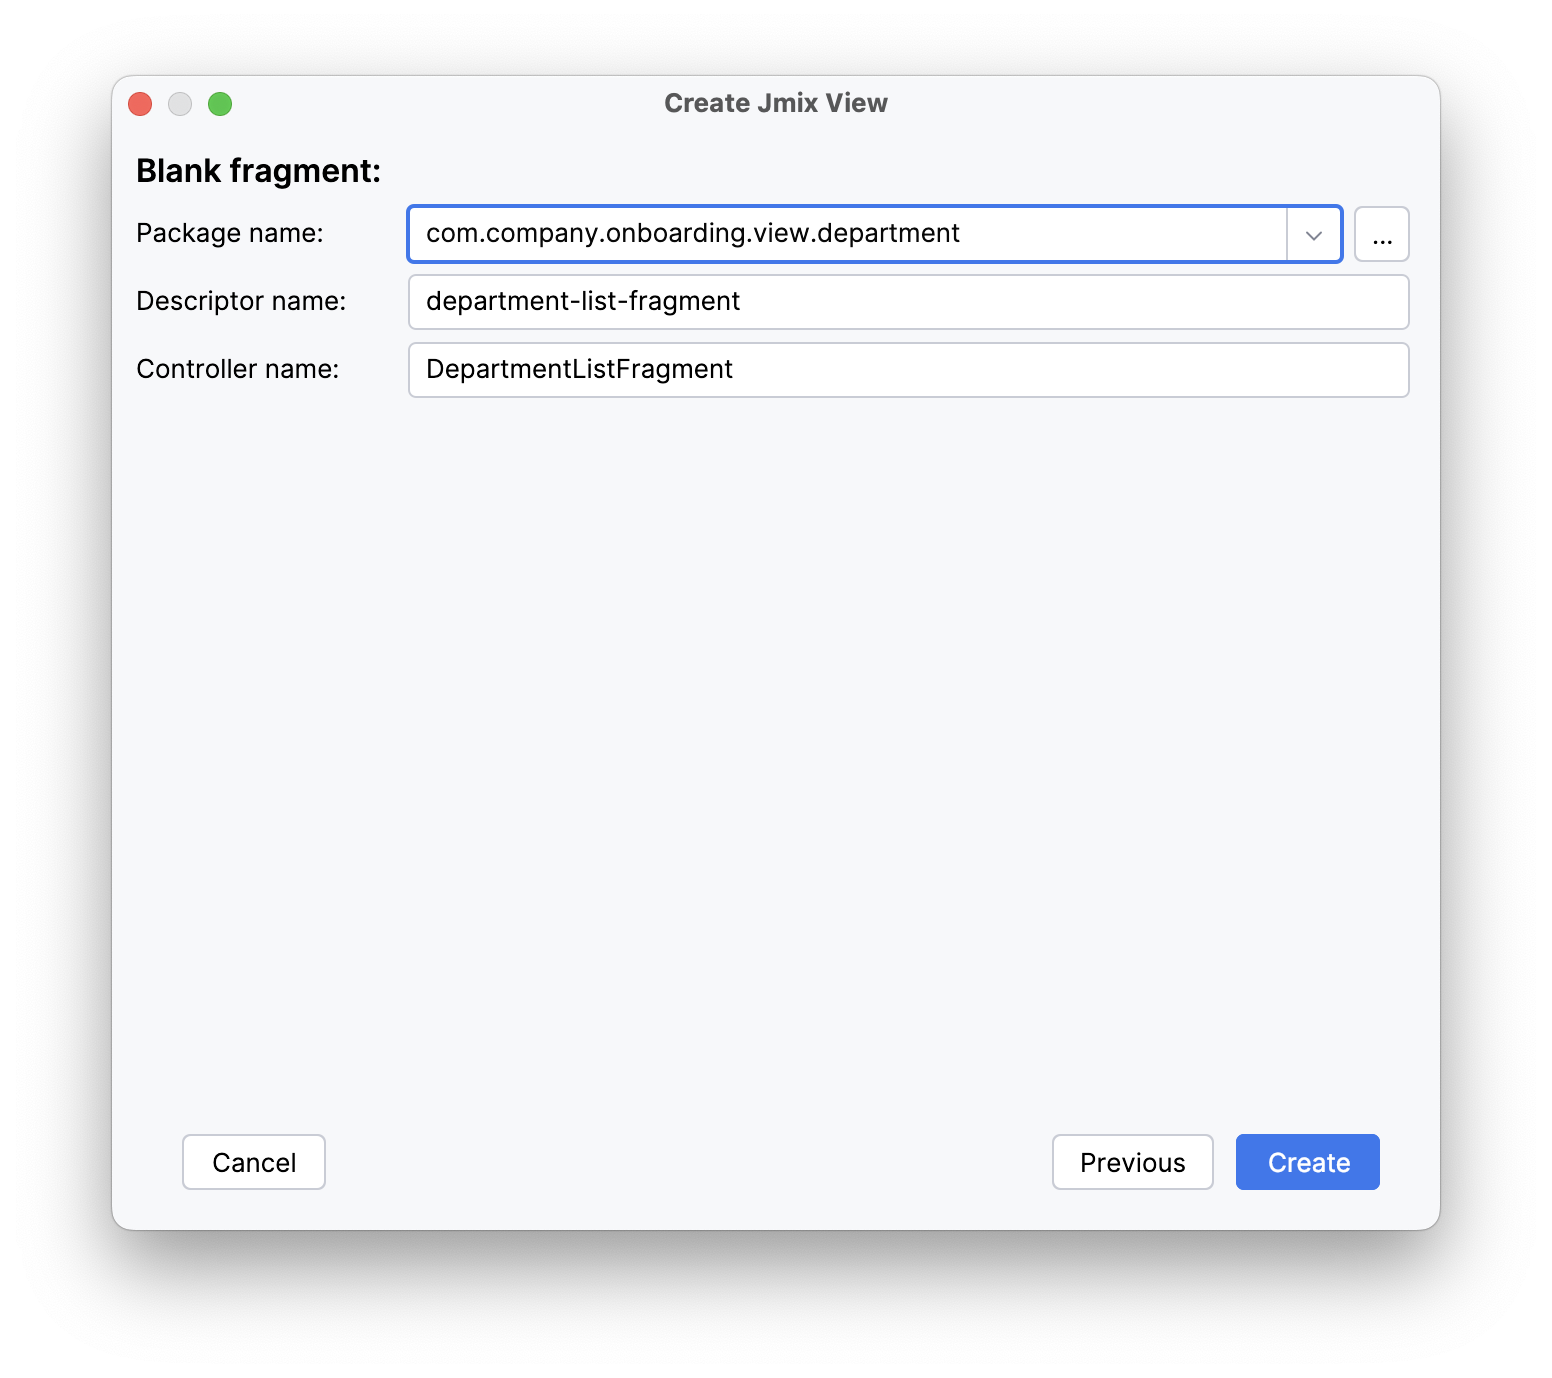
After clicking the Create button, the fragment’s XML and class files are generated.
Use the View designer to configure the fragment.
Creating Main View with Top Menu
By default, Jmix provides the main view with a list menu.
Studio’s View Creation Wizard offers a template to create a main view with a top menu.
If you want to use the new view instead of the existing main view, select the Use as default main view checkbox on the first step of the wizard.
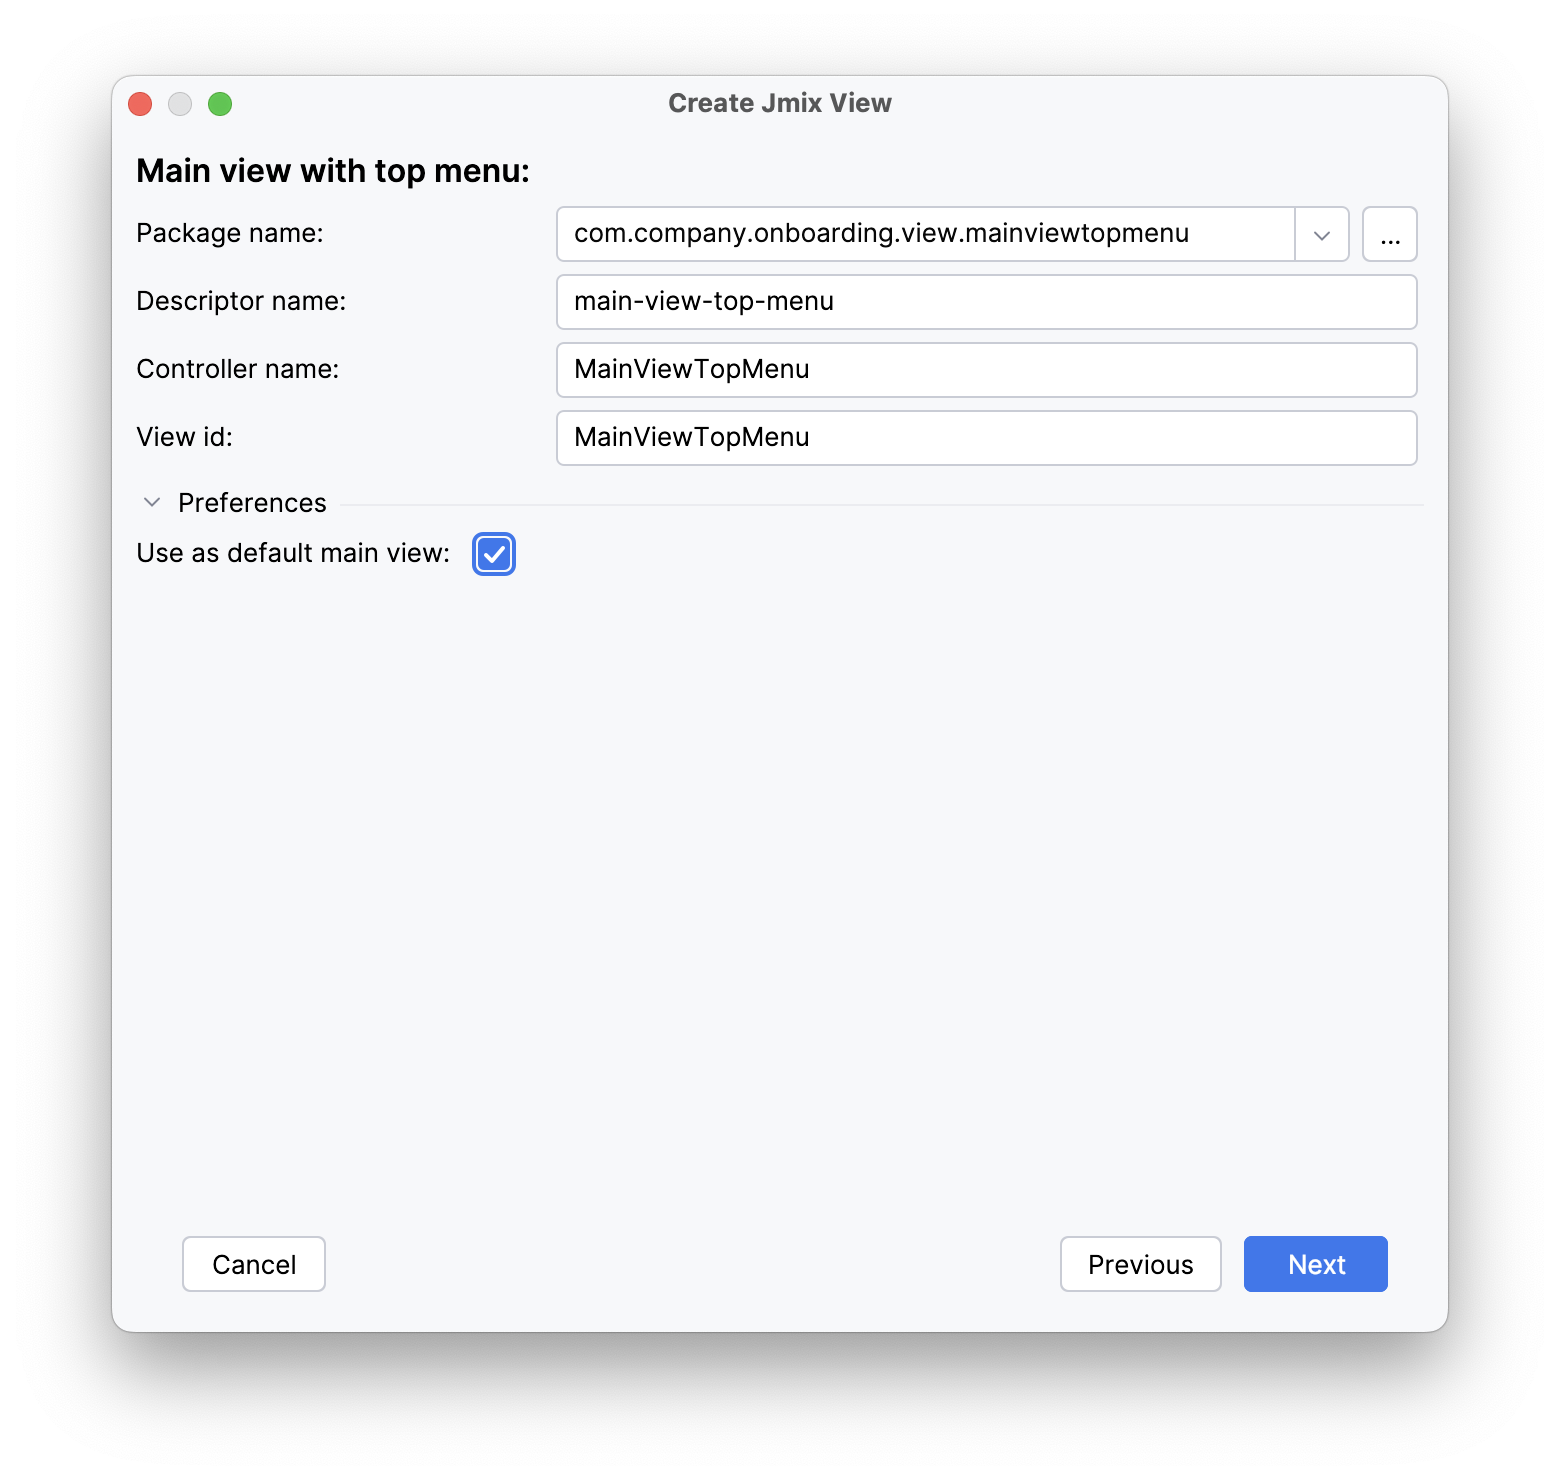
Studio will replace the layout attribute of the @Route annotation in all views and set the new view in the jmix.ui.main-view-id application property.
