9. Data Access Control
So far you entered the application as admin and had full control over data and UI. In this final chapter, you will set up restricted access to the application for HR Managers and Employees.
Resource Role for Employees
Creating Resource Role
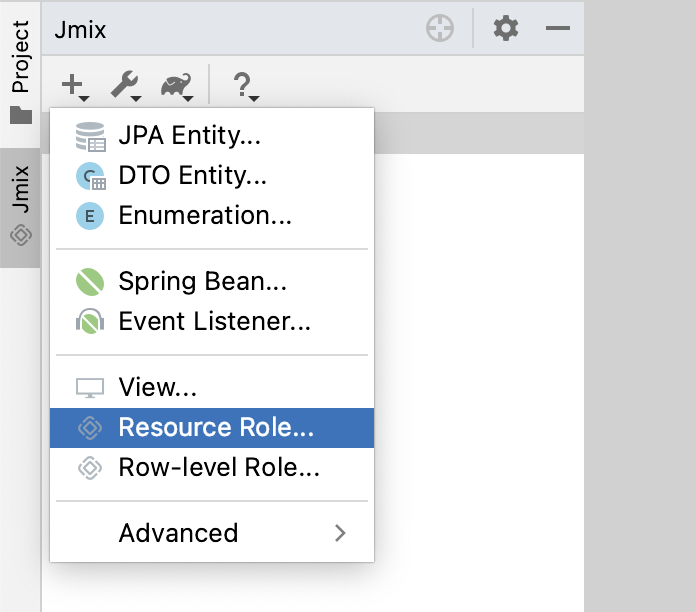
In the Jmix tool window, click New ( ) → Resource Role:
In the New Resource Role dialog, enter Employee into the Role name field and select UI in the Security scope dropdown:
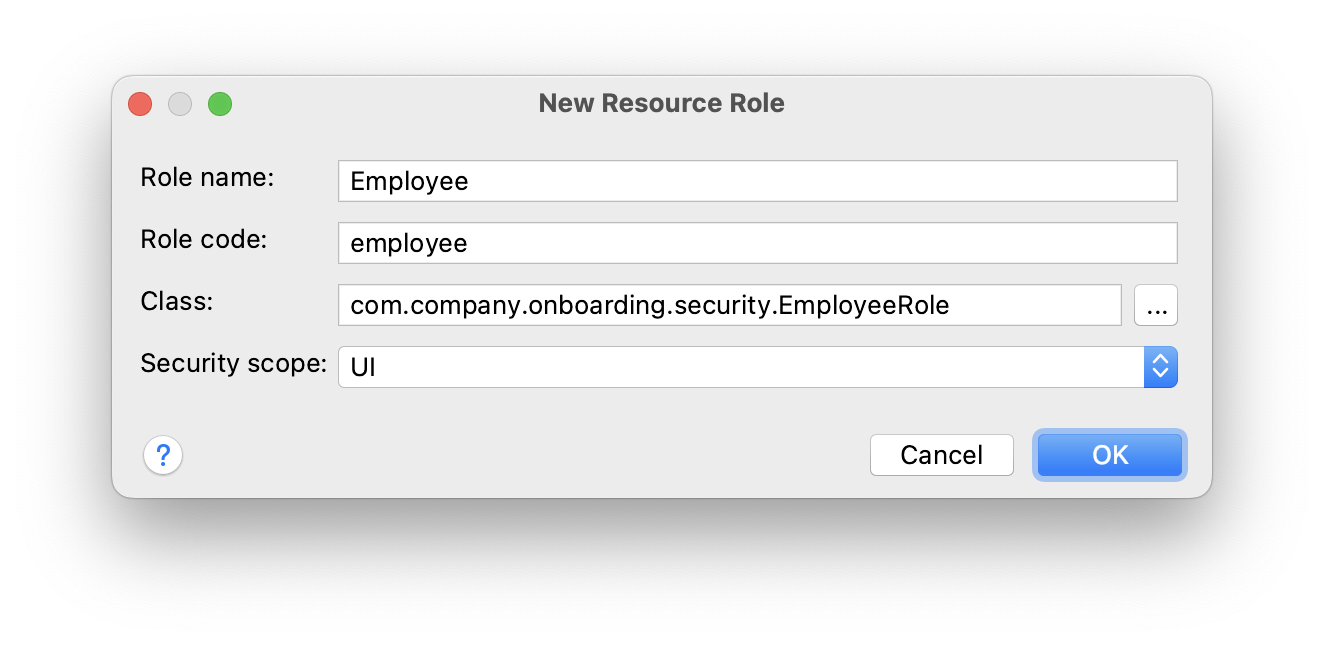
Click OK.
Studio will create and open an annotated interface:
package com.company.onboarding.security;

import io.jmix.security.role.annotation.ResourceRole;

@ResourceRole(name = "Employee", code = EmployeeRole.CODE, scope= "UI")
public interface EmployeeRole {
    String CODE = "employee";
}
A role with the UI scope is applied to users only when they enter the system through the UI. If the same user logs in through the REST API, the role is not applied. It is recommended to create a different set of roles for the API, usually with fewer permissions.
|
Switch to the User Interface tab to define permissions to views. Select MyOnboardingView in the menu tree and select Allow checkboxes on the right:
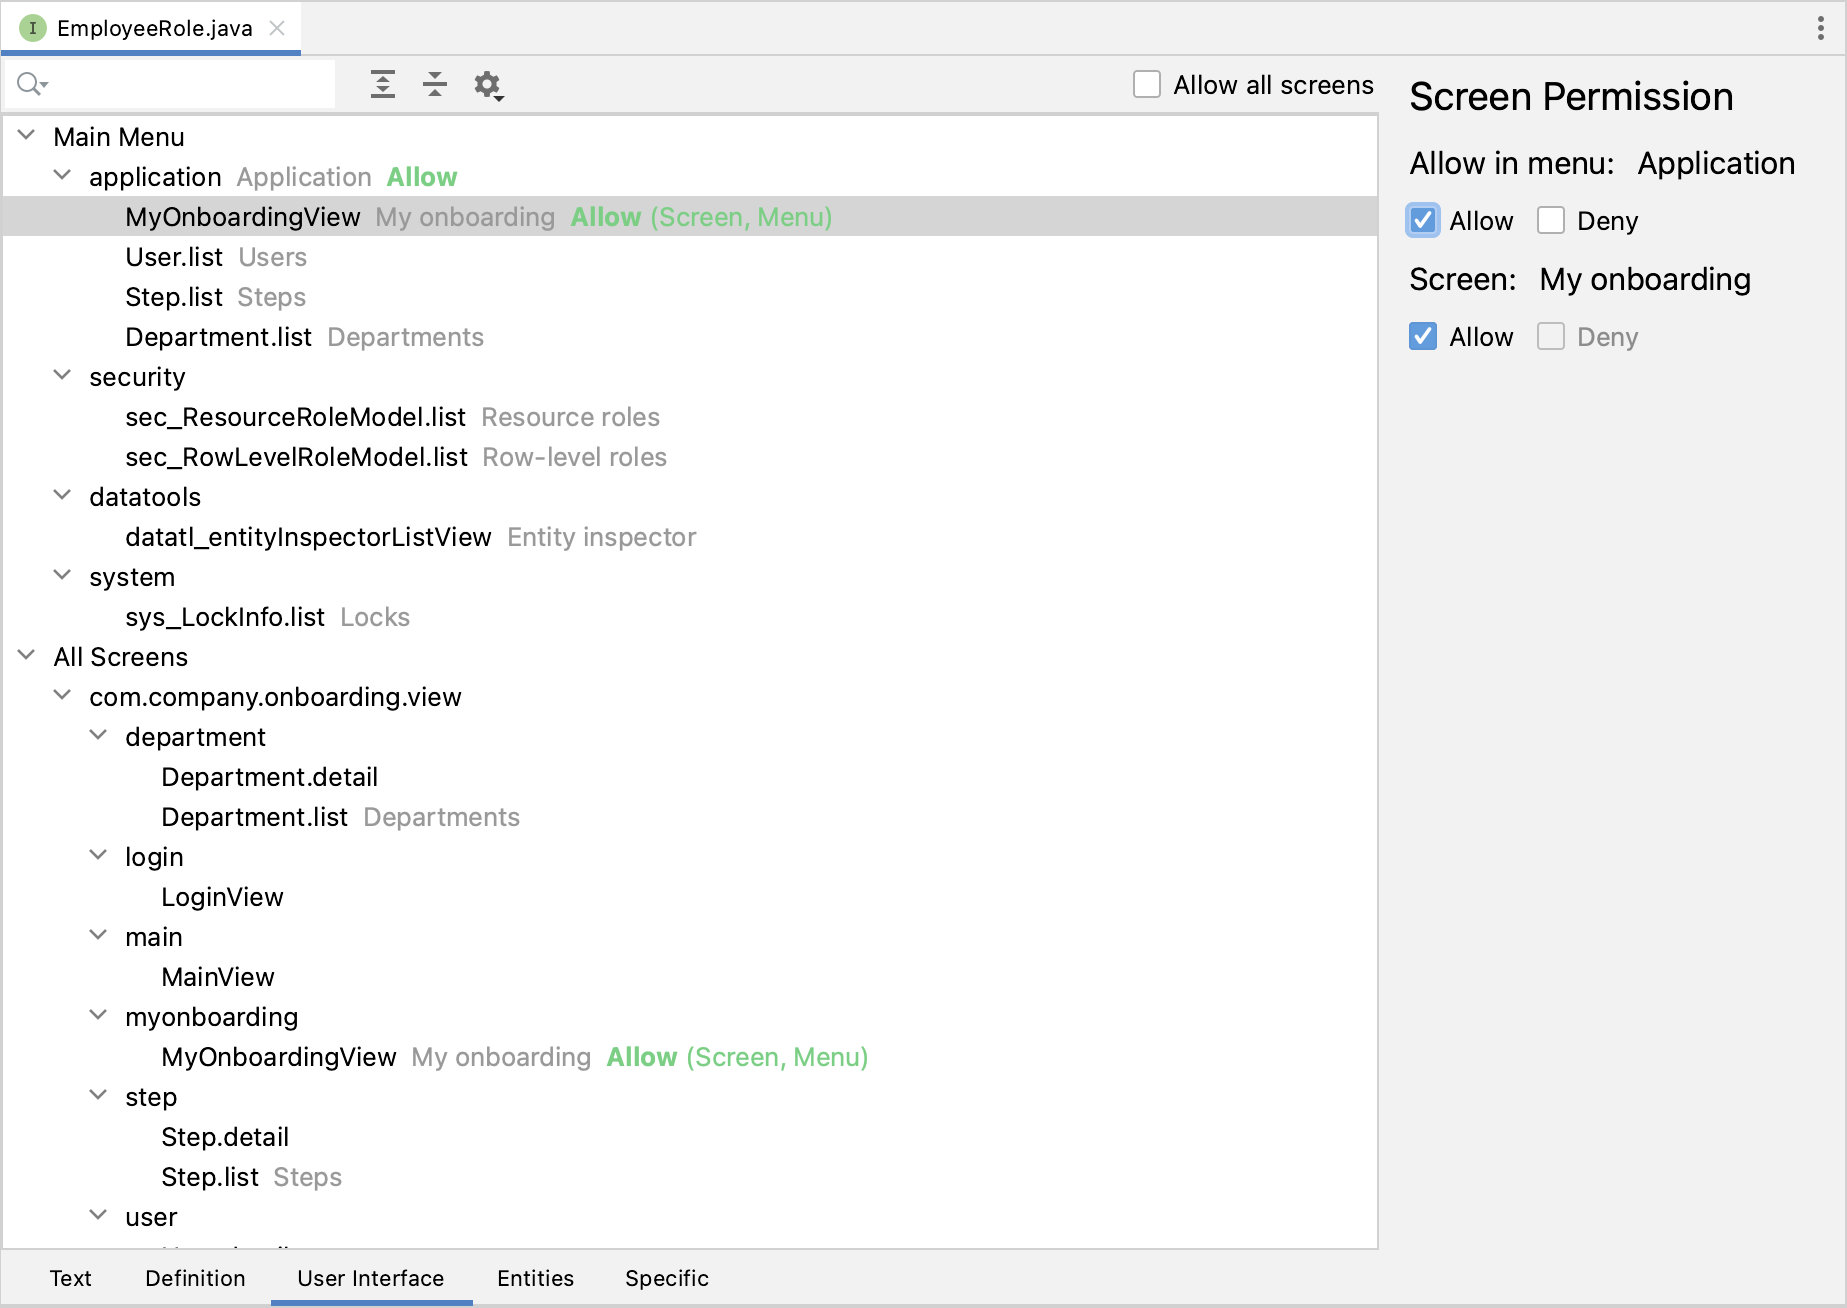
After that, switch to the Entities tab and select the following permissions:
An employee needs to read the Step, User and UserStep entities to view them in UI and update User and UserStep to mark completed steps.
Switch back to the Text tab. You will see that Studio has generated a few methods with annotations corresponding to granted permissions:
@ResourceRole(name = "Employee", code = EmployeeRole.CODE, scope = "UI")
public interface EmployeeRole {
String CODE = "employee";
@MenuPolicy(menuIds = "MyOnboardingView")
@ViewPolicy(viewIds = "MyOnboardingView")
void screens();
@EntityAttributePolicy(entityClass = User.class,
attributes = "*",
action = EntityAttributePolicyAction.VIEW)
@EntityPolicy(entityClass = User.class,
actions = {EntityPolicyAction.READ, EntityPolicyAction.UPDATE})
void user();
@EntityAttributePolicy(entityClass = UserStep.class,
attributes = "*",
action = EntityAttributePolicyAction.VIEW)
@EntityPolicy(entityClass = UserStep.class,
actions = {EntityPolicyAction.READ, EntityPolicyAction.UPDATE})
void userStep();
@EntityAttributePolicy(entityClass = Step.class,
attributes = "*",
action = EntityAttributePolicyAction.VIEW)
@EntityPolicy(entityClass = Step.class,
actions = EntityPolicyAction.READ)
void step();
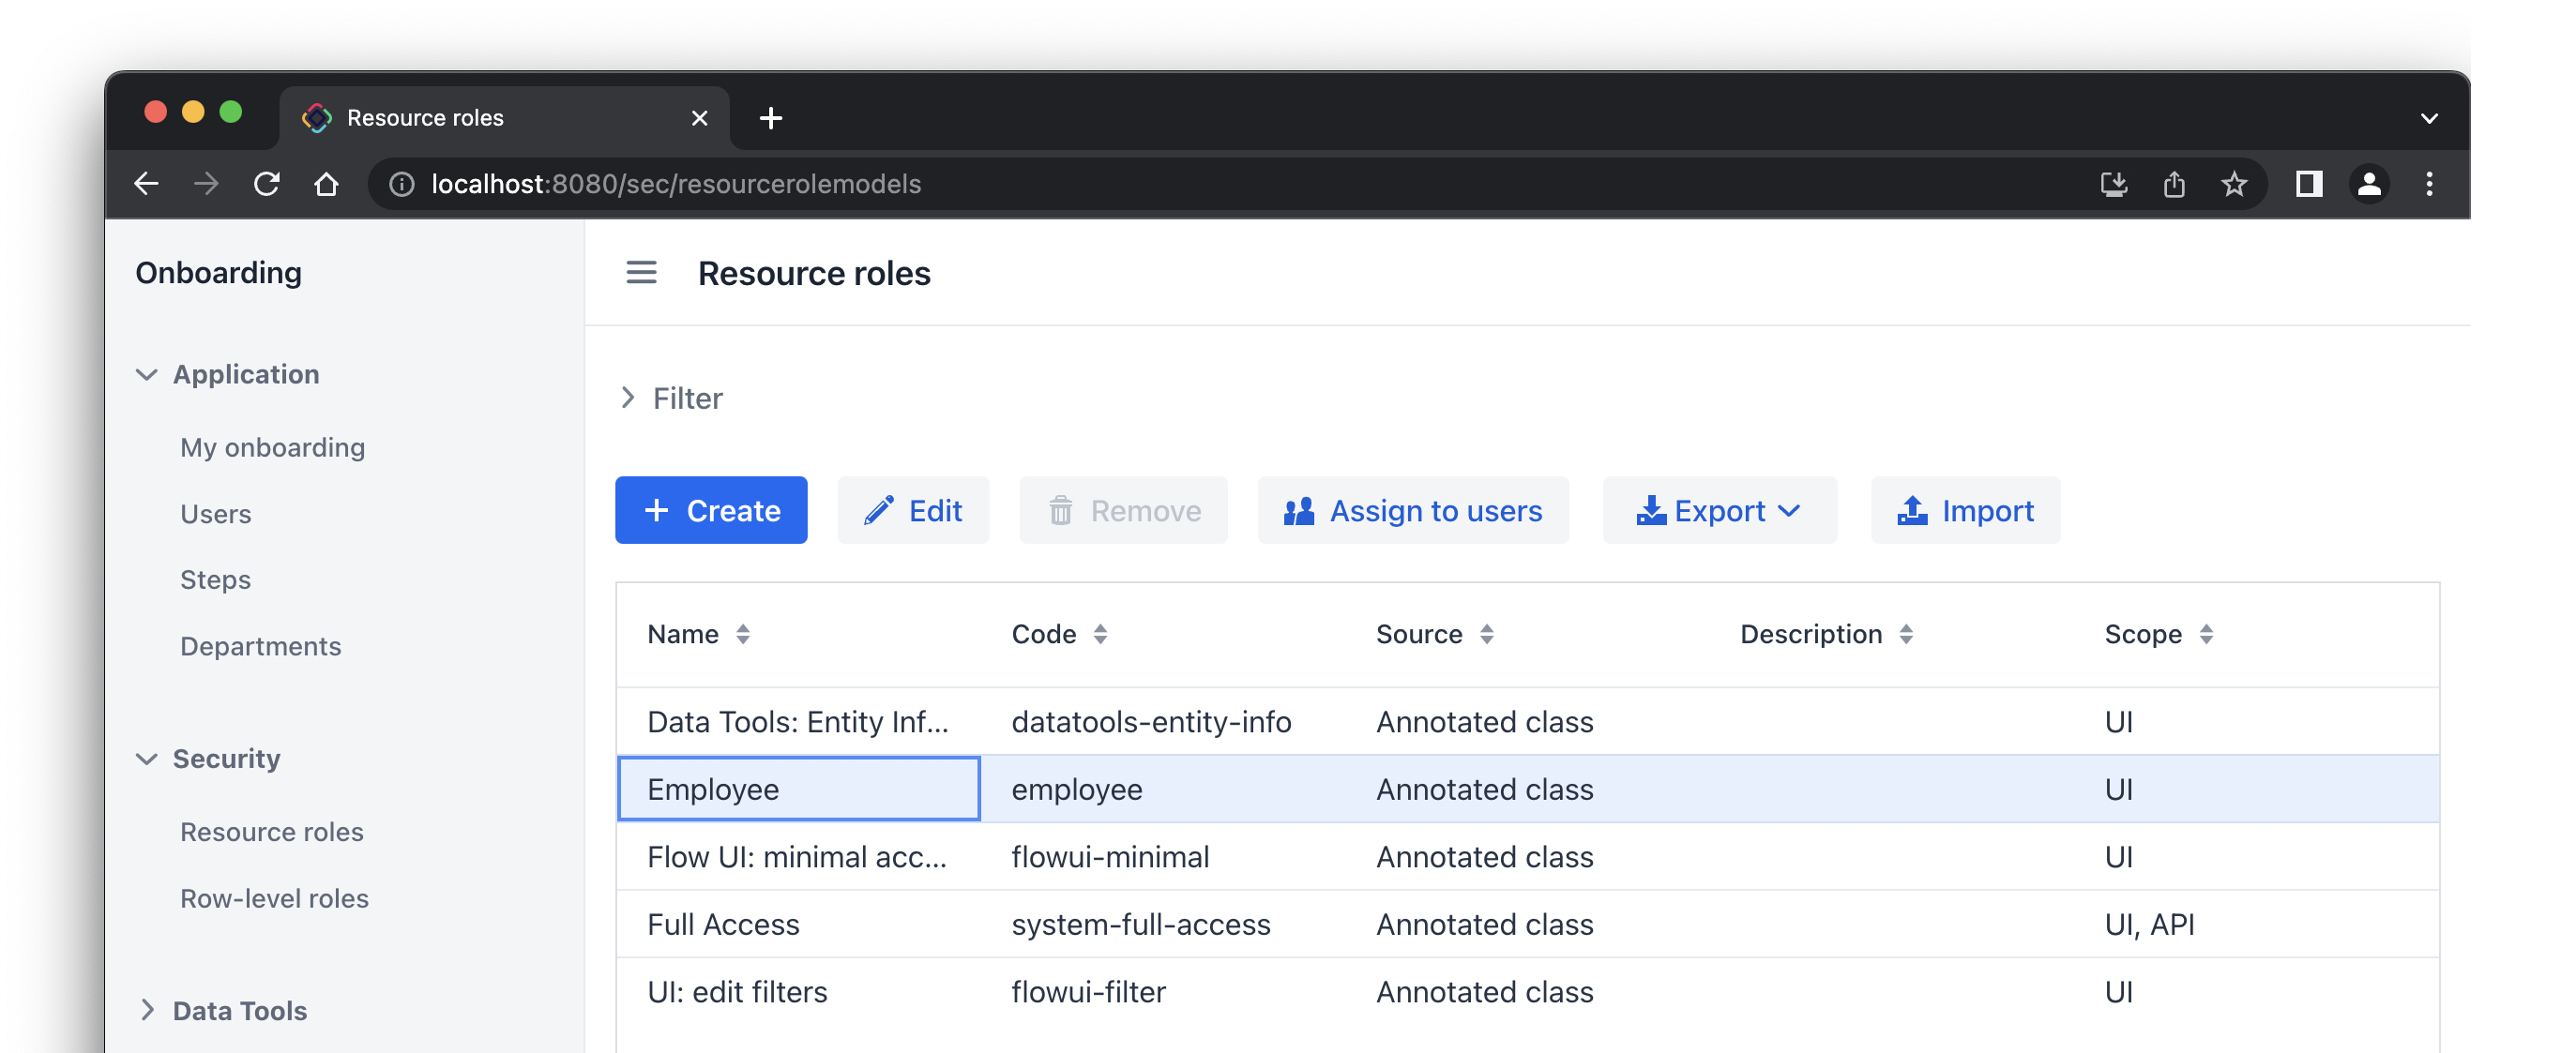
}Press Ctrl/Cmd+S and switch to the running application. Open Security → Resource roles view. You will see the new role in the list:
Assigning Role
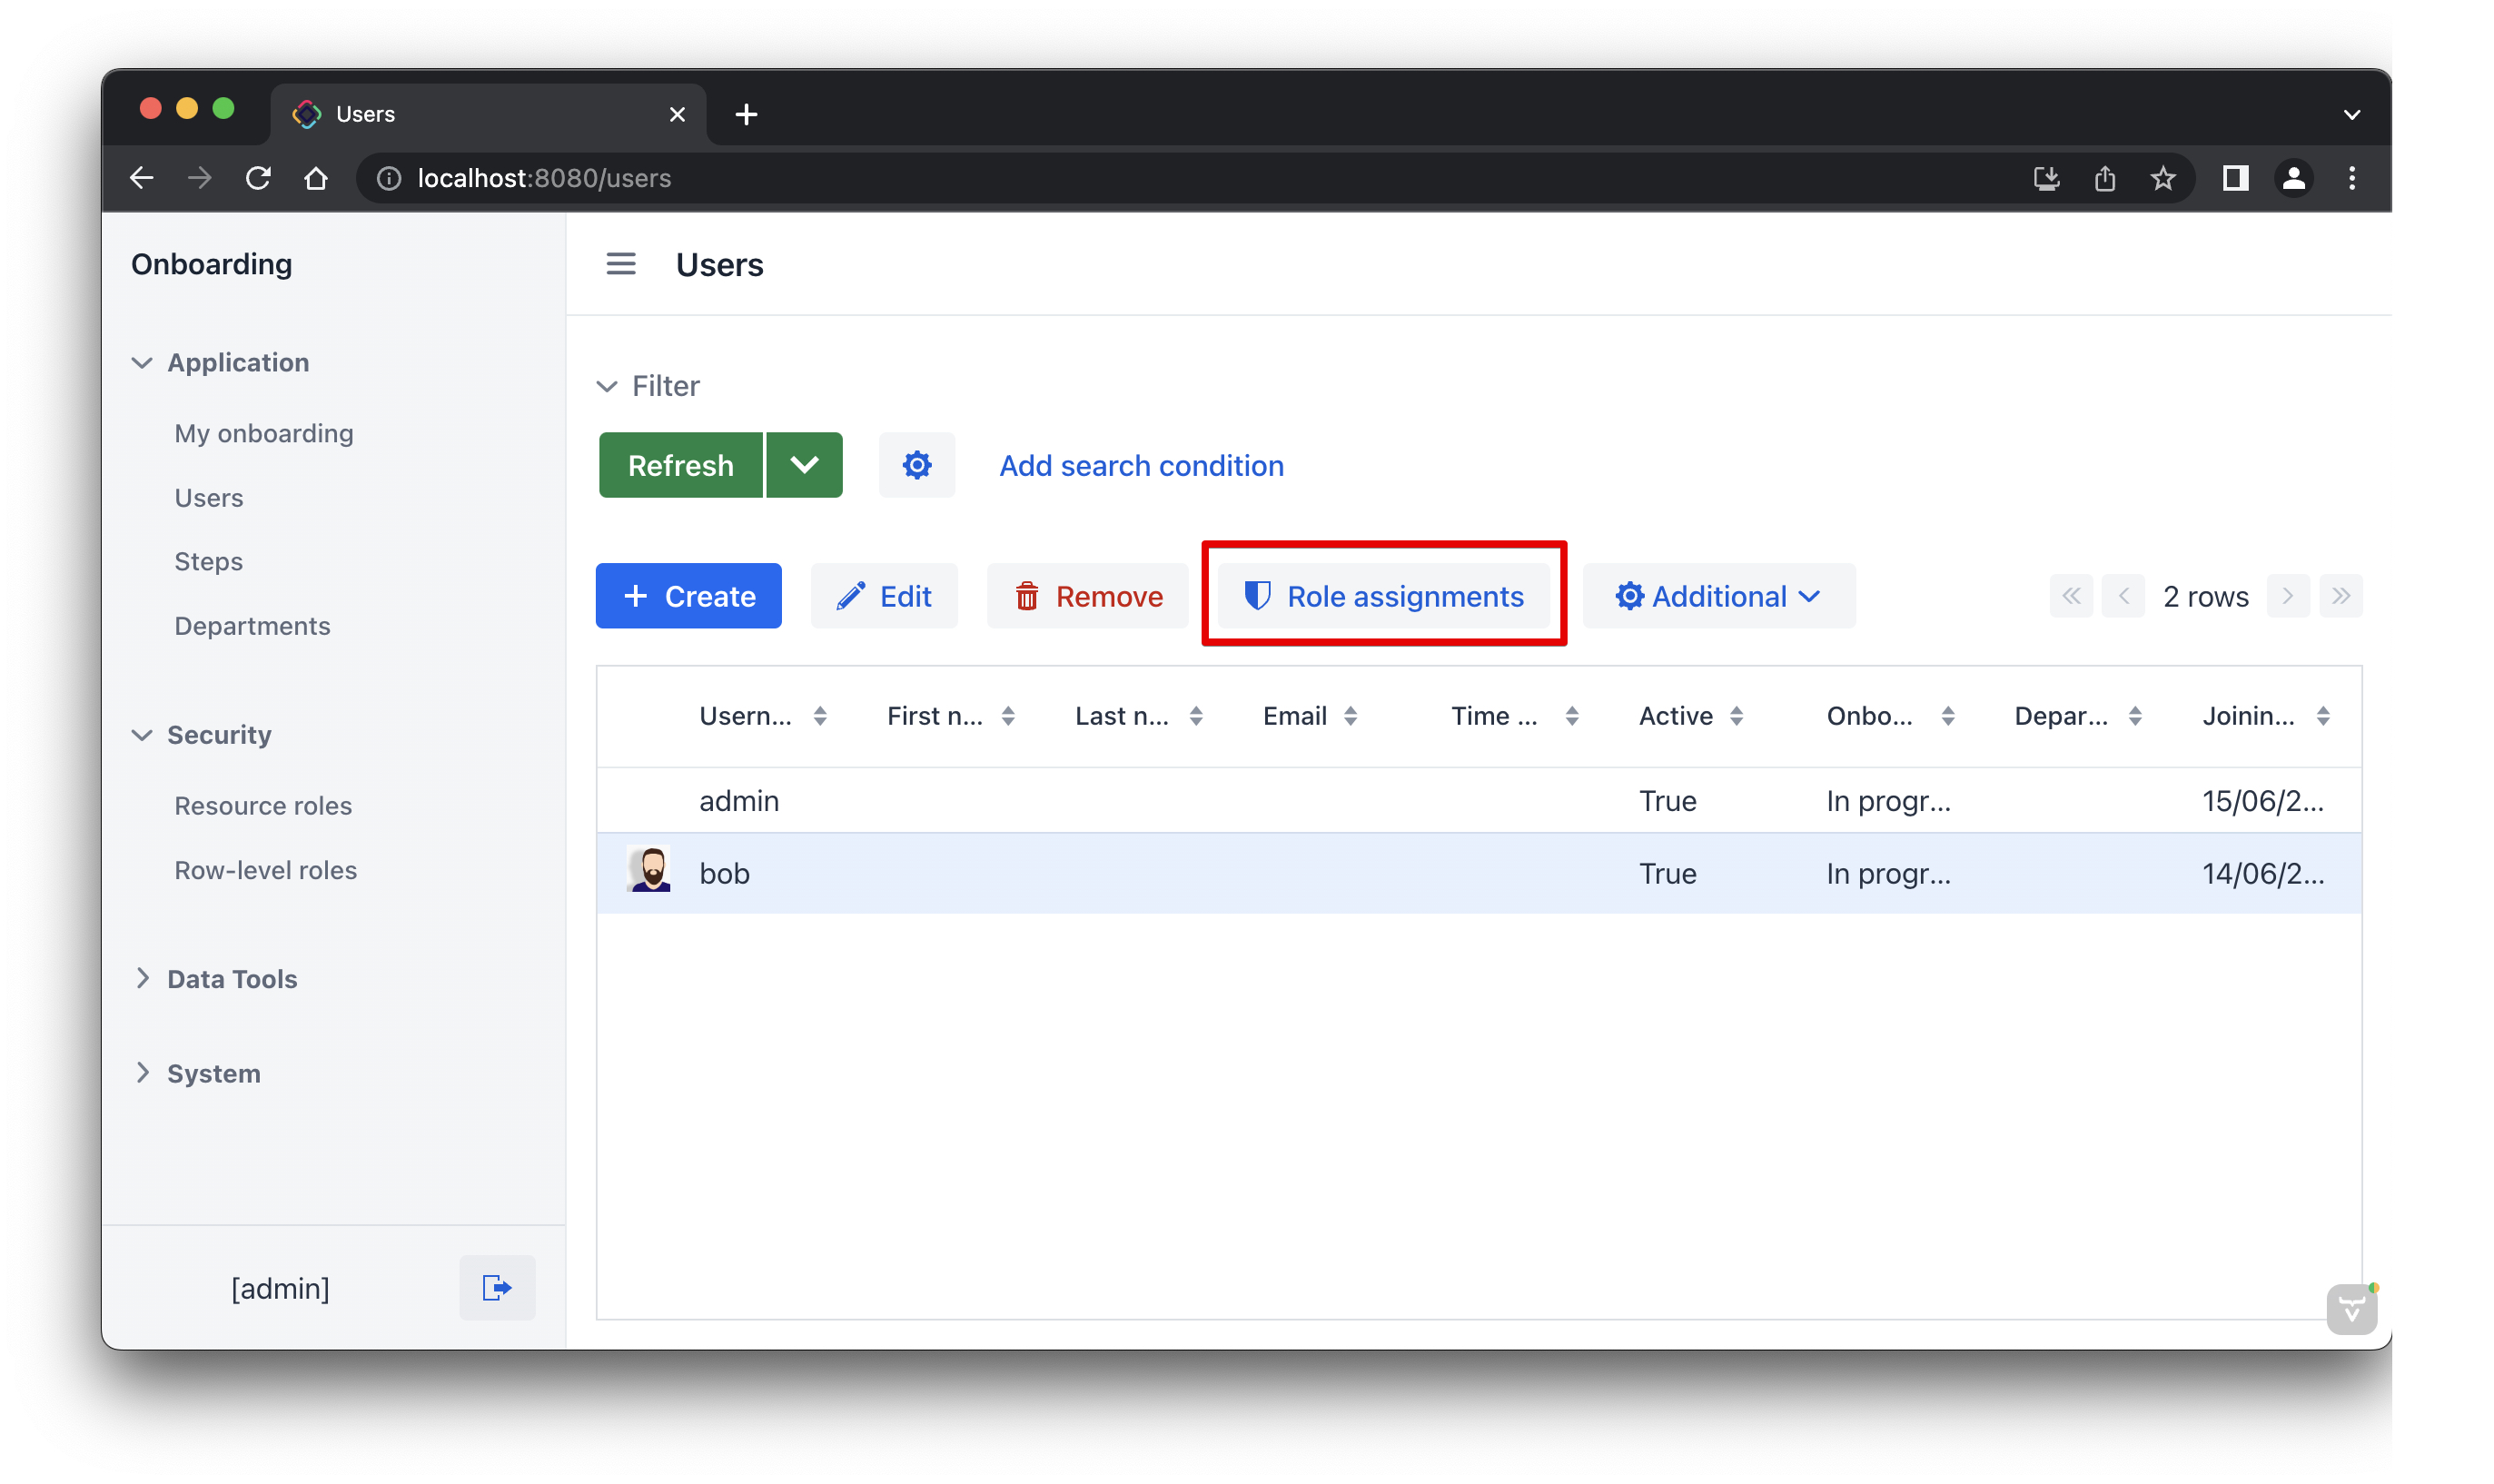
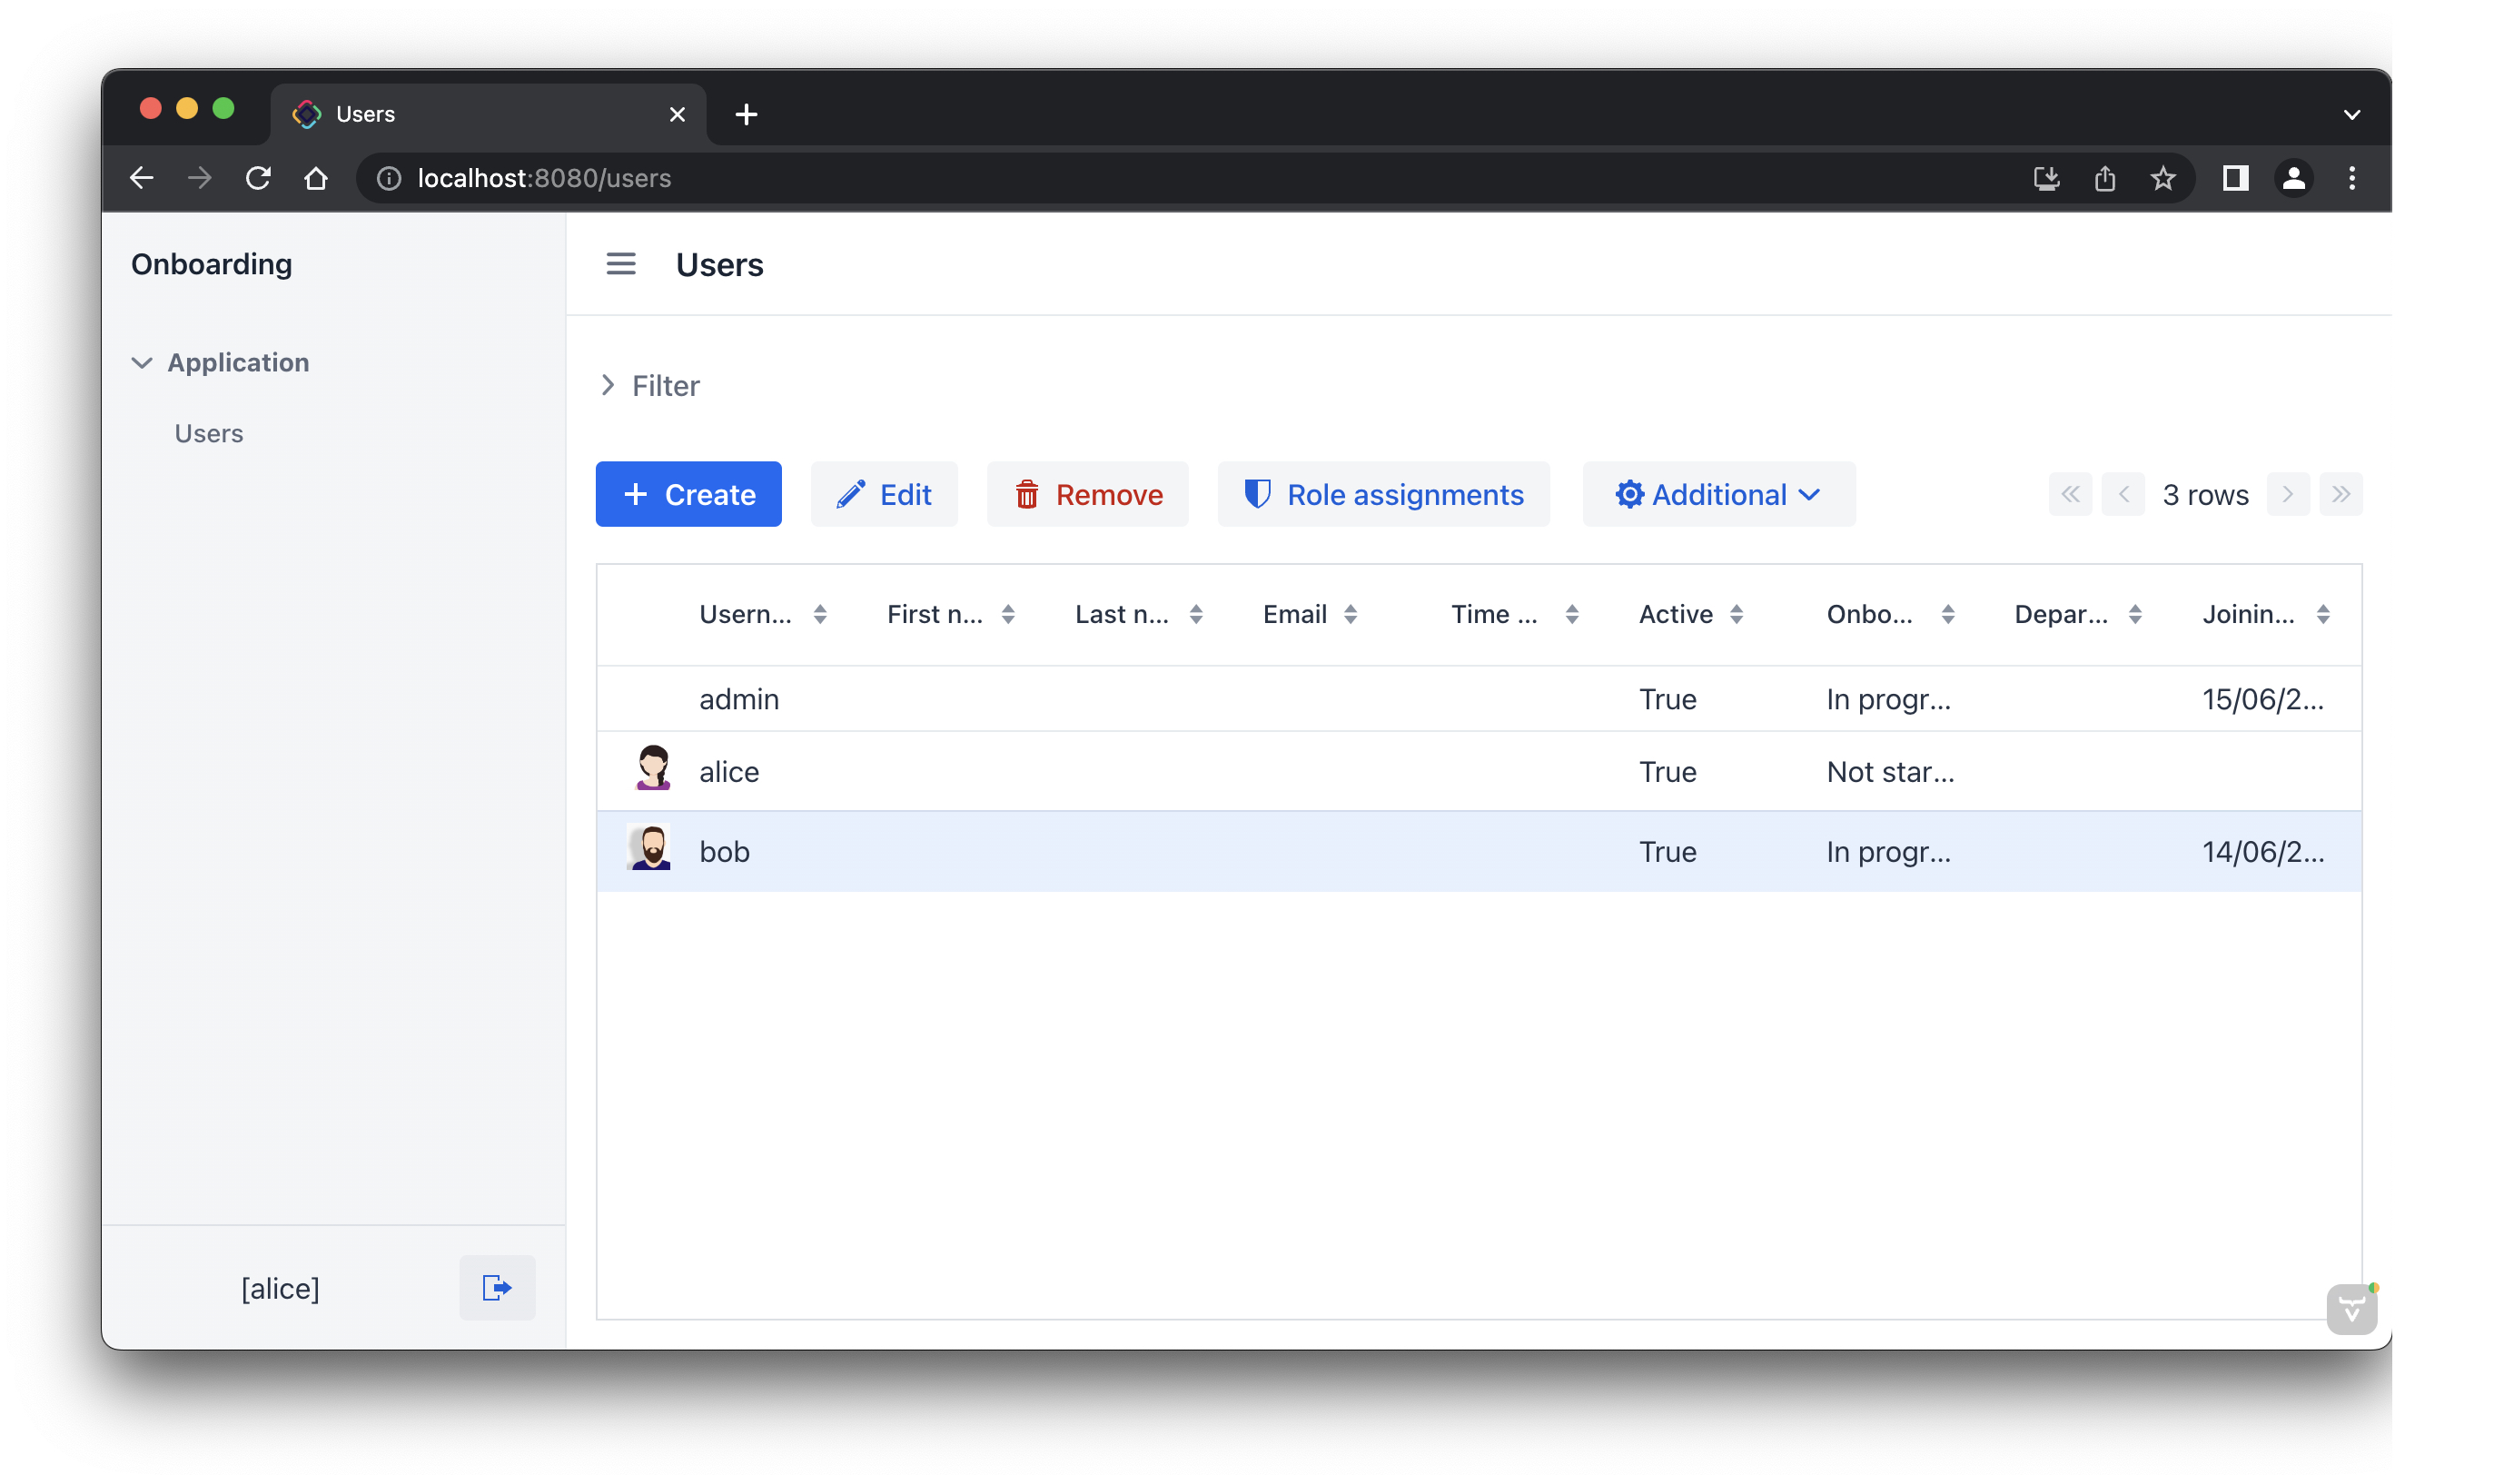
Now let’s assign the role to a user. Open the Users list view and create a new user bob. Select the user and click Role assignments button:
In the Role assignments view, click the Add button in the Resource roles panel.
In the Select resource roles dialog, select Employee and UI: minimal access roles:

Click Select. The selected roles will be shown in the Resource roles panel:
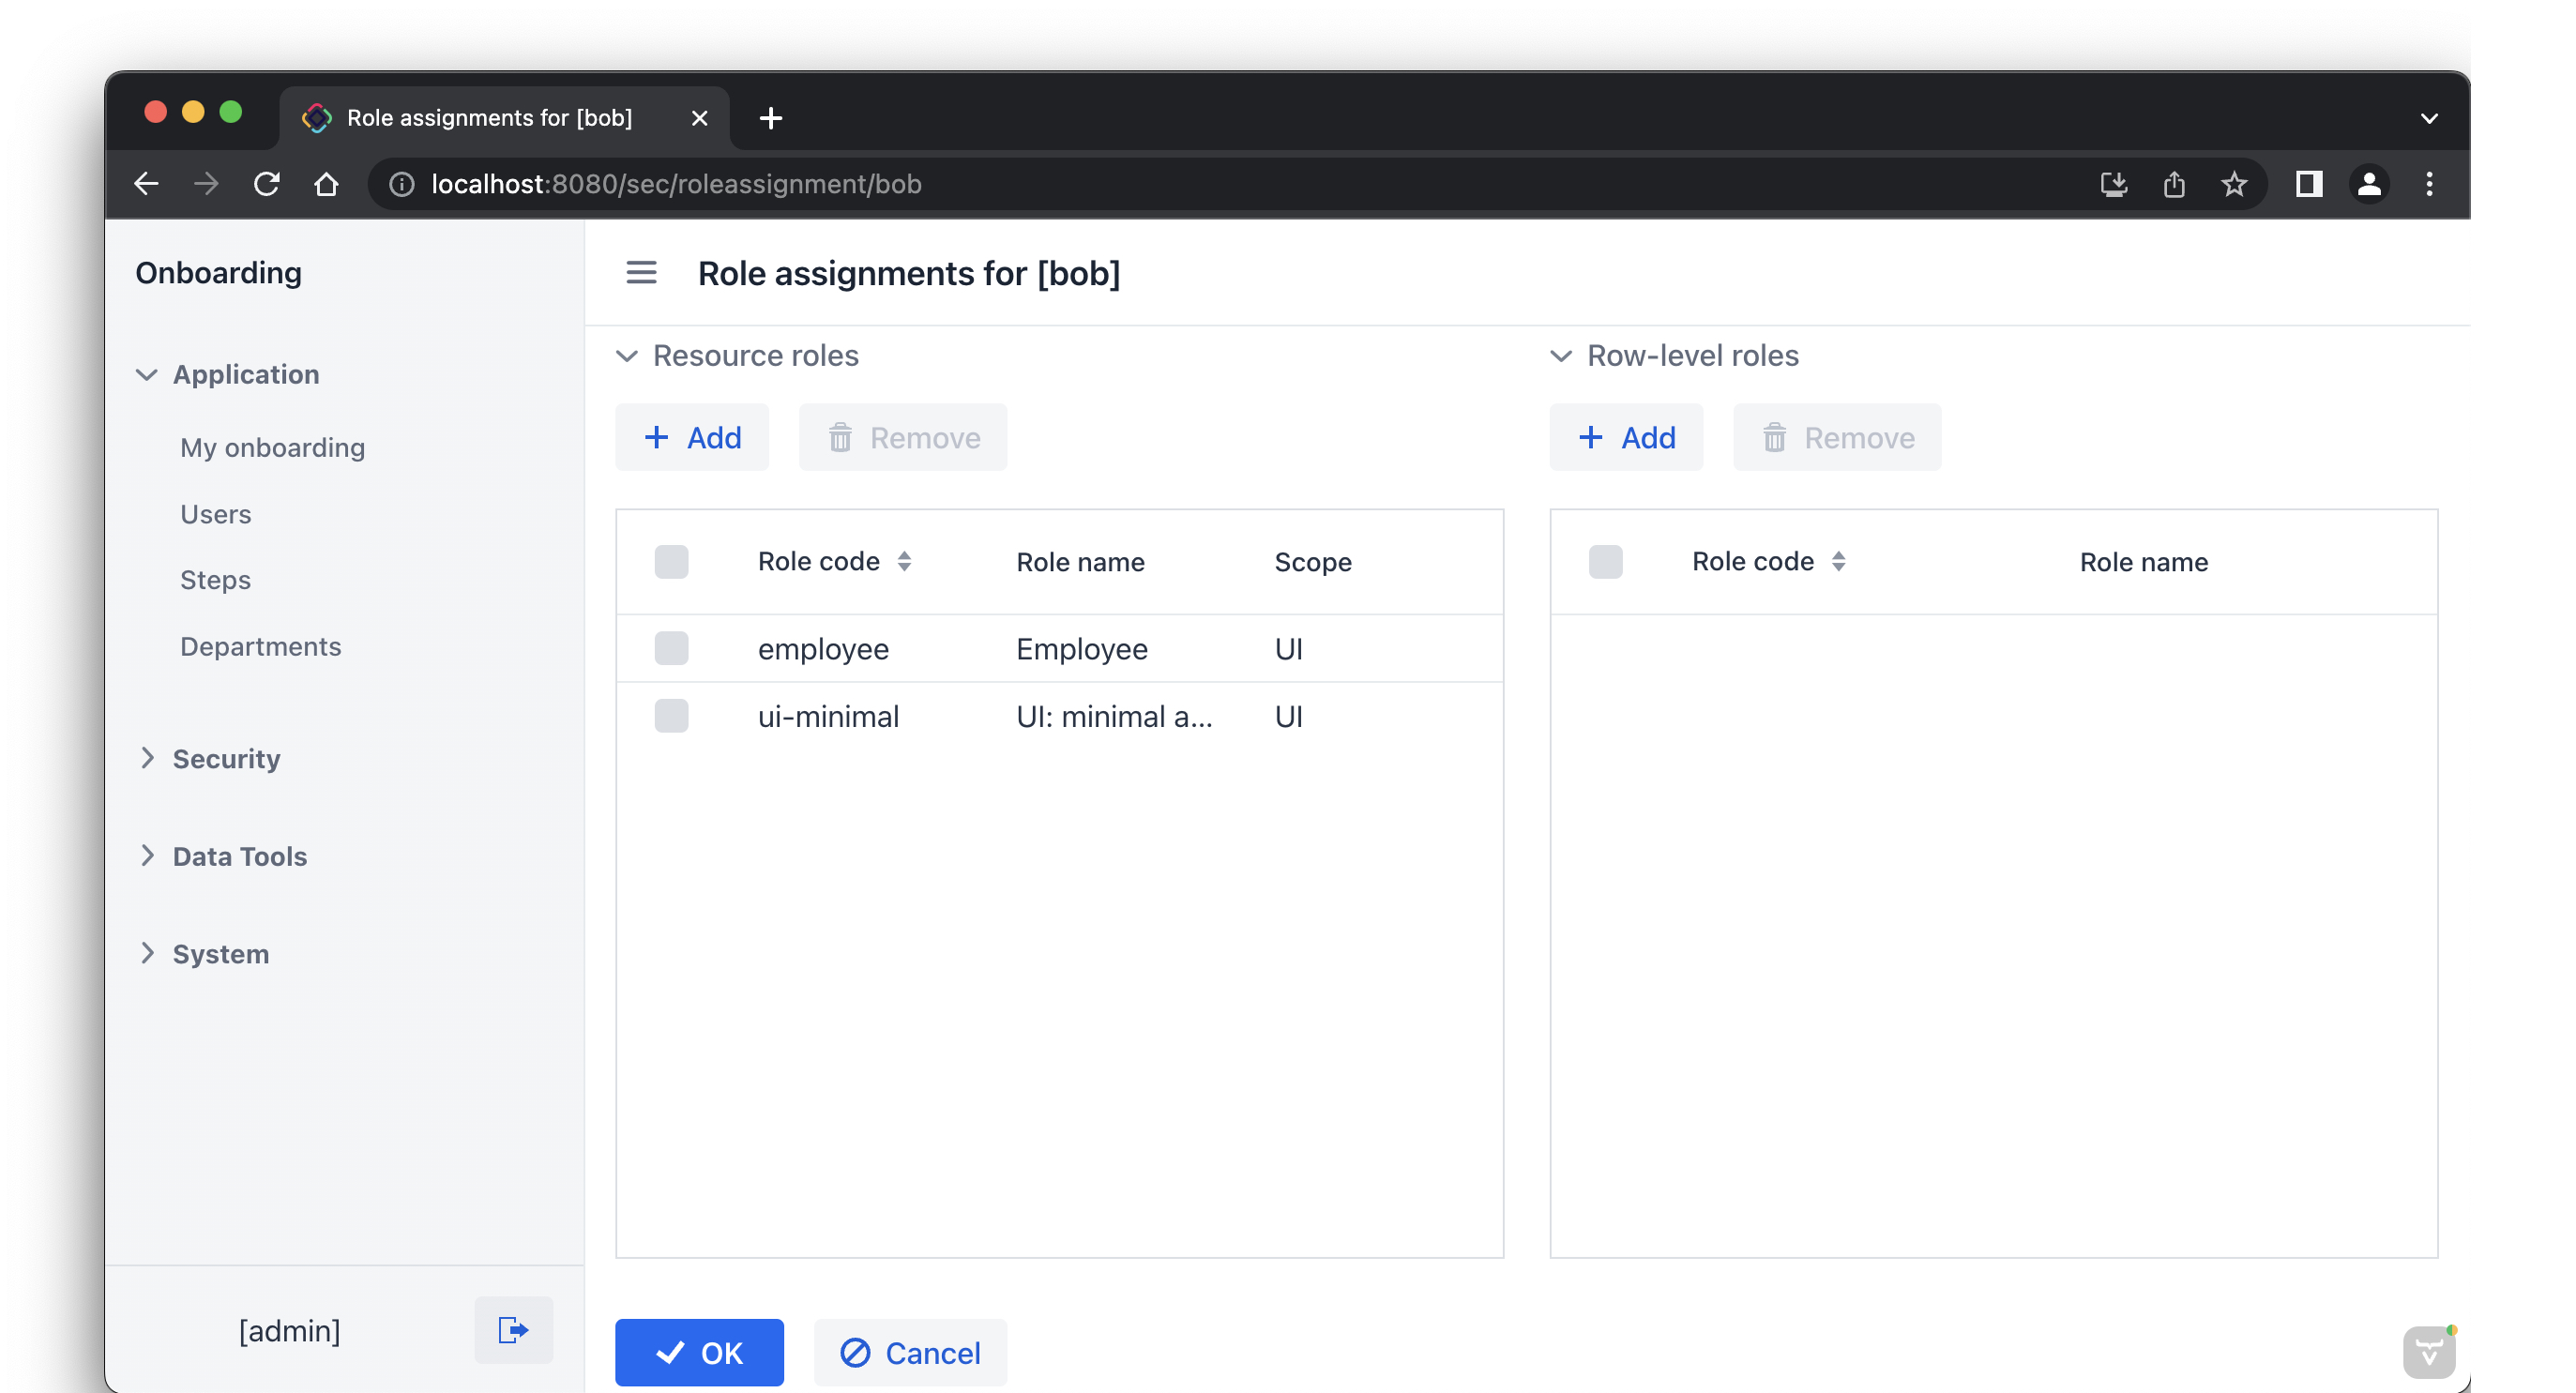
Click OK to save the role assignments.
The UI: minimal access role is required for the user to log in to the application UI. You can find it in your project and investigate its contents.
|
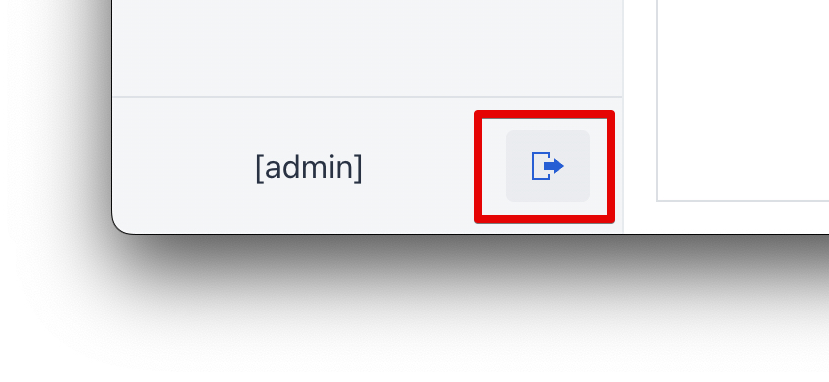
Log out using the button next to the current user name:
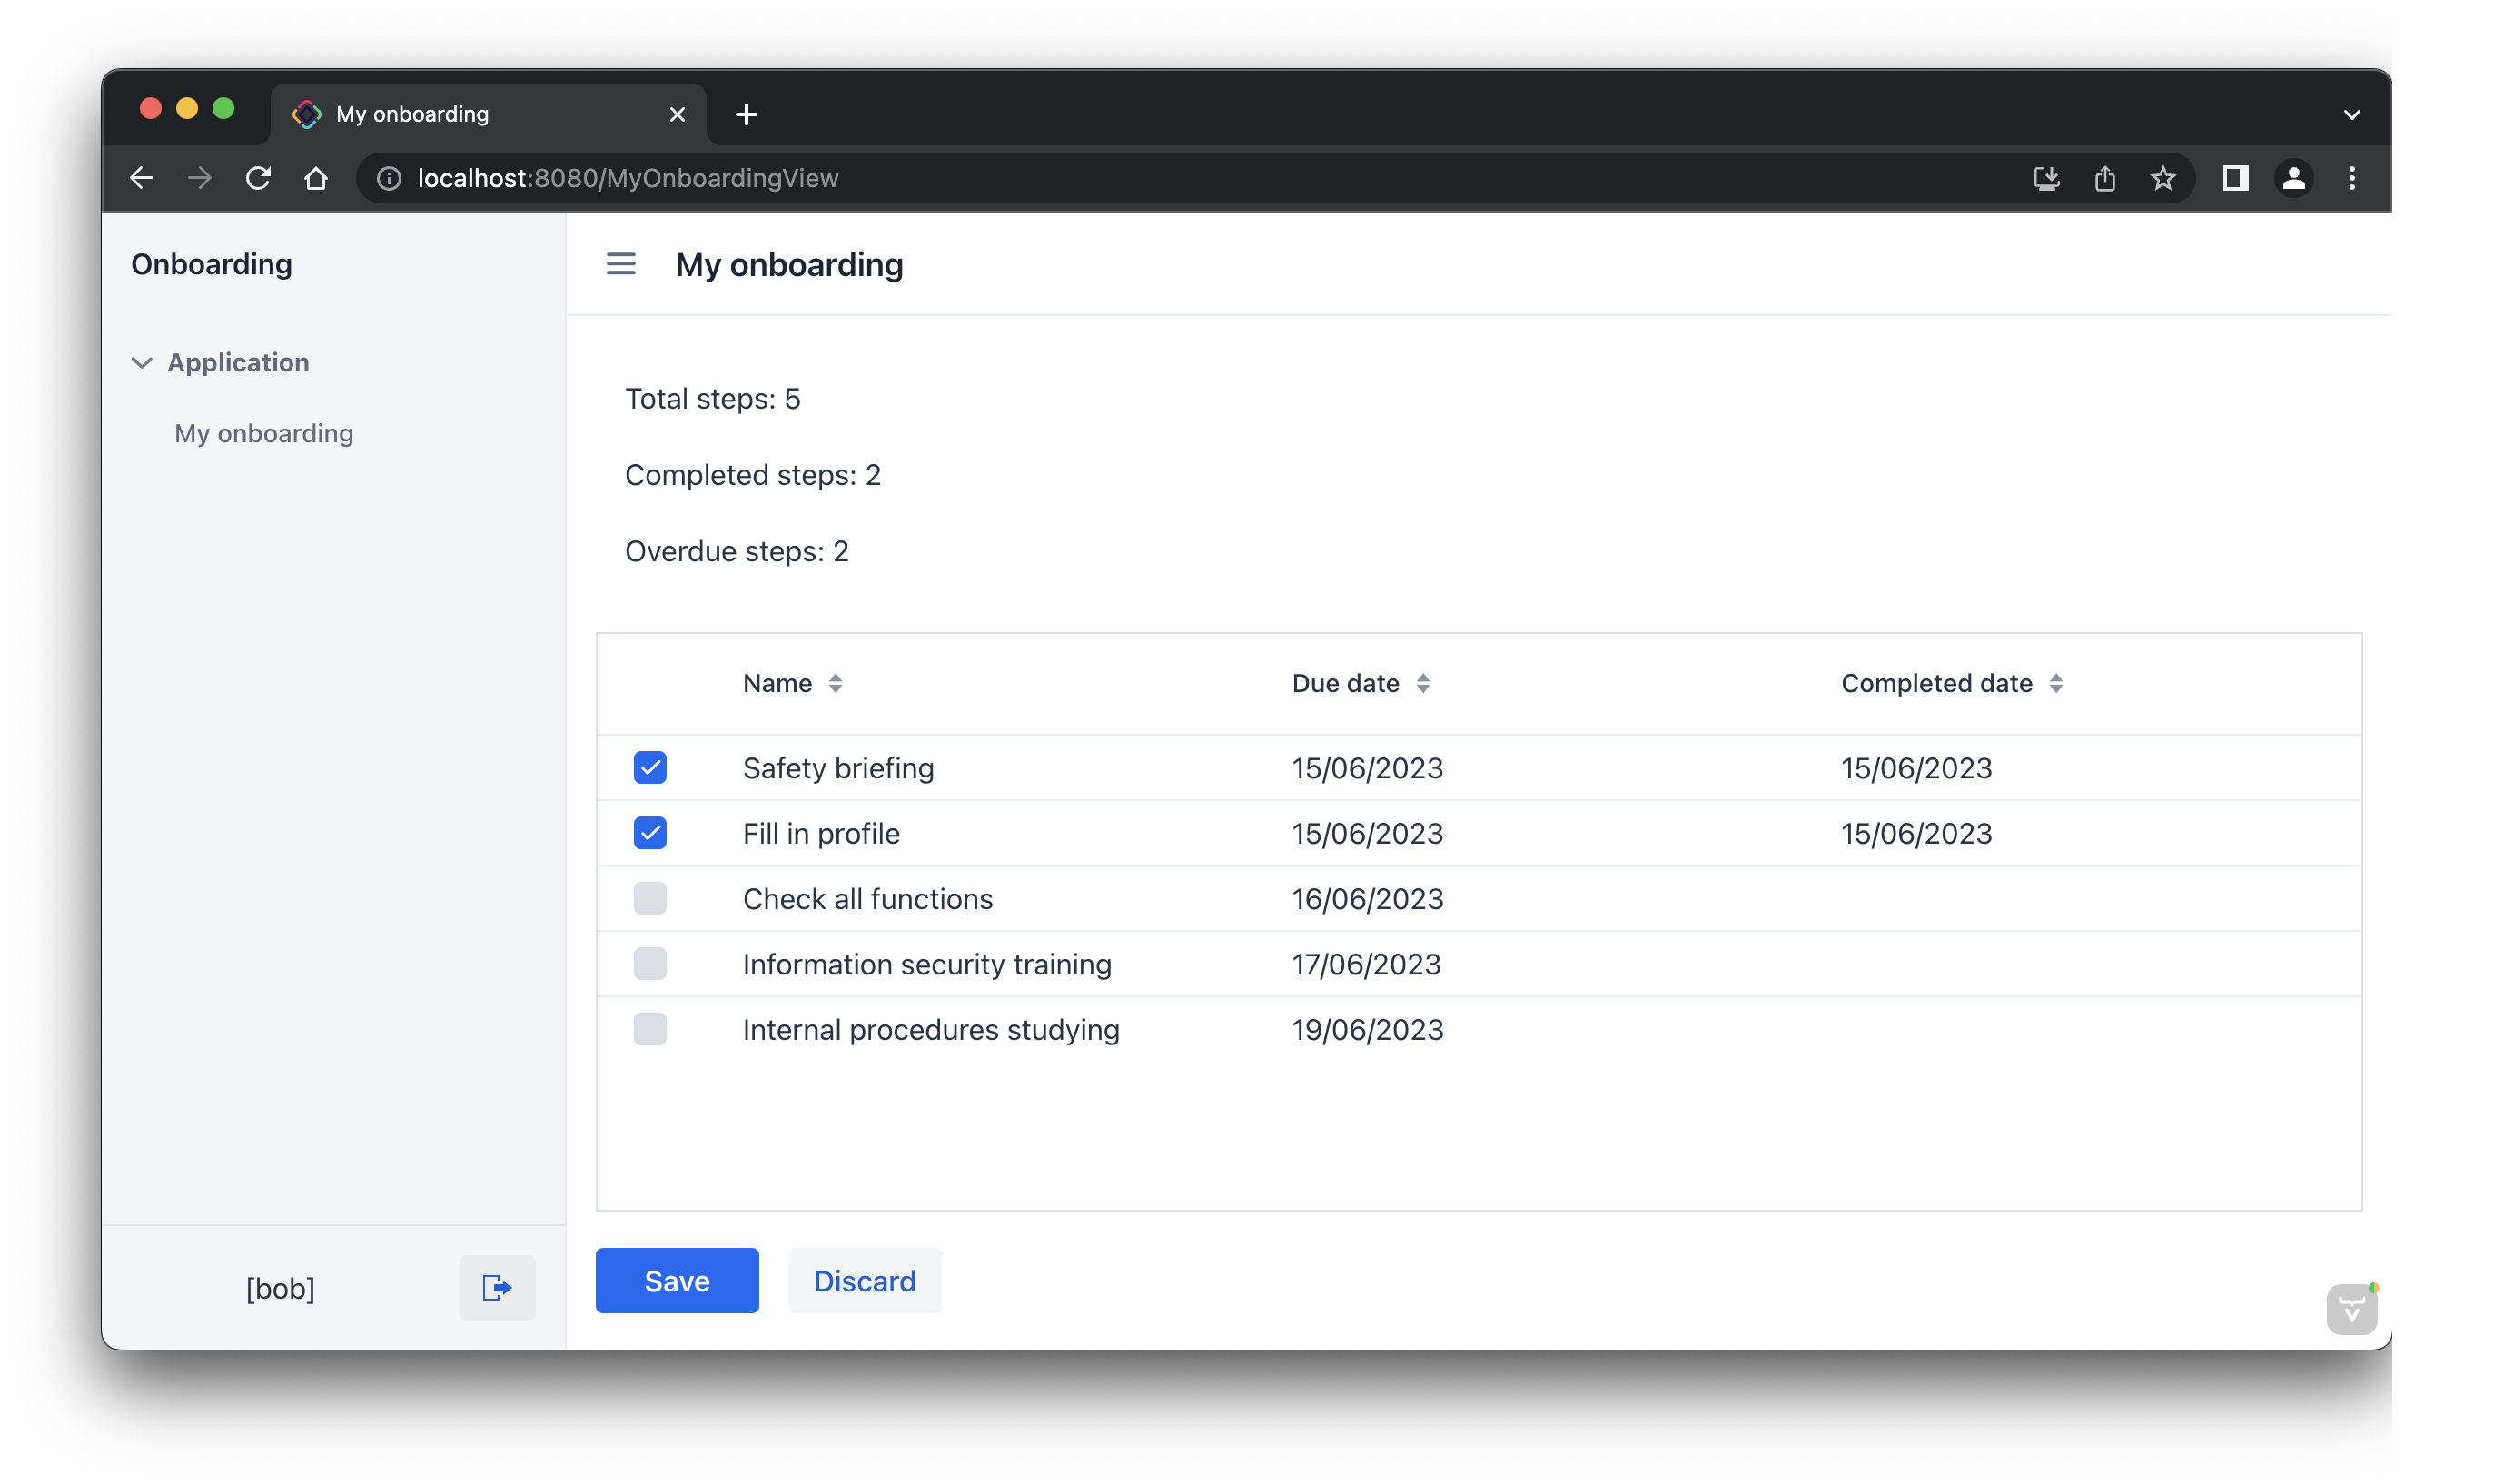
Log in as bob. You will see only My onboarding view in the menu:
Resource Role for HR Managers
In the Jmix tool window, click New () → Role.
In the New Role dialog, enter HR Manager into the Role name field, set Role code to hr-manager, and select UI in the Security scope dropdown:
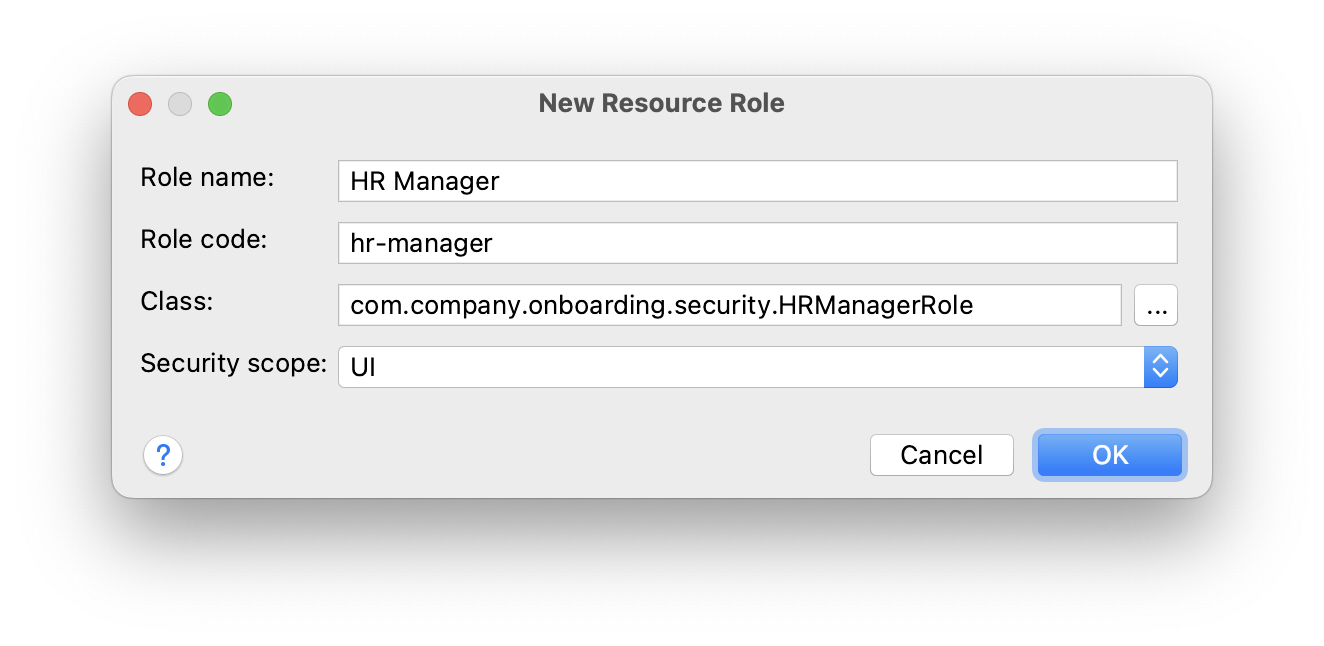
Click OK.
Studio will create and open the annotated interface defining the role:
package com.company.onboarding.security;
import io.jmix.security.role.annotation.ResourceRole;
@ResourceRole(name = "HR Manager", code = HRManagerRole.CODE, scope = "UI")
public interface HRManagerRole {
String CODE = "hr-manager";
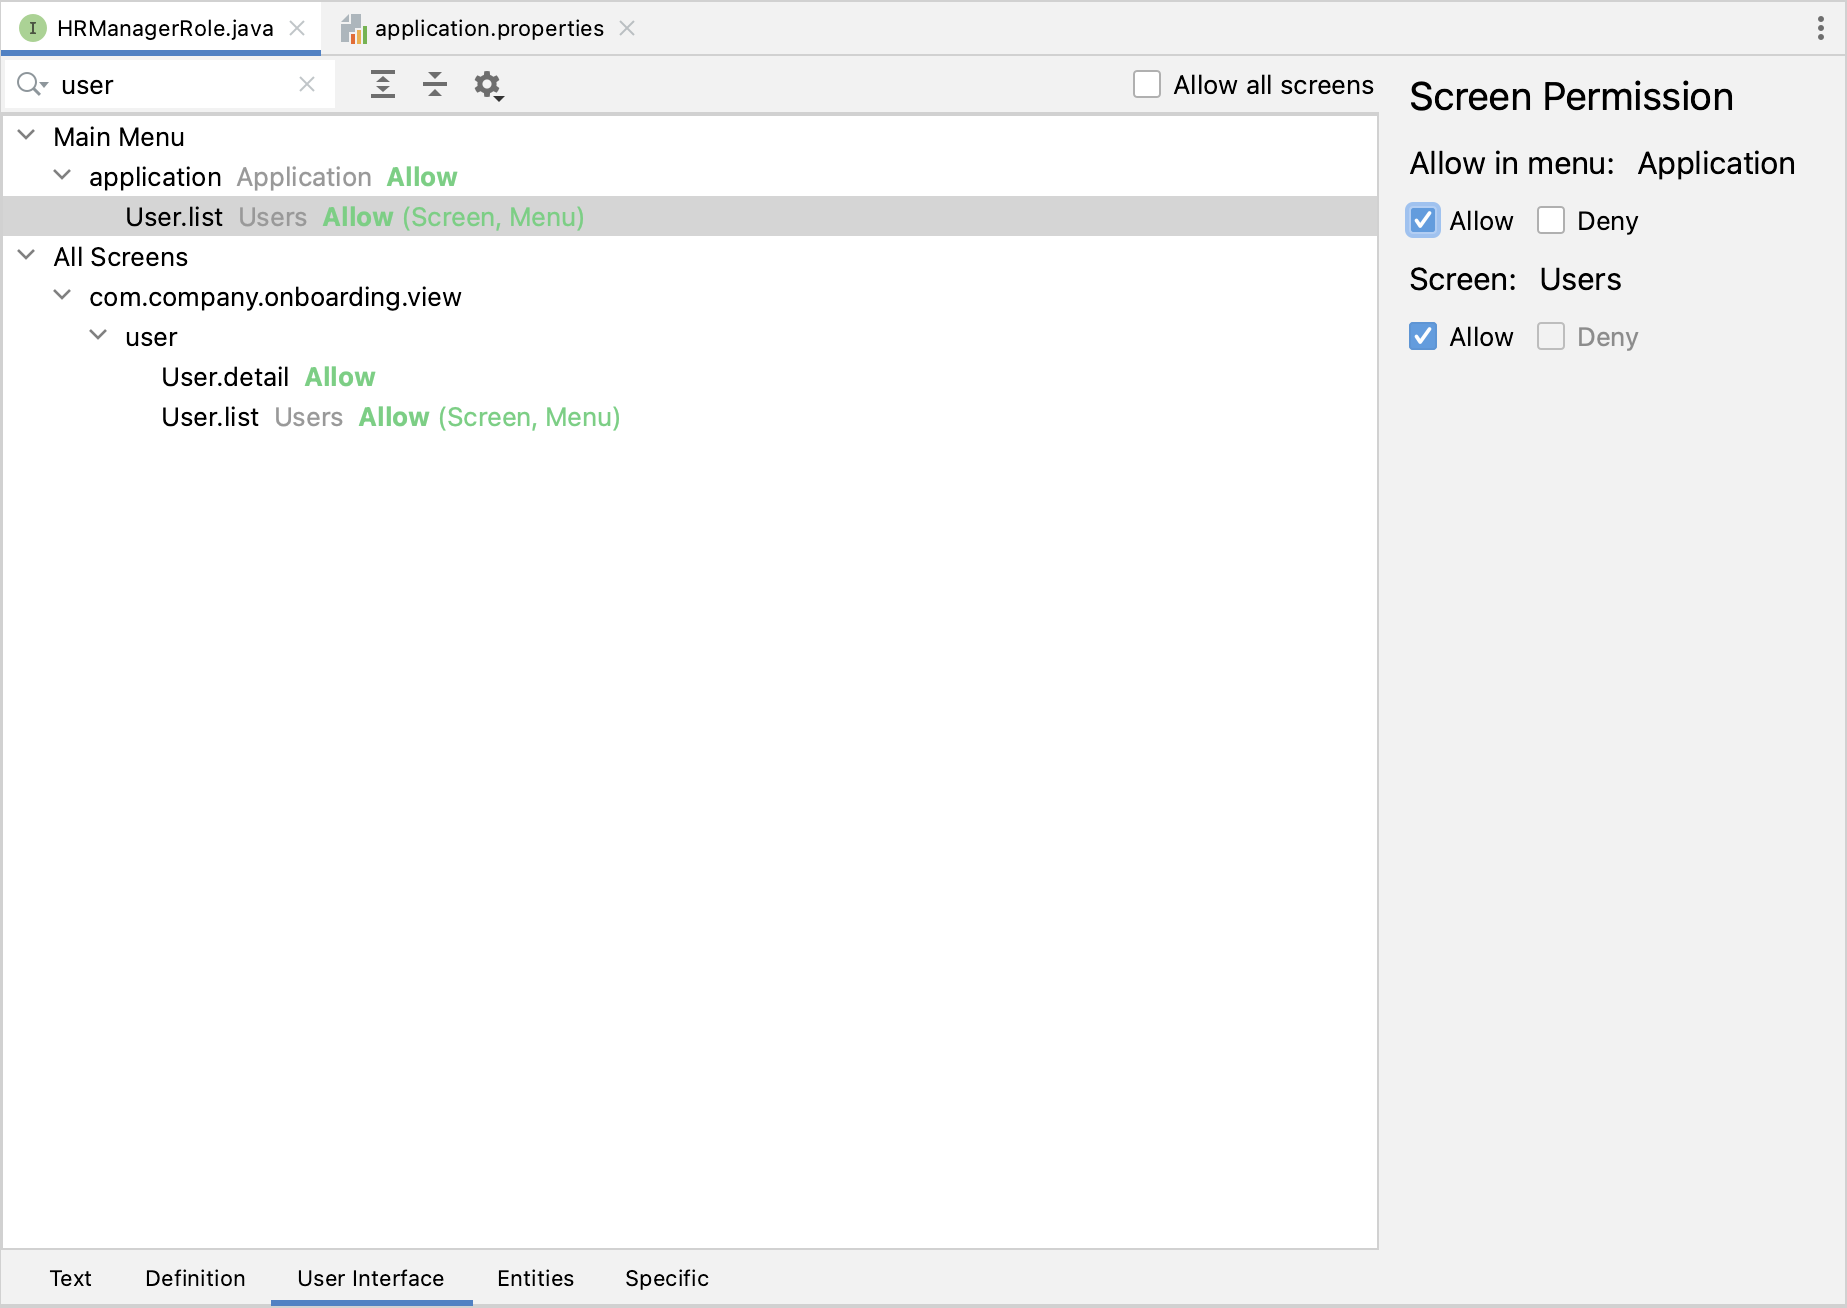
}Switch to the User Interface tab and allow User.list and User.detail views (use the search field on top to filter the tree):
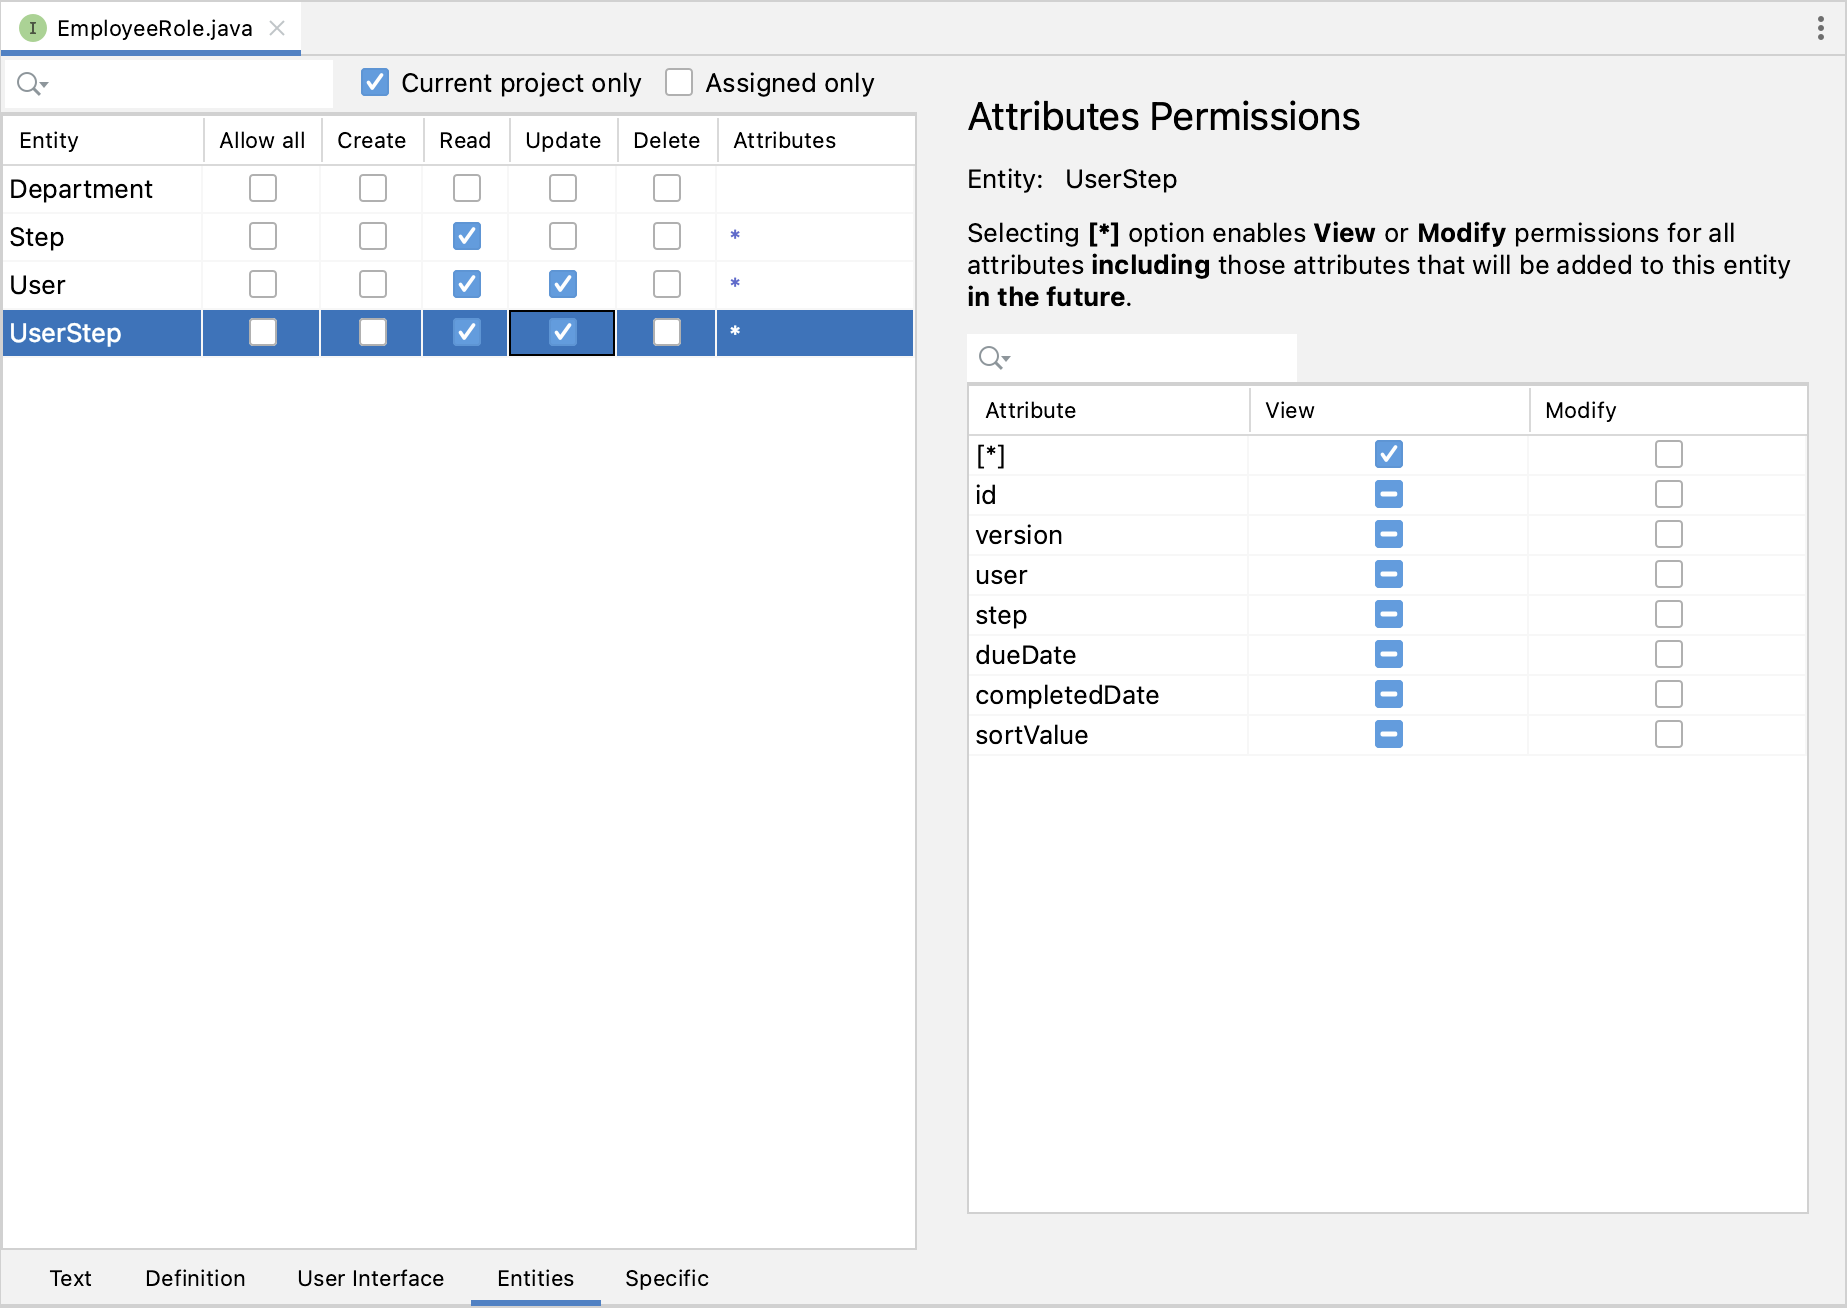
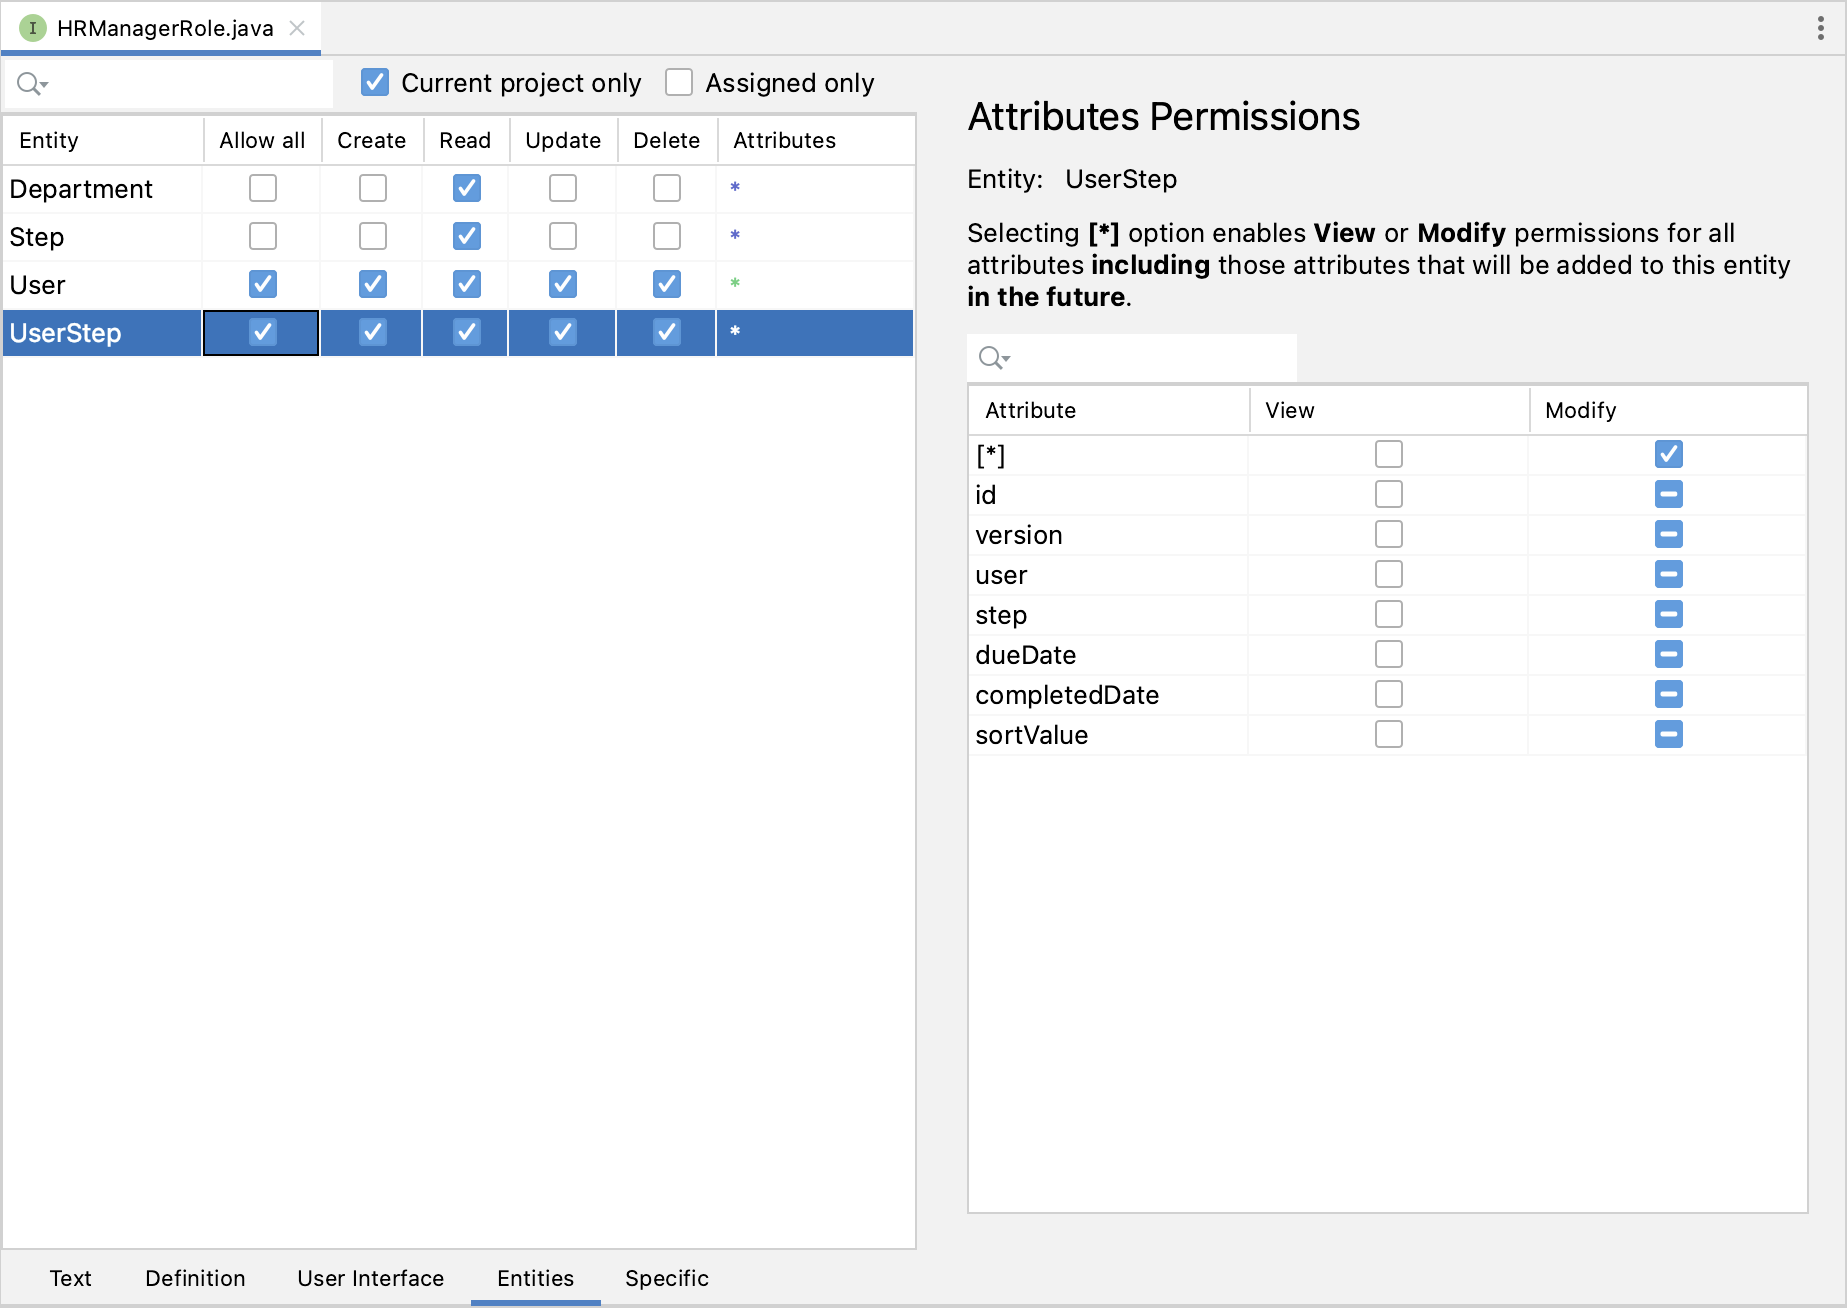
Switch to the Entities tab and give read permission to Department and Step, and all permissions to User and UserStep:
Switch back to the Text tab and inspect the annotations generated by Studio:
@ResourceRole(name = "HR Manager", code = HRManagerRole.CODE, scope = "UI")
public interface HRManagerRole {
    String CODE = "hr-manager";

    @MenuPolicy(menuIds = "User.list")
    @ViewPolicy(viewIds = {"User.detail", "User.list"})
    void screens();

    @EntityAttributePolicy(entityClass = Department.class,
            attributes = "*",
            action = EntityAttributePolicyAction.VIEW)
    @EntityPolicy(entityClass = Department.class,
            actions = EntityPolicyAction.READ)
    void department();

    @EntityAttributePolicy(entityClass = Step.class,
            attributes = "*",
            action = EntityAttributePolicyAction.VIEW)
    @EntityPolicy(entityClass = Step.class,
            actions = EntityPolicyAction.READ)
    void step();

    @EntityAttributePolicy(entityClass = User.class,
            attributes = "*",
            action = EntityAttributePolicyAction.MODIFY)
    @EntityPolicy(entityClass = User.class,
            actions = EntityPolicyAction.ALL)
    void user();

    @EntityAttributePolicy(entityClass = UserStep.class,
            attributes = "*",
            action = EntityAttributePolicyAction.MODIFY)
    @EntityPolicy(entityClass = UserStep.class,
            actions = EntityPolicyAction.ALL)
    void userStep();
}
Press Ctrl/Cmd+S and switch to the running application. Log in as admin. Open Security → Resource roles view and make sure the new HR Manager role is in the list.
Create a new user, say alice.
Assign the HR Manager and UI: minimal access roles to alice as you did in the previous section.
Log in as alice. You will see the Users view and will be able to manage users and their onboarding steps:
Row-level Role for HR Managers
Currently, HR managers can create users, assign any department to a user, and see users of all departments.
In this section, you will introduce a row-level role which restricts access to departments and other users for an HR manager. They will be able to see and assign only their own department (the one where they are set in the hrManager attribute).
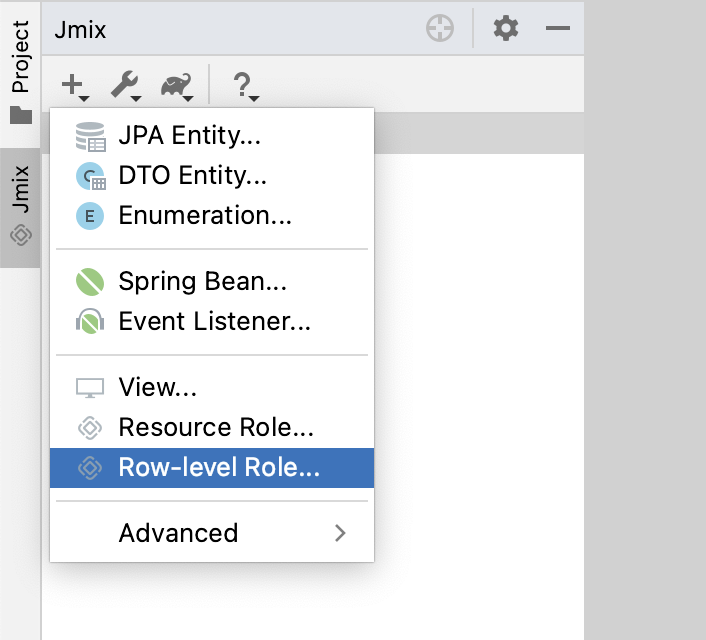
In the Jmix tool window, click New () → Row-level Role:
In the New Row-level Role dialog, enter:
-
Role name:
HR manager’s departments and users -
Role code:
hr-manager-rl -
Class:
com.company.onboarding.security.HrManagerRlRole
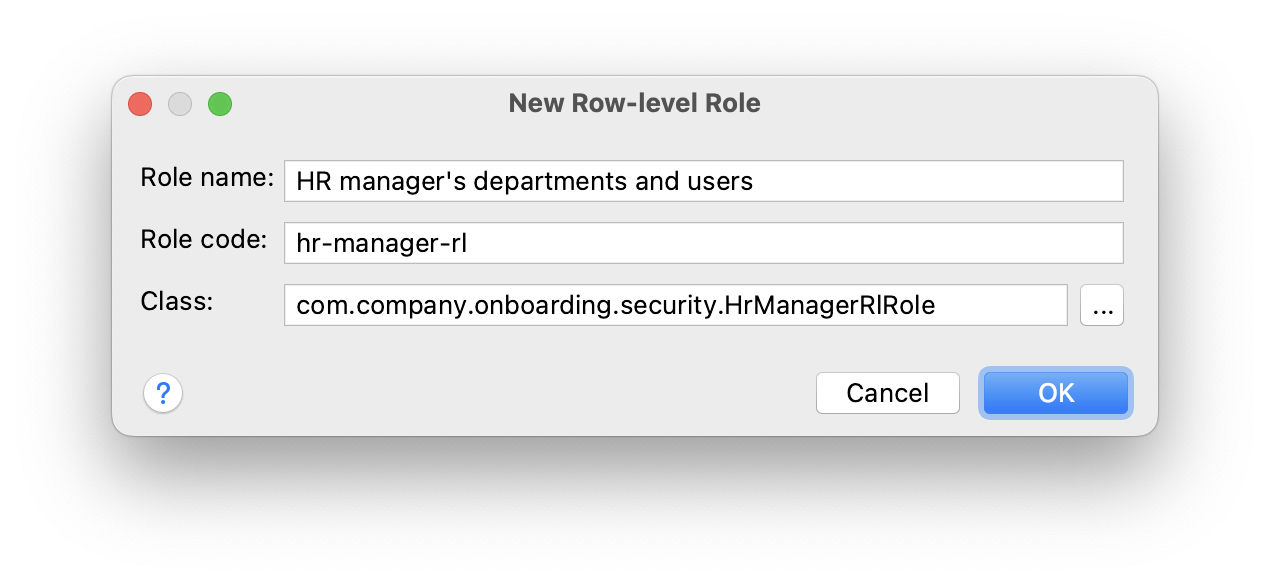
Click OK.
Studio will create and open an annotated interface:
package com.company.onboarding.security;

import io.jmix.security.role.annotation.RowLevelRole;

@RowLevelRole(name = "HR manager’s departments and users", code = HrManagerRlRole.CODE)
public interface HrManagerRlRole {
    String CODE = "hr-manager-rl";
}
Click Add Policy → JPQL Policy in the top actions panel:

In the Add JPQL Policy dialog, enter:
-
Entity:
Department -
Where clause:
{E}.hrManager.id = :current_user_id

Click OK.
Click Add Policy → JPQL Policy again and enter:
-
Entity:
User -
Where clause:
{E}.department.hrManager.id = :current_user_id
Click OK.
The HrManagerRlRole interface will have the following code:
package com.company.onboarding.security;

import com.company.onboarding.entity.Department;
import com.company.onboarding.entity.User;
import io.jmix.security.role.annotation.JpqlRowLevelPolicy;
import io.jmix.security.role.annotation.RowLevelRole;

@RowLevelRole( (1)
        name = "HR manager's departments and users",
        code = HrManagerRlRole.CODE)
public interface HrManagerRlRole {
    String CODE = "hr-manager-rl";

    @JpqlRowLevelPolicy( (2)
            entityClass = Department.class, (3)
            where = "{E}.hrManager.id = :current_user_id") (4)
    void department();

    @JpqlRowLevelPolicy(
            entityClass = User.class,
            where = "{E}.department.hrManager.id = :current_user_id")
    void user();
}| 1 | @RowLevelRole annotation indicates that the interface defines a row-level role. |
| 2 | @JpqlRowLevelPolicy defines a policy to be applied on the database level when reading the entity. |
| 3 | The entity class for which the policy is applied. |
| 4 | The where clause to be added for each JPQL select statement for this entity. {E} is used instead of the entity alias in the query. :current_user_id is a predefined parameter set by the framework to the id of the currently logged-in user. |
Press Ctrl/Cmd+S and switch to the running application. Log in as admin. Open Security → Row-level roles view and make sure the new HR manager’s departments and users role is in the list.
Open Role assignments view for alice and add the role to the Row-level roles table:
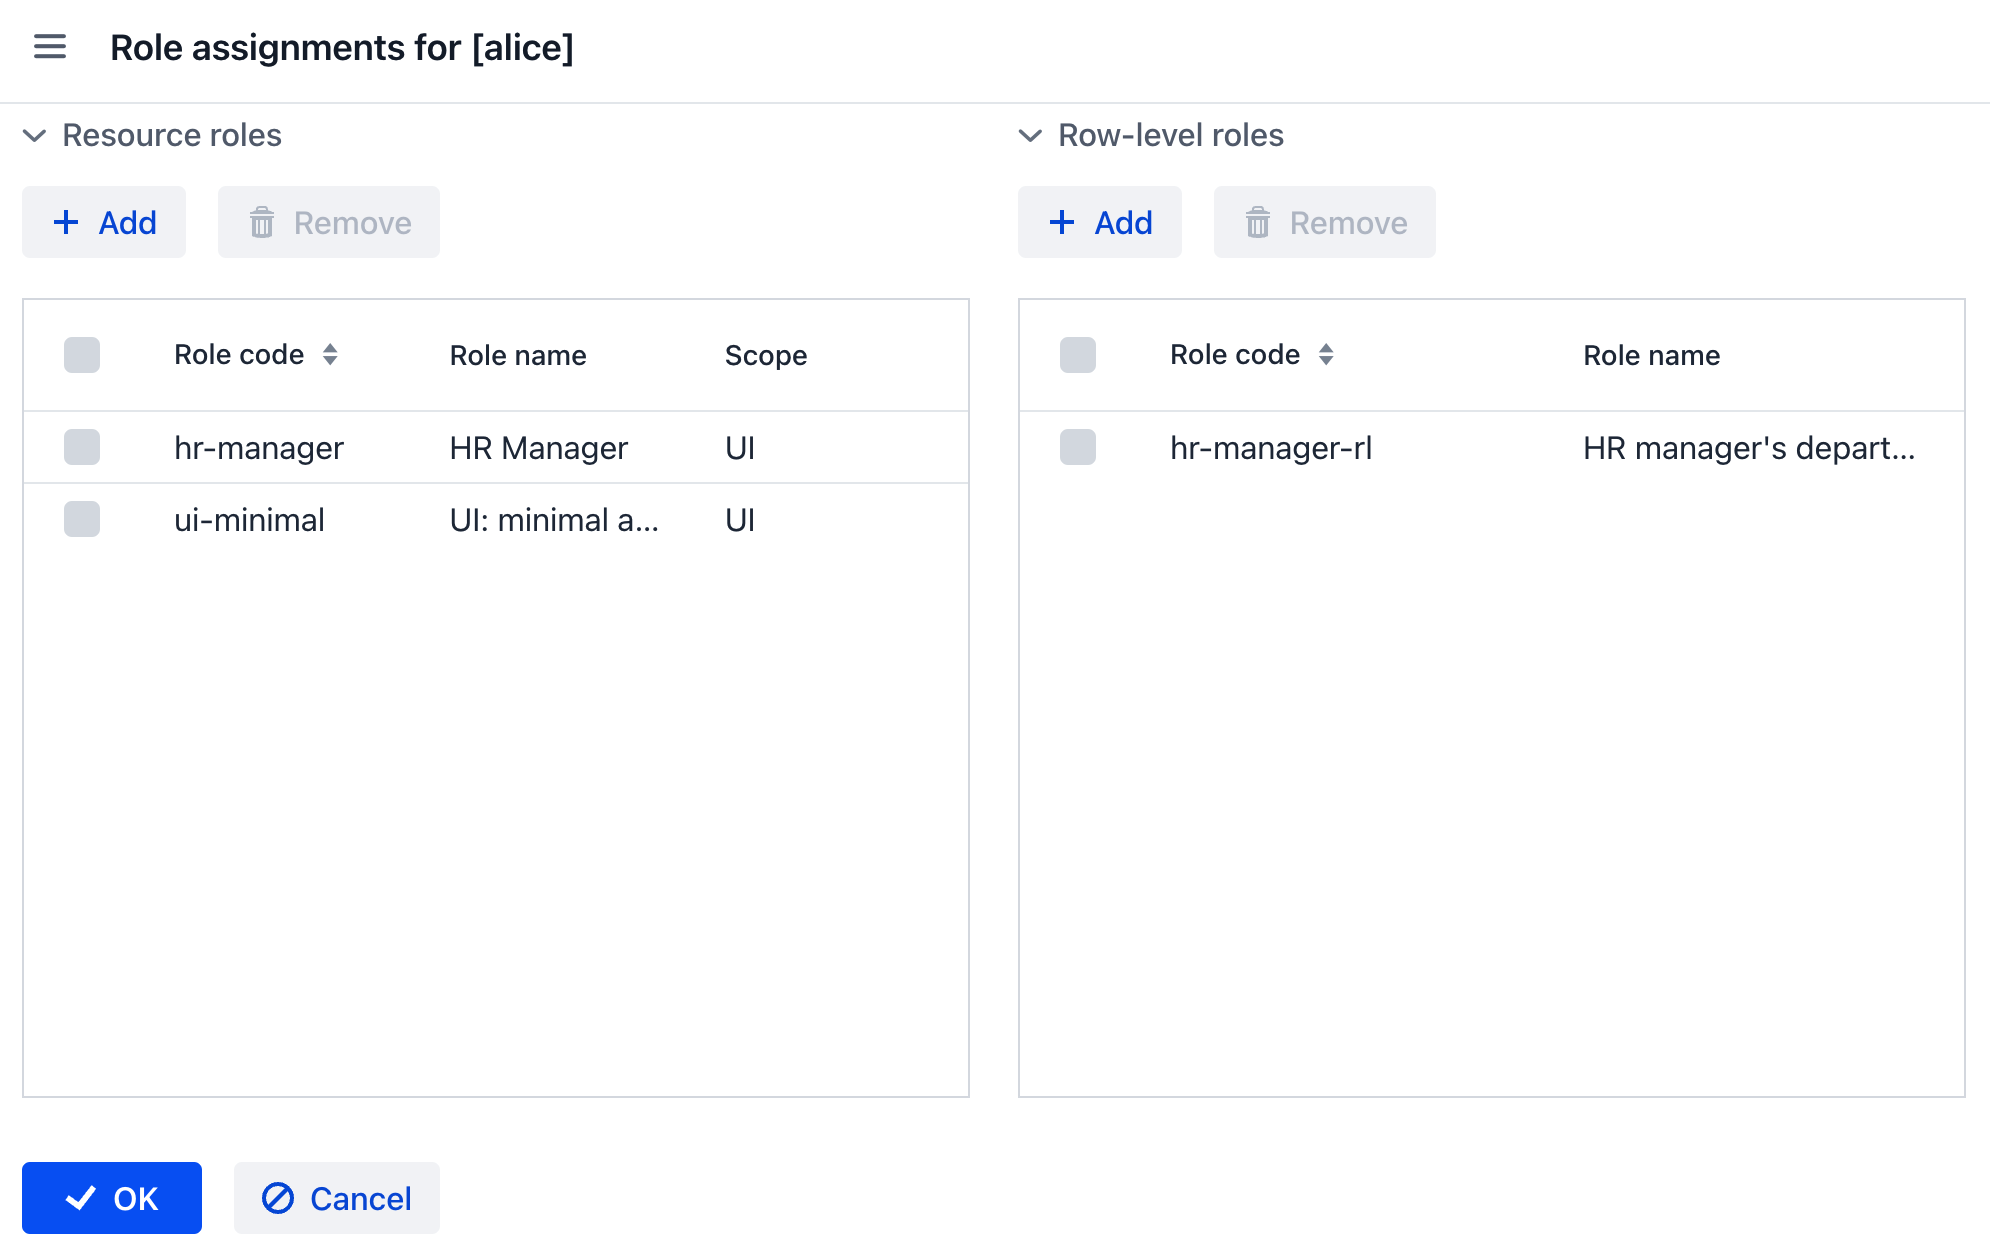
Click OK to save the role assignments.
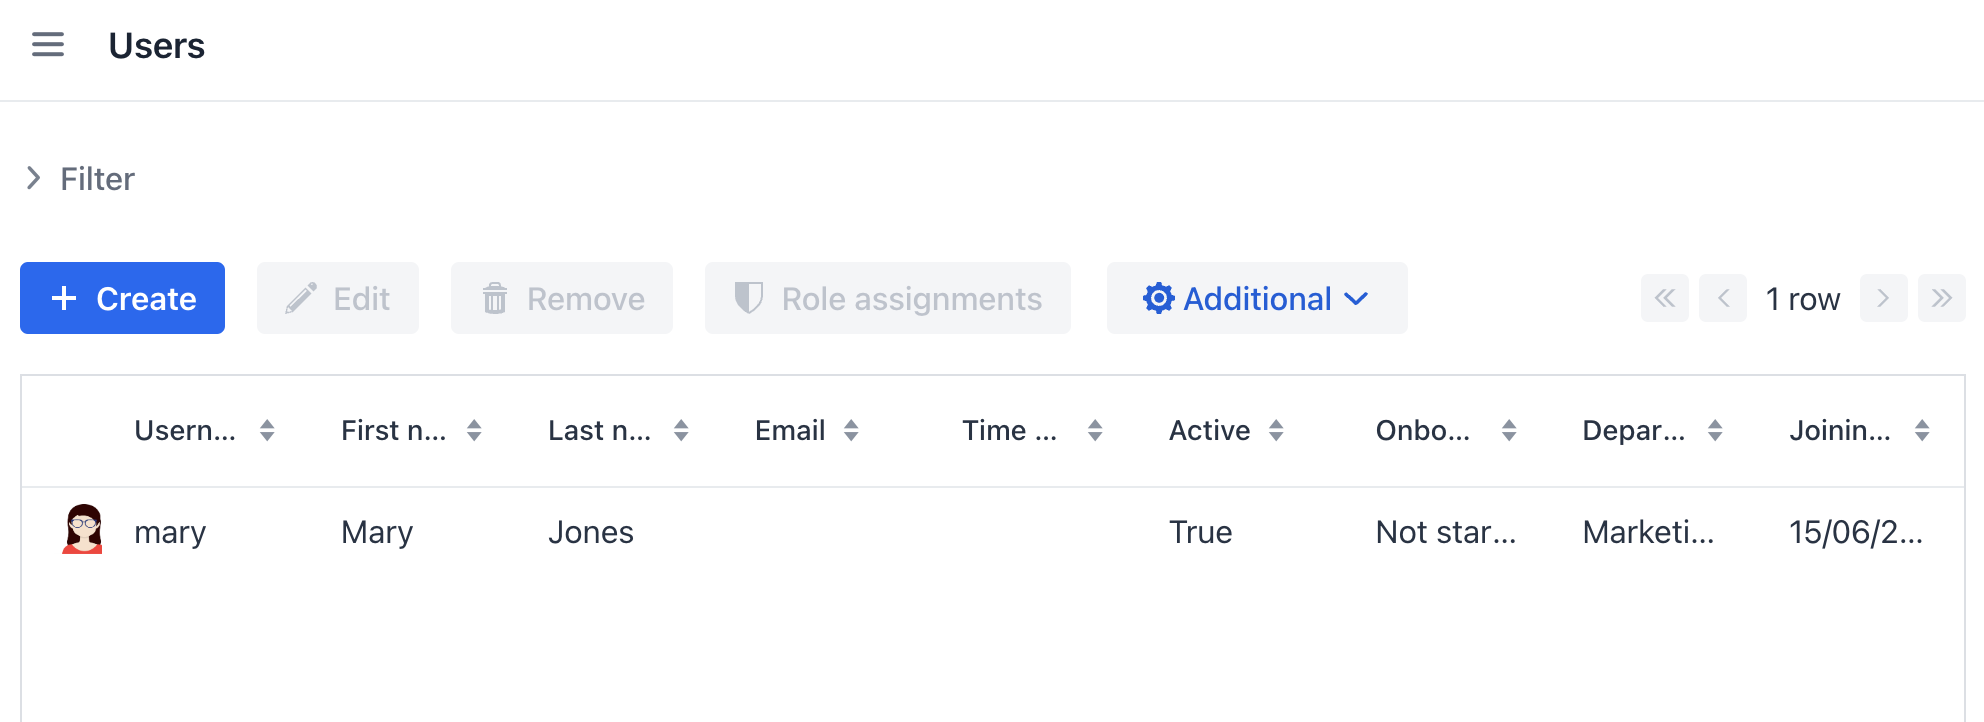
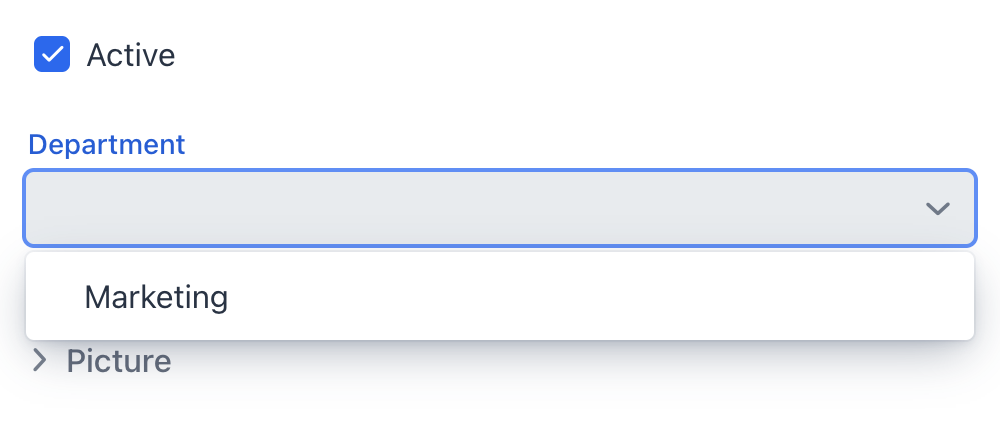
Set alice as HR Manager for a Department:
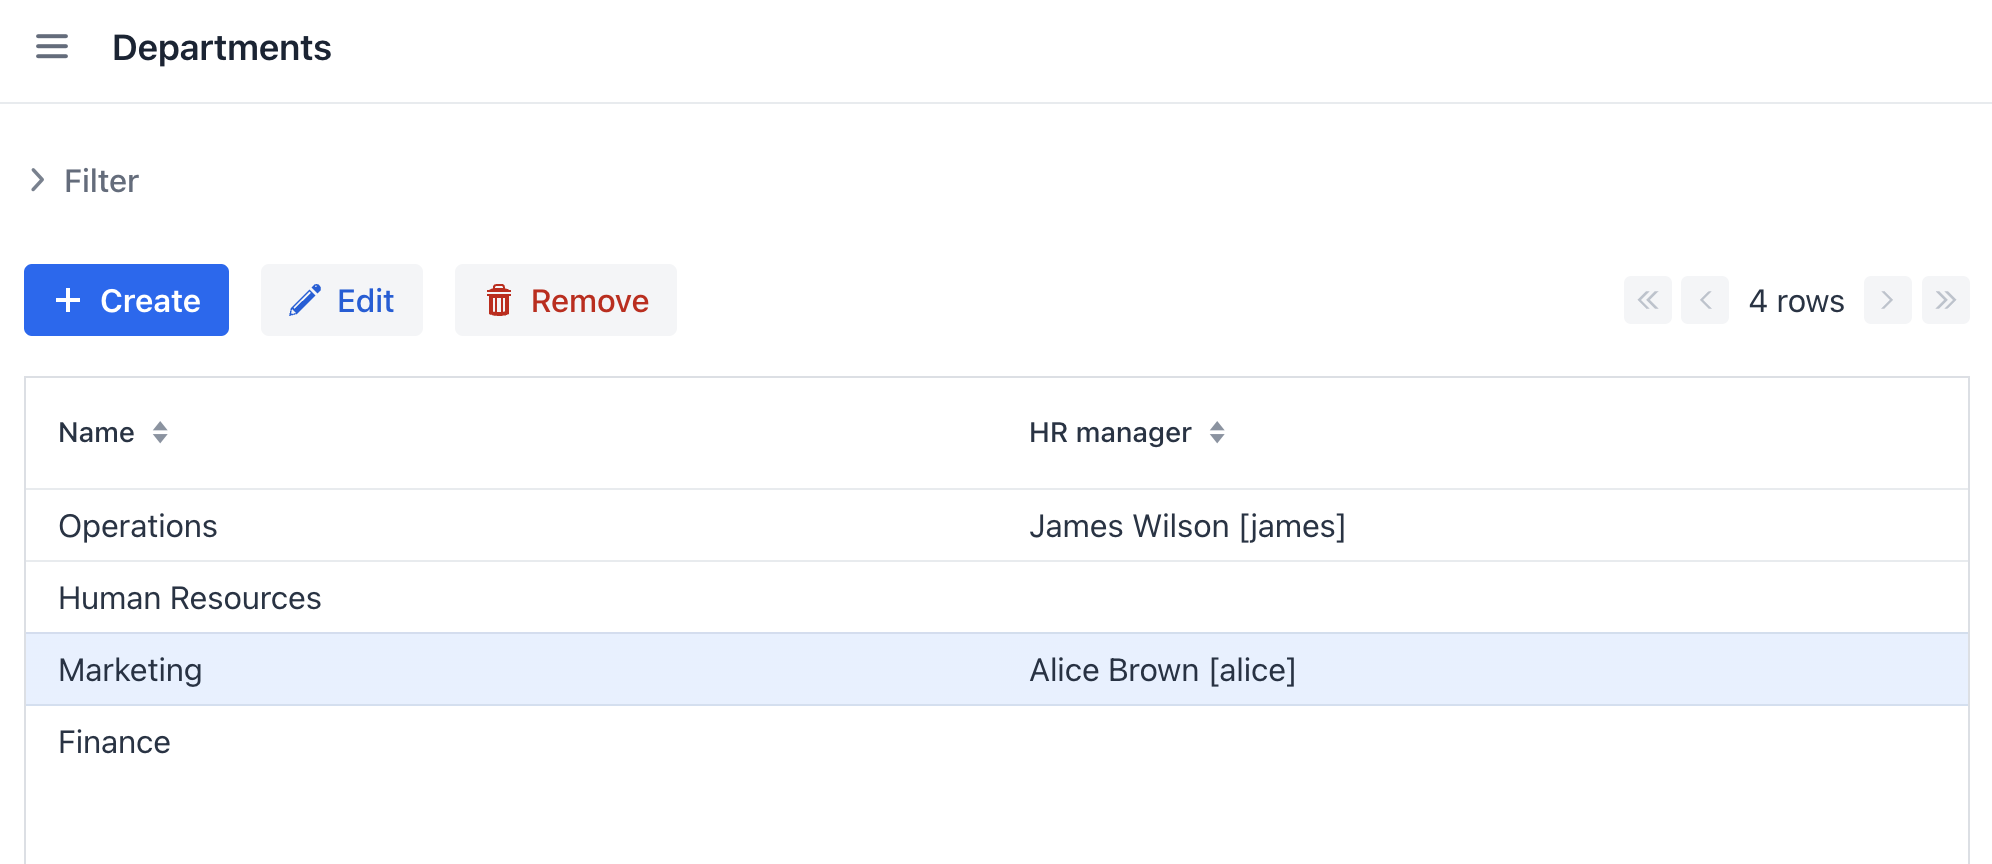
Log in as alice.
In the Users list view, you will see only users of her department:
And alice can assign only this department to a user:
Summary
In this section, you have created HR Managers and Employees roles to restrict access to the application for different groups of users.
You have learned that:
-
A resource role gives users permissions to open views and to work with particular entities.
-
A row-level role, in contrast, restricts user’s ability to read particular entity instances for an entity permitted by a resource role.
-
Roles are assigned to users at runtime using the Role assignment view available from the
User.detailview. -
The
UI: minimal accessrole scaffolded in the project is required for a user to log in to the application UI.
