OpenID Connect
The Jmix OpenID Connect add-on provides predefined Spring Security configurations and a set of services that allow you to easily implement the following features in your applications:
-
User authentication using an external OpenID Provider (e.g., Keycloak).
-
Mapping user attributes and roles from an OpenID Provider user to a Jmix user.
-
Persisting the user entity and role assignments after the user is successfully authenticated by the OpenID Provider.
The add-on leverages Spring Security support for OAuth2 and OpenID Connect 1.0. You may read about it in Spring Security documentation.
The add-on applies OidcAutoConfiguration unless it is explicitly disabled by setting the jmix.oidc.use-default-configuration=false application property. The configuration enables OpenID Connect authentication for UI and REST API URLs.
See also the REST DataStore with External Authentication guide for practical examples.
Installation
For automatic installation through Jmix Marketplace, follow instructions in the Add-ons section.
For manual installation, add the following dependency to your build.gradle:
implementation 'io.jmix.oidc:jmix-oidc-starter'Client Configuration
After including the add-on in your project and before starting the application, you should configure the "client", which is a Jmix application that requires end-user authentication from the OpenID Provider.
Use the standard Spring Security approach to configure the client. You can do it by adding the following properties to the application.properties file:
spring.security.oauth2.client.registration.keycloak.client-id=<client-id>
spring.security.oauth2.client.registration.keycloak.client-secret=<client-secret>
spring.security.oauth2.client.registration.keycloak.scope=openid, profile, email
spring.security.oauth2.client.provider.keycloak.issuer-uri=http://localhost:8180/realms/<realm>
spring.security.oauth2.resourceserver.jwt.issuer-uri=http://localhost:8180/realms/<realm>
keycloak in the property key is the provider ID. It may have any value, for example okta, so the property will be spring.security.oauth2.client.registration.okta.client-id.
Client ID and client secret values must be taken from the OpenID Provider.
The issuer-uri property contains a path to the OpenID Provider Configuration Endpoint.
By default, the "sub" claim will be used as a Jmix user username. If you want to change it, use the following application property:
spring.security.oauth2.client.provider.keycloak.user-name-attribute=preferred_usernameUsing Default Add-on Configuration
After including the add-on in the project, configuring the client and setting up Keycloak, you may start the application. In this case, the default add-on configuration will do the following:
-
Non-authenticated users will be redirected to the OpenID Provider login page.
-
After the user has authenticated with the OpenID Provider, an instance of
DefaultJmixOidcUserwill be created and set to the security context. No user attributes will be mapped. The user won’t be stored in the database. -
A collection of user role codes will be taken from the "roles" claim of the ID Token, and then resource and row-level roles with the given codes will be set to the user authentication object.
The DefaultJmixOidcUser class implements the JmixOidcUser interface. The user class must always implement this interface because Jmix applications require the UserDetails interface, and Spring Security works with the OidcUser interface. JmixOidcUser just extends both these interfaces.
Mapping User Attributes and Roles
If you need to work with an in-memory user but want to fill some user attributes, create a class that extends DefaultJmixOidcUser. In the example below, it has the position attribute:
import io.jmix.oidc.user.DefaultJmixOidcUser;

public class MyUser extends DefaultJmixOidcUser {

    private String position;

    public String getPosition() {
        return position;
    }

    public void setPosition(String position) {
        this.position = position;
    }
}
Then you need to register an instance of OidcUserMapper as a Spring bean. You can extend the BaseOidcUserMapper and override its methods:
import examples.oidcex1.entity.MyUser;
import io.jmix.oidc.claimsmapper.ClaimsRolesMapper;
import io.jmix.oidc.usermapper.BaseOidcUserMapper;
import org.springframework.security.core.GrantedAuthority;
import org.springframework.security.oauth2.core.oidc.user.OidcUser;
import org.springframework.stereotype.Component;

import java.util.Collection;

@Component
public class MyOidcUserMapper extends BaseOidcUserMapper<MyUser> {

    private ClaimsRolesMapper claimsRolesMapper;

    public MyOidcUserMapper(ClaimsRolesMapper claimsRolesMapper) {
        this.claimsRolesMapper = claimsRolesMapper;
    }

    @Override
    protected String getOidcUserUsername(OidcUser oidcUser) {
        return oidcUser.getName();
    }

    @Override
    protected MyUser initJmixUser(OidcUser oidcUser) {
        return new MyUser();
    }

    @Override
    protected void populateUserAttributes(OidcUser oidcUser, MyUser jmixUser) {
        jmixUser.setPosition((String) oidcUser.getClaims().get("position"));
    }

    @Override
    protected void populateUserAuthorities(OidcUser oidcUser, MyUser jmixUser) {
        Collection<? extends GrantedAuthority> authorities = claimsRolesMapper.toGrantedAuthorities(oidcUser.getClaims());
        jmixUser.setAuthorities(authorities);
    }
}
Note that in the example above, the mapping of claims from OIDC user to Jmix granted authorities is delegated to the ClaimsRolesMapper interface. The default implementation of ClaimsRolesMapper is DefaultClaimsRolesMapper, which gets the claim with the "roles" name from the ID Token. This claim must contain a collection of role names. Then for each role from the claim value resource role and row-level role are searched in Jmix. If found, corresponding granted authorities will be added to the user. The roles claim name can be configured using the following application property:
jmix.oidc.default-claims-roles-mapper.roles-claim-name=myRolesIf necessary, you can create your own mapper of claims to roles. The easiest way to do it is to extend the BaseClaimsRolesMapper and override its getResourceRolesCodes() and/or getRowLevelRolesCodes() methods. The example below demonstrates how to assign roles based on the "position" claim:
import io.jmix.oidc.claimsmapper.BaseClaimsRolesMapper;
import io.jmix.security.role.ResourceRoleRepository;
import io.jmix.security.role.RoleGrantedAuthorityUtils;
import io.jmix.security.role.RowLevelRoleRepository;
import org.springframework.stereotype.Component;

import java.util.Collection;
import java.util.HashSet;
import java.util.Map;

@Component
public class MyClaimsRoleMapper extends BaseClaimsRolesMapper {

    public MyClaimsRoleMapper(ResourceRoleRepository resourceRoleRepository,
                              RowLevelRoleRepository rowLevelRoleRepository,
                              RoleGrantedAuthorityUtils roleGrantedAuthorityUtils) {
        super(resourceRoleRepository, rowLevelRoleRepository, roleGrantedAuthorityUtils);
    }

    @Override
    protected Collection<String> getResourceRolesCodes(Map<String, Object> claims) {
        Collection<String> jmixRoleCodes = new HashSet<>();
        String position = (String) claims.get("position");
        if ("Manager".equals(position)) {
            jmixRoleCodes.add("edit-contracts");
            jmixRoleCodes.add("view-archive");
        } else {
            jmixRoleCodes.add("view-contracts");
        }
        return jmixRoleCodes;

    }
}
Working with User JPA Entity
In order to work with the Jmix OIDC add-on, the User JPA entity must implement the io.jmix.oidc.user.JmixOidcUser interface that in turn implements org.springframework.security.oauth2.core.oidc.user.OidcUser required by Spring Security.
The simplest way to make the User entity compatible with the OIDC add-on is to make this class a subclass of the io.jmix.oidc.user.JmixOidcUserEntity abstract class:
@JmixEntity
@Entity
@Table(name = "USER_", indexes = {
        @Index(name = "IDX_USER__ON_USERNAME", columnList = "USERNAME", unique = true)
})
public class User extends JmixOidcUserEntity implements HasTimeZone {

    //...
}|
In a Kotlin project, you need to make the following additional changes in the
|
To store users in the database after they log in using an OpenID Provider, you’ll need to register a user mapper that extends the SynchronizingOidcUserMapper class. This superclass contains the behavior that stores/updates the user in the database. Optionally, you may also store information about role assignments in the database.
import examples.oidcex1.entity.User;
import io.jmix.core.UnconstrainedDataManager;
import io.jmix.core.security.UserRepository;
import io.jmix.oidc.claimsmapper.ClaimsRolesMapper;
import io.jmix.oidc.usermapper.SynchronizingOidcUserMapper;
import io.jmix.security.role.RoleGrantedAuthorityUtils;
import org.springframework.context.annotation.Profile;
import org.springframework.security.oauth2.core.oidc.user.OidcUser;
import org.springframework.stereotype.Component;

@Component
public class MySynchronizingOidcUserMapper extends SynchronizingOidcUserMapper<User> {

    public MySynchronizingOidcUserMapper(UnconstrainedDataManager dataManager,
                                         UserRepository userRepository,
                                         ClaimsRolesMapper claimsRolesMapper,
                                         RoleGrantedAuthorityUtils roleGrantedAuthorityUtils) {
        super(dataManager, userRepository, claimsRolesMapper, roleGrantedAuthorityUtils);

        //store role assignments in the database (false by default)
        setSynchronizeRoleAssignments(true);
    }

    @Override
    protected Class<User> getApplicationUserClass() {
        return User.class;
    }

    @Override
    protected void populateUserAttributes(OidcUser oidcUser, User jmixUser) {
        jmixUser.setUsername(oidcUser.getName());
        jmixUser.setFirstName(oidcUser.getGivenName());
        jmixUser.setLastName(oidcUser.getFamilyName());
        jmixUser.setEmail(oidcUser.getEmail());
    }
}
Protecting API
A Jmix application may work as a resource server. To specify which authorization server to use, define the following application property:
spring.security.oauth2.resourceserver.jwt.issuer-uri=http://localhost:8180/realms/<realm>The value of the property is the URL contained in the iss claim for JWT tokens that the authorization server will issue. See Spring Security documentation for details.
By default, the "sub" claim value is used as the username of the Jmix user that is set to the security context. If you want to change this, use the following application property:
jmix.oidc.jwt-authentication-converter.username-claim=preferred_usernameIn most cases the property value should be aligned with the value of the spring.security.oauth2.client.provider.keycloak.user-name-attribute property.
Access tokens obtained from an OpenID Provider can be used to access protected endpoints provided by the REST API add-on.
For a local Keycloak instance, access tokens can be obtained as follows:
curl -X POST http://localhost:8180/realms/sample1/protocol/openid-connect/token \
--user <client-id>:<client-secret> \
-H "Content-Type: application/x-www-form-urlencoded" \
-d "grant_type=password&scope=openid&username=<username>&password=<password>"
For example:
curl -X POST http://localhost:8180/realms/sample1/protocol/openid-connect/token \
--user jmix-app:UONXQZf6unxVuWsxXvhMAPv5IxFz5P7D \
-H "Content-Type: application/x-www-form-urlencoded" \
-d "grant_type=password&&scope=openid&username=johndoe&password=mypass"
Now let’s see how to protect custom MVC controllers, for example the following one:
import org.springframework.web.bind.annotation.GetMapping;
import org.springframework.web.bind.annotation.RestController;

@RestController
public class GreetingController {

    @GetMapping("/authenticated/hello")
    public String authenticatedHello() {
        return "authenticated-hello";
    }

    @GetMapping("/anonymous/hi")
    public String anonymousHello() {
        return "anonymous-hi";
    }
}
Imagine that you need all URLs starting with /authenticated/ to be protected and all URLs starting with /anonymous/ to be available for anonymous access. There are several ways to achieve this. The simplest approach is to use application properties:
# All endpoints that match the given pattern will require a bearer token
jmix.resource-server.authenticated-url-patterns = /authenticated/**

# However, endpoints that match the following pattern will be accessible without a token
jmix.resource-server.anonymous-url-patterns = /anonymous/**
OIDC Properties
jmix.oidc.filter-chain.force-api-scope-enabled
A toggle for compatibility with pre-2.8 versions. Set this property to false to ignore role scopes when authenticating users in REST API.
Default value: true
jmix.oidc.filter-chain.force-ui-scope-enabled
A toggle for compatibility with pre-2.8 versions. Set this property to false to ignore role scopes when authenticating users in UI.
Default value: true
jmix.oidc.use-default-configuration
Defines whether to apply the default auto-configuration. True by default. Set this property to false in case you want to have access to add-on beans and interfaces but don’t want to use predefined Spring security configuration for protecting endpoints. In this case, you’ll have to write your own security configuration.
jmix.oidc.use-default-configuration = falseConfiguring Local Keycloak Instance
One of the most popular OpenID Providers is Keycloak. To get familiar with the Jmix OIDC add-on you can run Keycloak locally using Docker.
Starting Keycloak Using Docker
Use the following command to start a Keycloak instance using Docker on port 8180:
docker run -p 8180:8080 -e KEYCLOAK_ADMIN=admin -e KEYCLOAK_ADMIN_PASSWORD=admin --name keycloak quay.io/keycloak/keycloak:22.0 start-devSee Keycloak documentation for details.
Keycloak URL: http://localhost:8180
Admin credentials:
Username: admin
Password: admin
You can read about configuring the Keycloak instance in the Server Administration Guide.
Creating a Realm
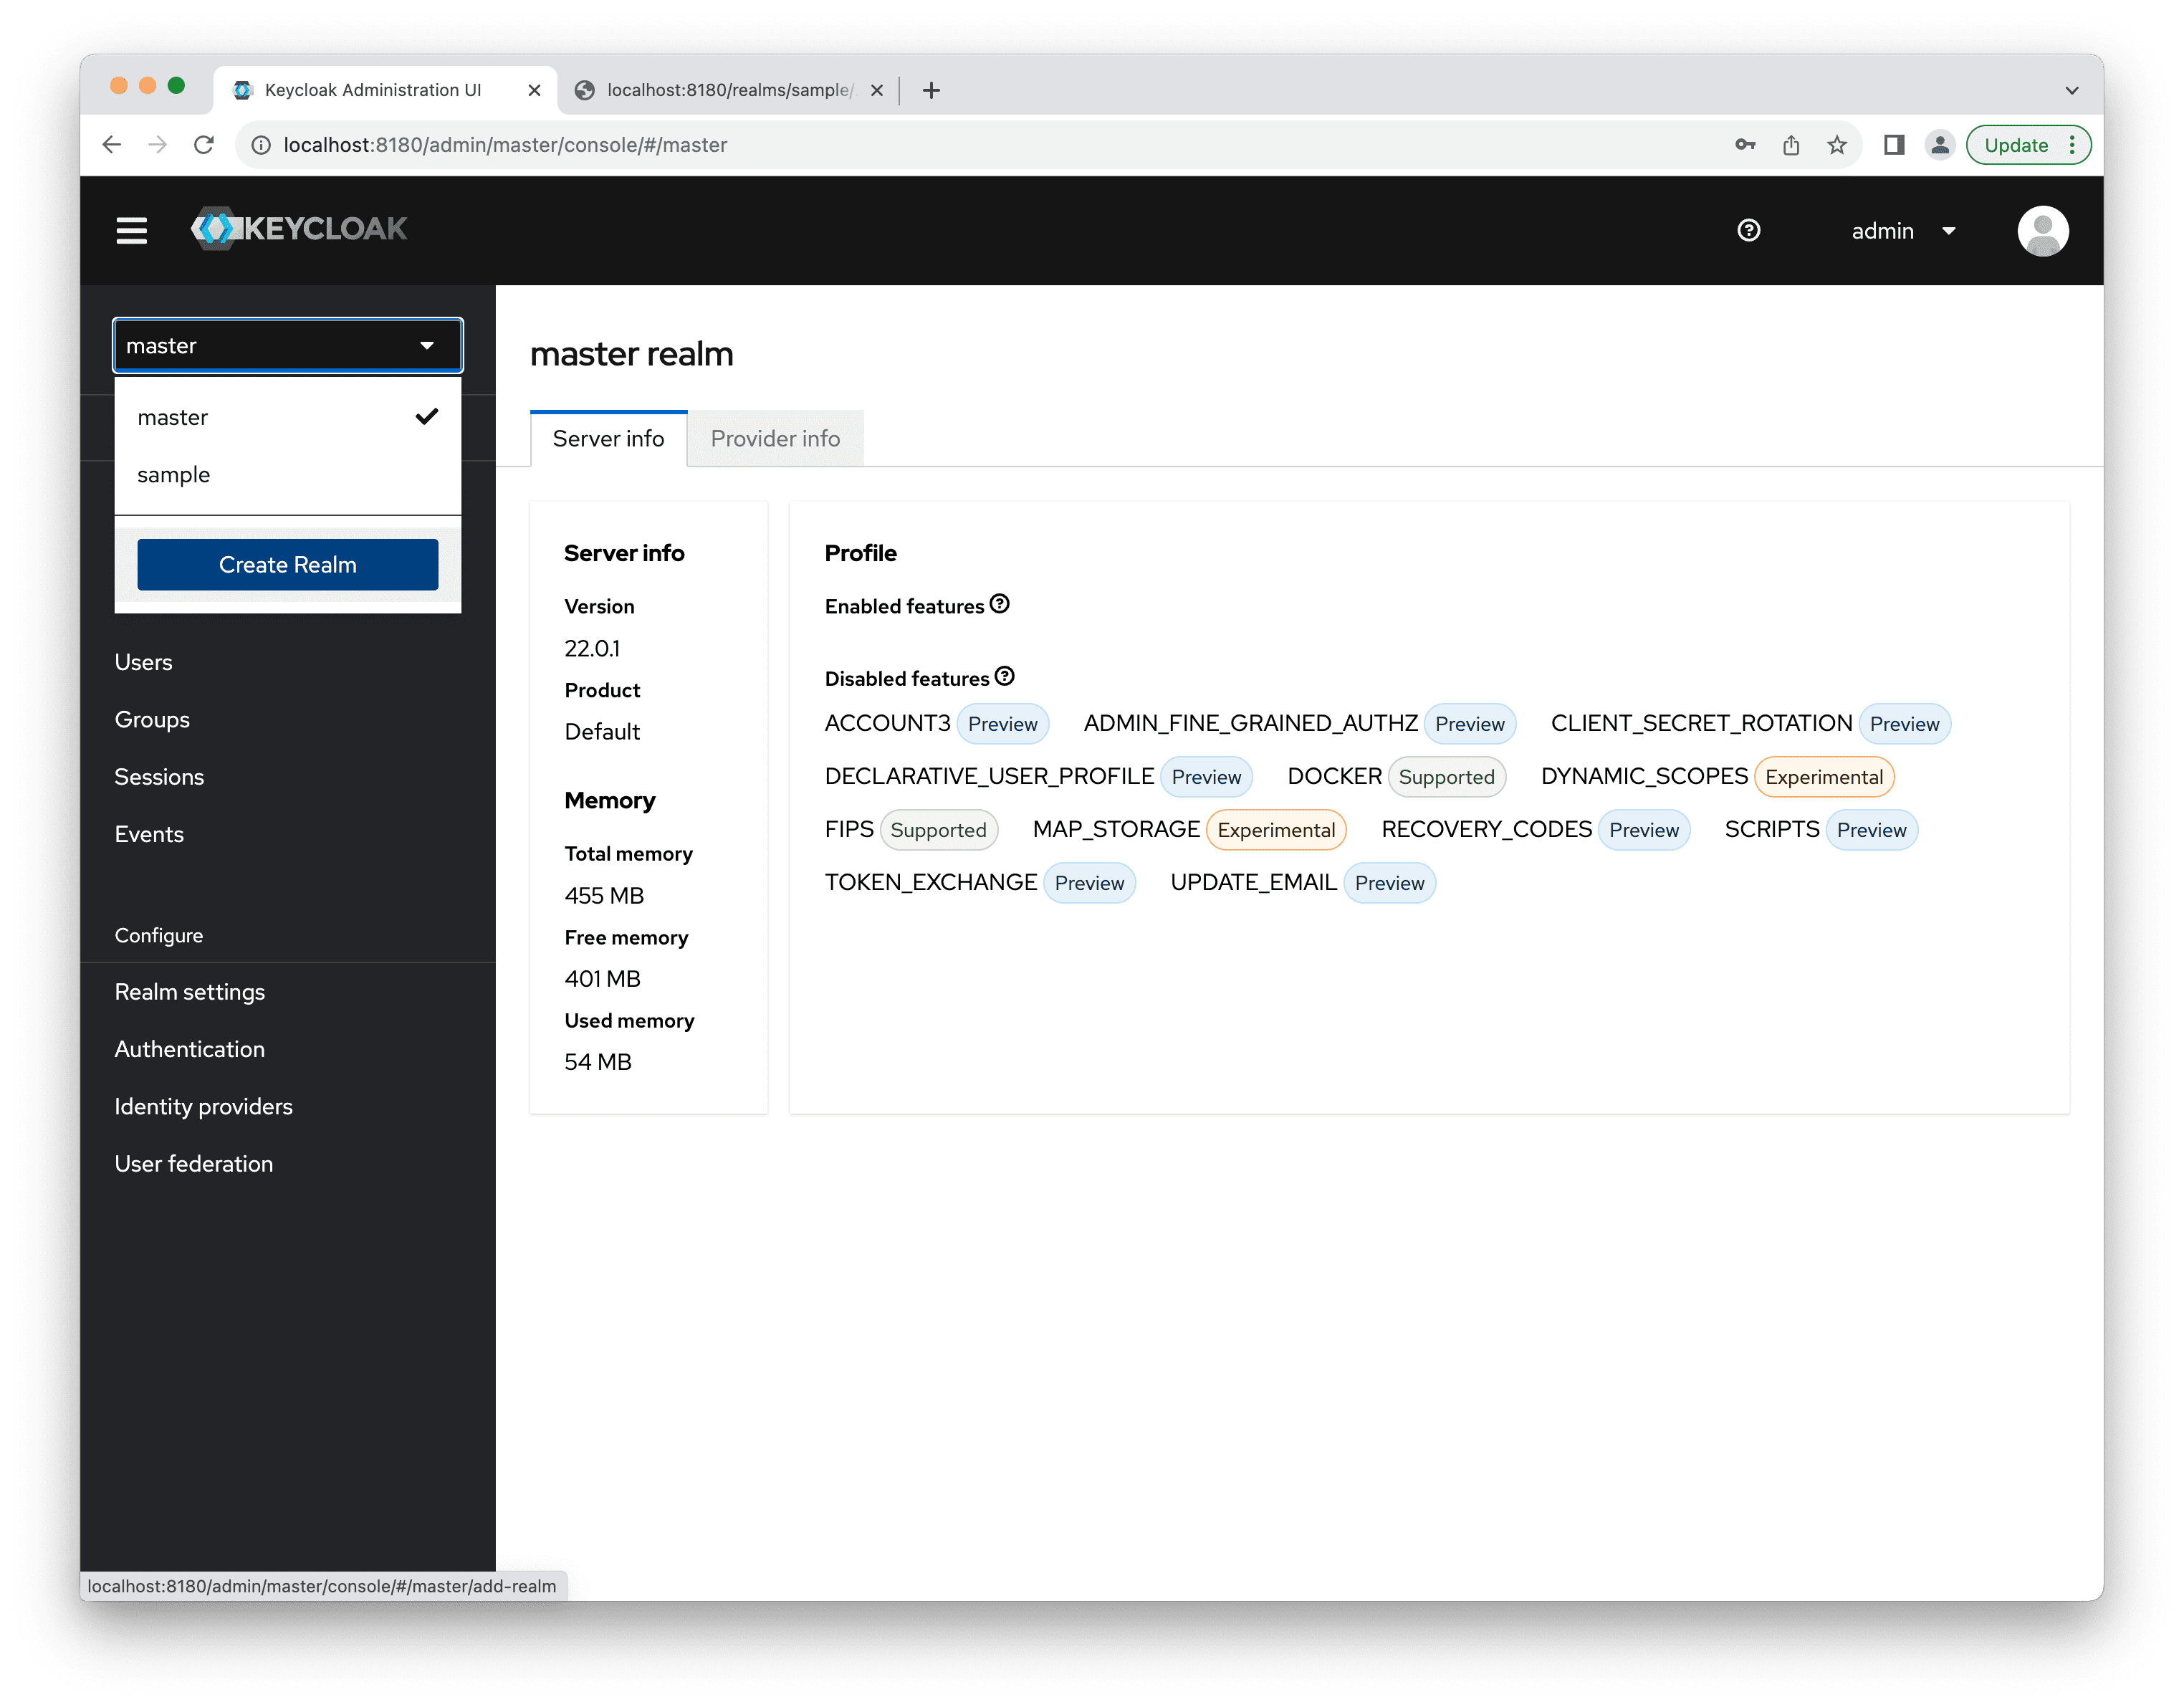
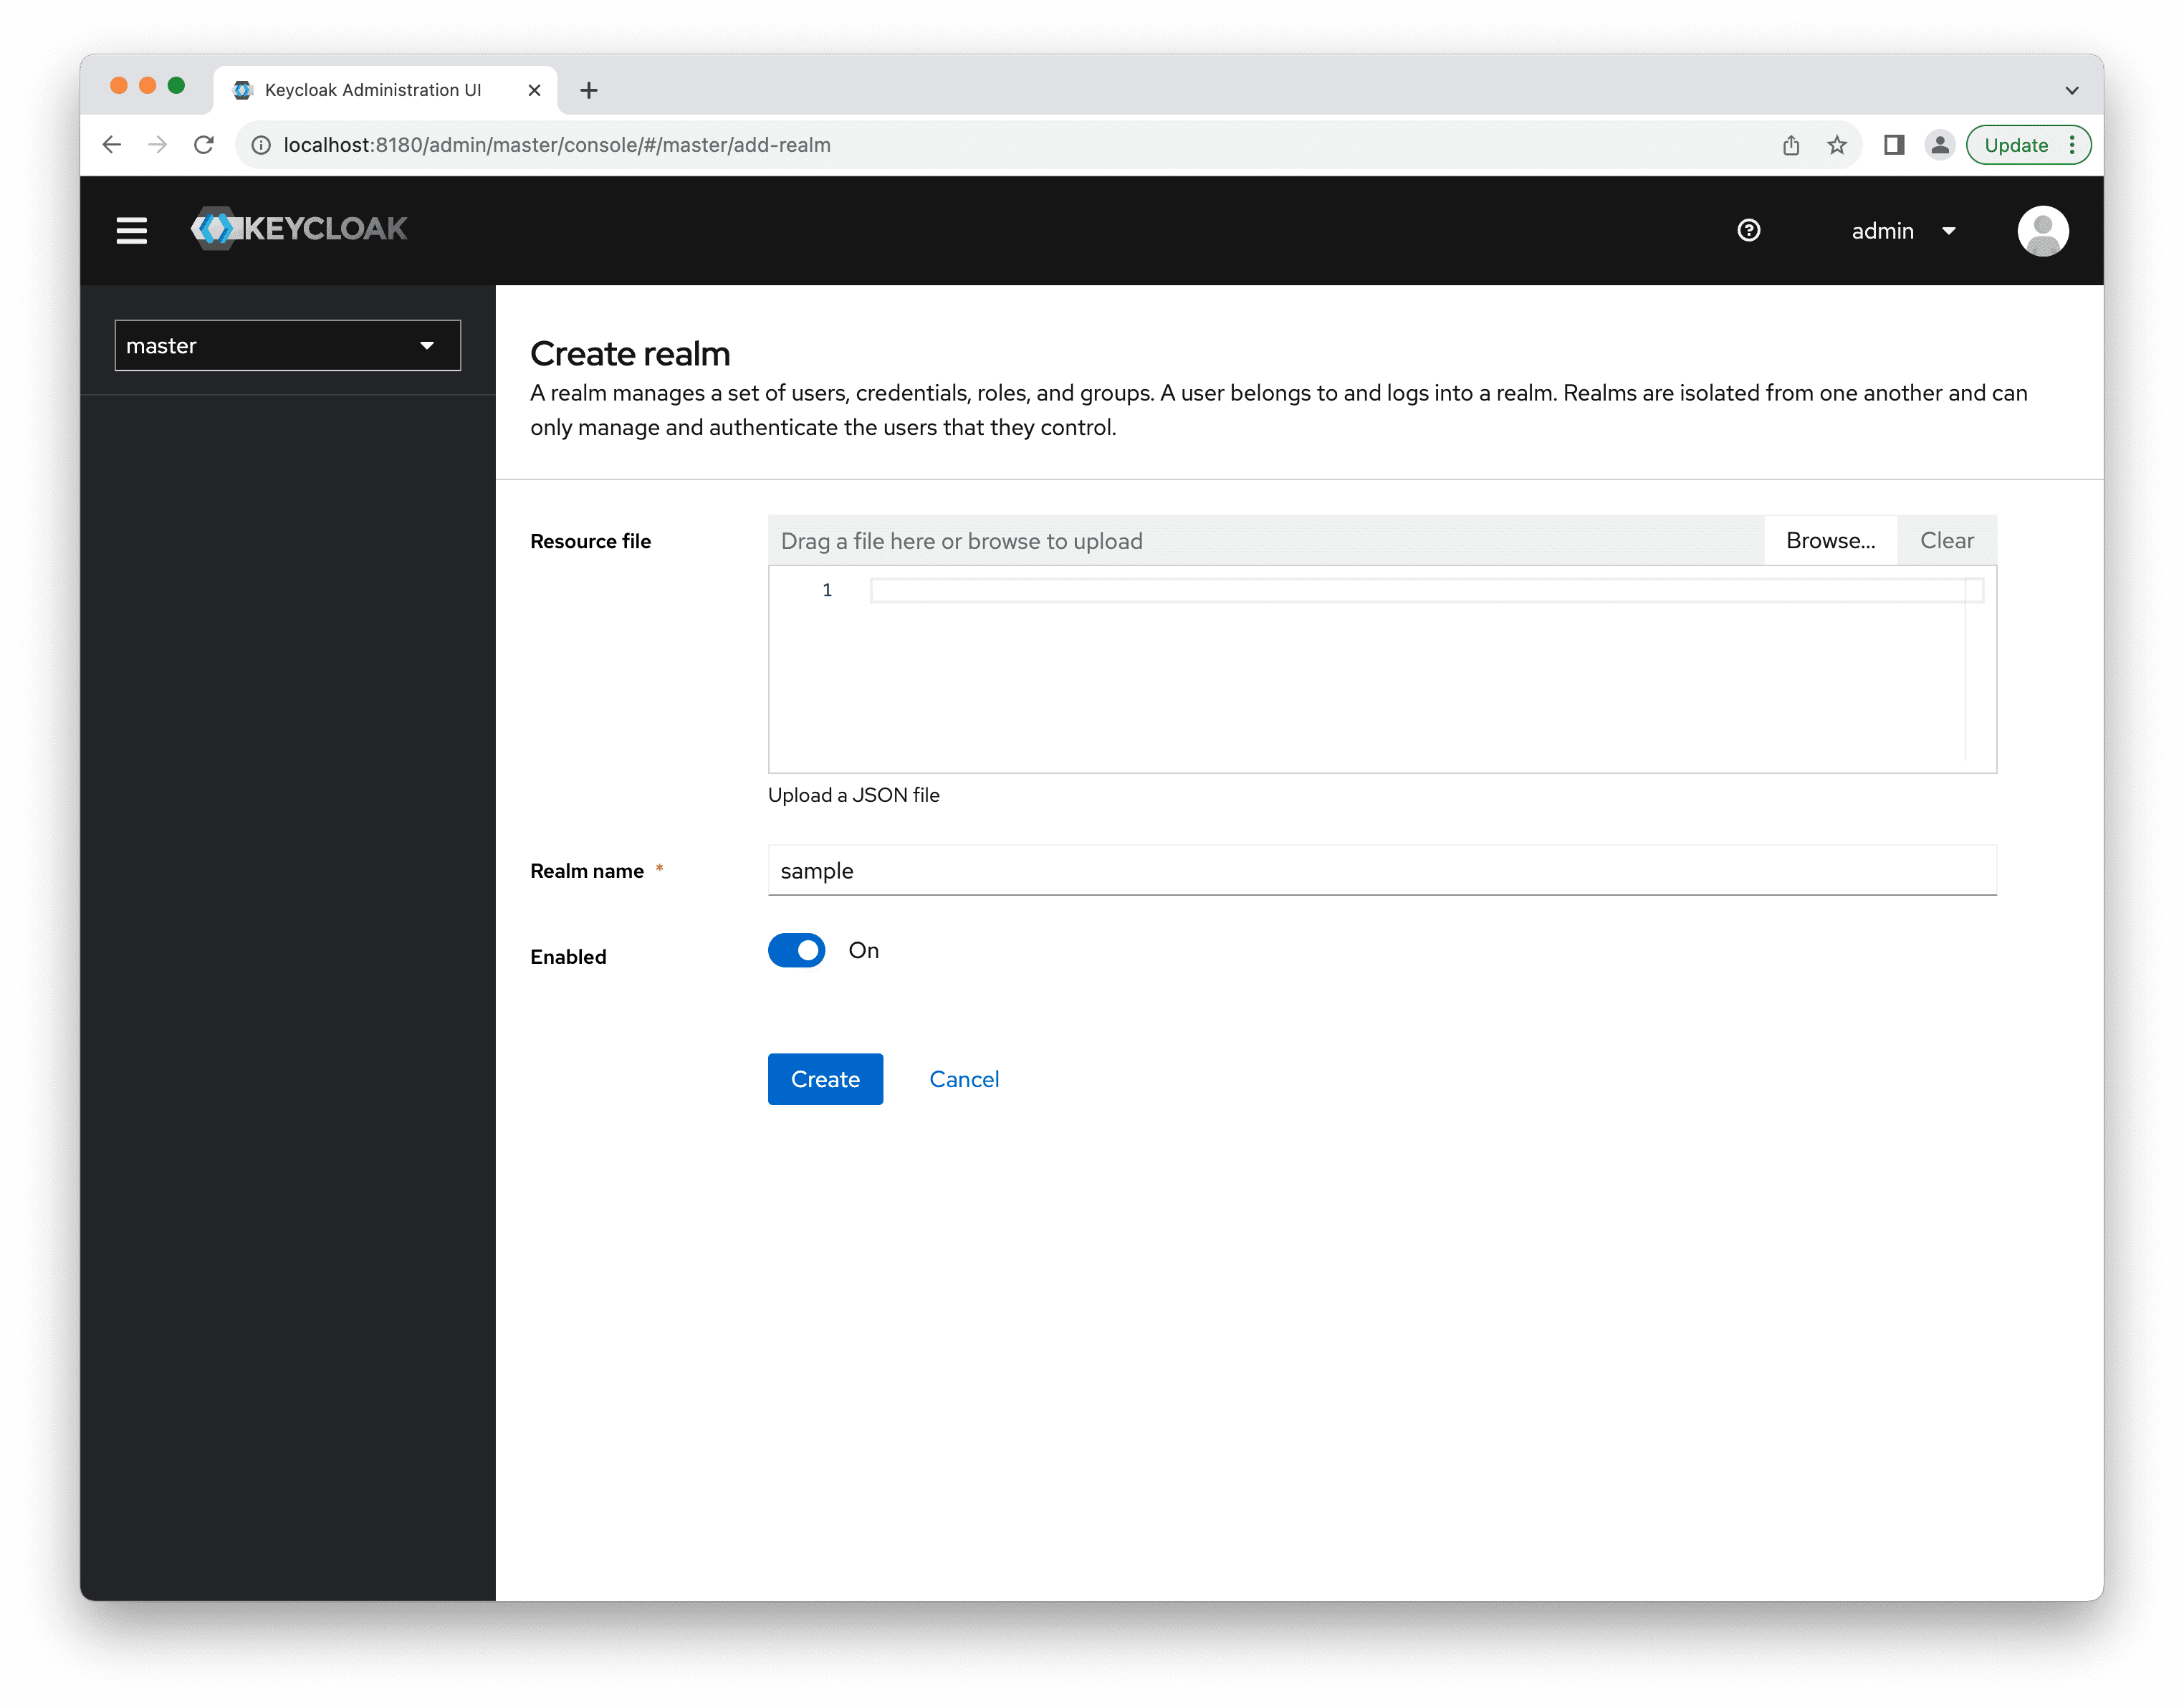
Log in to the Keycloak admin console.
Open the popup at the top of the left pane.
Click Create Realm.
Give a name to the new realm, e.g. "sample".
Creating a Client
In order to connect a Jmix application to Keycloak, you need to create a new client jmix-app with the Client type OpenID Connect.

Enable Client authentication.
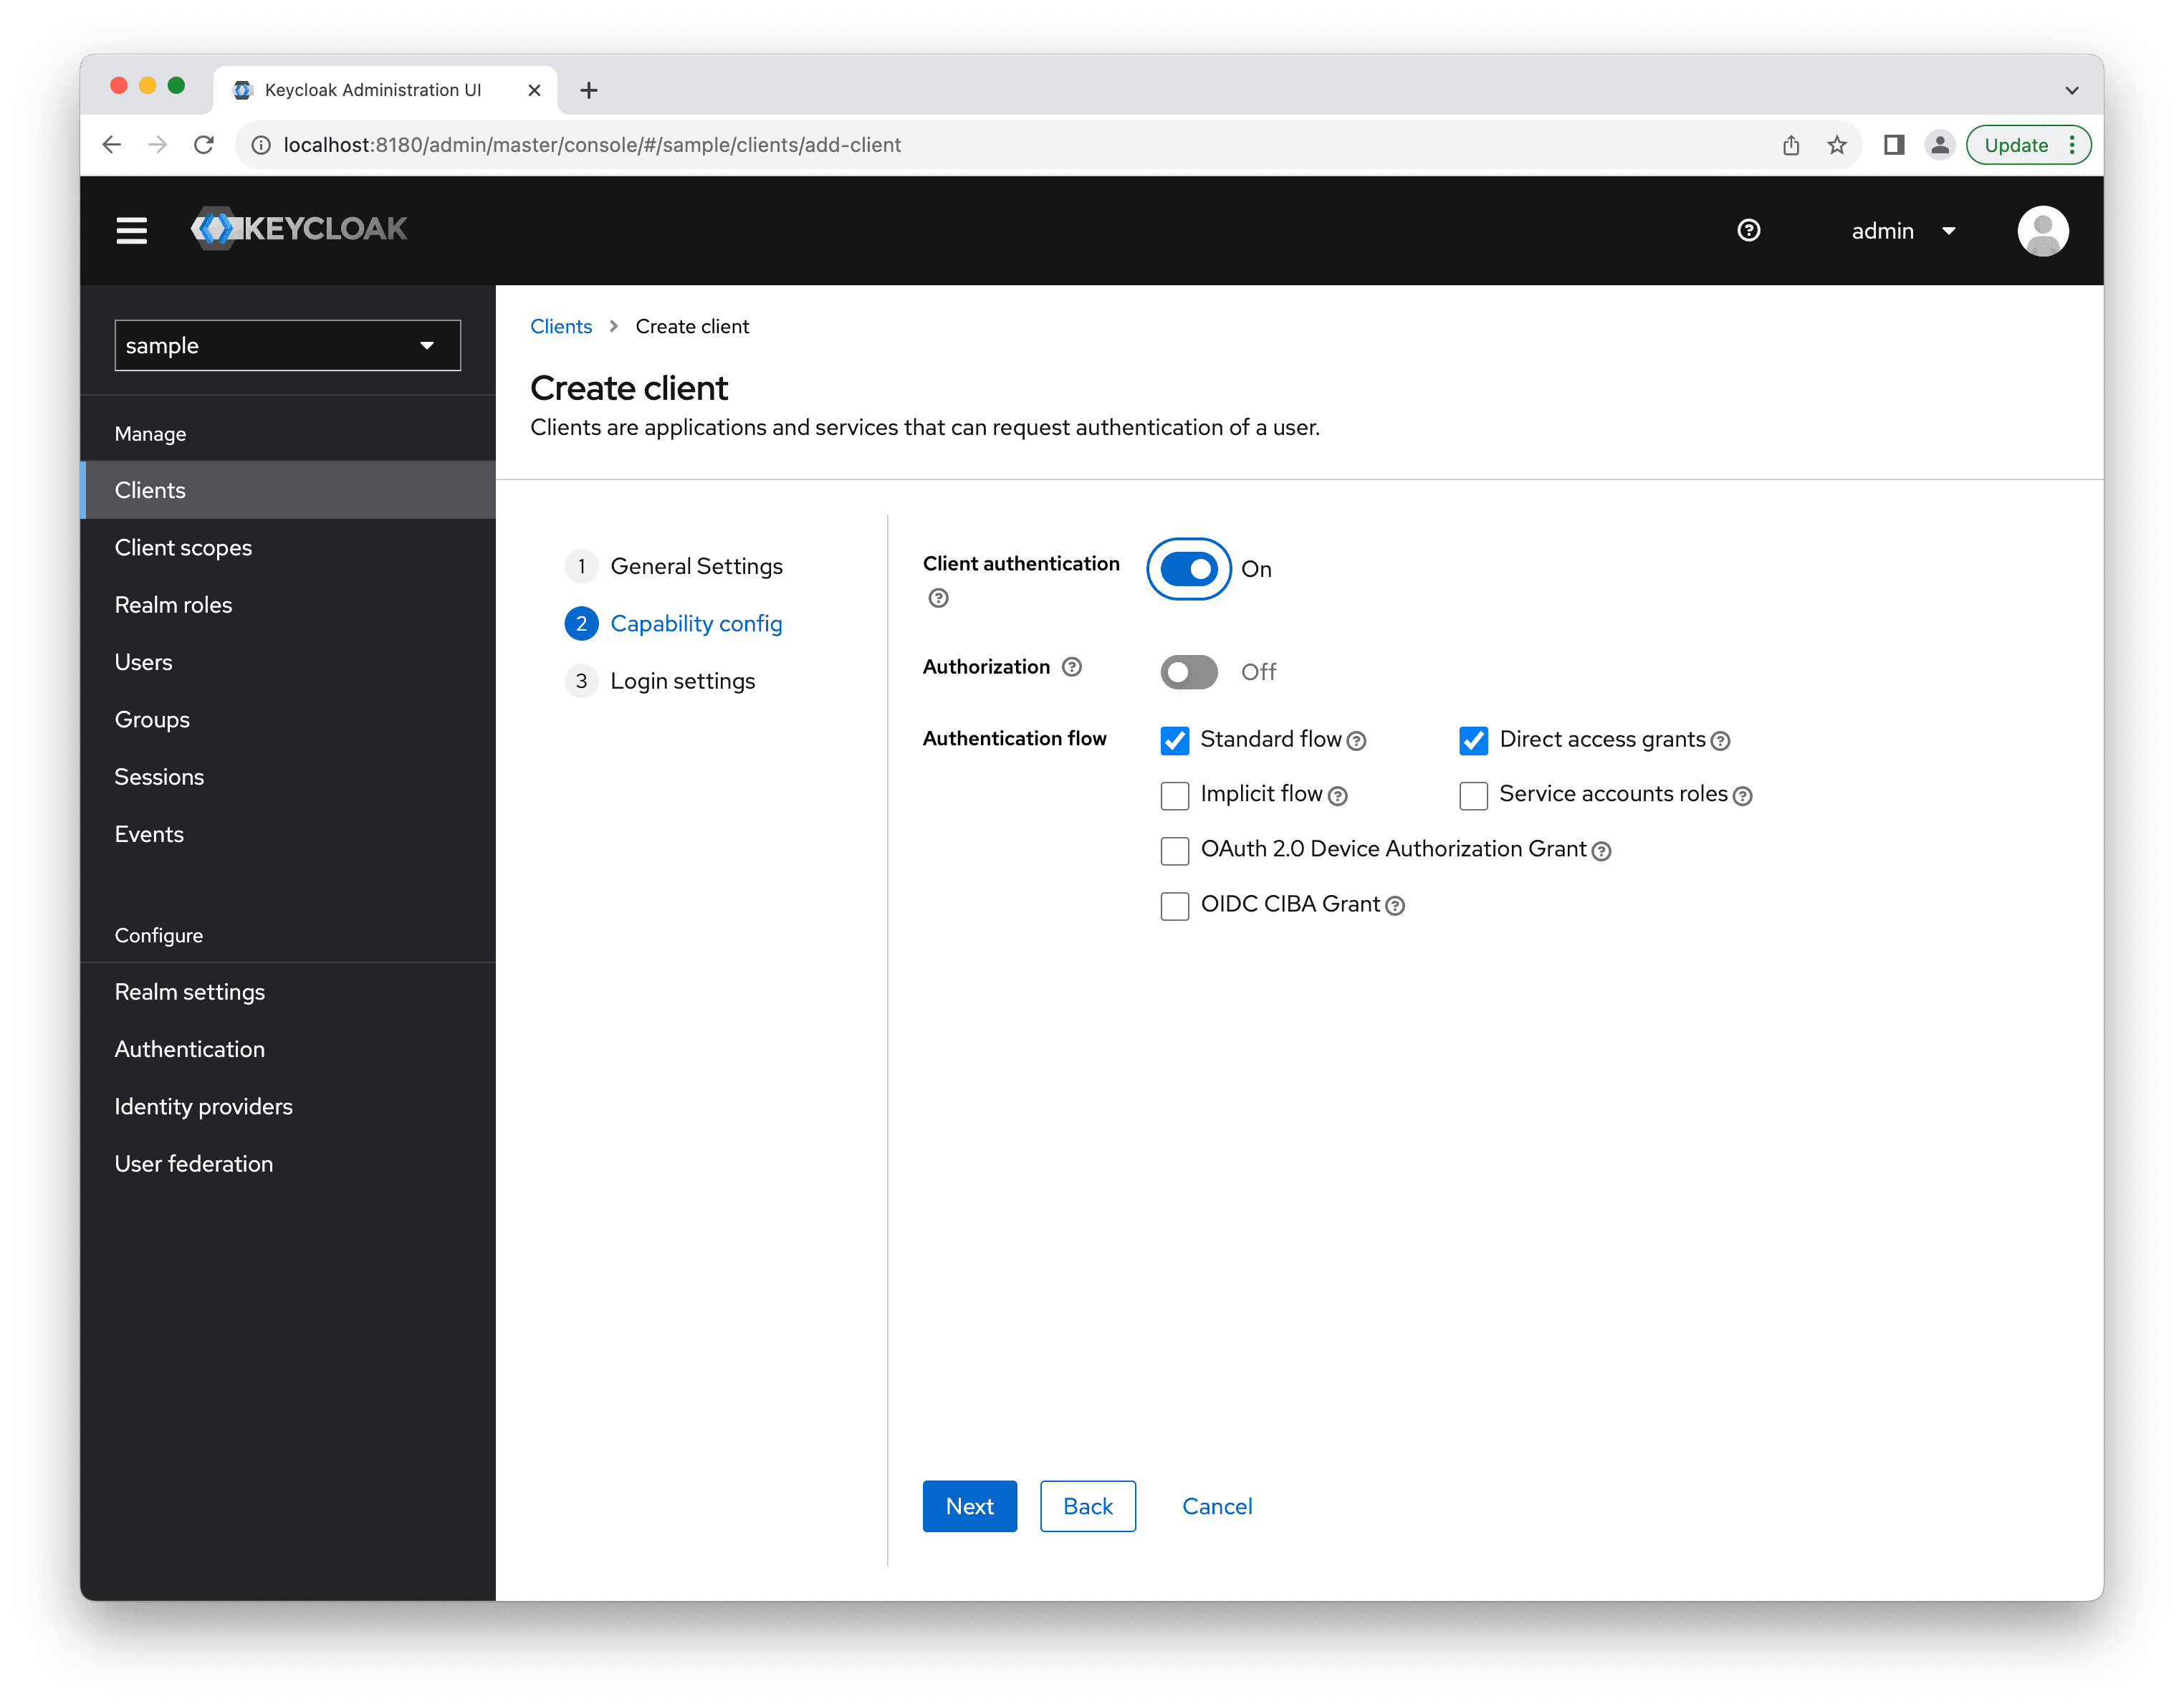
Enter Valid redirect URIs:
http://localhost:8080/*and Web origins:
http://localhost:8080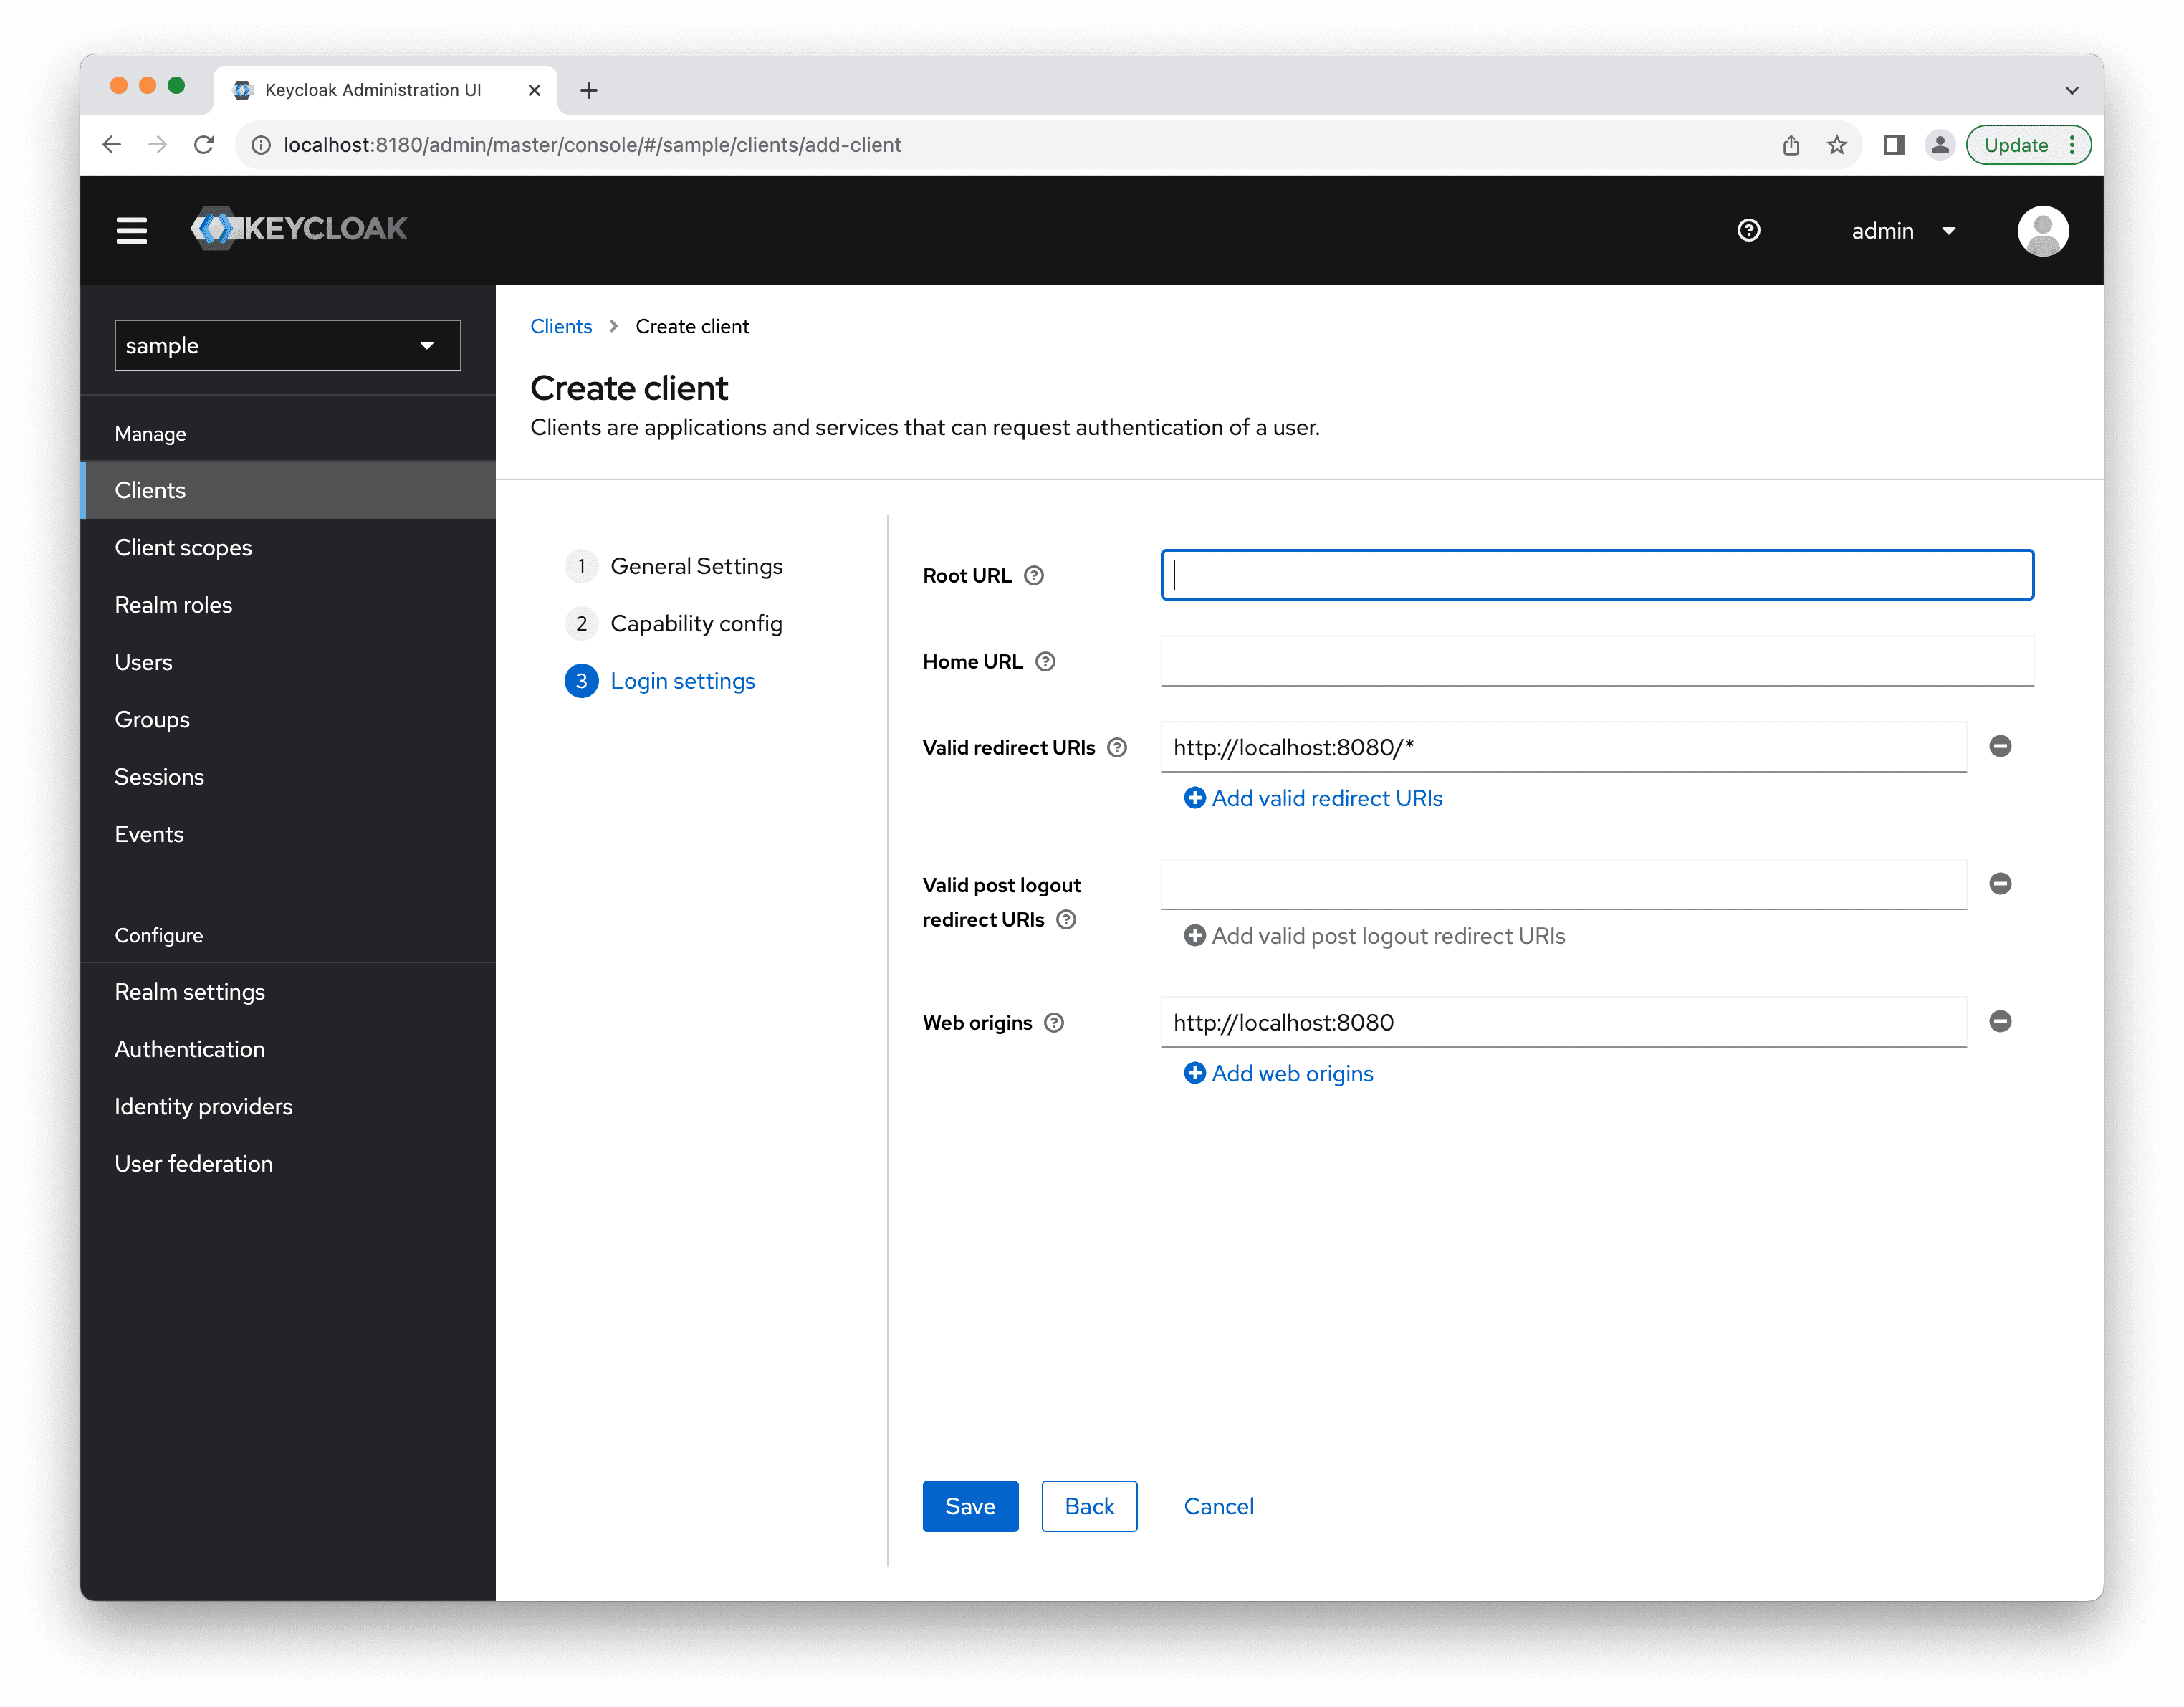
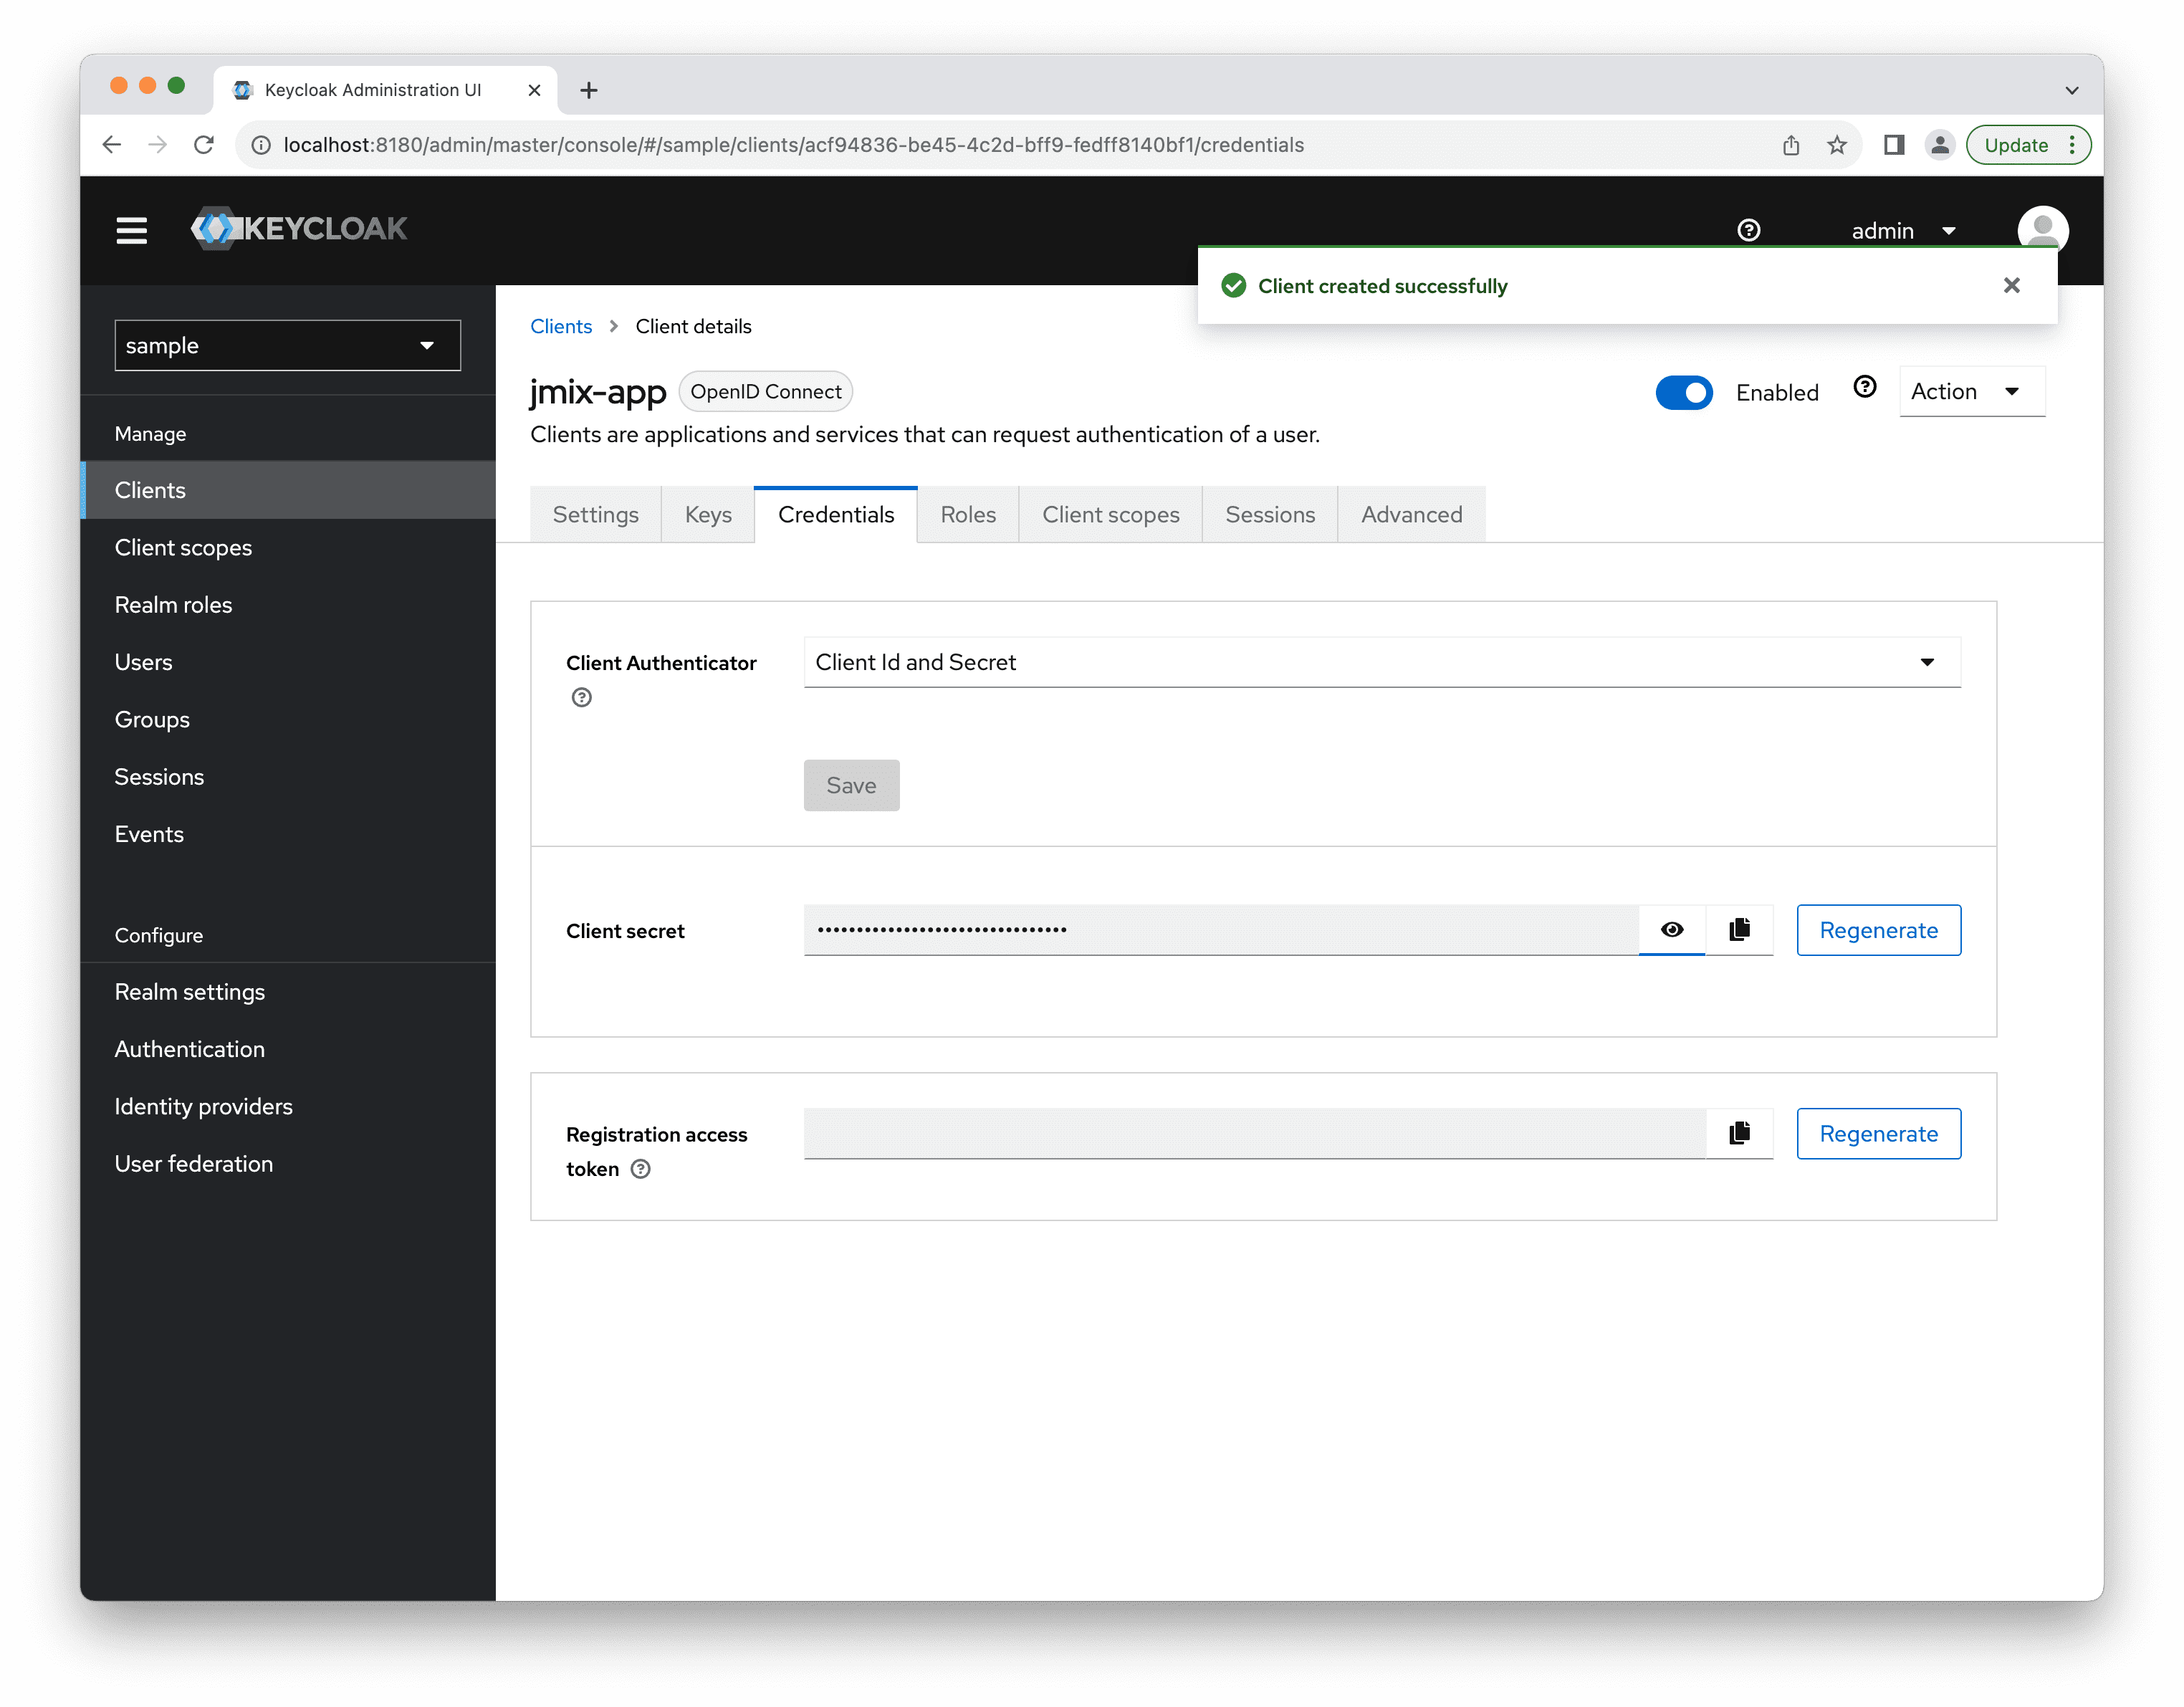
Open the just created client and go to the Credentials tab. It displays the Client secret, which you need in the Jmix project to set up a connection.
Client parameters should be used in the application.properties file. See the Client Configuration section.
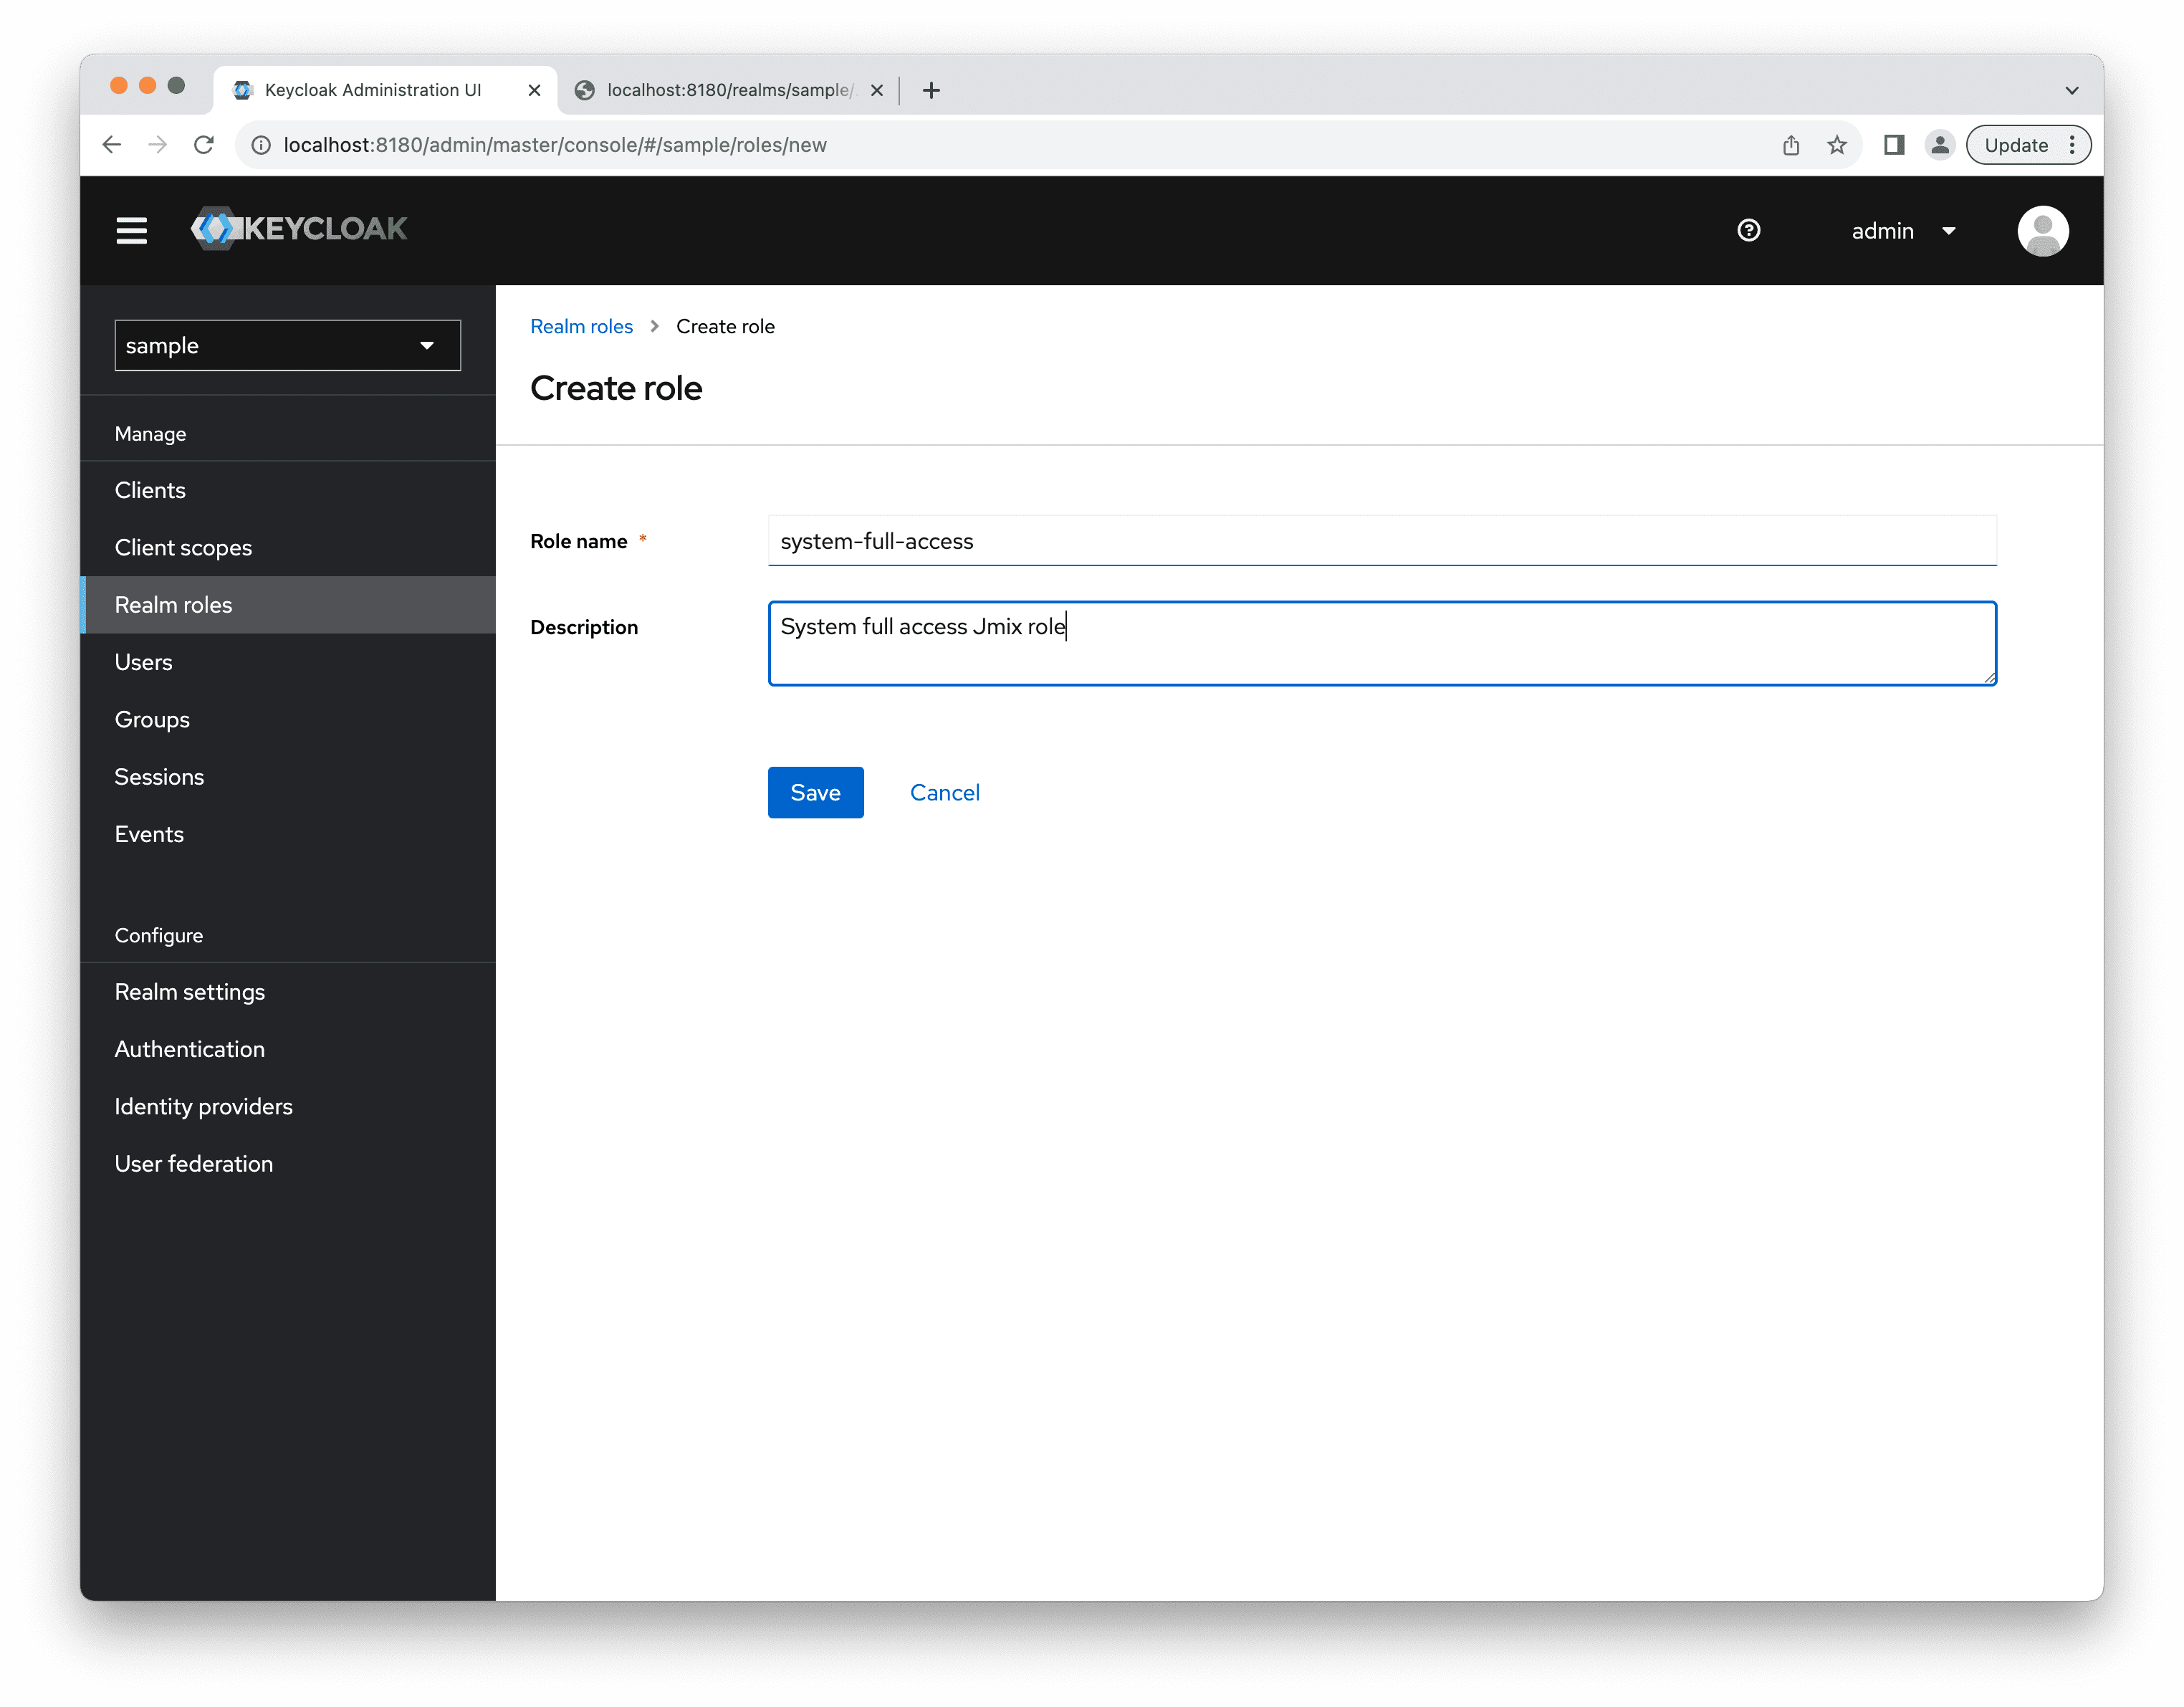
Creating a Role
Next you should create a new realm role. By default, the role name should match the Jmix role code. Create the system-full-access role:
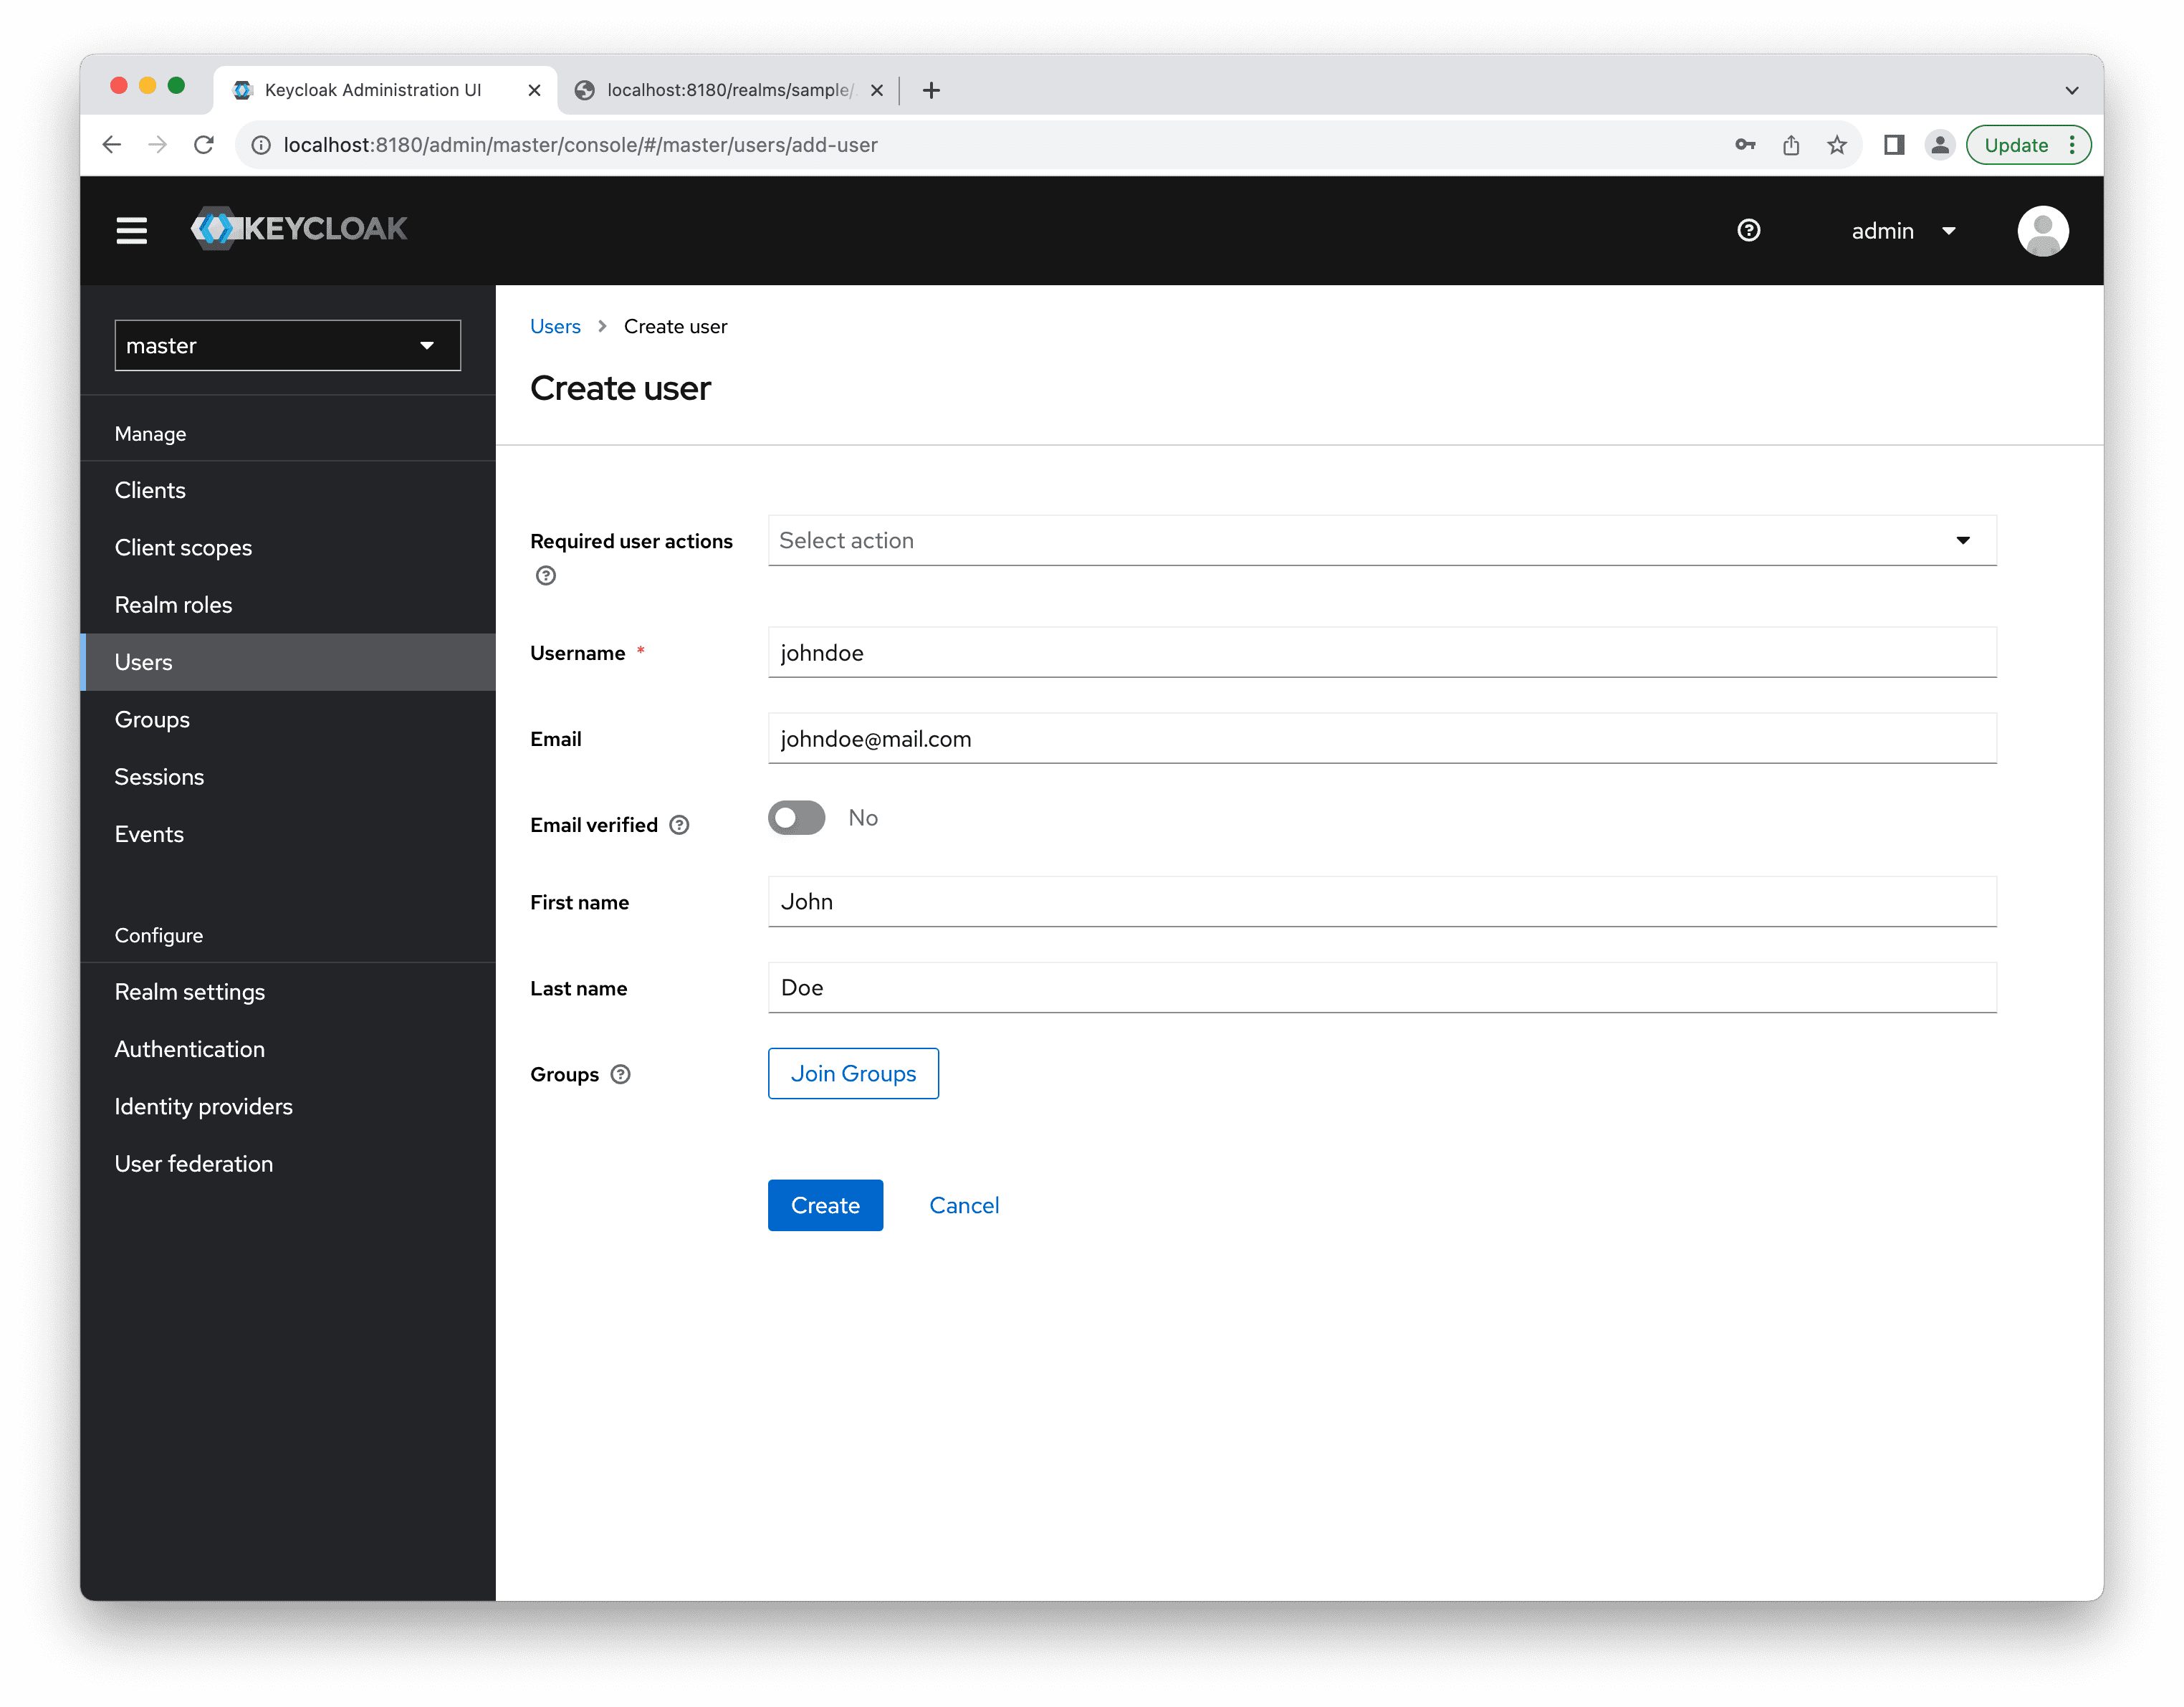
Creating a User
Create a user with johndoe username:
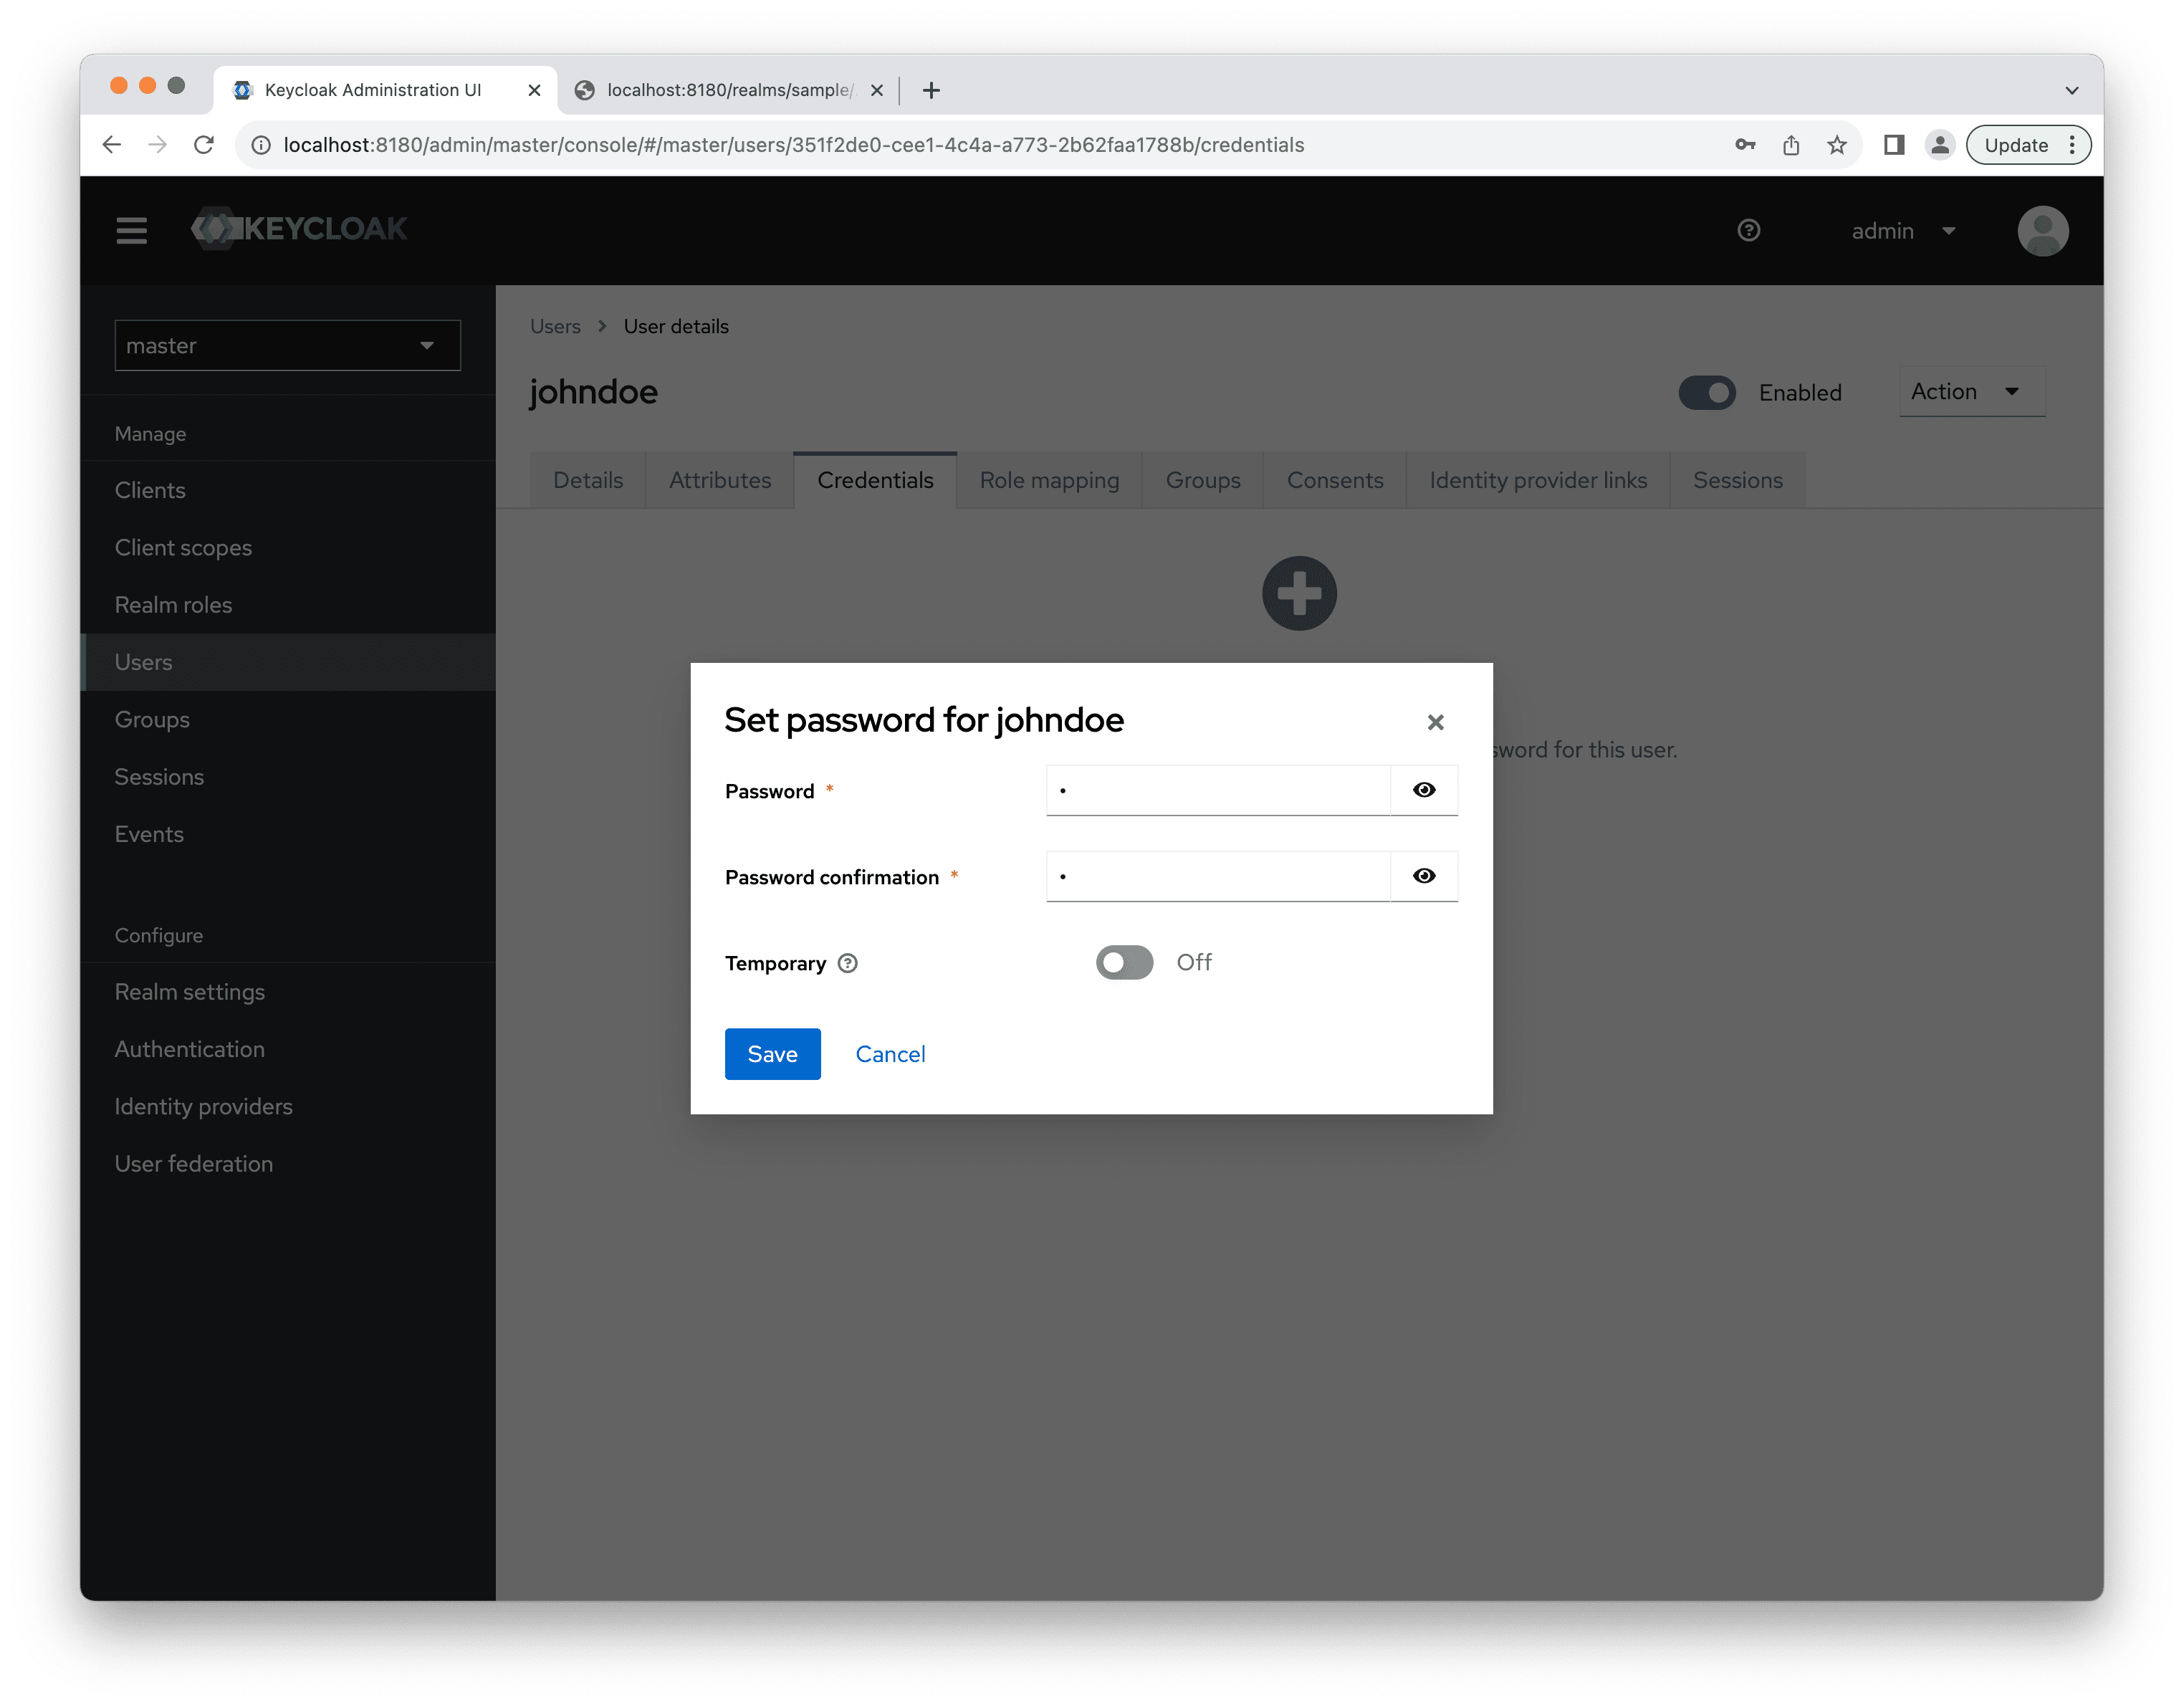
After the user is saved, the Credentials tab will appear. There you can set the user password.
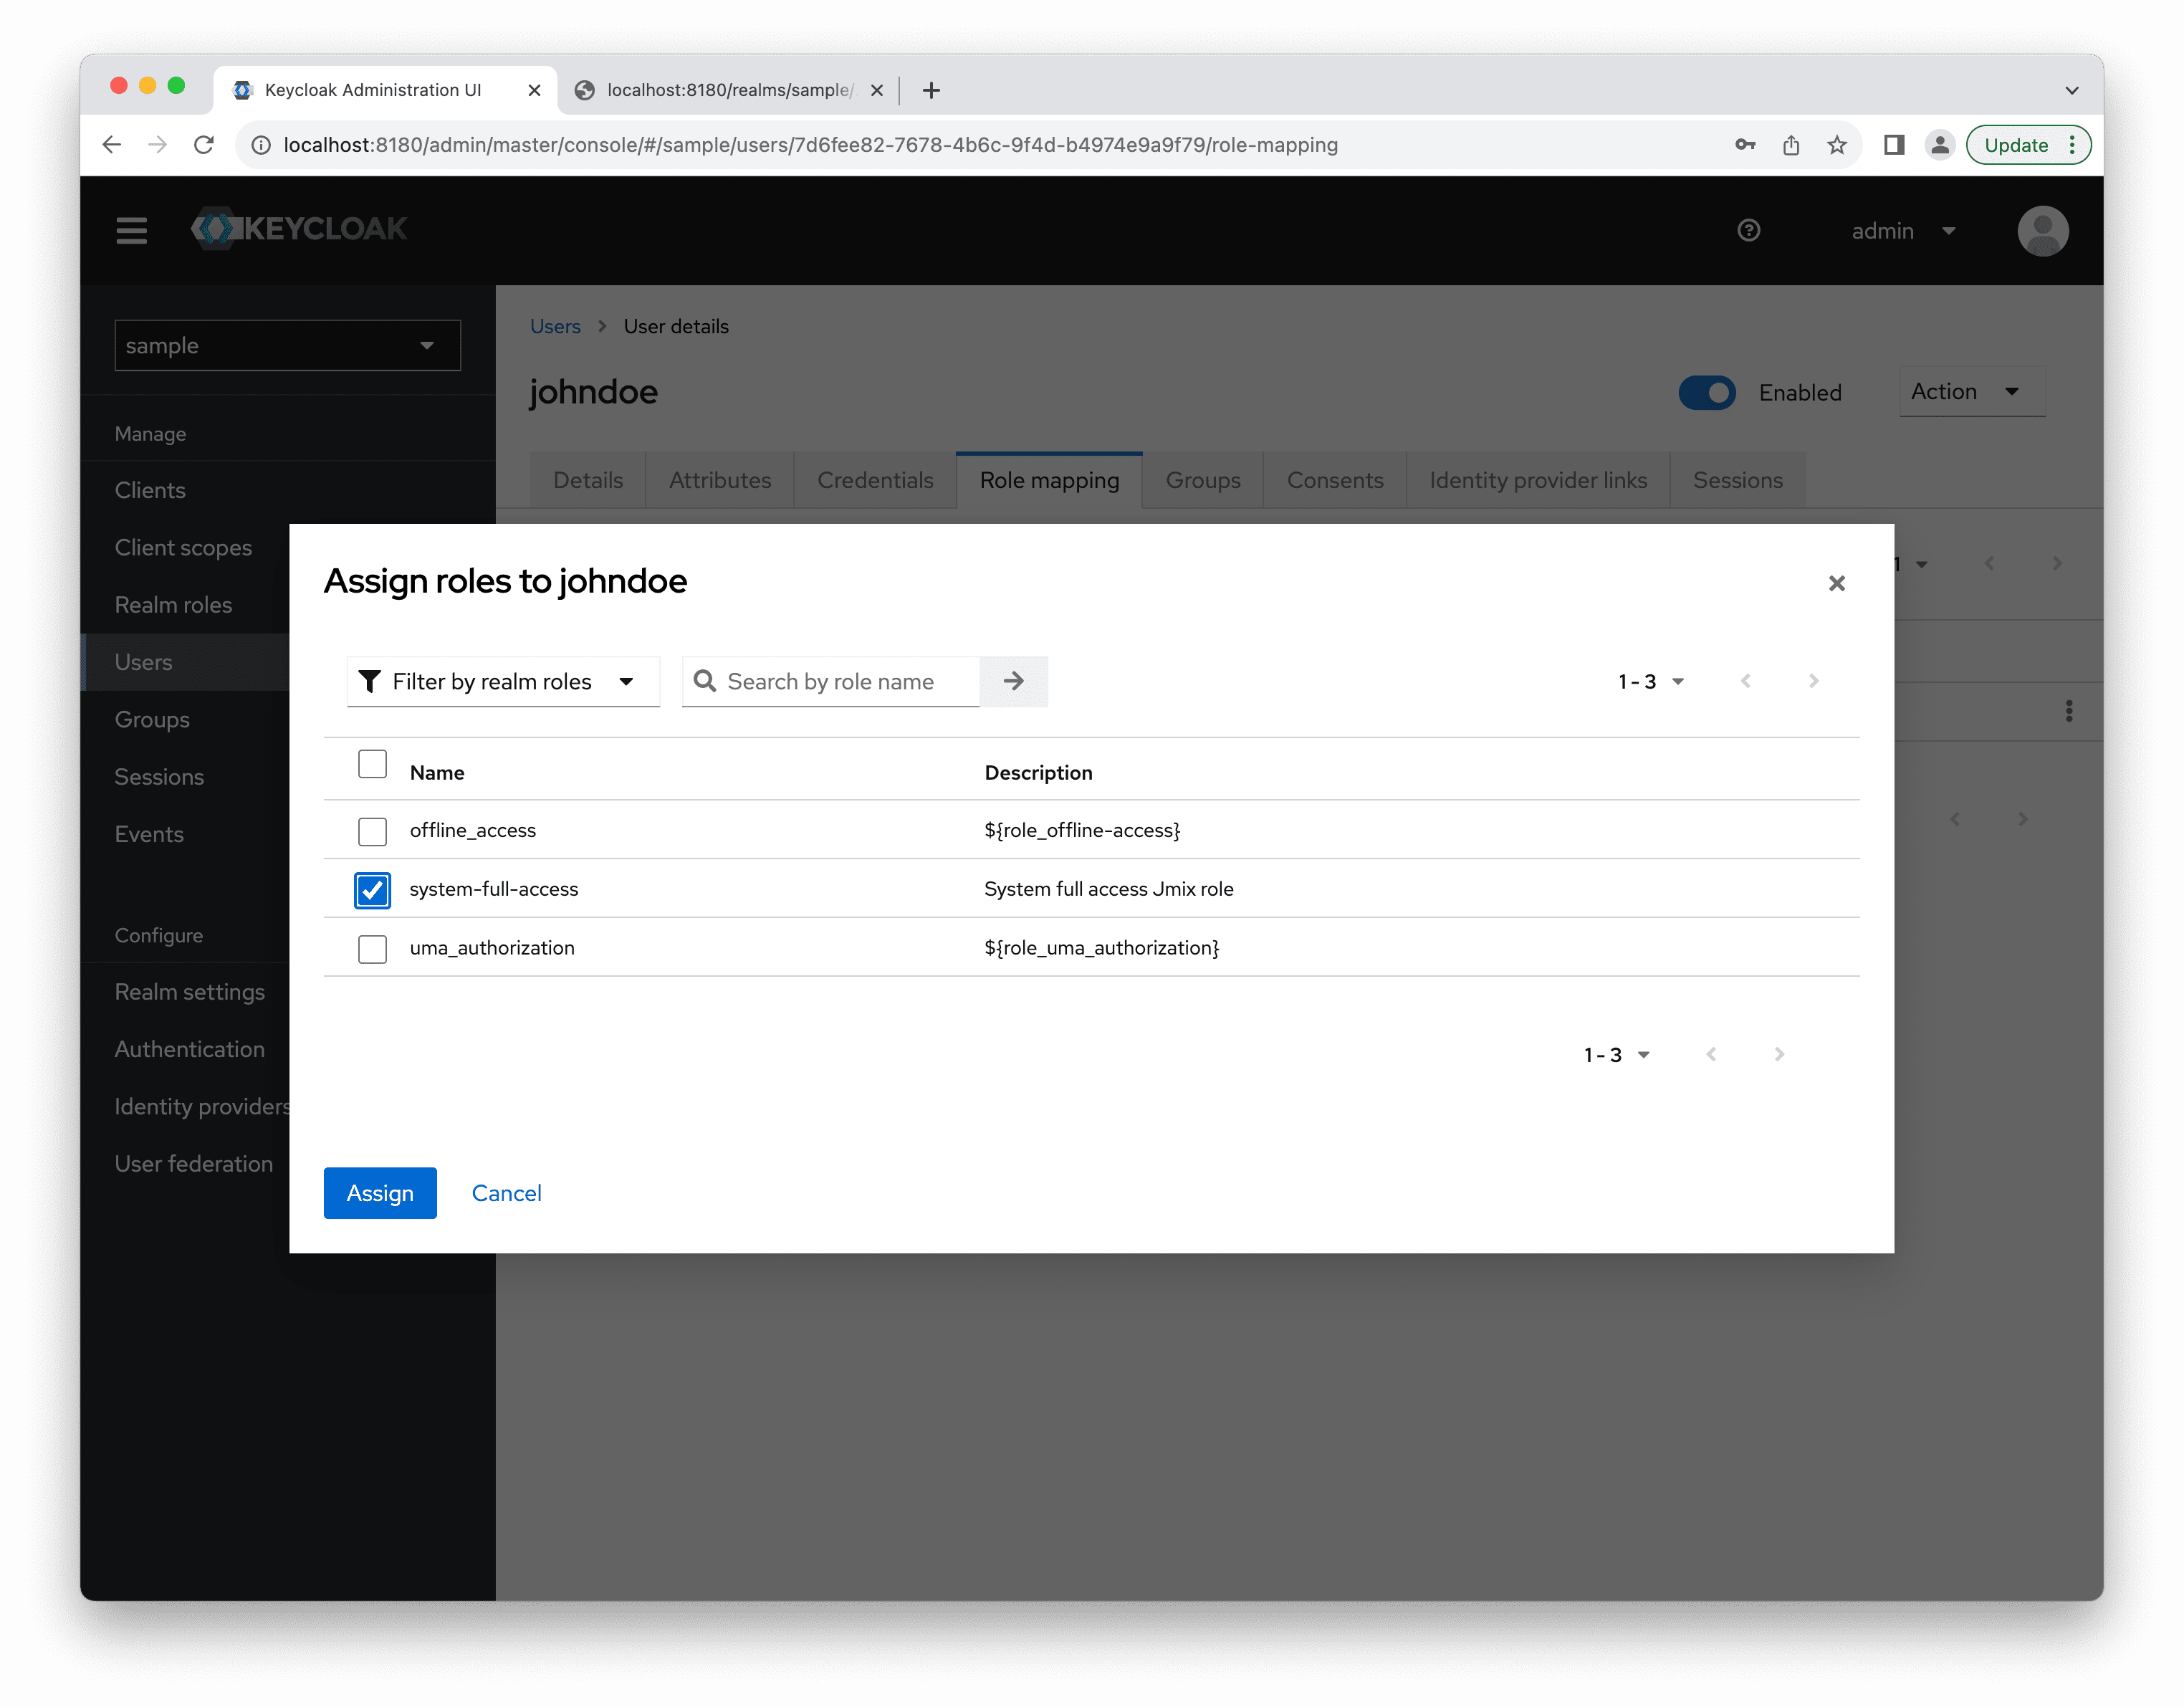
On the Role mappings tab, assign the system-full-access role:
If you want to fill in user attributes (e.g. "position"), you can do that in Attributes tab in the user editor.
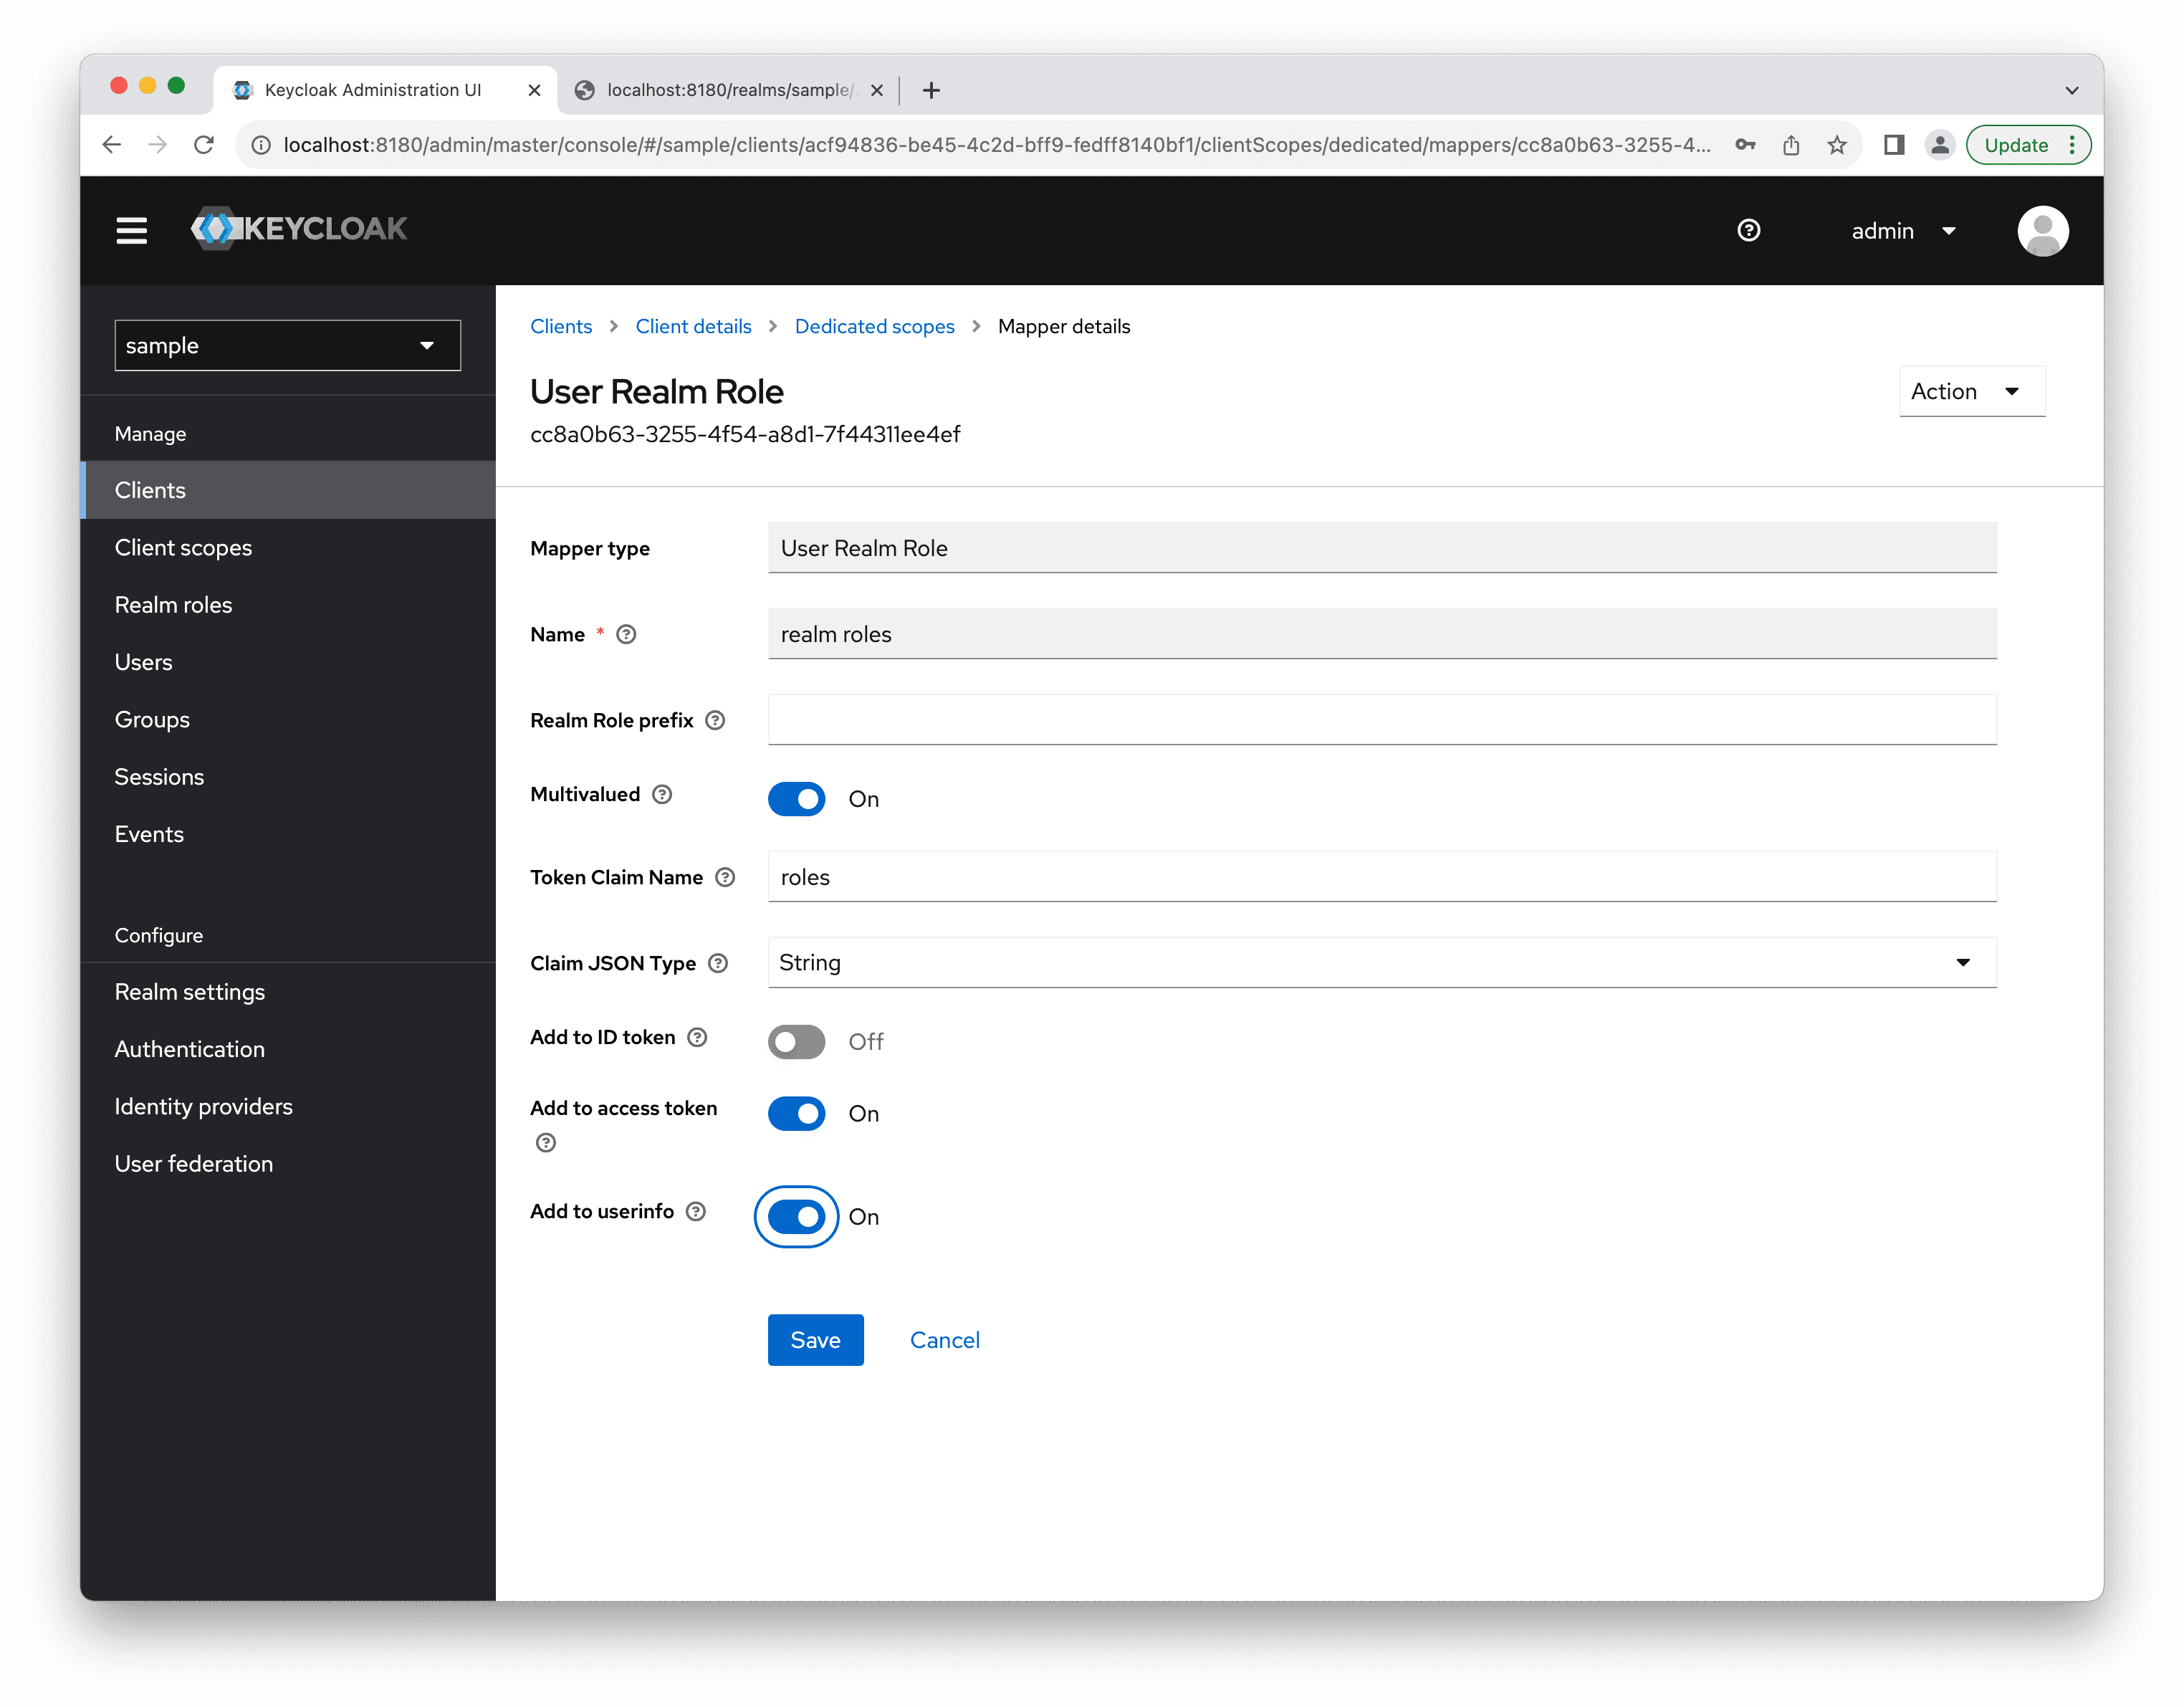
Creating a Roles Mapper
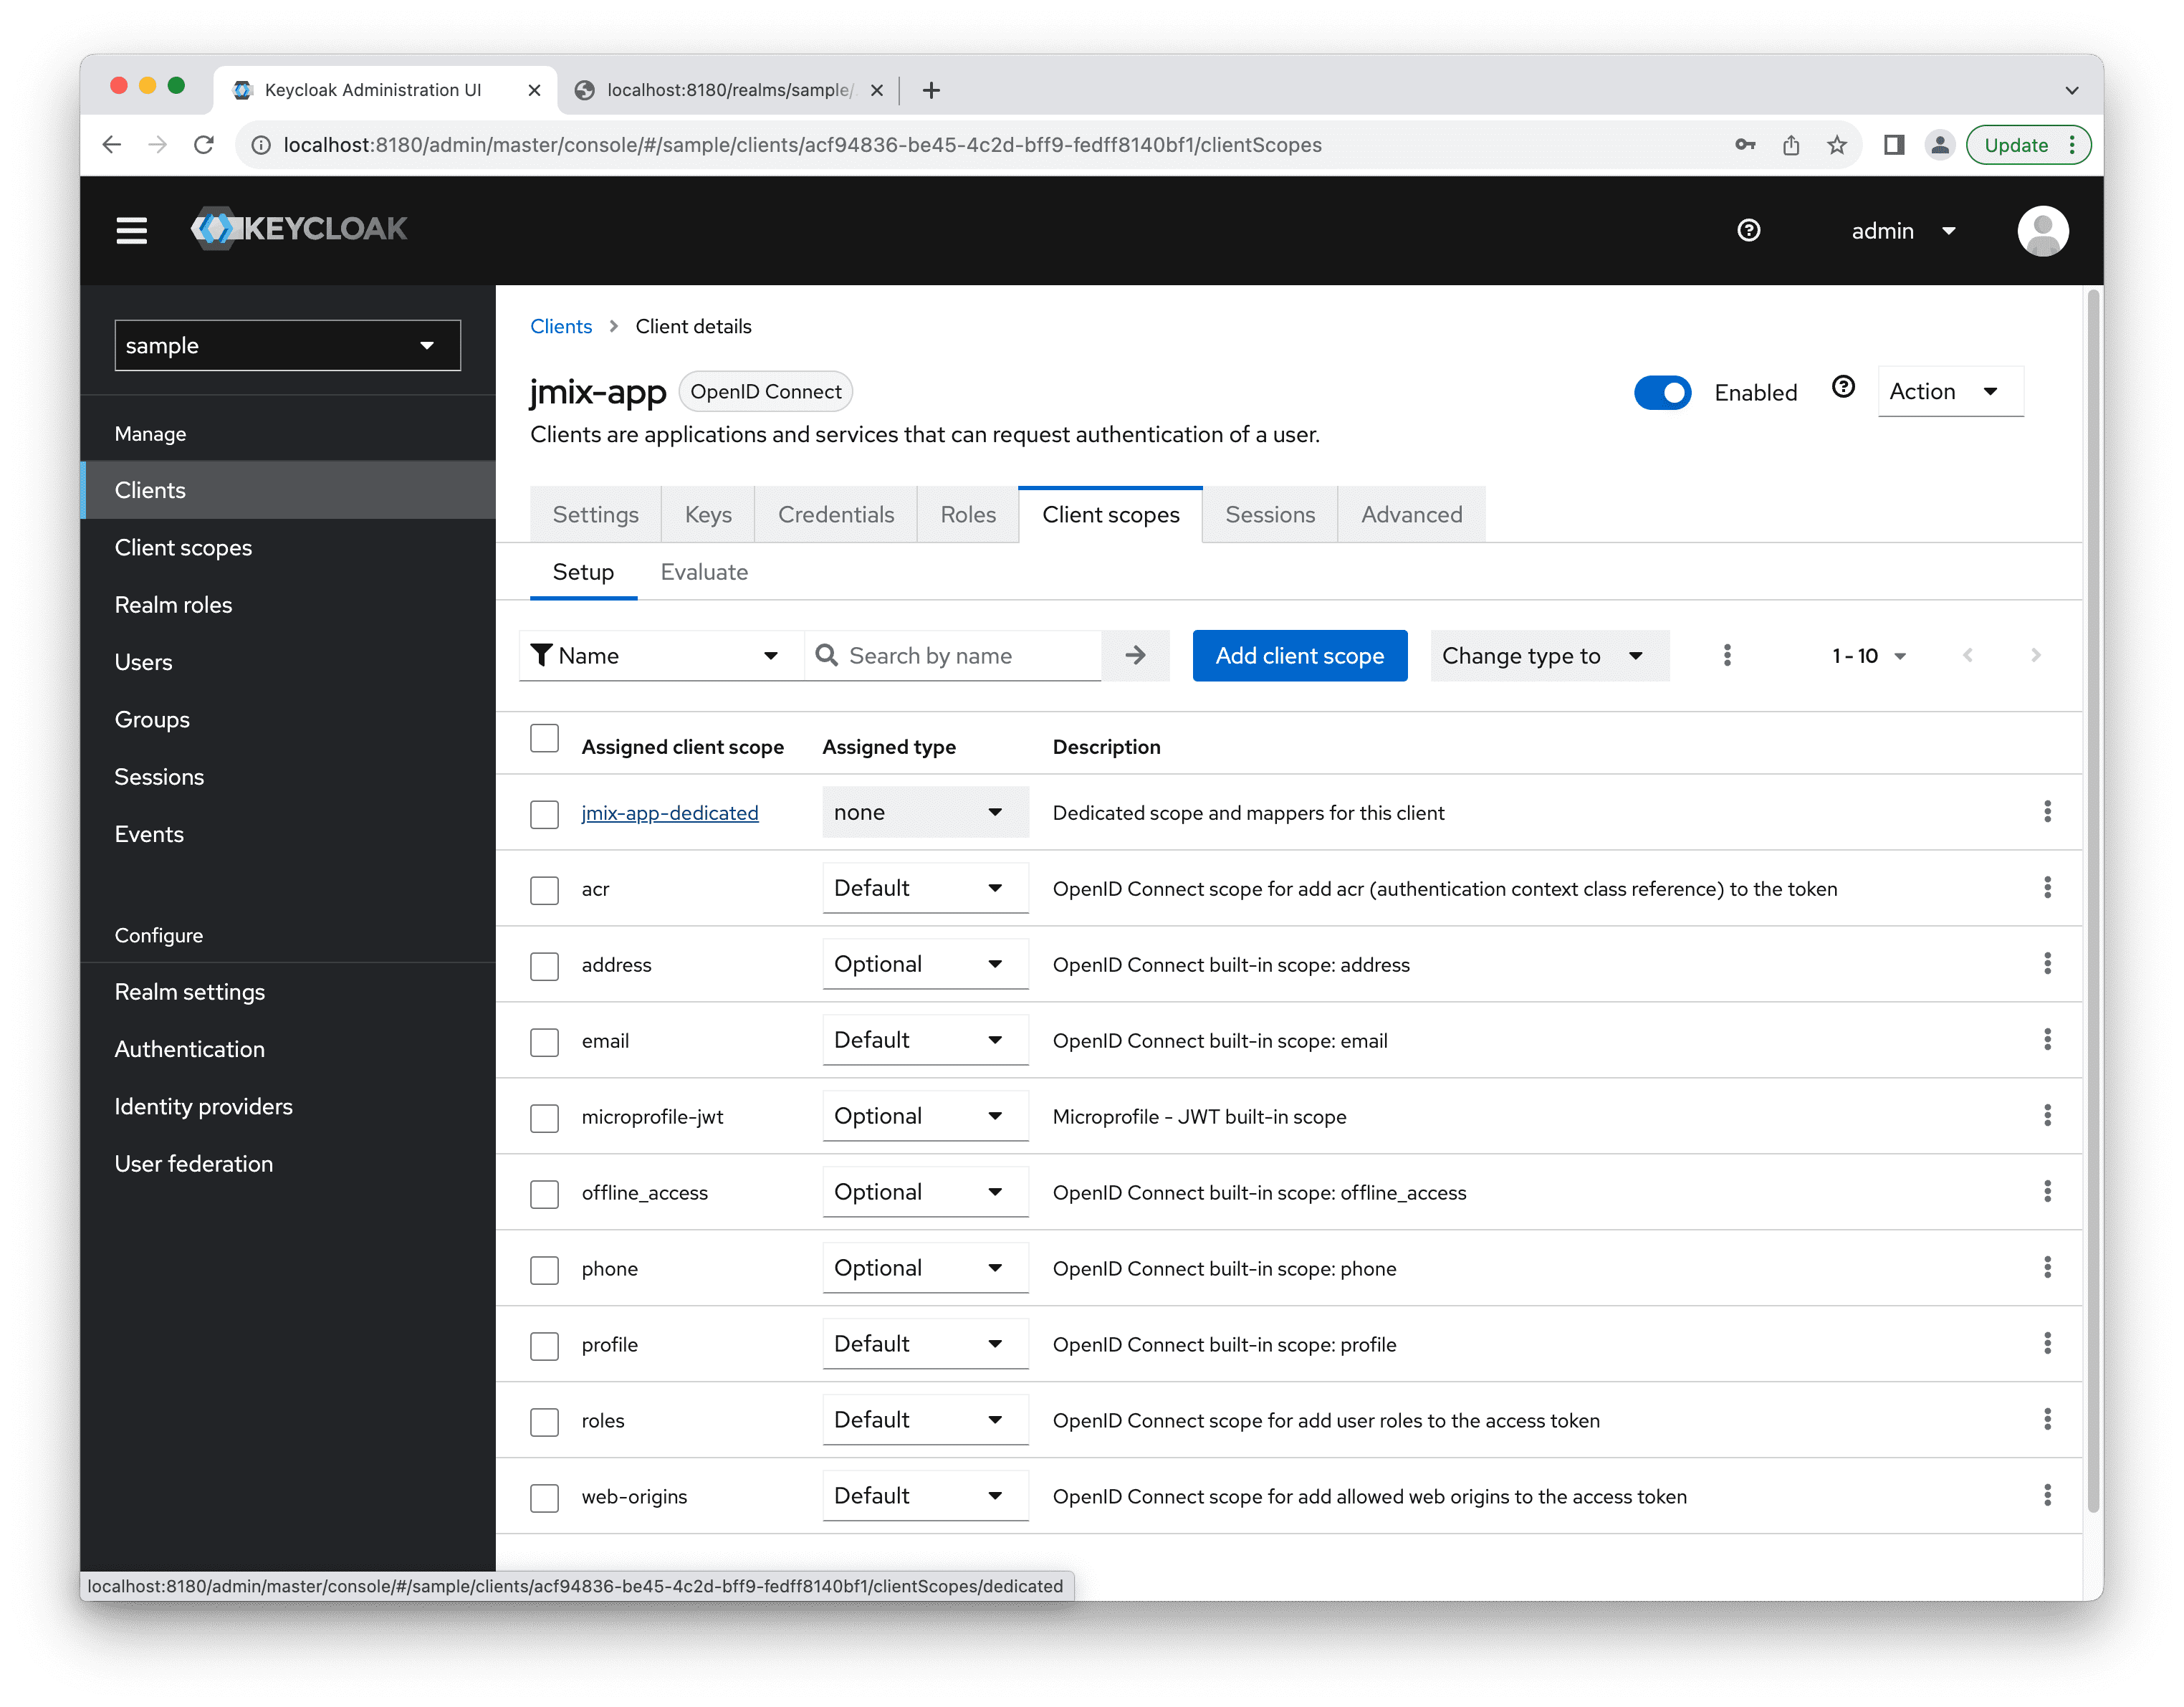
In order to return the realm roles information in the ID Token you need to define a mapper for the jmix-app client. Open the client editor and switch to the Client scopes tab:
Open the editor of the jmix-app-dedicated scope. Add a predefined mapper for the "realm roles" there:
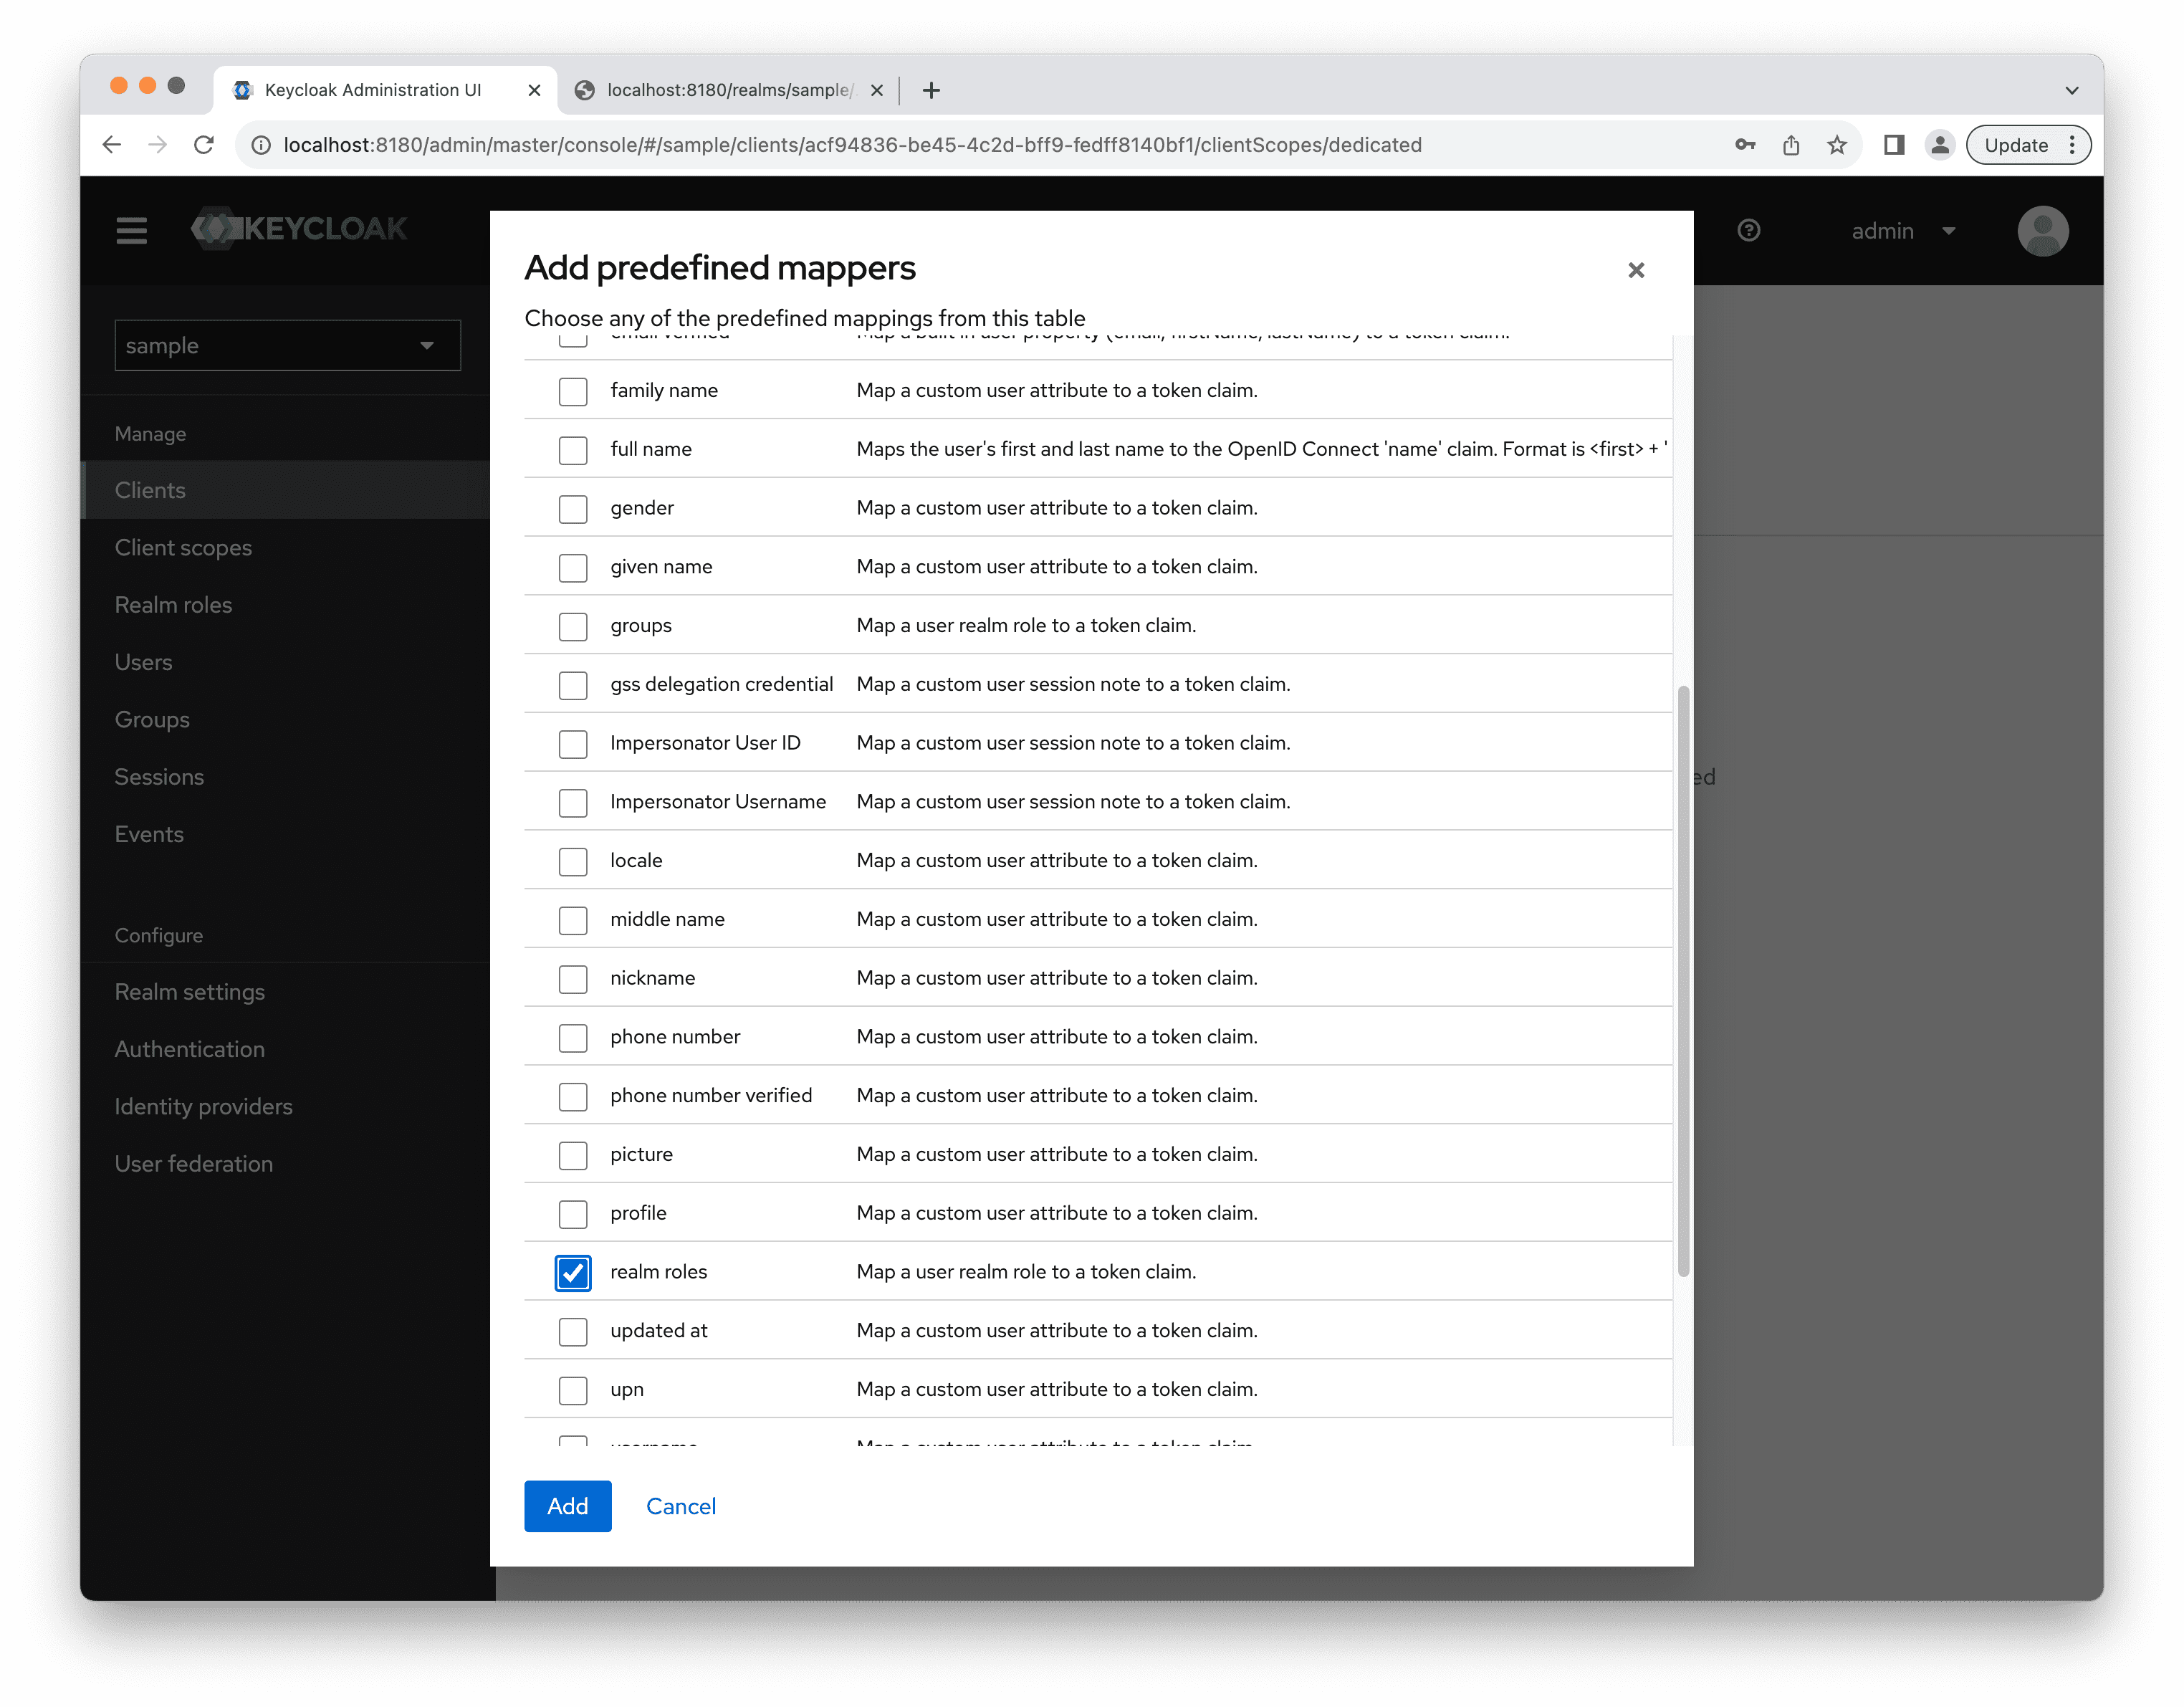
Open the just created realm roles mapper. Set the roles value to the Token Claim Name attribute. By doing this we specify that the name of the token claim containing a list of roles is roles.
Select the Add to userinfo checkbox.