4. Advanced Notifications with Message Templates
Before we begin, please ensure the Notifications add-on is installed. If it is not currently installed, please install it before continuing.
In this section, you will:
-
Set up the Notifications add-on.
-
Create a
Plain texttemplate using the template editor. -
Add parameters to a template.
-
Create a notification that leverages this template, demonstrating its practical application.
Setting Up the Notifications Add-on
For a detailed example of configuring the Notifications add-on, please refer to the Configuration section. Here, we’ll provide a concise overview of the key steps.
Proceed with the following actions:
-
Create a set of
NotificationTypeinstances and register them viaNotificationTypesRepositorywithin your main application class:@Autowired private NotificationTypesRepository notificationTypesRepository; @EventListener public void onApplicationContextRefreshed(final ContextRefreshedEvent event) { notificationTypesRepository.registerTypes( new NotificationType("info", "INFO_CIRCLE"), new NotificationType("warn", "WARNING") ); } -
Add a notification indicator component to the
main-view.xmlfile:<mainView xmlns="http://jmix.io/schema/flowui/main-view" xmlns:ntf="http://jmix.io/schema/notifications/ui" title="msg://MainView.title"> <navigationBar> <header id="header" classNames="jmix-main-view-header"> <drawerToggle id="drawerToggle" classNames="jmix-main-view-drawer-toggle" themeNames="contrast" ariaLabel="msg://drawerToggle.ariaLabel"/> <h1 id="viewTitle" classNames="jmix-main-view-title"/> </header> <ntf:notificationsIndicator id="ntfIndicator" classNames="me-m"/> </navigationBar>
Creating Message Template
Launch the application. Navigate to the Message Templates view. Click the Create button to start creating a new template.
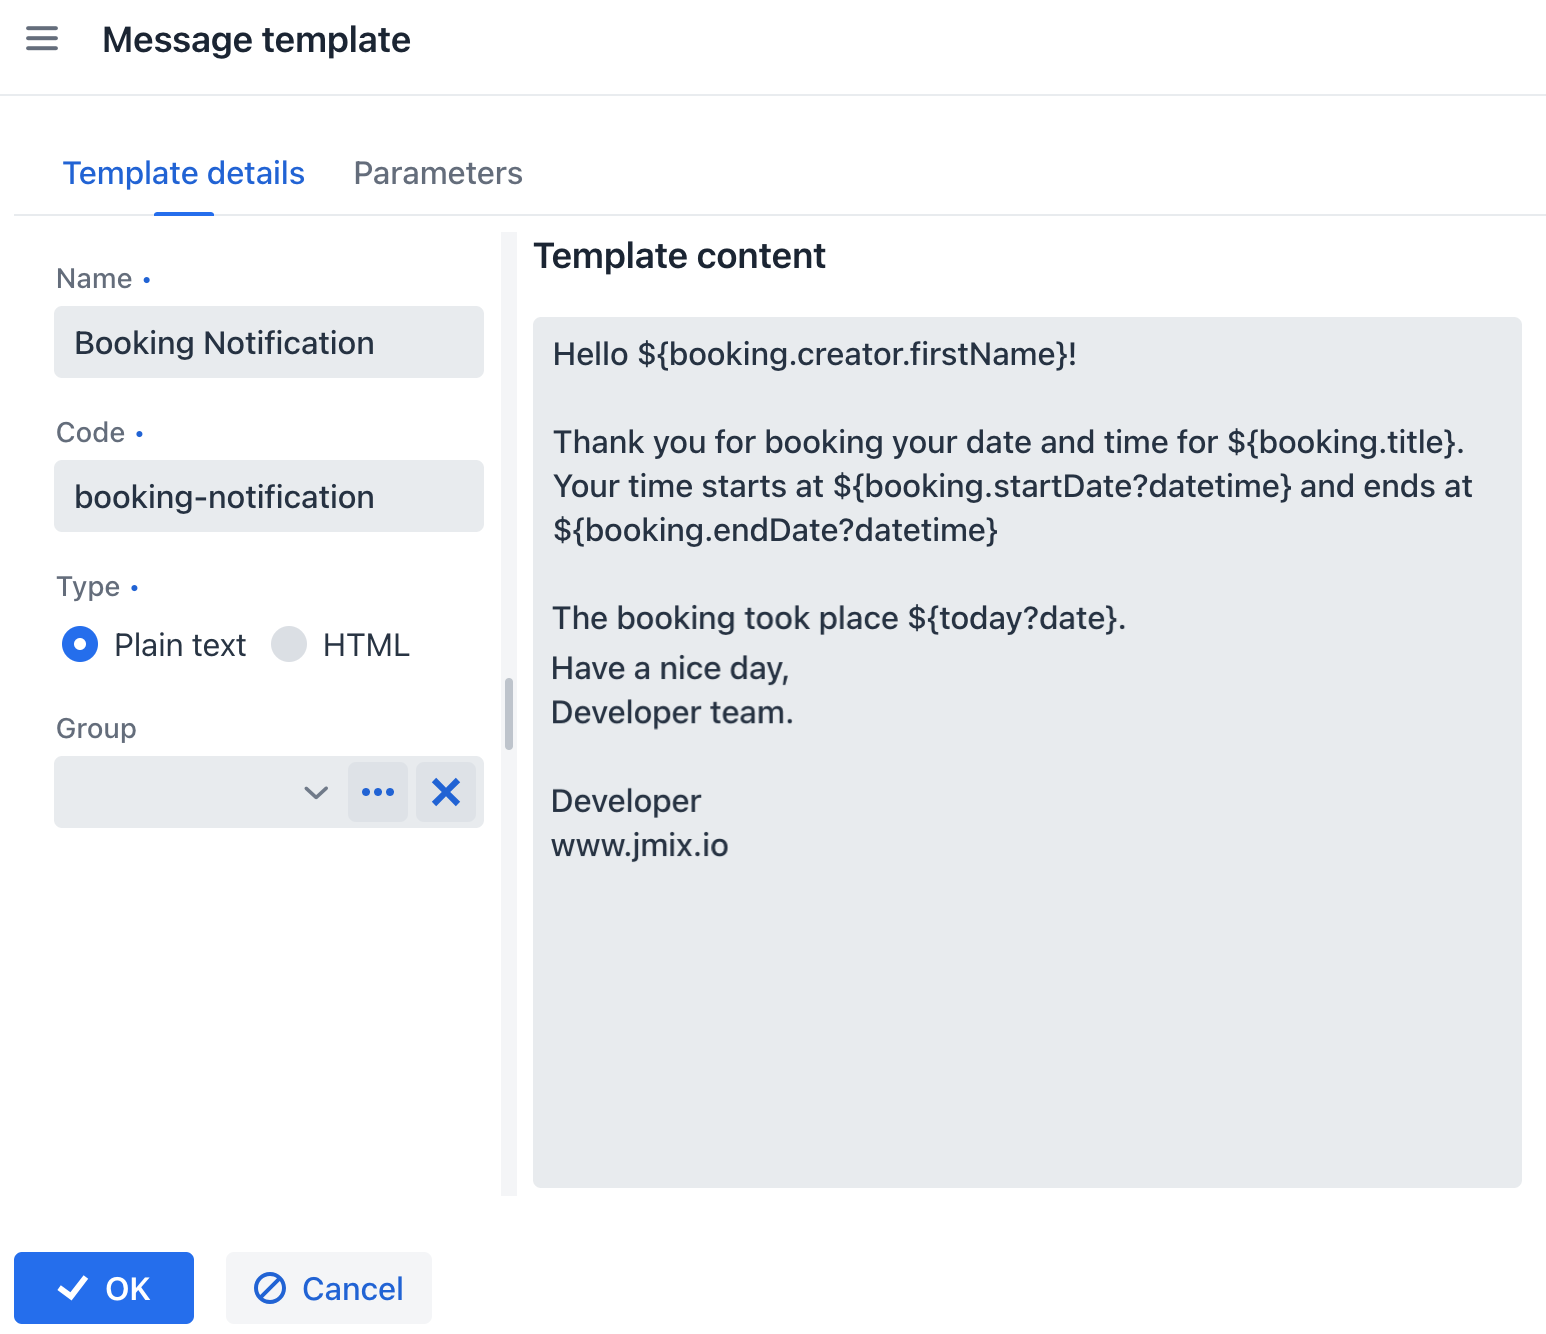
After clicking Create, the template designer will open. Configure the template as follows:
-
Name: Enter a user-friendly name for the template, such as
Booking Notification. -
Code: Set the template code to
booking-notification. -
Type: Select Plain text as the template type.
-
Content: Define the content of the template:
Hello ${booking.creator.firstName!"Guest"}!

Thank you for booking your date and time for ${booking.title}.
Your time starts at ${booking.startDate?datetime} and ends at ${booking.endDate?datetime}

The booking took place ${today?date}.

Have a nice day,
Developer team.

Developer
www.jmix.io
This template is formatted using placeholders with Apache FreeMarker Template Engine syntax.
Adding Template Parameters
Switch to the Parameters tab of the template designer. Click Create and add two parameters:
-
Booking
-
Name: Booking
-
Alias: booking
-
Type: Entity
-
Entity: Booking
-
-
Today
-
Name: Today
-
Type: Date
-
Once the template is configured, save it.
Creating a Notification
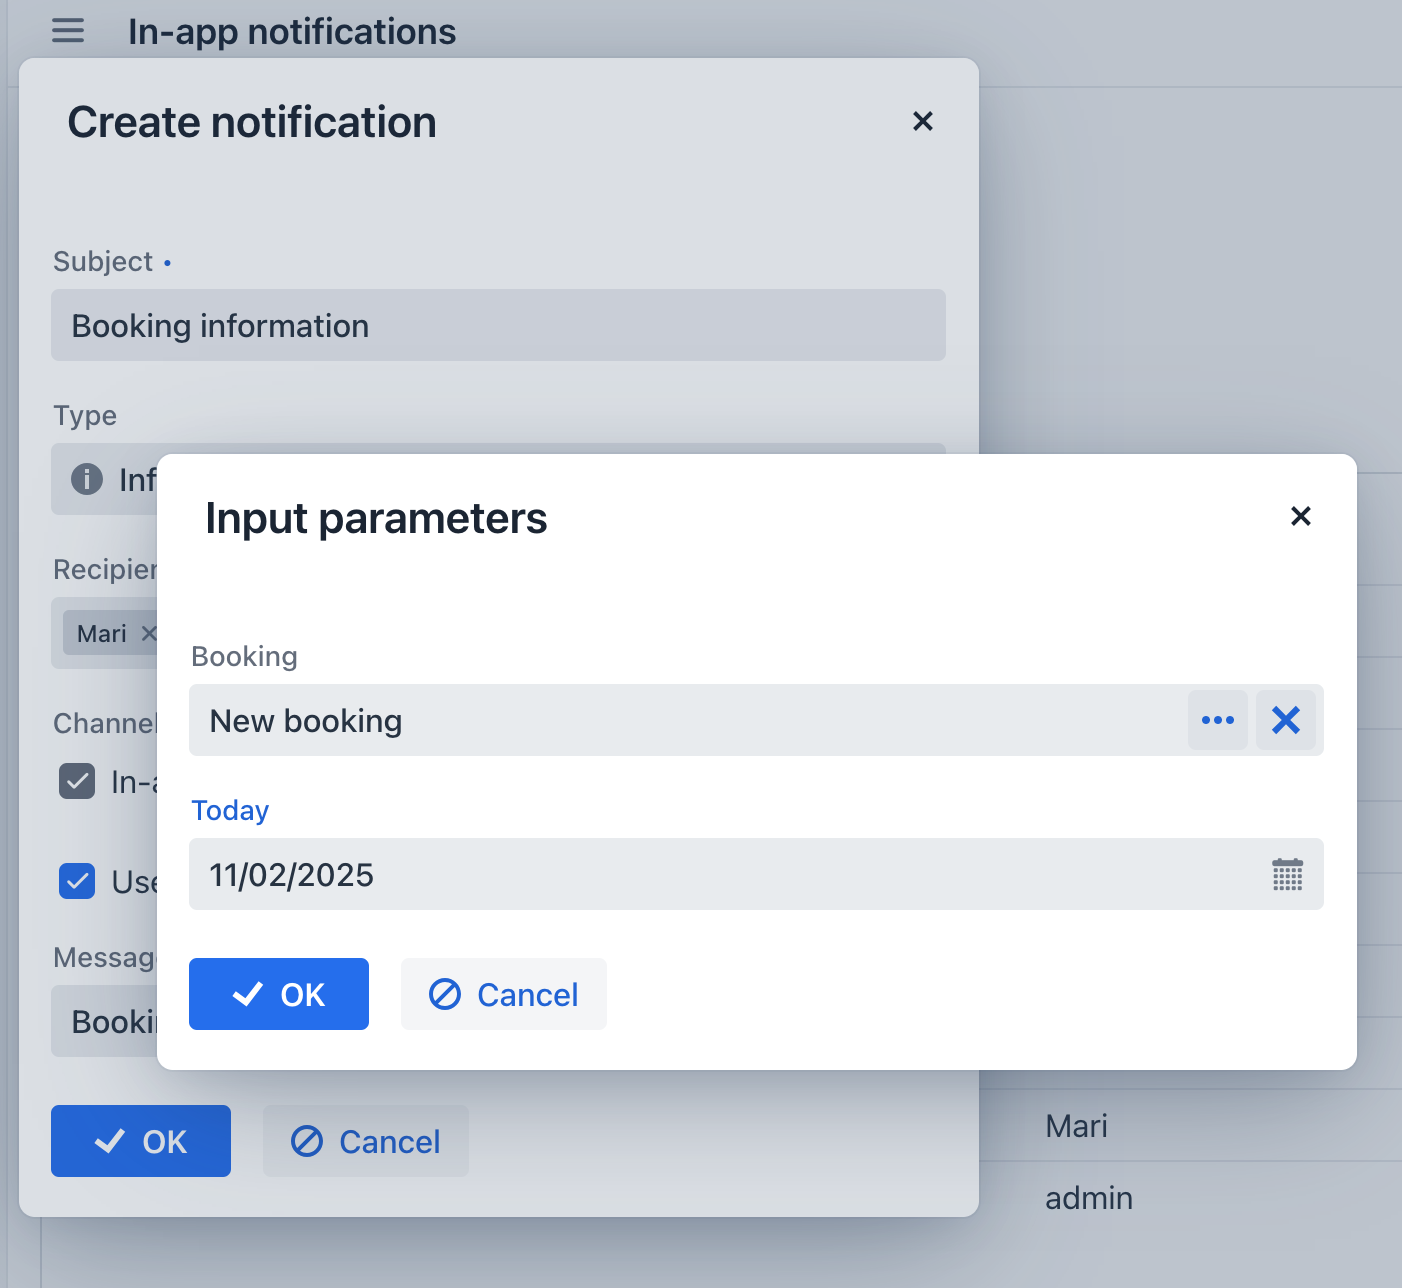
Navigate to the Notifications view. Click the Create notification button to begin creating a new notification. Configure the notification as follows:
-
Subject: the subject of the notification -
Booking information. -
Type: select the notification type you created earlier in this section. Choose
Info. -
Recipients: list of recipients of the notification. Start typing a username in the field, and select the appropriate users from the list.
-
Select the Use message template checkbox and choose the previously created template,
Booking Notification. -
Enter the parameter values.
-
Click OK. The notification will then be saved and displayed to the specified user.
Viewing Notification
Log in as the Mari user.
|
Note that user
|
Look for the notification indicator in the upper-right corner of the main view and click it. Then open a notification to view its full content:
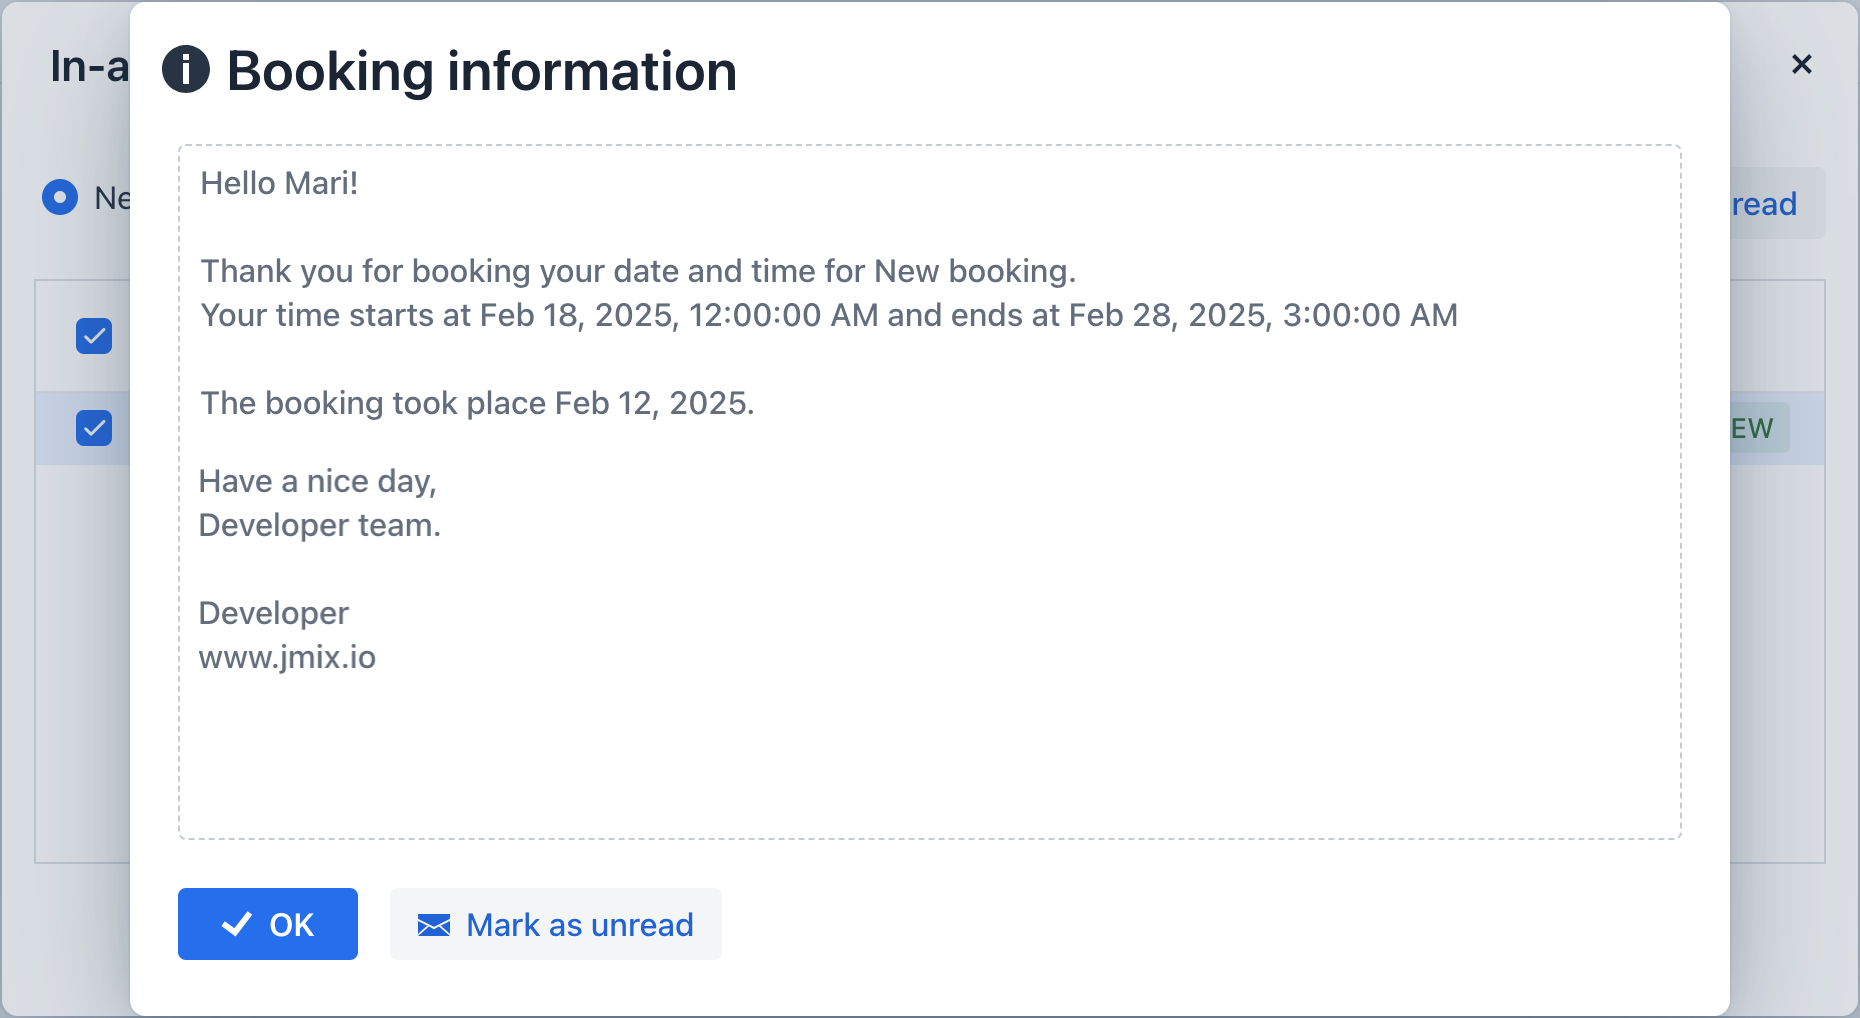
You’ll notice that the parameter values you provided when creating the notification have been automatically inserted into the corresponding placeholders within the message template, personalizing the notification content.