Reverse Engineering
Studio allows you to create the data model and standard UI views for an existing database.
First, you should create an additional data store or change your main data store to point to an existing database.
Right-click the data store item in the Jmix Tool Window and select Generate Model from Database in the context menu.
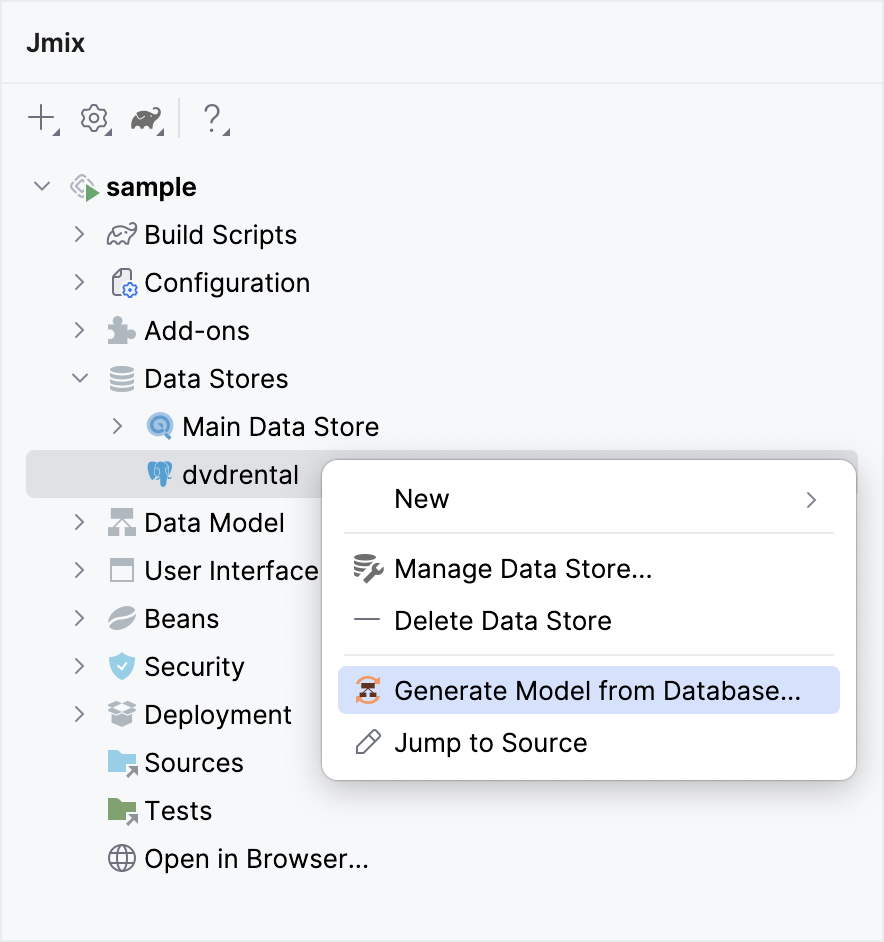
Then Studio opens the Generate Model from Database wizard.
Generate Model from Database Wizard
- Step 1
-
This is the first step of the model generation wizard. Click Refresh List.
The wizard displays the list of tables that have no corresponding entities in the project’s data model. You can use the filter field above to find a table by its name.
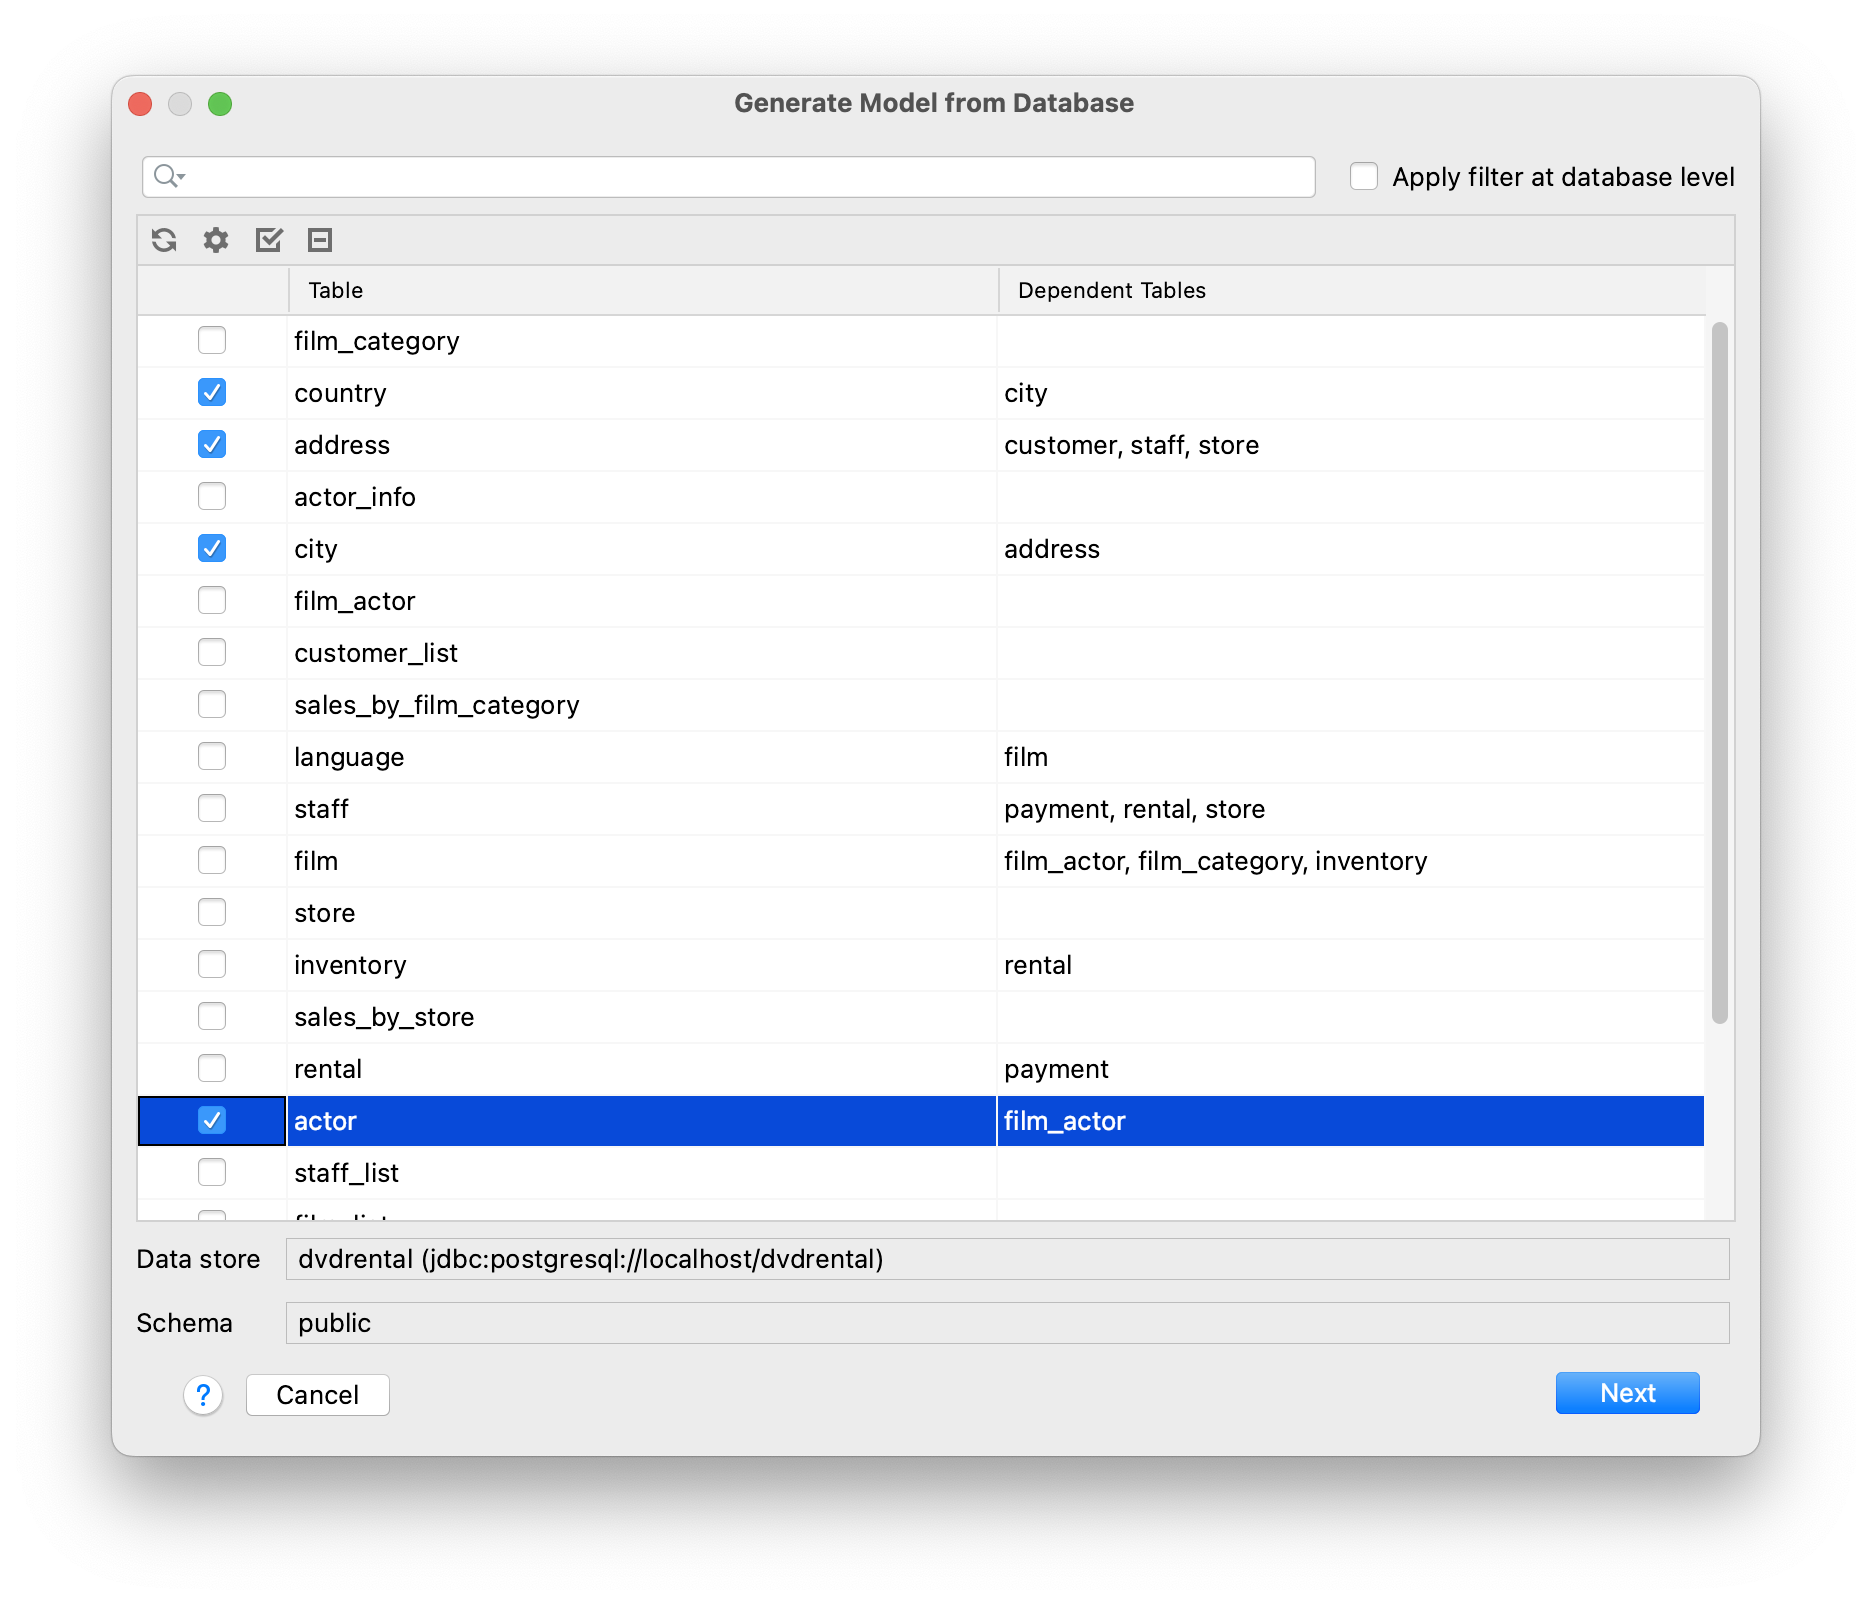
Select tables that you want to map to the data model. Some tables depend on others through foreign keys, so when you select a table, all tables that it depends on also become selected. If you deselect a table, all dependent tables become deselected too.
You can click on the
 and
and  checkboxes to select or deselect all available tables.
Optional step: click
 to set up a Java package for new entities and default mappings for system attributes.
For example, if all or most of the tables in your database contain
ModifiedandModifiedBycolumns, you can map them tolastModifiedDateandlastModifiedByattributes of created entities. In this case, you don’t need to map them individually for each table. Use the Exclude columns from mapping list to not map certain columns automatically for all tables.Click Next.
- Step 2
-
At this step, you can review and edit automatically generated mappings for the selected tables.
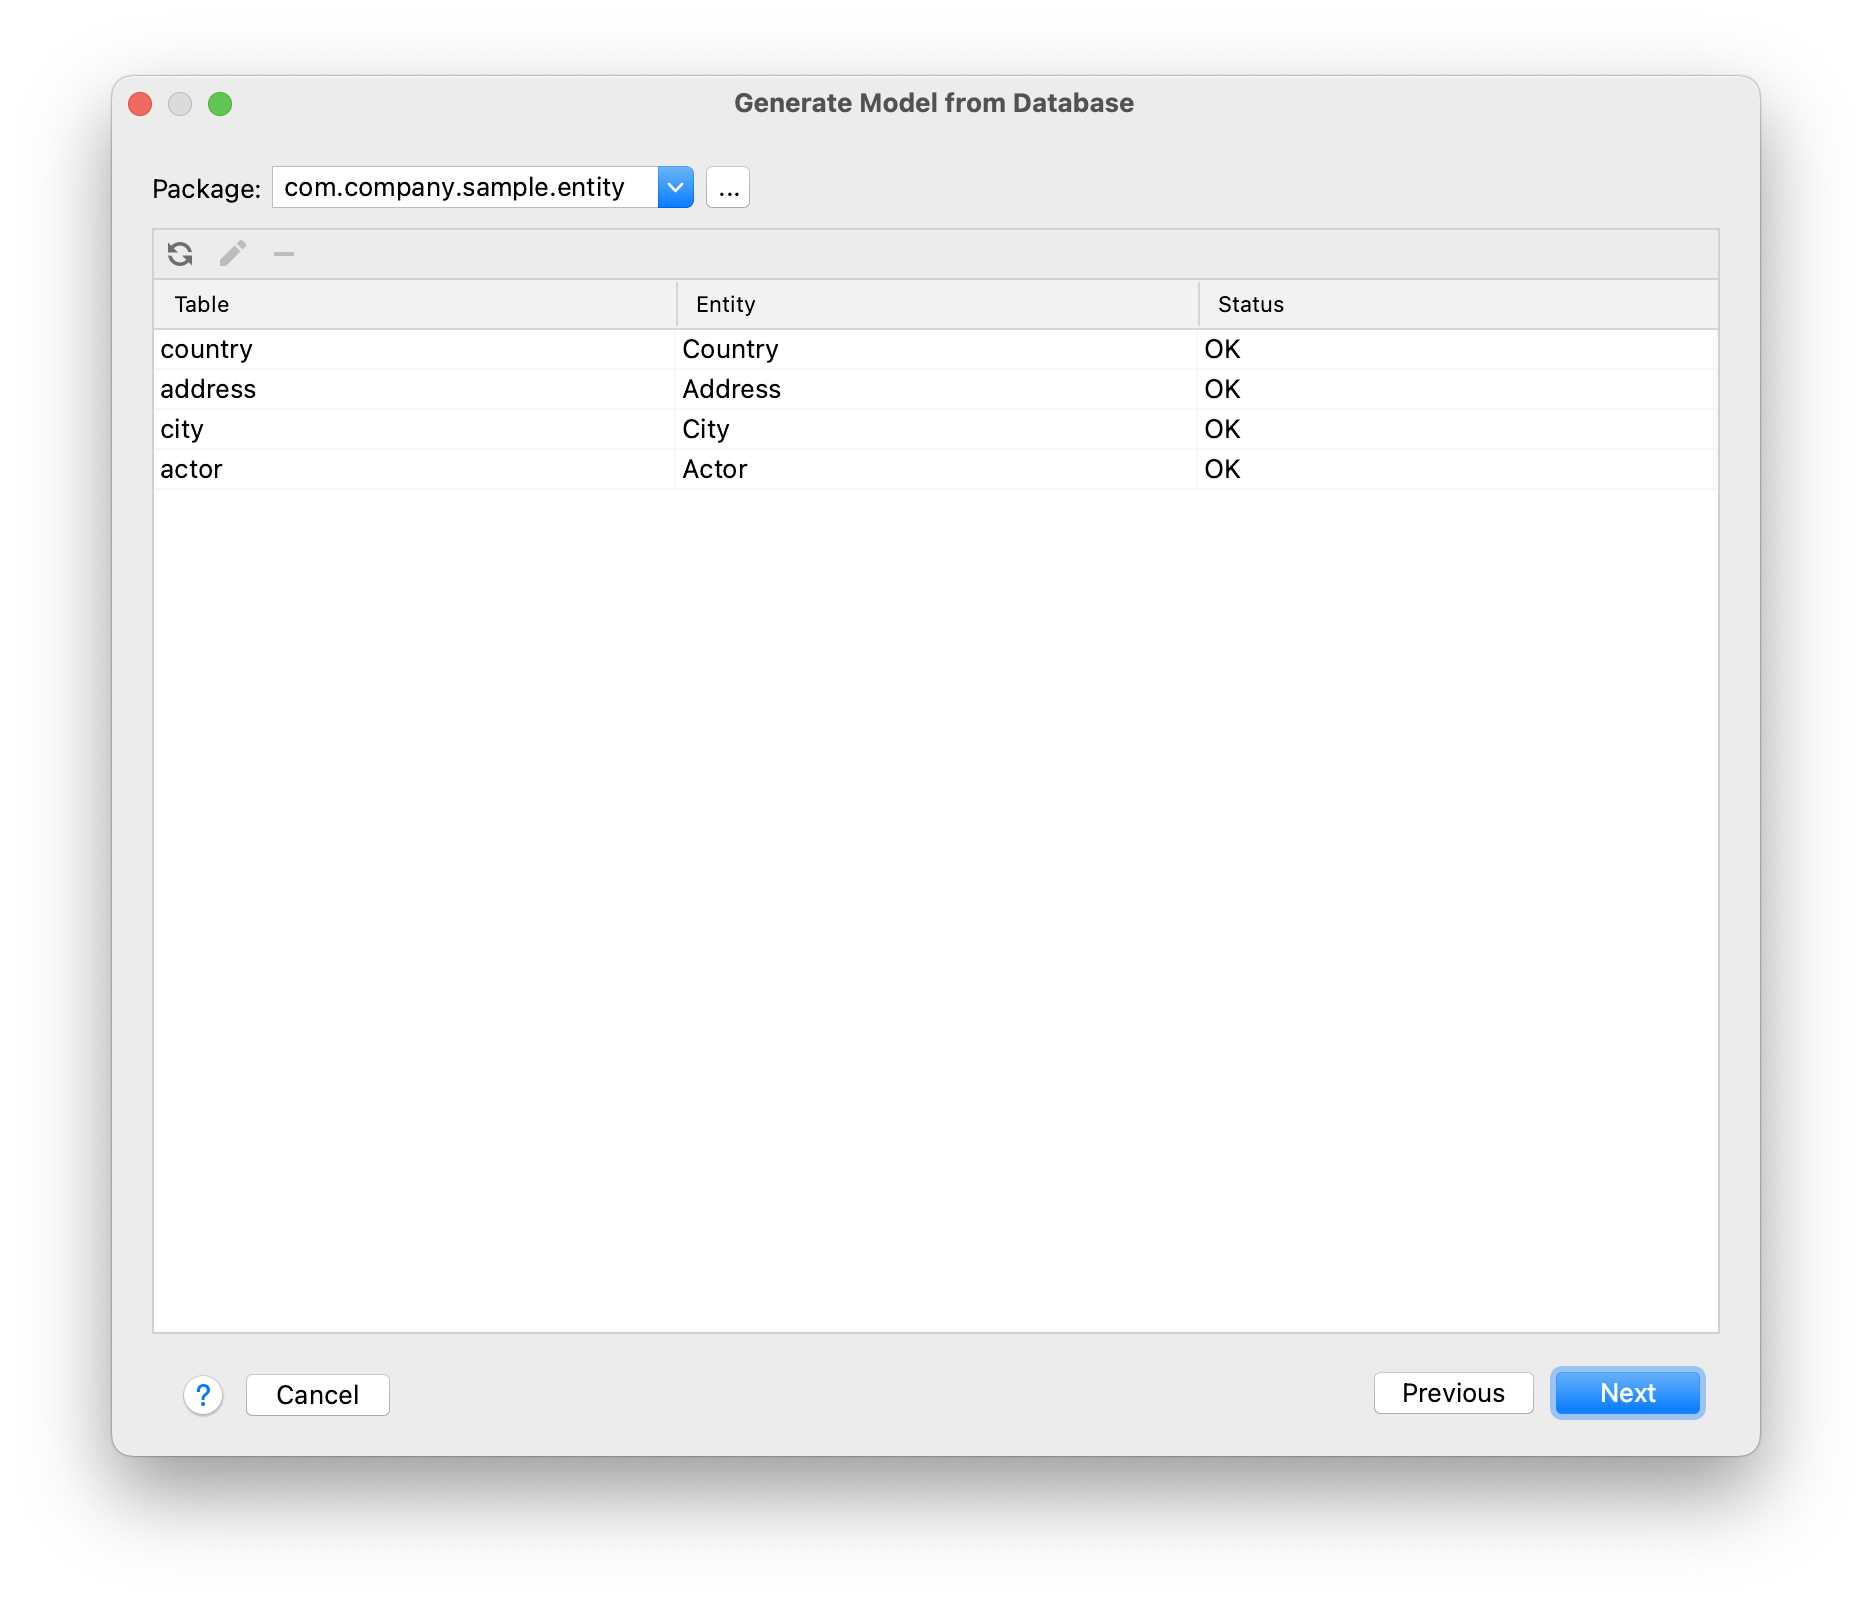
The Status column describes the result of the automatic mapping:
-
OK - the automatic mapping was successful, and all columns are mapped to a new entity.
-
Join table - a link between entities is recognized and mapped as a many-to-many join table.
-
Composite key - Jmix Studio creates an entity that is a composite key.
-
Composite PK will be replaced - the table has a composite primary key, but no other tables reference it. The composite PK will be replaced by the primary key of the UUID type.
-
New PK will be created - the table has no primary key. A new PK of the UUID type will be created.
-
PK is an identity field - the table has a primary key, which is an identity field. Its values are managed by the server and usually cannot be modified.
-
There are unmapped columns - some columns cannot be mapped to a new entity.
-
Composite PK referenced by other tables - the table has a composite primary key, and some tables reference it. Studio cannot map such a table.
-
Choose primary key for DB view - it’s a database view, and you should select a column or a set of columns suitable for the entity identifier. In this case, click the Choose PK button and select columns for the primary key.
-
Unsupported PK type - the table has a primary key of an unsupported type. Studio cannot map such a table.
The
 button allows you to re-launch automatic mapping for the selected table. For example, you can go to a database SQL tool, make some changes in the database schema, then return to the wizard and launch the mapping procedure again.
The
 button opens a dialog window with the mapping details. There you can change the entity name and the list of system interfaces implemented by the entity class. It will affect the number of system columns being created for compatibility with Jmix entities.
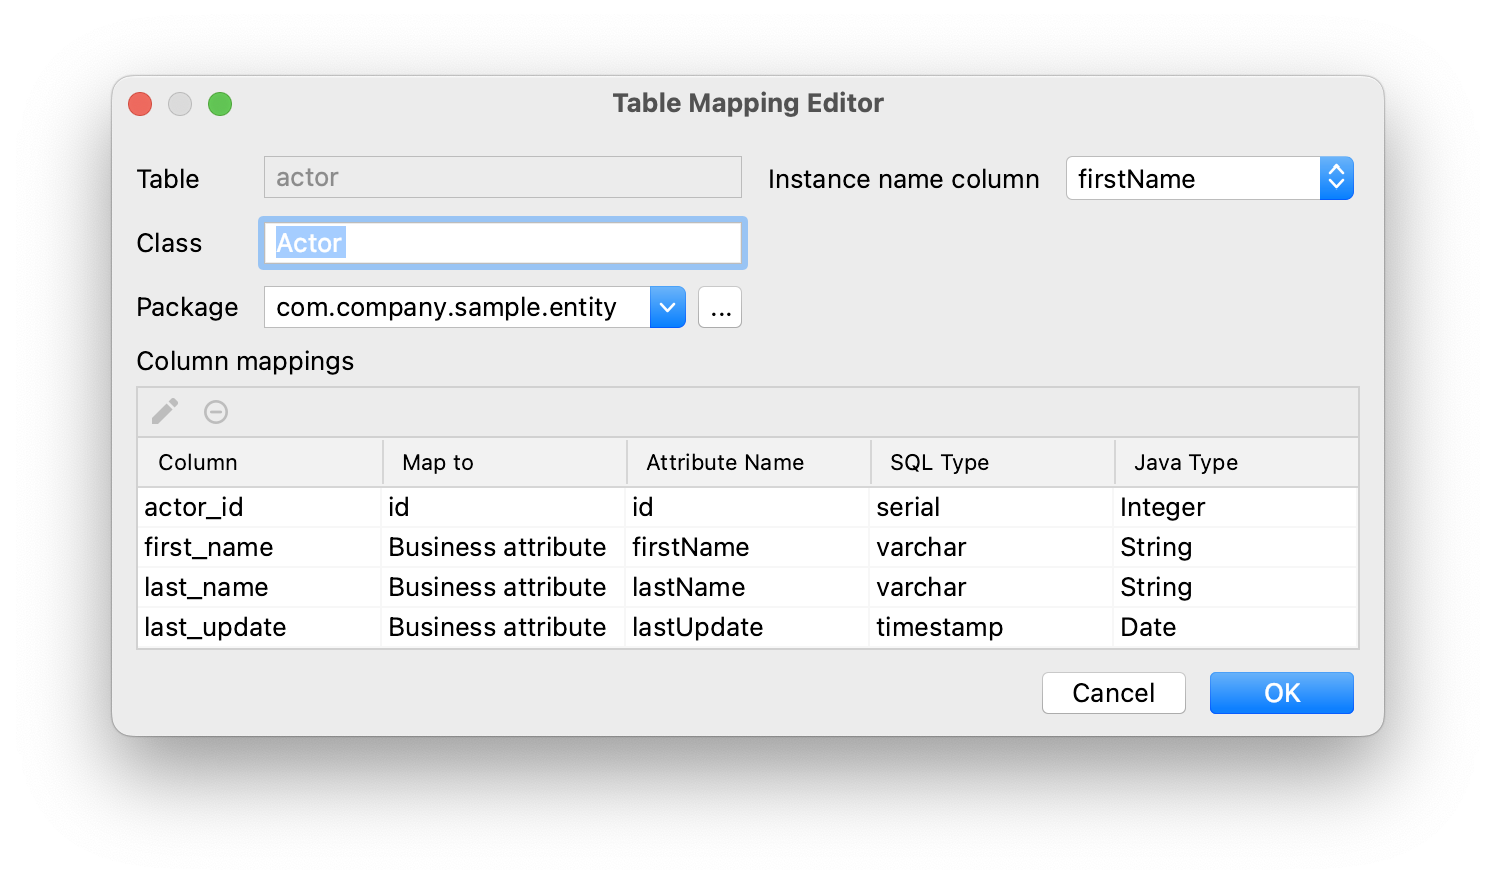
The Choose PK button appears instead of Edit mapping when a database view is selected, and you need to select columns for the entity identifier.
By clicking Previous, you can go to the previous step to select or deselect tables.
Click Next to go to the next step.
-
- Step 3
-
At this step, you can specify what UI views should be created for new entities.
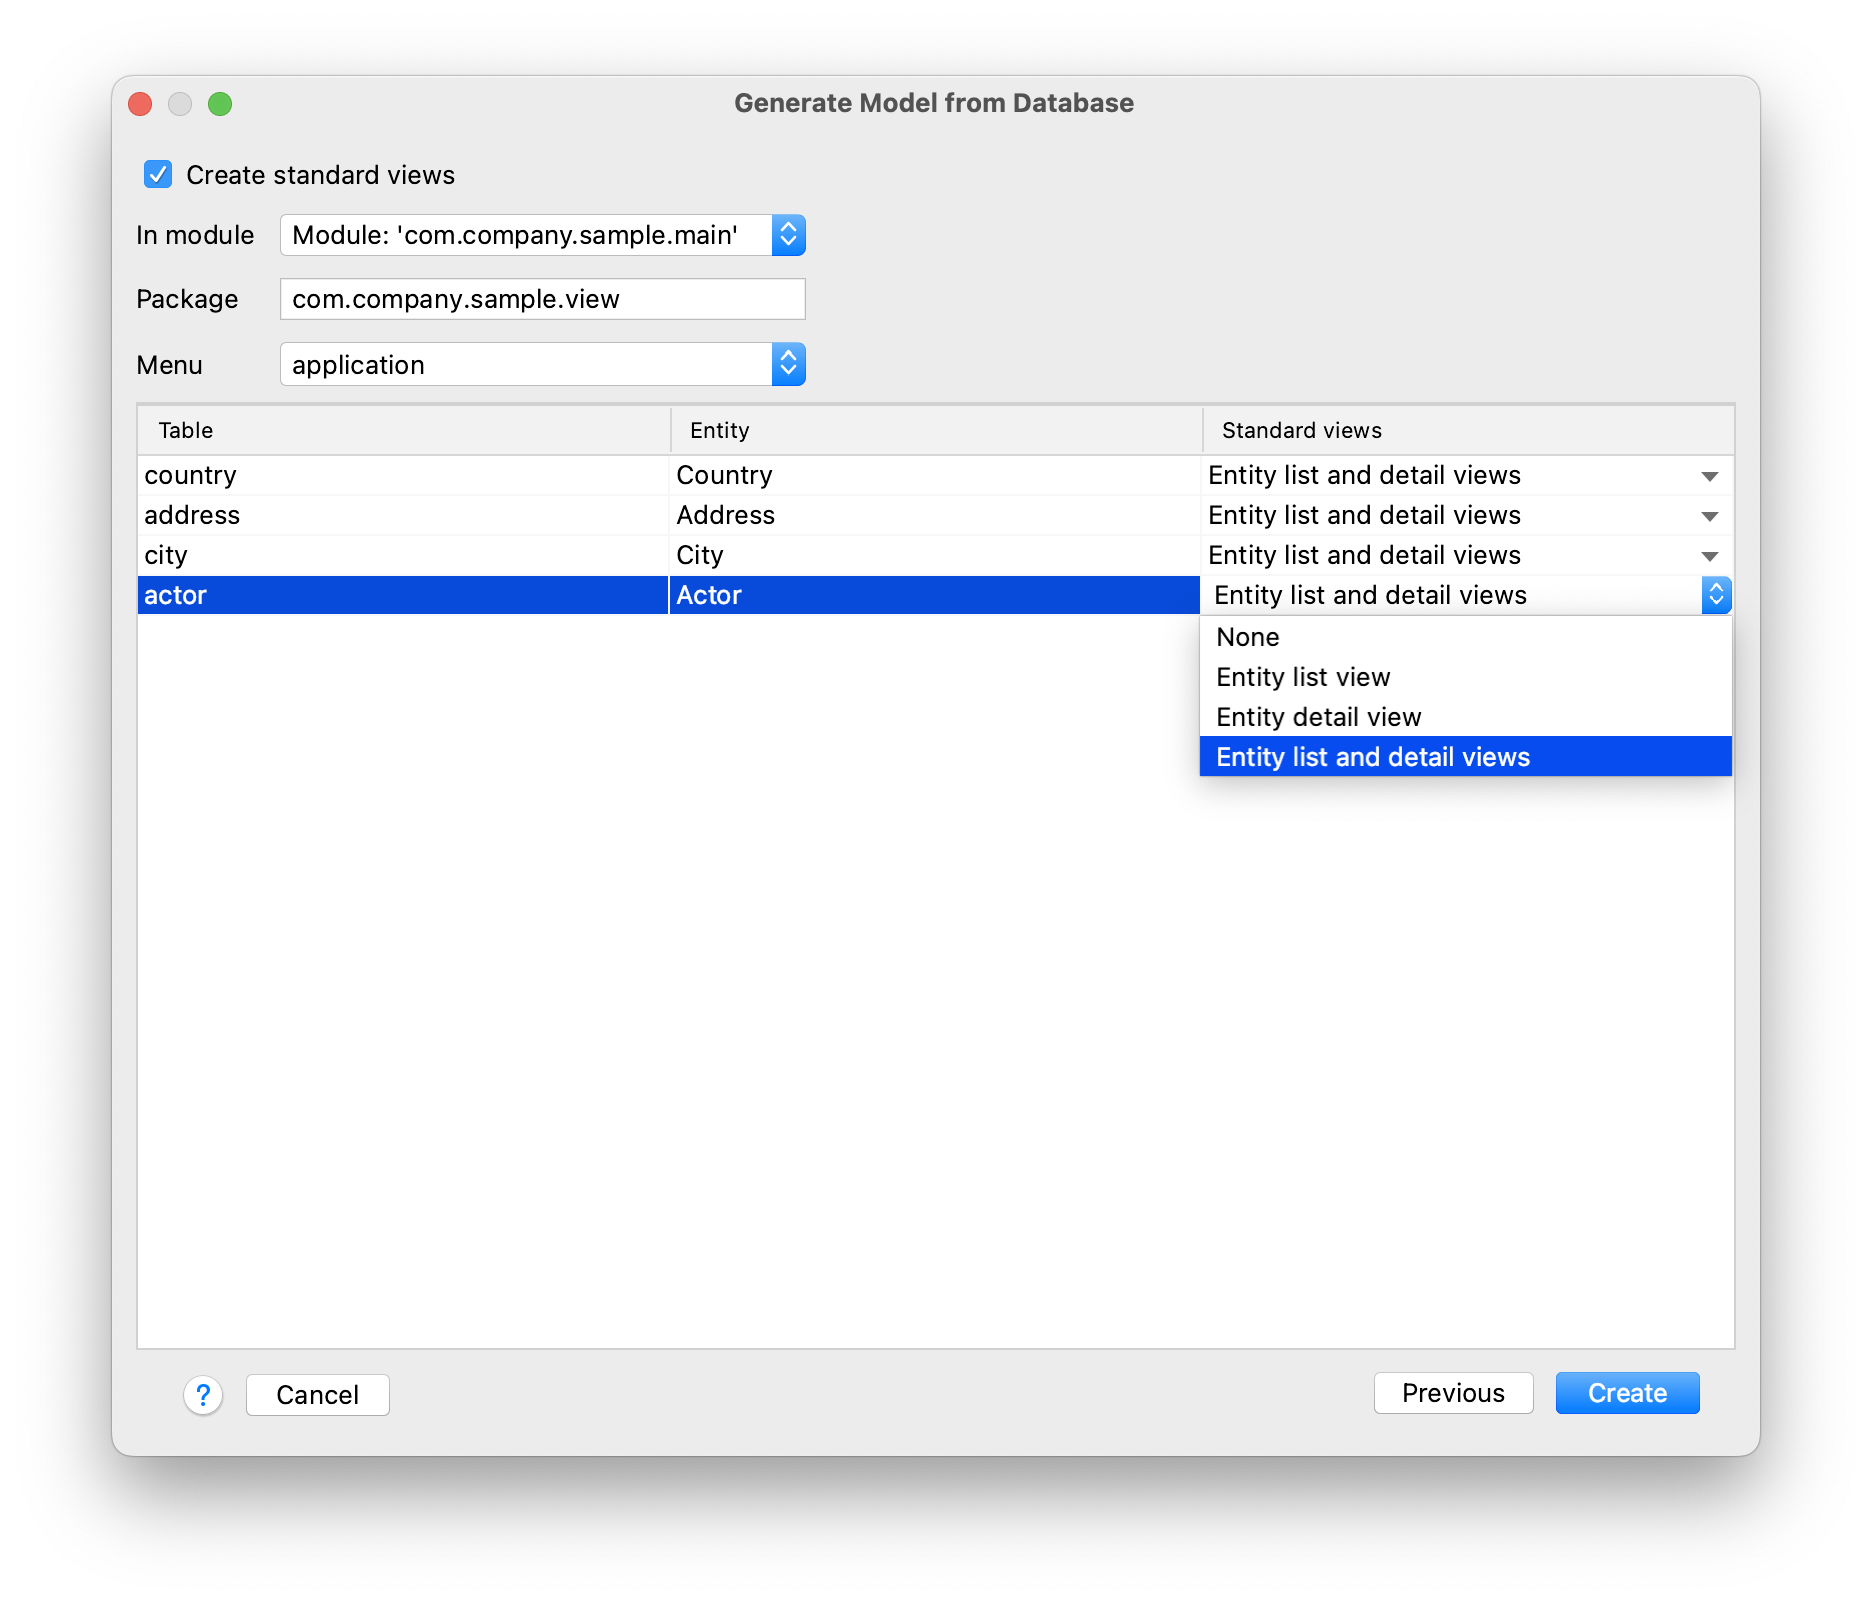
If you deselect the Create standard views checkbox, Studio will not generate UI for the new entities.
Use the In module, Package, and Menu fields to specify where to place the views source code and where to display them in the main menu.
Use the drop-down list in the Standard views column to select what types of views to generate.
You can safely skip this step and generate UI views for your entities later after finishing the model generation process.
Click Create. Studio will generate entities and views.
When Studio creates entities based on their table definitions, it marks entities with @DdlGeneration(value = DdlGeneration.DbScriptGenerationMode.DISABLED)annotation. It means that Liquibase changelogs won’t be generated for such entities. To enable Liquibase script generation for imported entities, you can just remove this annotation (or change the corresponding setting in the entity designer).
Partial Reverse Engineering
This feature enables you to generate entity attributes from the database schema for already mapped entities. This is particularly useful when developers make changes to the database schema first and need to subsequently synchronize the data model and user interface.
Jmix Studio can track database changes and assist in propagating these changes to your code, while preserving all existing custom code.
After making changes to database tables, you can generate the missing attributes in your JPA entity model. Use either of the following methods:
-
Click
 in the Attributes panel within the Entity Designer.
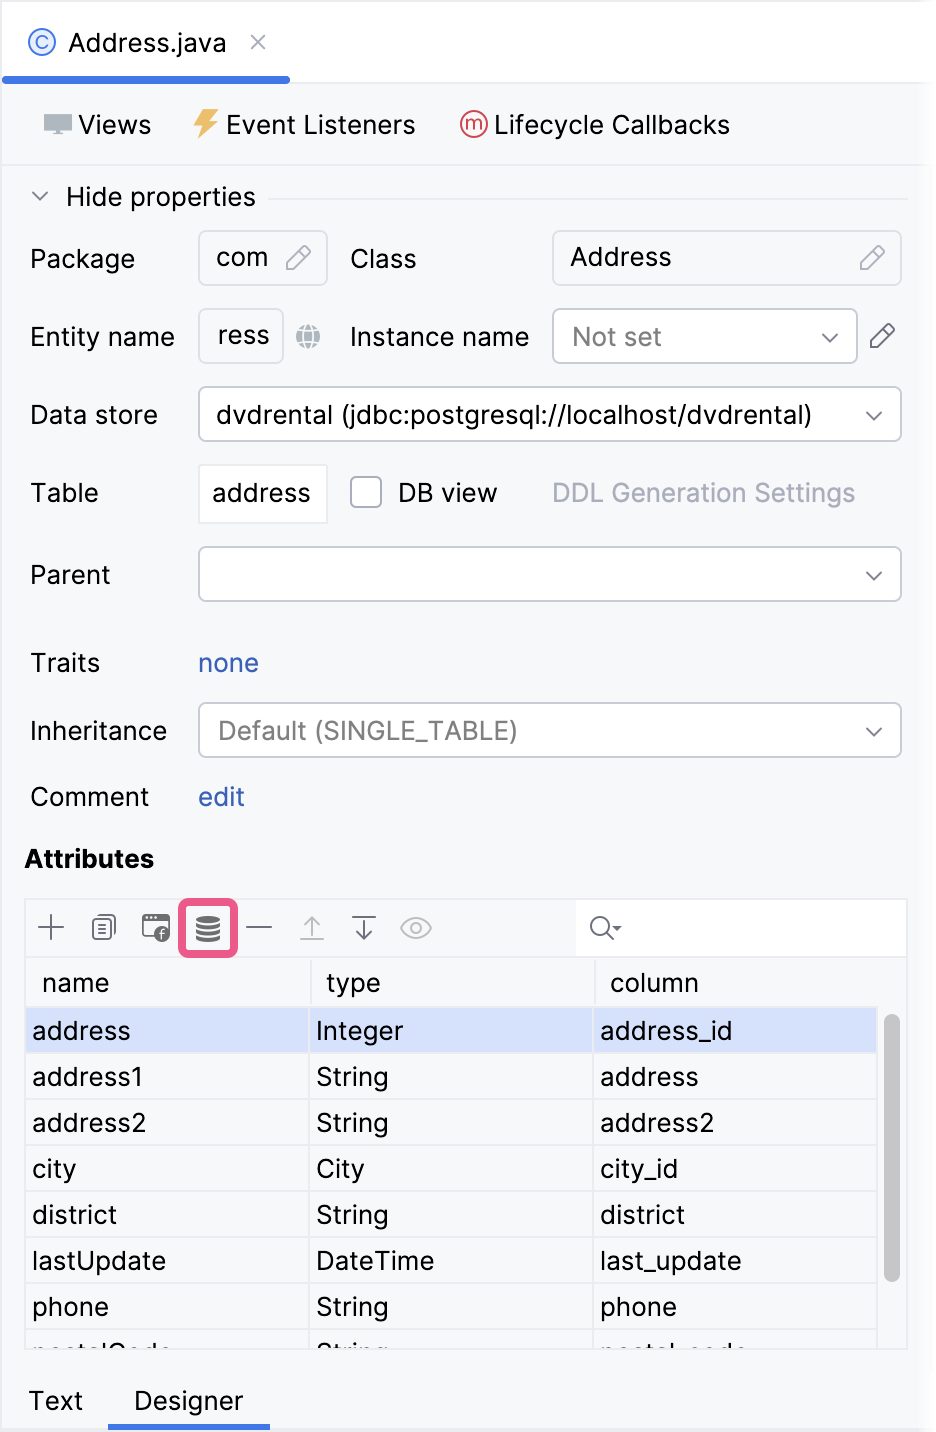
-
Click the Add attribute from DB button in the toolbar of the entity’s text editor.
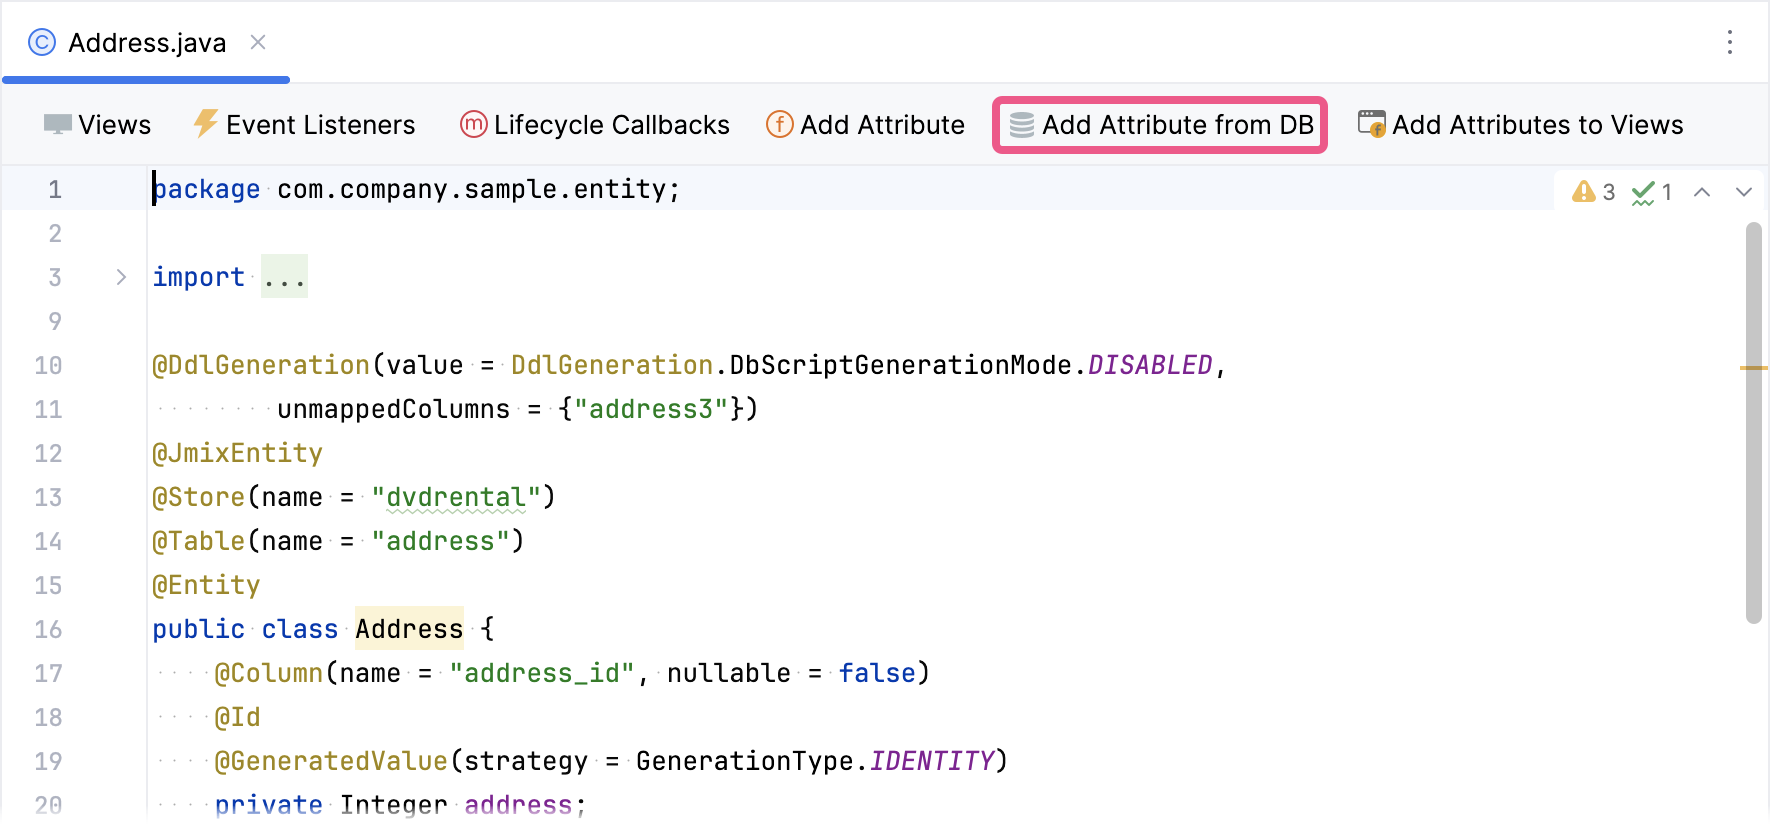
Clicking either button will open the Add Entity Attribute(s) from DB dialog.
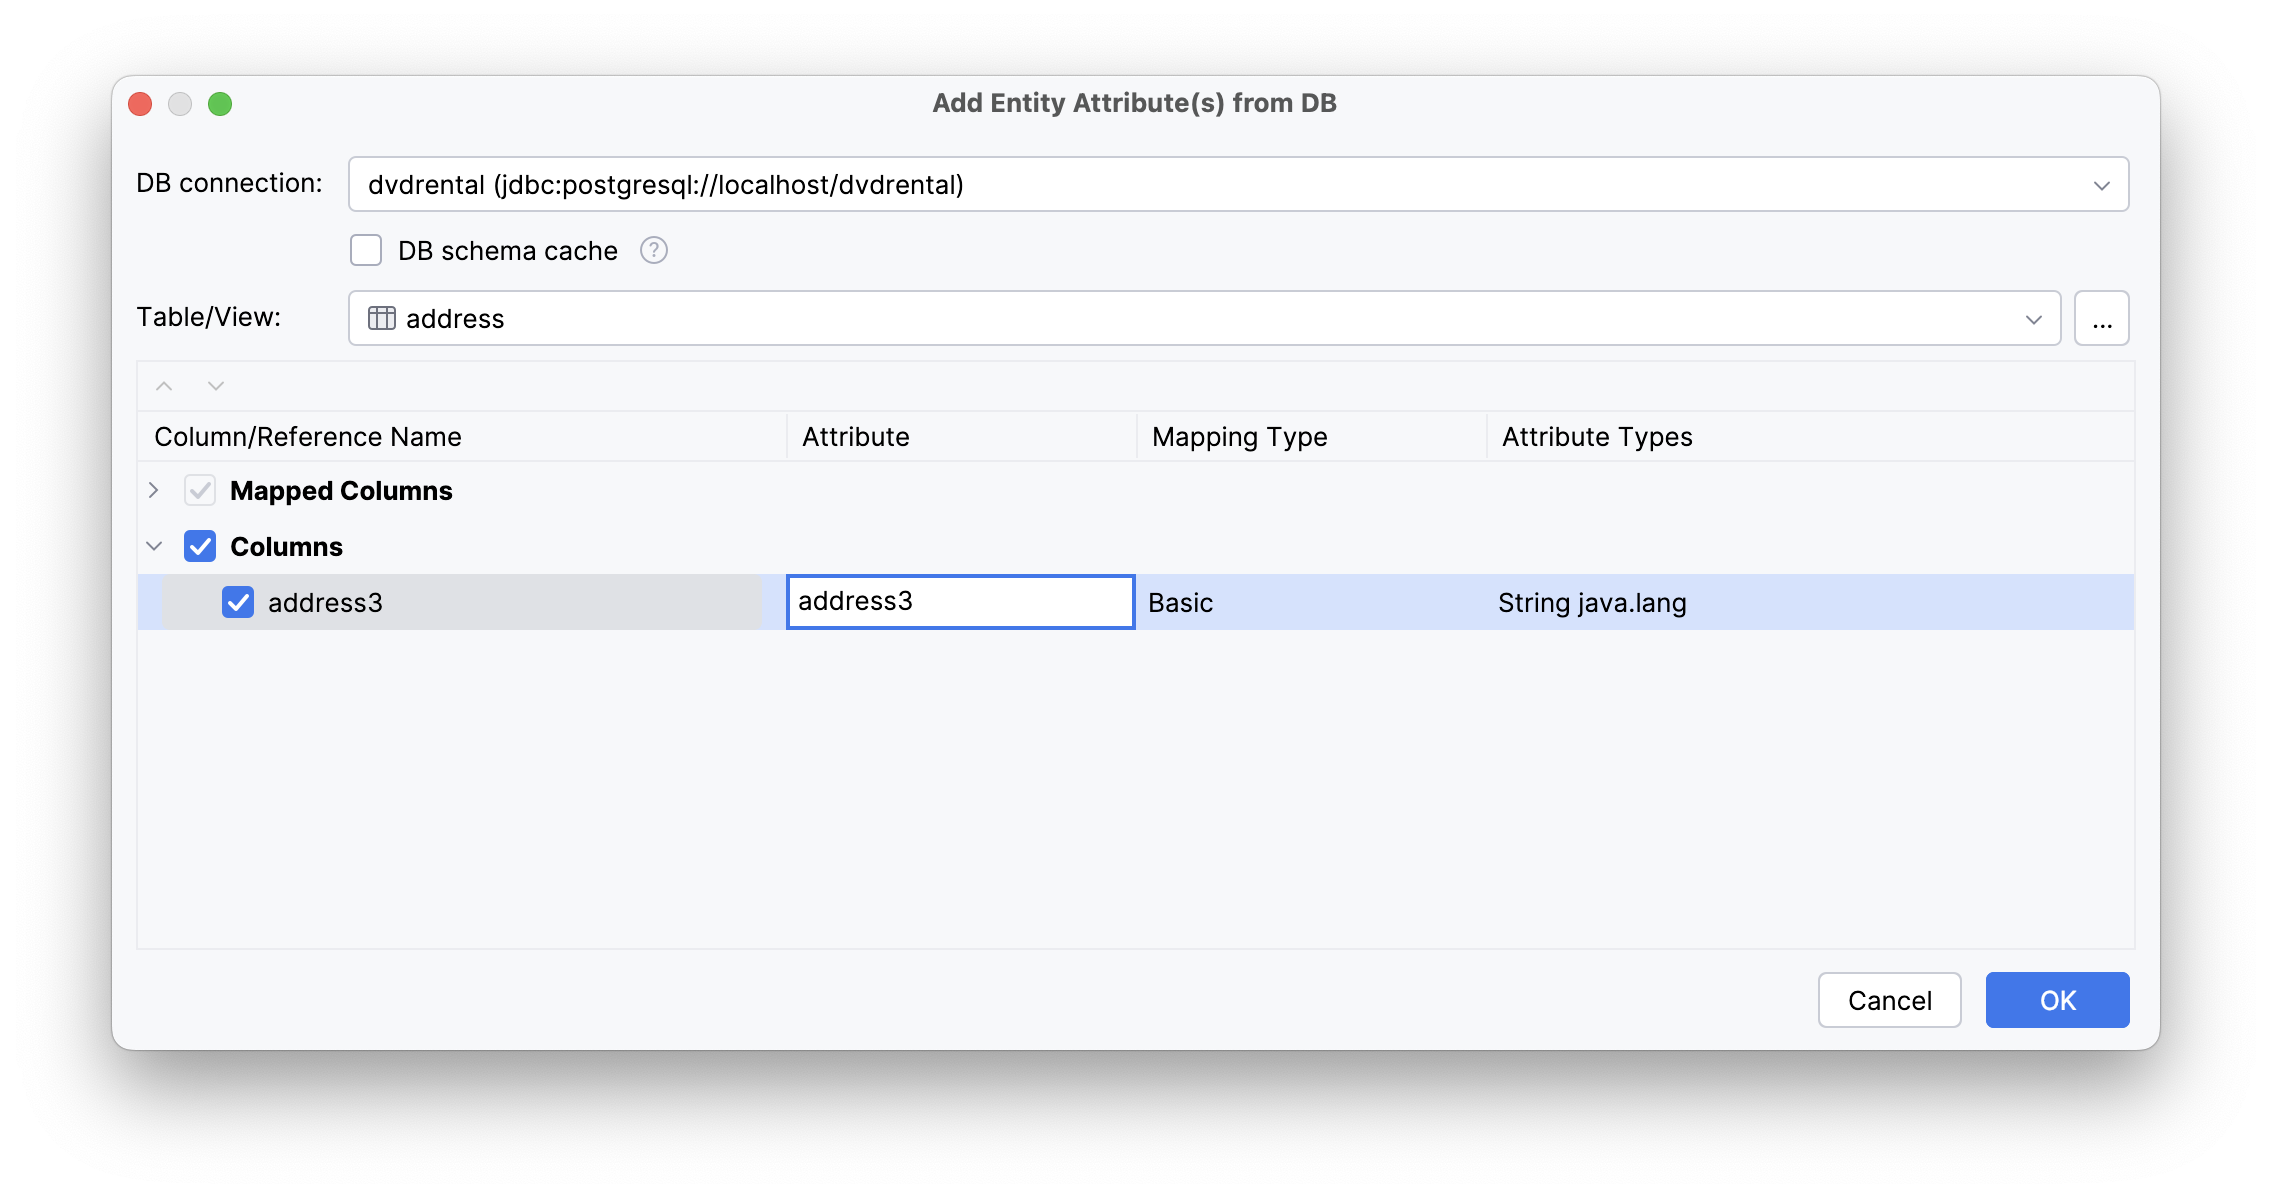
The address table is already selected in the Table/View dropdown field.
In the Columns section, select the new attributes you want to create. The cells in the table are editable, allowing you to:
-
Modify the attribute name.
-
Change the mapping type (for example, specify an enumeration type).
-
Select a different data type if the one suggested by Studio does not meet your requirements.
Click OK. The new attributes will be added to the existing Address entity without modifying any previously written code.
