Composite Projects
A composite project in Jmix refers to a project structure that organizes multiple related add-ons and applications into a single IDE project, regardless of whether they are located in the same source code repository or in different ones.
To learn about the motivation and background for this feature, see the Add-ons and Composite Projects article in the Jmix blog.
Creating Composite Project
To create an empty composite project, start the project wizard and select one of the Composite Project templates.
If you choose the Composite Project for Monorepo template, Studio will create a project with build files in the root folder:
root-dir/
    build.gradle
    settings.gradle
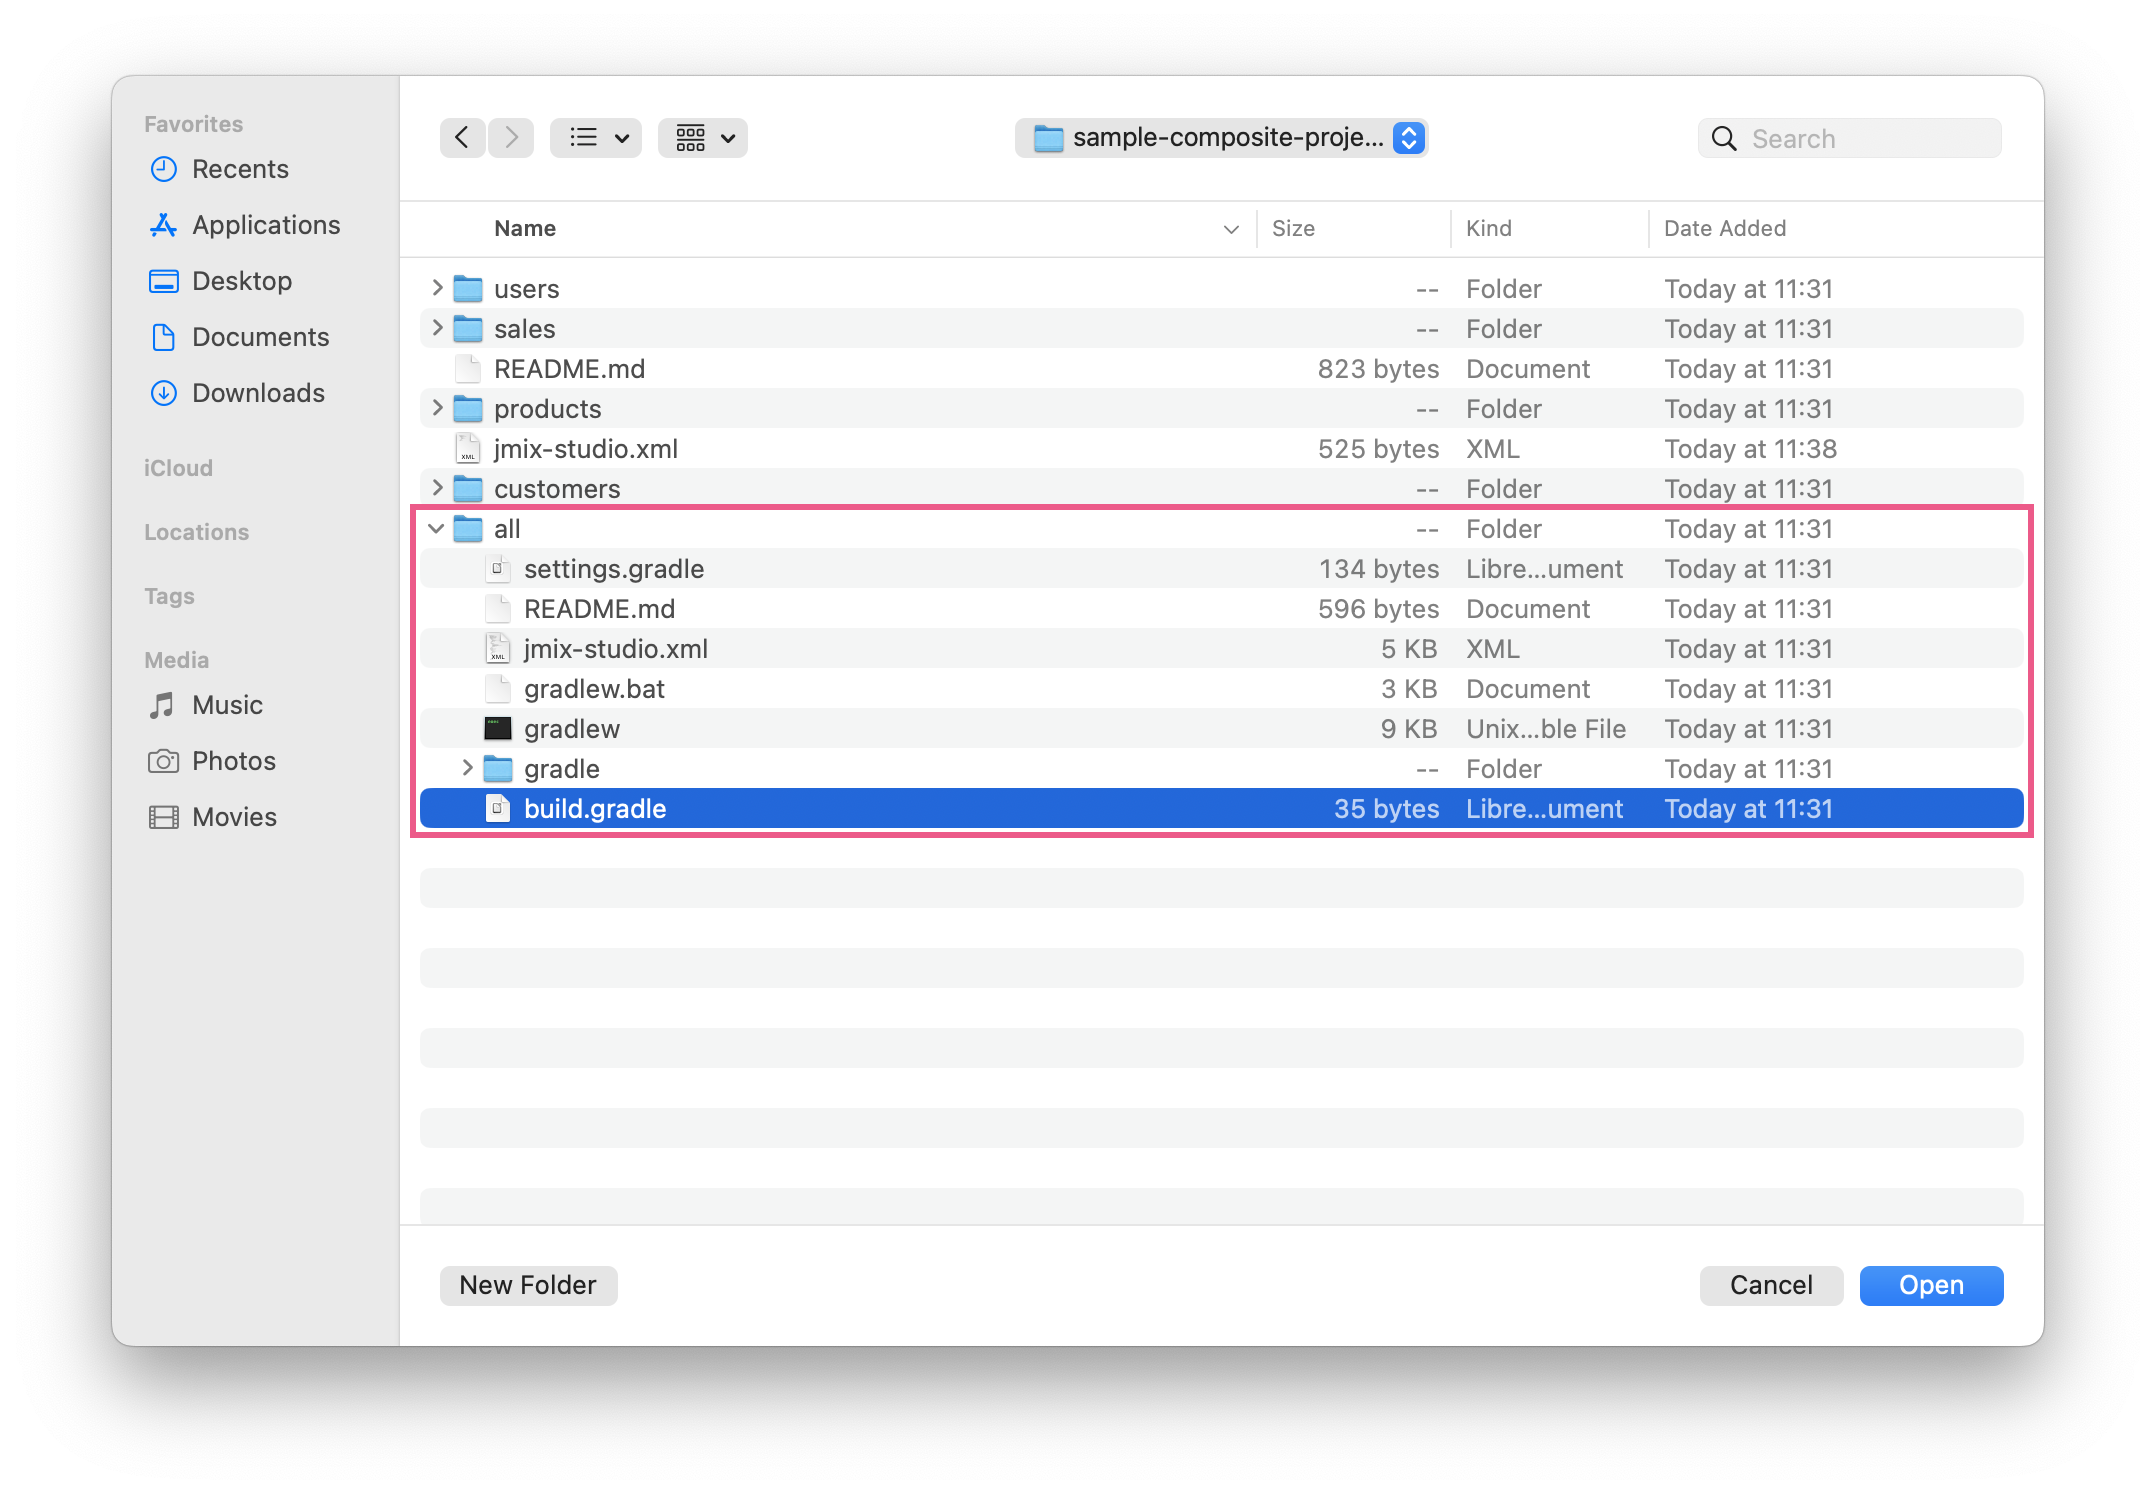
If you choose the Composite Project for Separate Repositories template, Studio will create a project with the following structure (provided that the project name is sales):
root-dir/
    sales-all/
        build.gradle
        settings.gradle
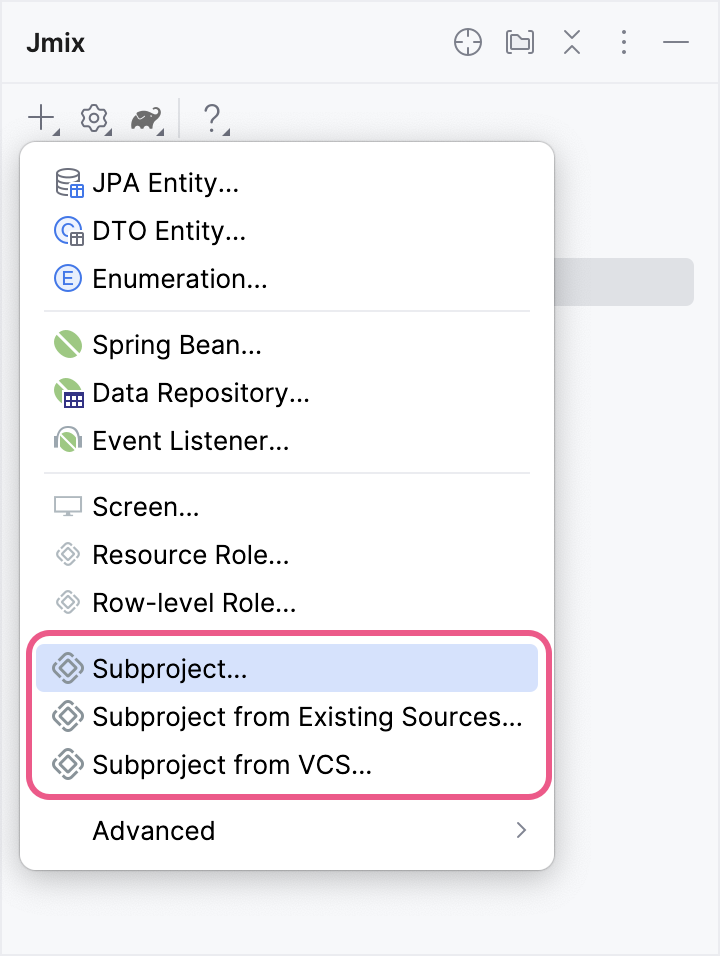
Then you can add subprojects by creating new add-ons or applications, checking out an existing project from VCS or just adding an existing folder with a project. Use New → Subproject actions of the Jmix Tool Window:
Studio shows the composite project and all subprojects as top-level nodes in the Jmix Tool Window:
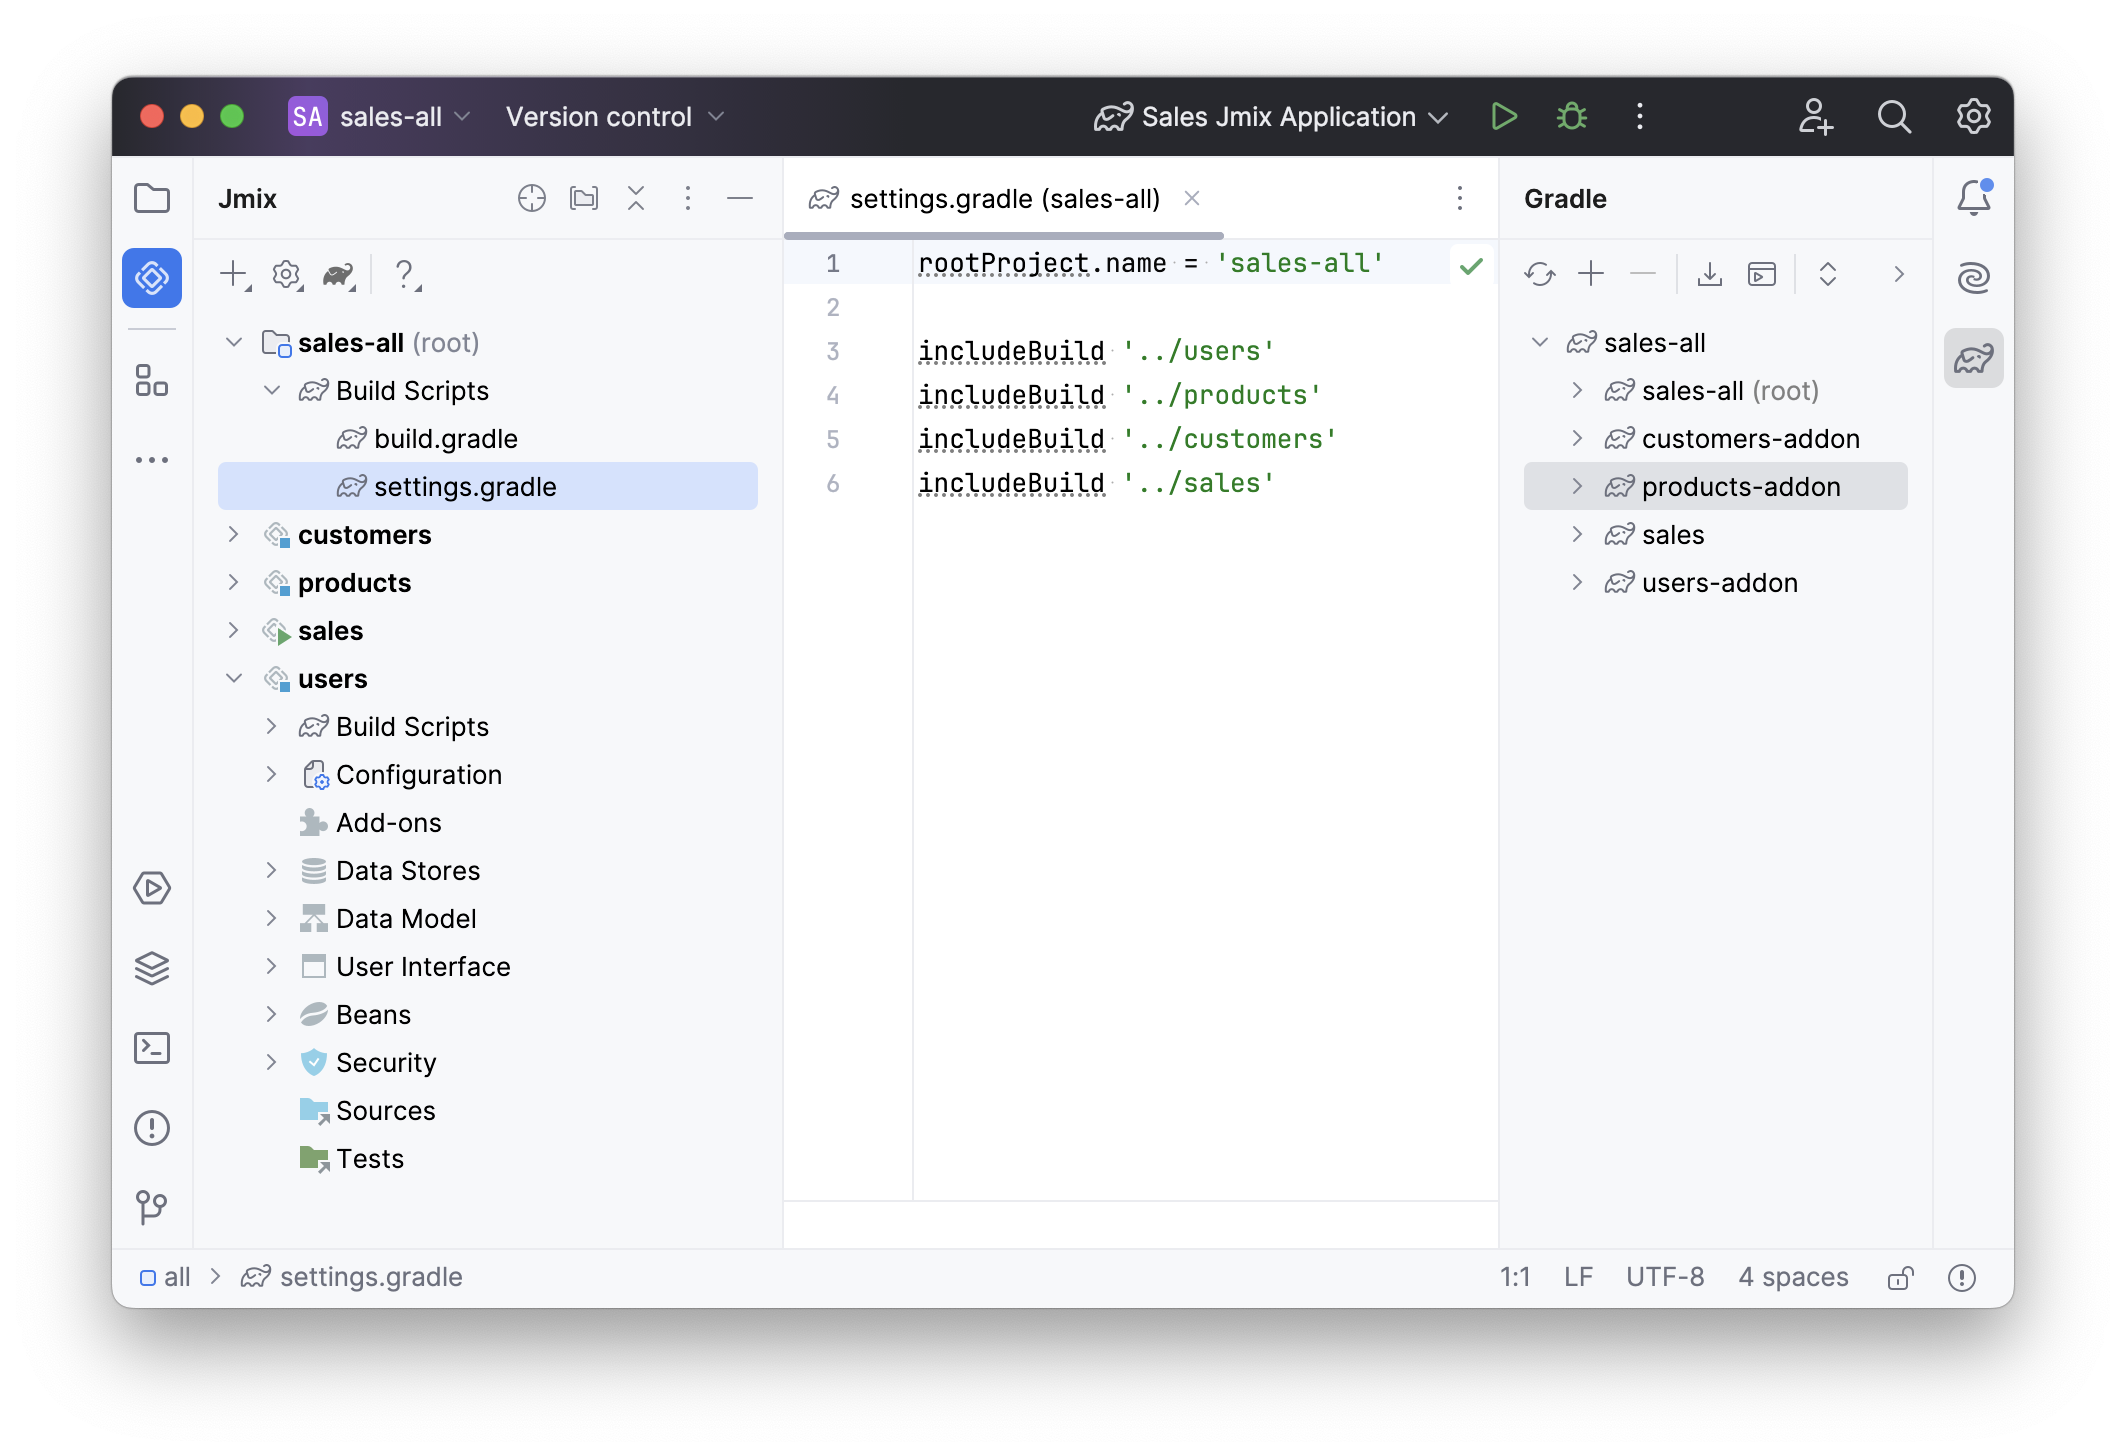
As you can see, the aggregator composite project’s settings.gradle file uses includeBuild instructions. These instructions are provided by the Gradle’s composite build feature.
In a composite build, Gradle replaces dependencies on artifacts with direct dependencies between subprojects. This means that changes made to an add-on immediately impact dependent add-ons and the application. IntelliJ IDEA perfectly imports such a project, recognizing the Gradle-defined dependencies. As a result, you get a composite project structure that enables transparent refactoring and eliminates the need for the "publish locally" workflow.
Opening Composite Project
When opening a composite project, make sure to navigate to the aggregator project directory and open the build.gradle file within that directory.
If the composite project was created using the Composite Project for Monorepo template, its build.gradle file is in the root folder.
If the composite project was created using the Composite Project for Separate Repositories template, its build.gradle file is in the <project-name>-all folder:
Managing Properties
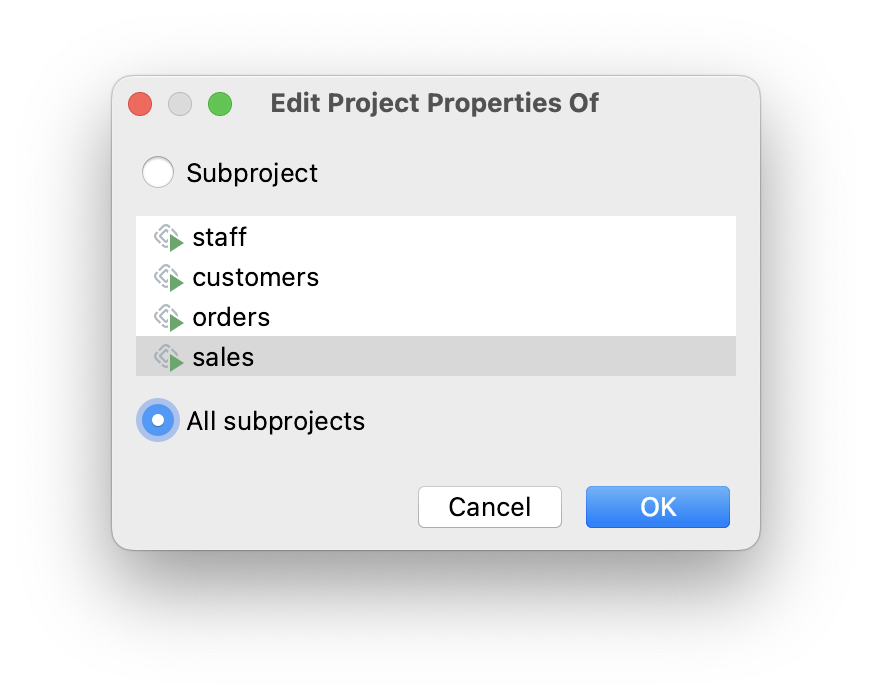
You can edit common properties of all subprojects. Click Settings→Project Properties on the toolbar of the Jmix Tool Window. Select All subprojects when Studio asks you which project you want to edit:
The common properties include the artifact repository settings and Jmix framework version. So, you can upgrade all subprojects to a newer Jmix version at once.
Configuring Dependencies
The most useful feature for large composite projects is the ability to configure dependencies between subprojects in a simple dialog.
You can open it from the Settings → Dependencies Between Subprojects action of the Jmix Tool Window.
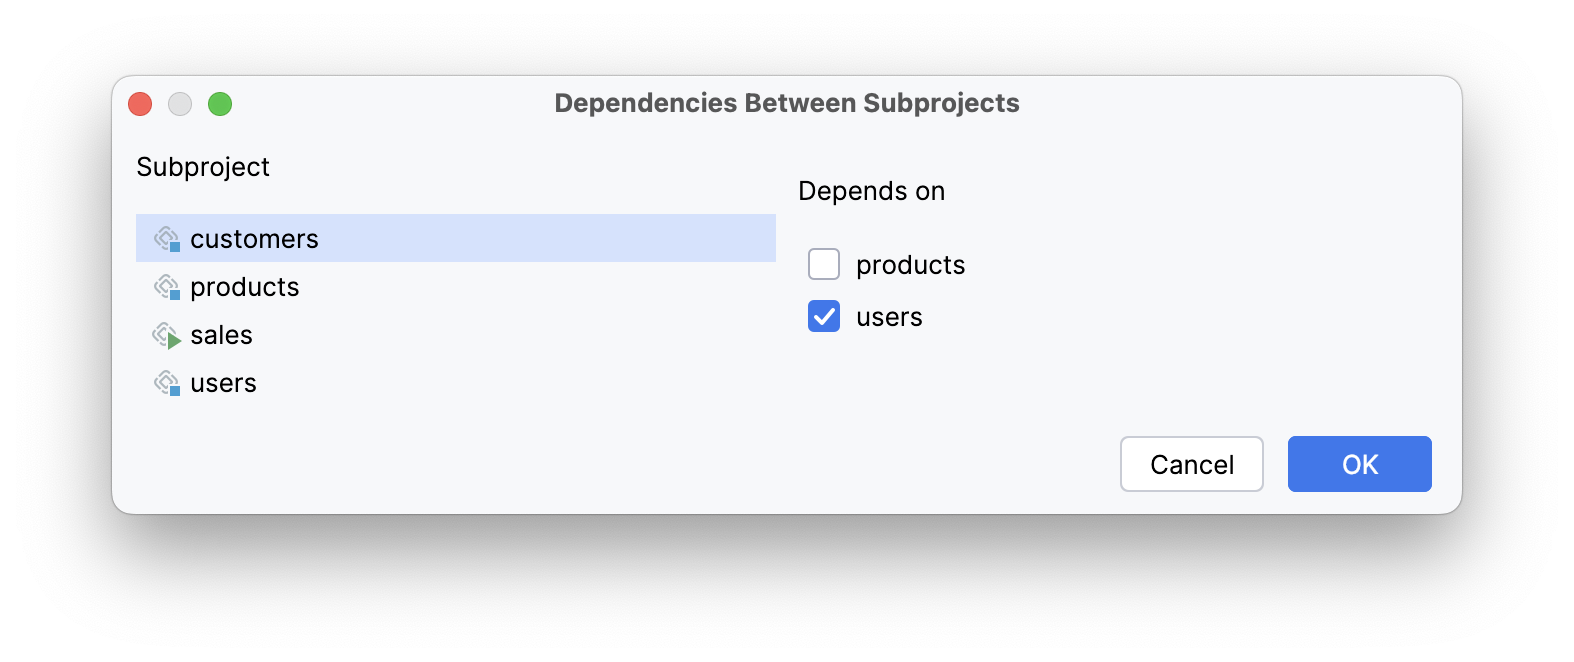
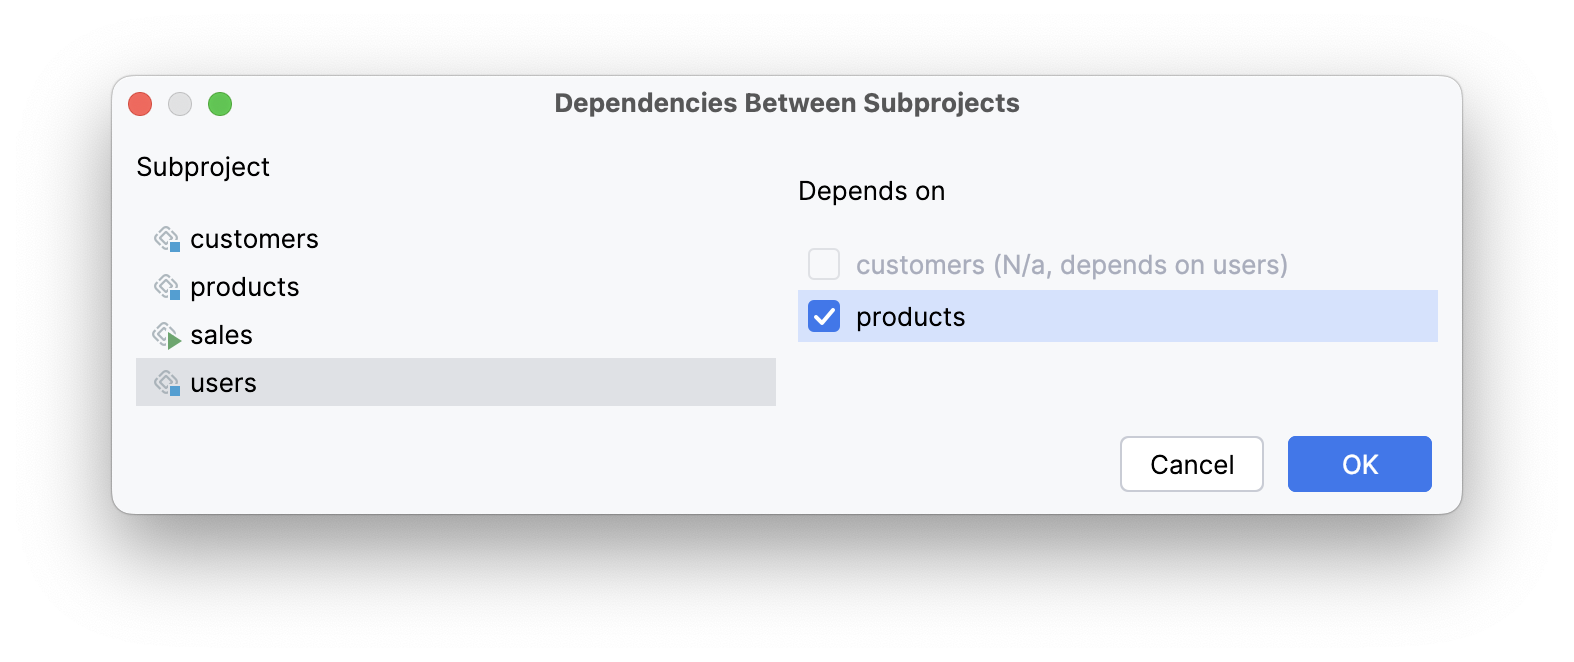
Here customers is an add-on which depends on the users add-on. According to changes you make in this dialog, Studio adds artifact dependencies to build.gradle files of the subprojects, and also configures the @JmixModule annotations of the add-ons. It also prevents you from introducing circular dependencies. In the screenshot below you can see that the dialog doesn’t allow you to make the users add-on dependent on customers because customers already depends on users:
Managing Data Stores
Studio can generate Liquibase changelogs in add-ons, including when working with them in composite projects.
To generate a changelog, you first need to define a Data Store in the add-on. It will be displayed in the Jmix tree:
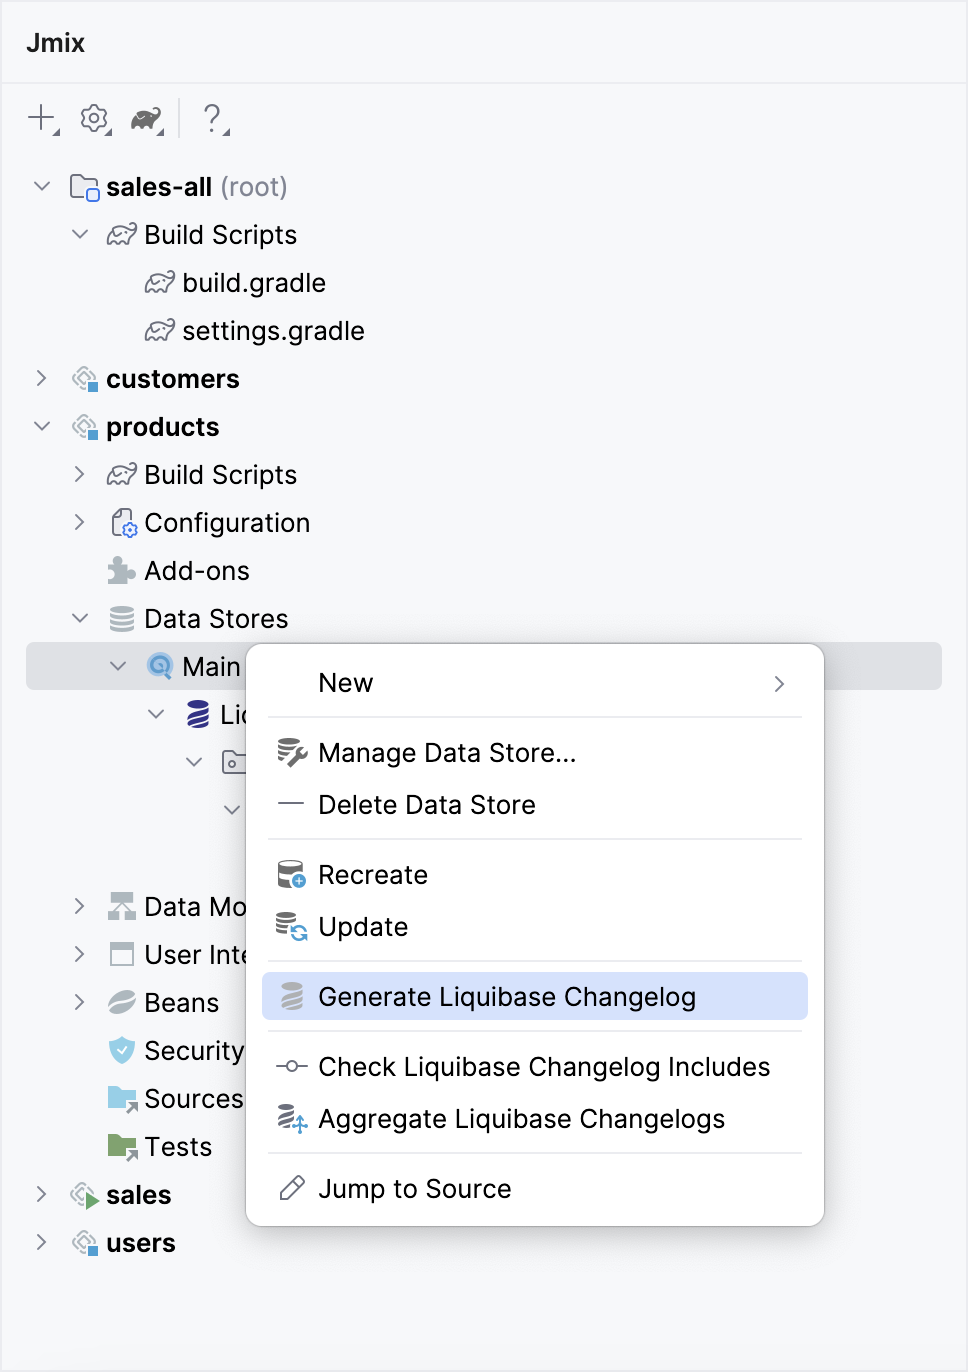
Now, you can execute the Generate Liquibase Changelog action on the Data Store.
The data store settings will be saved in the jmix-studio.xml file instead of the Java configuration. This means that the add-on does not define a data store for an application in which it is included. Instead, it expects the data store with the same name to be defined by the application itself.
For example, if you define ads1 data store in an add-on, you should also define the ads1 data store in the application that includes this add-on. And if the add-on provides Liquibase changelogs for this data store, they will be executed by the application.
When working with an add-on both in a standalone project and in a composite project, you should specify a data store twice, because the composite project has its own jmix-studio.xml file located in the root or in the <project-name>-all aggregator project. So, the data store settings will be stored separately in the standalone project and in the composite project, but the set of generated changelogs will be the same.
|
