Setup
Check System Requirements
Make sure your computer meets the following requirements:
-
64-bit operating system: Windows, Linux or macOS.
-
Memory – at least 16 GB.
-
Hard drive free space – at least 20 GB.
Install Jmix Studio
Jmix Studio is implemented as a plugin for IntelliJ IDEA. The minimal supported IntelliJ IDEA version is 2025.3.
If you don’t have IntelliJ IDEA installed yet, download Community edition from the JetBrains website and install it.
After IntelliJ IDEA has been installed, do the following:
-
Start IntelliJ IDEA (2025.3 or newer).
-
On the startup screen of the IDE, click the Plugins button.
If you have any project open, use the main menu: File → Settings (on Windows and Linux) or IntelliJ IDEA → Preferences (on macOS). Then switch to the Plugins section.
-
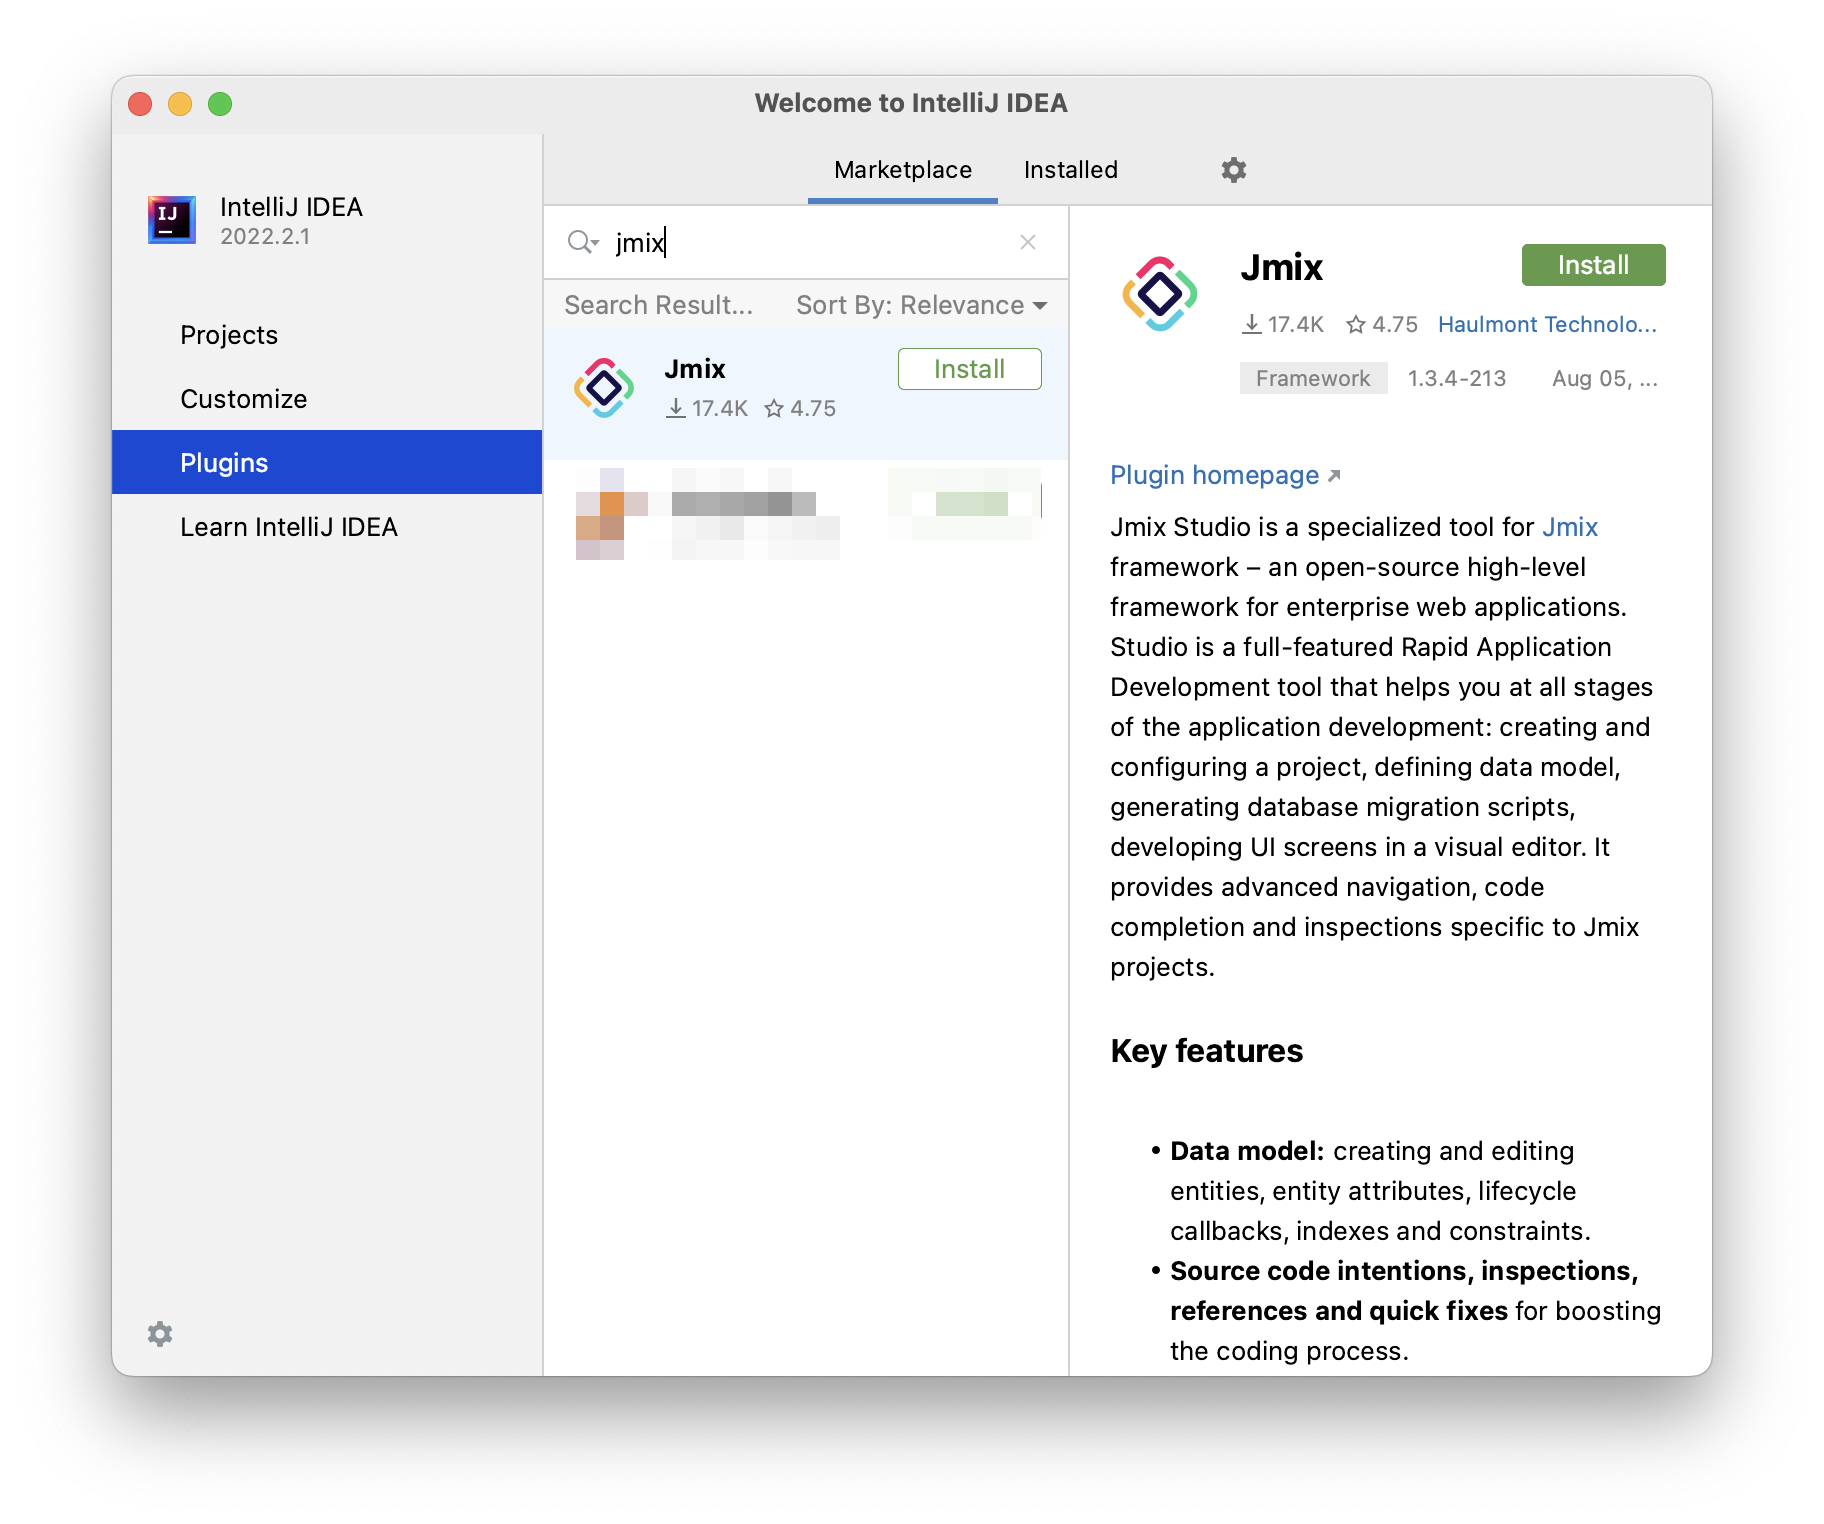
Switch to the Marketplace tab.
-
Enter "jmix" into the search field. You will see the Jmix plugin in the search results.
-
Click Install and follow the further instructions of the IDE.
In case you need to configure internet access via a proxy server or install non-standard Studio builds, visit the Studio installation section.
| To access premium Studio features, configure a subscription in the subscription dialog window. |
Install Java Development Kit (JDK)
Download JDK version 21 or 25 (for example, Eclipse Temurin) and install it to a directory suggested by the installer. This is enough for creating and running applications from the IDE.
| With Jmix 3.0, you can build applications using Java 21 or 25 from any vendor. However, we don’t recommend an OpenJ9-based JDK due to the problems it has caused in the past. |
To run Jmix applications from the terminal, set the JAVA_HOME environment variable as described below.
-
On Windows, create the
JAVA_HOMEvariable with the path to the installed JDK root directory at Computer → Properties → Advanced System Settings → Advanced → Environment variables. The variable should be added to the System variables list. -
On macOS and Linux set
JAVA_HOMEin~/.bash_profileor another appropriate file of your shell, for example:export JAVA_HOME="/Library/Java/JavaVirtualMachines/temurin-21.jdk/Contents/Home" -
Restart the computer to make sure the environment variable has taken effect.
-
Check that the environment variable is set correctly by running the following command in the console:
On Windows"%JAVA_HOME%\bin\java" -versionOn Linux and macOS"$JAVA_HOME/bin/java" -versionThe command should return the Java version, e.g.
21.0.2.
| If you connect to the internet via a proxy server, some Java system properties must be passed to the JVM running development tools and Gradle. Configure these properties using Jmix Studio. |
Coding with AI Agents
You can speed up the development of Jmix applications by using AI coding agents.
To enable an AI agent to work effectively with Jmix patterns, architecture, and best practices, we recommend using the Jmix AI Agent Guidelines. These guidelines provide:
-
Architecture Overview: Deep understanding of Jmix-specific patterns.
-
Agent Skills: Specialized knowledge for developing entities, UI views, data access, and more.
-
Development Workflow: Optimized instructions for AI agents to follow Jmix-specific mandatory rules.
Troubleshooting
Depending on the size of your project, you may need to increase available memory for the IntelliJ IDEA and Gradle processes.
-
In IntelliJ IDEA, open Help → Edit Custom VM Options… and edit the
-Xmxparameter (it’s usually on top). The recommended value is2048mor more, for example:-Xmx2048m -
Edit the
~/.gradle/gradle.propertiesfile and set the-Xmxparameter in theorg.gradle.jvmargsproperty. The recommended value is2048mor more, for example:org.gradle.jvmargs=-Xmx2048m
