3. Using Message Templates for Email
This section shows how to generate an email from the subject and body templates created in the previous section.
Before you begin, make sure that the Email Sending add-on is installed and appropriate sending parameters are configured.
Adding Notify by Email Button
Add a Notify by Email button to the booking list view. This button sends an email notification to the creator of the selected booking.
Open booking-list-view.xml and add a notifyEmail action to the bookingsDataGrid actions:
<action id="notifyEmail"
        type="list_itemTracking"
        icon="ENVELOPE"
        text="msg://notifyEmail.text"/>
Then bind the action to the button:
<hbox id="buttonsPanel" classNames="buttons-panel">
    <!--...-->
    <button id="notifyEmailButton" action="bookingsDataGrid.notifyEmail"/>
</hbox>
Generating an Email from the Template
Generate an ActionPerformedEvent handler method for the notifyEmailButton action and add the following logic:
@ViewComponent
private DataGrid<Booking> bookingsDataGrid;

@Autowired
private MessageTemplatesGenerator messageTemplatesGenerator; (1)

@Autowired
private Emailer emailer; (2)

@Autowired
private Notifications notifications; (3)

@Subscribe("bookingsDataGrid.notifyEmail")
public void onBookingsDataGridNotifyEmail(final ActionPerformedEvent event) {
    Booking booking = bookingsDataGrid.getSingleSelectedItem();
    User creator = booking.getCreator(); (4)

    String email = creator.getEmail();
    if (email == null) {
        showNoEmailNotification(creator); (5)
        return;
    }

    List<String> messages = messageTemplatesGenerator.generateMultiTemplate()
            .withTemplateCodes("booking-email-subject", "booking-email-body") (6)
            .withParams(
                    Map.of(
                            "booking", booking,
                            "today", new Date()
                    )) (7)
            .generate();

    EmailInfo emailInfo = EmailInfoBuilder.create()
            .setAddresses(email)
            .setSubject(messages.get(0))
            .setBody(messages.get(1))
            .setBodyContentType("text/html; charset=UTF-8")
            .build(); (8)

    try {
        emailer.sendEmail(emailInfo); (9)
    } catch (EmailException e) {
        showSendingErrorNotification(email);
    }

    showSendingSuccessNotification(email); (10)
}

private void showSendingErrorNotification(String email) {
    notifications.create("Failed to send email to %s".formatted(email))
            .withThemeVariant(NotificationVariant.LUMO_ERROR)
            .show();
}

private void showNoEmailNotification(User creator) {
    notifications.create("%s did not specify an email".formatted(creator.getDisplayName()))
            .withThemeVariant(NotificationVariant.LUMO_ERROR)
            .show();
}

private void showSendingSuccessNotification(String email) {
    notifications.create("The message has been successfully sent to %s".formatted(email))
            .withThemeVariant(NotificationVariant.LUMO_SUCCESS)
            .show();
}| 1 | Bean for generating messages from templates. |
| 2 | Bean for sending emails. |
| 3 | Bean for showing notifications to the user. |
| 4 | Gets the selected booking and its creator from bookingsDataGrid. |
| 5 | Checks whether the creator has an email address. If not, the method shows a notification and exits. |
| 6 | Generates the email subject and body from the booking-email-subject and booking-email-body templates. |
| 7 | Passes the booking and today parameters to the templates. |
| 8 | Creates an EmailInfo object with the recipient address, subject, body, and content type. |
| 9 | Sends the email by using the emailer bean. If an error occurs, the method shows an error notification. |
| 10 | Shows a success notification after the email is sent. |
Email Sending and Viewing
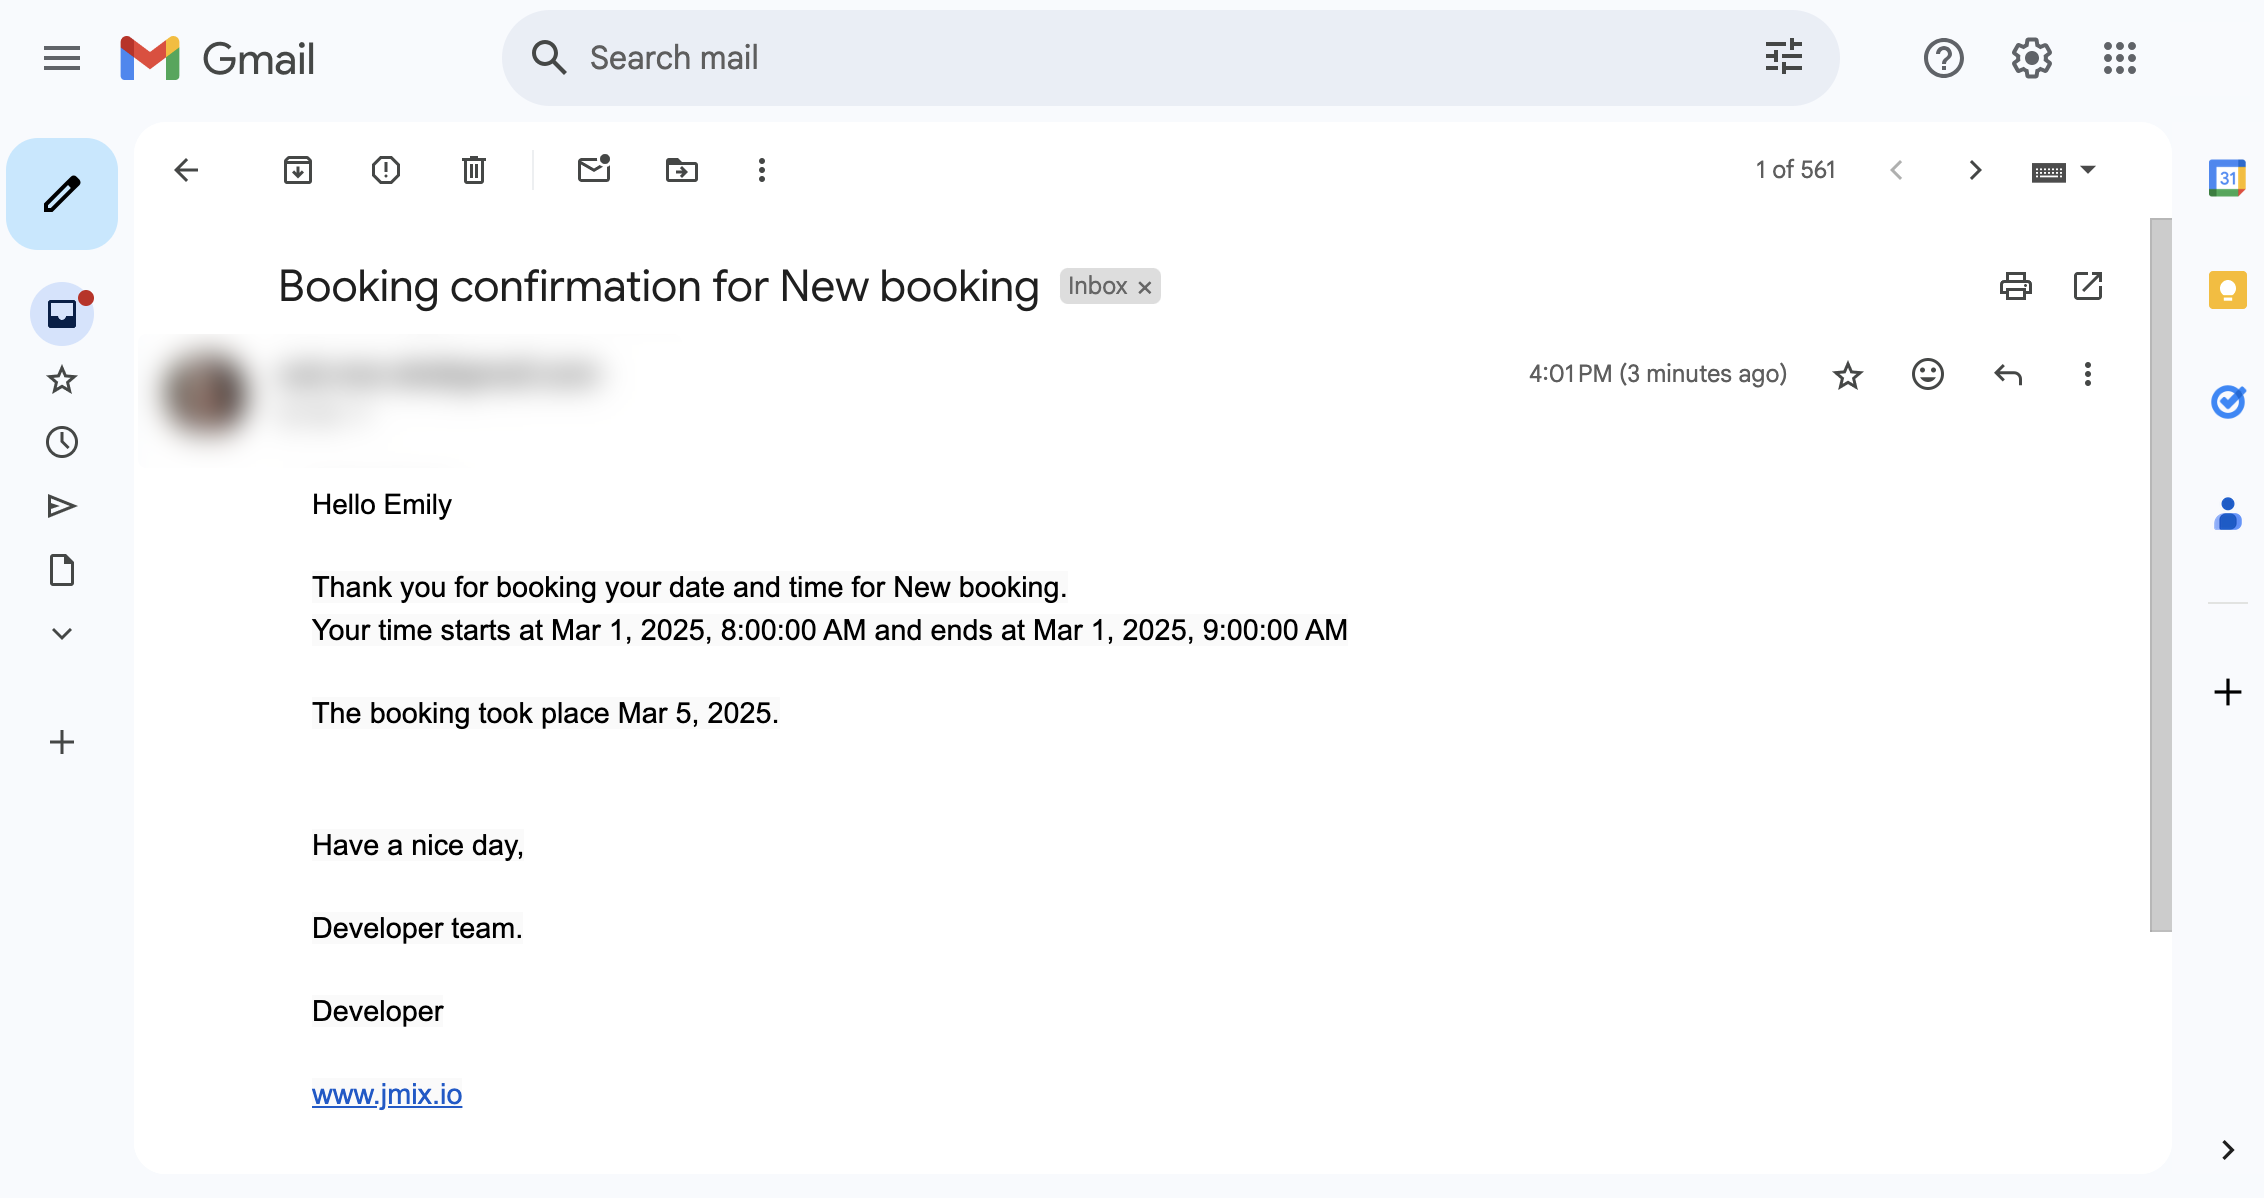
To verify the email generation flow:
-
Launch the application and navigate to the Application → Bookings view.
-
Create a new booking. Select an existing user with a valid email address in the creator field and fill in the other required fields.
-
Select the booking and click Notify by Email. The application then shows a success notification.
-
Check the recipient inbox and confirm that the email content matches the booking details and the configured template.