EntityPicker
Basics
Use EntityPicker if:
-
The field value is a reference to an entity instance.
-
Users need to select or create an entity instance via the lookup screen or enter a specific value.
-
Users need to open the edit screen for a related entity instance.
By default, Jmix Studio generates EntityPicker when creating an entity editor screen with a reference attribute.
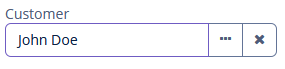
In the following example, the screen defines the orderDc data container for the Order entity having the customer attribute. In the entityPicker element, the dataContainer attribute contains a link to the orderDc data container, and the property attribute refers to the customer entity attribute. The entity attribute should be a reference to an entity. In the following example, it is Customer.
<data>
    <instance id="orderDc"
              class="ui.ex1.entity.Order">
        <fetchPlan extends="_base">
            <property name="customer" fetchPlan="_instance_name"/>
        </fetchPlan>
        <loader/>
    </instance>
</data>
<layout spacing="true">
    <vbox spacing="true" id="vbox">
        <entityPicker id="customerField"
                      dataContainer="orderDc"
                      property="customer"
                      caption="msg://ui.ex1.entity/Order.customer">
            <actions>
                <action id="lookup" type="entity_lookup"/>
                <action id="clear" type="entity_clear"/>
            </actions>
        </entityPicker>
    </vbox>
</layout>|
For |
Actions
You can define custom and predefined actions for EntityPicker displayed as buttons on the right.
You can do it either in the XML descriptor using the actions nested element or programmatically in the controller using the addAction() method.
|
To add |
Predefined Actions
When Studio generates EntityPicker in the editor screen, it also generates two predefined standard actions: entity_lookup and entity_clear. There are also the entity_open and entity_openComposition actions.
Use the type and id attributes for declaring predefined action in XML.
If you create EntityPicker without actions, the XML loader will define only the entity_lookup and entity_clear actions. To add another predefined action, for example, the entity_open, you should specify the actions element as follows:
<entityPicker dataContainer="orderDc"
              property="customer"
              caption="msg://ui.ex1.entity/Order.customer">
    <actions>
        <action id="lookup" type="entity_lookup"/>
        <action id="open" type="entity_open"/>
        <action id="clear" type="entity_clear"/>
    </actions>
</entityPicker>
The actions element does not extend but overrides a set of standard actions. You should define the identifiers of all required actions explicitly.
Custom Actions
To define a custom action in XML, use the actions nested element. Specify the id and icon attributes for the action:
<entityPicker id="customerEntityPicker"
              property="customer"
              dataContainer="orderDc">
    <actions>
        <action id="lookup" type="entity_lookup"/>
        <action id="points"
                icon="QUESTION"
                description="msg://knowPoints"/>
    </actions>
</entityPicker>
Then implement custom logic in the screen controller by subscribing to Action.ActionPerformedEvent:
@Autowired
private EntityPicker<Customer> customerEntityPicker;
@Autowired
private Notifications notifications;

@Subscribe("customerEntityPicker.points")  (1)
public void onCustomerEntityPickerPoints(Action.ActionPerformedEvent event) {
    Customer customer = customerEntityPicker.getValue();
    if (customer != null) {
        notifications.create()
                .withCaption(customer.getFirstName() +
                        " has " + customer.getRewardPoints() +
                        " reward points")
                .show();
    } else {
        notifications.create()
                .withCaption("Choose a customer")
                .show();
    }
}| 1 | The @Subscribe annotation contains the EntityPicker id and the id of the action separated by a dot. |
|
You can generate the |
Adding Actions Programmatically
Use the addAction() method to set actions programmatically.
-
Adding Standard Action
For example, if the component is defined in the XML descriptor without
actionsnested element, it is sufficient to add missing standard actions:@Autowired private Actions actions; @Autowired private EntityPicker<Customer> entityPicker; @Subscribe public void onInit(InitEvent event) { entityPicker.addAction(actions.create(EntityOpenAction.class)); } -
Adding Custom Action
An example of creating a custom action:
@Autowired
private EntityPicker<Customer> customerEp;

@Subscribe
public void onInit(InitEvent event) {
    customerEp.addAction(new BaseAction("showLevel")
            .withCaption(null)
            .withDescription(null)
            .withIcon(JmixIcon.VIEW_ACTION.source())
            .withHandler(e -> {
                Customer customer = customerEp.getValue();
                if (customer != null) {
                    notifications.create()
                            .withCaption(customer.getFirstName() + " " +
                                    customer.getLastName() +
                                    "'s level is " + customer.getLevel())
                            .show();
                } else {
                    notifications.create()
                            .withCaption("Choose a customer")
                            .show();
                }
            }));
}
MetaClass
You can use EntityPicker without binding to the data container, that is, without setting dataContainer and property. In this case, the metaClass attribute should be used to specify an entity type for EntityPicker. For example:
<entityPicker id="custPicker" metaClass="uiex1_Customer">
    <actions>
        <action id="lookup" type="entity_lookup"/>
        <action id="open" type="entity_open"/>
    </actions>
</entityPicker>
You can get an instance of a selected entity by injecting the component into a controller and invoking its getValue() method.
Setting Icons
EntityPicker can have an icon on the left. Just install fieldIconProvider in the screen controller to implement your custom logic:
@Install(to = "customerField", subject = "fieldIconProvider")
private String customerFieldFieldIconProvider(Customer customer) { (1)
    return (customer != null) ? "font-icon:CHECK" : "font-icon:BAN";
}| 1 | Implementation of the fieldIconProvider delegate method. |
See Icons for more information on working with icons.
To register the field icon provider programmatically, use the setFieldIconProvider() component method.
Entering a Text Value
By default, a user cannot input the value manually. If you set the fieldEditable attribute to true, you enable manual input. It can be useful when creating an entity instance based on a value entered by the user.
Keep in mind that the entered value is not set to the data model. To handle user input, use the FieldValueChangeEvent.
Look at the example below. We have the Address entity with the association country attribute referencing the Country entity. The Country entity has only one name attribute. Let’s define the countryField in the XML-descriptor with fieldEditable="true":
<entityPicker id="countryField" property="country" fieldEditable="true">
    <actions>
        <action id="lookup" type="entity_lookup"/>
        <action id="clear" type="entity_clear"/>
    </actions>
</entityPicker>
Now the user can input the value manually. To handle this value, interpreted as String, subscribe to FieldValueChangeEvent in the controller:
@Autowired
private DataContext dataContext;

private Country country;

@Autowired
private TextField<String> addressField;

@Autowired
private EntityPicker<Country> countryField;

@Autowired
private Dialogs dialogs;

@Subscribe("countryField") (1)
public void onCountryFieldFieldValueChange(ValuePicker.FieldValueChangeEvent<Country>
                                                       event) {
    String value = event.getText(); (2)
    if (!Strings.isNullOrEmpty(value)) {
        country = dataContext.create(Country.class); (3)
        country.setName(value);
        countryField.setValue(country); (4)
    }
}| 1 | The @Subscribe annotation contains the EntityPicker id. |
| 2 | Get the entered value from the event object. |
| 3 | Create a new instance of the Country entity. |
| 4 | Set the created instance to the field. |
To register the event handler programmatically, use the addFieldValueChangeListener() component method.
Creating EntityPicker Programmatically
To create EntityPicker in the controller, use the UiComponents factory. Keep in mind that the programmatically created EntityPicker will get no default actions, and you need to add all necessary actions explicitly:
@Autowired
private Metadata metadata;
@Autowired
private UiComponents uiComponents;
@Autowired
private Actions actions;
@Subscribe
public void onInit(InitEvent event) {
    EntityPicker<User> userPicker = uiComponents.create(EntityPicker.of(User.class));
    userPicker.setMetaClass(metadata.getClass(User.class));
    userPicker.addAction(actions.create(EntityLookupAction.class));
    userPicker.addAction(actions.create(EntityOpenAction.class));
    userPicker.addAction(actions.create(EntityClearAction.class));
    vbox.add(userPicker);
}
Events and Handlers
|
To generate a handler stub in Jmix Studio, select the component in the screen descriptor XML or in the Jmix UI hierarchy panel and use the Handlers tab of the Jmix UI inspector panel. Alternatively, you can use the Generate Handler button in the top panel of the screen controller. |
FieldIconProvider
See Setting Icons.
FieldValueChangeEvent
FieldValueChangeEvent is fired when a user inputs value manually.
For more information, see Entering a Text Value.
Formatter
Adds a formatter instance to the component.
In the example below, we will show a formatter usage for the customerFormat entity picker:
@Install(to = "customerFormat", subject = "formatter")
protected String customerFormatFormatter(Customer value) {
    return value != null ? value.getFirstName() + " " + value.getLastName() : null;
}
To add a formatter programmatically, use the setFormatter() component method.
Validator
See Validator.
ValueChangeEvent
See ValueChangeEvent.
EntityPicker XML Attributes
|
You can view and edit attributes applicable to the component using the Jmix UI inspector panel of the Studio’s Screen Designer. |
align - buffered - caption - captionAsHtml - colspan - contextHelpText - contextHelpTextHtmlEnabled - css - dataContainer - description - descriptionAsHtml - editable - enable - box.expandRatio - fieldEditable - height - htmlSanitizerEnabled - icon - id - inputPrompt - metaClass - property - required - requiredMessage - stylename - tabIndex - visible - width
