Generic JavaScriptComponent
JavaScriptComponent is a simple UI component that can work with any JavaScript wrapper without Vaadin component implementation. Thus, you can easily integrate any pure JavaScript component in your Jmix-based application.
The component can be defined declaratively in an XML descriptor of the screen so that you can configure dynamic properties and JavaScript dependencies in XML.
XML-name of the component: jsComponent.
Defining Dependencies
You can define a list of dependencies (JavaScript, CSS) for the component. A dependency can be obtained from the following sources:
-
WebJar resource - starts with
webjar://. -
File placed within VAADIN directory - starts with
vaadin://. -
Web resource - starts with
http://orhttps://.
The list of dependencies is defined in the dependencies element. Each dependency is described in a nested dependency element.
Specify a dependency path in the path attribute.
Example of defining dependencies in XML:
<jsComponent id="timePicker"
             initFunctionName="ui_ex1_components_javascript_TimePicker">
    <dependencies>
        <dependency path="webjar://jquery:jquery.min.js"
                    type="JAVASCRIPT"/>
        <dependency path="vaadin://timepicker/wickedpicker.min.js"/>
        <dependency path="vaadin://timepicker/wickedpicker.min.css"/>
        <dependency path="vaadin://timepicker/time-picker-connector.js"/>
    </dependencies>
</jsComponent>
If the type of dependency cannot be inferred from the extension, specify the type explicitly in the type XML attribute.
|
To add a dependency in Jmix Studio, select |
You can add a dependency programmatically using the addDependency() method. To specify the type of dependency, pass the DependencyType enum value to the addDependency() method.
Example of adding dependencies programmatically:
timePicker.addDependencies(
        "webjar://jquery:jquery.min.js",
        "vaadin://timepicker/wickedpicker.min.js",
        "vaadin://timepicker/time-picker-connector.js");
timePicker.addDependency("vaadin://timepicker/wickedpicker.min.css",
        JavaScriptComponent.DependencyType.STYLESHEET);
Defining Initialization Function
The component requires an initialization function. This function’s name will be used to find an entry point for the JavaScript component connector.
|
The initialization function name must be unique within a window. |
Specify the function name in the initFunctionName attribute of jsComponent.
The function name can be passed to the component using the setInitFunctionName() method:
timePicker.setInitFunctionName("ui_ex1_components_javascript_TimePicker");Defining JavaScript Connector
To use JavaScriptComponent wrapper for a library, you should define a JavaScript connector - a function that initializes the JavaScript component and handles communication between the server-side and the JavaScript code.
The following methods are available from the connector function:
-
this.getElement()returns the HTML DOM element of the component. -
this.getState()returns a shared state object with the current state as synchronized from the server-side.
Component Features
JavaScriptComponent has the following features that let you:
-
Set a state object that can be used in the client-side JavaScript connector and is accessible from the
datafield of the component’s state, for example:TimePickerState state = new TimePickerState(); state.now = "12:35:57"; state.showSeconds = true; state.twentyFour = true; timePicker.setState(state); -
Register a function that can be called from the JavaScript using the provided name, for example:
timePicker.addFunction("onBeforeShow", callbackEvent -> notifications.create() .withCaption("Before Show Event") .withPosition(Notifications.Position.MIDDLE_RIGHT) .show()); -
Invoke a named function that the JavaScript connector has added to the connector wrapper object.
timePicker.callFunction("showValue");connector.showValue = function () { alert(timepicker.wickedpicker('time')); };
Using JavaScriptComponent
This section describes integrating a third-party JavaScript library to a Jmix-based application taking Quill Rich Text Editor as an example. To use Quill in your project, you should follow the steps below.
-
Add the following dependency to the
build.gradlefile:implementation 'org.webjars.npm:quill:1.3.6' -
Create the
quill-connector.jsfile in thesrc/main/resources/VAADIN/quilldirectory. -
In this file, add the connector implementation:
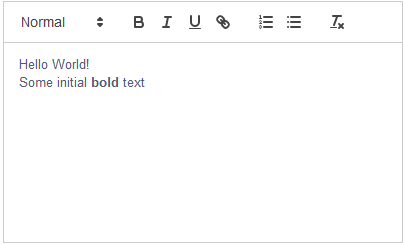
ui_ex1_components_javascript_RichTextEditor = function () {
    var connector = this;
    var element = connector.getElement();
    element.innerHTML = "<div id=\"editor\">" +
        "<p>Hello World!</p>" +
        "<p>Some initial <strong>bold</strong> text</p>" +
        "<p><br></p>" +
        "</div>";

    connector.onStateChange = function () { (1)
        var state = connector.getState();
        var data = state.data;

        var quill = new Quill('#editor', data.options);

        quill.on('text-change', function (delta, oldDelta, source) { (2)
            if (source === 'user') {
                connector.valueChanged(quill.getText(), quill.getContents());
            }
        });
    }
};
1 Handle changes from the server-side. 2 Subscribe on the textChangeevent. -
Create a screen with the following
jsComponentdefinition:<?xml version="1.0" encoding="UTF-8" standalone="no"?> <window xmlns="http://jmix.io/schema/ui/window" caption="msg://richTextEditorScreen.caption"> <layout> <jsComponent id="quill" initFunctionName="ui_ex1_components_javascript_RichTextEditor" height="200px" width="400"> <dependencies> <dependency path="webjar://quill:dist/quill.js"/> <dependency path="webjar://quill:dist/quill.snow.css"/> <dependency path="vaadin://quill/quill-connector.js"/> </dependencies> </jsComponent> </layout> </window> -
Add the following screen controller implementation:
@UiController("sample_RichTextEditorScreen")
@UiDescriptor("rich-text-editor-screen.xml")
public class RichTextEditorScreen extends Screen {
    @Autowired
    private JavaScriptComponent quill;

    @Autowired
    private Notifications notifications;

    @Subscribe
    protected void onInit(InitEvent event) {
        QuillState state = new QuillState();
        state.options = ParamsMap.of("theme", "snow",
                "placeholder", "Compose an epic...");

        quill.setState(state);

        quill.addFunction("valueChanged", javaScriptCallbackEvent -> {
            String value = javaScriptCallbackEvent.getArguments().getString(0);
            notifications.create()
                    .withCaption(value)
                    .withPosition(Notifications.Position.BOTTOM_RIGHT)
                    .show();
        });
    }

    class QuillState {
        public Map<String, Object> options;
    }
}
As a result, the Quill Rich Text Editor is available on the screen:
All XML Attributes
|
You can view and edit attributes applicable to the component using the Jmix UI inspector panel of the Studio’s Screen Designer. |
align - box.expandRatio - caption - captionAsHtml - colspan - contextHelpText - contextHelpTextHtmlEnabled - css - description - descriptionAsHtml - enable - height - htmlSanitizerEnabled - icon - id - initFunctionName - requiredIndicatorVisible - responsive - rowspan - stylename - visible - width
