valuePicker
valuePicker displays a value of any type. It consists of the text field and the set of buttons defined by actions.
XML Element |
|
|---|---|
Java Class |
|
Attributes |
id - alignSelf - allowCustomValue - ariaLabel - ariaLabelledBy - autofocus - classNames - colspan - css - dataContainer - enabled - errorMessage - focusShortcut - height - helperText - label - maxHeight - maxWidth - minHeight - minWidth - placeholder - property - readOnly - required - requiredMessage - tabIndex - themeNames - title - visible - width |
Handlers |
AttachEvent - BlurEvent - ComponentValueChangeEvent - CustomValueSetEvent - DetachEvent - FocusEvent - formatter - statusChangeHandler - validator |
Elements |
Basics
The component is most often used to select complex values, meaning values where the selection involves some kind of action.
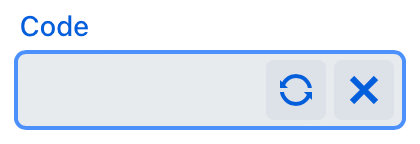
An example of defining valuePicker with a label, and two actions:
<valuePicker id="valuePicker" label="Code">
    <actions>
        <action id="generate" icon="REFRESH"/>
        <action id="valueClear" type="value_clear"/>
    </actions>
</valuePicker>
To create valuePicker connected to data, use the dataContainer and property attributes:
<data>
    <instance class="com.company.onboarding.entity.Step" id="stepDc"> (1)
        <fetchPlan extends="_base"/> (2)
        <loader id="stepDl"/>
    </instance>
</data>
<layout>
    <valuePicker label="msg://com.company.onboarding.entity/Step.name"
                 dataContainer="stepDc"
                 property="name"> (3)
        <actions>
            <action id="lookup" icon="ELLIPSIS_DOTS_H"/>
            <action id="valueClear" type="value_clear"/>
        </actions>
    </valuePicker>
</layout>| 1 | InstanceContainer for the Step entity. |
| 2 | Inline fetch plan of the entity instance located in the container. |
| 3 | Binding the component to a data container and property. The dataContainer attribute contains a link to the stepDc data container, and the property attribute refers to the name entity attribute. |
Actions
You can define custom and predefined actions for valuePicker displayed as buttons on the right.
You can do it either in the XML descriptor using the actions nested element or programmatically in the controller using the addAction() method.
|
To add |
Predefined Action
The framework provides only one predefined action - value_clear:
<action id="valueClear" type="value_clear"/>Use the type and id attributes for declaring predefined action in XML.
Use addAction() to set it programmatically:
@ViewComponent
private JmixValuePicker<String> loginValuePicker;

@Autowired
private Actions actions;

@Subscribe
public void onInit(InitEvent event) {
    loginValuePicker.addAction(actions.create(ValueClearAction.ID));
}
Custom Actions
To define a custom action in XML, use the actions nested element. Specify the id and icon attributes for the action:
<valuePicker id="generateLoginPicker" label="Login">
    <actions>
        <action id="valueClear" type="value_clear"/>
        <action id="generate" icon="REFRESH"/>
    </actions>
</valuePicker>
Then implement a custom logic in the screen controller by subscribing to ActionPerformedEvent:
@ViewComponent
private JmixValuePicker<String> generateLoginPicker;

@Subscribe("generateLoginPicker.generate")
public void onGenerateLoginPickerGenerate(ActionPerformedEvent event) {
    generateLoginPicker.setValue(RandomStringUtils.randomAlphabetic(5, 10));
}
Custom Value Entry
valuePicker allows you to configure it to accept custom values.
When the allowCustomValue attribute is set to true, users can enter custom string values. This triggers CustomValueSetEvent.
valuePicker doesn’t do anything with the custom value string automatically. Use CustomValueSetEvent to determine how the custom value should be handled.
|
See the example:
@Autowired
private Notifications notifications;

@ViewComponent
private JmixValuePicker<String> vPicker;

@Subscribe("vPicker")
public void onVPickerCustomValueSet(
        CustomValueSetEvent<JmixValuePicker<String>, Object> event) {
    String text = event.getText(); (1)
    notifications.create("Entered value: " + text)
            .show();
    if (!Strings.isNullOrEmpty(text))
        vPicker.setValue(text); (2)
}| 1 | Get the user input value as String. |
| 2 | Set the value to vPicker. |
Formatter
Adds a formatter instance to the component.
In the example below, we will show a formatter usage for the vPicker value picker:
@Install(to = "vPicker", subject = "formatter")
private String vPickerFormatter(String value) {
    return value != null ? "Code: " + value : null;
}
To add formatter programmatically, use the setFormatter() component method.
Validation
To check values entered into the valuePicker component, you can use a validator in a nested validators element.
The following predefined validators are available for valuePicker:
XML Element |
|
|---|---|
elements |
custom - decimalMax - decimalMin - digits - doubleMax - doubleMin - email - max - min - negativeOrZero - negative - notBlank - notEmpty - notNull - positiveOrZero - positive - regexp - size |
Attributes
In Jmix there are many common attributes that serve the same purpose for all components.
The following are attributes specific to valuePicker.
Name |
Description |
Default |
|---|---|---|
By default, users can’t manually enter values in the |
|
Handlers
In Jmix there are many common handlers that are configured in the same way for all components.
The following are handlers specific to valuePicker.
|
To generate a handler stub in Jmix Studio, use the Handlers tab of the Jmix UI inspector panel or the Generate Handler action available in the top panel of the view class and through the Code → Generate menu (Alt+Insert / Cmd+N). |
Name |
Description |
|---|---|
|
|
