1. Binding Kanban to Data
In this chapter, you will create:
-
The
TaskStatusenumeration. -
The
KanbanTaskentity with the attributes required to be displayed on the Kanban board. -
CRUD views with a Kanban board on the
KanbanTask.listview.
Creating KanbanTask Entity and Views
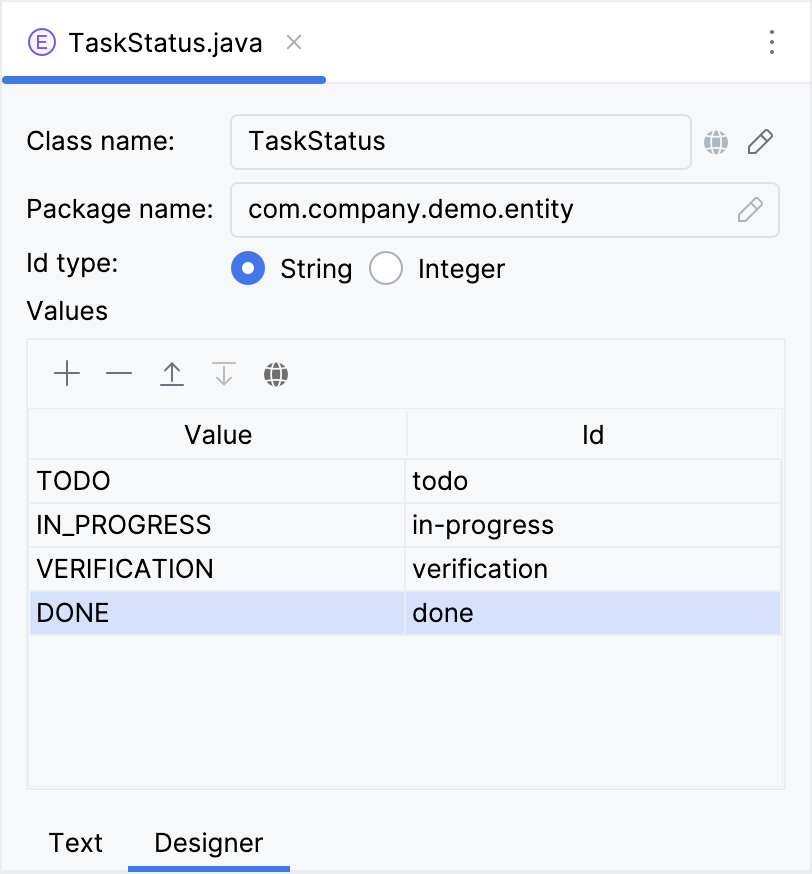
To start, you’ll need to generate a TaskStatus enumeration consisting of the following values:
-
Todo -
In progress -
Verification -
Done
The detailed instructions for creating enumerations can be found in the Using Enumerations section of the Tutorial.
Next, create the KanbanTask entity. You can find detailed instructions for creating entities in the Simple CRUD section of the Tutorial.
The KanbanTask entity has the following attributes:
-
textwithStringtype. Select the Mandatory checkbox. -
statuswithTaskStatusenumeration type. Select the Mandatory checkbox. -
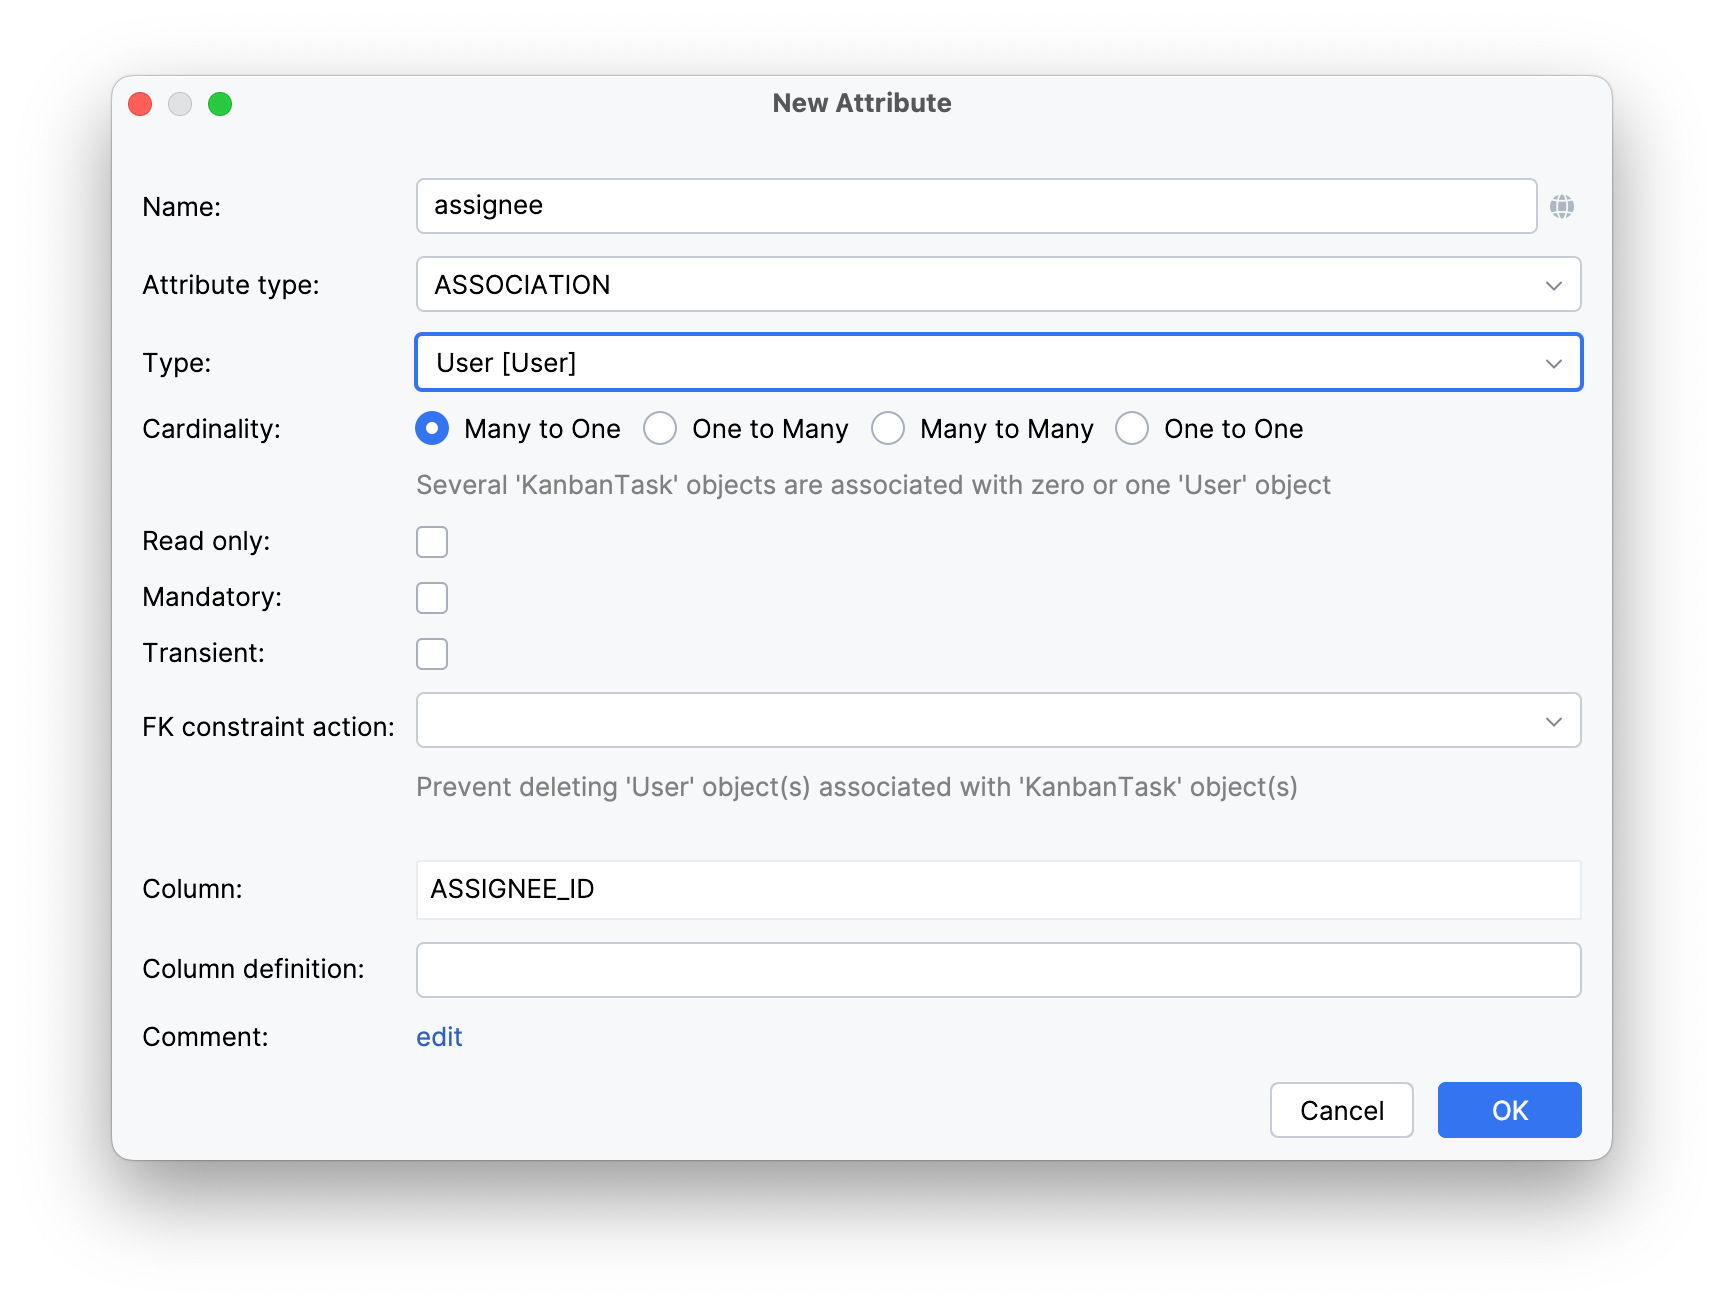
assigneewith association toUser, many-to-one cardinality.
Define the text attribute for generation an instance name.
Create detail view for the KanbanTask entity. You’ll find the detailed steps for generating entity list and detail views in the Creating CRUD Views section of the Tutorial.
Follow the suggested values at each step of the view creation wizard.
On the Entity detail view fetch plan step, add the assignee attribute to the selection. Now you can be sure that the referenced User entity will be loaded together with the root KanbanTask entity and displayed in the detail view.
|
Studio will automatically generate KanbanTask.detail, and open the corresponding source code.
Adding Kanban on View
You’ll need to create a blank view with KanbanTask.list id. This view will be used to add a Kanban board.
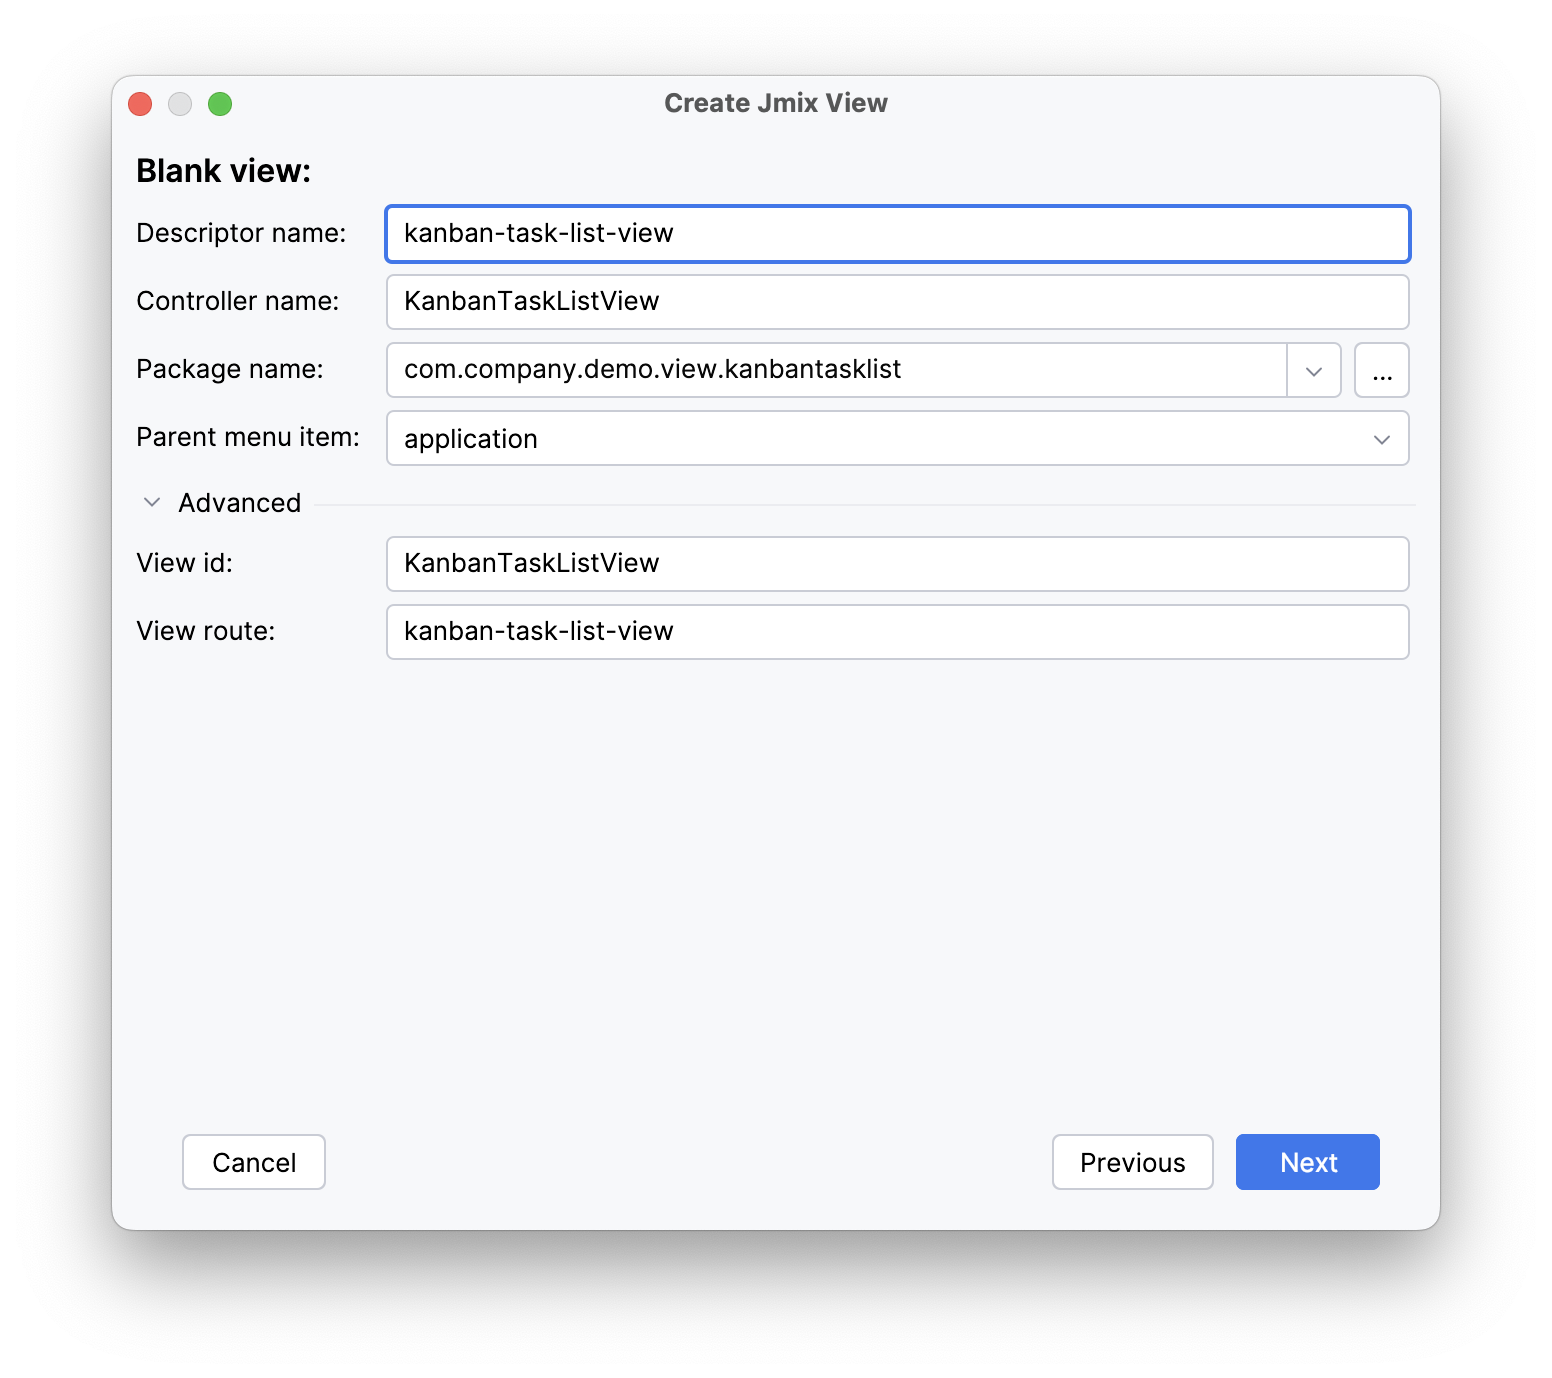
At the final step of the wizard, set the localizable message of the view title: Kanban board.
Locate kanban-task-list-view.xml in the Jmix tool window and double-click it. The view designer will appear.
To start, you’ll add a collectionContainer to load tasks from the database. The detailed instructions for defining Data Container can be found in the Creating UI from Scratch of the Tutorial.
Click Add Component in the actions panel, then find the CollectionContainer item and double-click it:
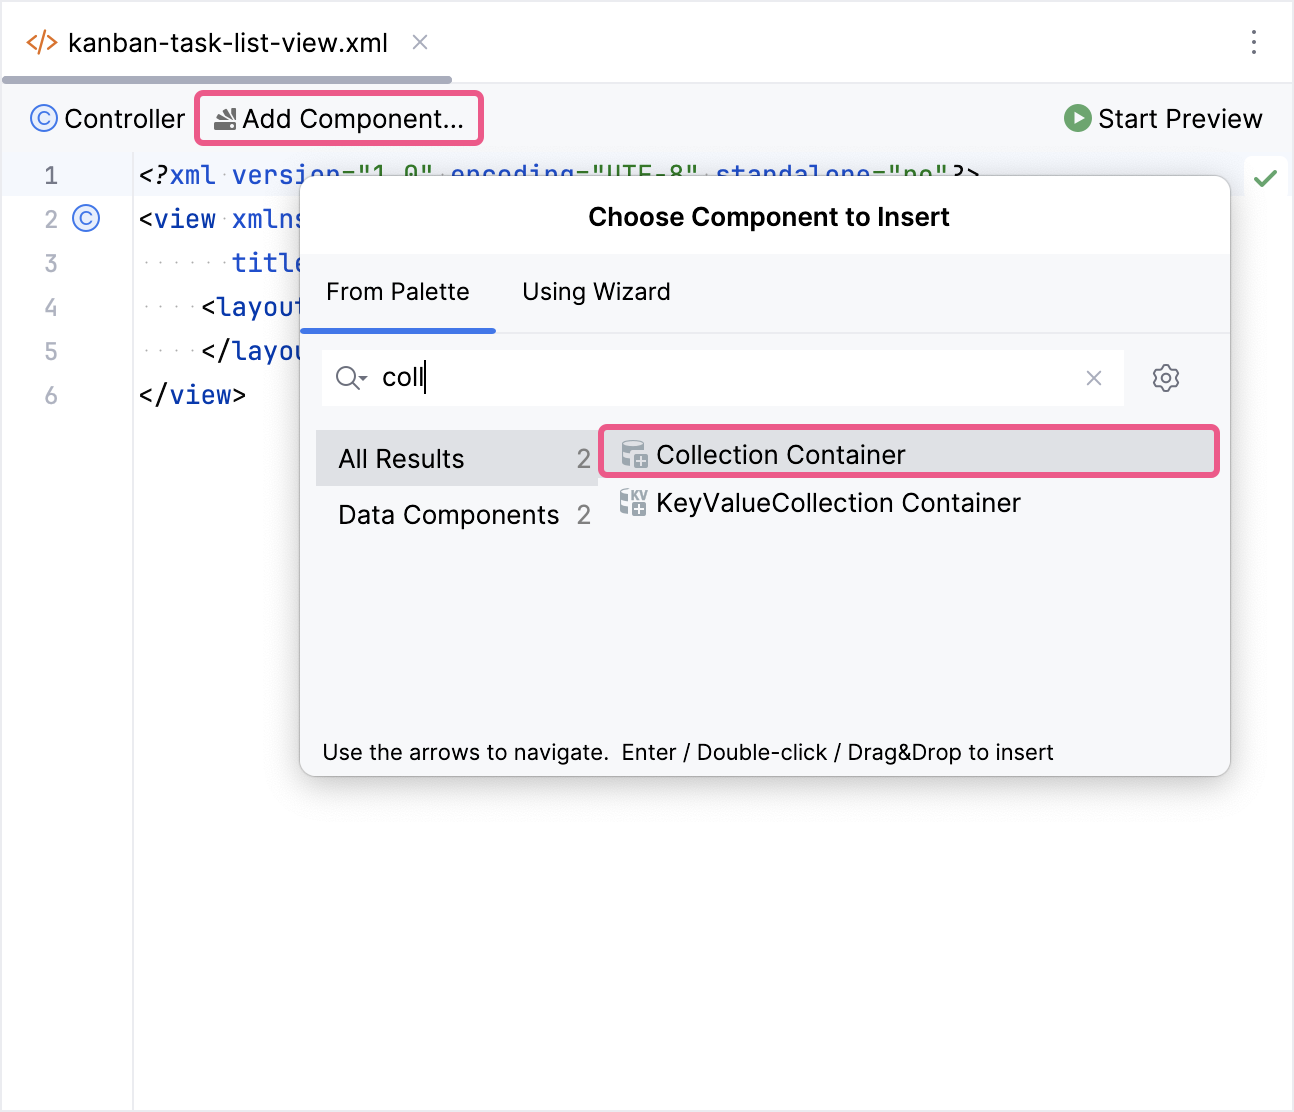
In the dialog that opens, select the KanbanTask entity. The new collectonContainer element will be added to both the Jmix UI hierarchy panel and the XML.
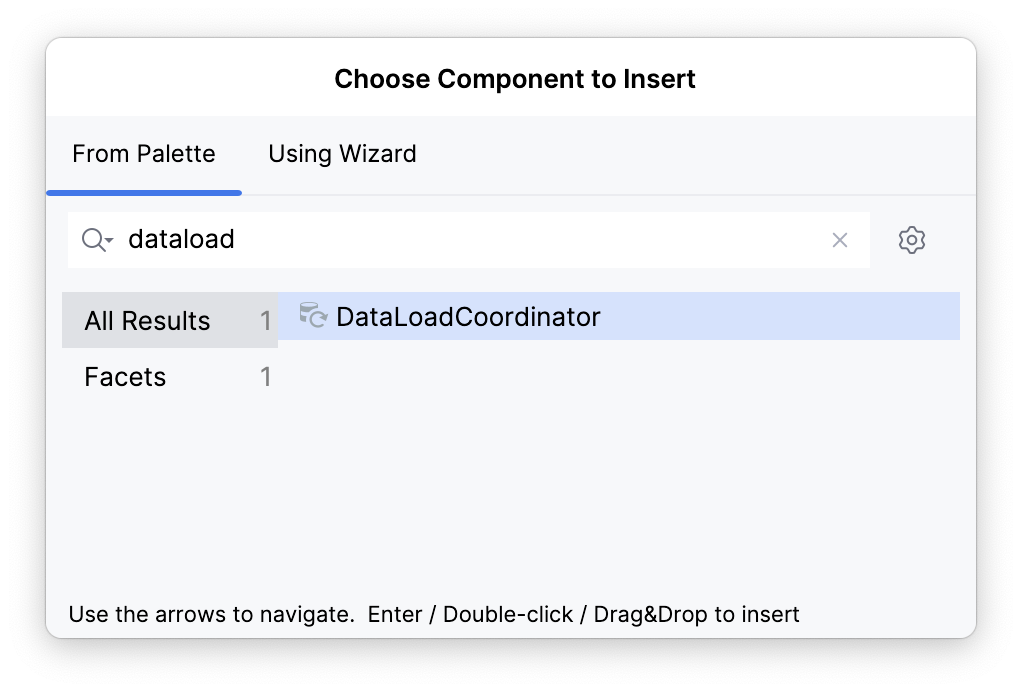
To ensure the dataLoader automatically loads data when the view opens, you need to add the dataLoadCoordinator facet. Click Add Component in the action panel, then find the DataLoadCoordinator item and double-click it:
If you want to display a Kanban on the view, you should include the kanban UI component in the XML descriptor.
Place the cursor inside the layout element.
Next, click Add Component in the actions panel, then find the Kanban item and double-click it:
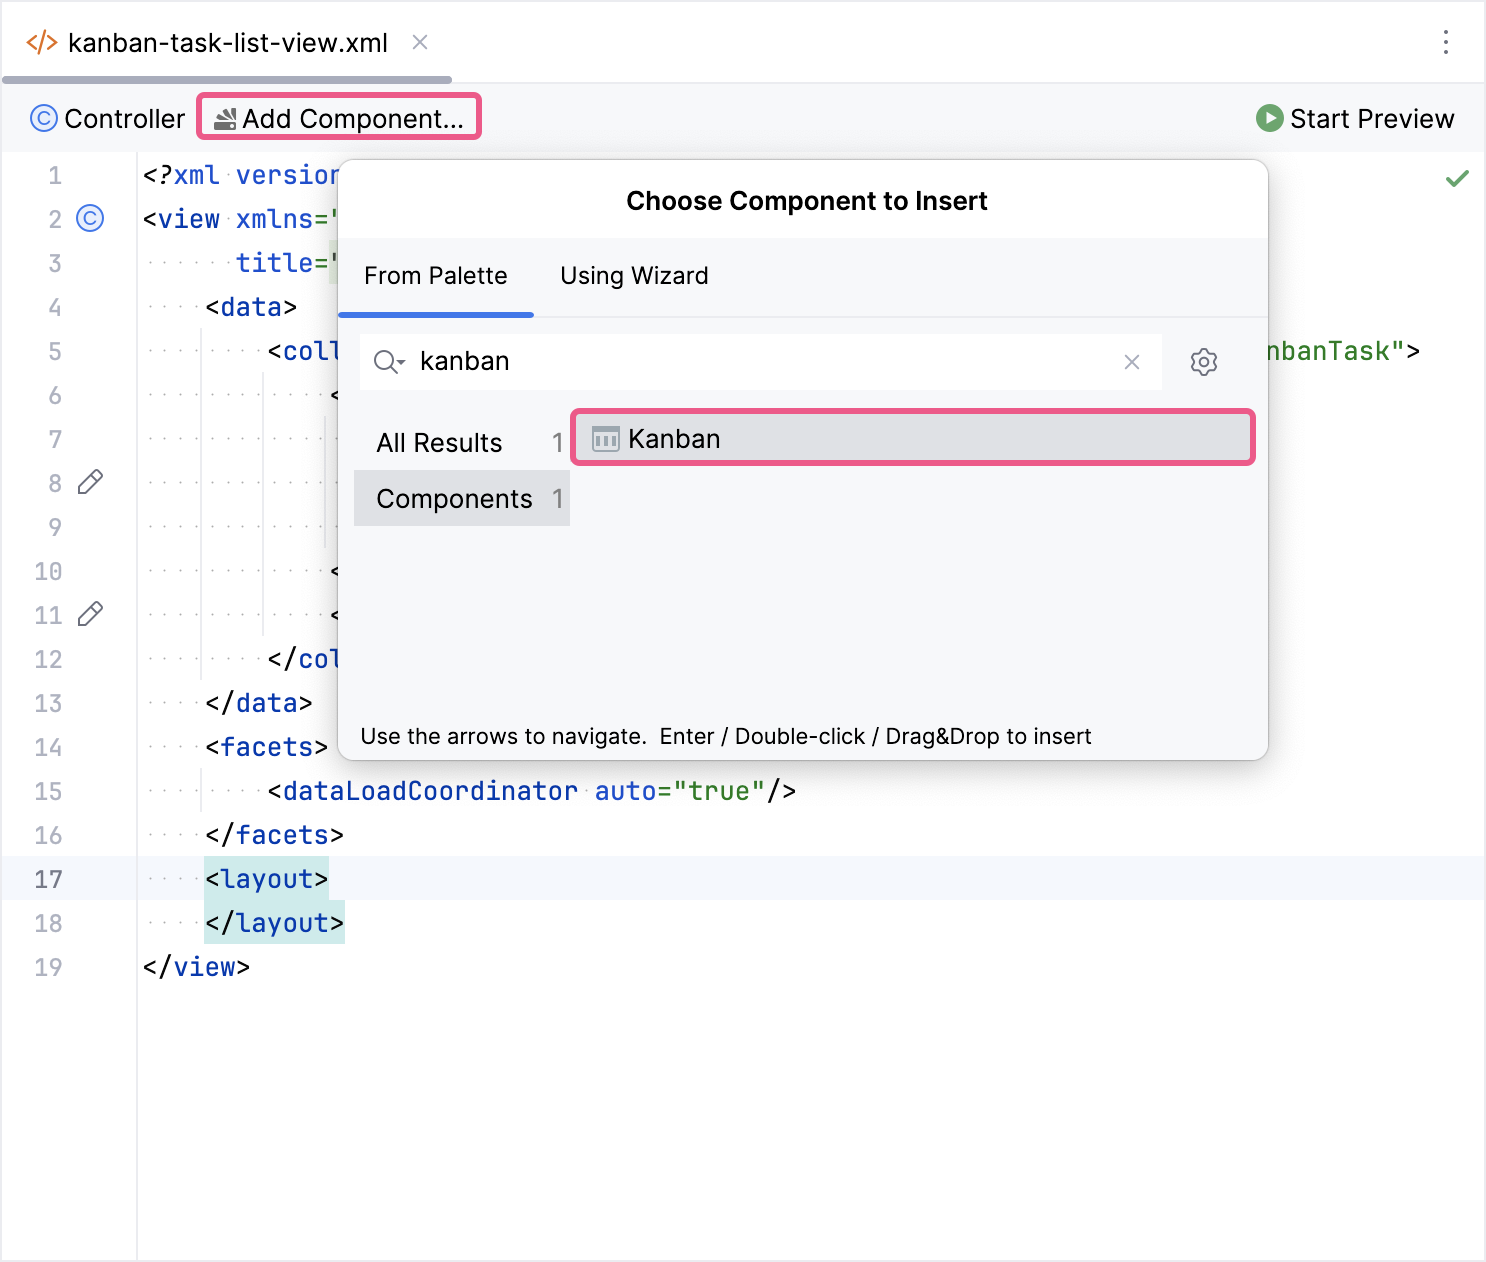
Configure the id, dataContainer, height and width attributes as shown below.
<kanban:kanban id="kanban" dataContainer="kanbanTasksDc" width="100%" height="100%"/>Configuring Columns
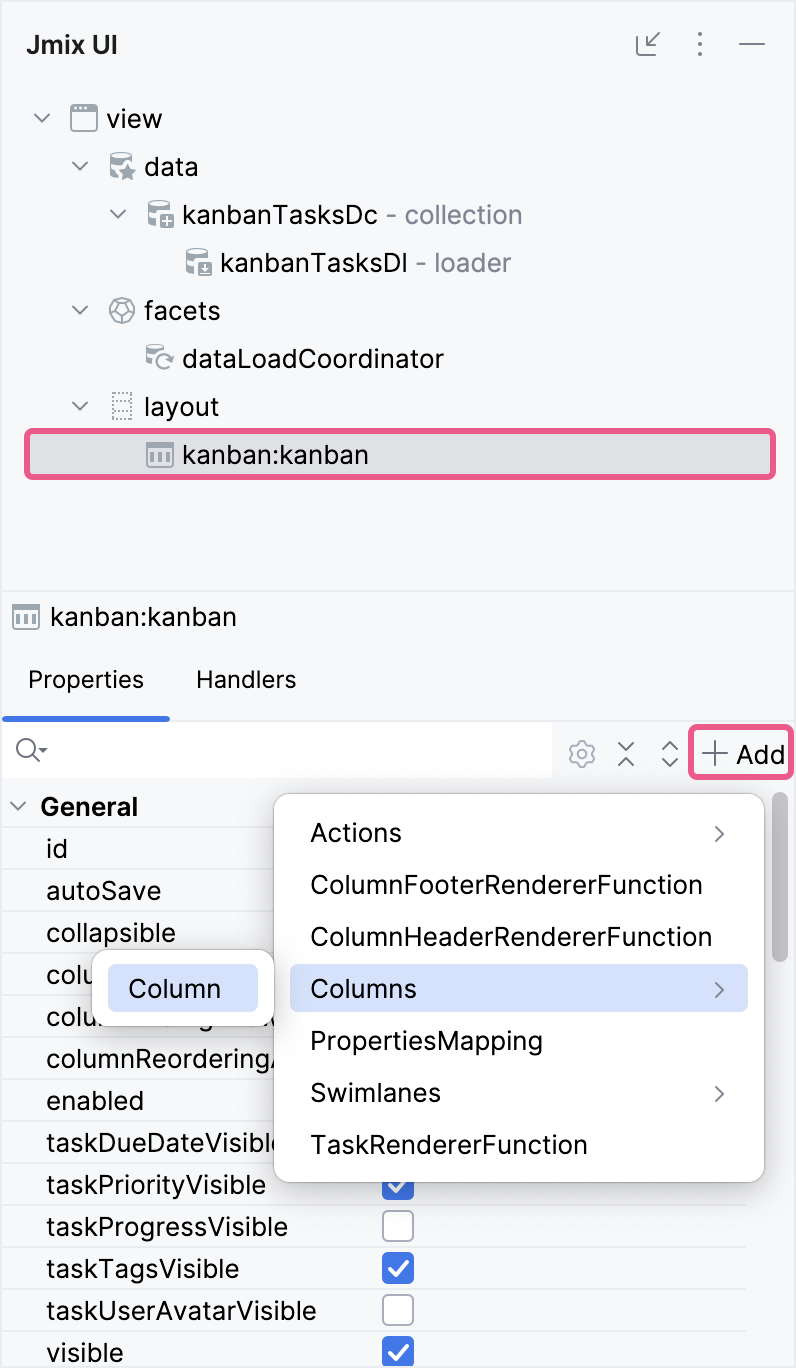
To display the Kanban board component on the view, you need to define columns. To do this, select kanban in the Jmix UI hierarchy panel or in the XML descriptor, then click the Add button in the component inspector panel. From the drop-down list, choose Columns → Column.
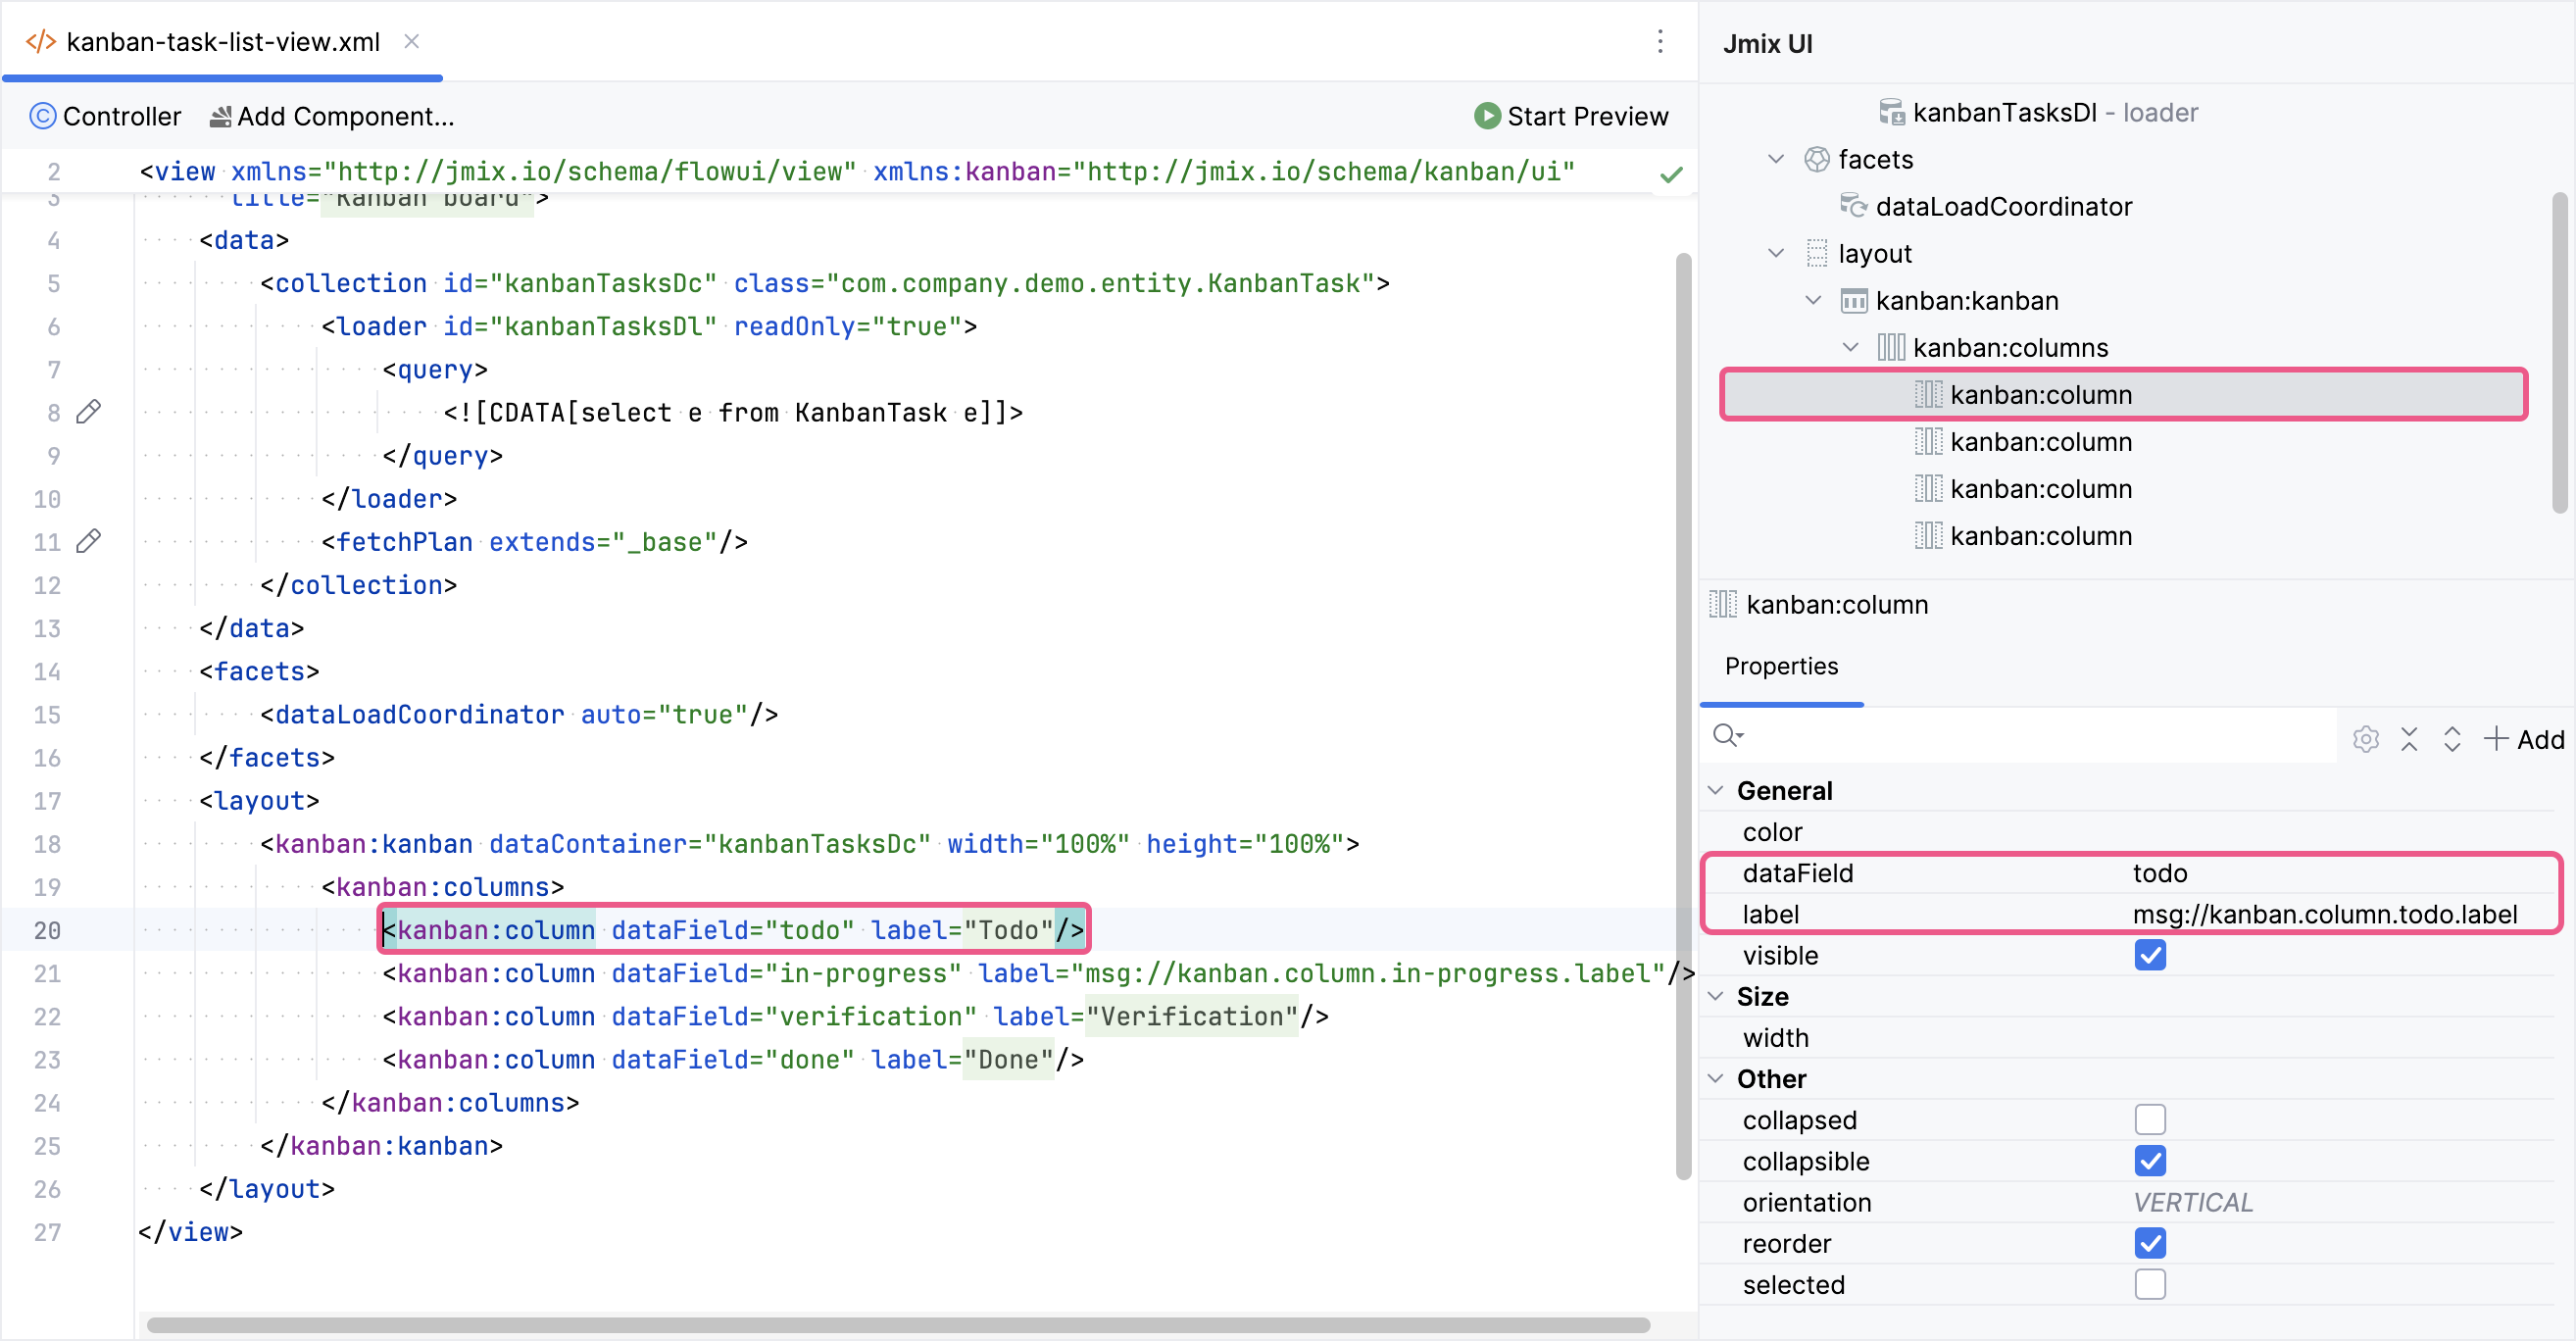
In the dialog that opens, you’ll define the mandatory column attribute dataField. This attribute is the identifier of the column in the kanban component. You need to define the column so that the values of the dataField attribute match the values of the TaskStatus enumeration. Additionally, you need to define the label attribute. The value of this attribute will be displayed in the column header.
Now, you can run the application to see the new component in action.
Click the Debug button ( ) in the main toolbar.
Before launching the application, Studio compares the project data model with the database schema. When you created a new entity, Studio automatically generates a Liquibase changelog to reflect the relevant database modifications (such as creating the KANBAN_TASK table):
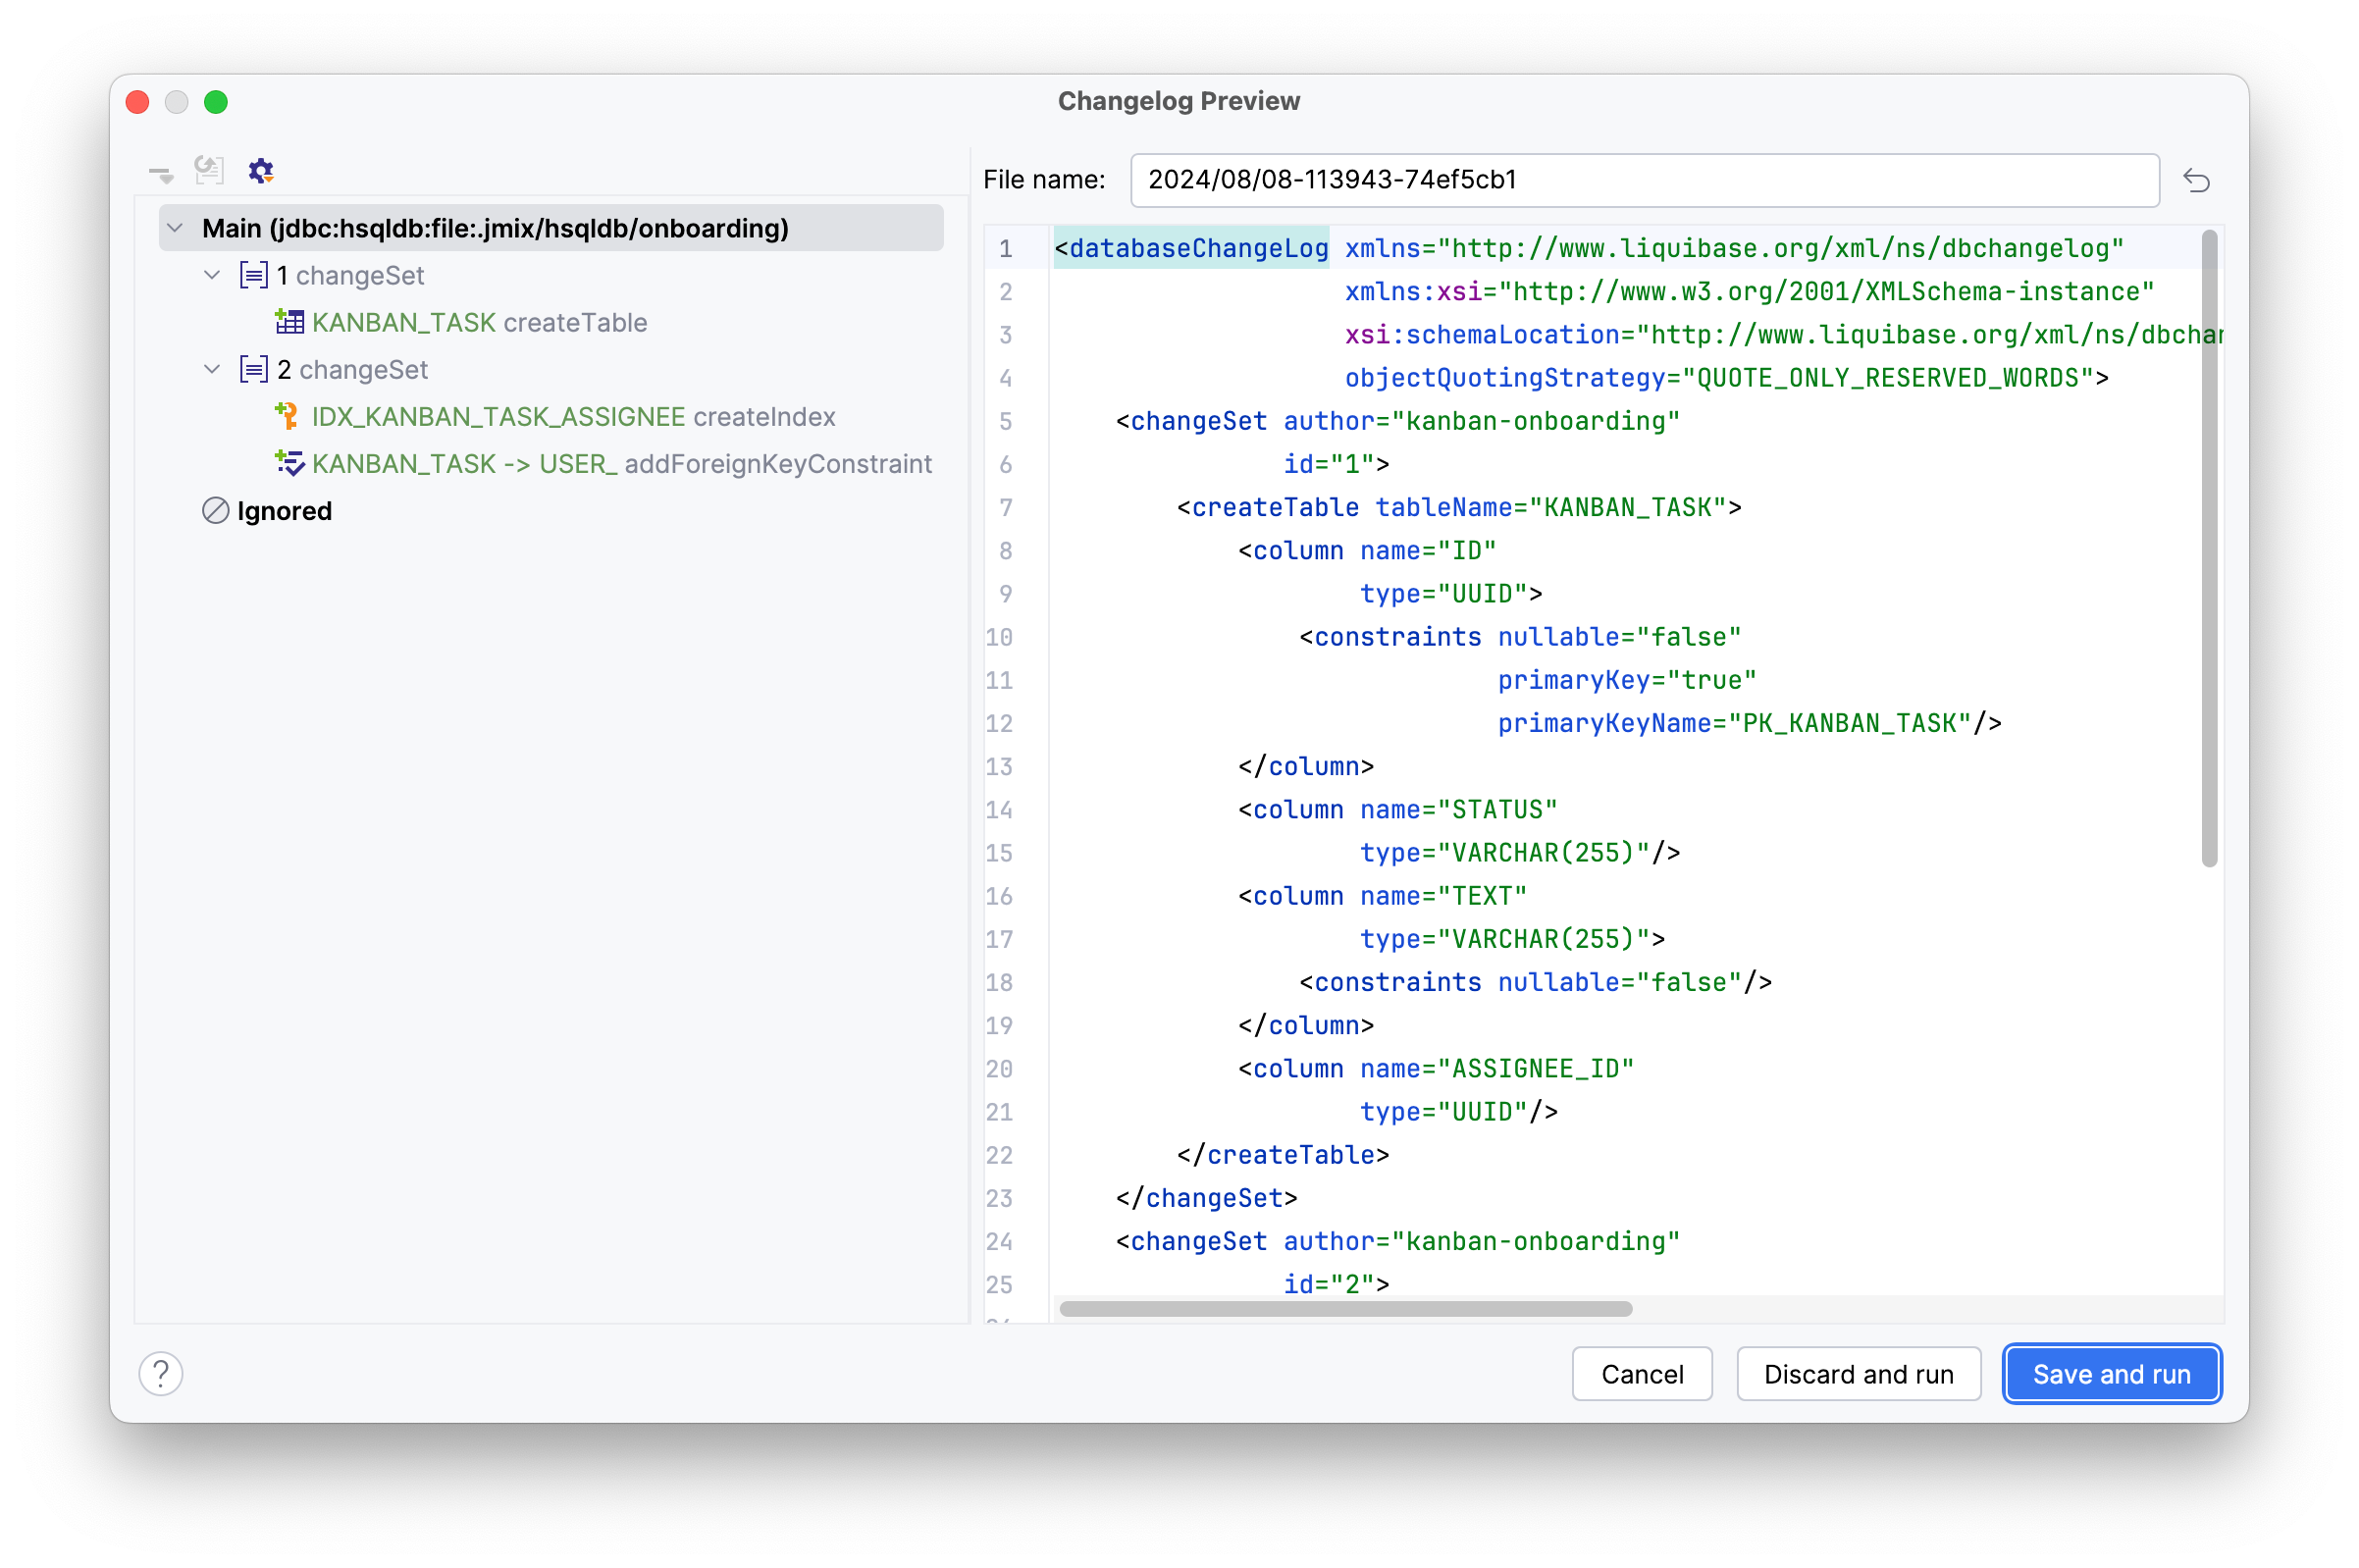
Click Save and run.
Studio will execute the changelog on your database, followed by building and running the application:
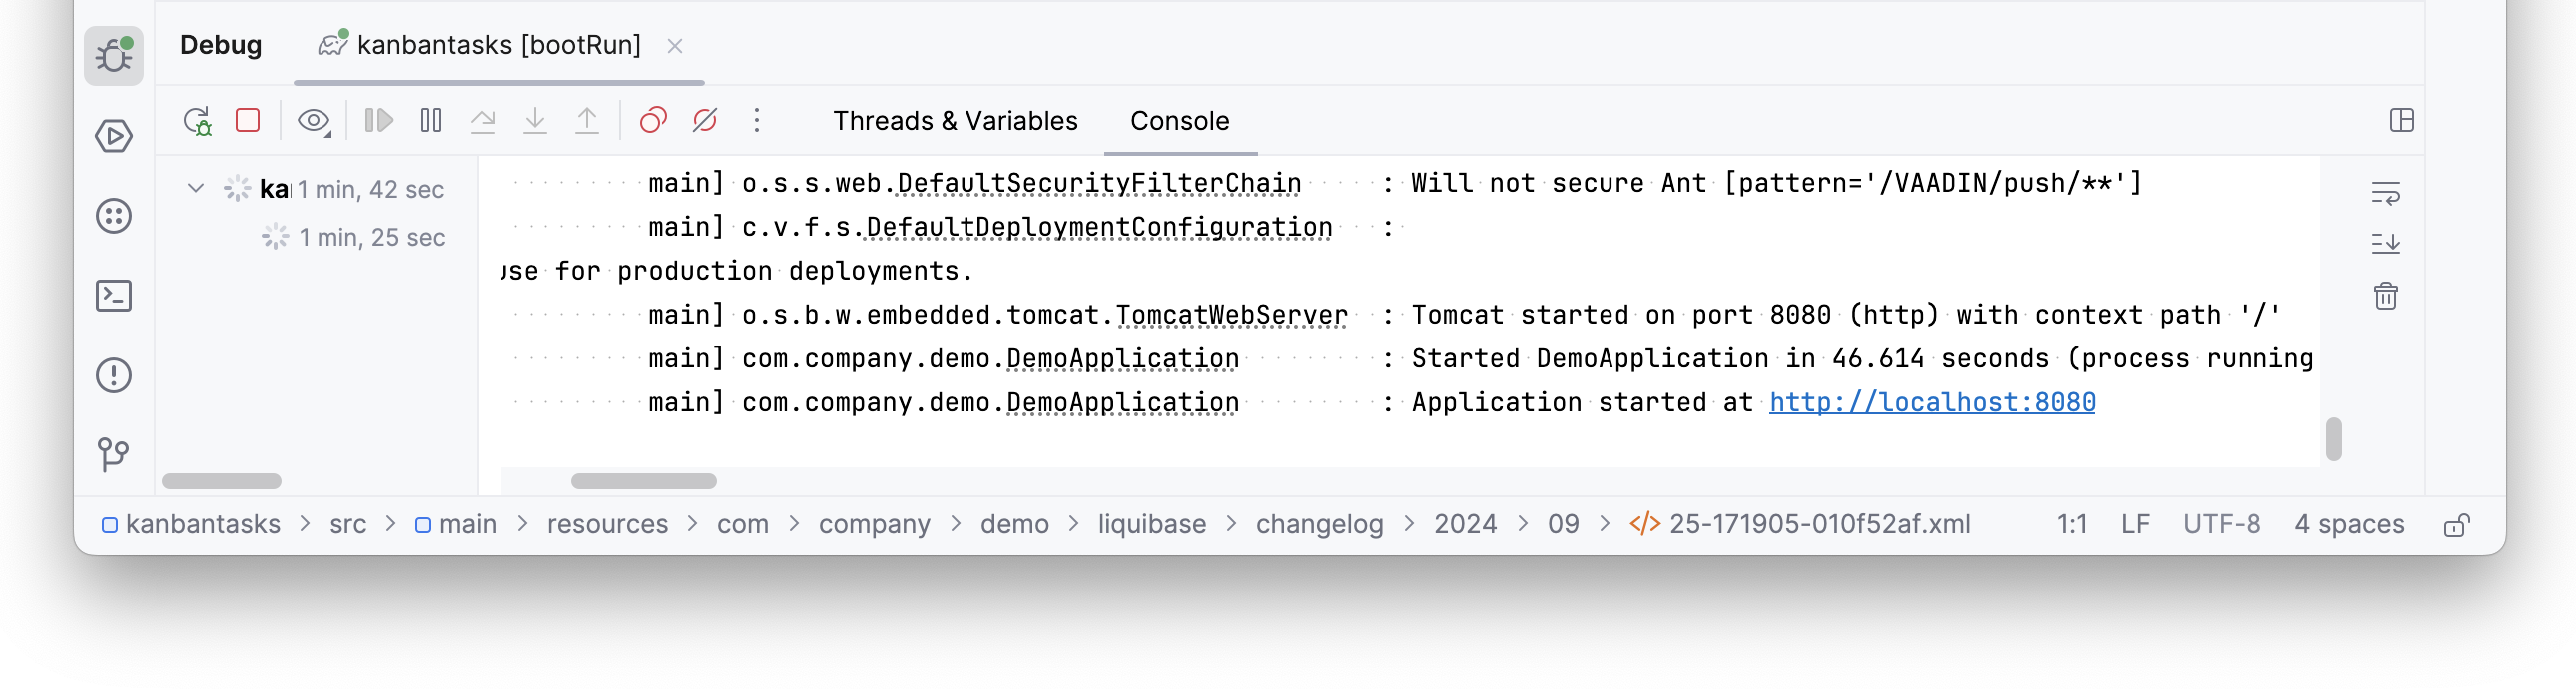
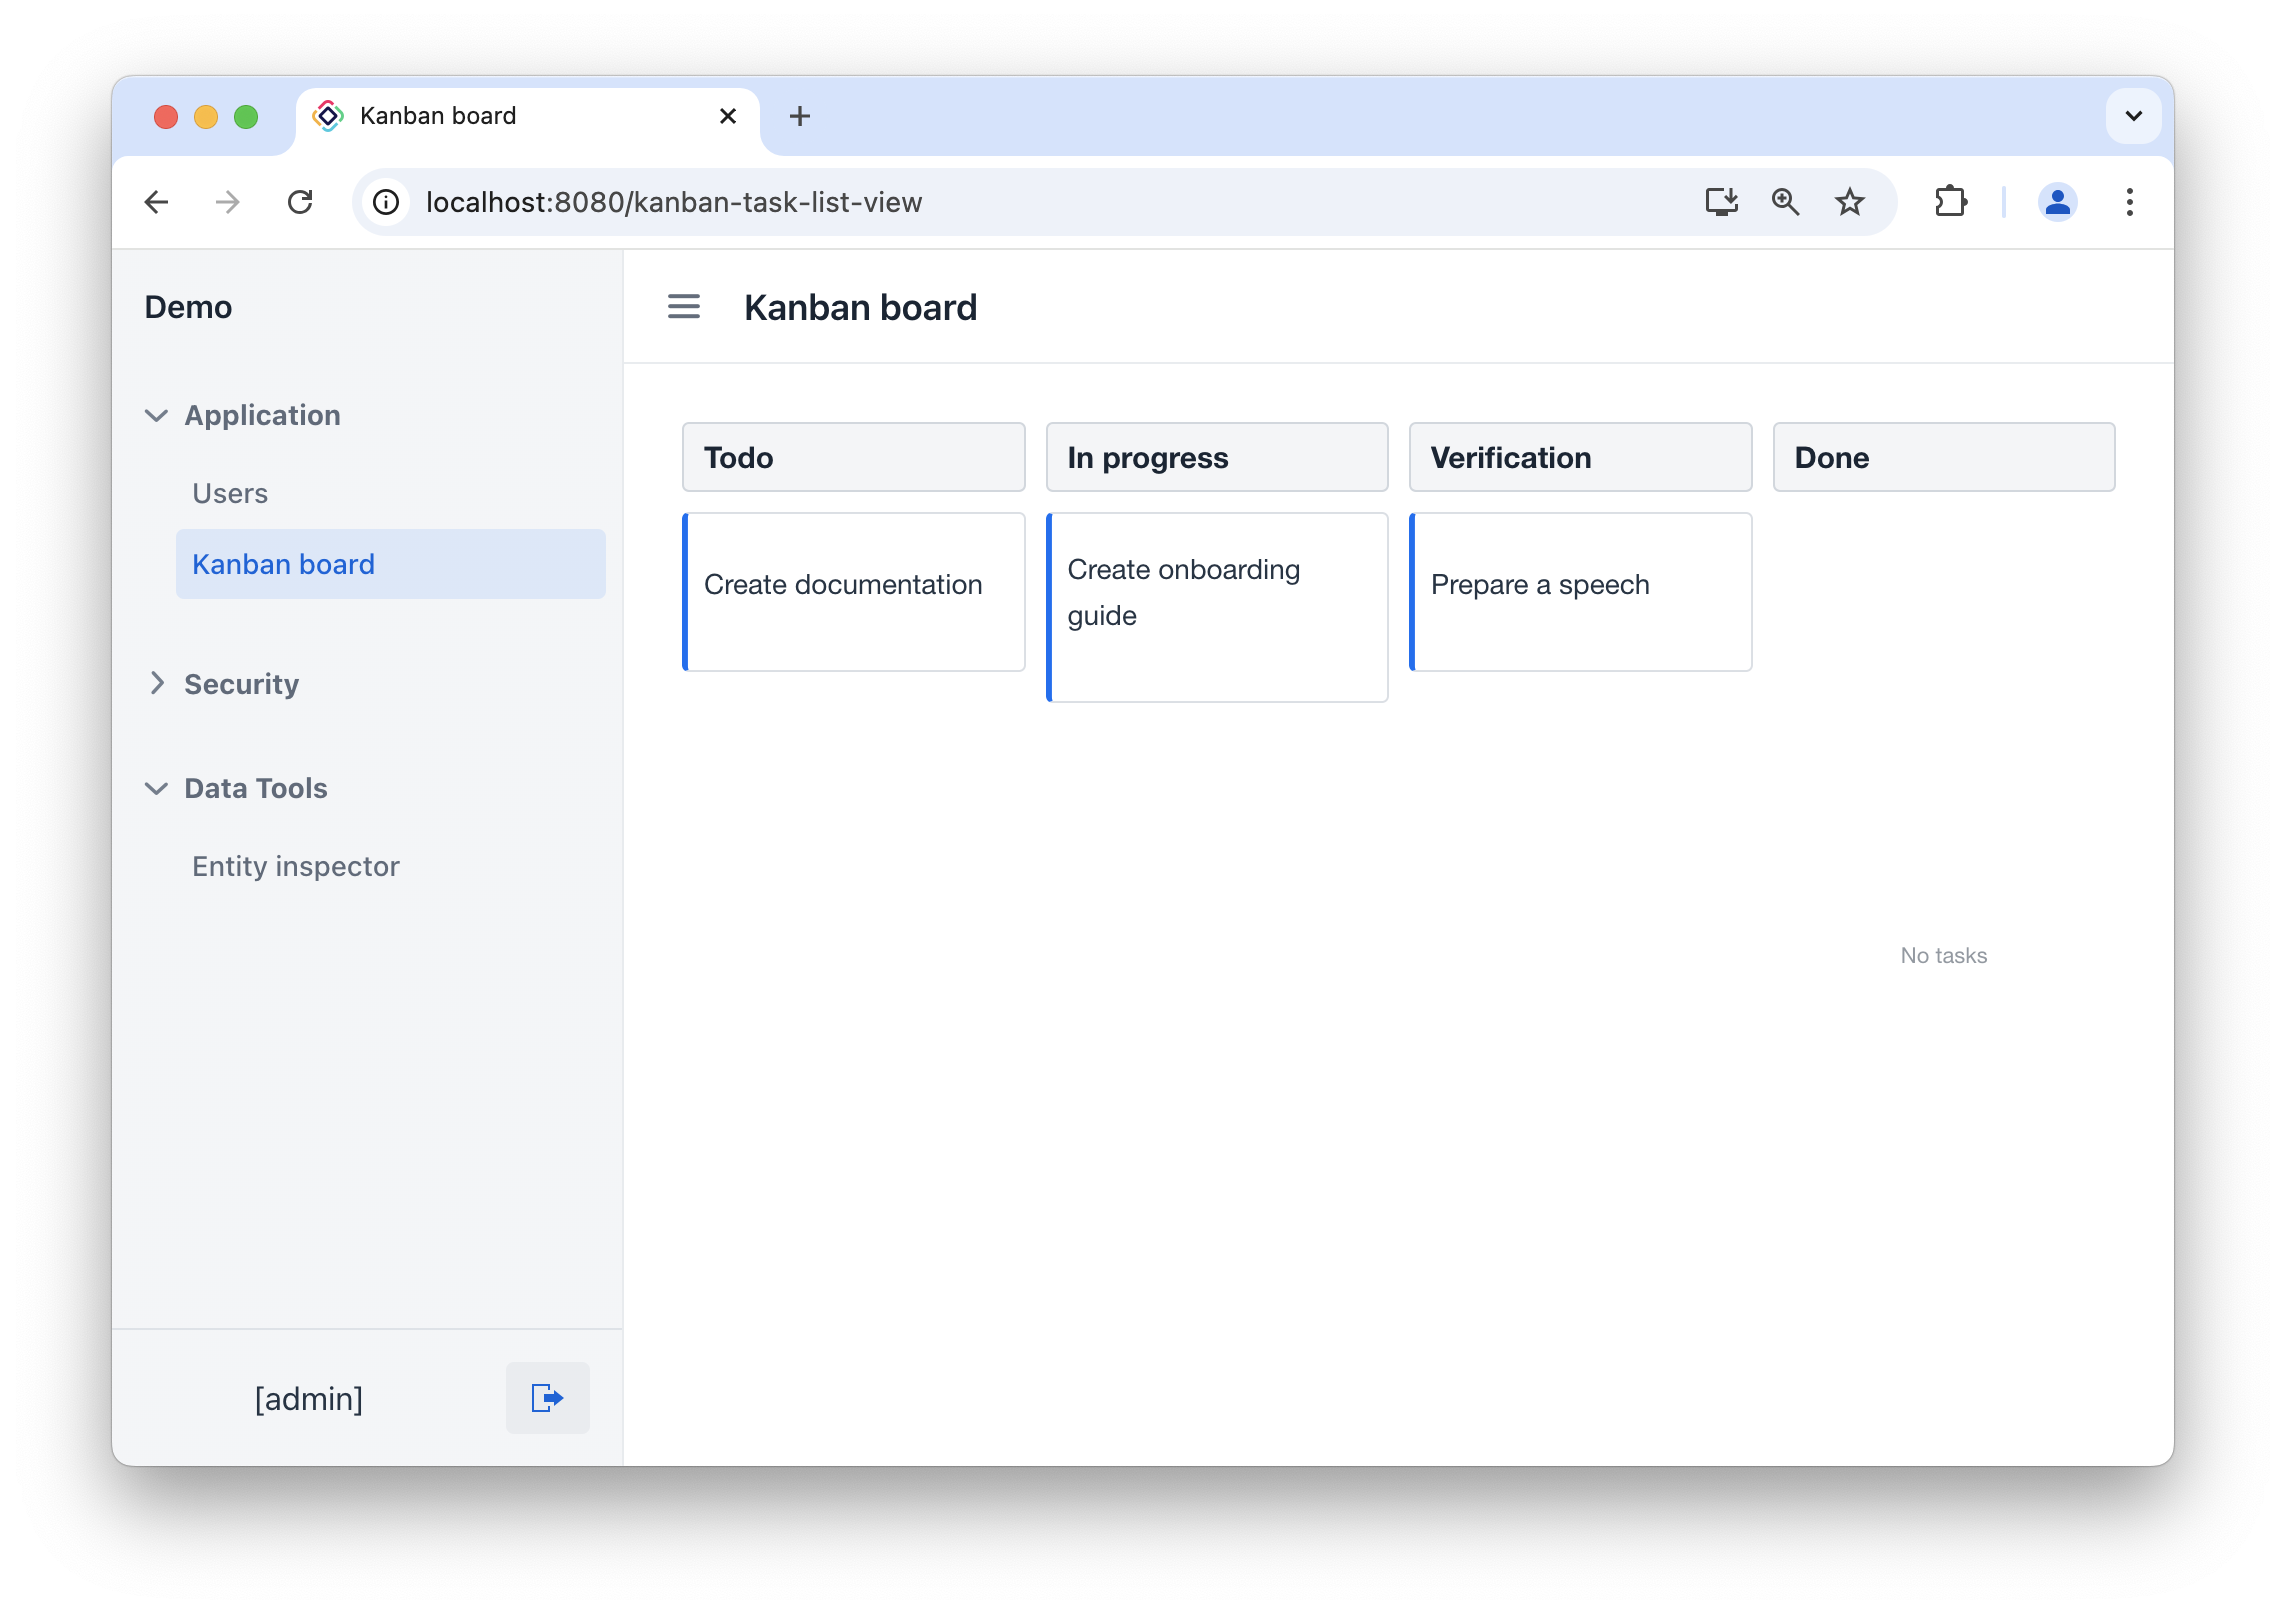
Once the application is up and running, navigate to http://localhost:8080 using your web browser and sign in to the application with the credentials admin/admin.
Choose the Kanban board item from the Application menu. You will see the KanbanTask.list view:
Adding Actions
To provide the ability to create, edit and remove tasks, you need to add actions to the component.
Choose kanban within the Jmix UI hierarchy panel or in the view XML descriptor, and then click the Add button in the component inspector panel. From the drop-down list, choose Actions → Action.
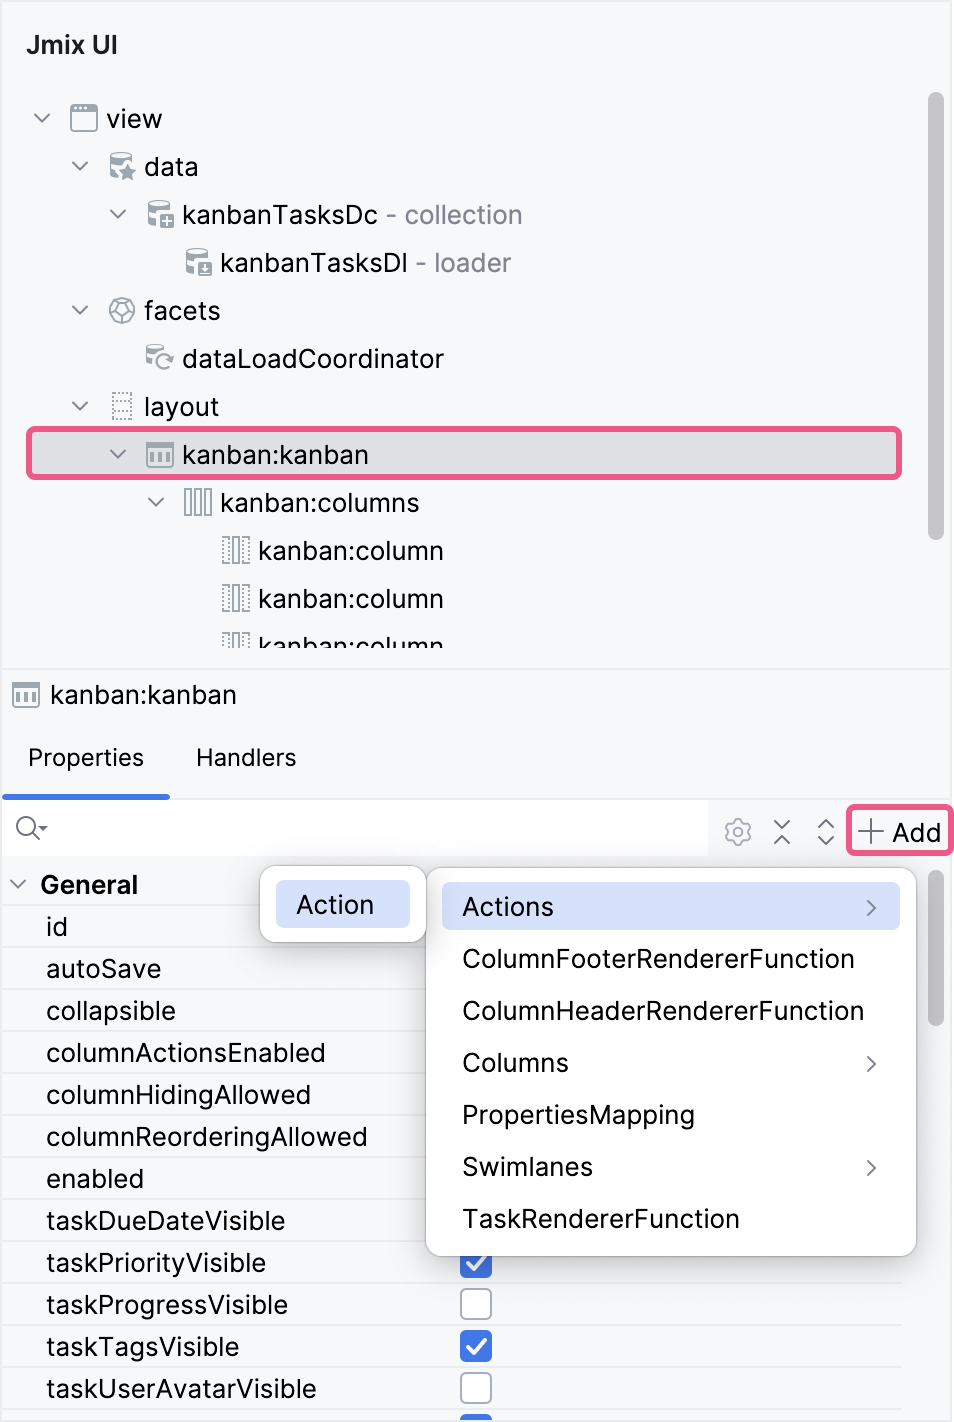
Specify the actions you want to add. For example: list_create, list_edit, list_remove.
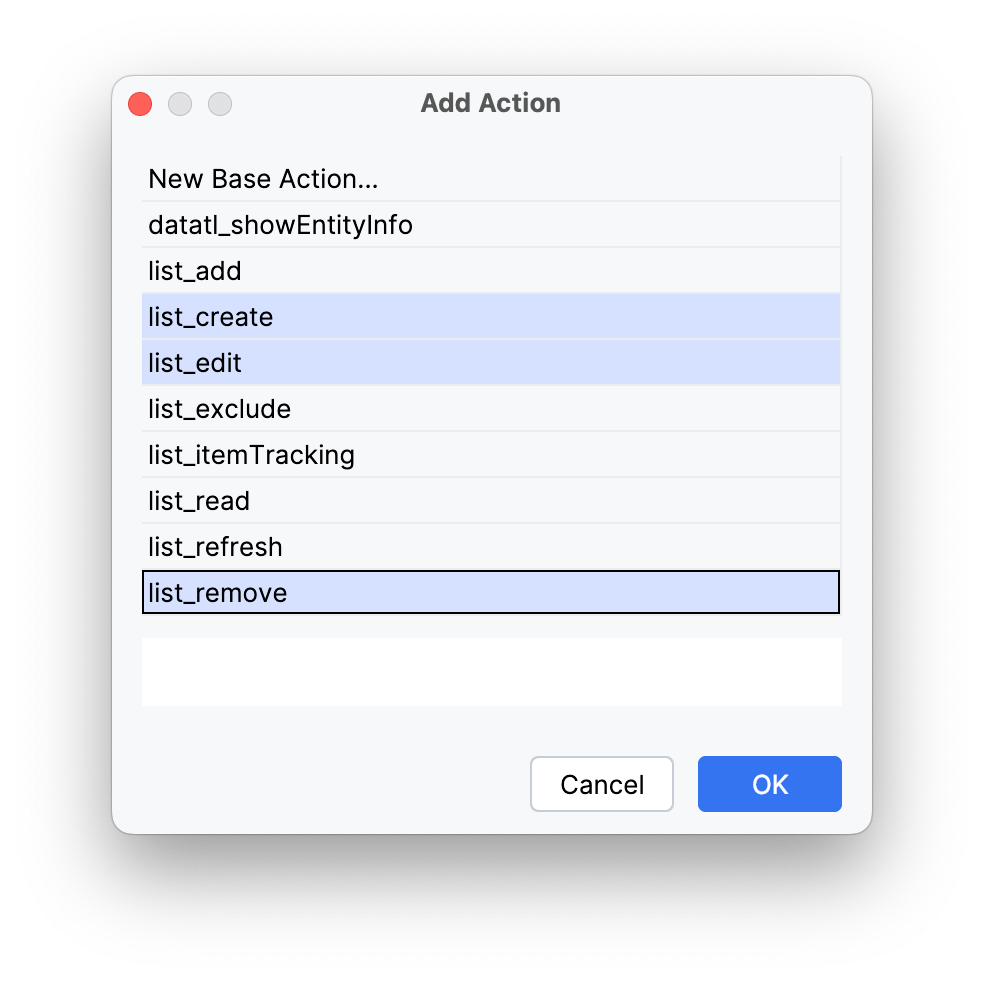
Click the OK button. The action elements will be added in both the Jmix UI hierarchy panel and in the XML. Next, to use these actions, you need to create buttons panel.
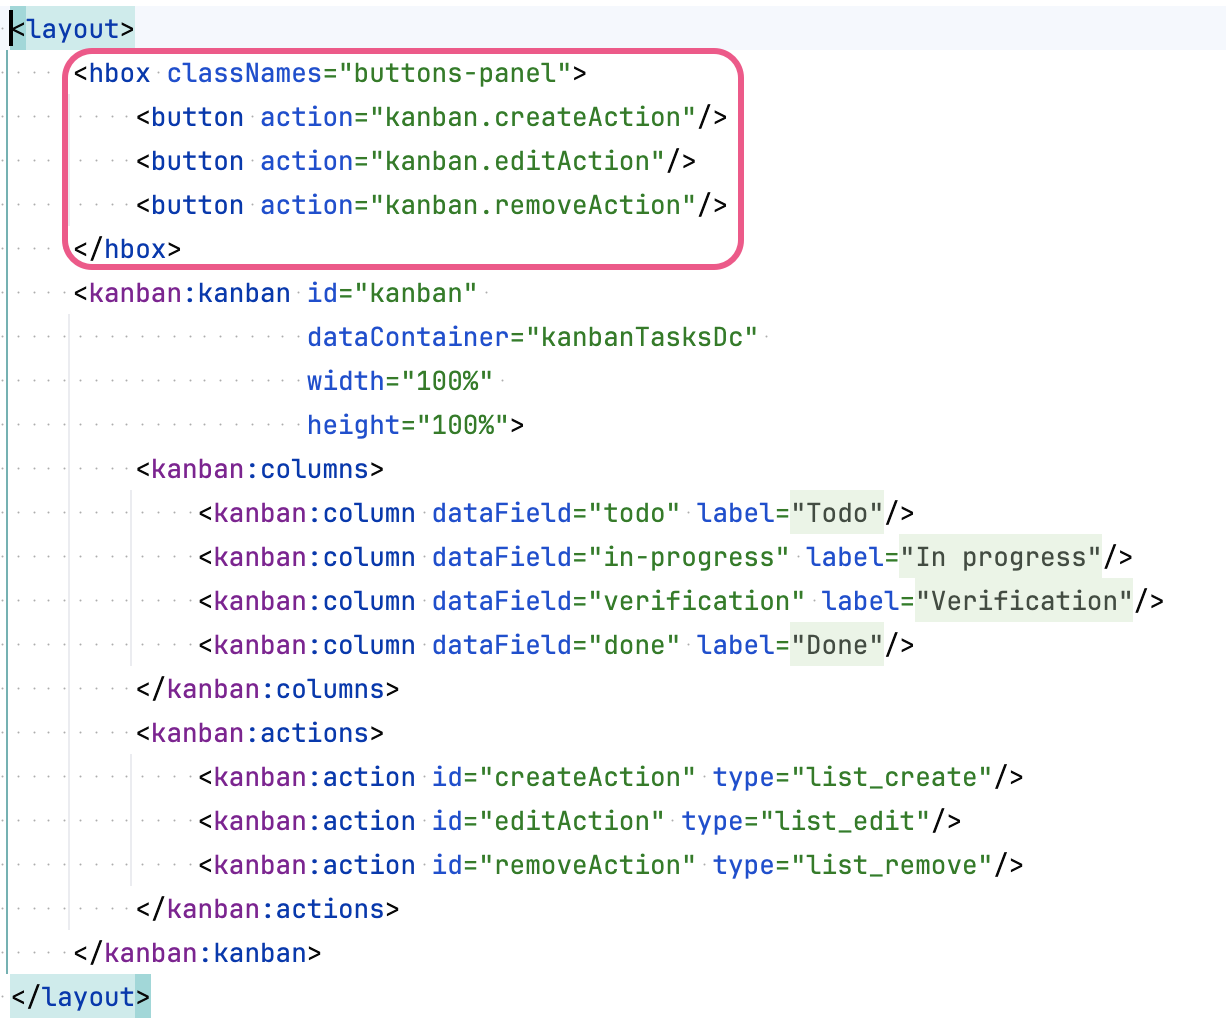
Place the cursor before the kanban element. Next, click Add Component in the actions panel, then find the hbox item and double-click it. To add the required styles, add the classNames attribute with the value buttons-panel to the hbox:
<hbox classNames="buttons-panel"/>Select hbox within the Jmix UI hierarchy panel or in the view XML descriptor, and then click the Add Component button in the actions panel, then find the button item and double-click it.
Use the component inspector panel to assign an action to the button. Create and assign buttons for each action.
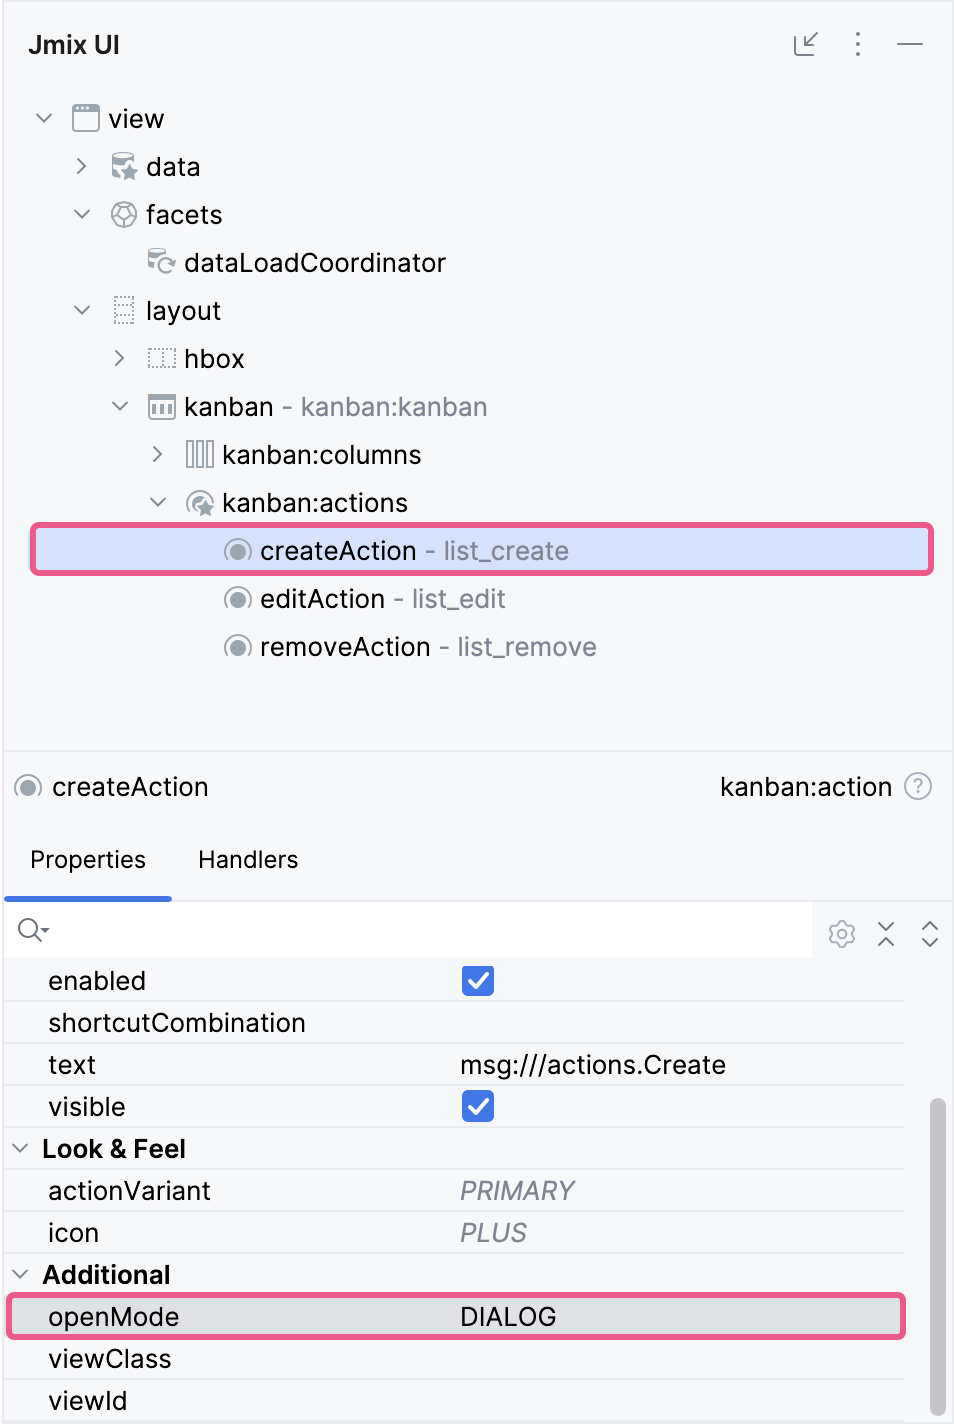
To make task editing more convenient, you’ll need to open the detail view in dialog mode. To do this, select the create action in the Jmix UI hierarchy panel or in the XML descriptor, then change the open mode property to DIALOG. Repeat the same steps for the edit action.
Press Ctrl/Cmd+S and switch to the running application.
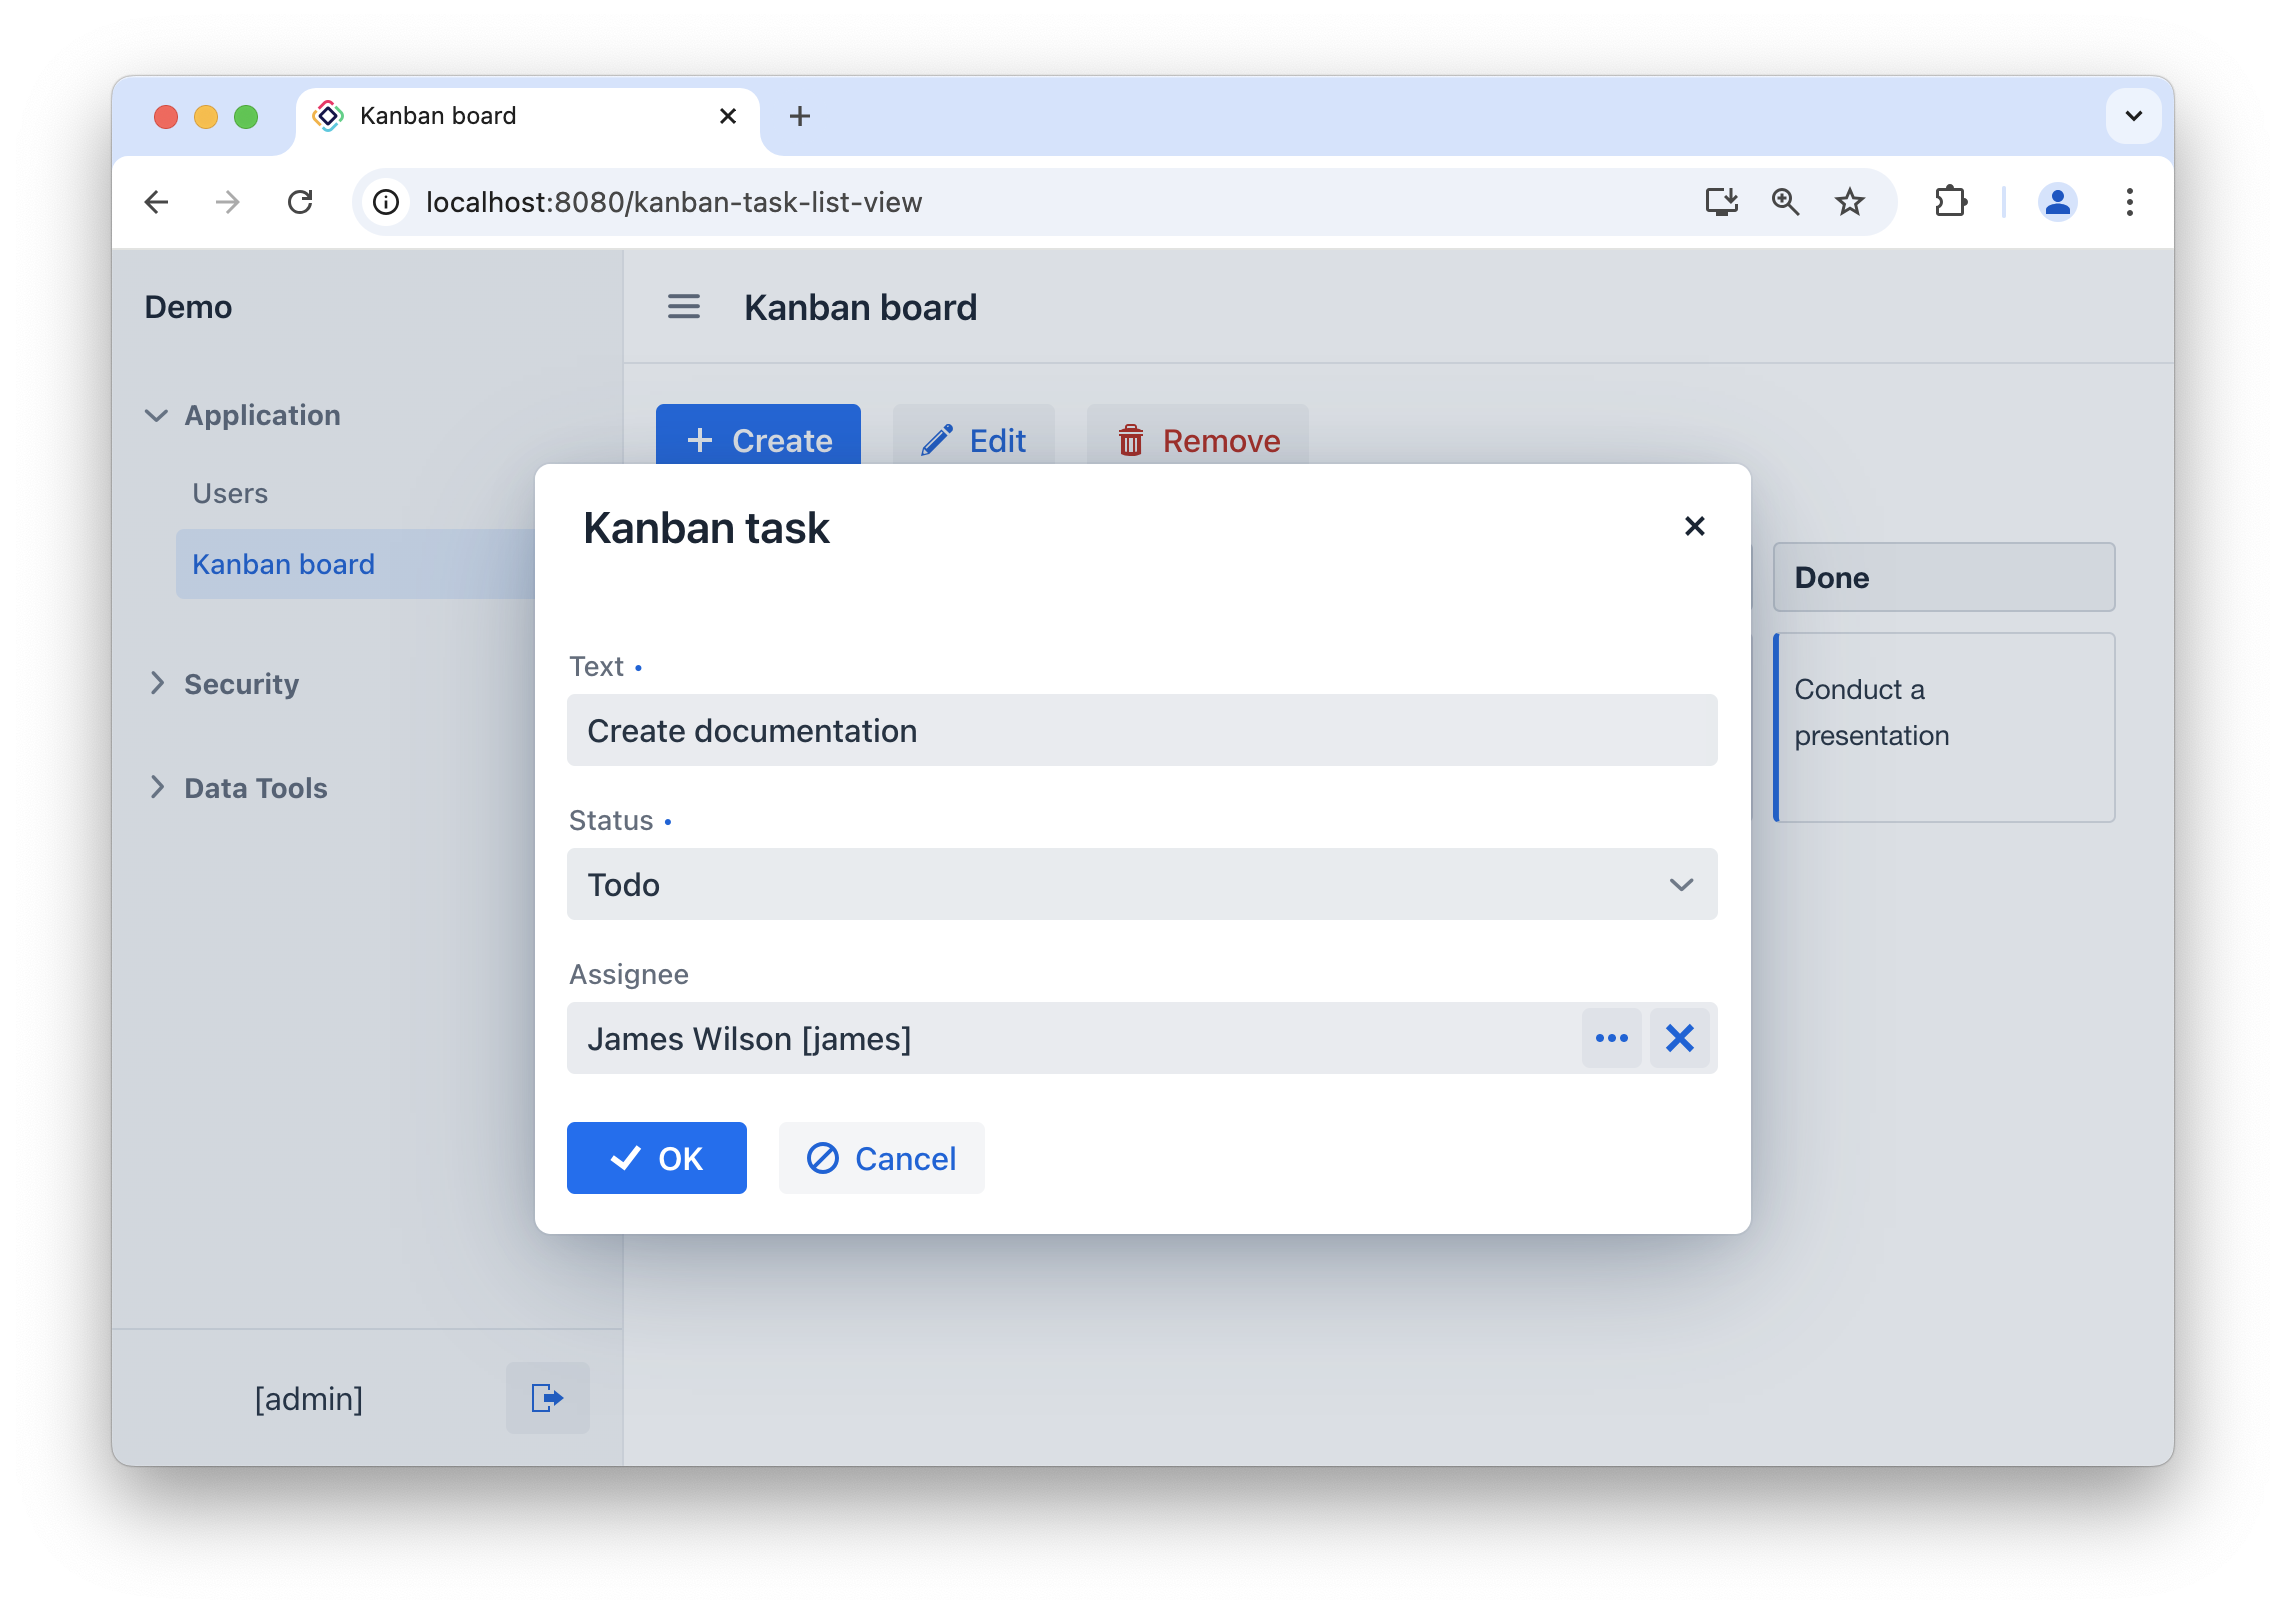
Choose the Kanban board item from the Application menu. You can now create, edit and remove tasks using the detail view dialog:
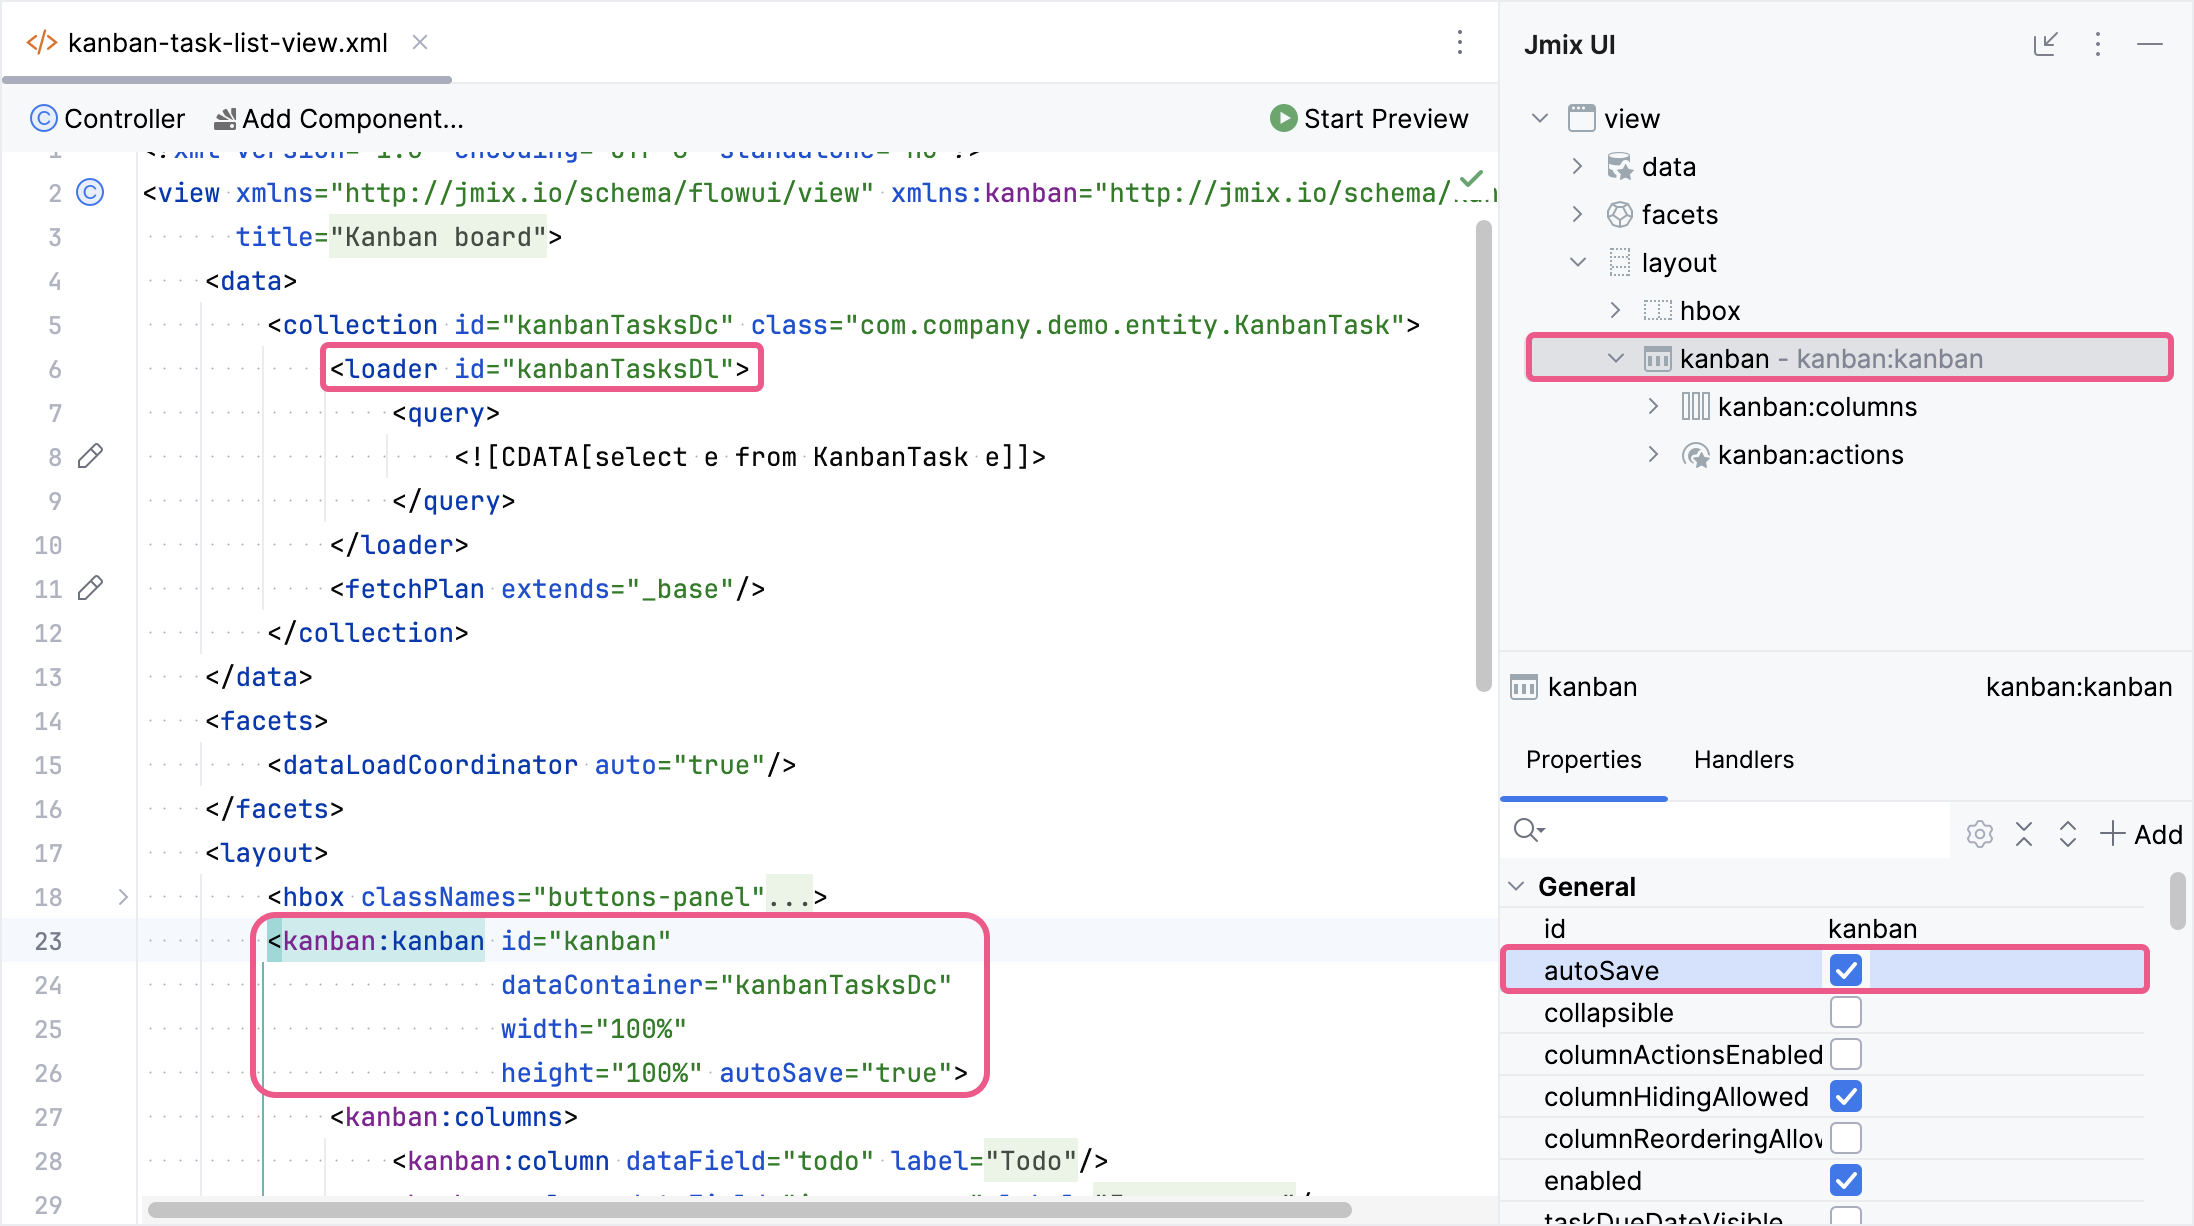
Auto Data Saving
The kanban component keeps temporary changes in a data container until a confirmation action is triggered to commit them to the database. This behavior is typical for visual components.
To enable automatic saving of the DataContext, you can use the autoSave attribute.
Choose kanban:kanban in the Jmix UI hierarchy panel or in the view XML descriptor, and then check the autoSave box in the inspector panel.
|
Don’t forget to remove the |
Press Ctrl/Cmd+S and switch to the running application.
Move any kanbanTask to a different column on the Kanban board and make sure the task’s new status persists even after you reopen the board.
Editing by Double-Clicking
Kanban supports event handling. For more information on available events, please refer to the handlers section.
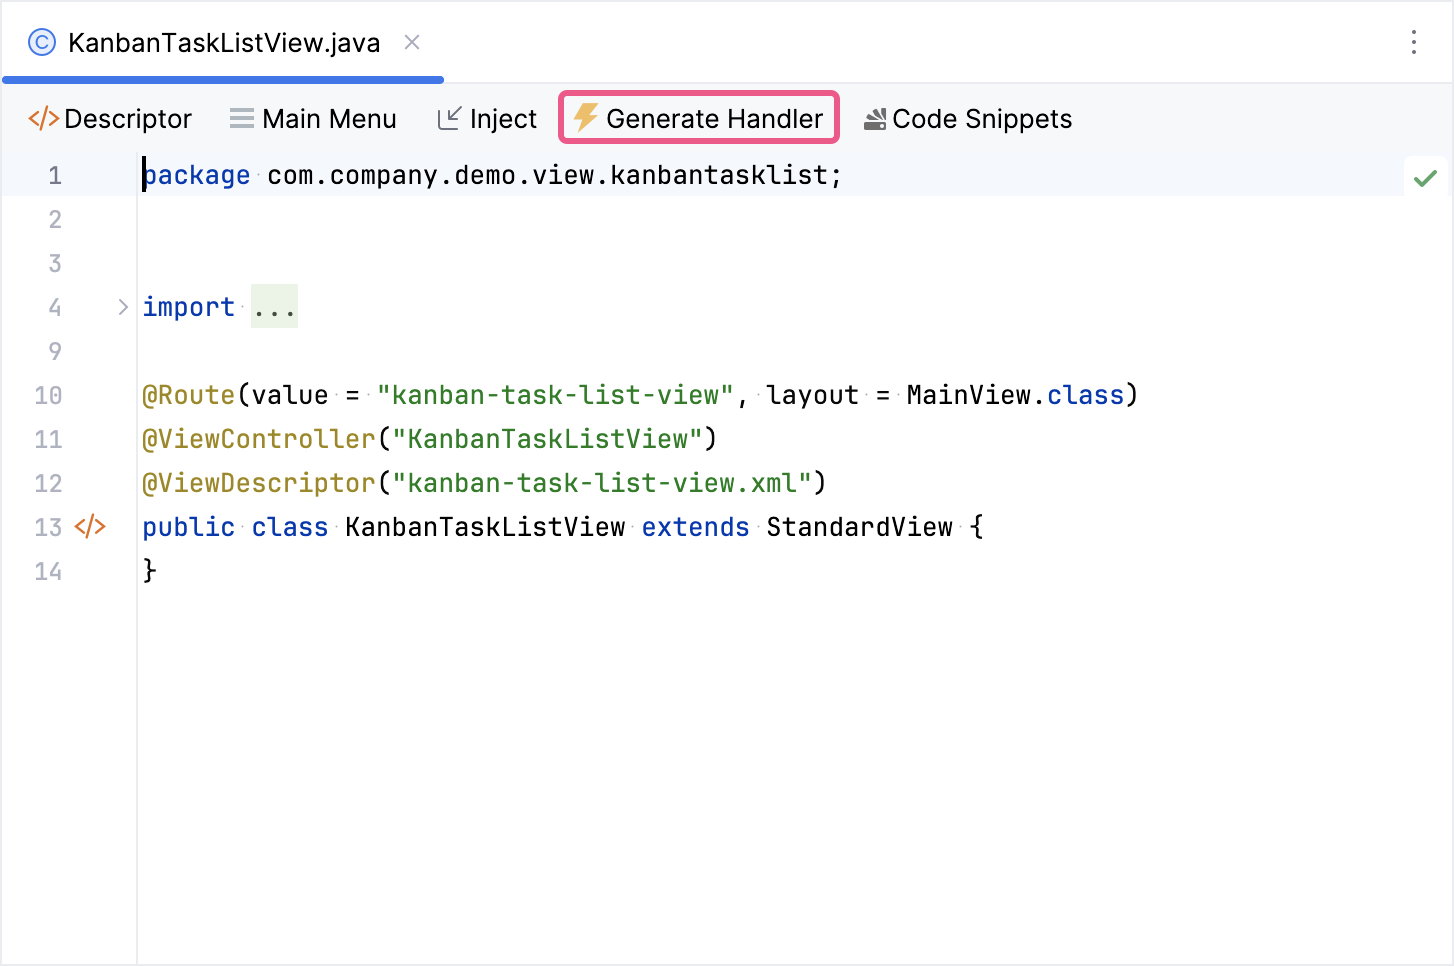
To enable editing a Kanban task card by double-clicking, you need to implement a KanbanTaskDoubleClickEvent handler.
Open the KanbanTaskListView.java class. To generate the handler method from scratch, click Generate Handler in the actions panel at the top of the code editor:
Then select KanbanTaskDoubleClickEvent in the Kanban handlers section of the tree:
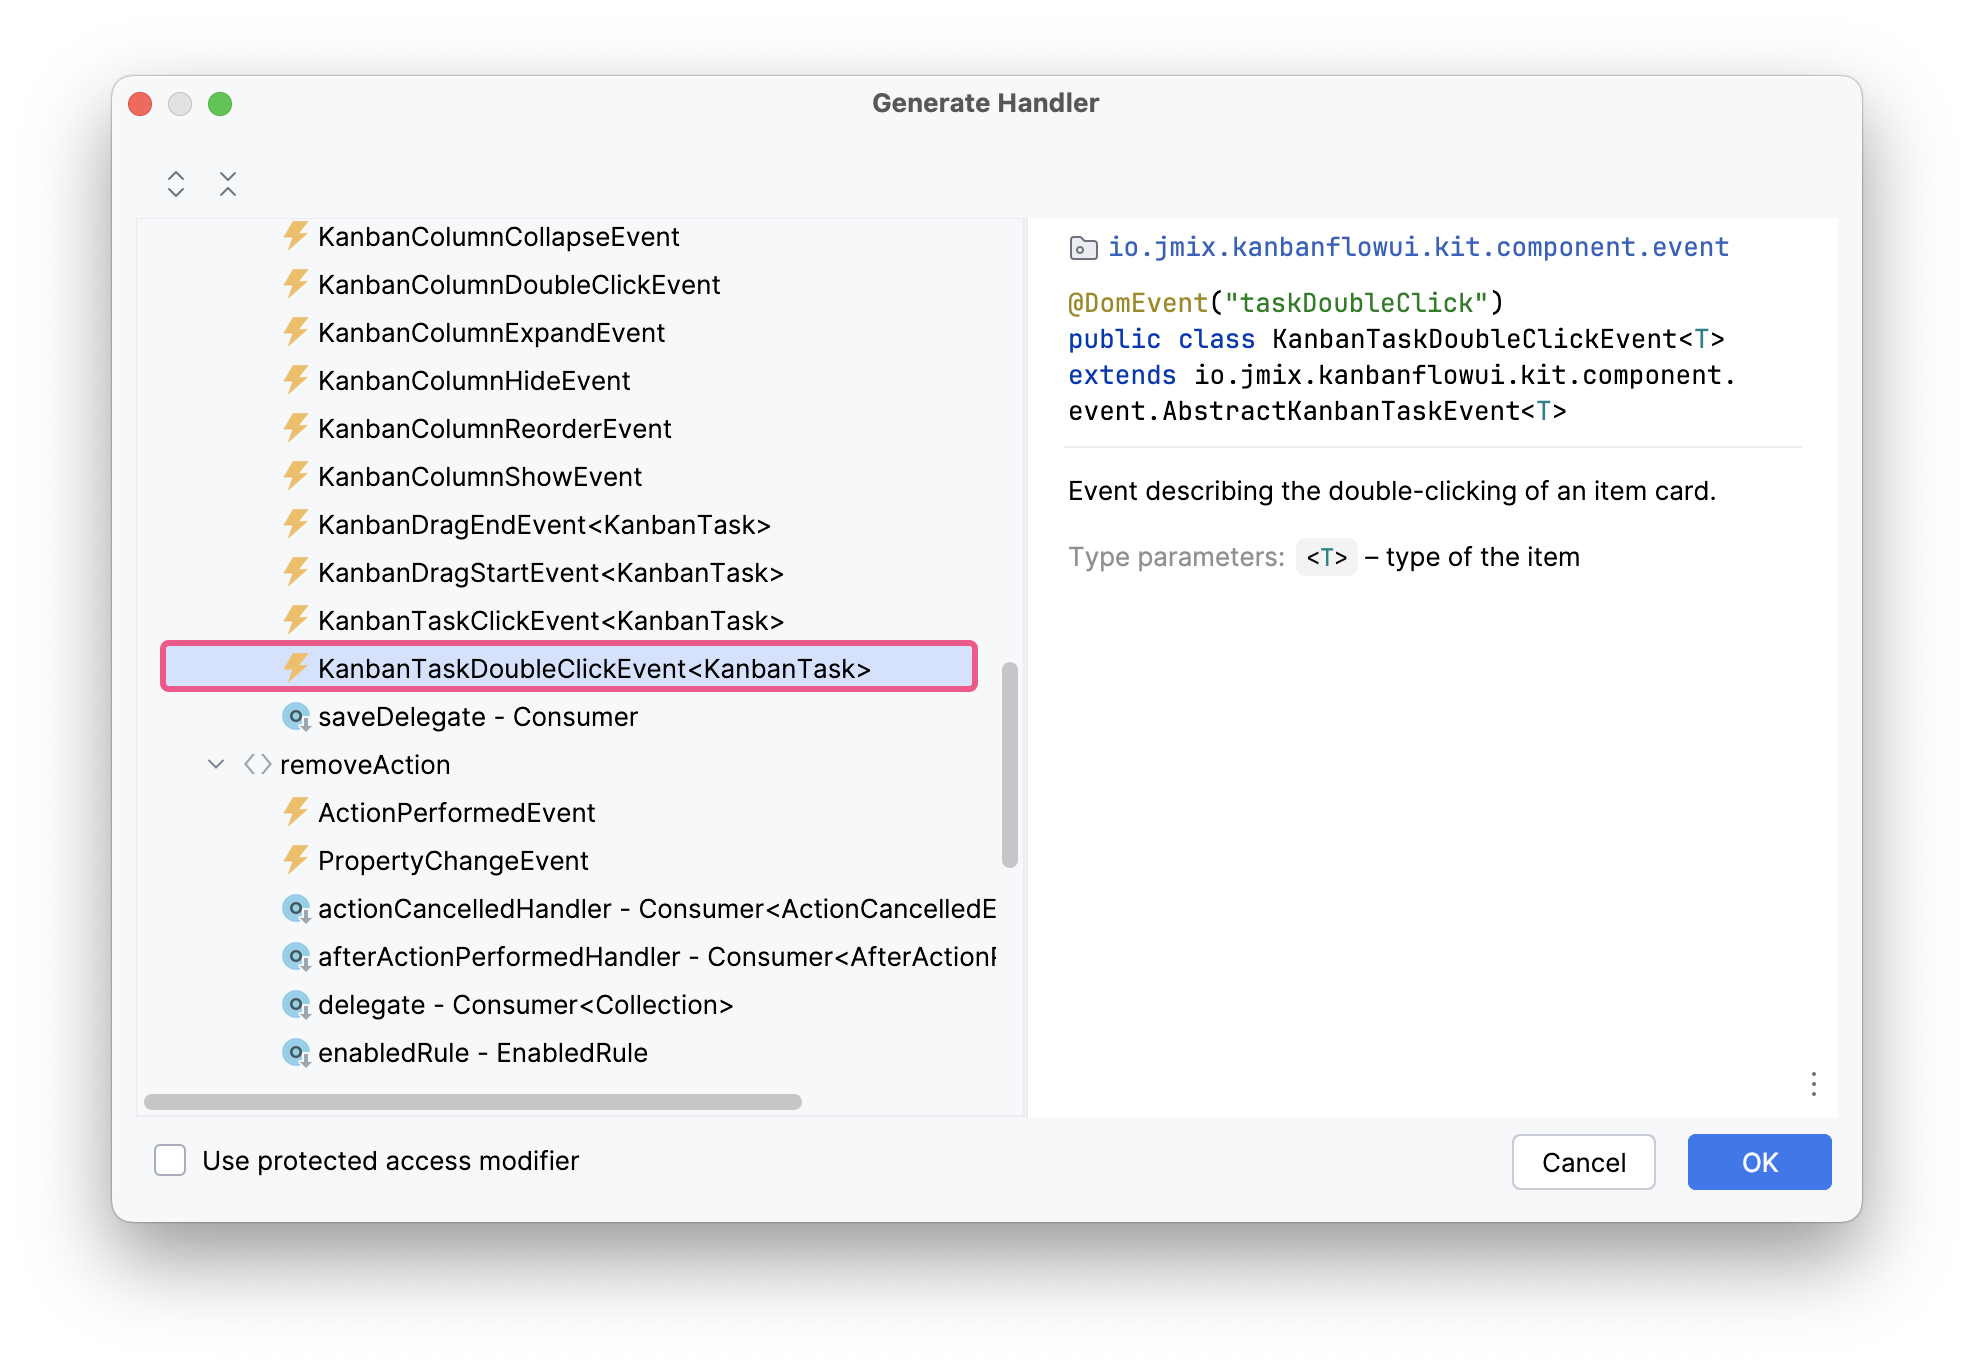
Now you need to implement the logic for opening the detail view:
@ViewComponent
private Kanban<KanbanTask> kanban;

@Autowired
private DialogWindows dialogWindows;

@Subscribe("kanban")
public void onKanbanKanbanTaskDoubleClick(
        final KanbanTaskDoubleClickEvent<KanbanTask> event) {
    dialogWindows.detail(kanban)
            .open();
}
Press Ctrl/Cmd+S and switch to the running application. You can now edit the card by double-clicking.
Summary
This section has covered how to connect the Kanban component to your application’s data, and described the steps to create a Kanban board.
This section has demonstrated:
-
Creating a JPA entity called
KanbanTaskto represent a task on the Kanban board. -
Connecting the Kanban component to data: you have learned how to bind the Kanban component to a collection container.
-
Defining Kanban columns: you have discovered how to create and configure columns on the Kanban board, representing different task statuses.
-
Handling actions and events: you have explored how to implement actions for creating, editing, and deleting tasks, as well as how to handle events such as double-clicking.
-
Enabling automatic data saving: you have learned how to configure the Kanban component to automatically save changes to your data source.
