Entity Data Task
Overview
An Entity Data Task (or shortly, data task) is a specific type of service task that represents operations with Jmix entities within a process. It can be convenient to use Entity Data Task for manipulations with data instead of regular service Task. You can load entities from the database, modify them, and create the new ones.
|
To be exact, we talk here about entity instances, not entities themselves. |
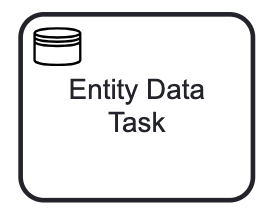
An entity data task is visualized as a rounded rectangle with a small database icon in the top-left corner.
|
As an Entity Data task is a Jmix extension, 3rd party BPMN modeling tools don’t support it. Take care about compatibility if you need to exchange BPMN models with some of them. For example, StormBPMN doesn’t allow to create entity data tasks — use service tasks instead with a comment thai it must be the data entity task. And vice versa: when publishing BPMN models from Jmix to Storm, your entity data task visually will be shown as common service tasks, but their properties in the XML will be safe. |
Depending on type, the entity data task XML representations differ. See examples in the corresponding task type descriptions.
Here is a newly created entity data task; by default, it is a Load entity task.
    <serviceTask id="entity-data-task" name="Entity Data Task"
        flowable:type="jmix-load-entities-jpql">
      <extensionElements />
    </serviceTask>
Properties
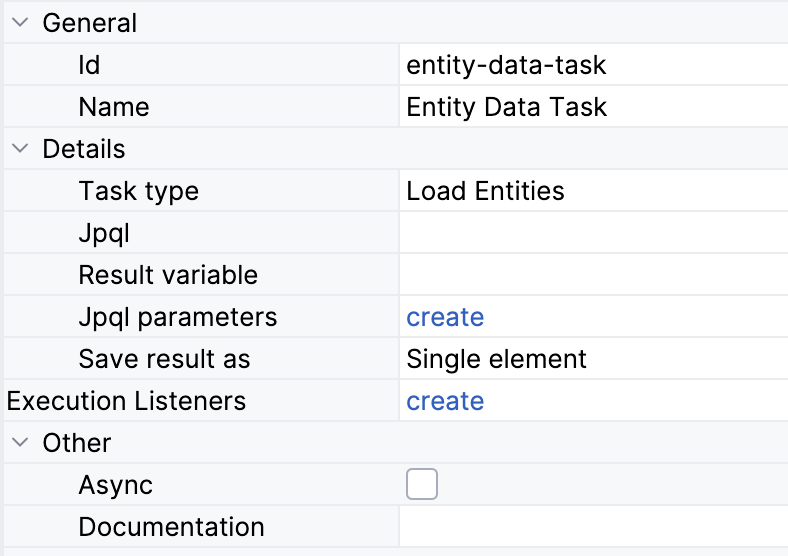
An entity data task has the following properties:
To configure data task:
-
First, set general task properties.
-
Then, define a Task type and set the required parameters depending on the selected type.
-
Create Execution listeners if necessary.
-
About the Async flag, see details in the Transactions section.
|
Entity data task doesn’t have multi-instance properties available. But you can use it within an embedded subprocess that is multi-instanced. See the Multi-Instance section. |
Data Task Types
You can select a type of data task from a pull-down list:
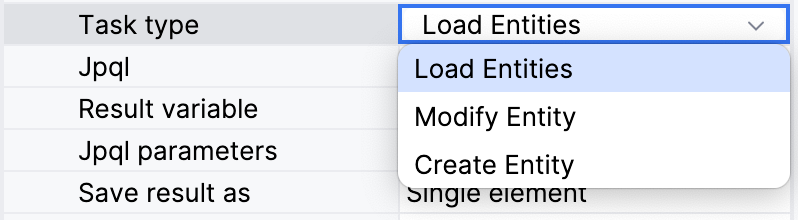
Here you can create data tasks of the following types:
|
To delete an entity, use a service task and call a method doing deletion with the help of DataManager. |
Loading Entities
To load entities, you should select the Load Entities task type in the properties panel. Then, define JPQL query and, if needed, the result variable.
JPQL Query
To create a JPQL query, select a JPQL property field and click the Edit button:

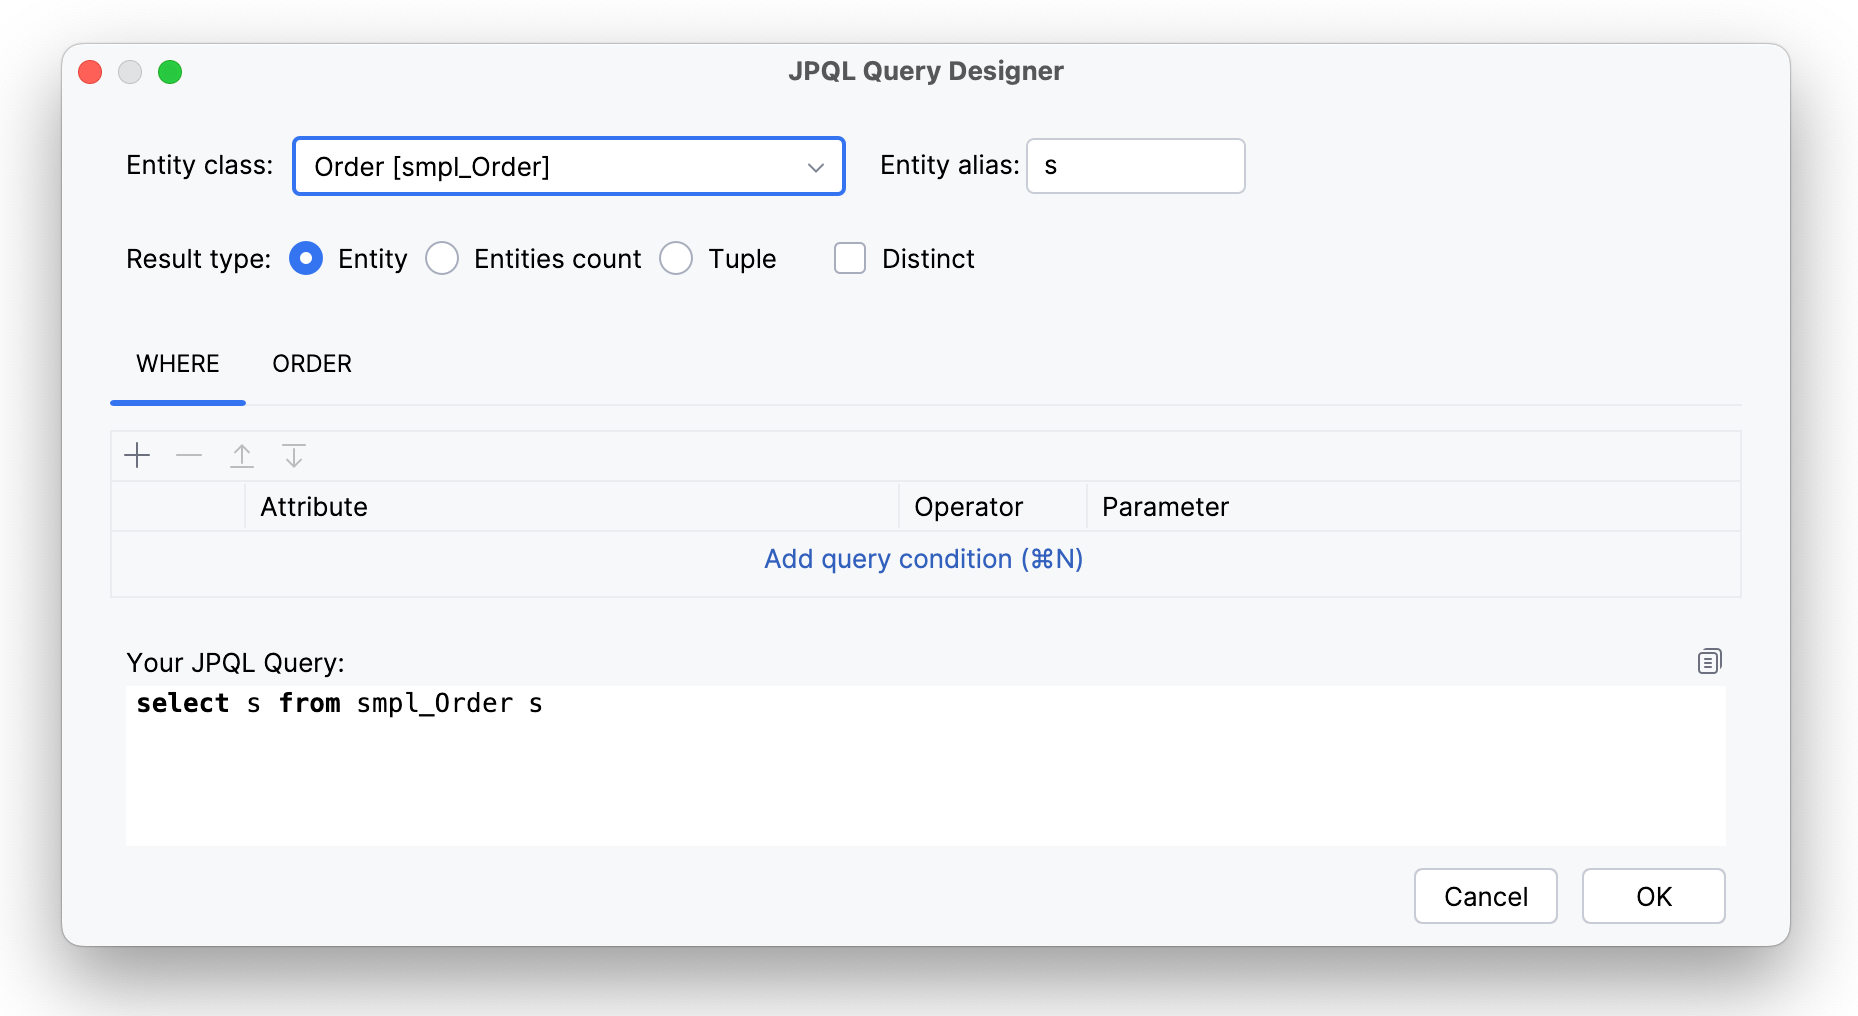
And JPQL Query Designer window will open. First, select entity class from a pull-down list, for example, smpl_Order. Entity alias will be set automatically, you can change it later.
Result Types
Next, select the result type:
- Entity
-
In this case, the query always returns a list of entities. If you choose option Save result as a single element, you’ll get the first element from the list, ordered by default or according parameter you set.
This JPQL query will be generated:
select s from smpl_Order s
- Entities count
-
In this cas, the query returns an integer value, the result of counting operation.
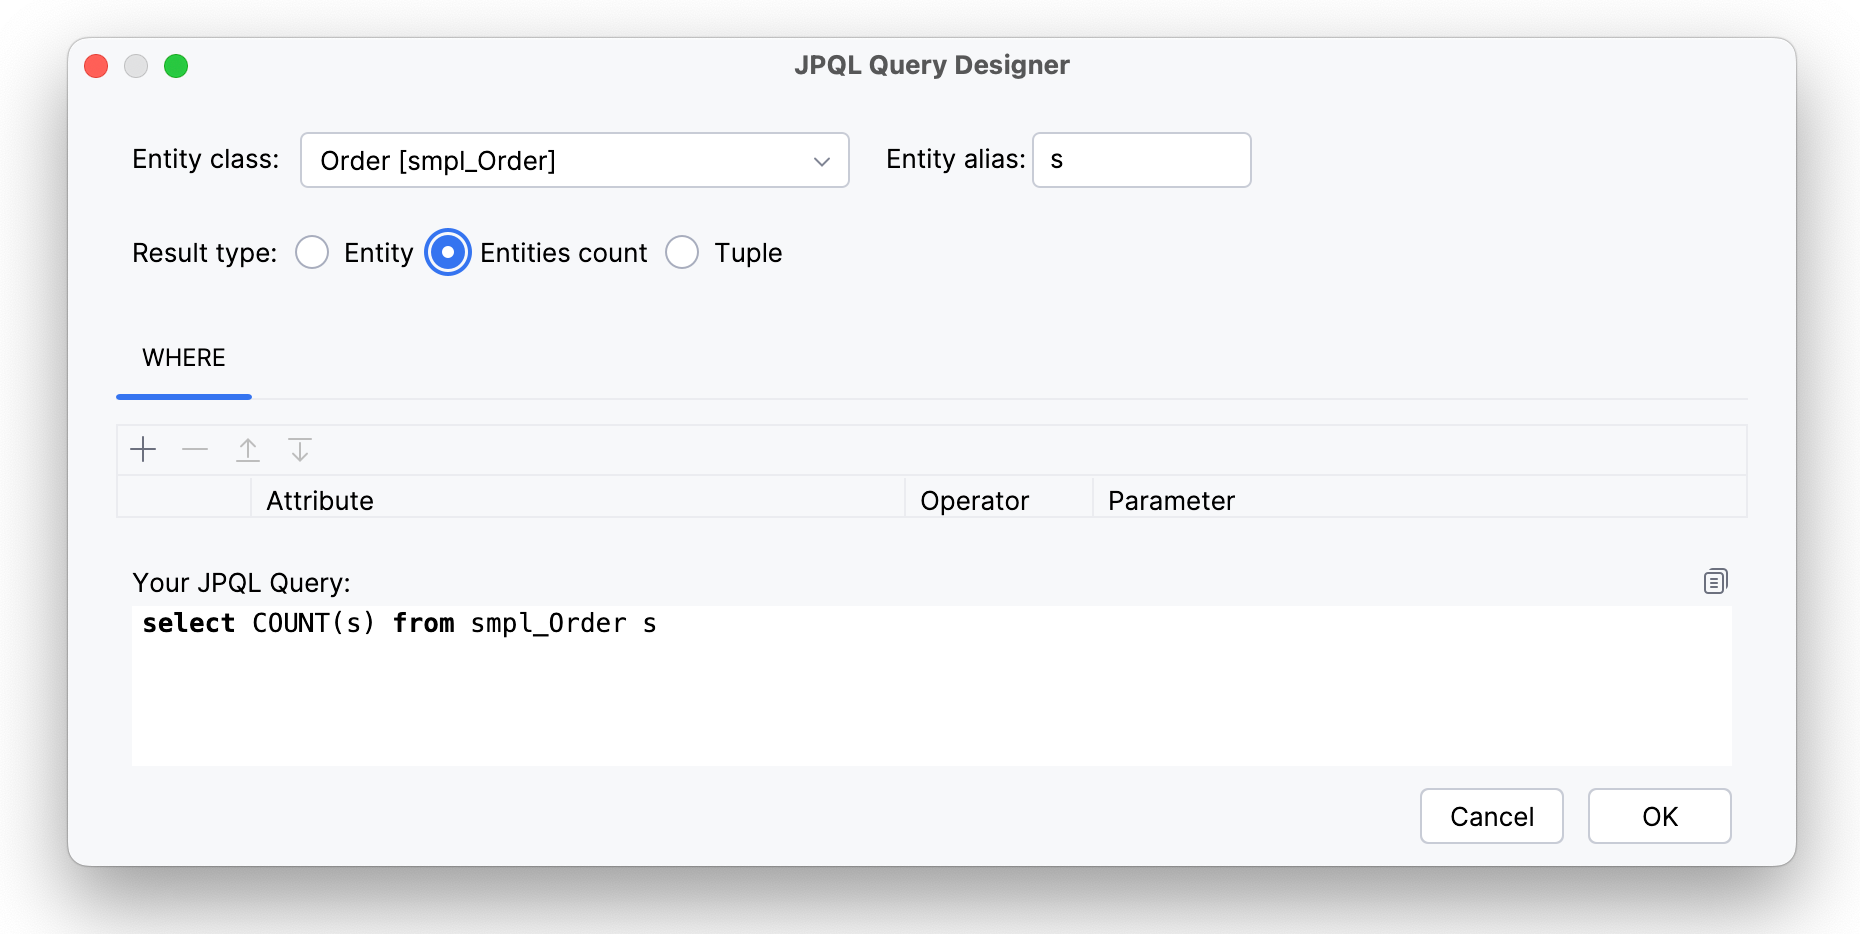
This JPQL query will be generated:
select COUNT(s) from smpl_Order s
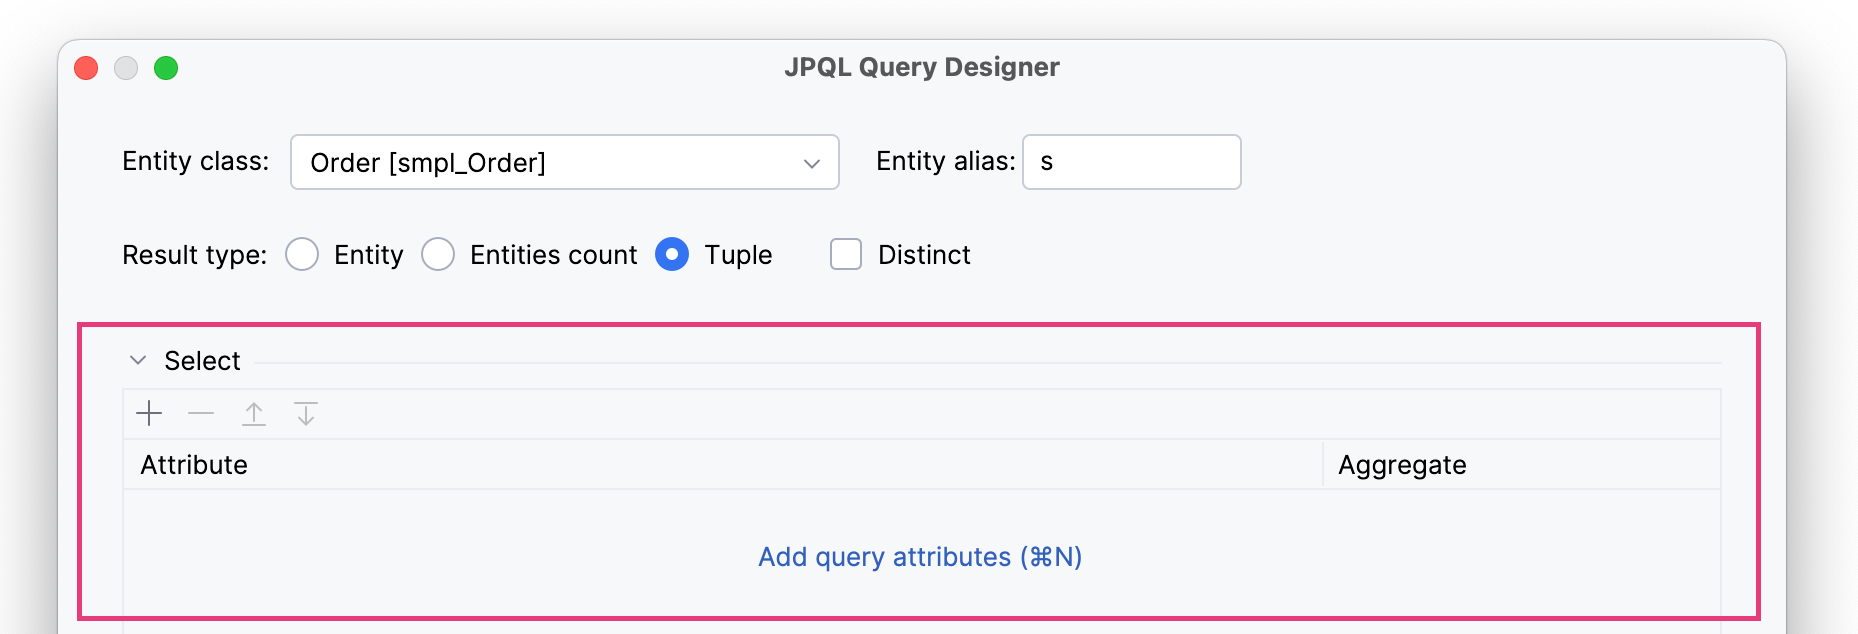
- Tuple
-
The query of this type returns a collection of field values, including from associated entities. When the Tuple result type has chosen, the Select section appears.
To complete the query creation, you have to select one attribute. For example,
customer.name.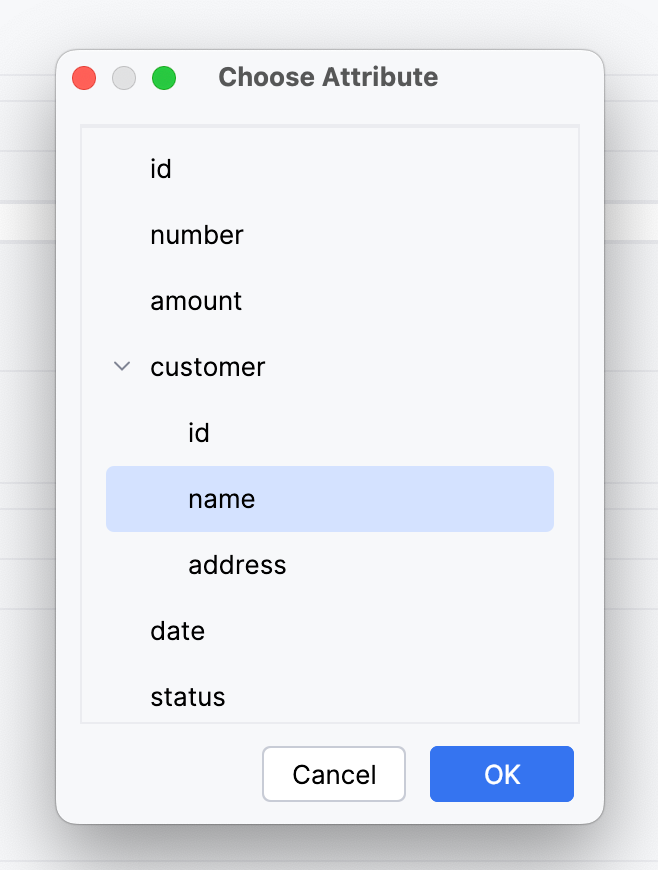
This JPQL query will be generated:
select s.customer.name from smpl_Order s
In addition, you can use Distinct check box for receiving only unique items.
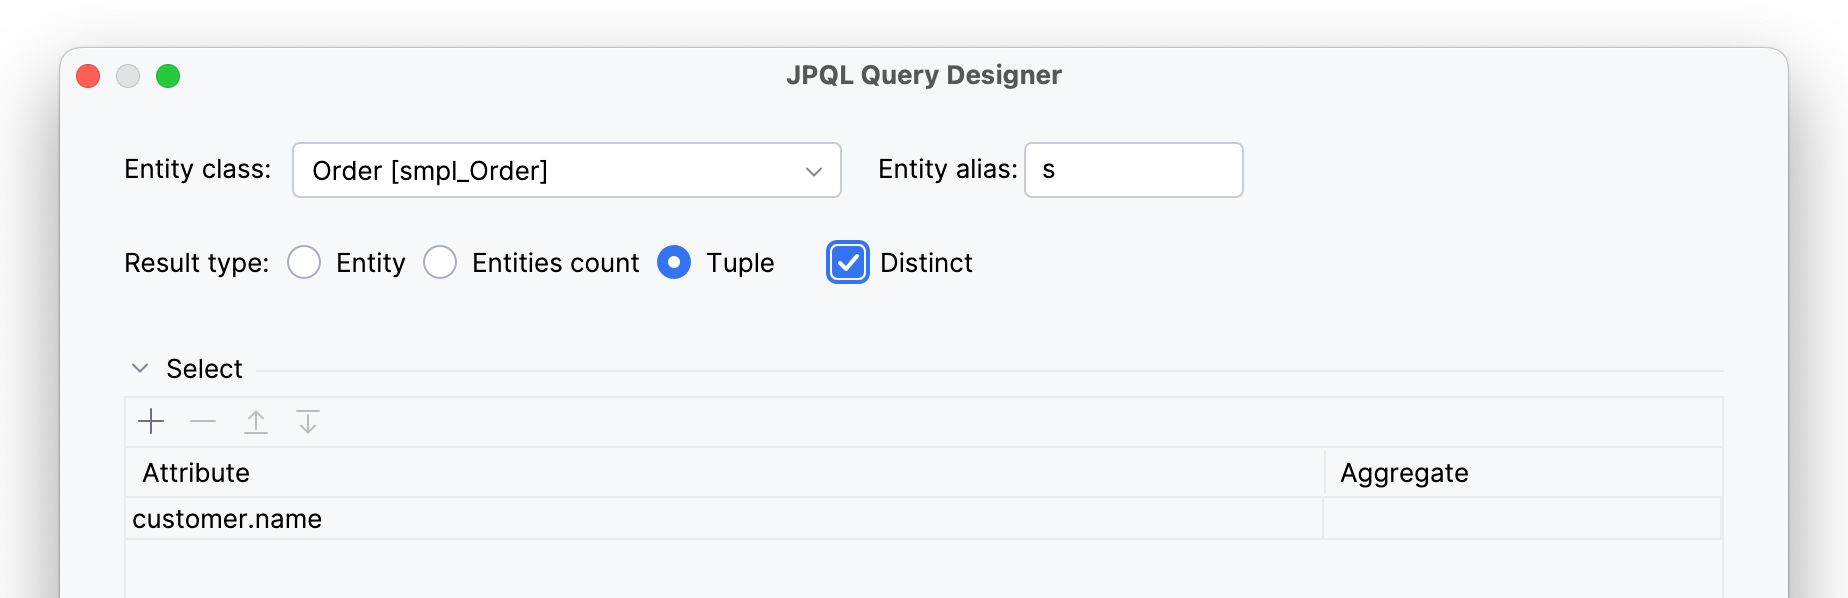
And the query will be modified:
select distinct s.customer.name from smpl_Order s
Only one field will be included in tuple, others will be ignored if you add more. As well, it’s possible to use aggregation functions with tuples.
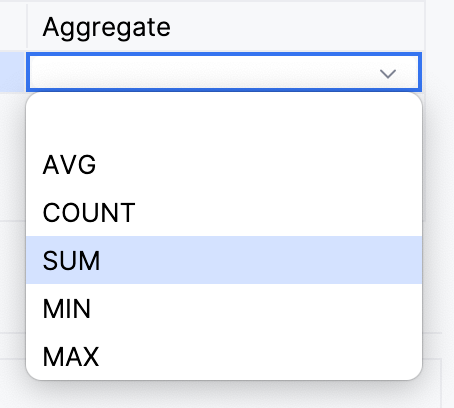
In this case, the query returns a single numeric value.
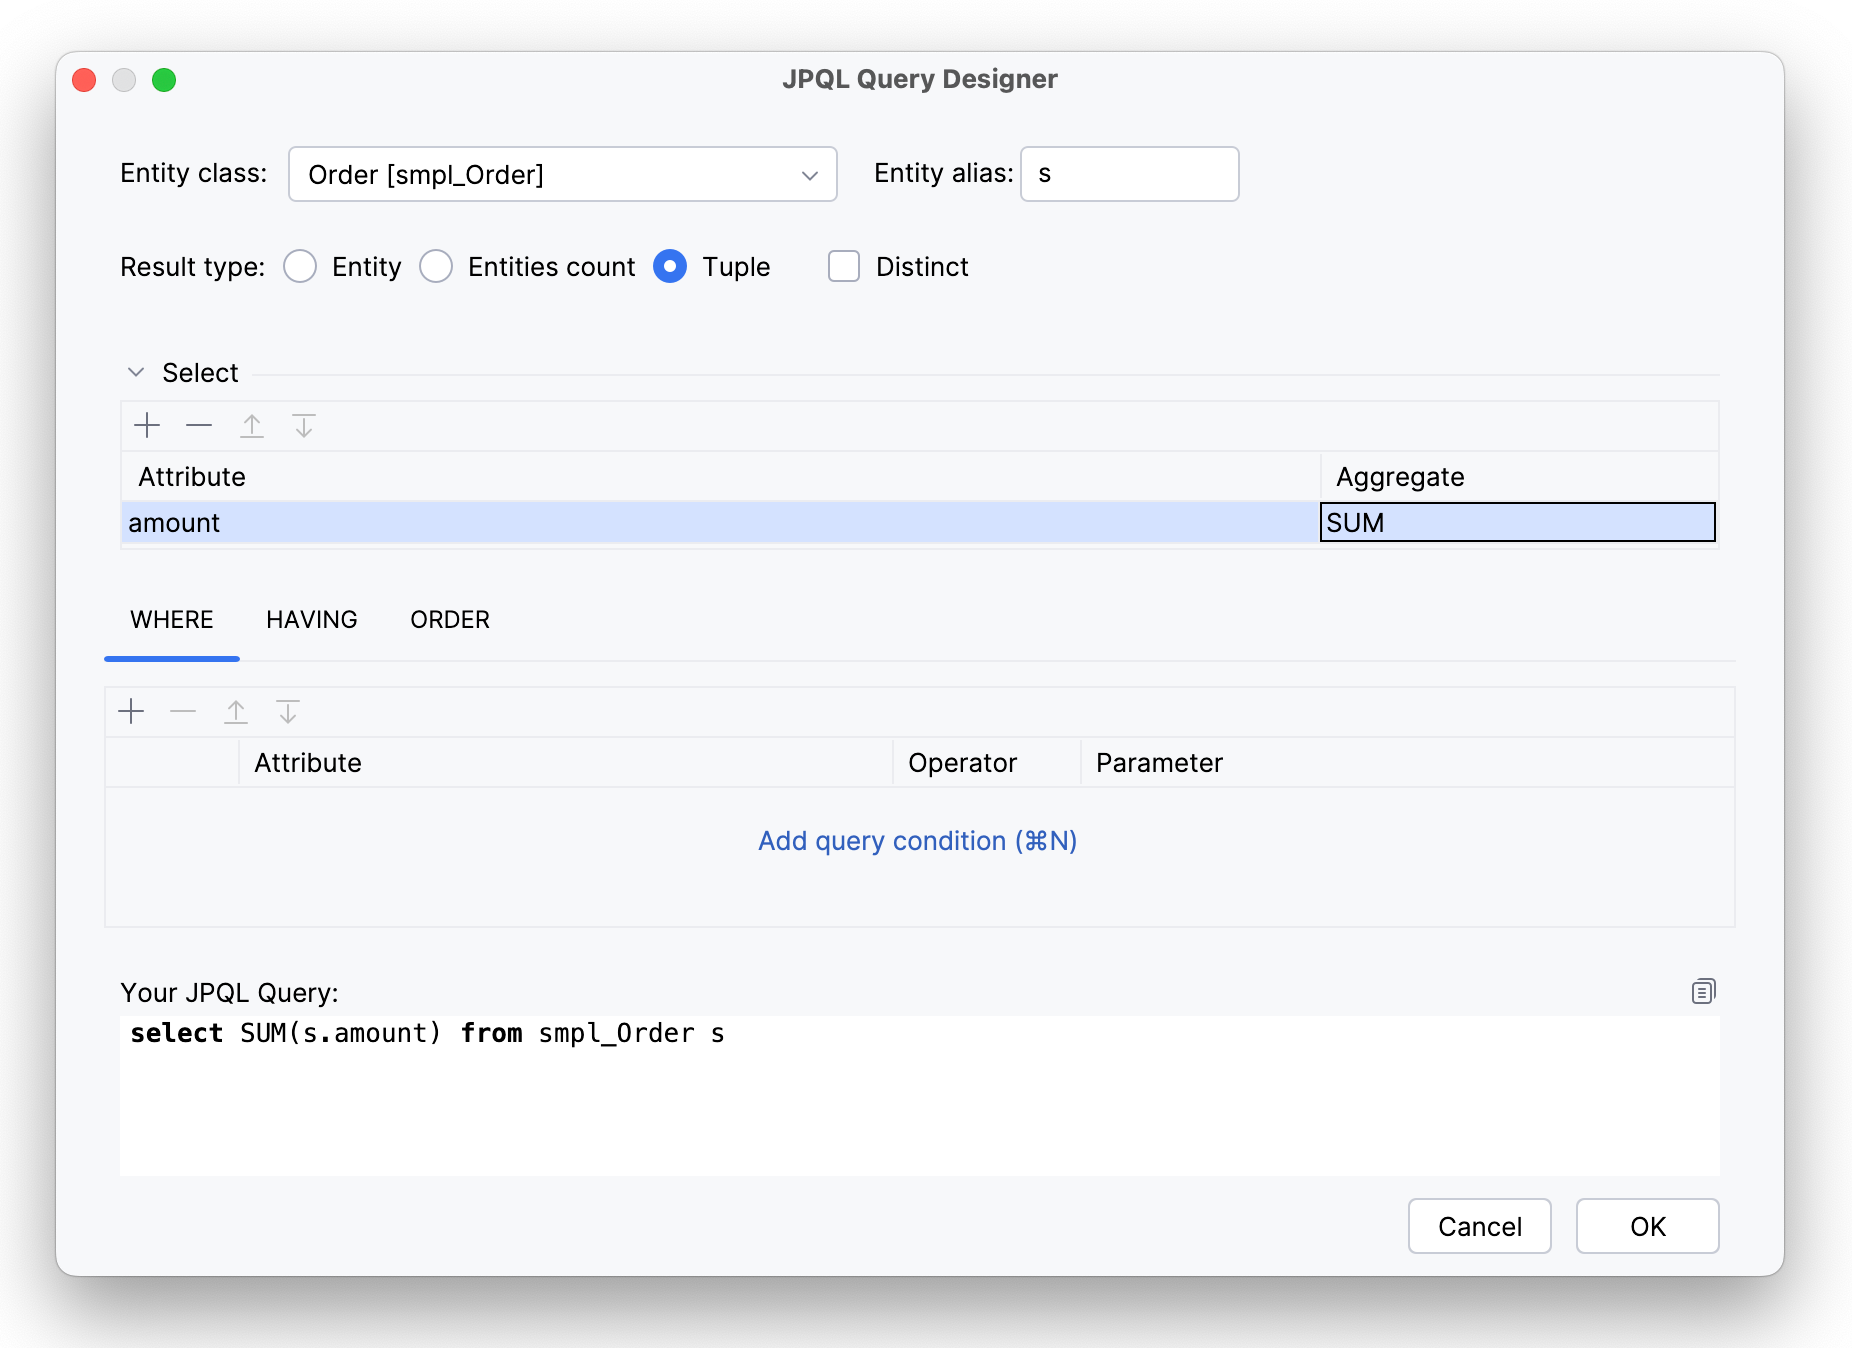
For example, this query calculates the sum of all order amounts.
select SUM(s.amount) from smpl_Order s
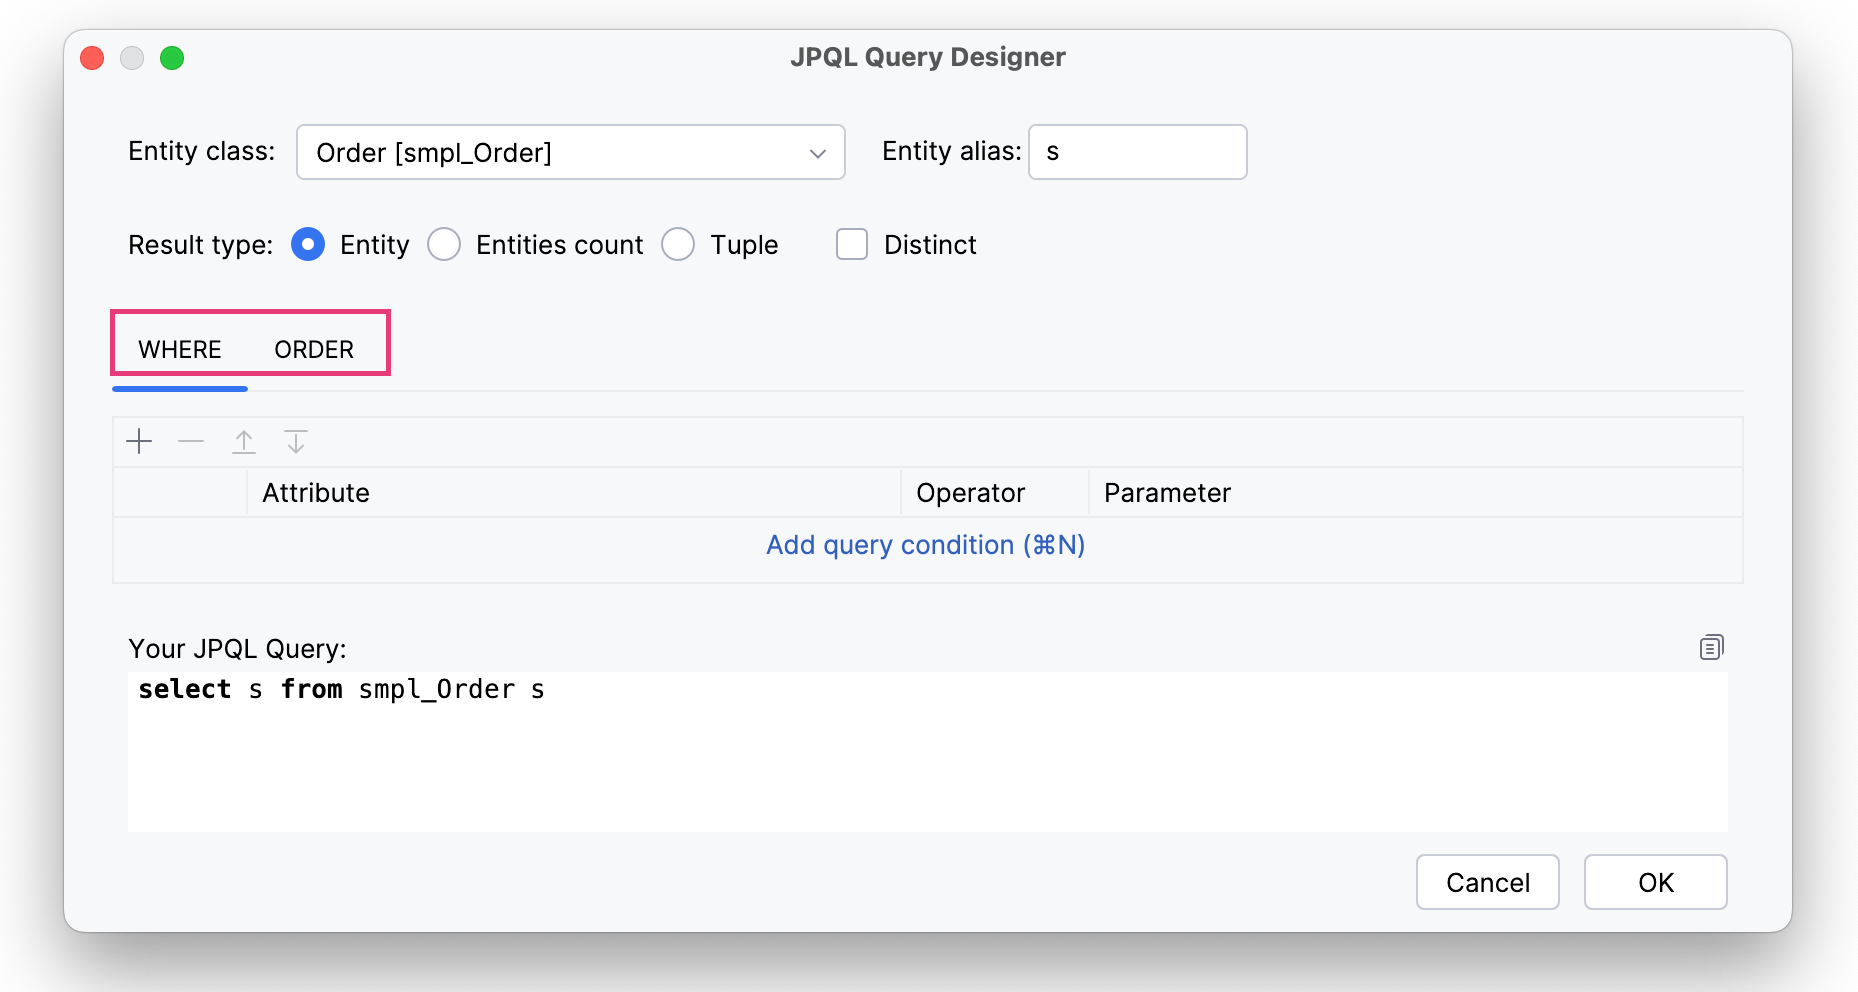
Query Filtering and Sorting
You can use WHERE and ORDER BY clauses with your JPQL query:
- WHERE clause
-
In JPQL, the
WHEREclause is used to specify conditions that filter the results of a query. To apply it, click icon and select an entity attribute, for example,
 amount: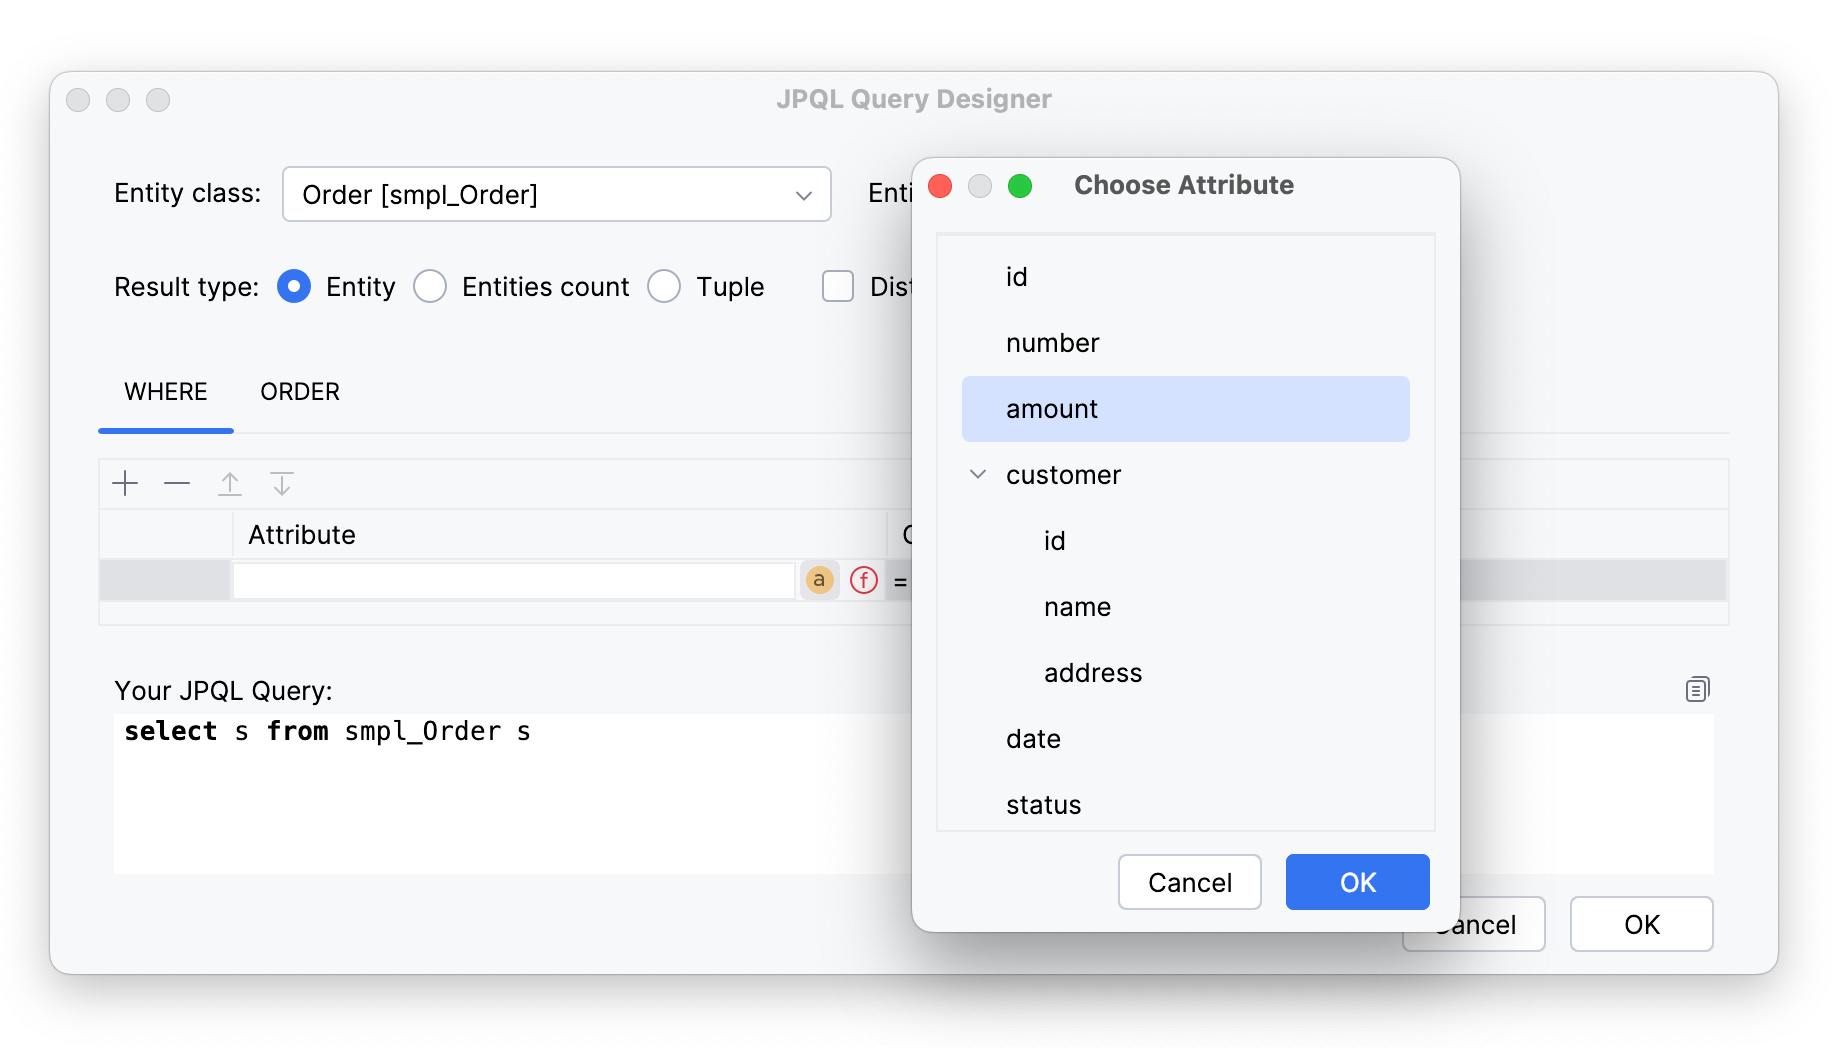
And define operation:
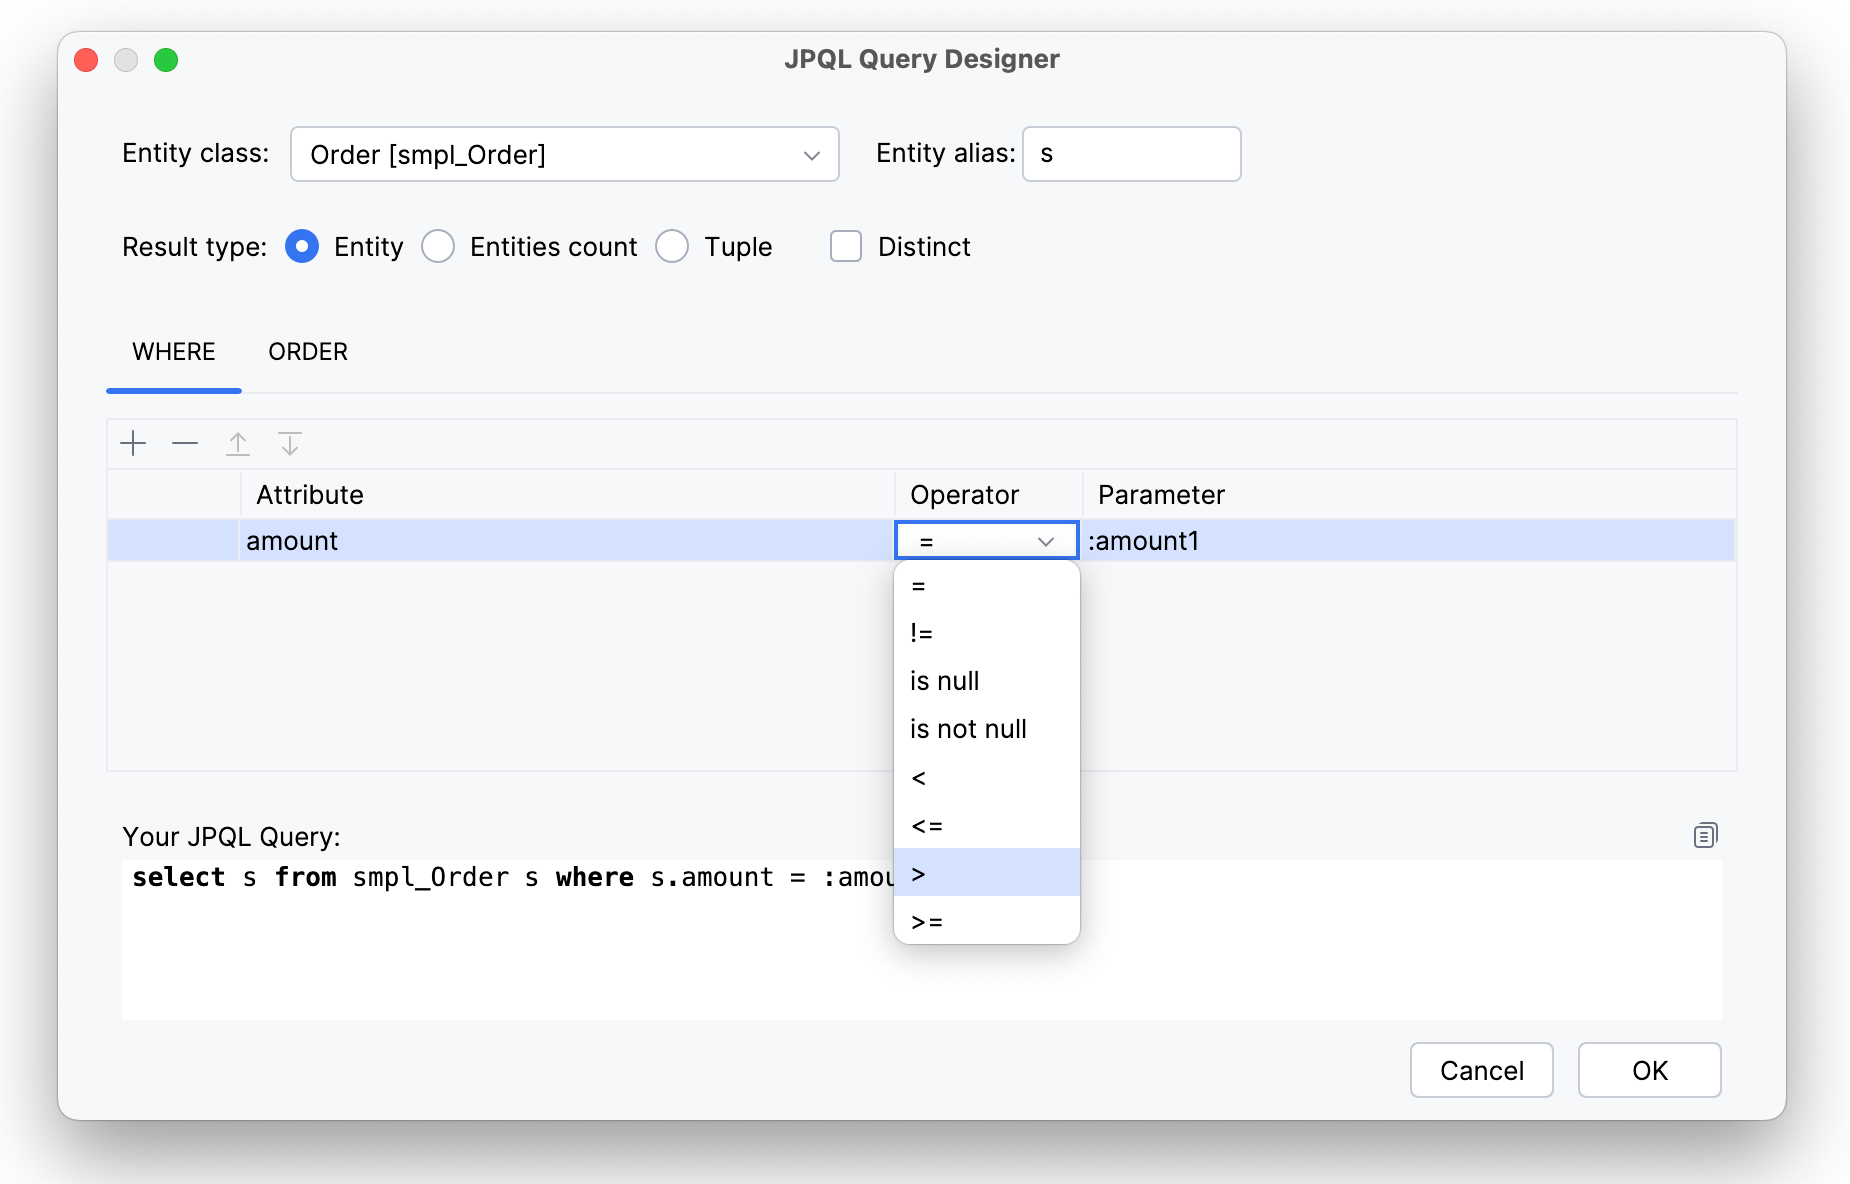
This JPQL query will be generated and returns a list of orders with amount greater than the value we set in parameter
amount1:select s from smpl_Order s where s.amount > :amount1
Besides, it’s possible to use functions in the
WHEREclause. Click icon, select one from the list and then select an attribute that will be used:
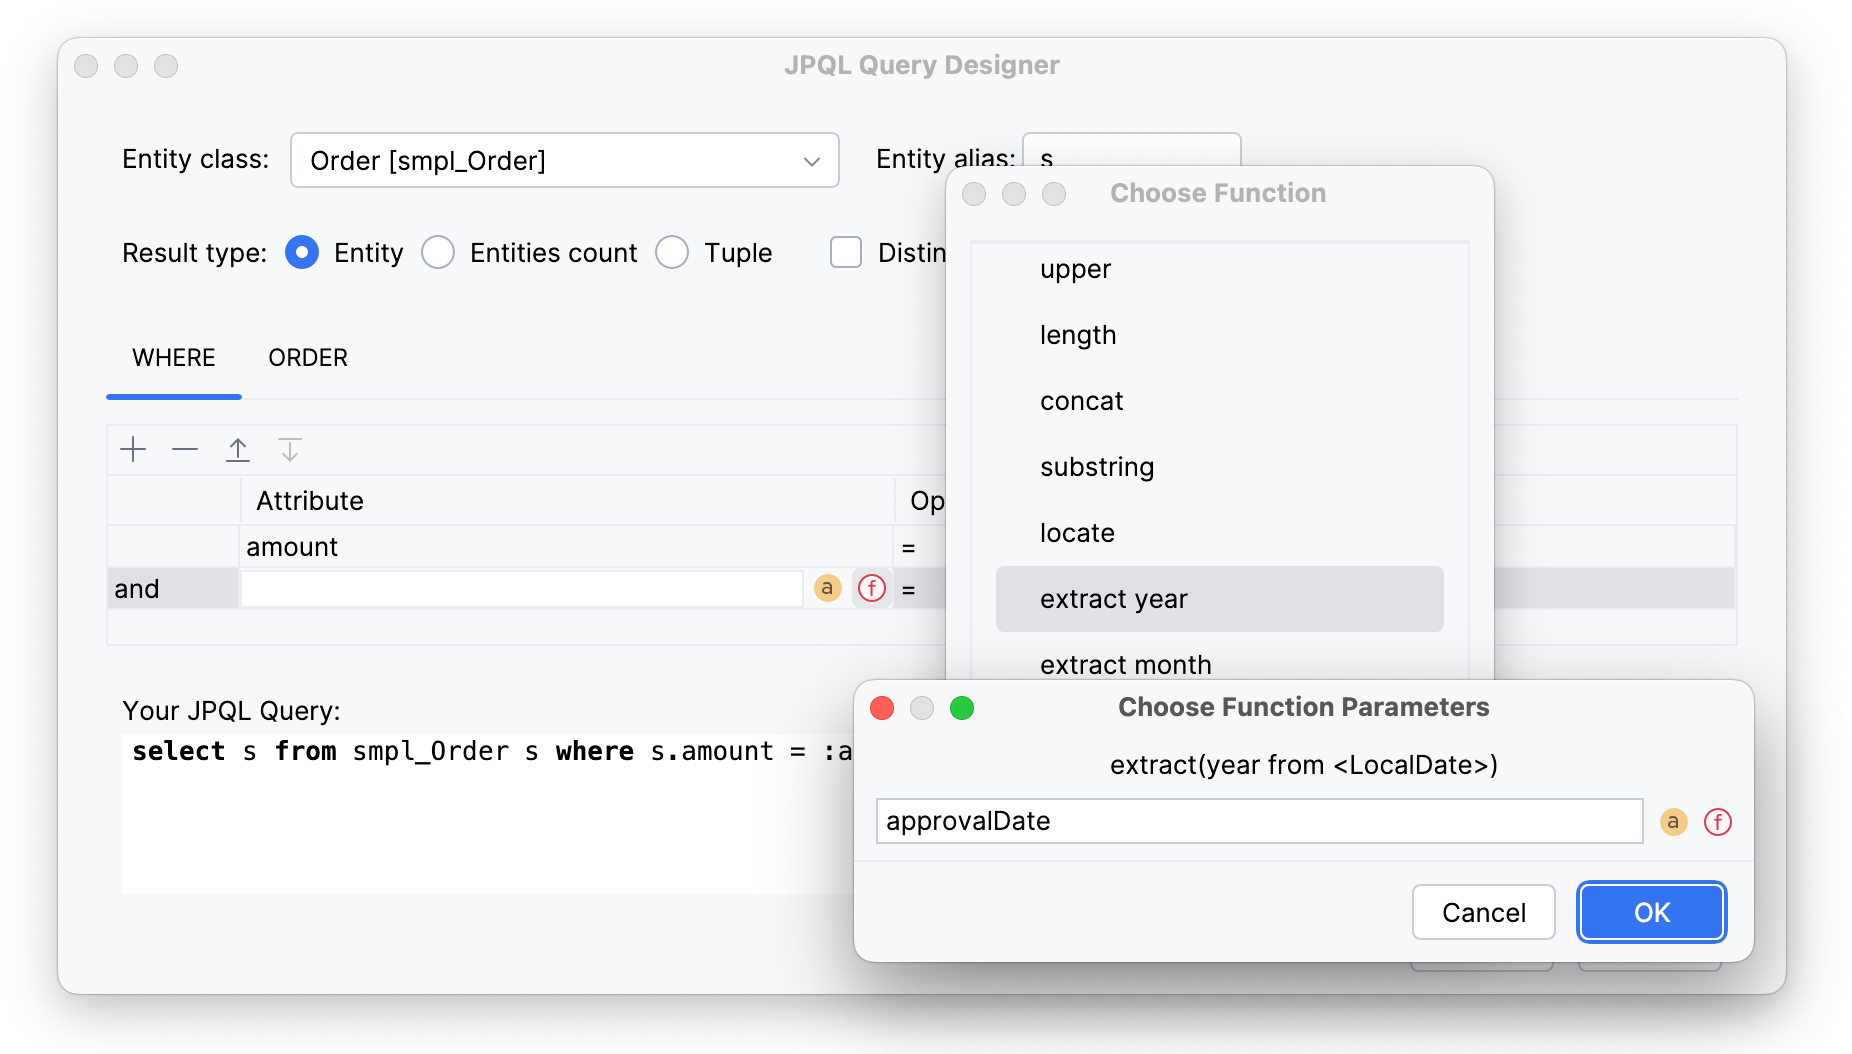
This query must return orders with the amount greater than parameter value and within a certain year, defined by another parameter.
select s from smpl_Order s where s.amount > :amount1 and extract(year from s.approvalDate) = :year1
When there is more than one condition in the
WHEREclause, they are joined by logical operators and/or, and you can choose desired one: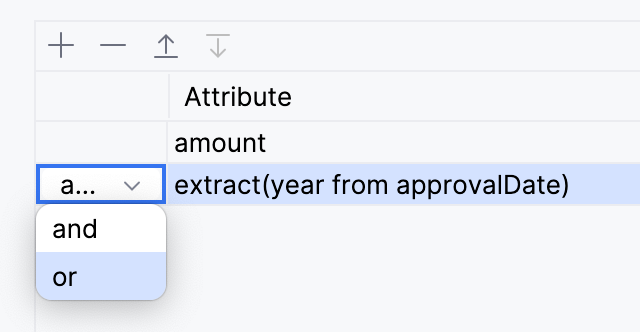
- ORDER clause
-
The
ORDER BYclause in JPQL is used to sort the results of a query in ascending or descending order based on one or more attributes of the entities. It allows you to specify the order in which the retrieved records should be presented.To add it to your query, switch to the
ORDERtab and select an attribute you want to use for sorting.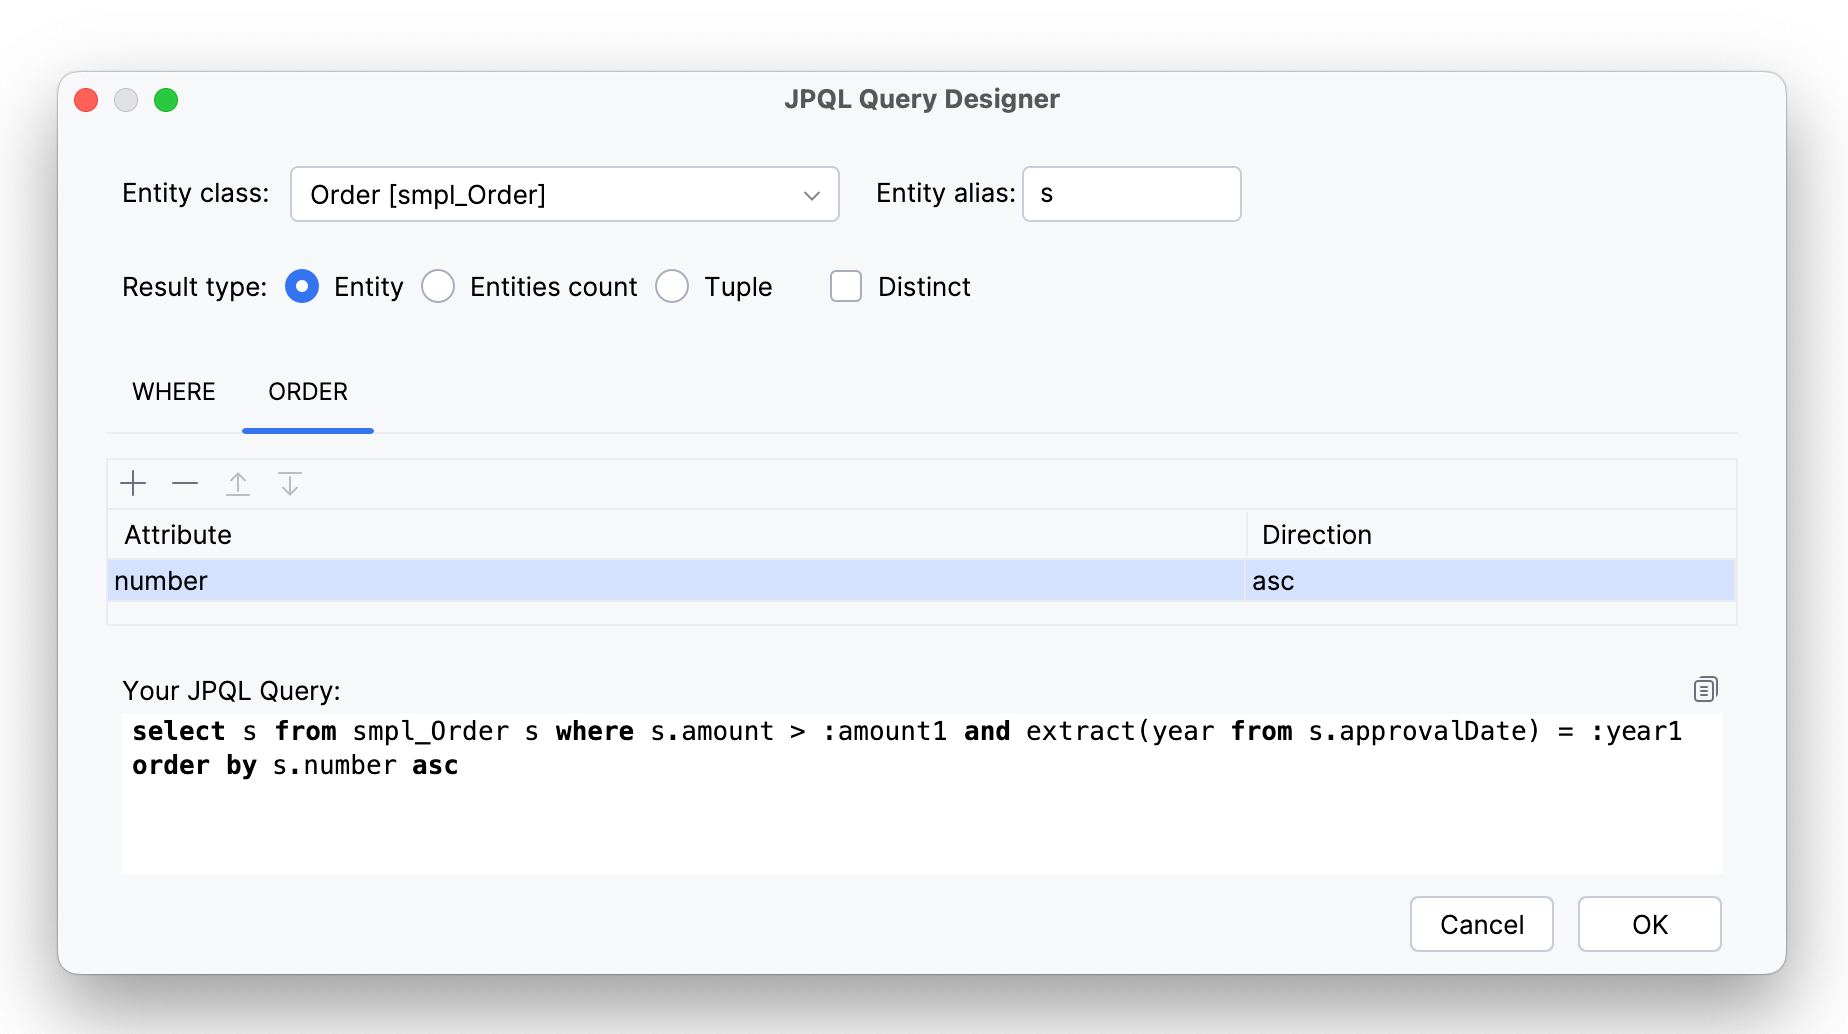
The query will be modified this way:
select s from smpl_Order s where s.amount > :amount1 and extract(year from s.approvalDate) = :year1 order by s.number asc
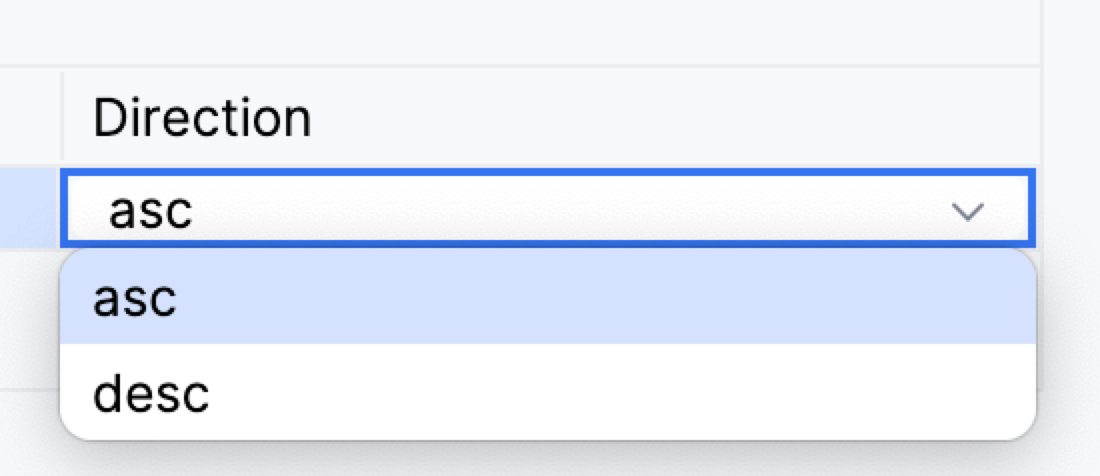
By default, an ascending direction is used, but you can change this:
|
Click the Copy button to copy your query in memory. 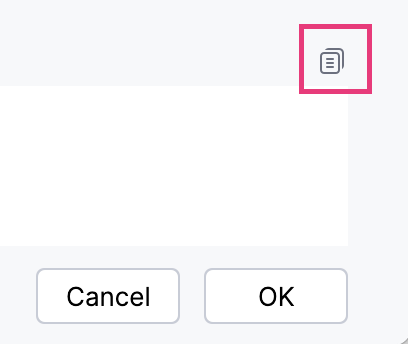
|
Query Parameters
You can set parameters of WHERE, ORDER BY clauses directly in the query body, for example:
select s from smpl_Order s where s.amount < 500
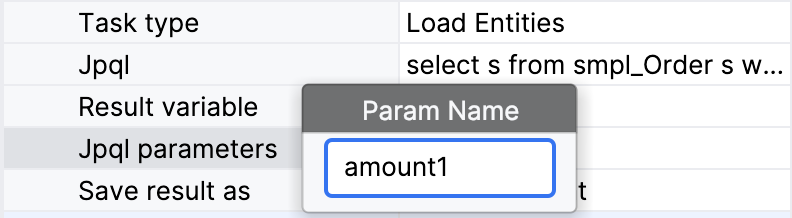
But often you need to define parameter values externally, i.e., at runtime. For this, you have to create named parameters:
-
JPQL parameters — If there are parameters in your query, define them here:
|
The name of parameter you create must match the name of the parameter in the query, there is no automatic control. |
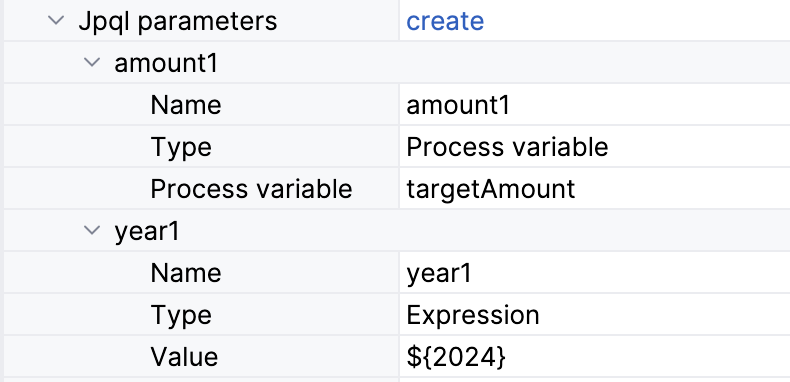
Parameter values can be passed into the process using two methods:
-
Process variable
-
Expression
For example, like this:
Loading Result
To use the result of the loading operation further in the process, define a Result variable. You can select one of the existing process variables or enter an arbitrary name — then a new variable will be created.

If there is an existed process variable with such a name but of the other type, it will be overridden. The type of the result variable will be defined by the type of the query result.
As well, you can choose between two options in the combo box Save result as depending on the query result you expect, a Single element or Collection.

XML Representation
In the XML, the loading entity data task is declared as a service task of the custom type flowable:type.
<serviceTask id="load-orders-task" name="Load orders"
flowable:type="jmix-load-entities-jpql"> (1)
<extensionElements>
<flowable:field name="jpql"> (2)
<flowable:string>select s from smpl_Order s where s.amount > :amount1</flowable:string>
</flowable:field>
<flowable:field name="resultVariable">
<flowable:string>order</flowable:string> (3)
</flowable:field>
<flowable:field name="saveLoadResultAs">
<flowable:string>collection</flowable:string> (4)
</flowable:field>
<flowable:field name="jpqlParameters"> (5)
<flowable:string>[{"name":"amount1","valueType":"processVariable","value":"targetAmount"}]</flowable:string>
</flowable:field>
</extensionElements>
</serviceTask>| 1 | — Declaring loading data task |
| 2 | — JPQL query body |
| 3 | — Result variable name |
| 4 | — Type of the result |
| 5 | — Query parameters in JSON format |
Modifying Entities
You can modify an entity stored in one of the existing process variables. Entity type will be detected automatically, and all non-system attributes will be available for changes.
Also, you can specify a process variable directly by typing its name. This is relevant when the variable is not presented in the list. For example, when it is created programmatically in the service task, or it is a result of loading entity by another data task. After that, it is necessary to explicitly define an entity type and proceed with specifying entity attributes.
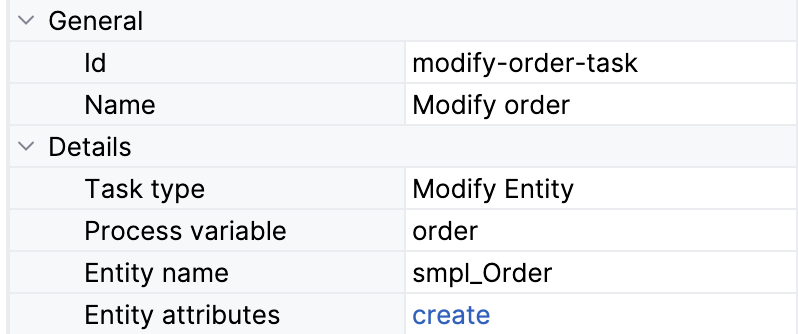
Specifying Attributes
Click a Create link to specify entity attributes you want to modify.
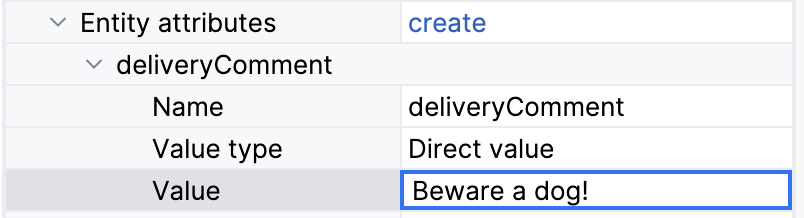
The value of the attribute can be specified in one of the following ways:
-
Specifying a direct value by typing in the field:
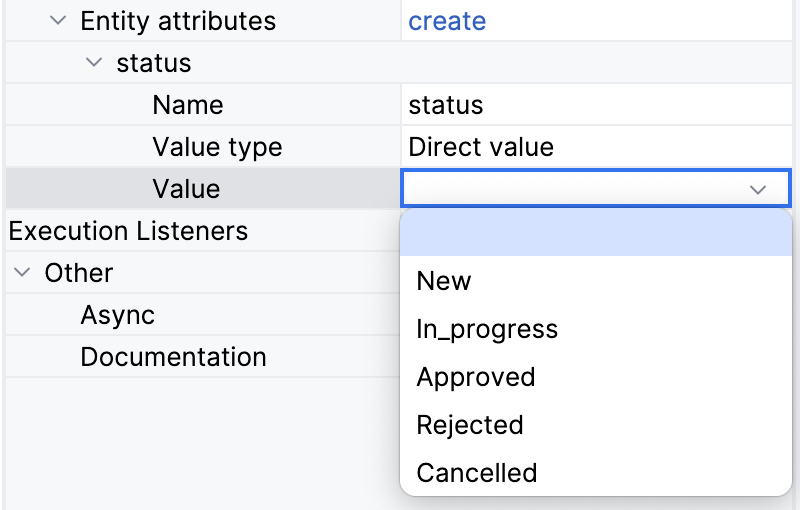
Or by selecting from the list for Enumerations:
-
Specifying an expression.
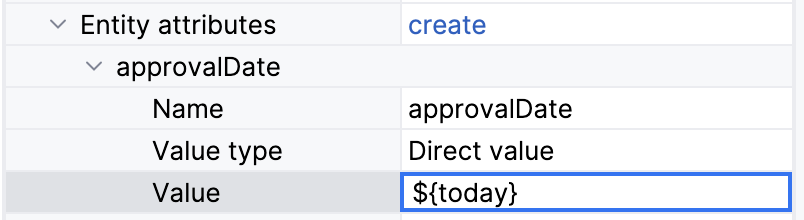
The process variable
todaymust be defined before this data task be executed. -
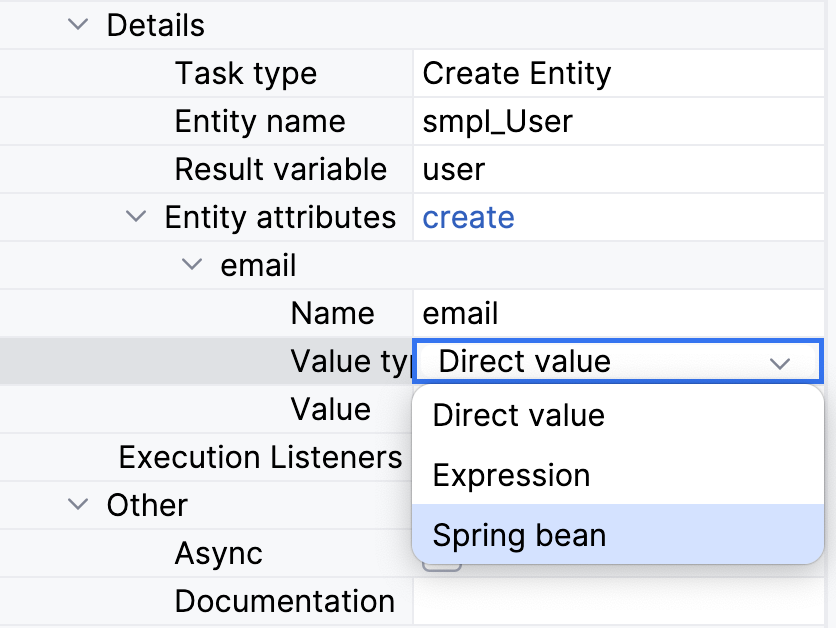
Using a Spring bean.
By default, this option is disabled. To enable this variant in the list, set the property:
jmix.bpm.data-task-spring-bean-entity-attribute-enabled=trueThen, a Spring bean option becomes available in the Value type field:
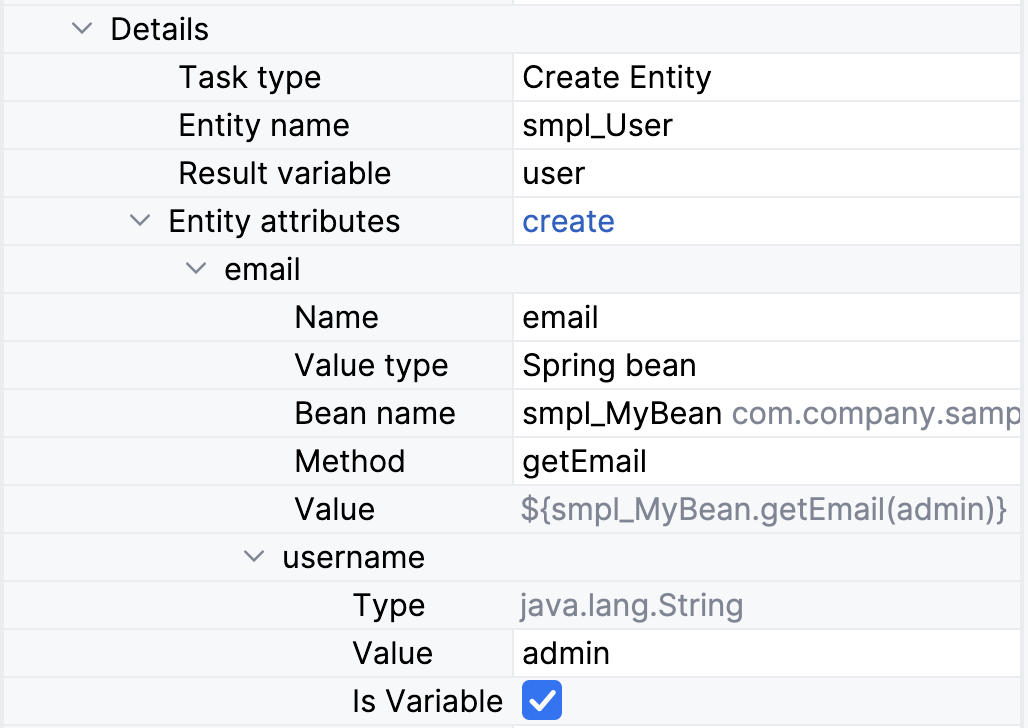
Now you can specify a Spring bean and its method to pass a value into entity attribute:
XML Representation
In the XML, the modifying entity data task is declared as a service task of the custom type flowable:type.
Attributes for the modified entity are passed via JSON.
<serviceTask id="modify-order-task" name="Modify order"
    flowable:type="jmix-modify-entity"> (1)
  <extensionElements>
    <flowable:field name="entityName">
      <flowable:string>smpl_Order</flowable:string> (2)
    </flowable:field>
    <flowable:field name="processVariable">
      <flowable:string>order</flowable:string> (3)
    </flowable:field>
    <flowable:field name="entityAttributes">
      <flowable:string>[{"name":"approvalDate","valueType":"directValue"}]</flowable:string> (4)
    </flowable:field>
  </extensionElements>
</serviceTask>| 1 | — Declaring task type |
| 2 | — Defining entity class |
| 3 | — Defining result variable |
| 4 | — Entity attributes in JSON format |
Creating Entities
To create an entity, select the entity name from the list. All non-system attributes will be available for specifying using BPMN Inspector.
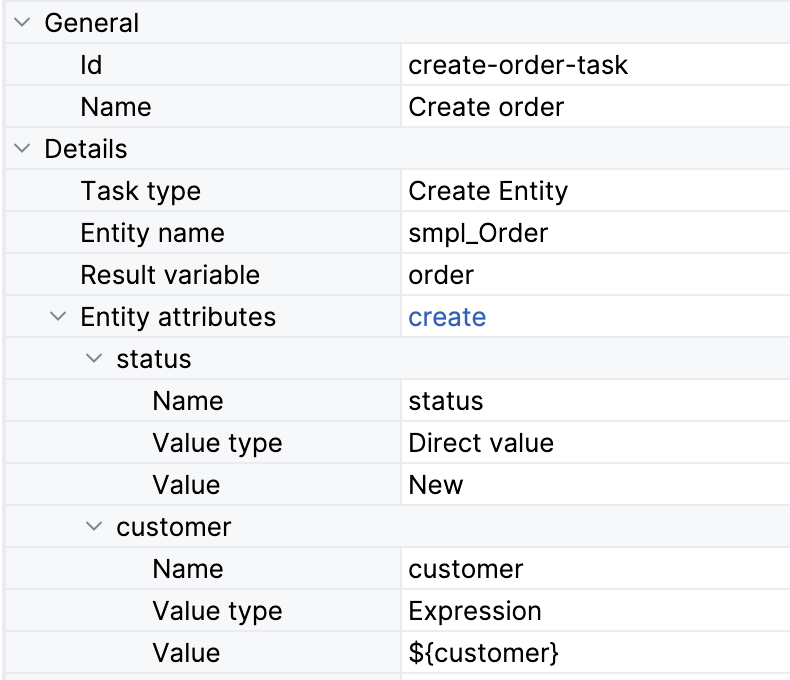
If you need to use this entity further in the process, set a Result variable parameter or leave it blank if you don’t need it.
Specify all required (mandatory) attributes and other ones you want.
XML Representation
In the XML, the creating entity data task is declared as a service task of the custom type flowable:type.
Attributes for the created entity are passed via JSON.
<serviceTask id="create-order-task" name="Create order"
    flowable:type="jmix-create-entity"> (1)
  <extensionElements>
    <flowable:field name="entityName">
      <flowable:string>smpl_Order</flowable:string> (2)
    </flowable:field>
    <flowable:field name="resultVariable">
      <flowable:string>order</flowable:string> (3)
    </flowable:field>
    <flowable:field name="entityAttributes">
      <flowable:string>[{"name":"status","valueType":"directValue","value":"New"},{"name":"customer","valueType":"expression","value":"${customer}"}]</flowable:string> (4)
    </flowable:field>
  </extensionElements>
</serviceTask>| 1 | — Declaring task type |
| 2 | — Defining entity class |
| 3 | — Defining result variable |
| 4 | — Entity attributes in JSON format |
