Creating Process in Studio
For developers, the BPMN Modeler in Studio serves as the primary tool for creating automated processes. It offers features beyond pure modeling, including:
-
Navigation to process models through the Jmix project tree.
-
BPM Inspector for manipulating the properties of BPMN elements.
-
Entity Data Task: an extended BPMN component that enables manipulating with Jmix entities directly within the process.
-
Wizard for JPQL queries to load entities.
-
Wizard for Jmix view process forms.
-
Suggestions and hints where applicable.
-
Generation of Spring beans and Java delegate templates in the context of the process.
-
Process deployment at application startup and hot deployment.
Modeling Process in Studio
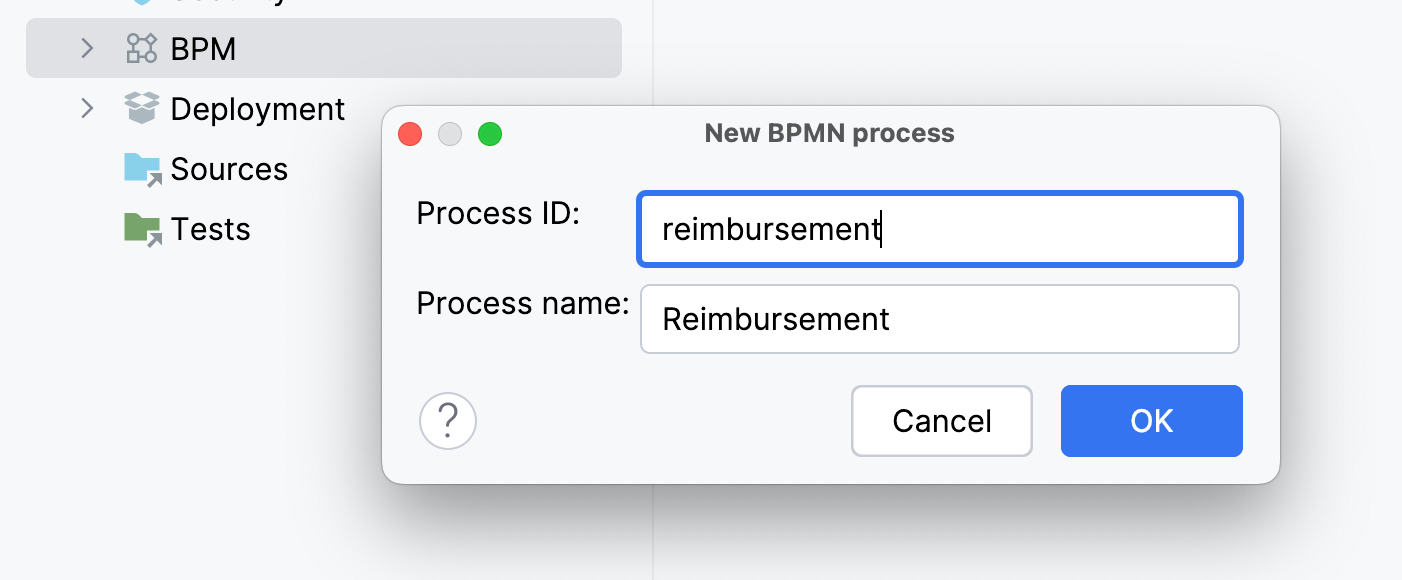
In the Jmix Tool window, find the BPM node. Right click on it and create a new BPMN model.
For our reimbursement process, fill the form:
-
Process id:
reimbursement -
Name:
Reimbursement(will be filled automatically)
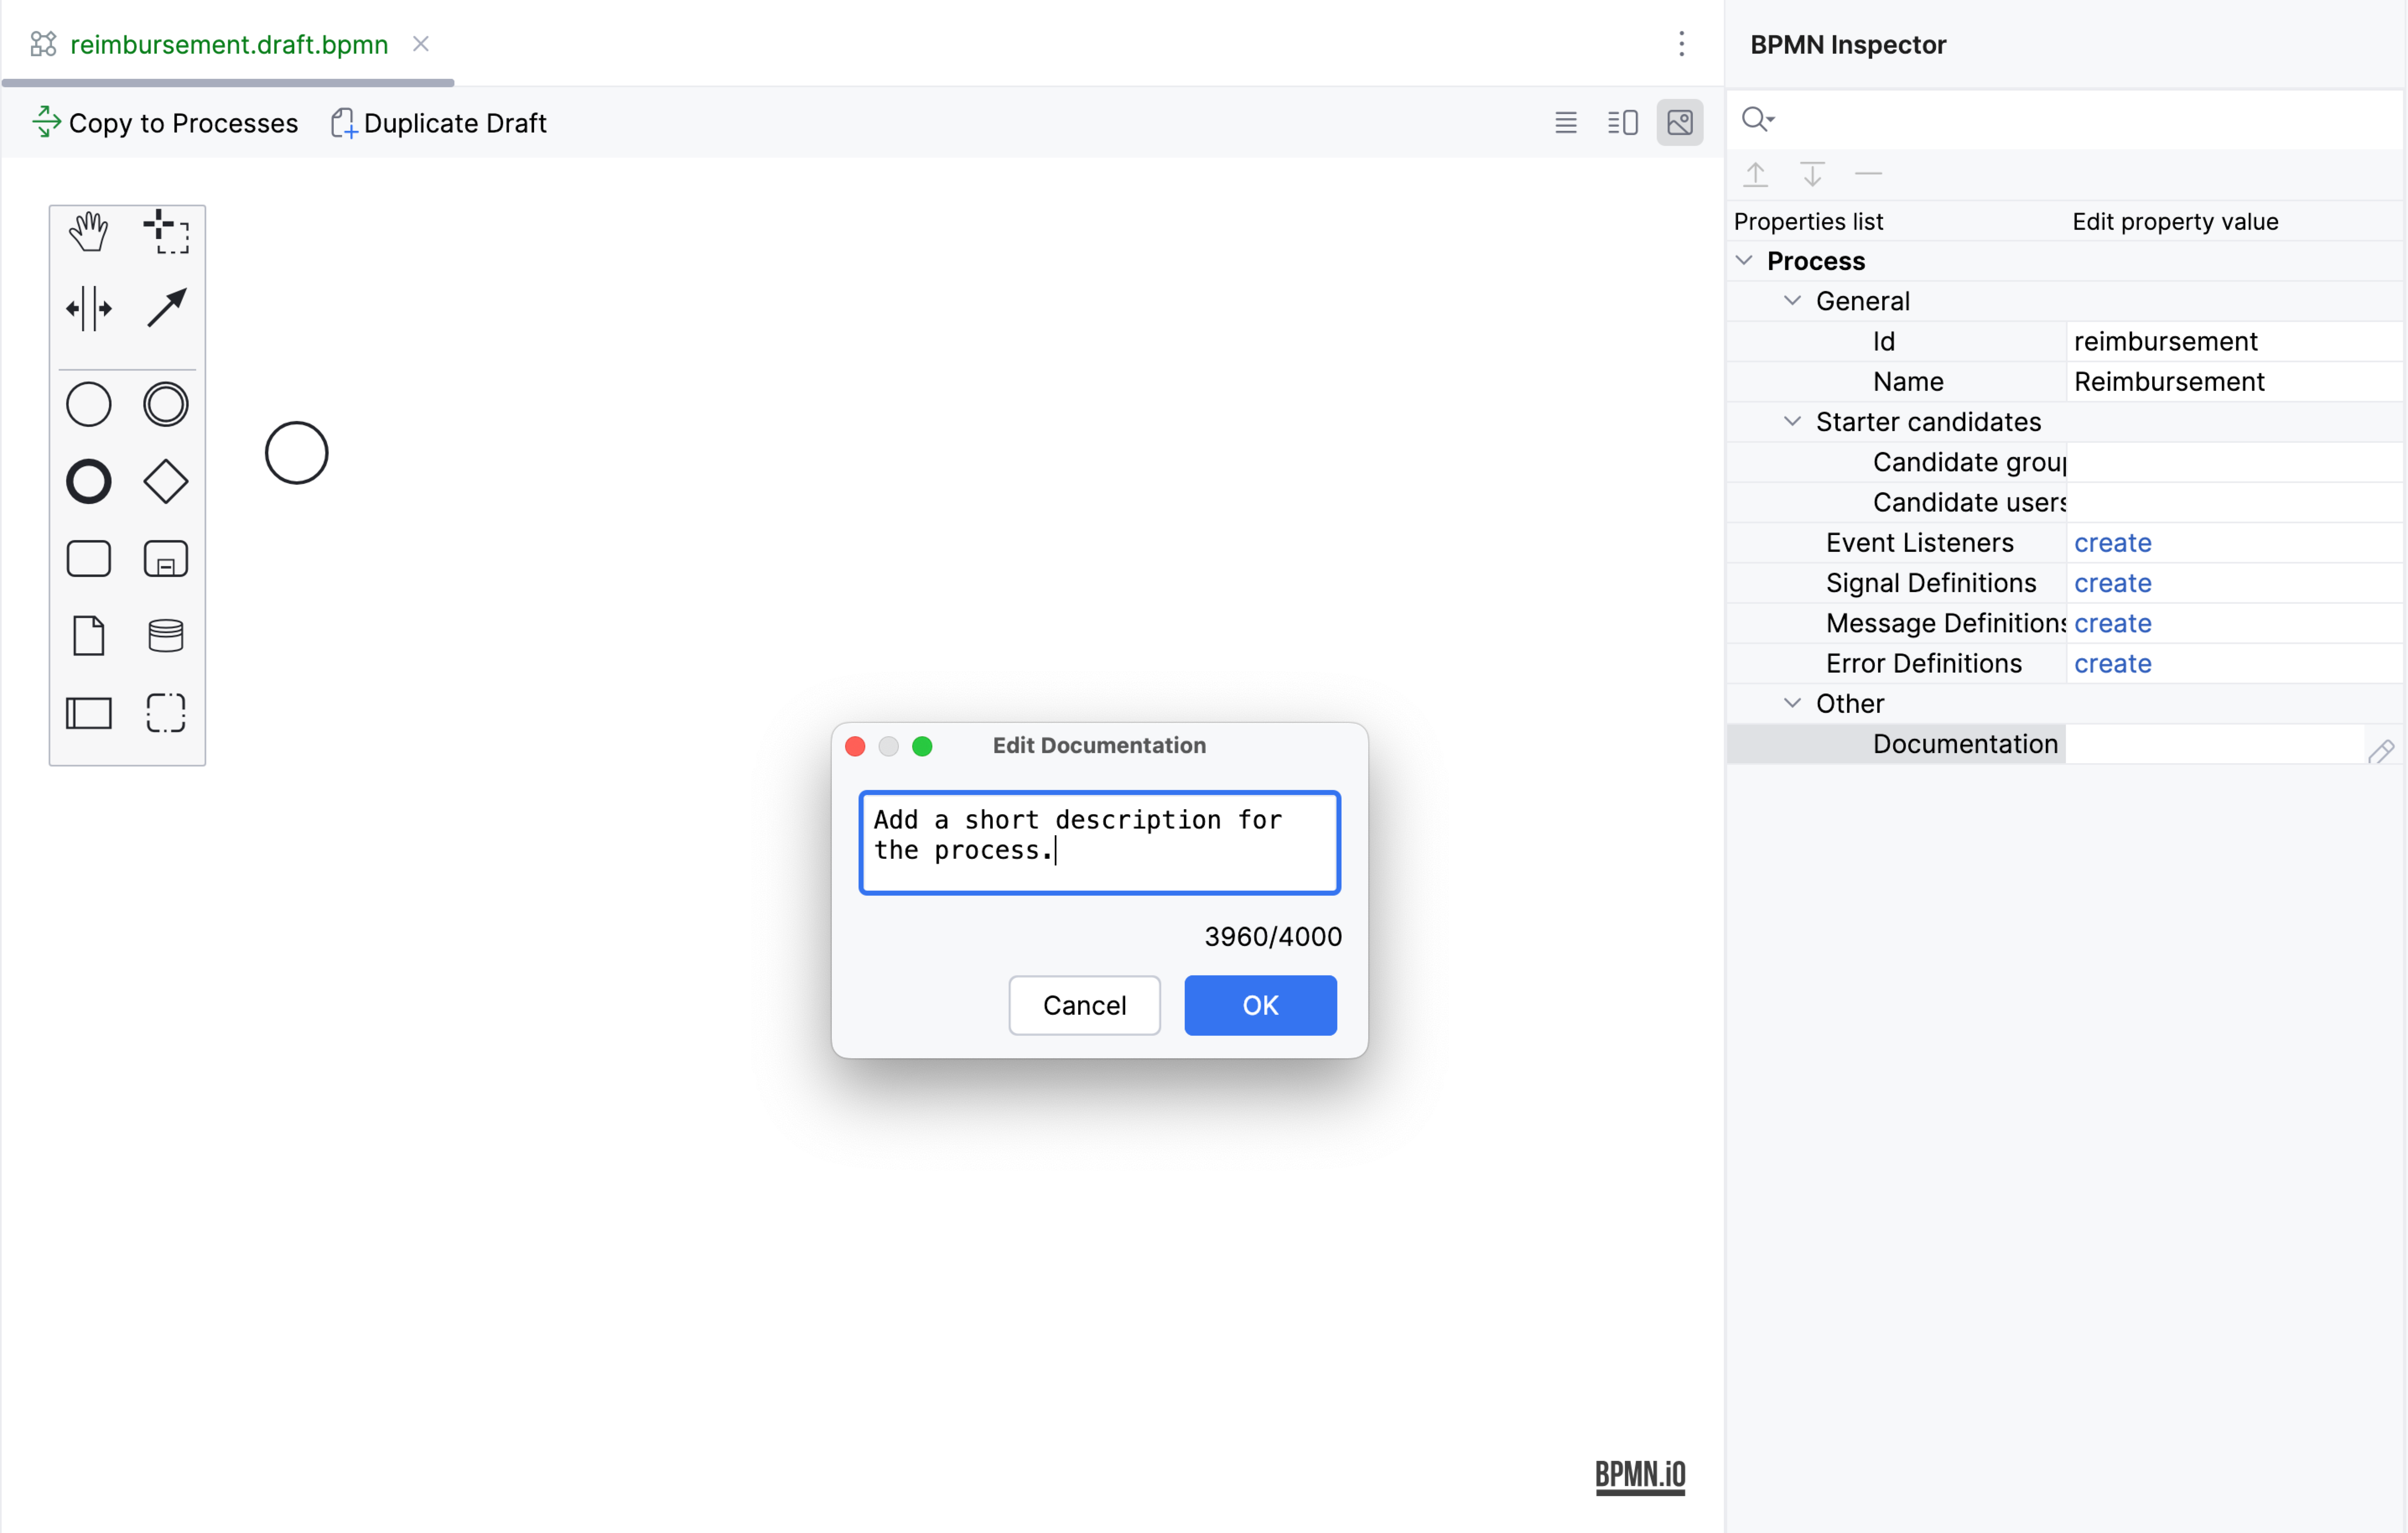
Then find a documentation field in the BPMN Navigator panel and fill it:
Creating Start Form
Each element on the canvas has its own properties.
At the moment the only element present is StartEvent.
It represents the Start form
seen by the user initiating the process.
Let’s configure it:
-
Click on the
StartEventelement to select it. -
Select
Input dialogin the Form Type field. Its Open mode is automatically set to Dialog.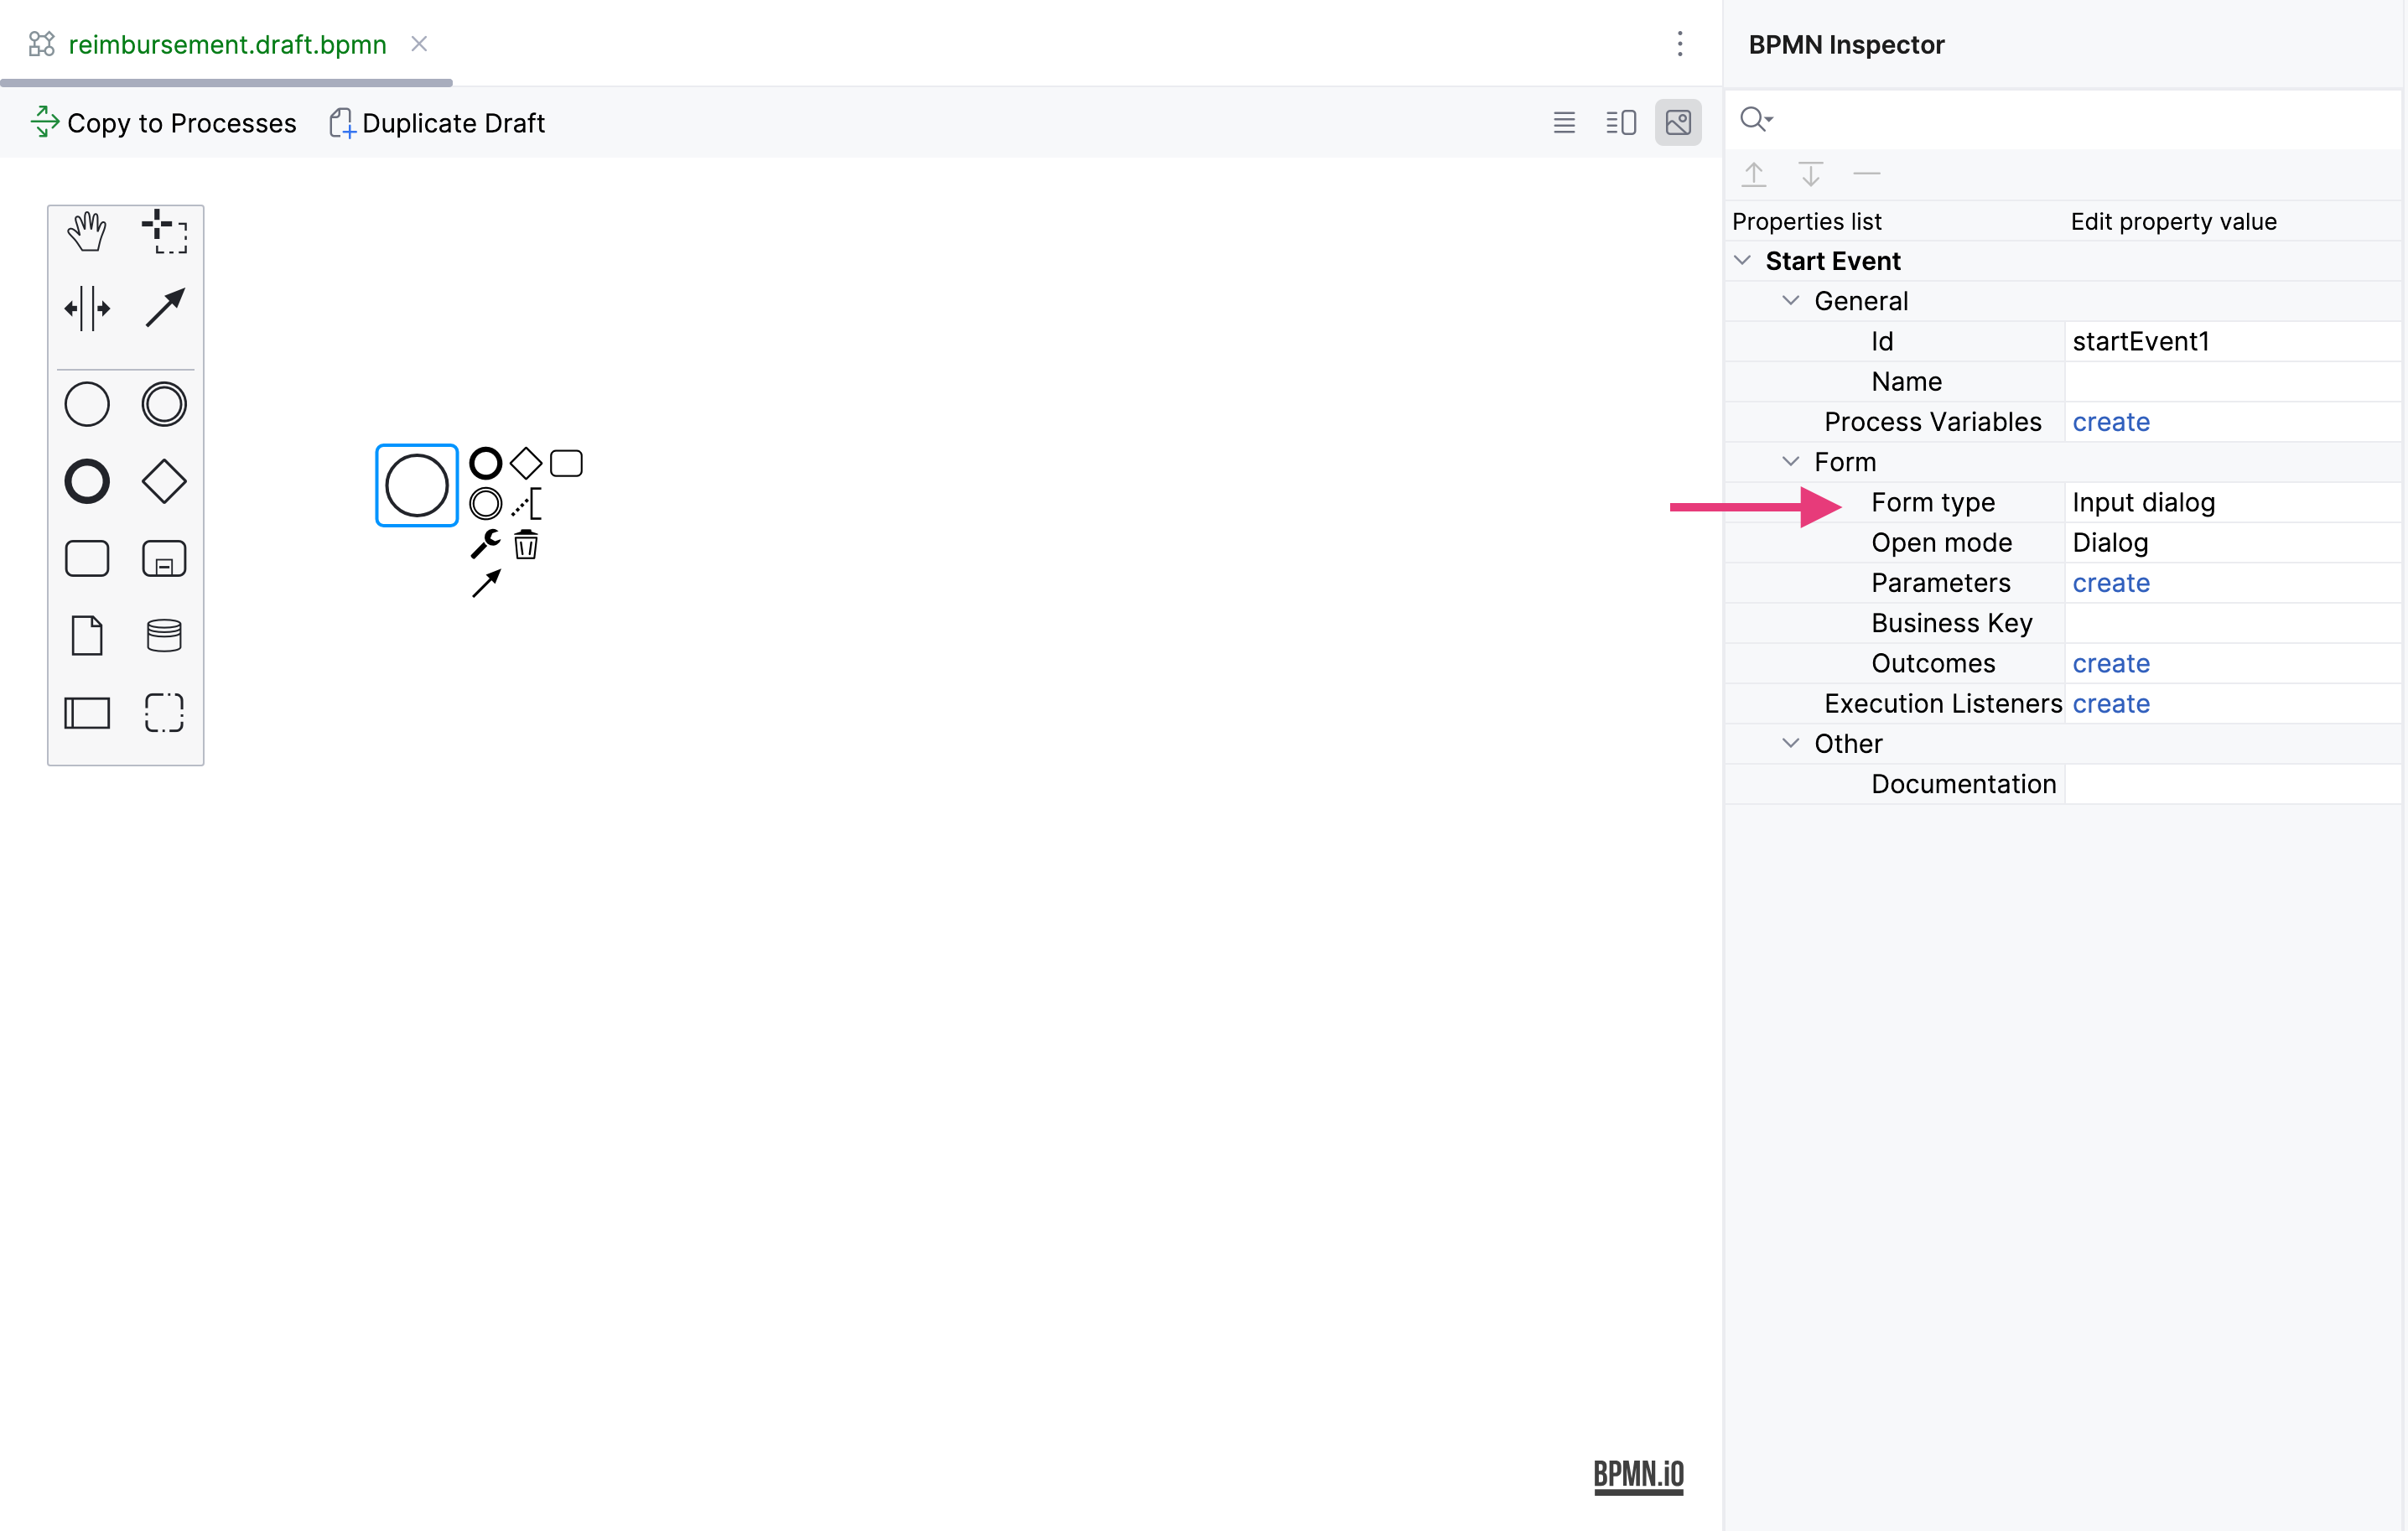
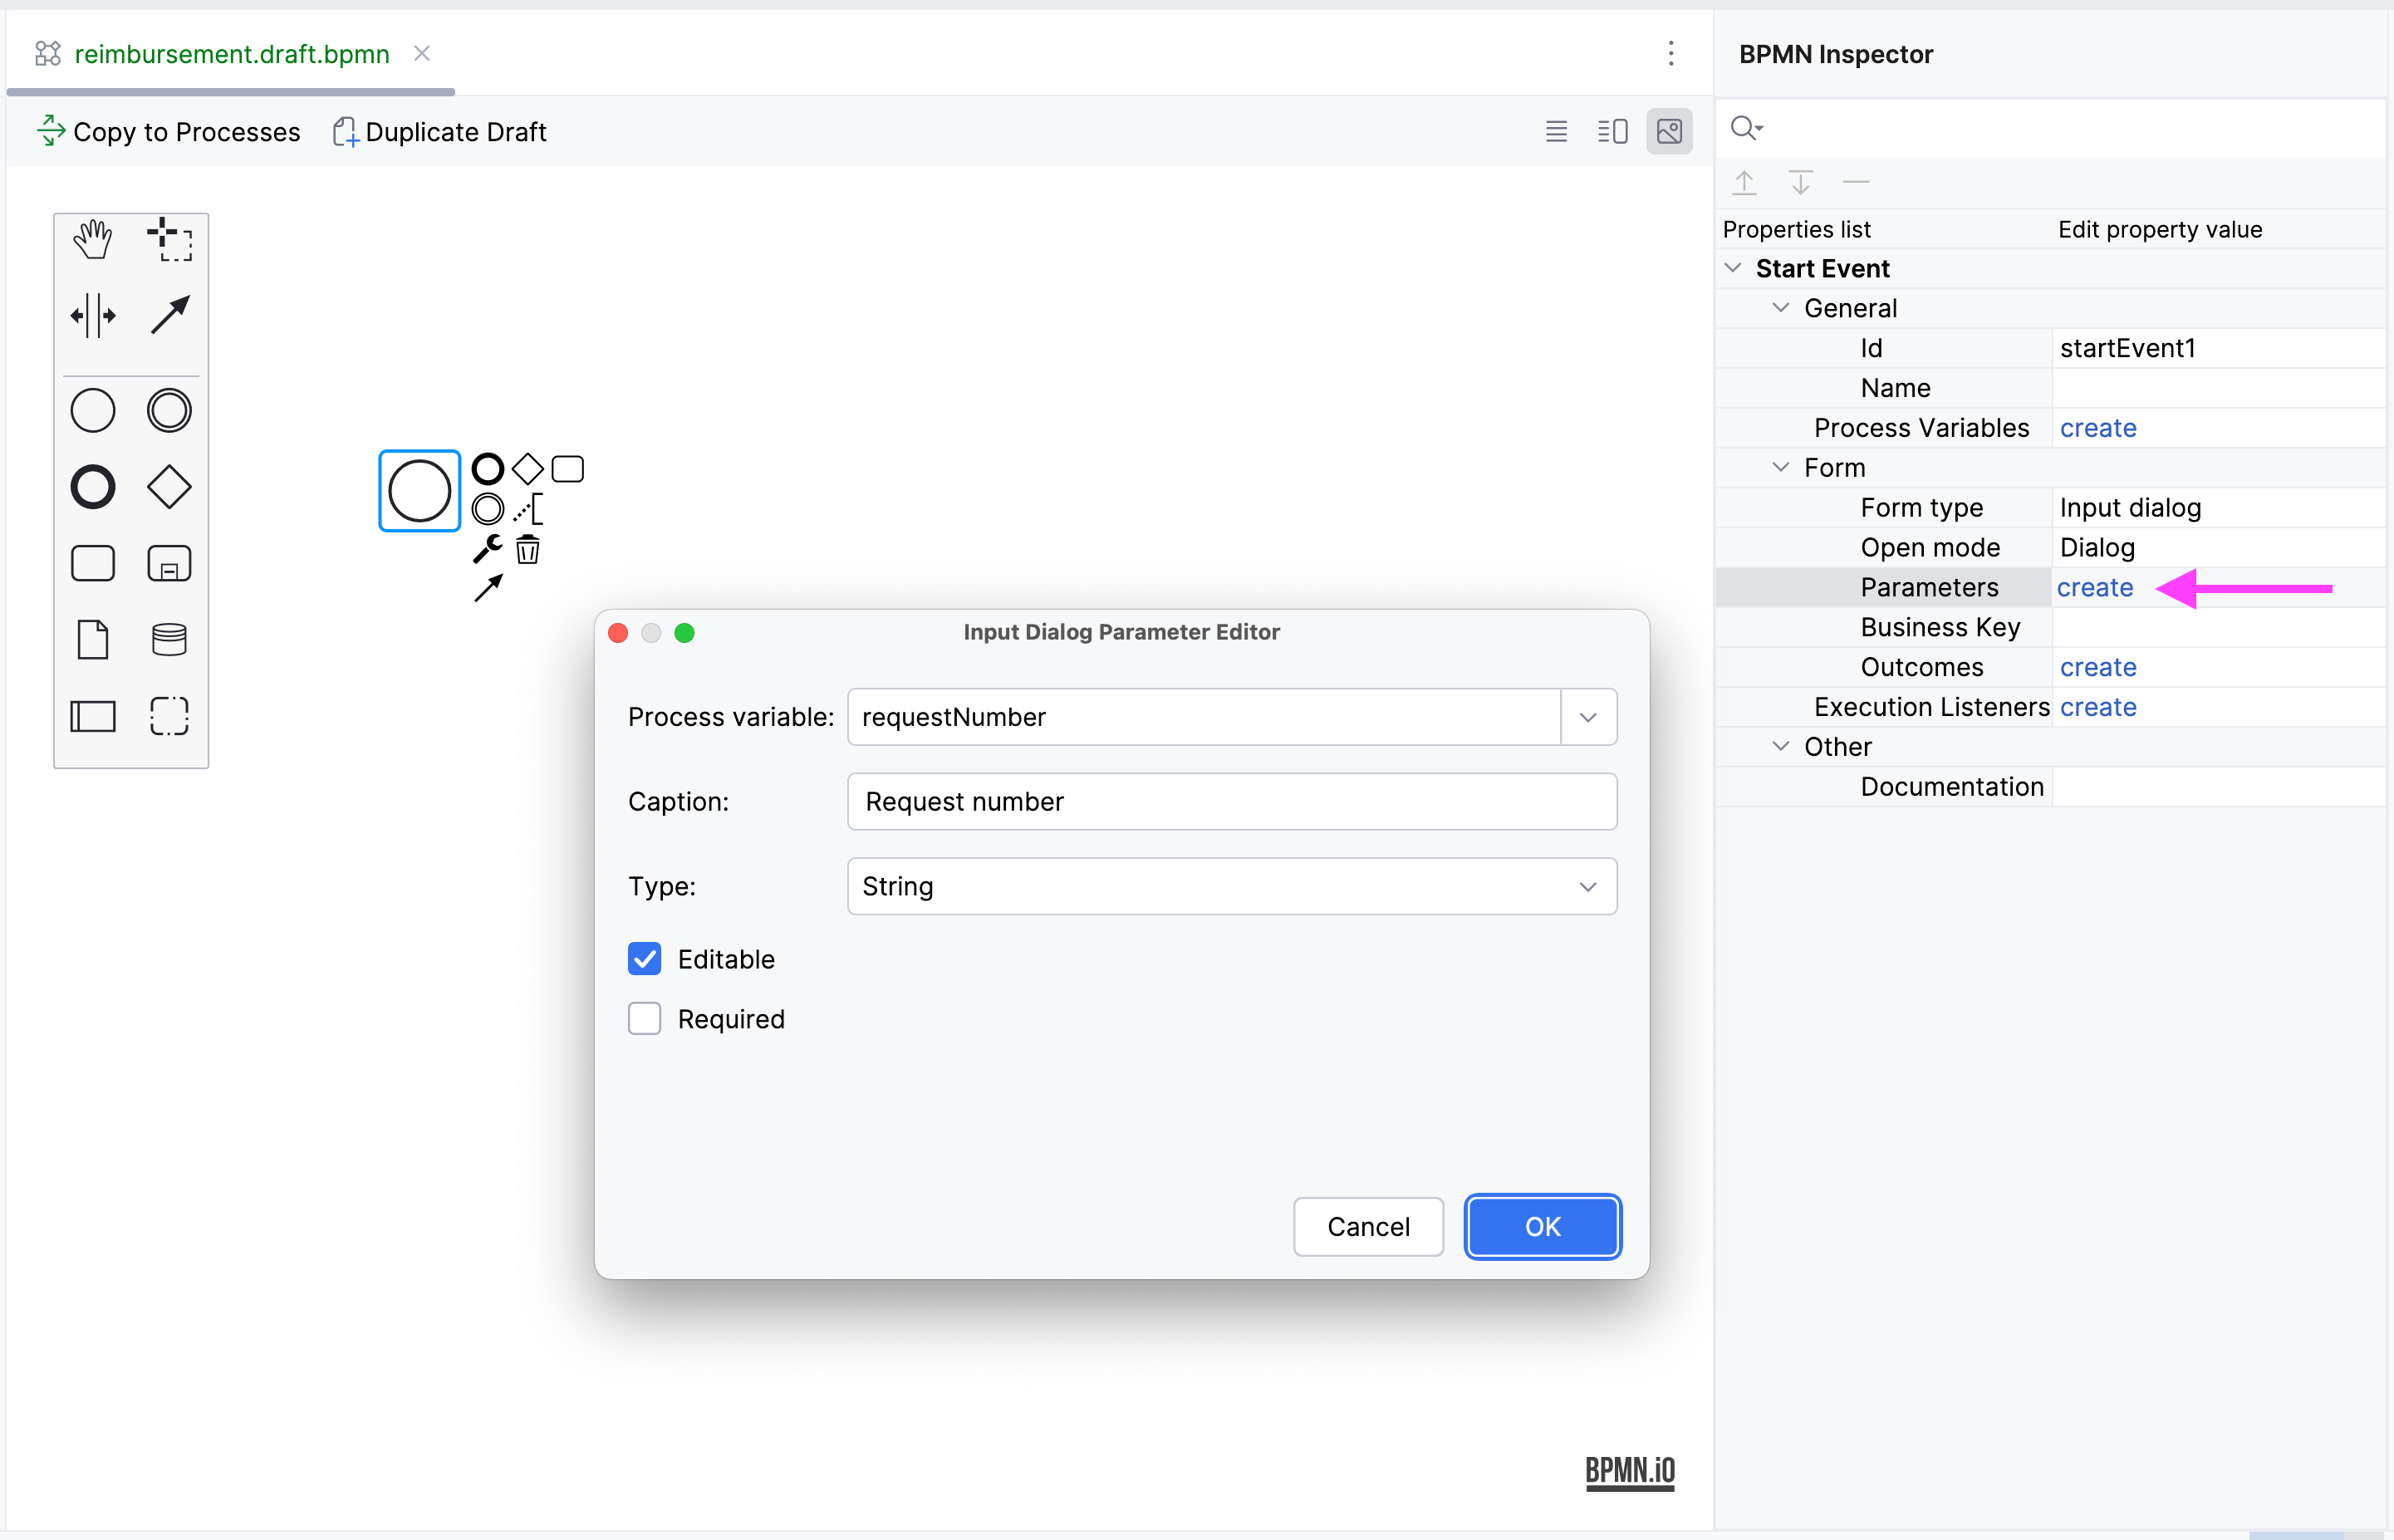
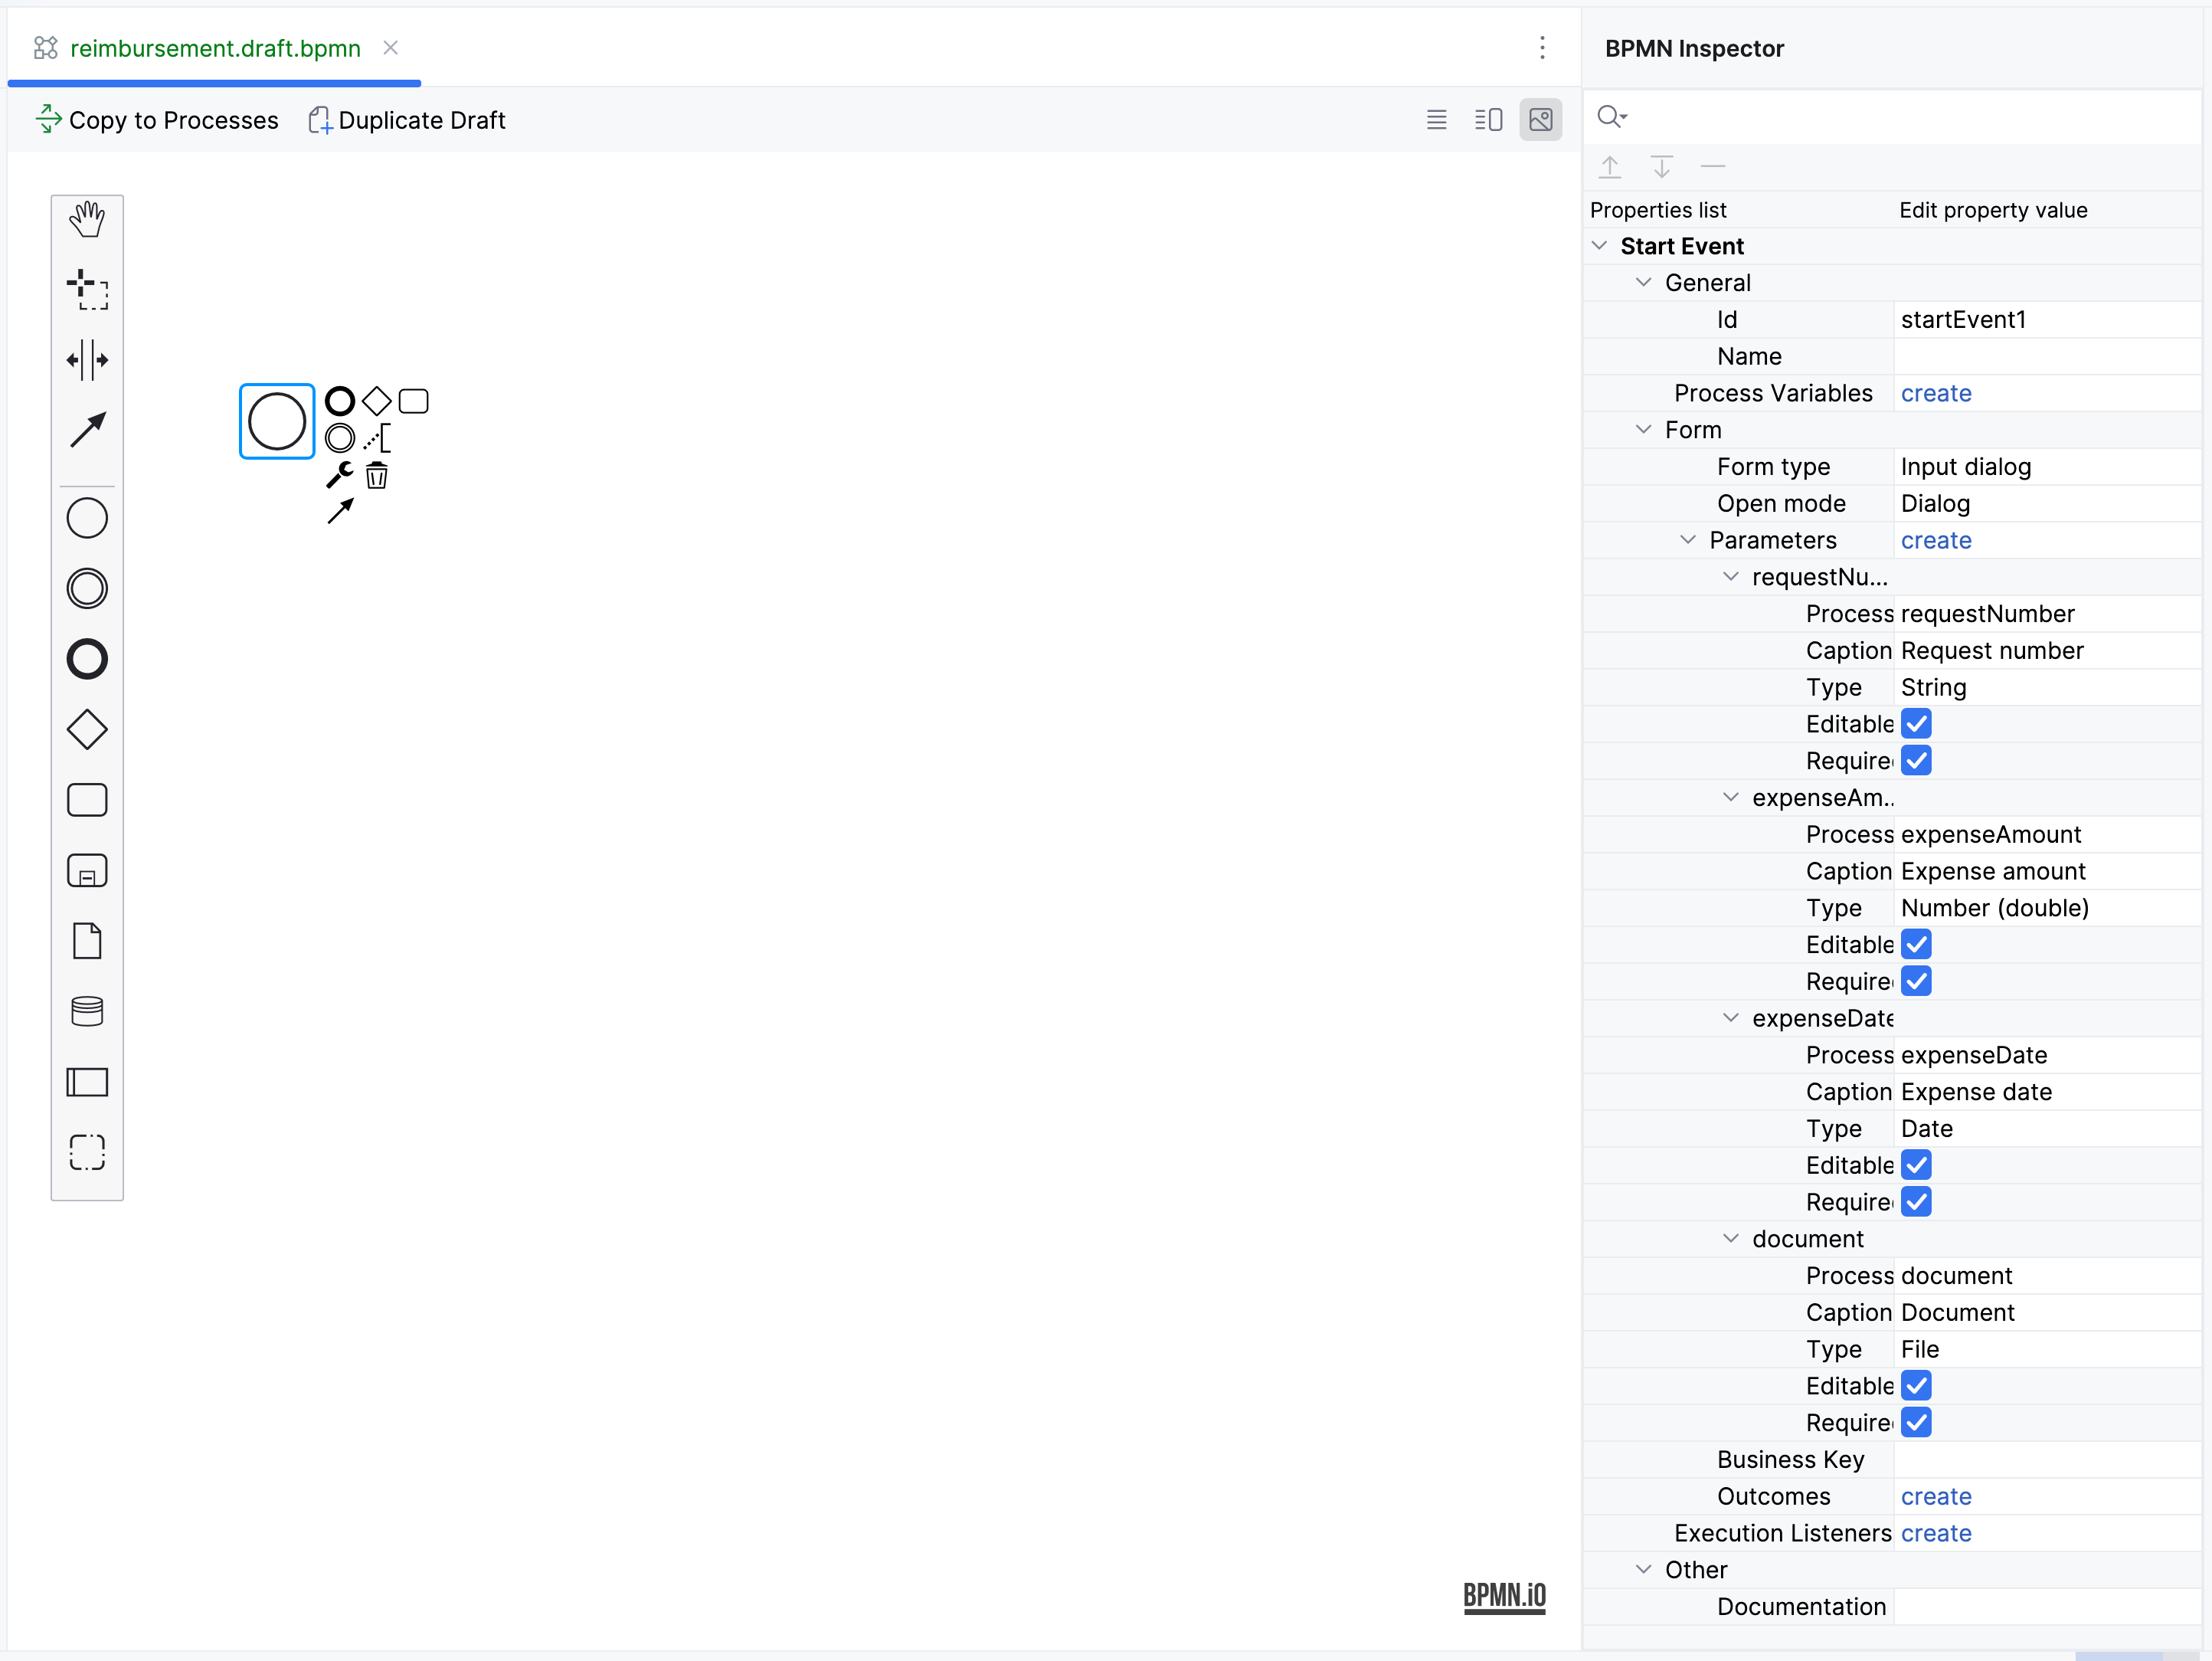
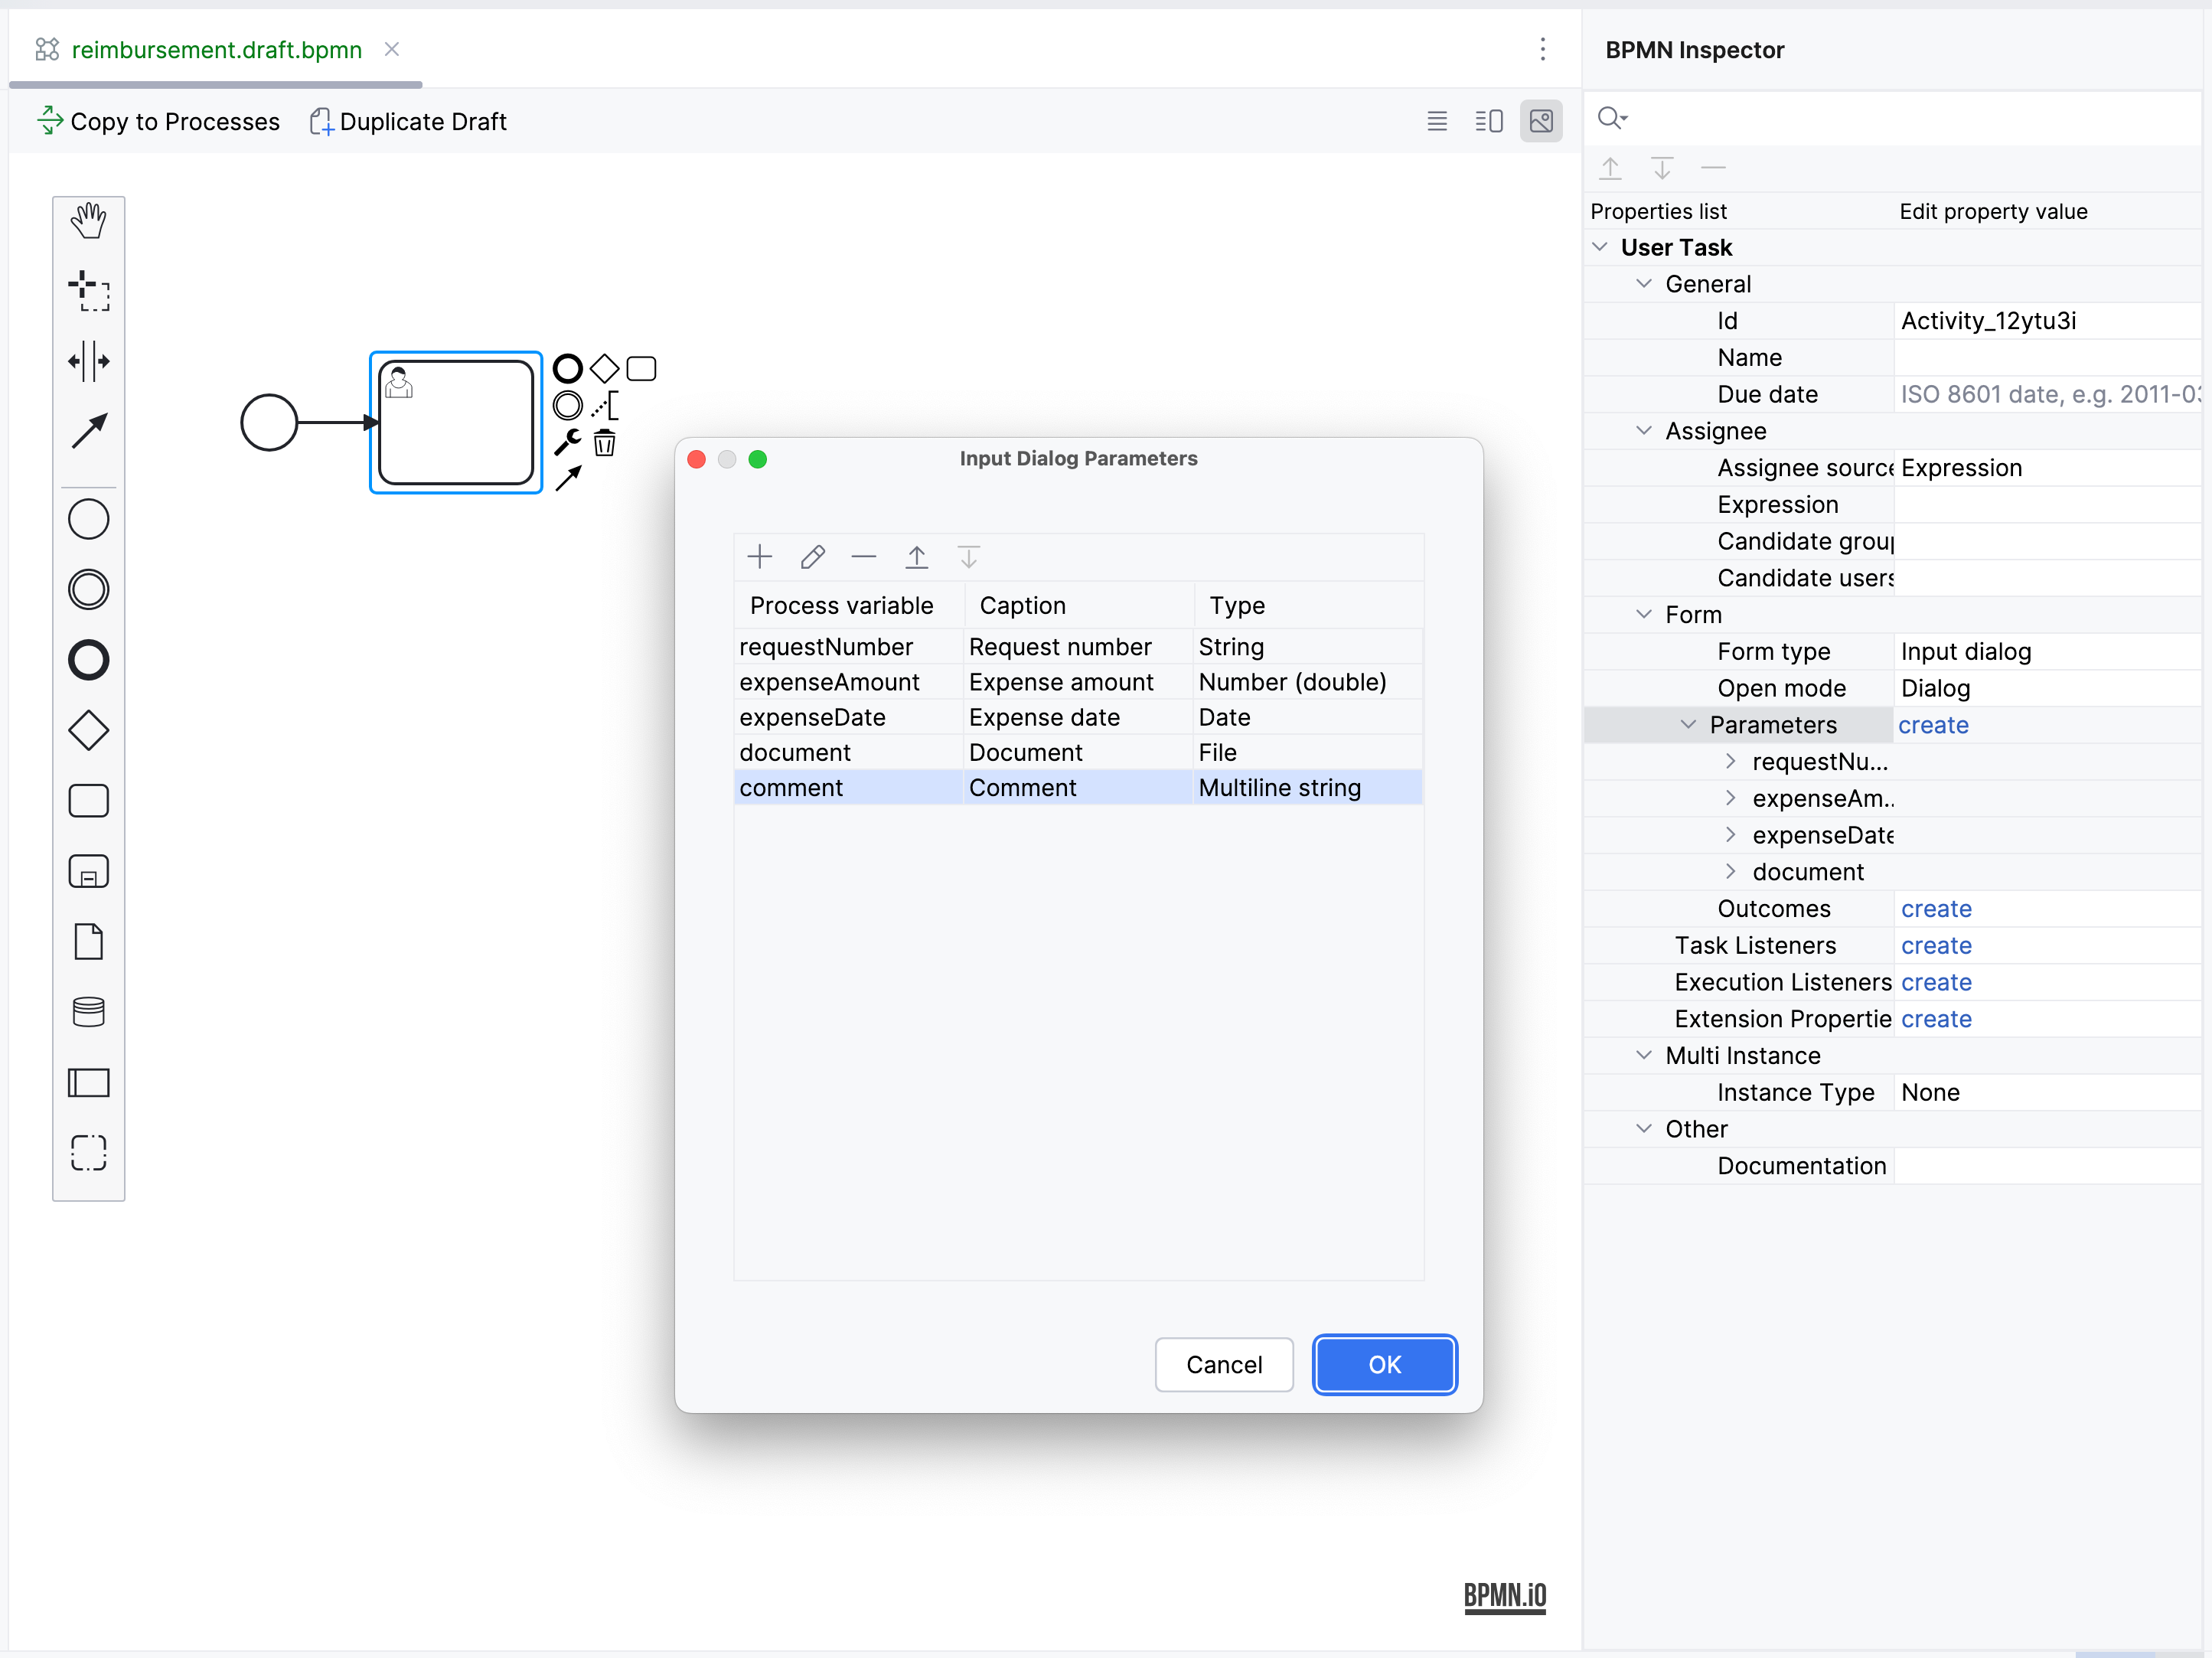
Next, create input parameters to prompt the user to enter values to this form:
-
Click create in the 'Parameters' field and add
requestNumberparameter with the following properties:
-
Repeat the previous step to create three more input parameters:
Process variable Caption Type Editable Required expenseAmountExpense amount
Decimal (double)
true
true
expenseDateExpense Date
Date
true
true
documentDocument
File
true
true
In result, you’ll get all fields created:
-
Next, create an input parameter to let users select a manager for approval. This will require a few additional properties:
Process variable Caption Type Editable Required Entity name UI Component JPQL query managerManager
Entity
true
true
User
ComboBox
leave blank*
* If no query is specified, this field defaults to
select e from User e.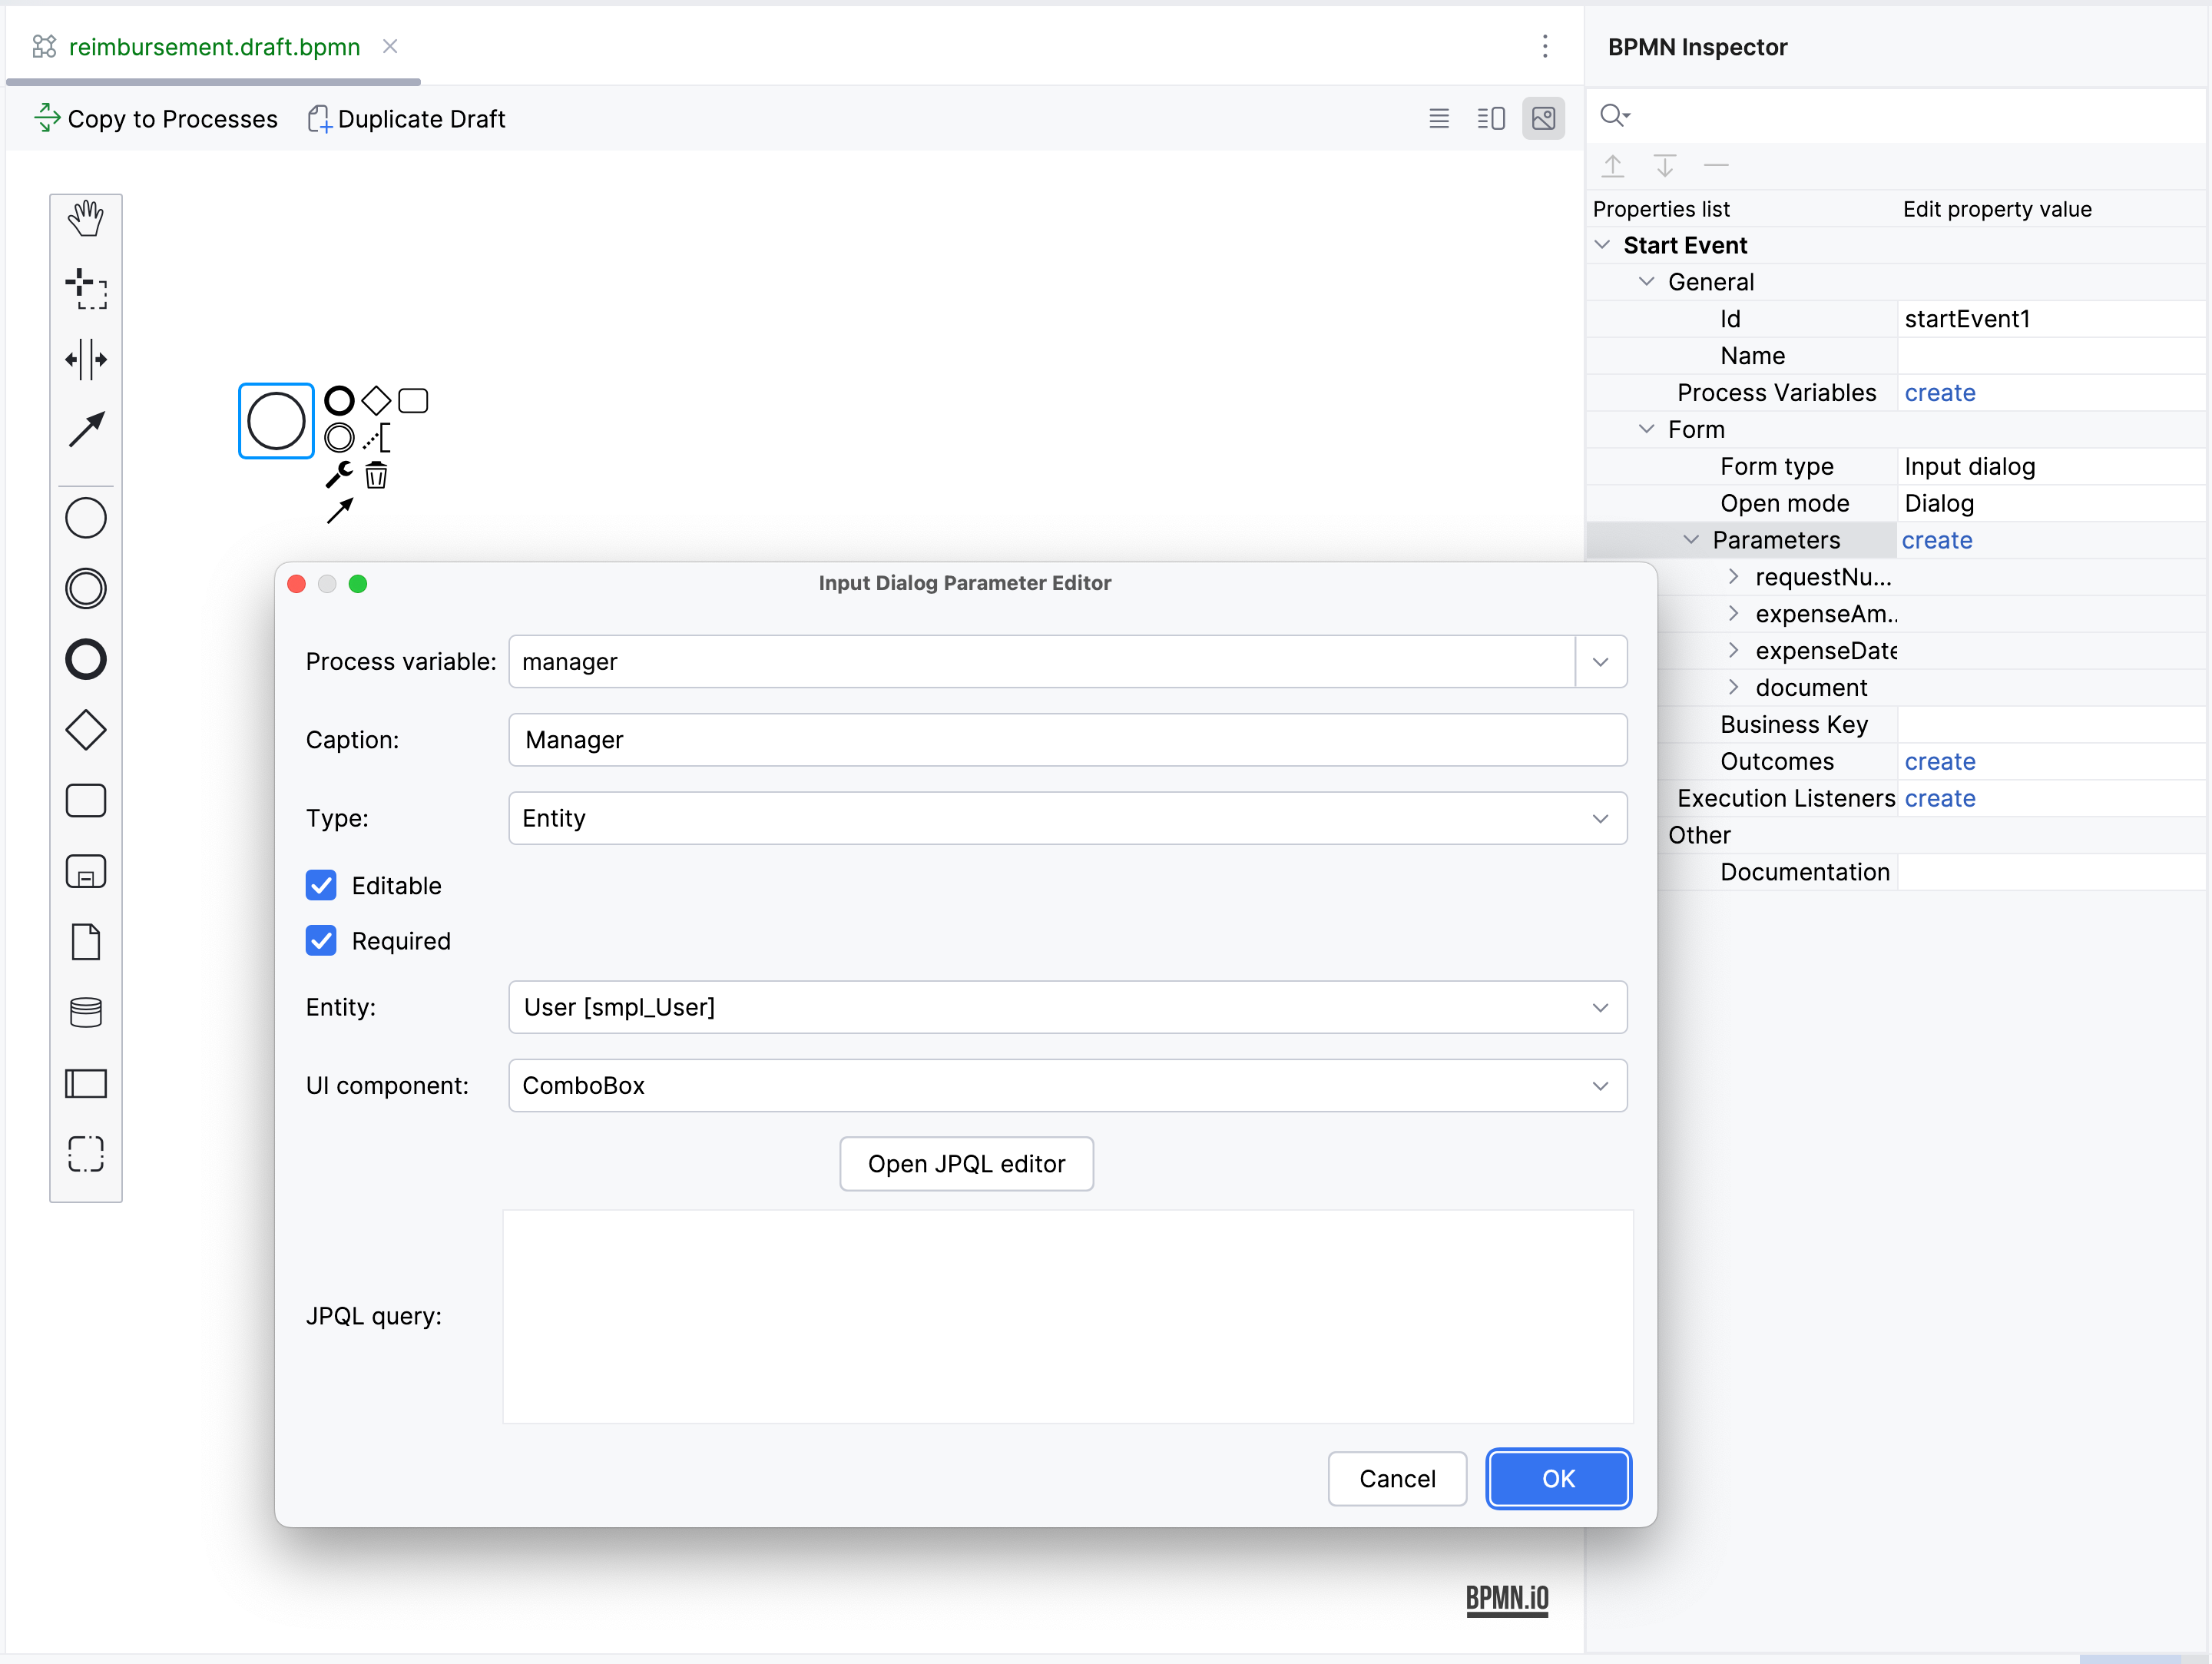
-
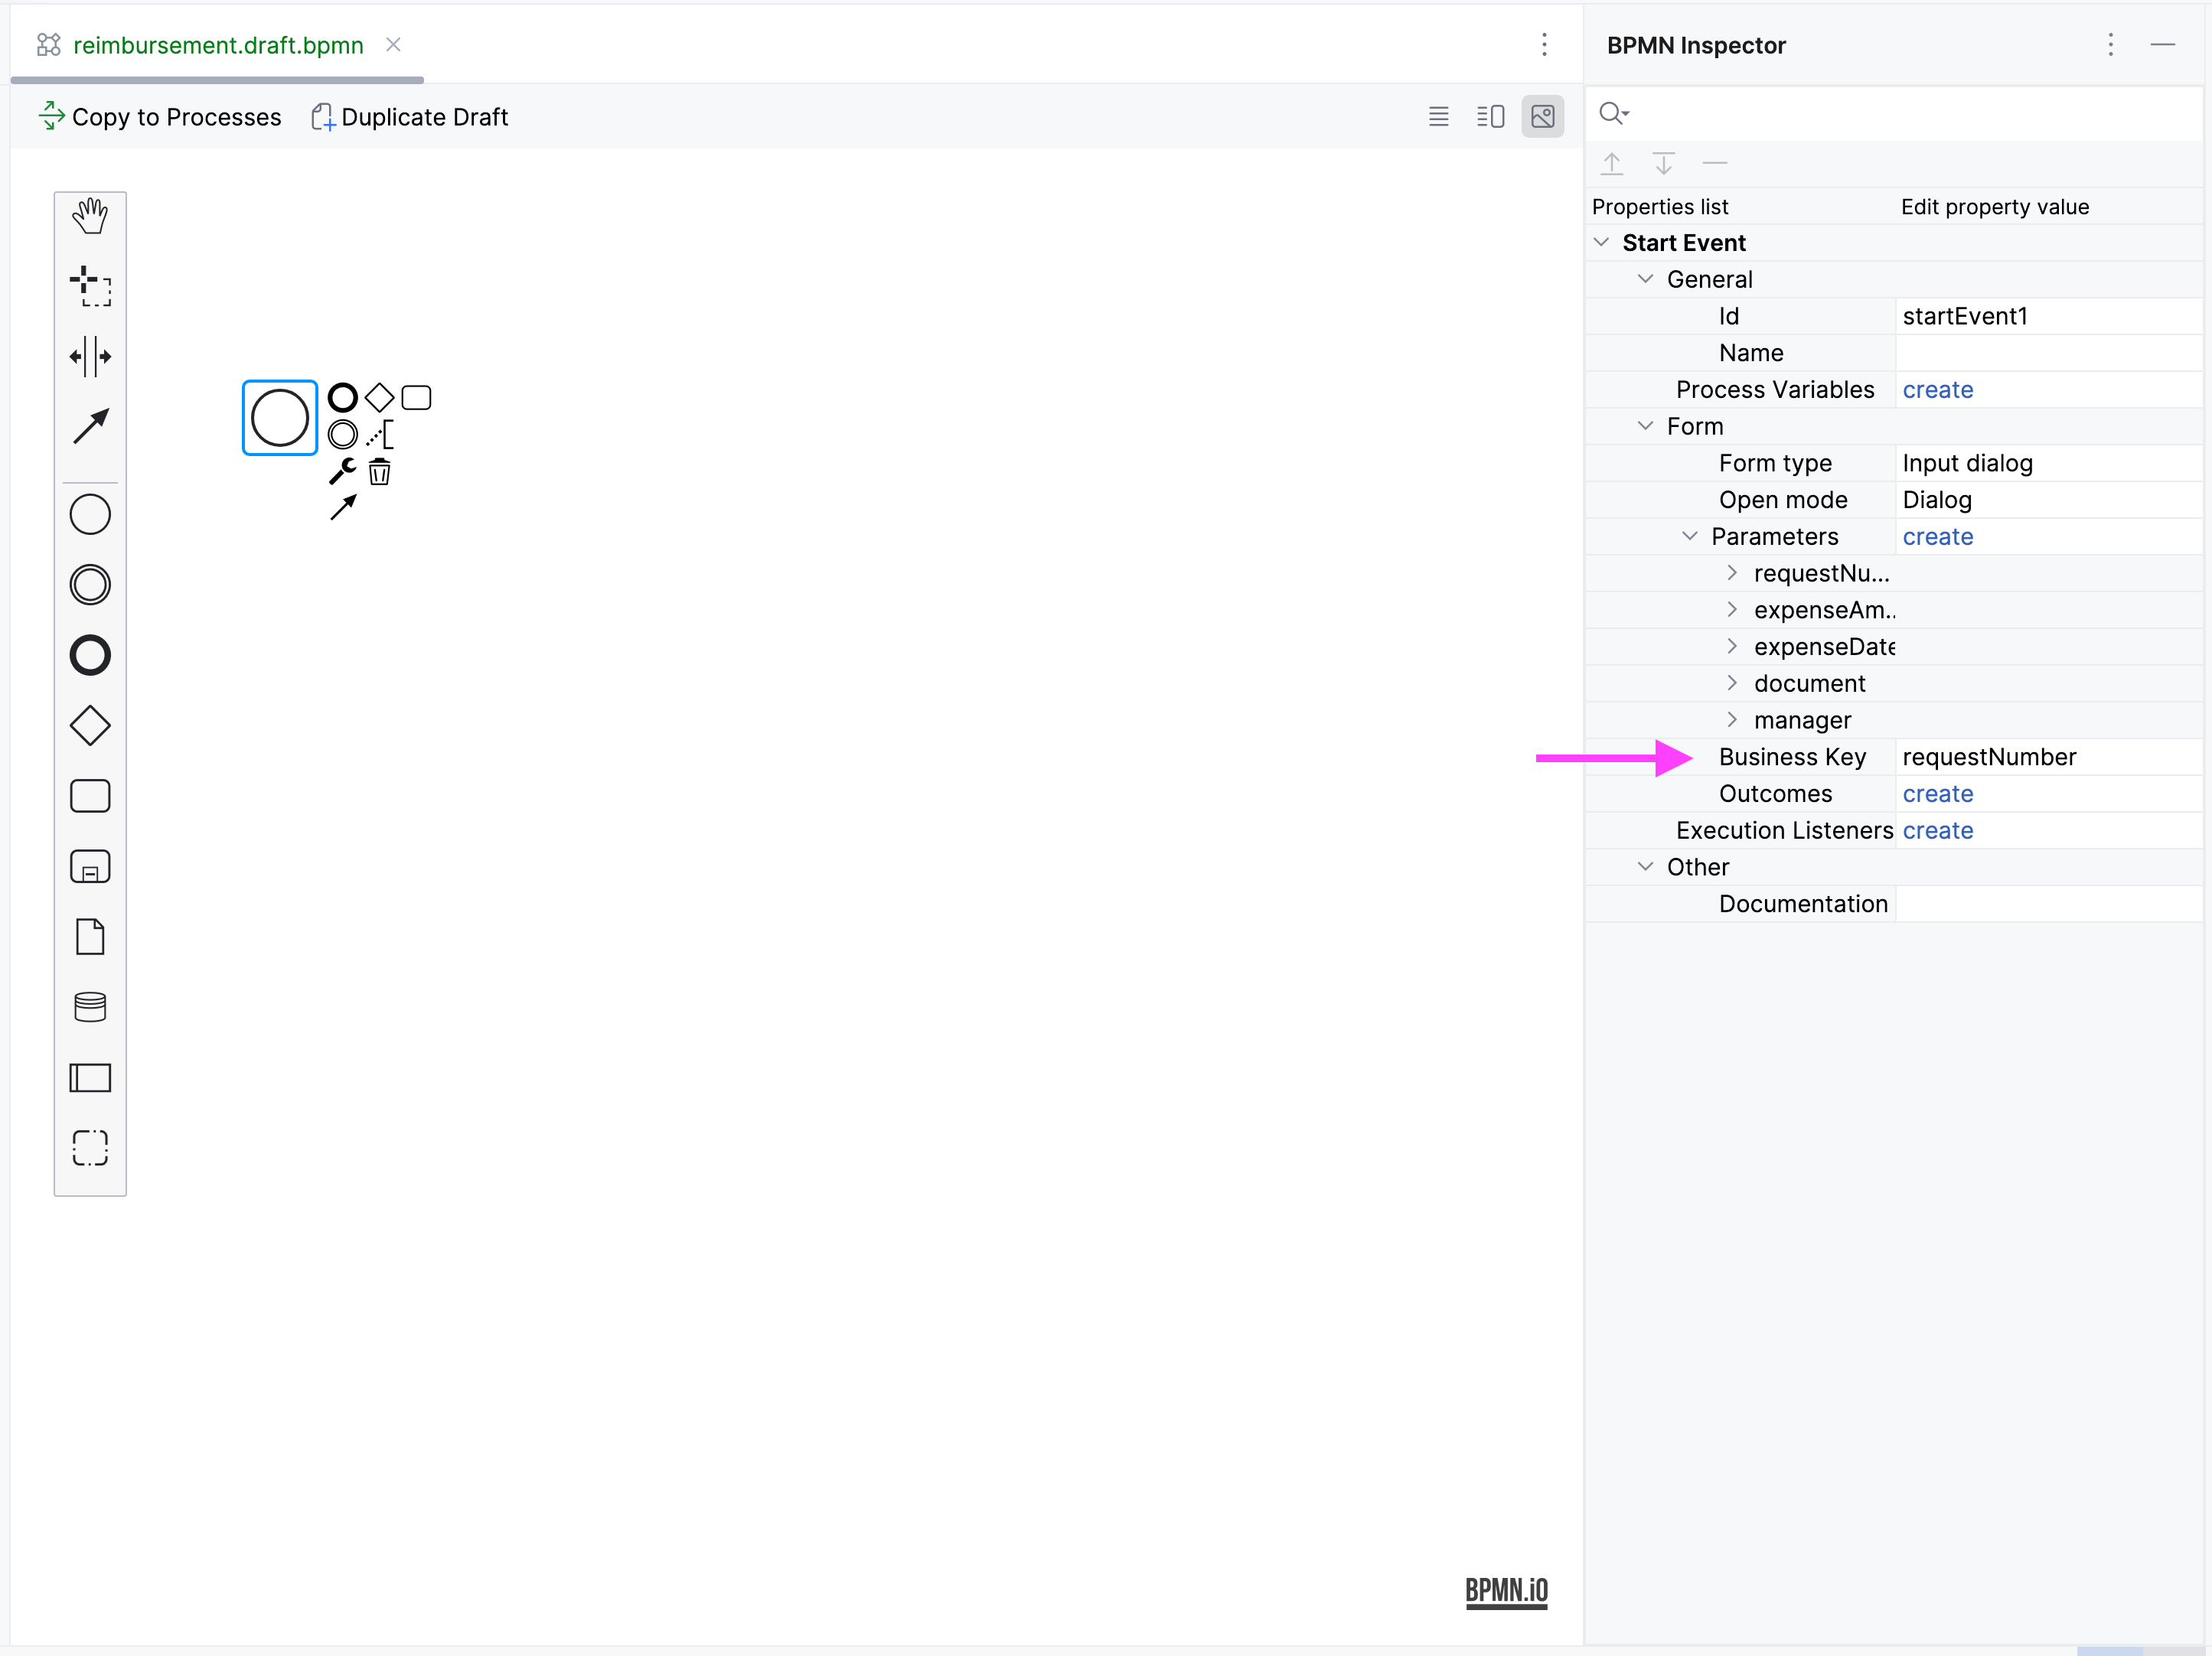
Set
requestNumberas the Business key field value. A business key is a domain-specific identifier of a process instance.
After adding all the parameters, the Form section should look as follows:
Creating Approval Task
Create a task for approval. It will be represented by the Approval form seen by the manager assigned to approve the reimbursement.
First, add a new element on the canvas:
-
Click on the
StartEventelement to select it. -
Click the Append task
 icon.
icon. -
Click the Change type
 icon
and select User Task in the drop-down.
icon
and select User Task in the drop-down.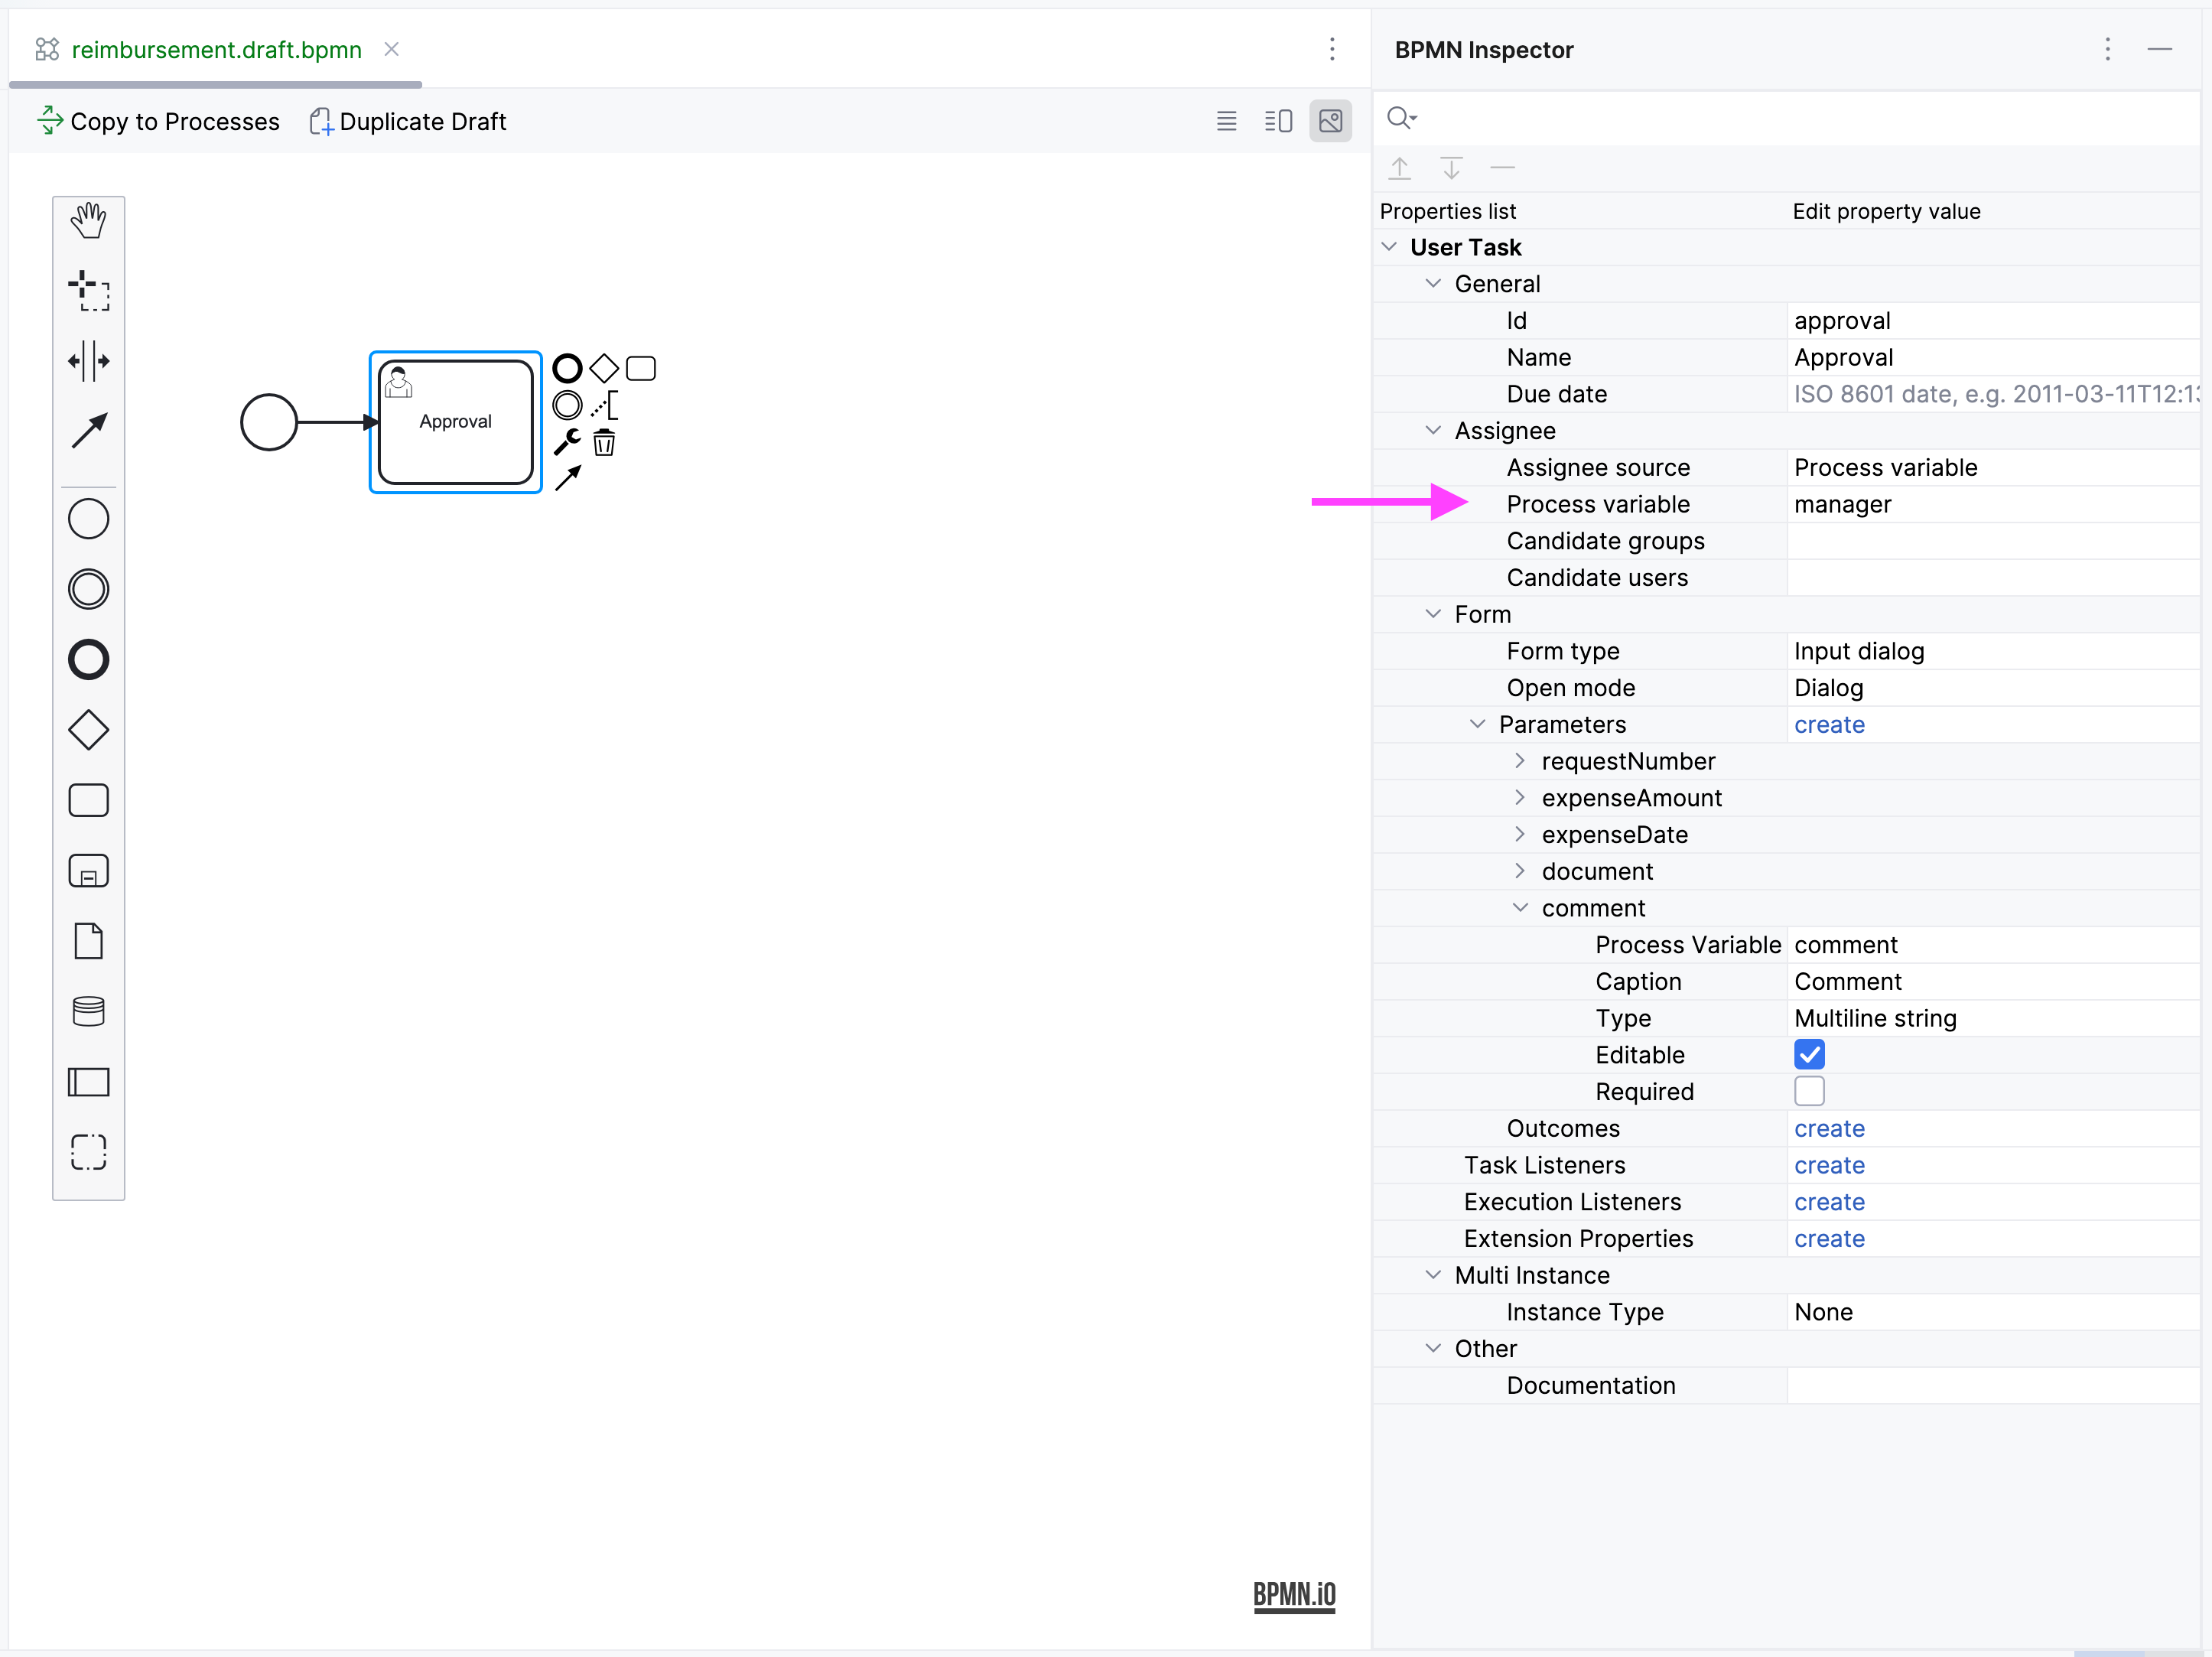
By default, the built-in initiatorprocess variable is available to assign a task. -
Proceed to the Form section and specify the following properties:
-
Form type:
Input dialog -
Open mode:
Dialog(this will be set by default)
-
-
Click the [
 link button] and
add the following existing parameters making them non-editable:
link button] and
add the following existing parameters making them non-editable:Process variable Caption Type Editable Required requestNumberRequest number
String
false
false
expenseAmountExpense amount
Decimal (double)
false
false
expenseDateExpense Date
Date
false
false
documentDocument
File
false
false
-
Click the [
link button]
and create one additional parameter for this form:Process variable Caption Type Editable Required commentComment
Multiline string
true
false
This parameter will be represented by a text field allowing the manager to leave notes during the approval step.
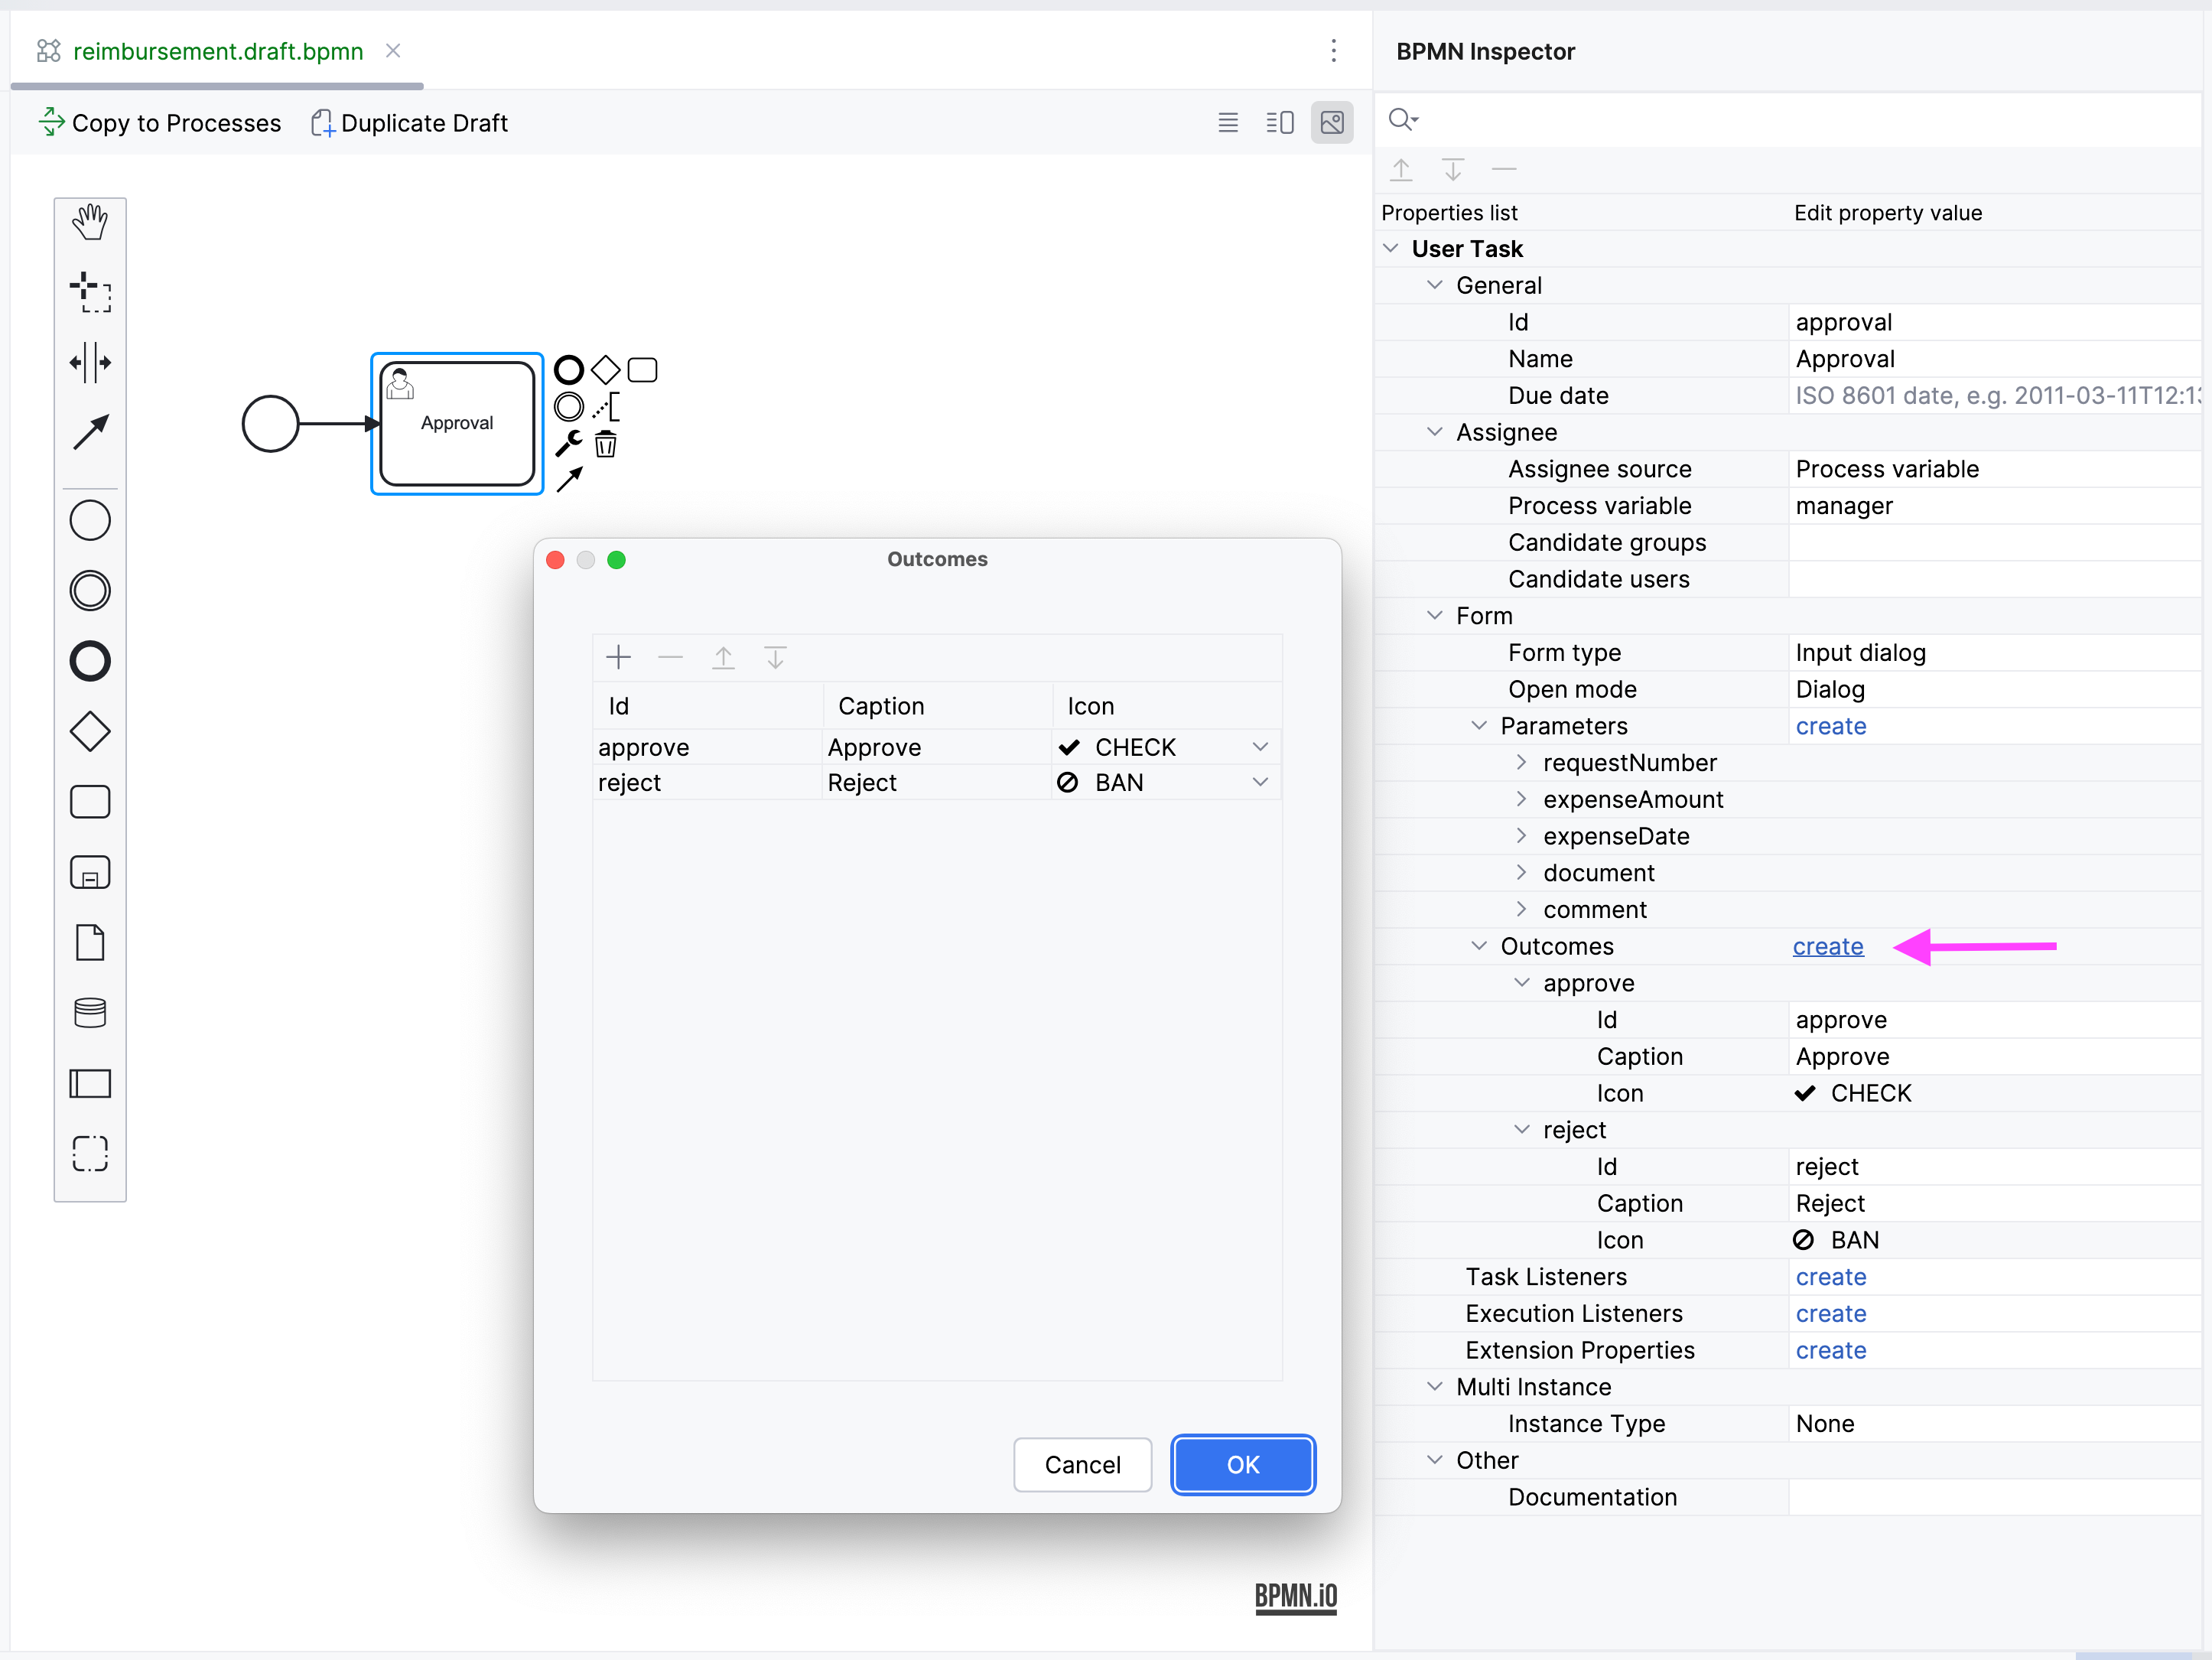
Creating Outcomes
The Approval step has two outcomes: approved or rejected. Therefore, the manager making decision, should see two buttons on the form.
-
Make sure the Approval element is selected. Then go to Outcomes properties and click the [
link button]. -
Set properties for the first outcome:
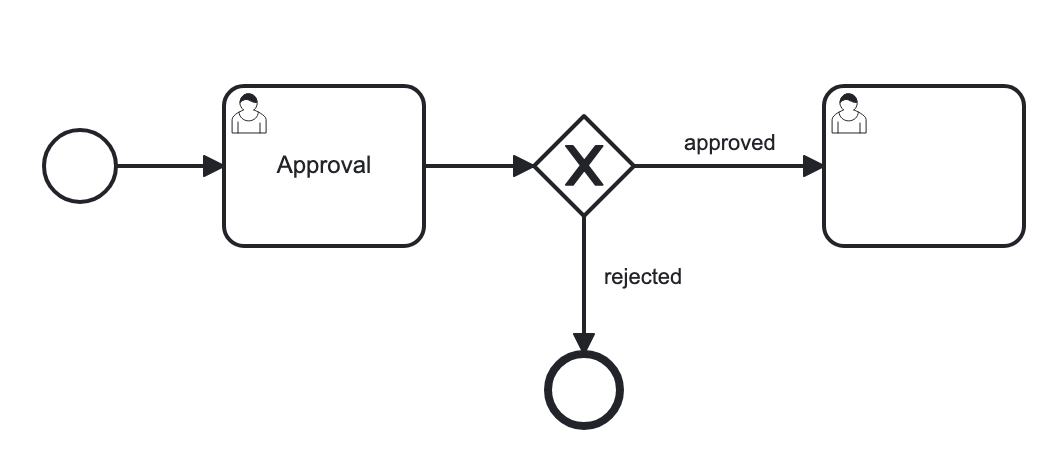
Depending on the Approval task’s outcome, two scenarios are possible. To indicate a point with several alternative paths, add an Exclusive Gateway element:
-
Select the Approval task element and click Append Gateway
 .
. -
Select the gateway element and create another user task with
→ → User Task. -
Select the gateway and click
 to create
 EndEventelement. -
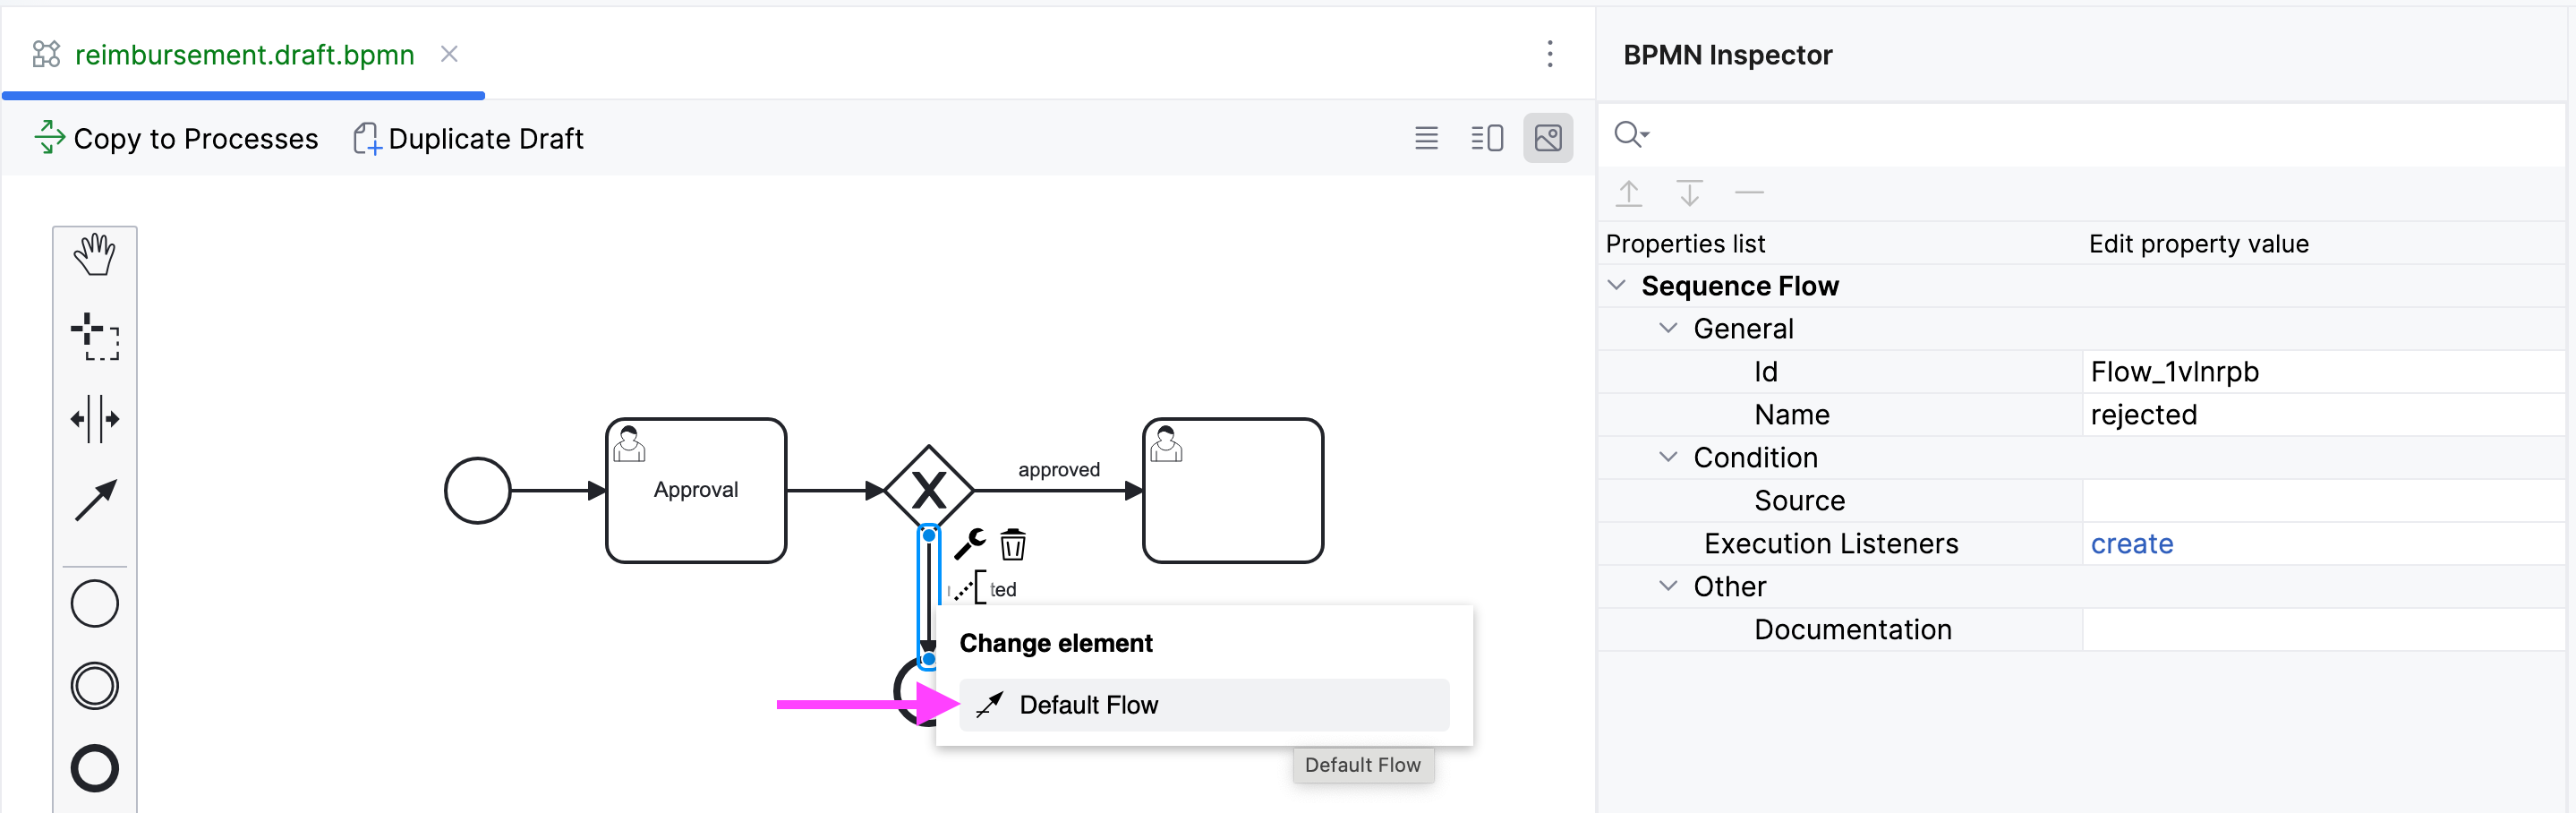
Select the new sequence flows between elements and name them:
approvedandrejected.
-
Select the
approvedsequence flow and specify its Condition properties:-
Condition source:
User task outcome -
User task id:
Approval -
User task outcome:
approve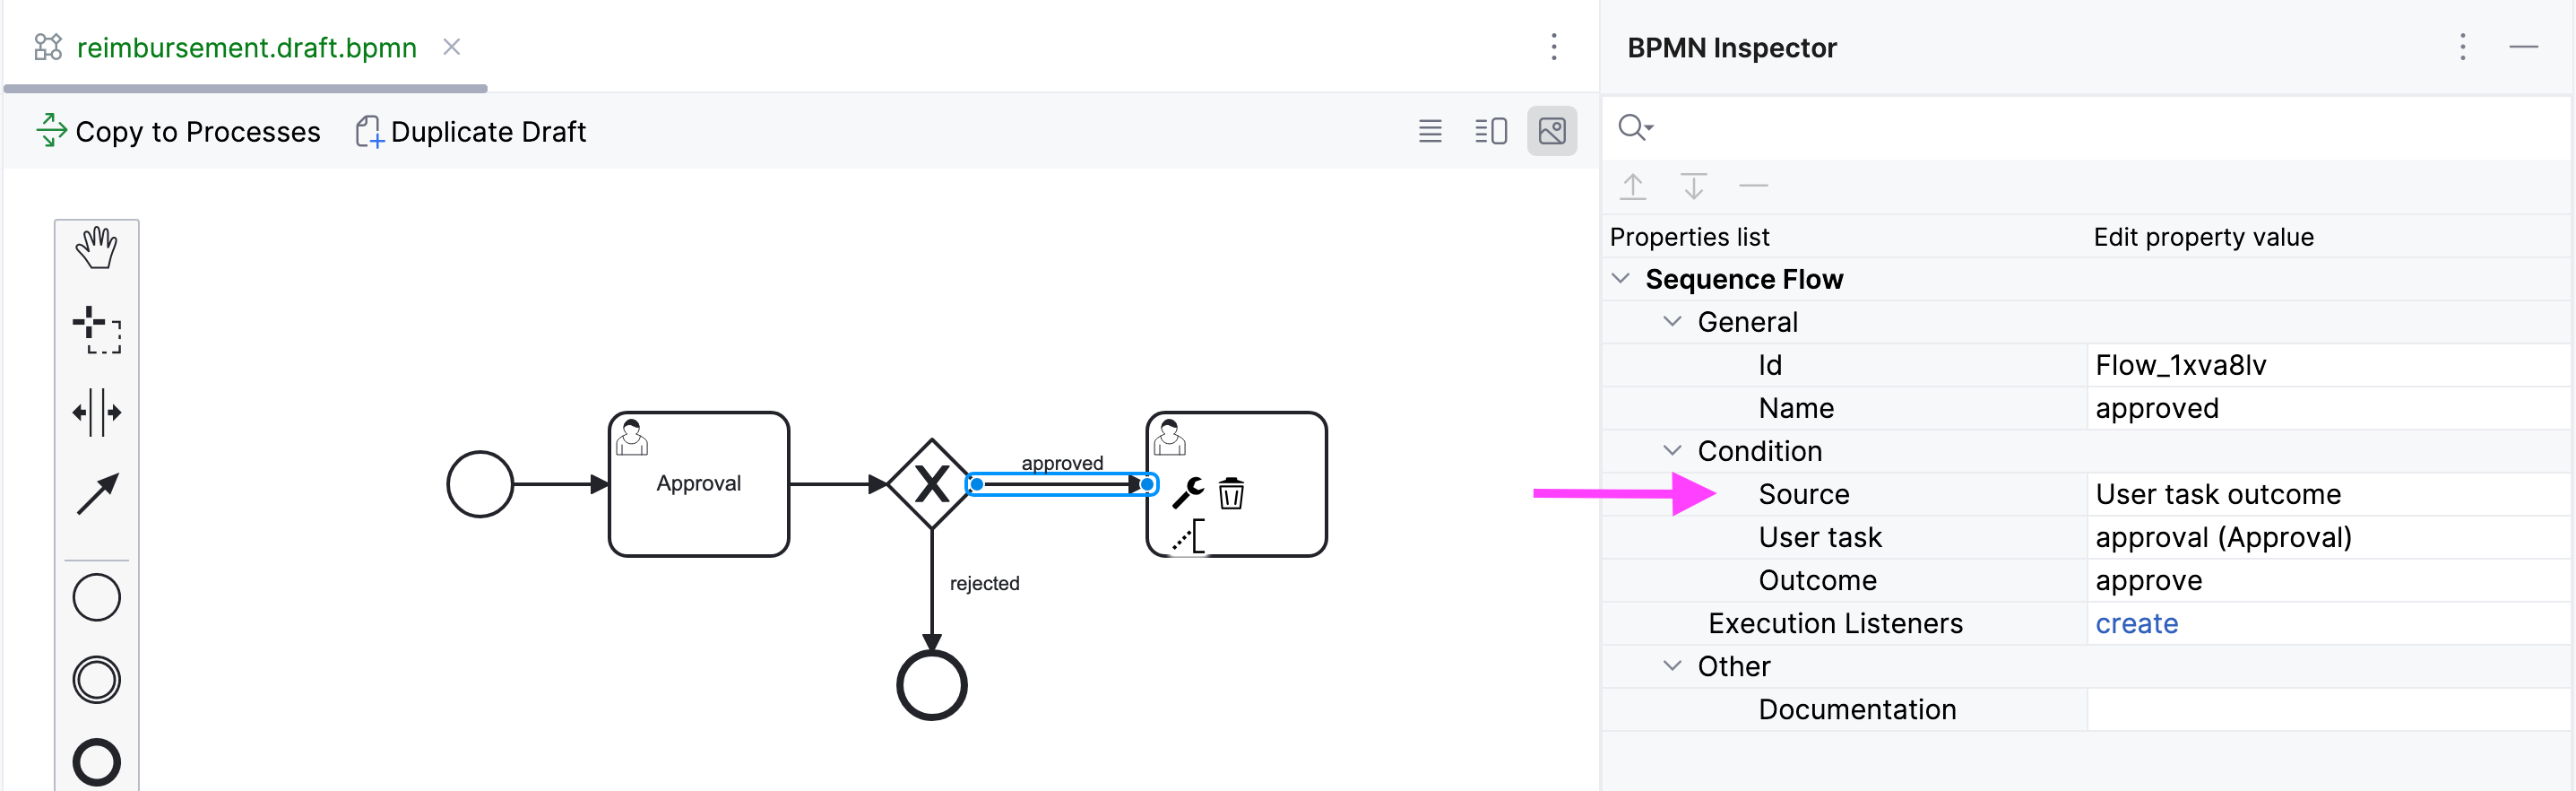
-
-
Similarly, specify Condition properties for the
rejectedsequence flow:-
Condition source:
User task outcome -
User task id:
Approval -
User task outcome:
reject
-
Creating Payment User Task
The other user task in our model is to notify accountants about reimbursement payment approval. It will be represented by the Payment form available only to accountants.
-
Select the user task on the canvas then set its Id and Name:
-
Id:
payment -
Name: Payment
-
For this task, we will implement the following behavior: it is sent to all accountants with any of them being able to claim this task. To achieve this, instead of a particular assignee, there is an option to specify Candidate groups or Candidate users.
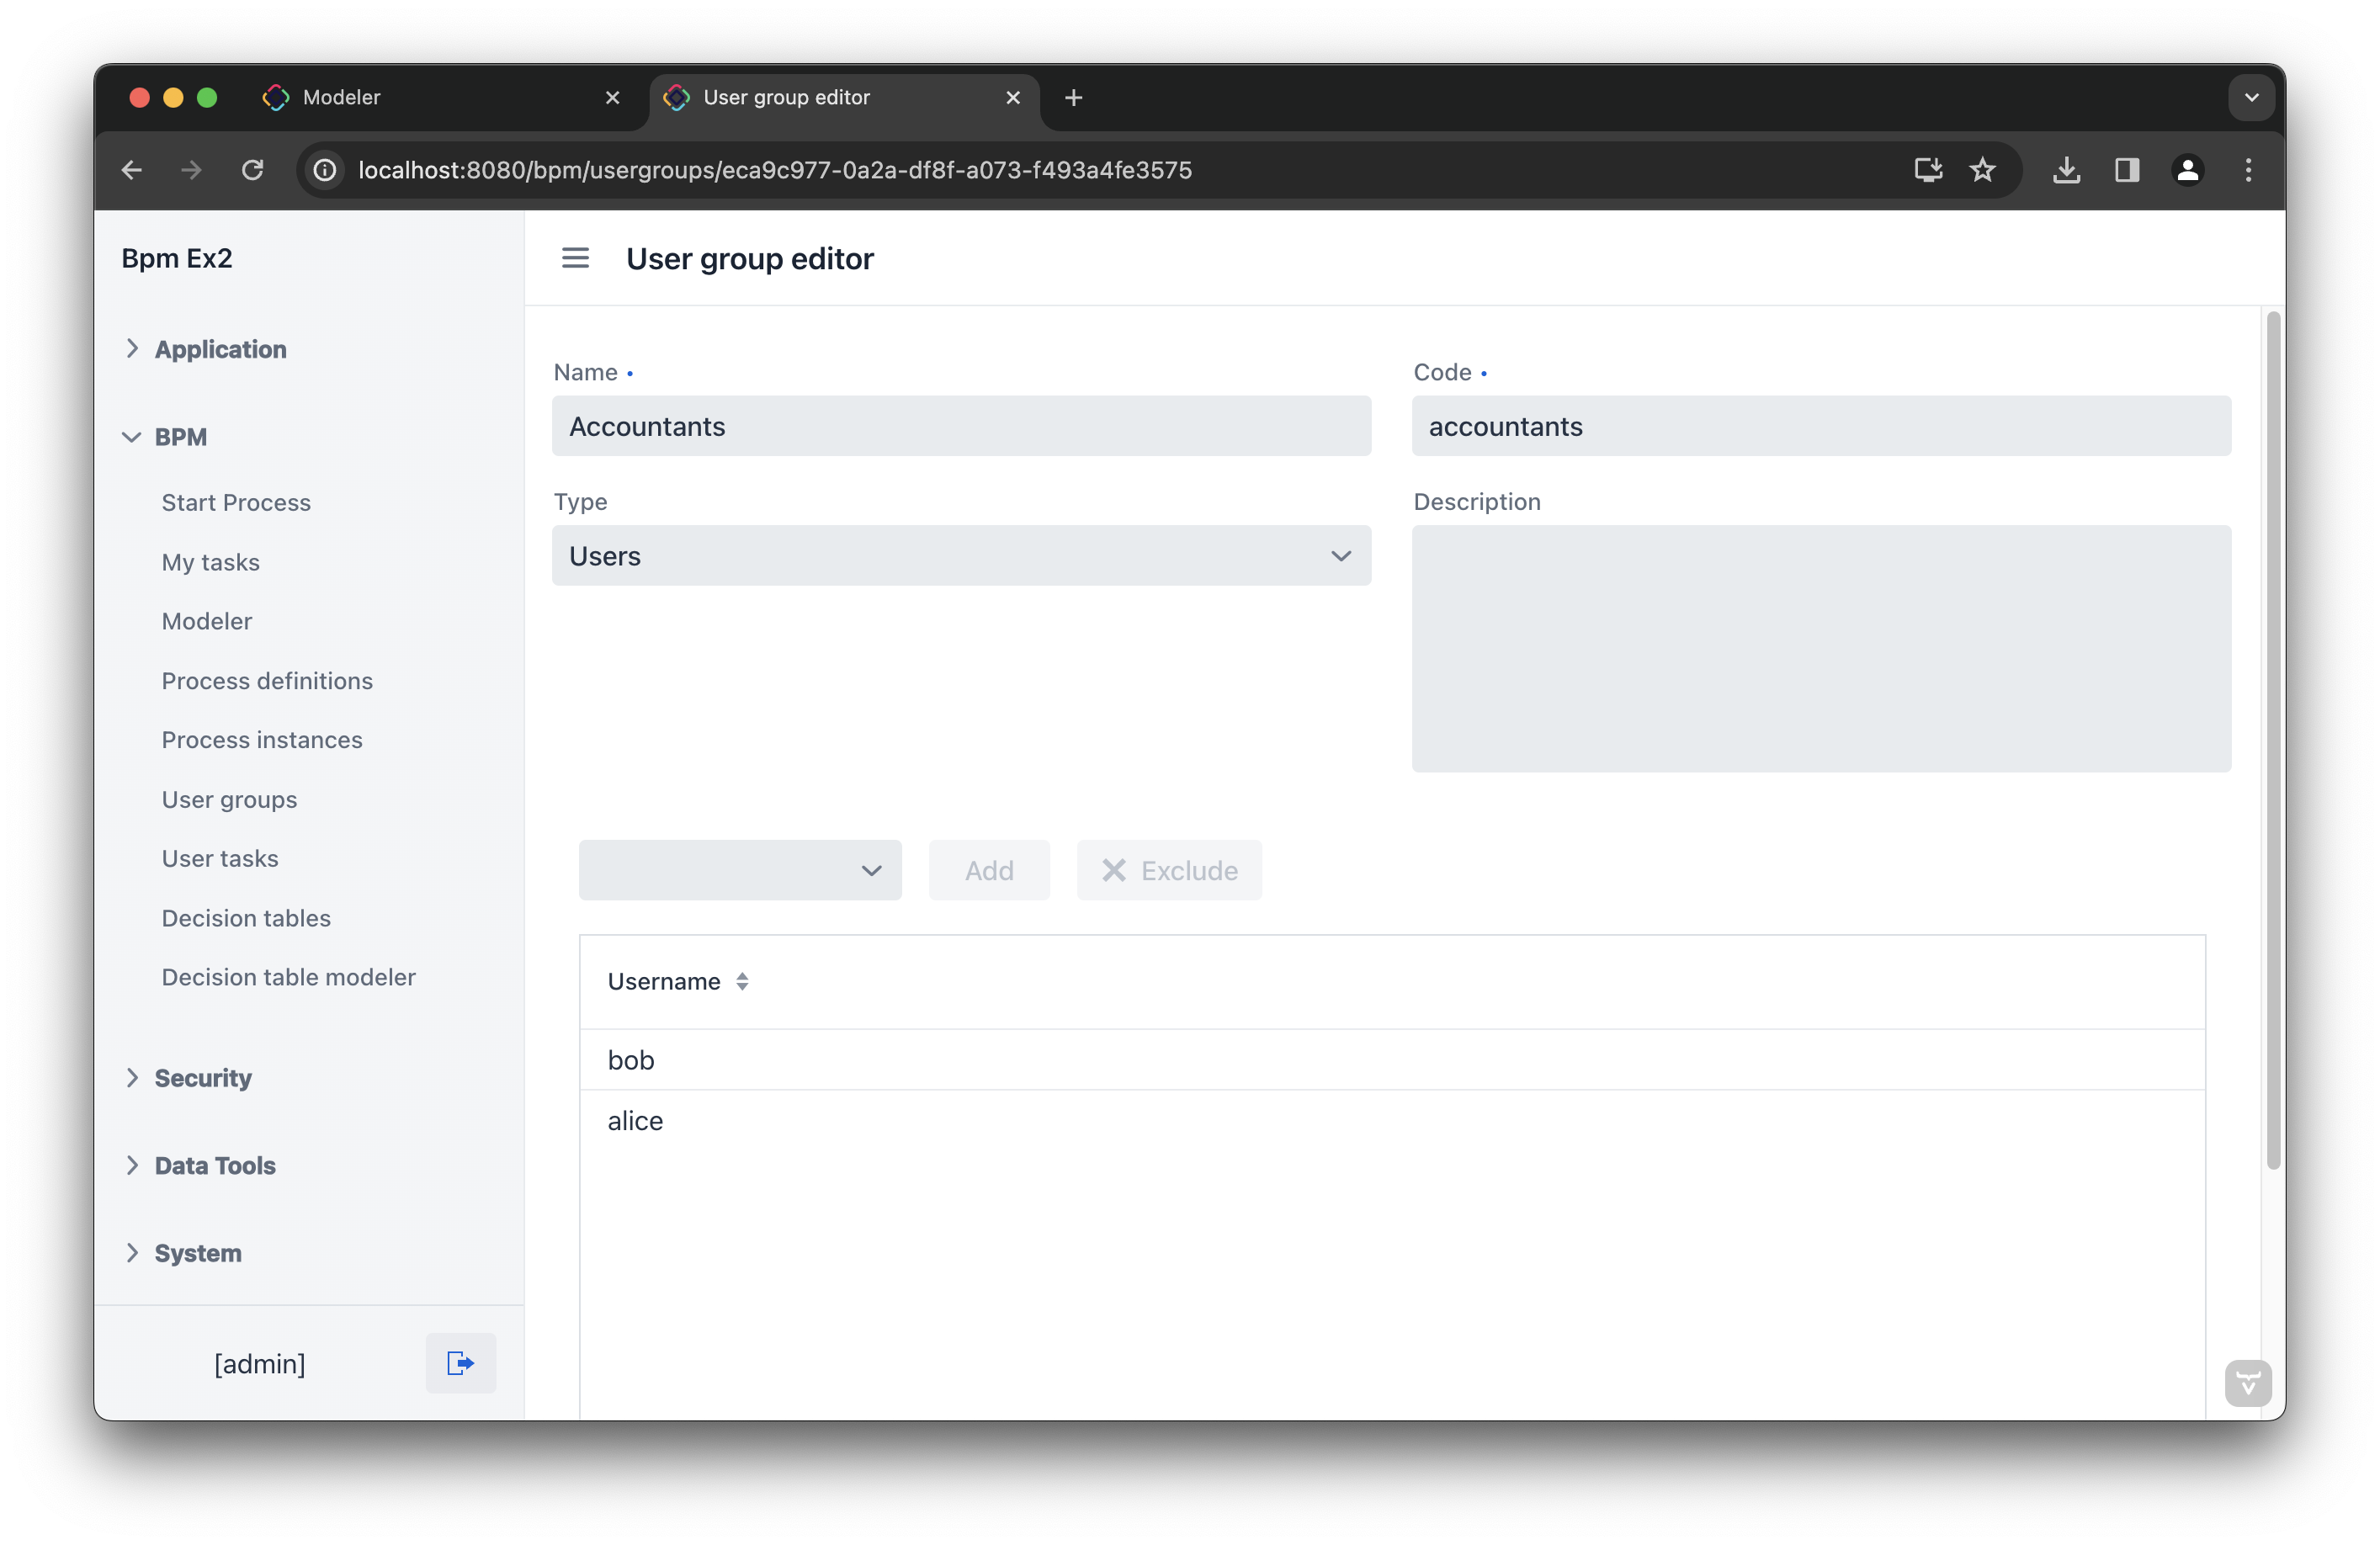
Therefore, let’s create a Candidate group for accountants.
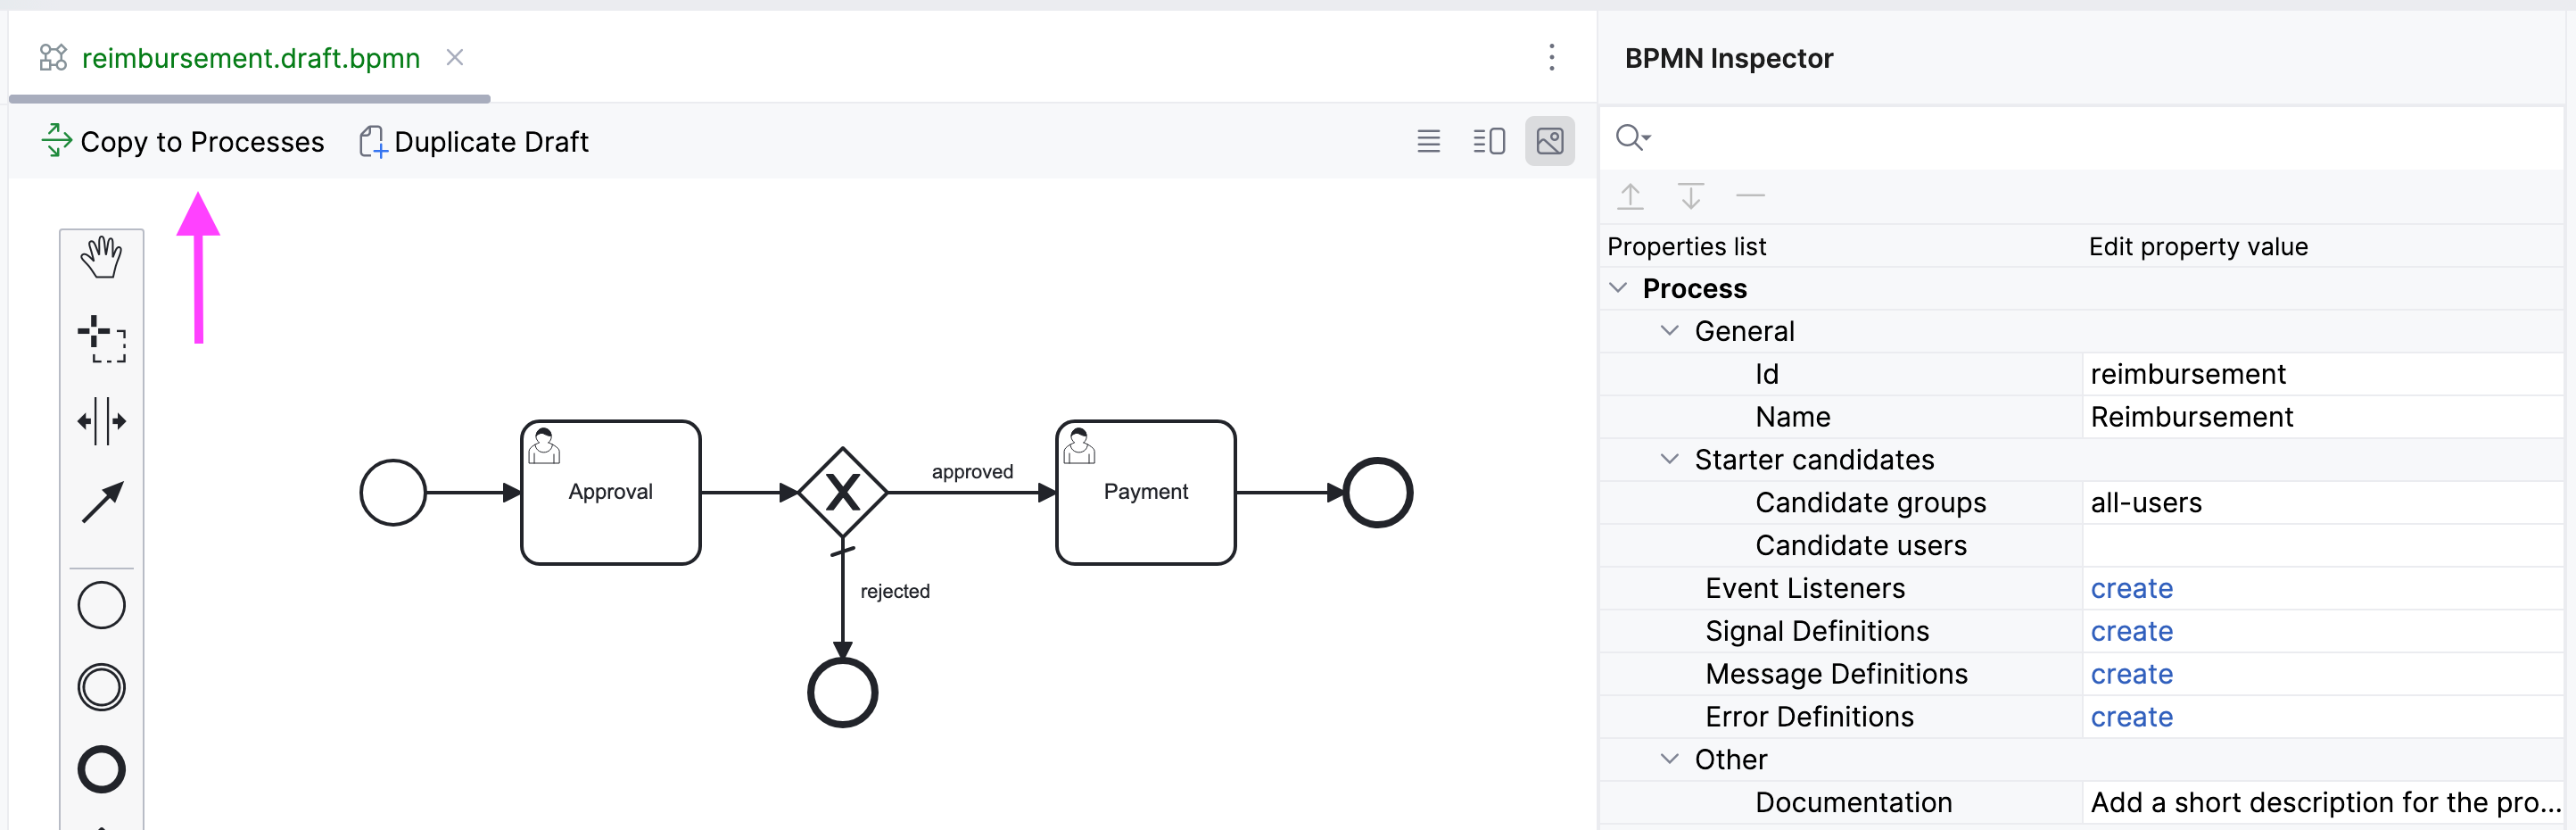
|
Before leaving Modeler,
save your model as draft with |
-
Go to the BPM→ User groups view and create a new group named
Accountantsand setaccountantsas its code. -
Set the user type to Users.
-
Add users to the group.
Users involved in the processes must be granted the BPM: process actor role.
This role provides access to BPM views and entities required for starting processes and working with user tasks.
You can assign roles in the Application→ Users view.
|
-
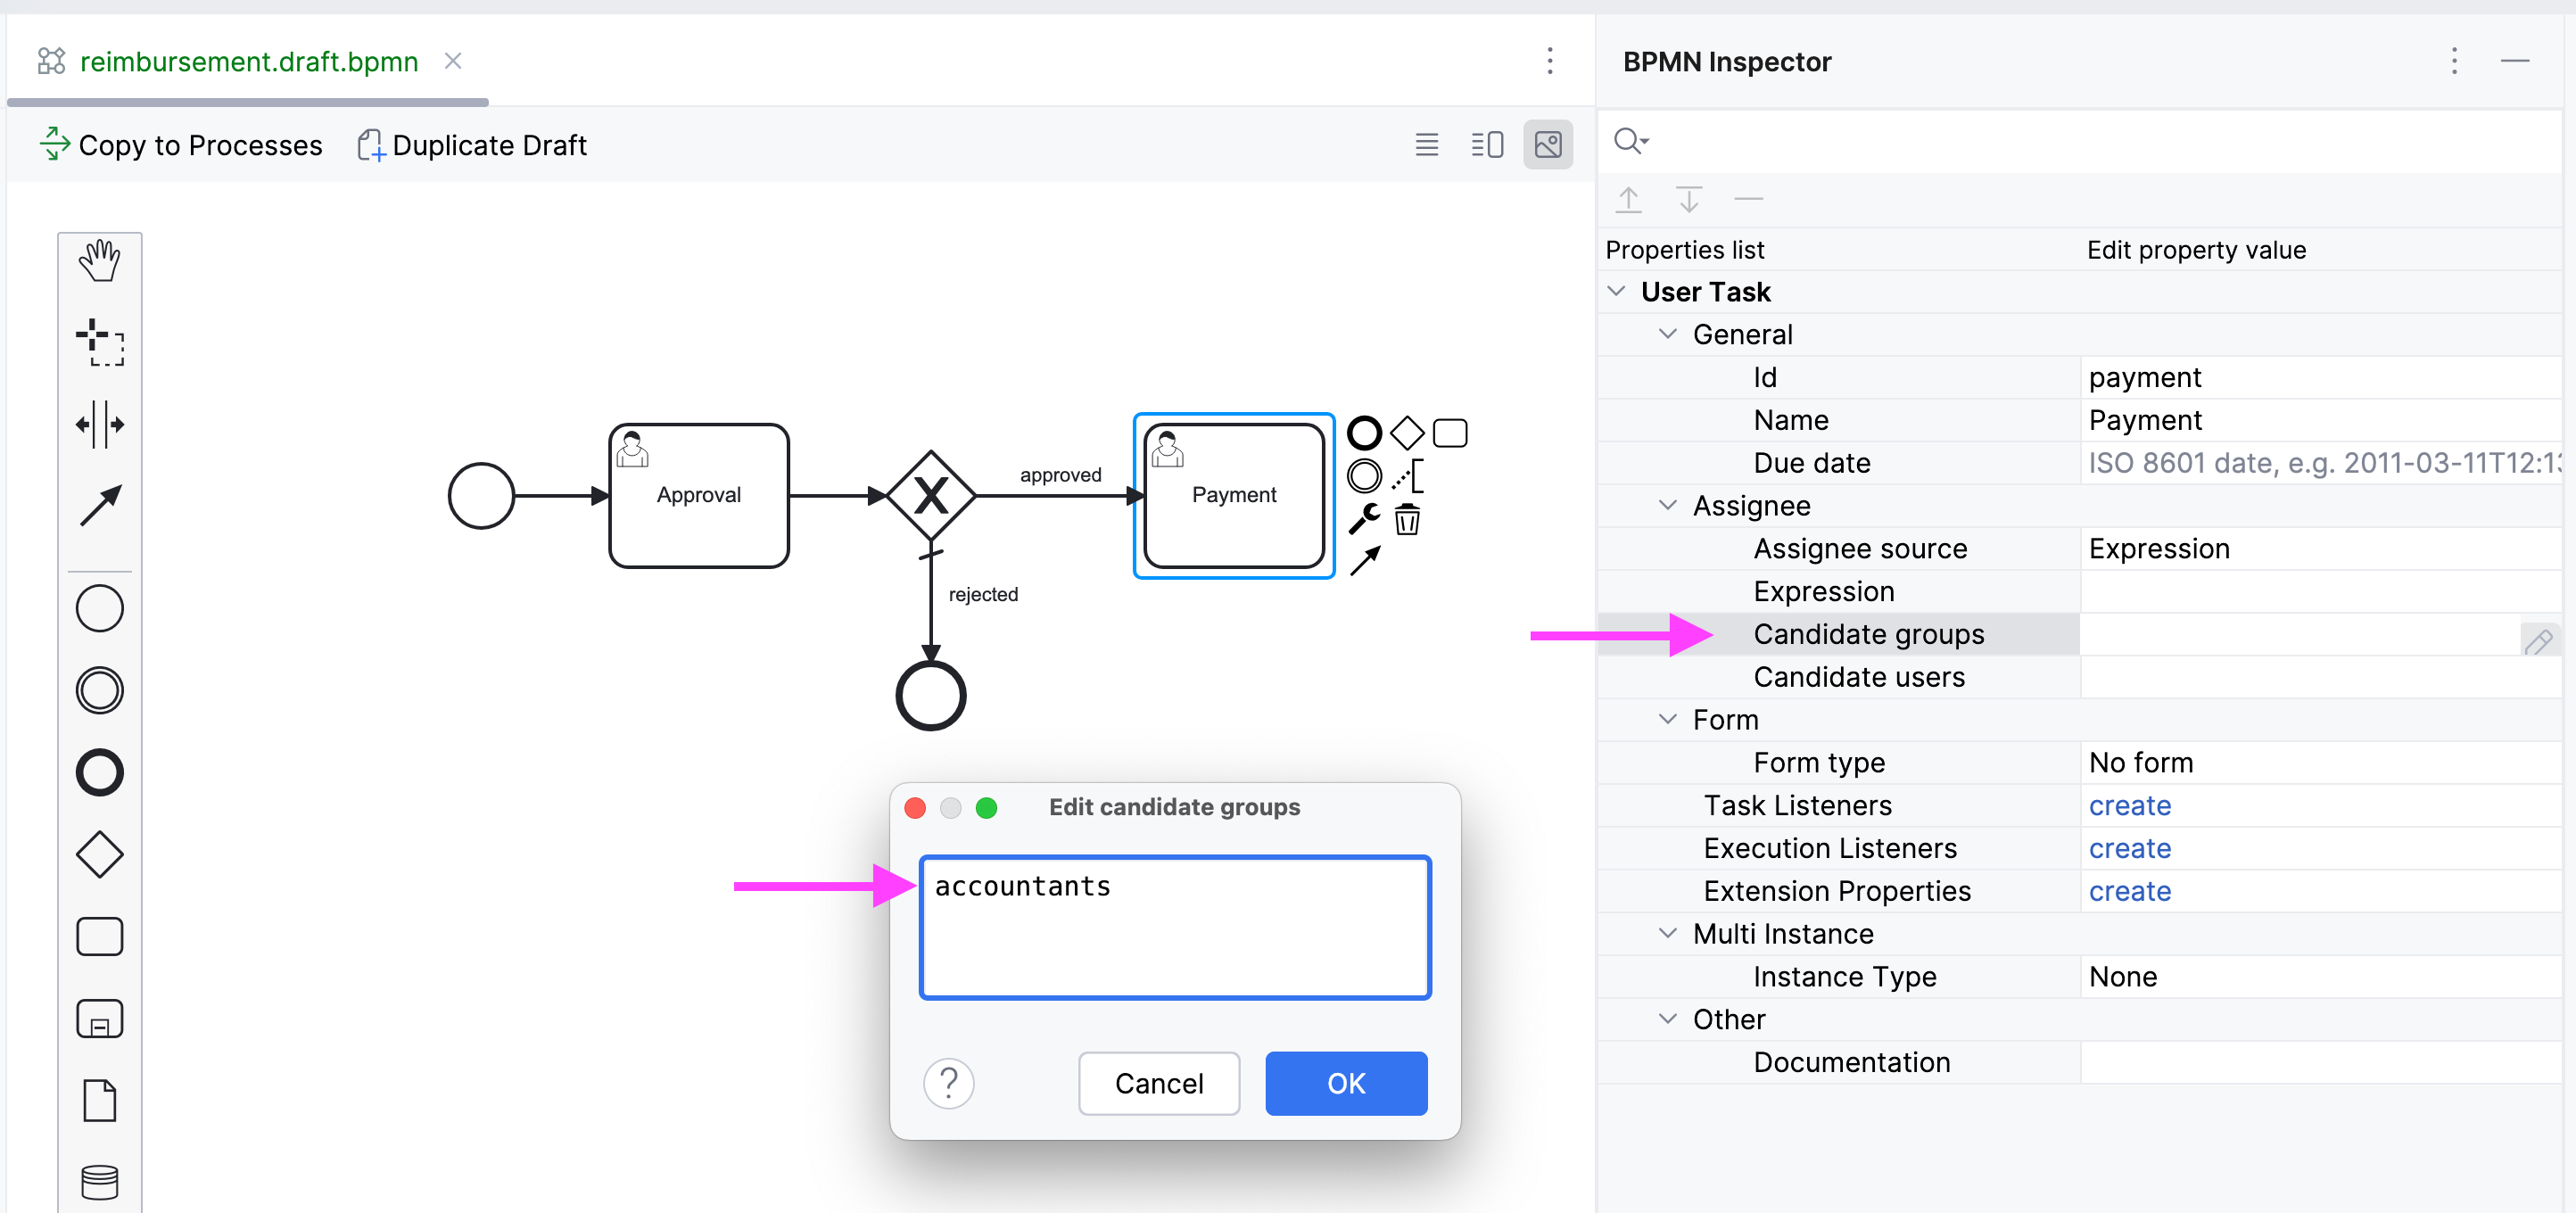
Go back to the modeler and select the
Paymentuser task. -
Find the Candidate groups property field and click the edit button
 next to it.
 -
In the Candidate group editor, add the
Accountantsgroup.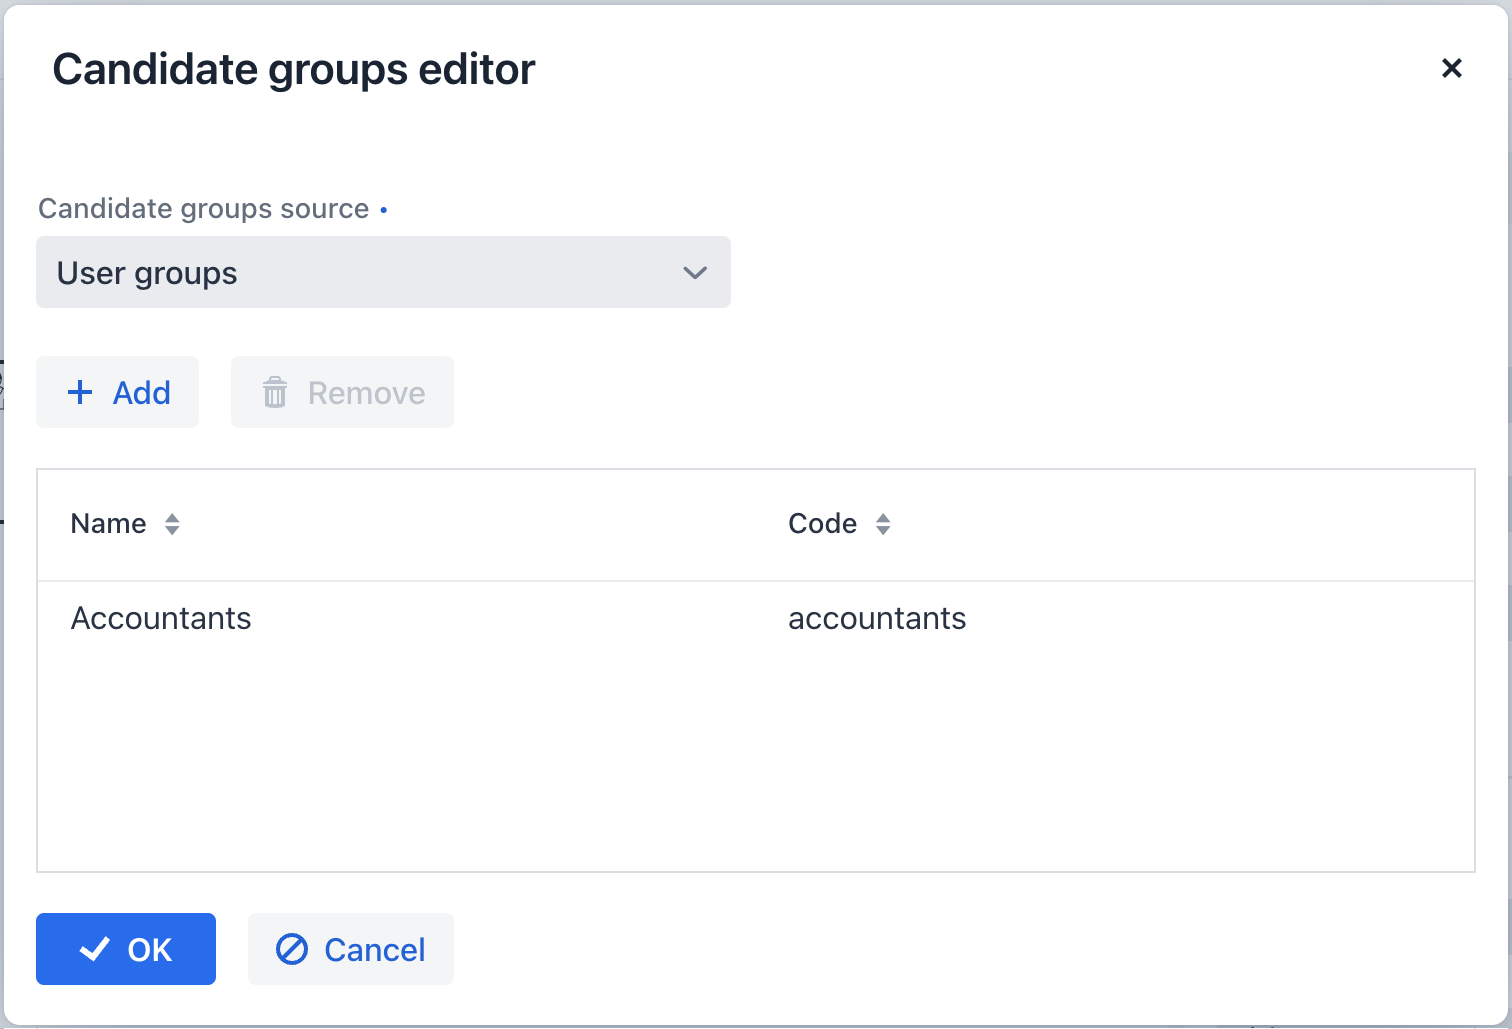
-
Configure an input dialog for the
Paymenttask similarly toApprovaltask. Set the following properties:-
Form type:
Input dialog -
Open mode:
Dialog(this will be set by default)
-
-
Add input parameters. They match the parameters on the Approval form, but the comment field should be non-editable too:
Process variable Caption Type Editable Required requestNumberRequest number
String
false
true
expenseAmountExpense amount
Decimal (double)
false
true
expenseDateExpense Date
Date
false
true
documentDocument
File
false
true
commentComment
Multiline string
false
false
-
Go back to the canvas and add the
EndEventelement after the Paymenttask.
Specifying Users to Start Process
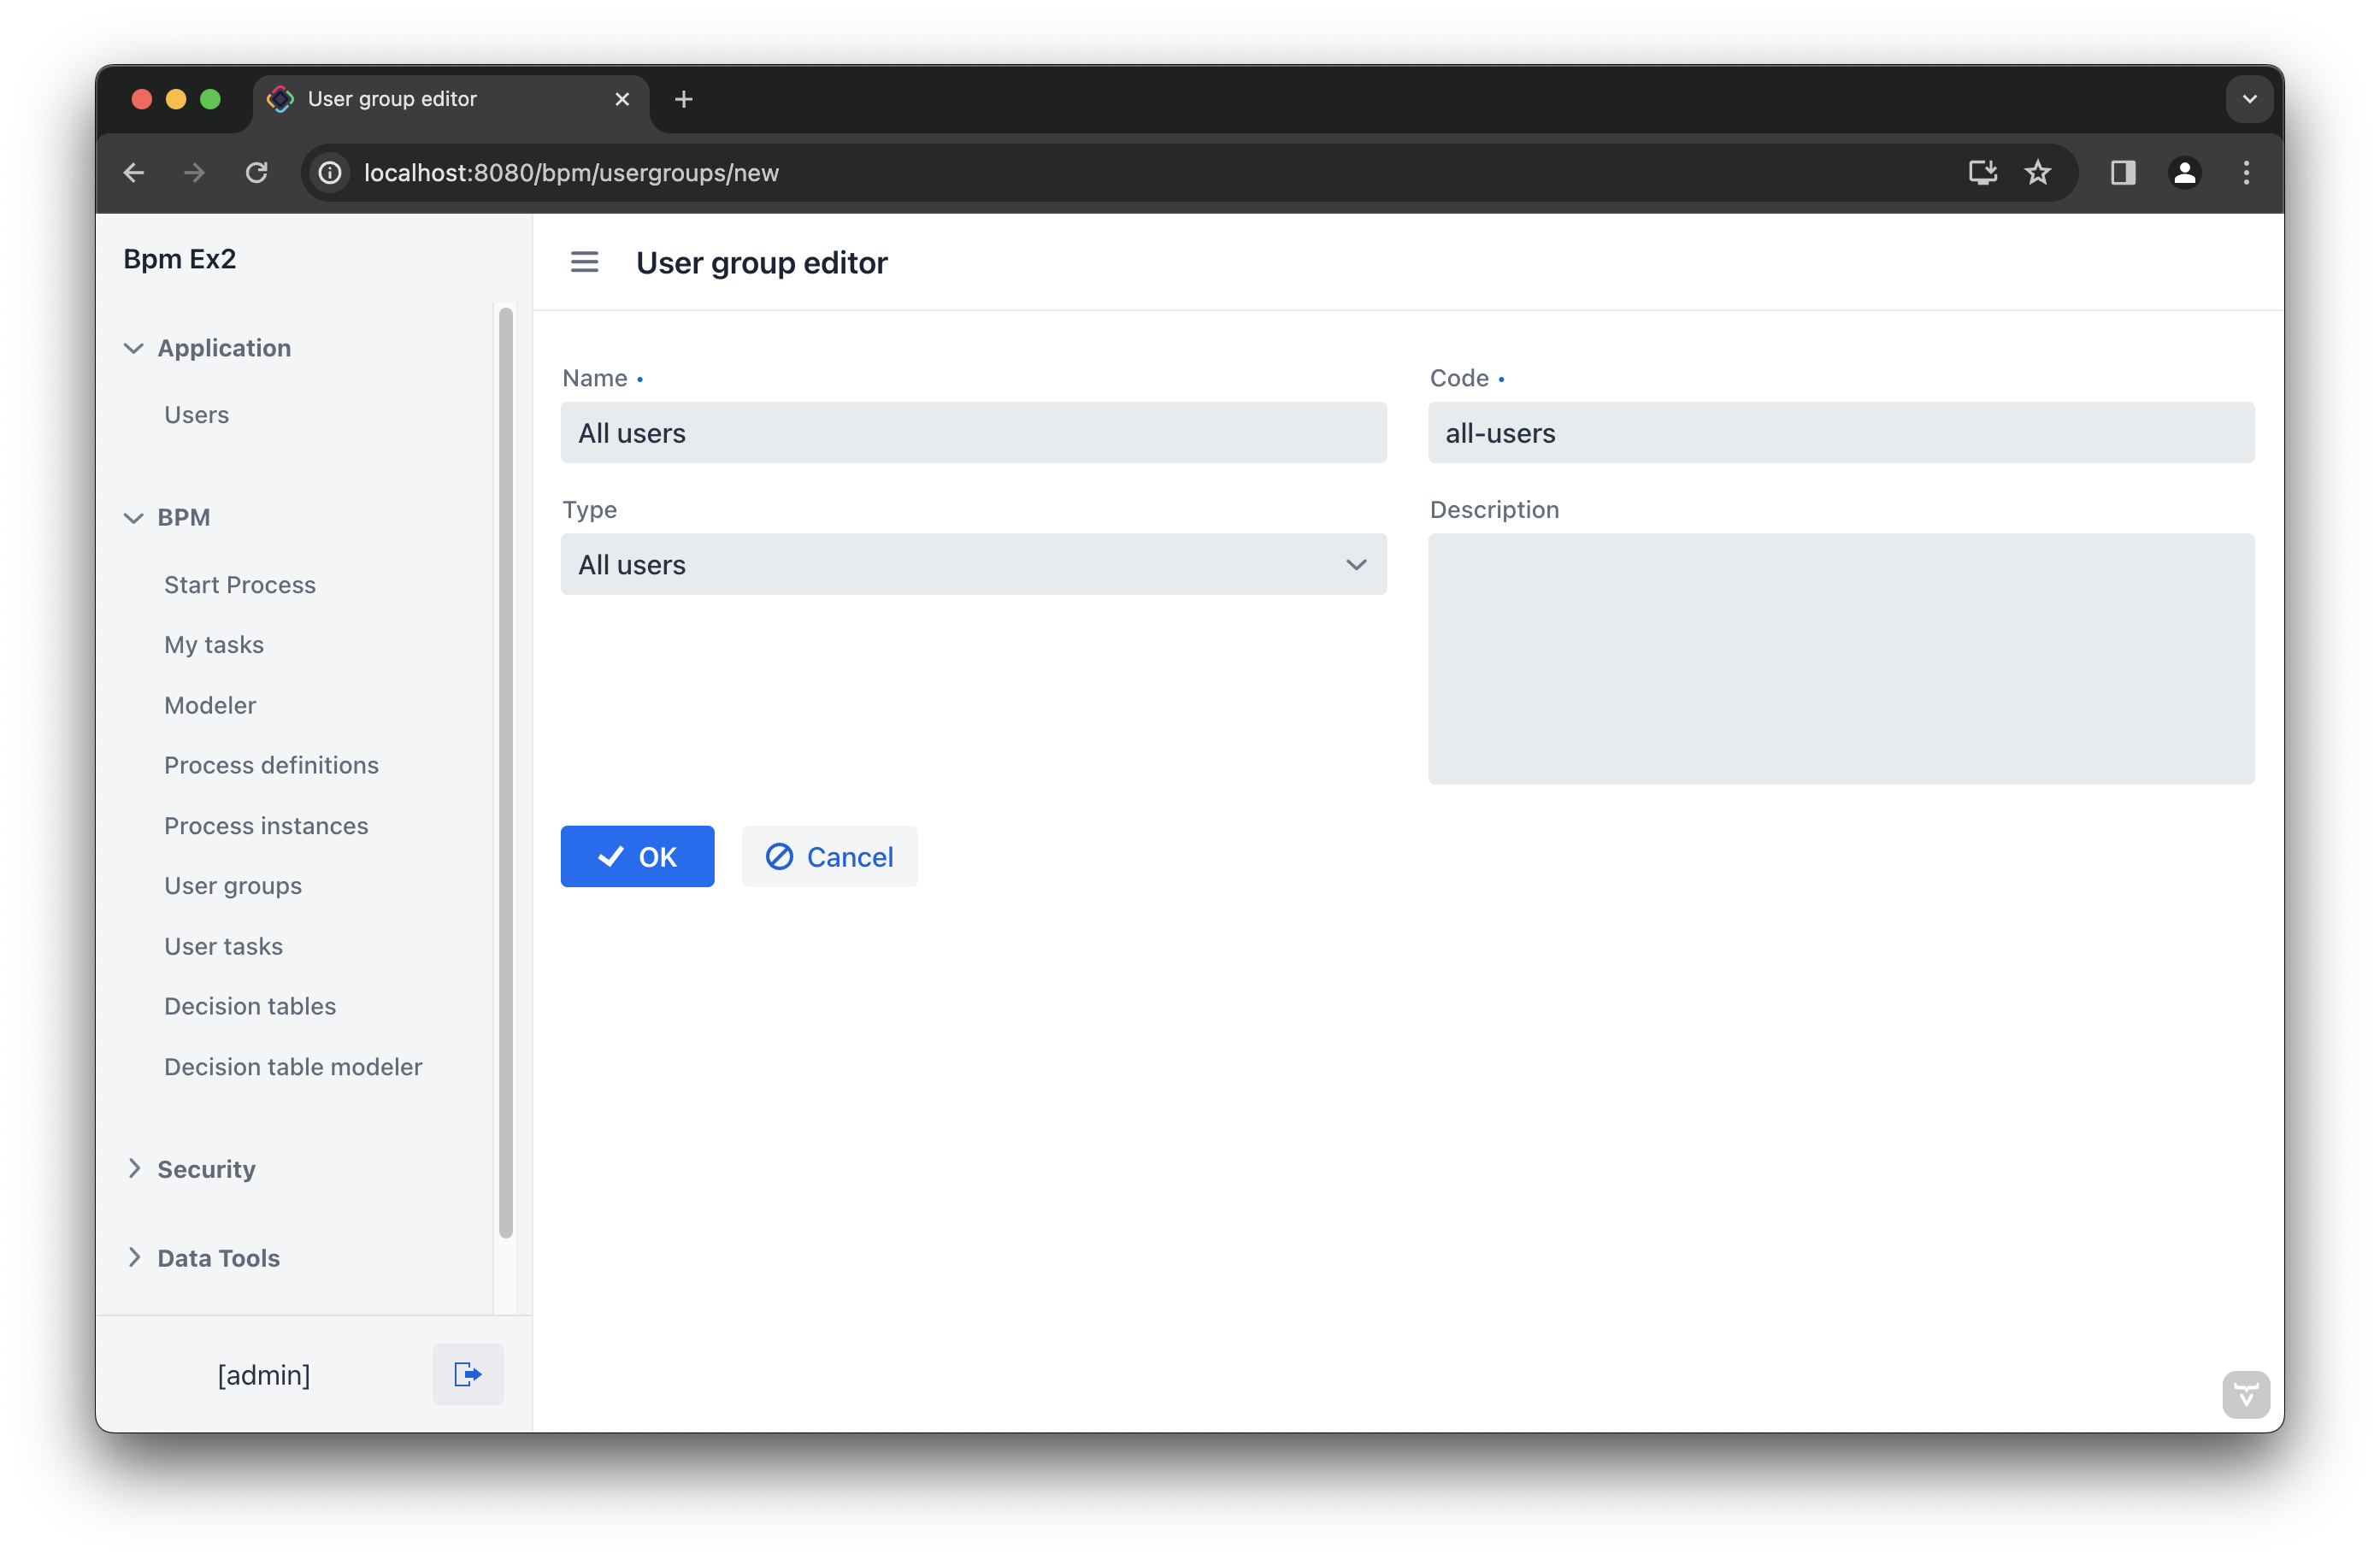
To start a process, the user must belong to a special user group. In our case, such a group will contain all users.
-
Switch to web application.
-
Open the User groups view and create a new group with the following properties:
-
Name: All users
-
Code: all-users
-
Type: All users
-
-
Go back to the Studio Modeler view and click anywhere on the canvas to display the process properties.
-
Set Candidate groups to
All usersin the Starter candidates section.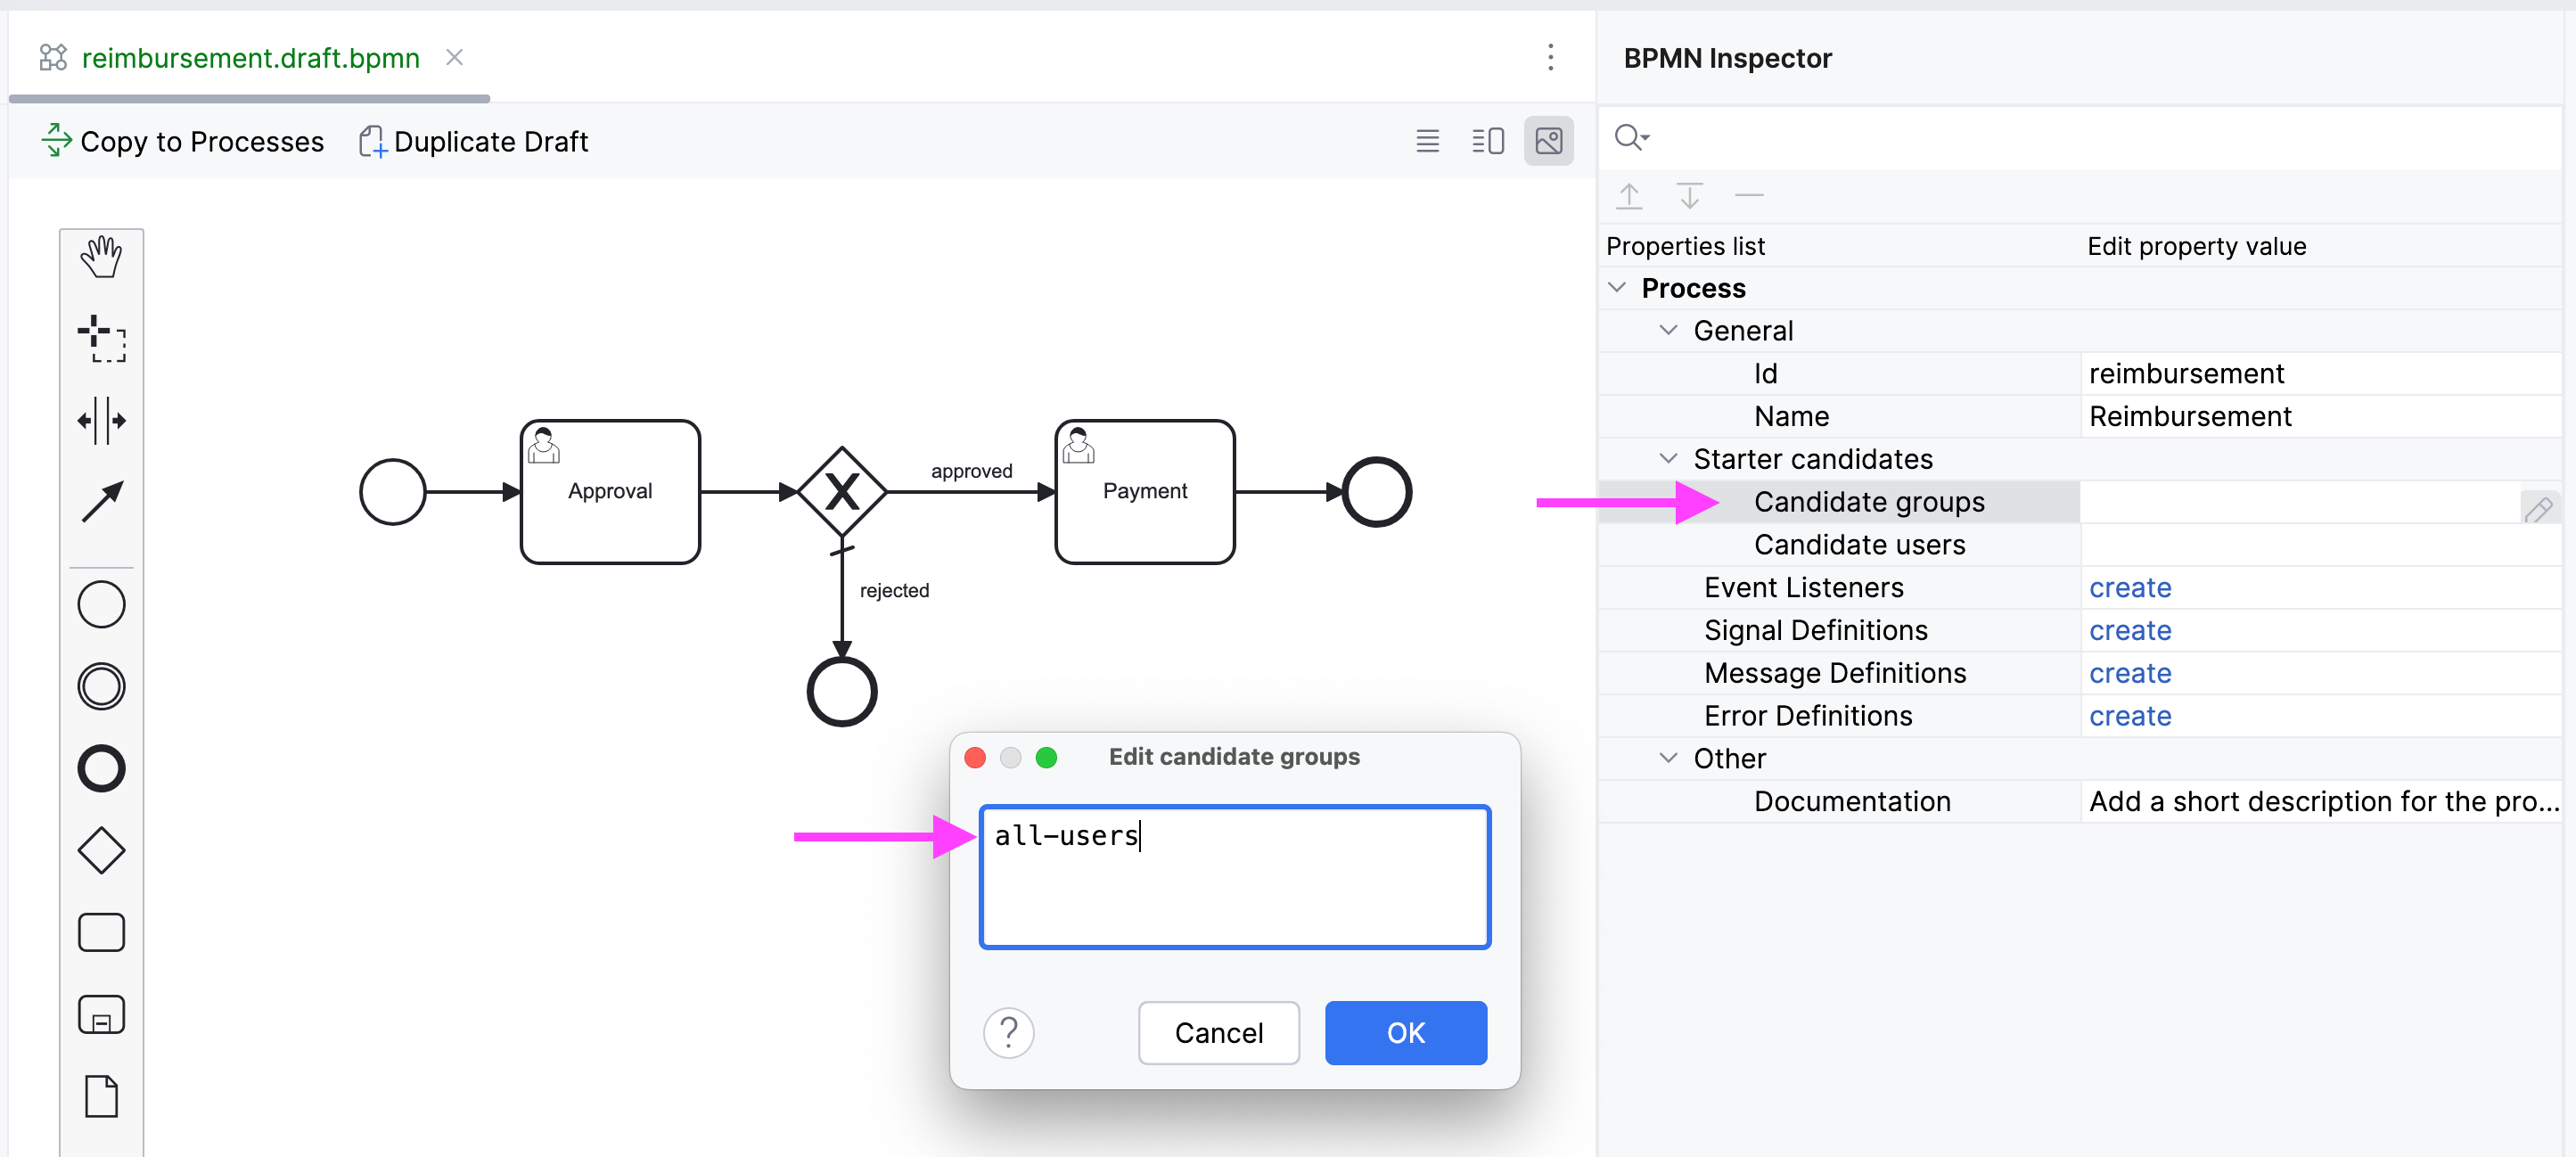
Deploying Process
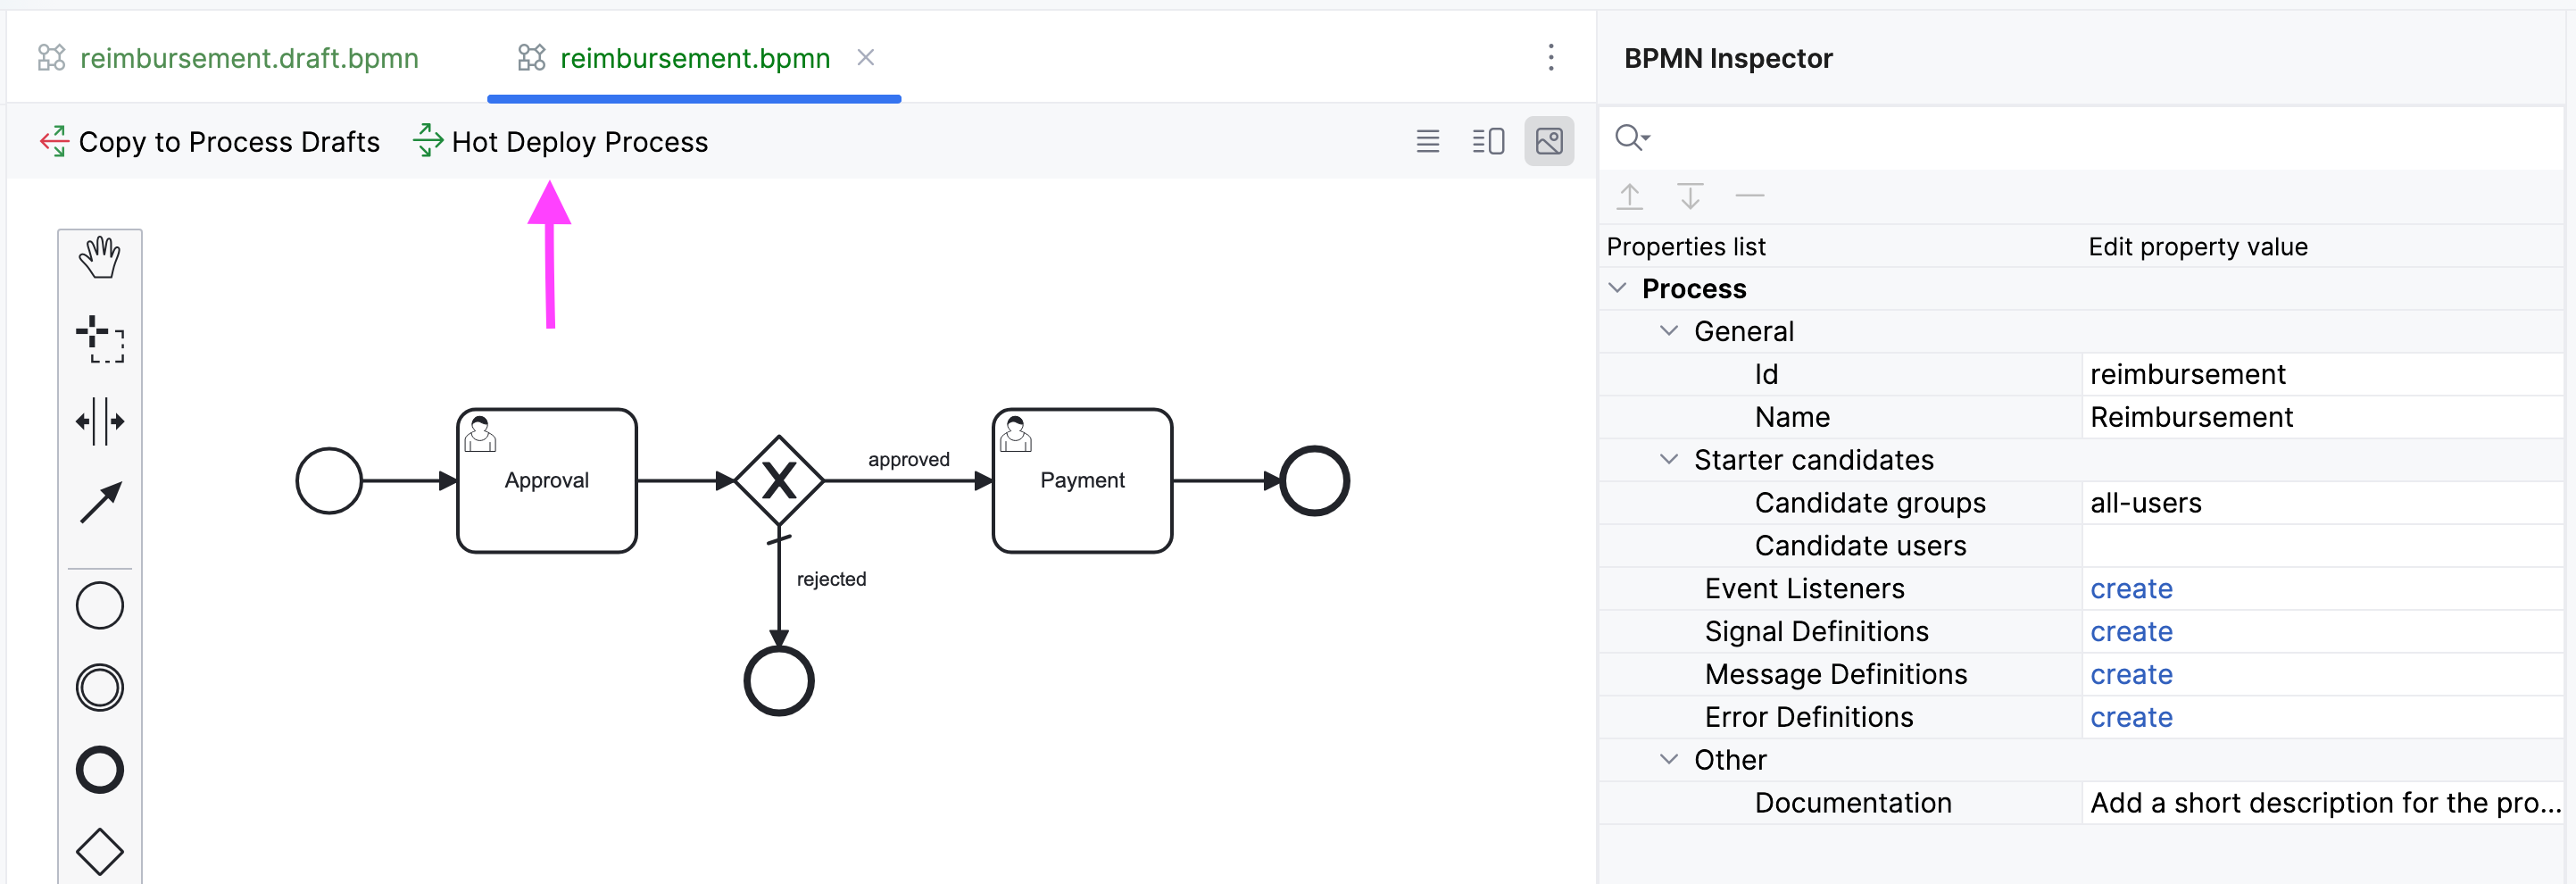
The process model is ready to be deployed to the process engine. Do the following steps:
-
Copy draft to processes:
-
If the application is started, use "Hot deploy" button:
-
Otherwise, run the application or start it in the debug mode:

-
If the process was deployed OK, you will see a message in the console:
BPMN process deployed: reimbursement.bpmn
Now you can start and test your process, go to the next section.
