upload
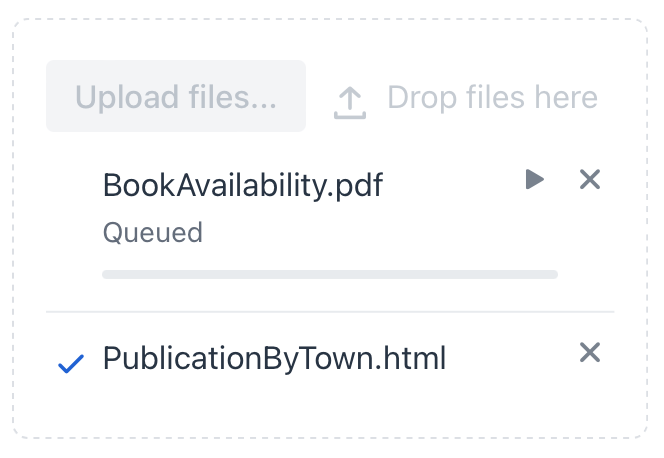
upload allows users to upload one or multiple files. It displays the upload progress and the status of each file. Files can be uploaded by clicking the Upload files button or by dragging them onto the component.
XML Element |
|
|---|---|
Java Class |
|
Attributes |
id - acceptedFileTypes - alignSelf - autoUpload - classNames - colspan - css - dropAllowed - dropLabel - dropLabelIcon - height - maxFileSize - maxFiles - maxHeight - maxWidth - minHeight - minWidth - receiverFqn - receiverType - uploadIcon - uploadText - visible - width |
Handlers |
AllFinishedEvent - AttachEvent - DetachEvent - FailedEvent - FileRejectedEvent - FinishedEvent - ProgressUpdateEvent - StartedEvent - SucceededEvent - receiver |
Auto-Upload
The autoUpload attribute determines whether files should be uploaded automatically as soon as they are selected, or if the user needs to explicitly trigger the upload.
-
When
true, files are uploaded immediately after selection. The upload progress bar is displayed, and the user can cancel the upload if needed. -
When
false, files are not uploaded automatically. The user must click the Upload button to start the upload process.
The default value is true.
Drag & Drop
The upload component supports drag and drop functionality, allowing users to upload files by simply dragging them from their file system and dropping them onto the component.
Drag & drop functionality is enabled by default. To disable it, set the dropAllowed attribute to false.
The dropLabel attribute allows you to customize the message that prompts users to drop files into the upload area.
The attribute value can either be the text itself or a key in the message bundle. In case of a key, the value should begin with the msg:// prefix.
The dropLabelIcon attribute allows you to specify an icon to be displayed along with the dropLabel text.
<upload dropLabel="Drop files here to upload"
        dropLabelIcon="vaadin:cloud-upload-o"/>
File Count
By default, upload doesn’t have a limit on the number of files that can be uploaded. You can set a file count limit using the maxFiles attribute.
This attribute specifies the maximum number of files to upload. If the value is set to one, the native file browser will prevent selecting multiple files.
Exceptions that arise aren’t shown in the UI by default. Use FileRejectedEvent to catch those exceptions and, for example, a notification to inform the user of the problem.
@Autowired
private Notifications notifications;

@Subscribe("upload")
public void onUploadFileRejected(final FileRejectedEvent event) {
    notifications.create(event.getErrorMessage())
            .show();
}
Receivers
The receiverFqn attribute specifies the fully qualified name of the Java class that will handle the uploaded files. This class must implement the Receiver interface.
If the receiver doesn’t implement MultiFileReceiver then the upload will be automatically set to only accept one file.
|
The receiverType attribute specifies the type of receiver used for handling uploaded files. It determines how the uploaded files will be processed and stored. Possible values are:
-
MemoryBufferHandles a single file upload at once. Writes the file data into an in-memory buffer. Using
MemoryBufferautomatically configures the component so that only a single file can be selected. -
MultiFileMemoryBufferHandles multiple file uploads at once. Writes the file data into a set of in-memory buffers.
-
FileTemporaryStorageBufferHandles a single file upload at once. Saves a file to the temporary storage. Using
FileTemporaryStorageBufferautomatically configures the component so that only a single file can be selected. -
MultiFileTemporaryStorageBufferHandles multiple file uploads at once. For each, it saves a file to the temporary storage.
The default receive type is MemoryBuffer.
Attributes
In Jmix there are many common attributes that serve the same purpose for all components.
The following are attributes specific to upload:
Name |
Description |
Default |
|---|---|---|
Sets whether the component allows uploads to start immediately after selecting files. See Auto-Upload. |
|
|
Specifies the drop label to show as a message to the user to drop files in the |
||
Sets the icon for the drop label. The icon is visible when the user can drop files to this |
||
Specifies the maximum number of files to upload. See File Count. |
unlimited |
|
Sets the receiver implementation that should be used for this |
||
Specifies the type of the |
|
Handlers
In Jmix there are many common handlers that are configured in the same way for all components.
The following are handlers specific to upload.
|
To generate a handler stub in Jmix Studio, use the Handlers tab of the Jmix UI inspector panel or the Generate Handler action available in the top panel of the view class and through the Code → Generate menu (Alt+Insert / Cmd+N). |
Name |
Description |
|---|---|
|
|
|
|
|
|
|
|
|
|
|
|
|
|
Sets the receiver implementation that should be used for this |
See Also
See Vaadin Docs for more information.

