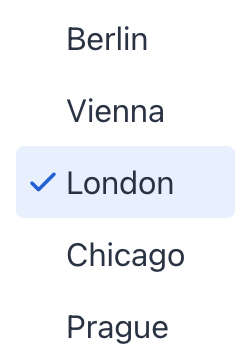
listBox
listBox allows users to select a single value from a scrollable list of items.
XML Element |
|
|---|---|
Java Class |
|
Attributes |
id - alignSelf - ariaLabel - ariaLabelledBy - classNames - colspan - css - enabled - height - itemsContainer - itemsEnum - maxHeight - maxWidth - minHeight - minWidth - readOnly - visible - width |
Handlers |
AttachEvent - ComponentValueChangeEvent - DetachEvent - itemEnabledProvider - itemsLabelGenerator - renderer |
Elements |
Basics
listbox can be populated with items from either an enumeration or collection of entities.
Use the itemsEnum attribute to directly specify the name of the enumeration class:
<listBox itemsEnum="com.company.onboarding.entity.OnboardingStatus"/>In case of entities, first define a collection container and then pass its name to the itemsContainer attribute:
<data>
    <collection class="com.company.onboarding.entity.City" id="citiesDc"> (1)
        <fetchPlan extends="_base"/>
        <loader id="citiesDl">
            <query>
                <![CDATA[select e from City e]]>
            </query>
        </loader>
    </collection>
</data>
<layout>
    <listBox itemsContainer="citiesDc"/> (2)
</layout>| 1 | CollectionContainer for the City entity. |
| 2 | citiesDc is set as an items container for the component. |

Disabled Items
itemEnabledProvider is applied to each item of this listBox to determine whether the item should be enabled (true) or disabled (false). Disabled items are displayed as grayed out and the user cannot select them. All the items are enabled by default.
Imagine listBox displaying a list of users. You want to display only users that have the "Completed" onboarding status as enabled, while users with "In progress" or "Not started" status should be disabled.
@Install(to = "listBox", subject = "itemEnabledProvider")
private boolean listBoxItemEnabledProvider(final User user) {
    if (user == null) {
        return true;
    }
    return user.getOnboardingStatus() == OnboardingStatus.COMPLETED;

}
In this example, itemEnabledProvider checks the status of each user. Only users with OnboardingStatus.COMPLETED will be displayed as enabled in listBox.
Rendering Items
The framework provides flexibility in customizing the rendering of items. You can use either the setRenderer() method or the @Supply annotation to achieve this.
<listBox id="listBox" itemsContainer="usersDc"/>@Autowired
private UiComponents uiComponents;
@Autowired
private FileStorage fileStorage;
@Supply(to = "listBox", subject = "renderer")
private ComponentRenderer<HorizontalLayout, User> listBoxRenderer() {
return new ComponentRenderer<>(user -> {
FileRef fileRef = user.getPicture();
HorizontalLayout row = uiComponents.create(HorizontalLayout.class);
row.setAlignItems(FlexComponent.Alignment.END);
if (fileRef != null) {
Image image = uiComponents.create(Image.class);
image.setWidth("30px");
image.setHeight("30px");
image.setClassName("user-picture");
StreamResource streamResource = new StreamResource(
fileRef.getFileName(),
() -> fileStorage.openStream(fileRef));
image.setSrc(streamResource);
row.add(image);
}
row.add(new Span(user.getFirstName() + ", " + user.getLastName()));
return row;
});
}See Also
See the Vaadin Docs for more information.
