Getting Started with Email
This section contains a practical guide on sending emails.
Let’s consider that we want to send emails to some addresses every time a new instance of an entity is created through the entity browse screen.
First of all, add Email Sending to your project according to the installation section.
Creating Entity and Screens
-
Create
NewsItementity containing the following fields:-
datewithLocalDatetype. -
captionwithStringtype. -
contentwithStringtype and unlimited length.
-
-
Create
NewsItemBrowseandNewsItemEditscreens.
Adding Confirmation Dialog
First, let’s check if the editor is opened to create a new entity.
Add the boolean attribute justCreated and subscribe to the InitEntity event.
private boolean justCreated;

@Subscribe
public void onInitEntity(InitEntityEvent<NewsItem> event) {
    justCreated = true;
}
justCreated is set to true every time editor is opened for a new entity.
Then, subscribe to the PostCommit event and add the following code:
private static final Logger log = LoggerFactory.getLogger(NewsItemEdit.class);

@Inject
protected Dialogs dialogs;

@Subscribe(target = Target.DATA_CONTEXT)
public void onPostCommit(DataContext.PostCommitEvent event) {
    if (justCreated) { (1)
        dialogs.createOptionDialog() (2)
                .withCaption("Email")
                .withMessage("Send the news item by email?")
                .withActions(
                        new DialogAction(DialogAction.Type.YES) {
                            @Override
                            public void actionPerform(Component component) {
                                try {
                                    sendByEmail(); (3)
                                } catch (IOException e) {
                                    log.error("Error sending email", e);
                                }
                            }
                        },
                        new DialogAction(DialogAction.Type.NO)
                )
                .show();
    }
}| 1 | This method is invoked after commit of data context. |
| 2 | If a new entity was saved to the database, ask a user about sending an email. |
| 3 | Invokes a method that sends an email. |
Adding Sending Email Method
Let’s add the sendbyEmail method that is invoked in the postCommit handler and sends an email asynchronously. To demonstrate how to add attachments, we will add a company’s logo image as an attachment.
Here is our method:
@Autowired
private Emailer emailer;

@Autowired
protected Resources resources;

private void sendByEmail() throws IOException {
    InputStream resourceAsStream = resources.getResourceAsStream("email/ex1/logo.png");
    byte[] bytes = IOUtils.toByteArray(resourceAsStream); (1)
    EmailAttachment emailAtt = new EmailAttachment(bytes,
            "logo.png", "logoId"); (2)
    NewsItem newsItem = getEditedEntity();
    EmailInfo emailInfo = EmailInfoBuilder.create()
            .setAddresses("john.doe@company.com,jane.doe@company.com") (3)
            .setSubject(newsItem.getCaption()) (4)
            .setFrom(null) (5)
            .setBody(newsItem.getContent())
            .setAttachments(emailAtt) (6)
            .build();
    emailer.sendEmailAsync(emailInfo);
}| 1 | Gets a file as a byte array. |
| 2 | Creates EmailAttachment object. |
| 3 | Recipients. |
| 4 | Email subject. |
| 5 | The from address will be taken from the jmix.email.from-address application property. |
| 6 | Attachments. |
Setting Sending Parameters
Set up the SMTP server parameters. You can set the parameters in the application.properties file of your application. Add the required parameters:
spring.mail.host = mail.company.com
jmix.email.from-address = info@company.com
Here is an example of connecting to the Google SMTP server:
spring.mail.host=smtp.gmail.com
spring.mail.port=587
spring.mail.protocol=smtp
spring.mail.username=username
spring.mail.password=password
spring.mail.properties.mail.smtp.auth=true
spring.mail.properties.mail.smtp.starttls.enable=true
Working with User Interface
Launch the application, open the NewsItem entity browser and click Create. The editor screen will be opened. Fill in the fields and press OK. The confirmation dialog with the question about sending emails will be shown. Click Yes.

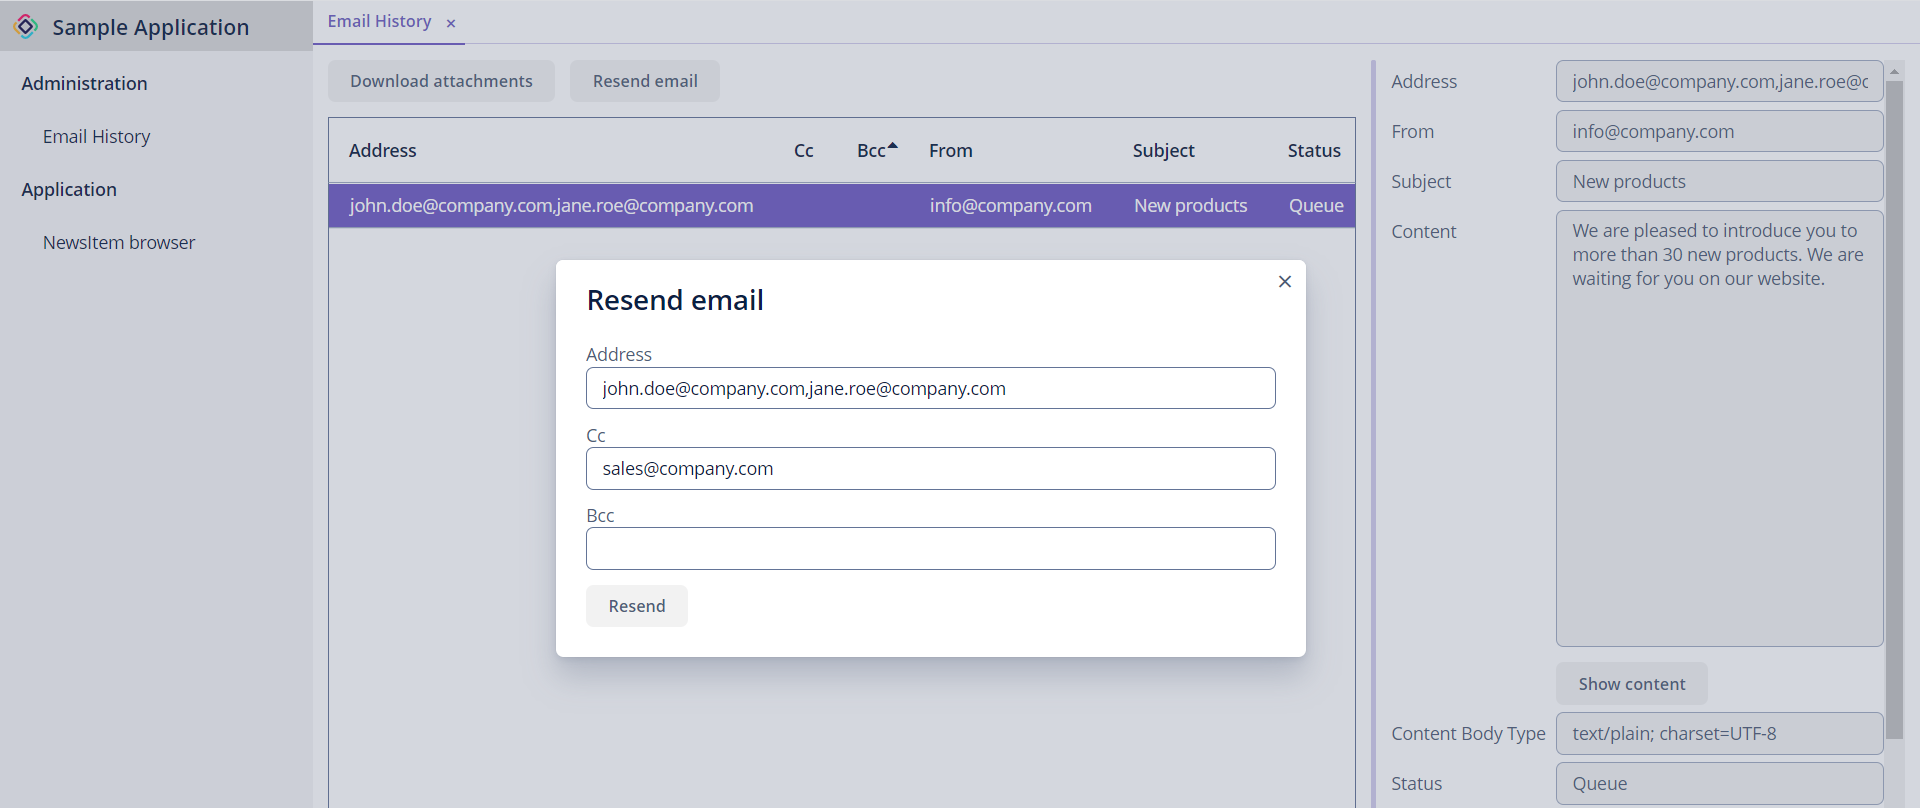
Go to the Email → Email history view of your application. You will see a record with the Queue status. It means that the email is in the queue and not yet sent. Email information is displayed on the right.
To send all queued email periodically, configure the Quartz Scheduler.
To send an email from the UI, choose it in the Email → Email history view and click Resend email. You can change or add recipients before sending. After successful sending, you will see a new line in the table with the Sent status.

