BPMN Modeler in Studio
Studio provides a BPMN Modeler that allows you to model business processes directly within the IDE. The designer becomes available only when the BPM add-on is added to the project.
Overview
Here is a BPMN Modeler window:
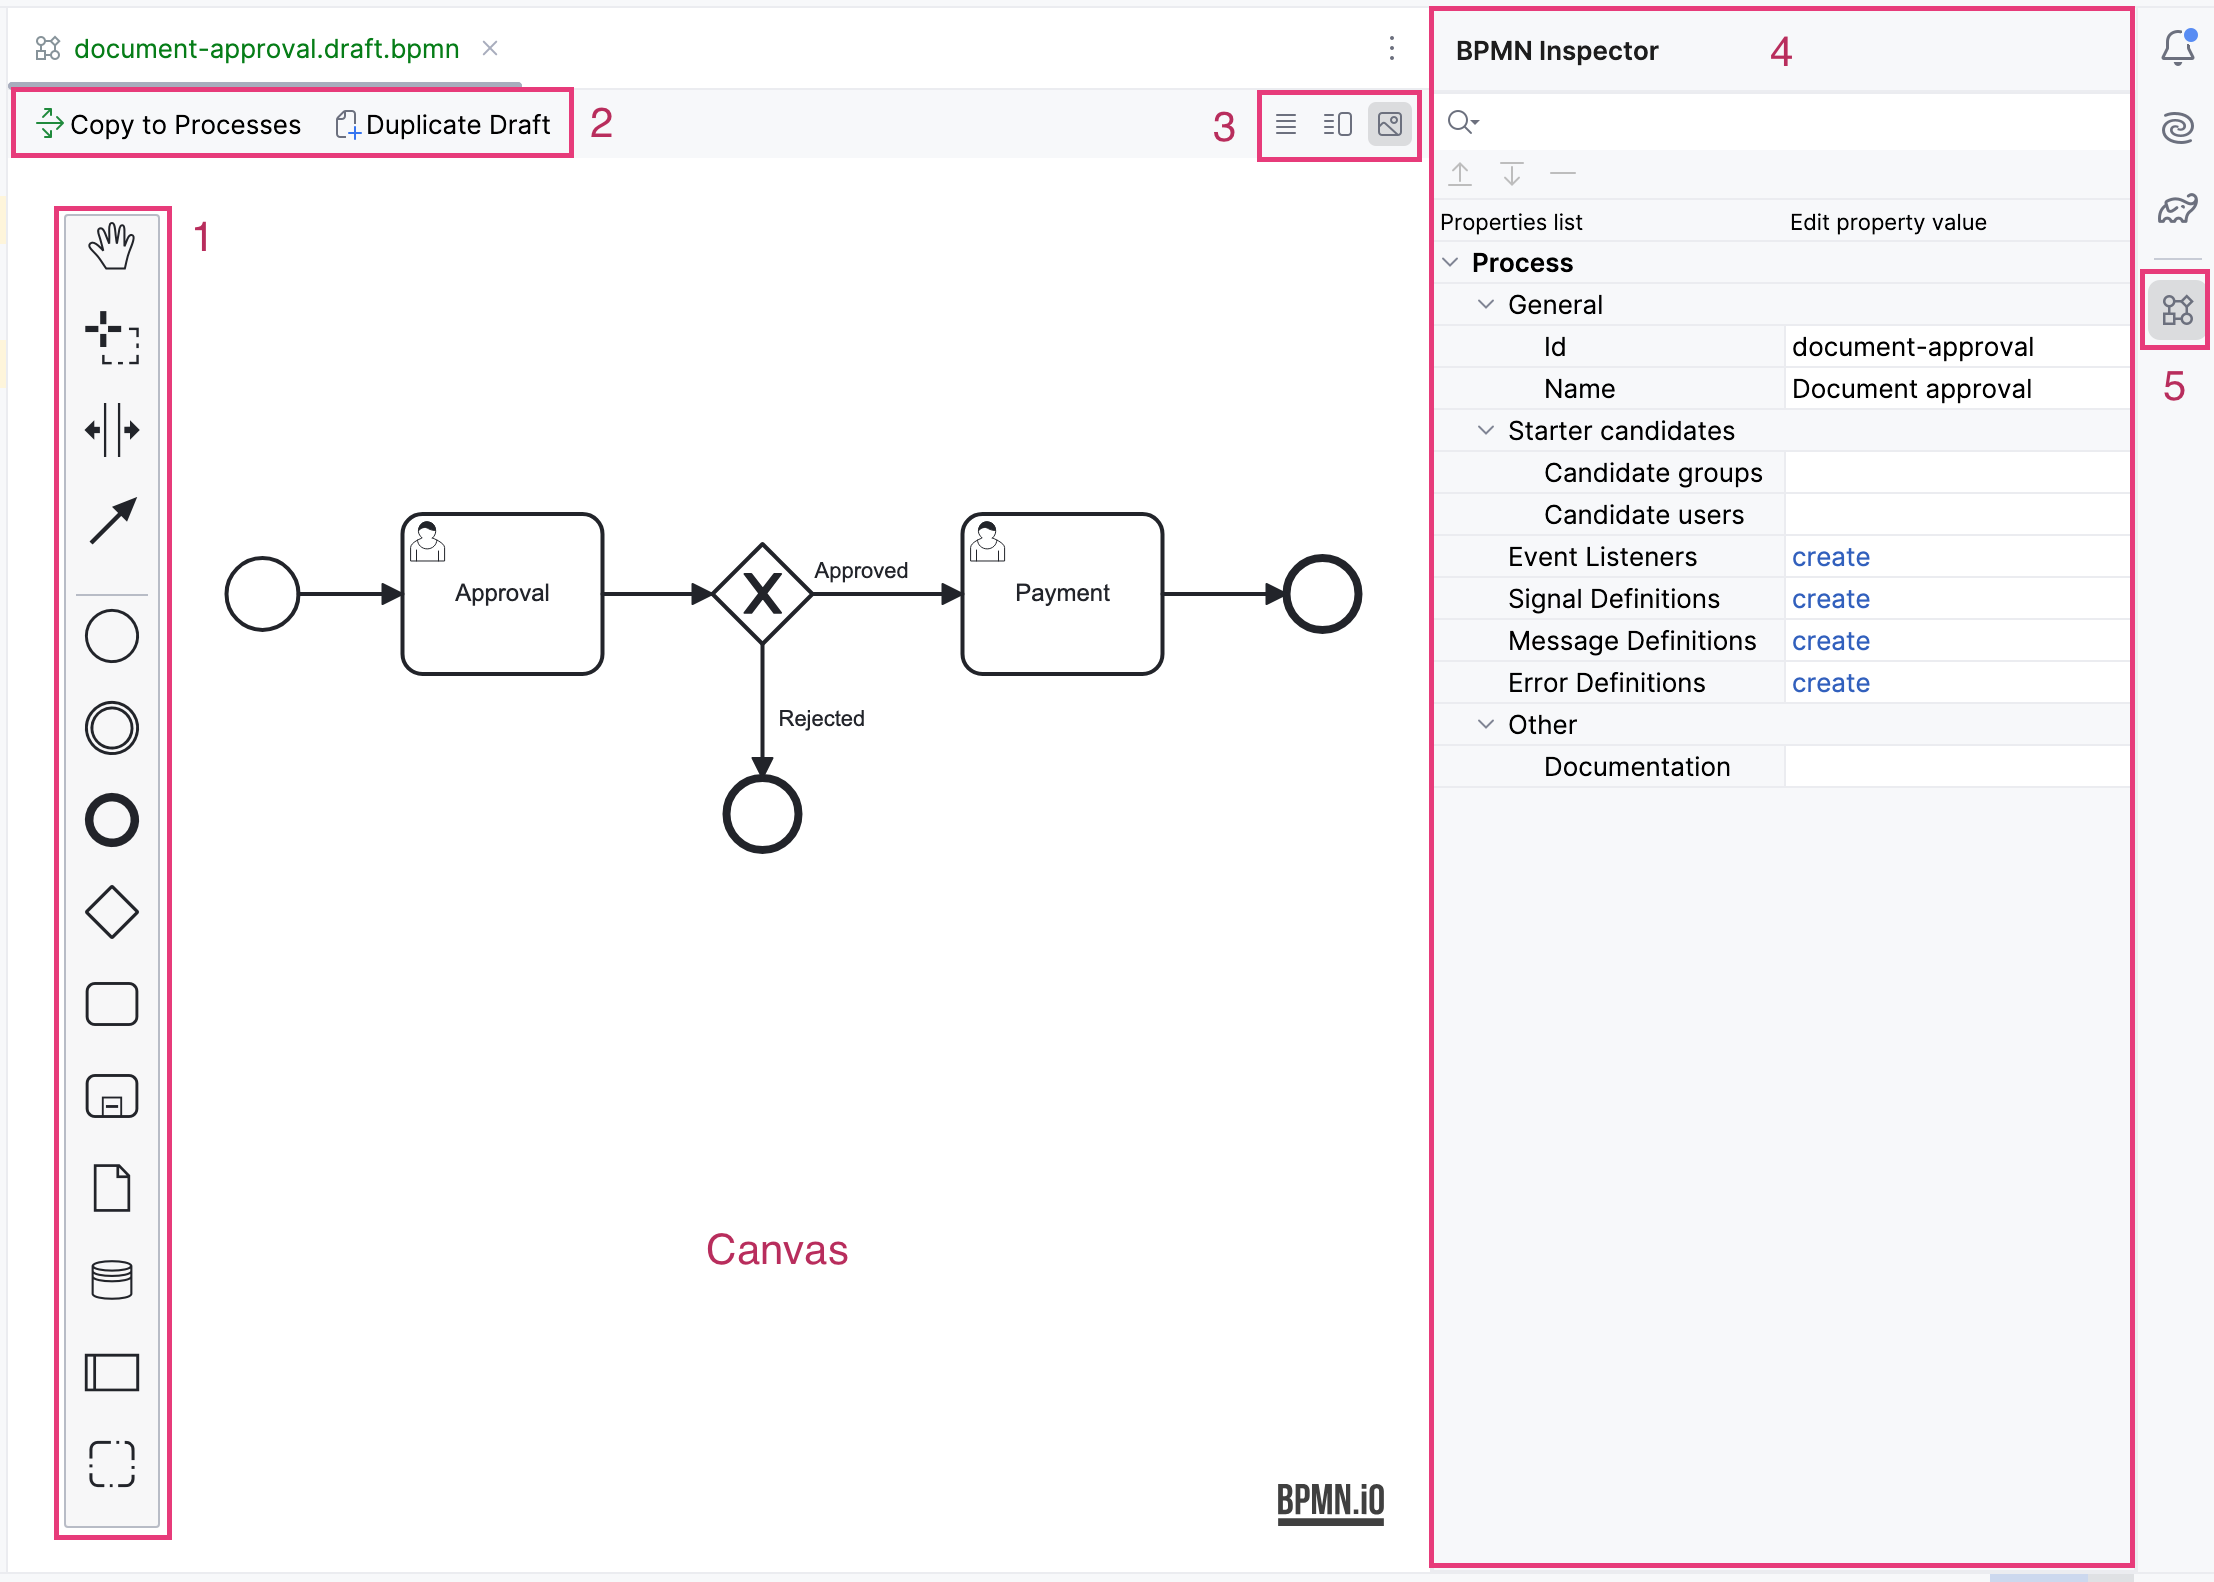
The following areas and controls are present:
-
Canvas — A workspace where you can place BPMN elements.
-
BPMN Palette (1) — The BPMN palette provides a comprehensive set of elements for constructing BPMN diagrams. Located on the left side of the modeling interface, the palette enables users to easily drag and drop various BPMN elements onto the diagram canvas, facilitating intuitive and efficient process modeling.
-
Process Actions (2) — Located at the top left of the modeler window, the process action buttons offer options that vary depending on whether the current model is a draft or a deployable process.
-
BPMN Inspector (4) — This essential feature allows users to configure and manage the properties of BPMN elements within their process models.
-
Visibility Button (5) — This button toggles the visibility of the BPMN Inspector on and off. == Navigate to Code
With the Modeler, you can navigate to the Java code associated with the properties of the selected element, allowing you to see where this code will be used.
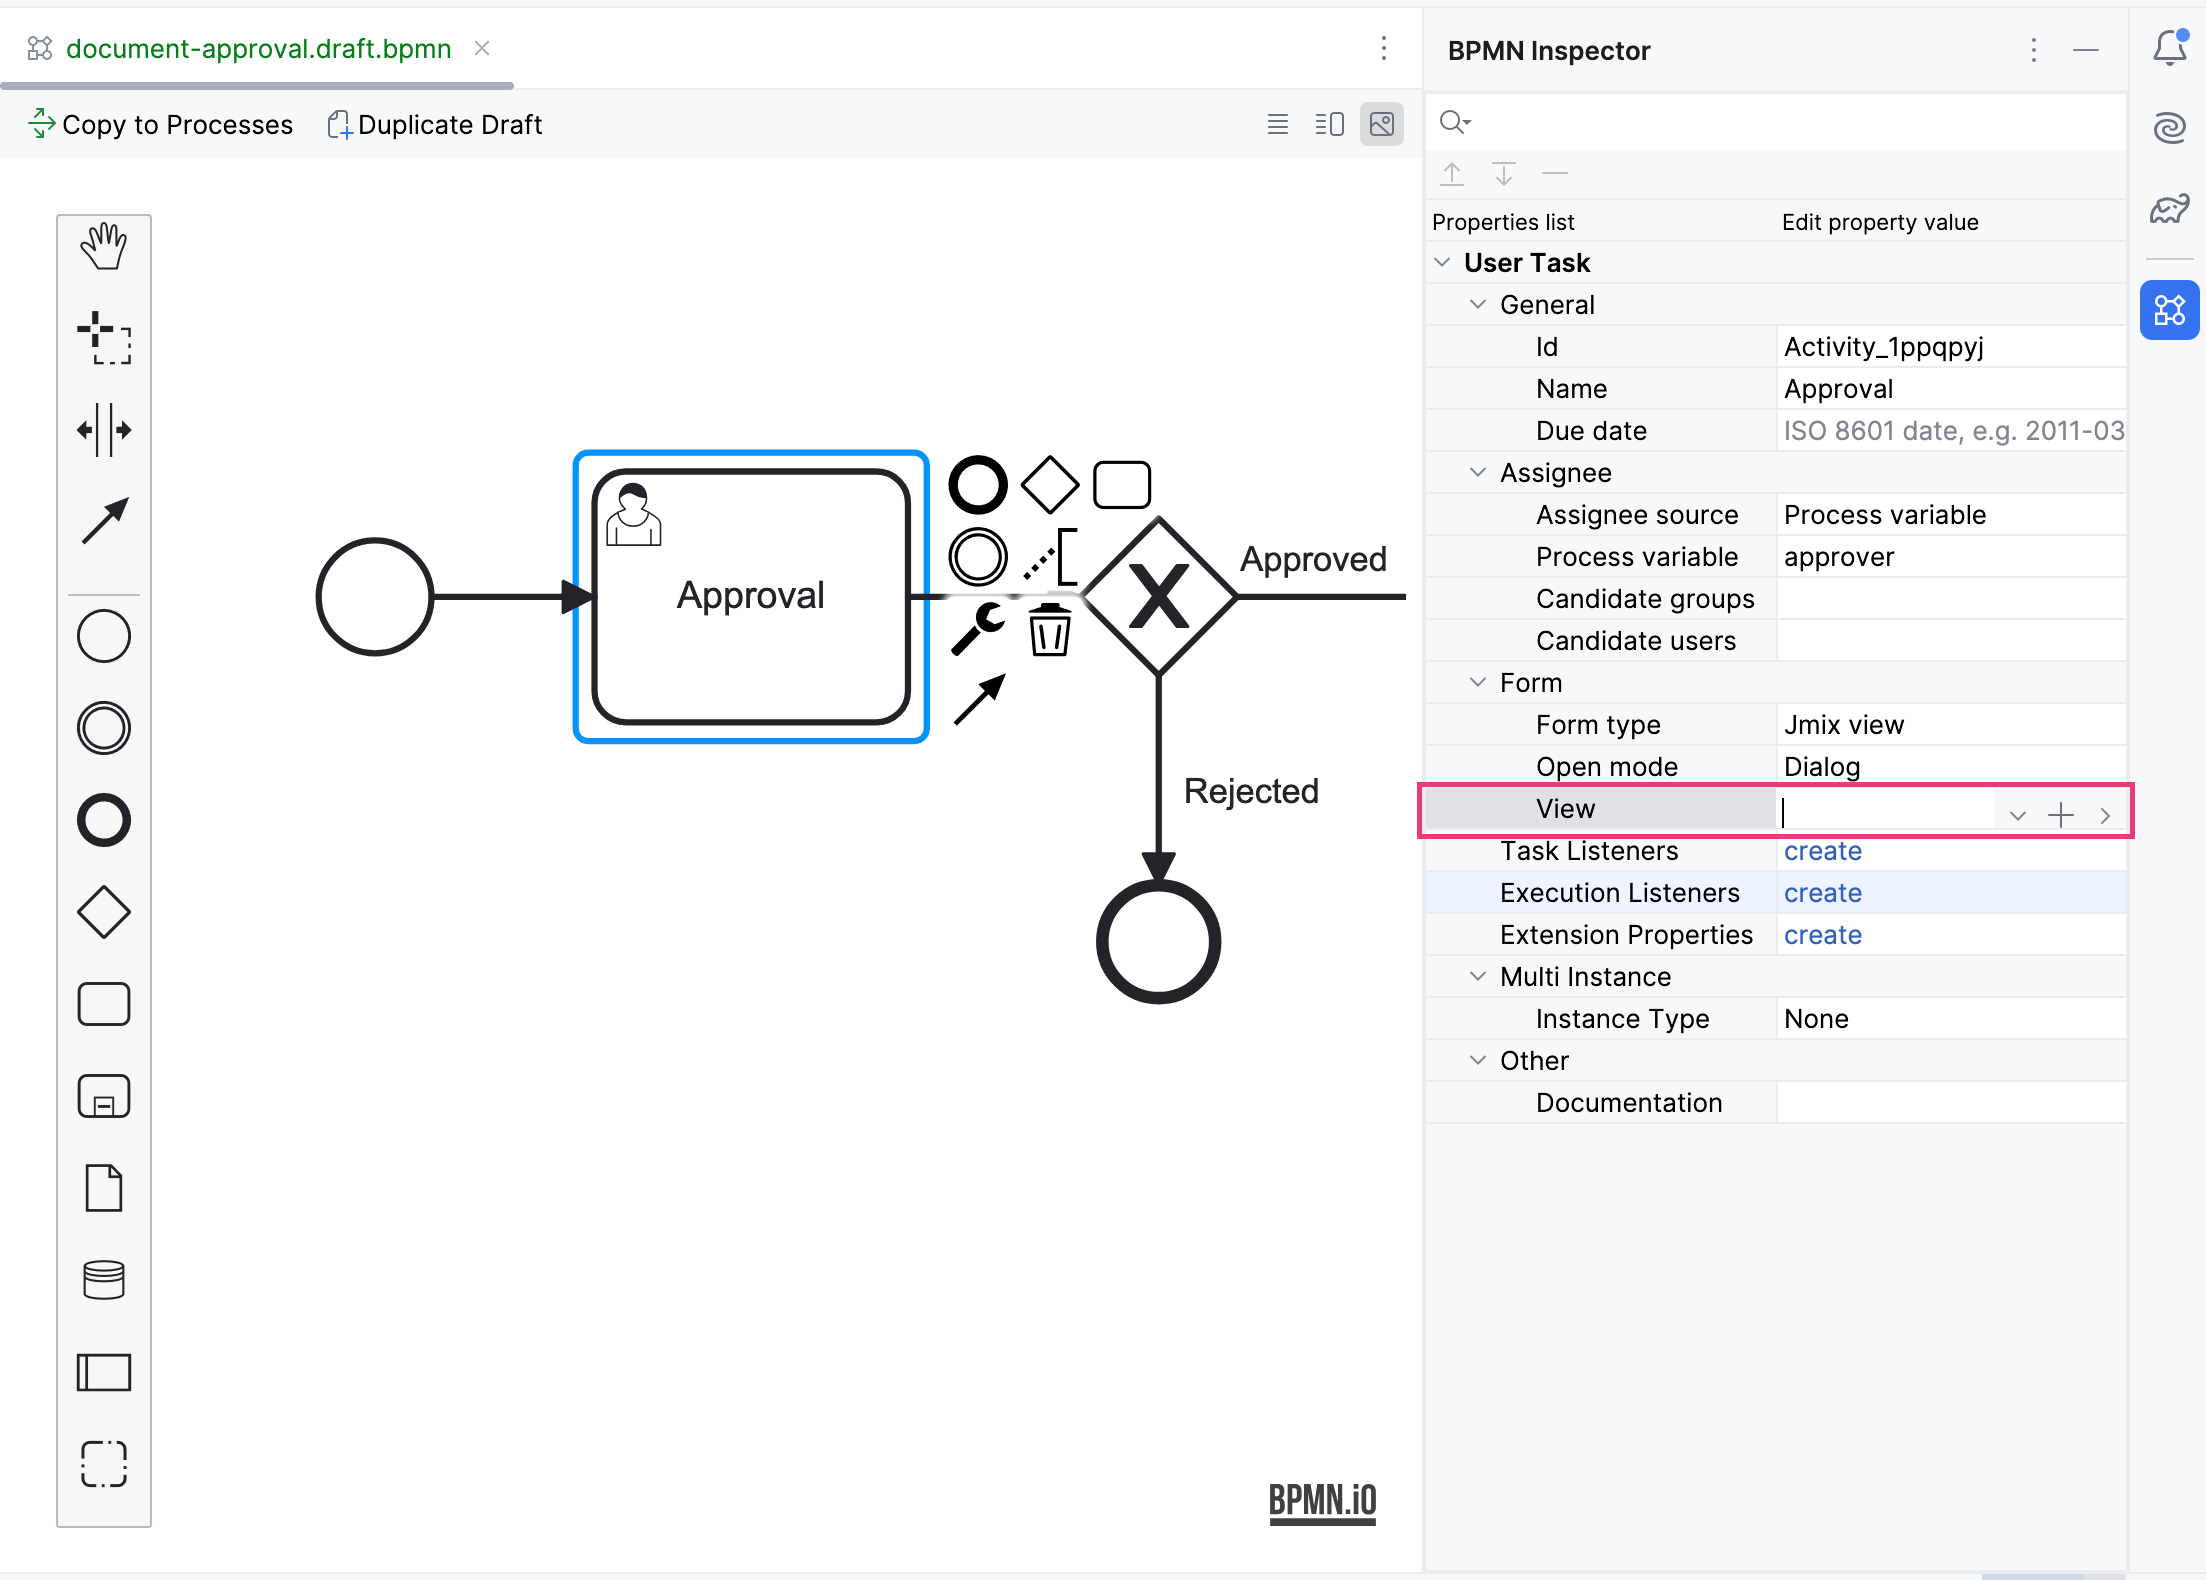
-
 (plus) — This button creates a new Spring bean, Java delegate, Jmix view process, or other component where code writing is necessary.
 -
 (chevron right) — This button navigates to the code if the element has already been configured.
 -
 (chevron down) — This button opens a dropdown list where you can select a code component to associate with the selected property.
Property Finder
At the top of the BPMN Inspector panel, there is a Find field. By inputting the name of the property here, only the properties matching your criteria will be displayed.
For example, let’s find properties with the name id:
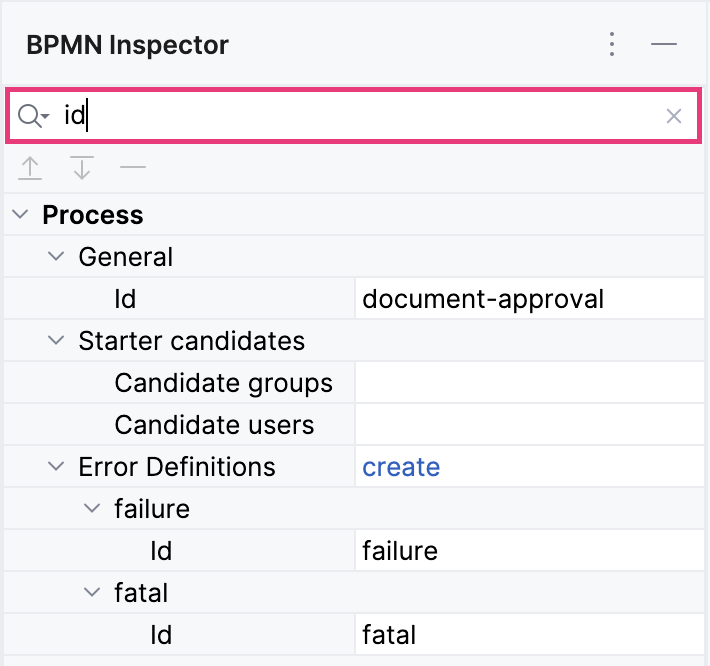
Now only matched properties are displayed.
Parameters Ordering and Deletion
When the element property may have several parameters like Input dialog form, the BPMN Inspector allows to move them up and down in the list.
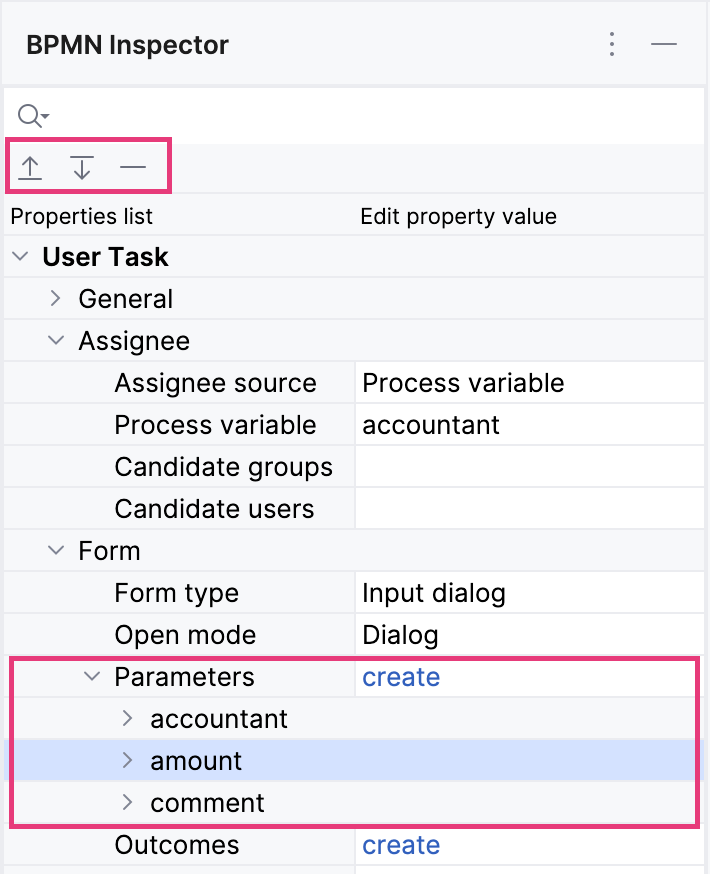
To do this, use up (![]() ) and down (
) and down (![]() ) buttons located at the top of the BPMN Navigator panel.
) buttons located at the top of the BPMN Navigator panel.
To delete an item from the list, use delete (![]() ) button.
) button.
Editing Commands
Modeler supports the following editing commands:
| Command | Windows | Mac OS |
|---|---|---|
Undo |
Ctrl-Z |
Cmd-Z |
Redo |
Ctrl-Y |
Cmd-Y |
Copy |
Ctrl-C |
Cmd-C |
Paste |
Ctrl-V |
Cmd-V |
Select all |
Ctrl-A |
Cmd-A |
Hand tool |
H |
H |
Lasso tool |
L |
L |
Space tool |
S |
S |
Edit label |
E |
E |
Find |
F |
F |
Processes and Drafts
When the BPM add-on is installed, an additional BPM node appears in the Jmix project tree. Initially, this node is empty. As you create drafts and processes, two sub-nodes will appear: Process Drafts and Processes.
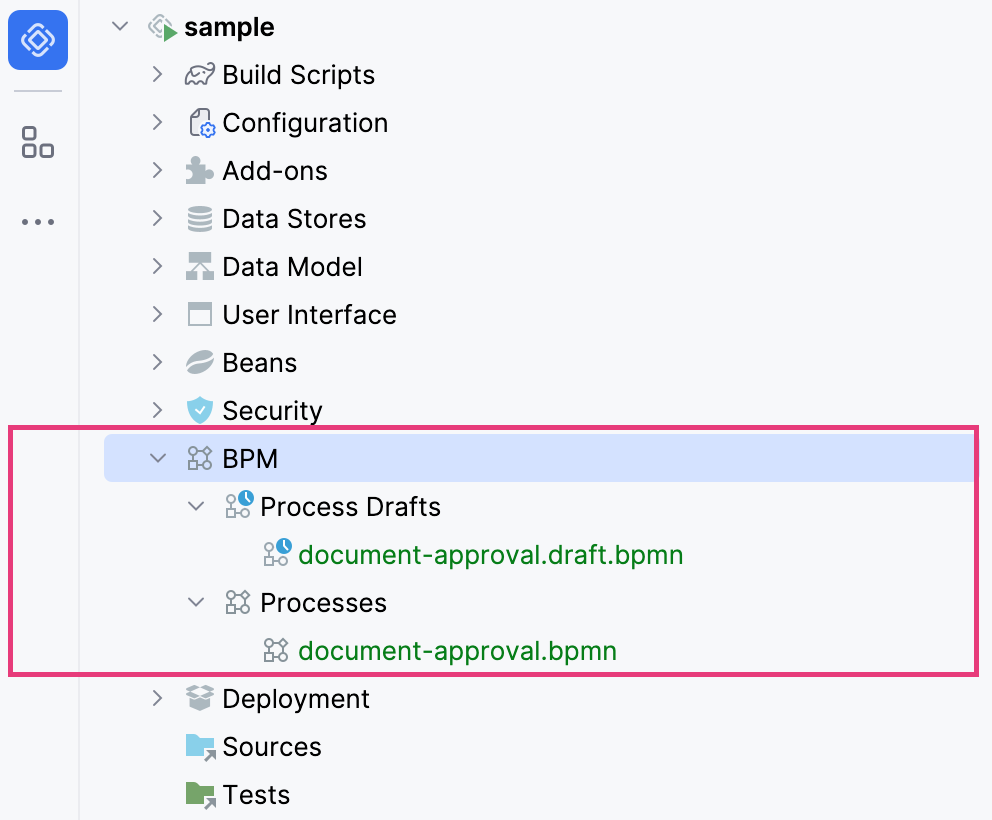
they are located in the resources/process-drafts and resources/process directories respectively.
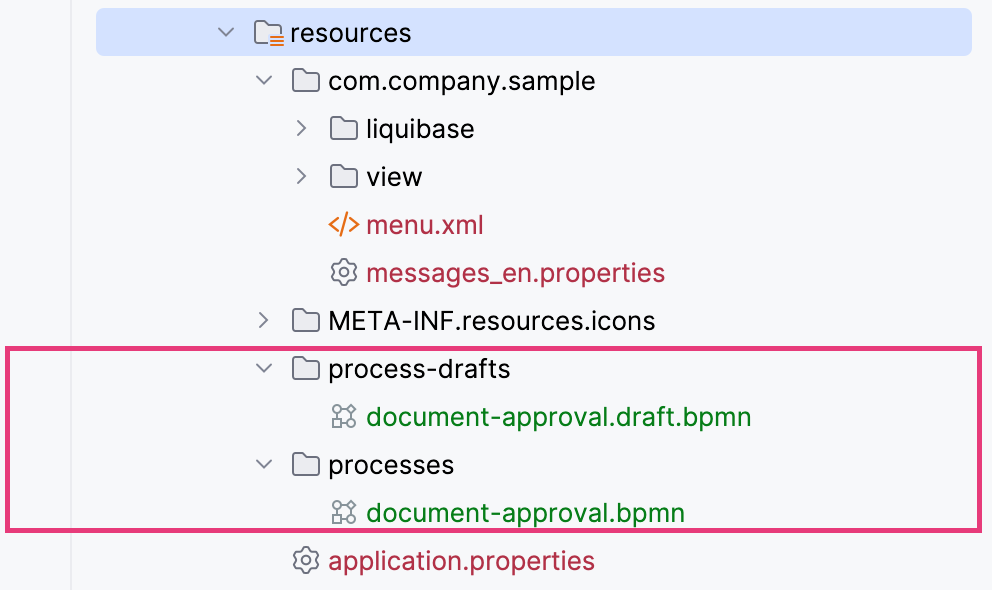
These two sub-nodes in the Jmix project tree are designed to enhance the developer’s experience. In the beginning, you create a draft of the process and save it in the Process Drafts node. Then, when the process is ready for deployment, copy it to the Processes node.
|
Technically, there is no difference between processes and process drafts: both are valid BPMN 2.0 XML files.
But process drafts have an additional extension in the file name following this pattern:
When the process model is copied to the Processes, the system removes |
|
Don’t remove manually |
Upon the next application startup, all models in the Processes node will be deployed to the server. Alternatively, you can use the Hot Deploy feature to deploy them without restarting the application.
Creating Processes
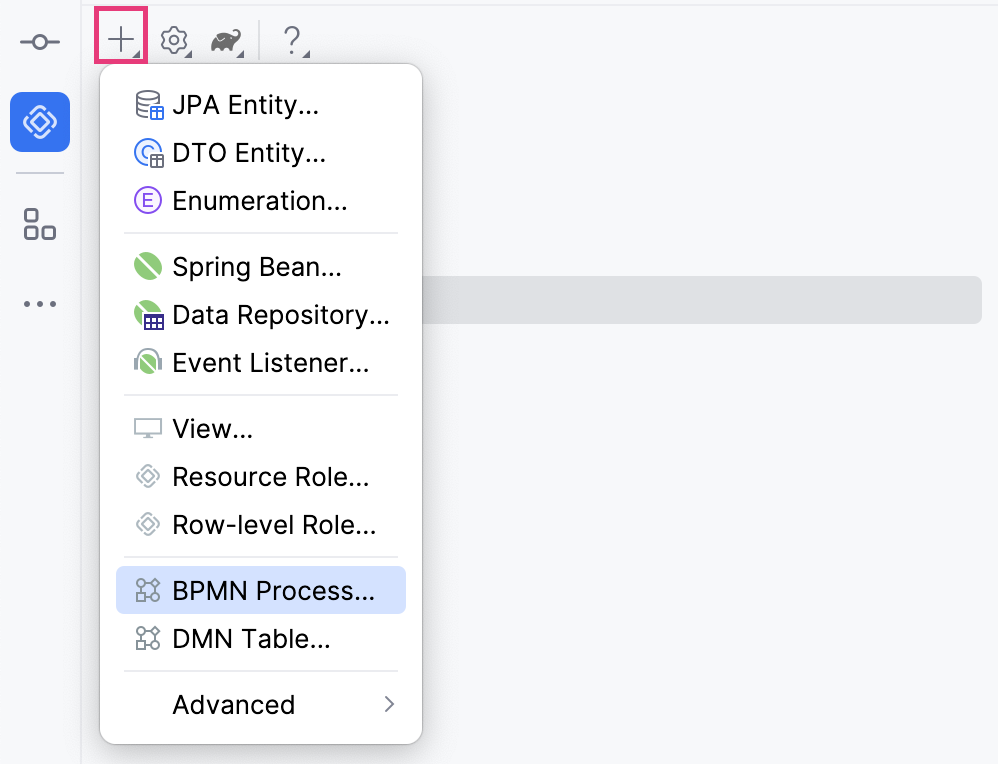
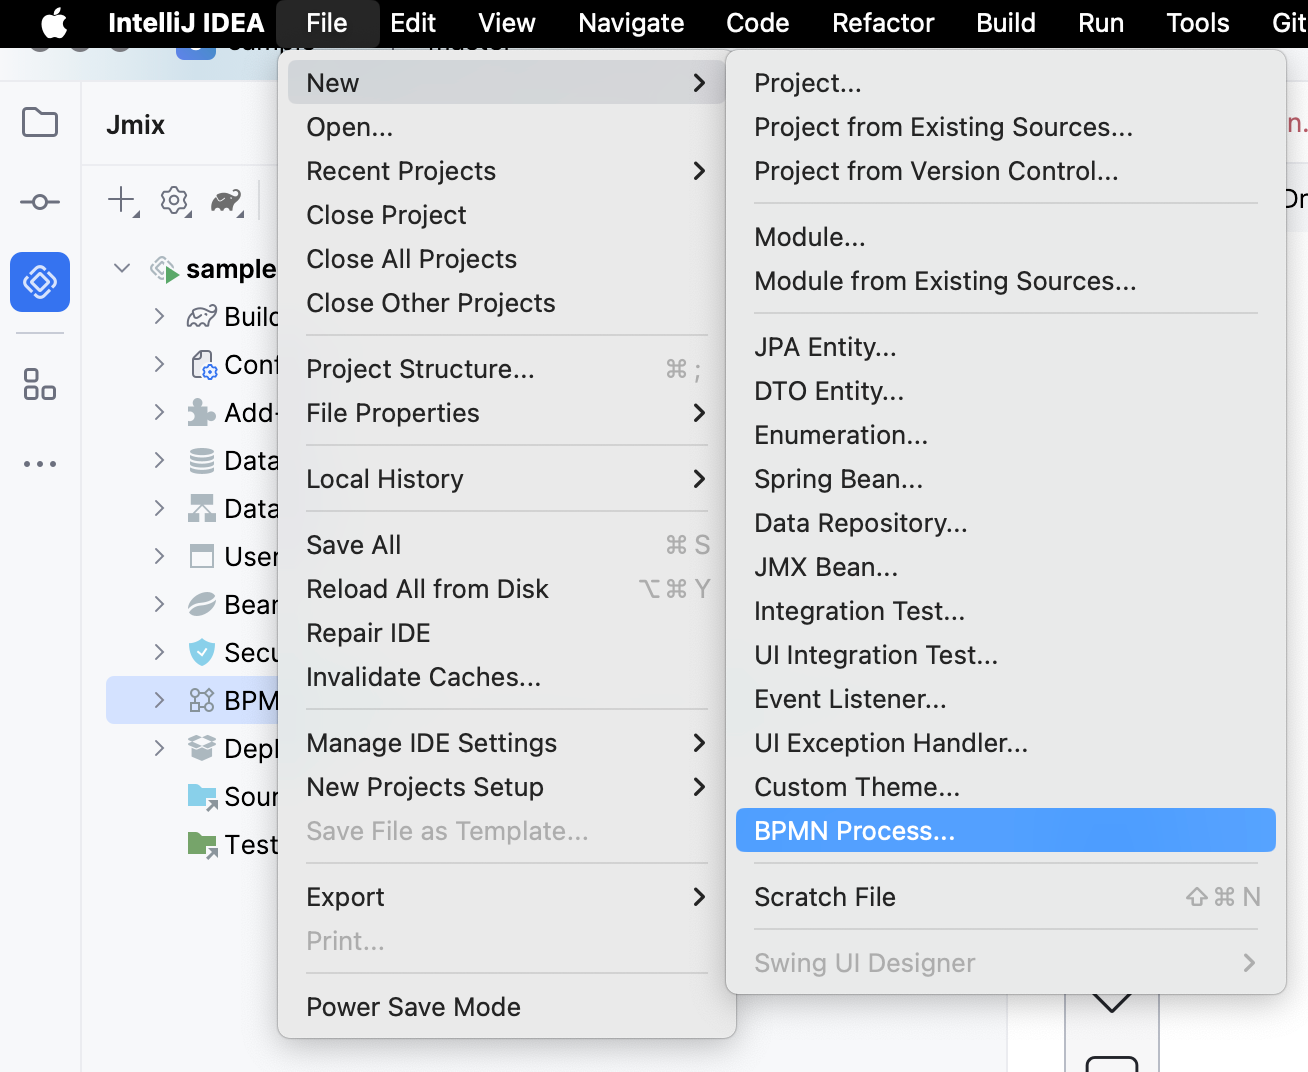
In Jmix Studio, you can create a new process several ways:
-
Using Jmix Tool Window:
-
Using the context menu in the BPM node (by right click):

-
Using IntelliJ IDEA main menu File→ New→ BPMN Process:
-
Using the context menu (by the right click) from anywhere within your project:
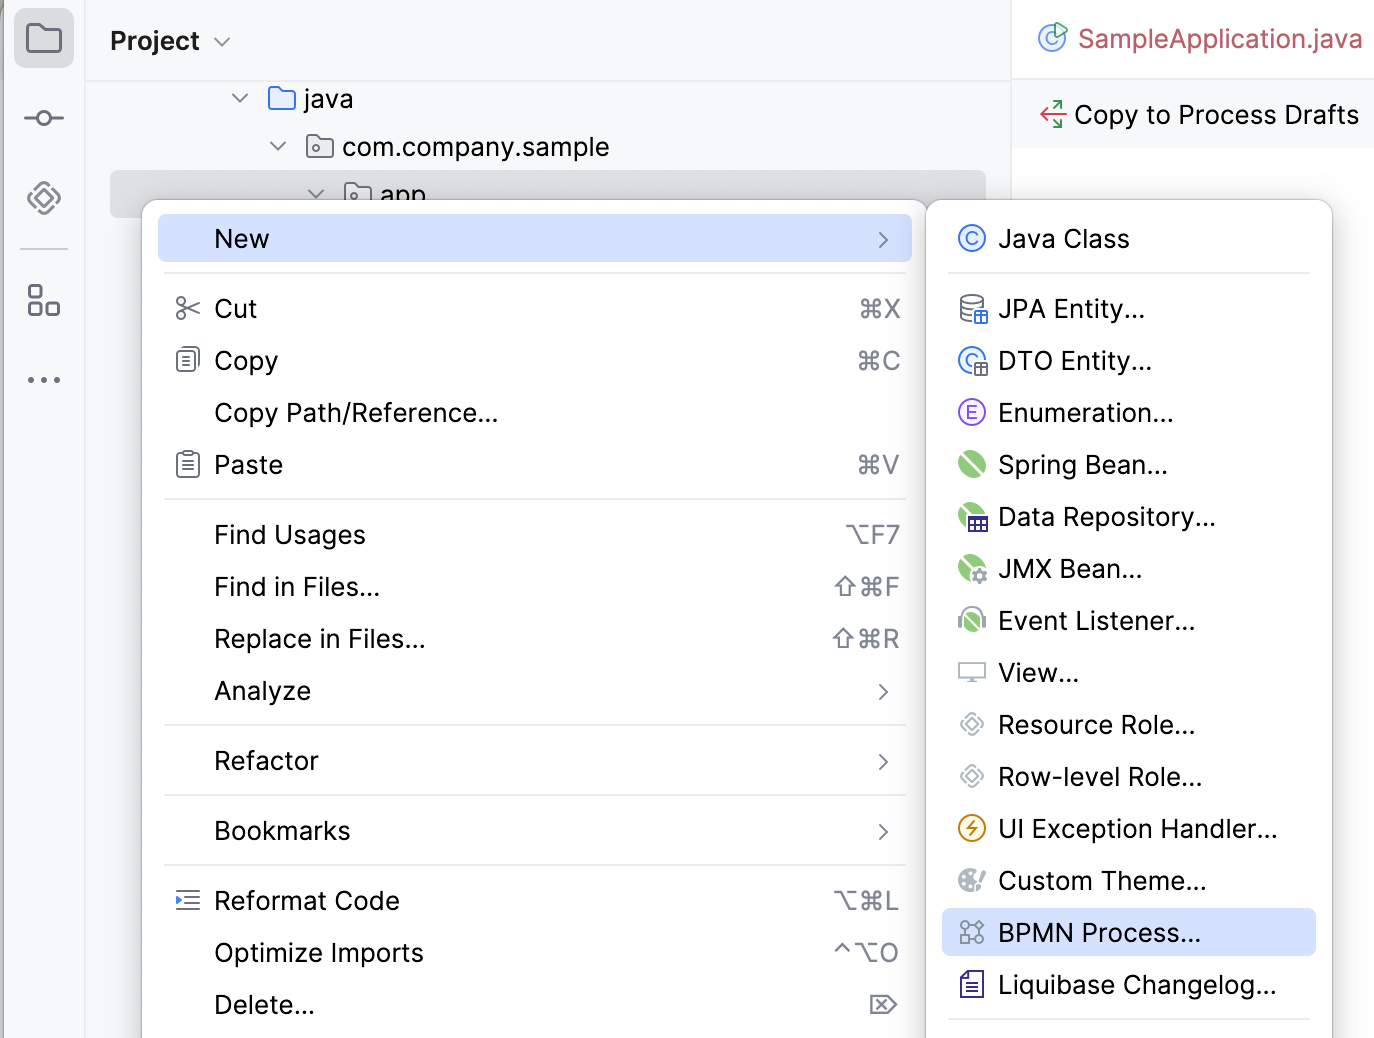
Next, a New BPMN Process dialog window appears. Enter the process ID in snake case, and the name will be filled automatically.
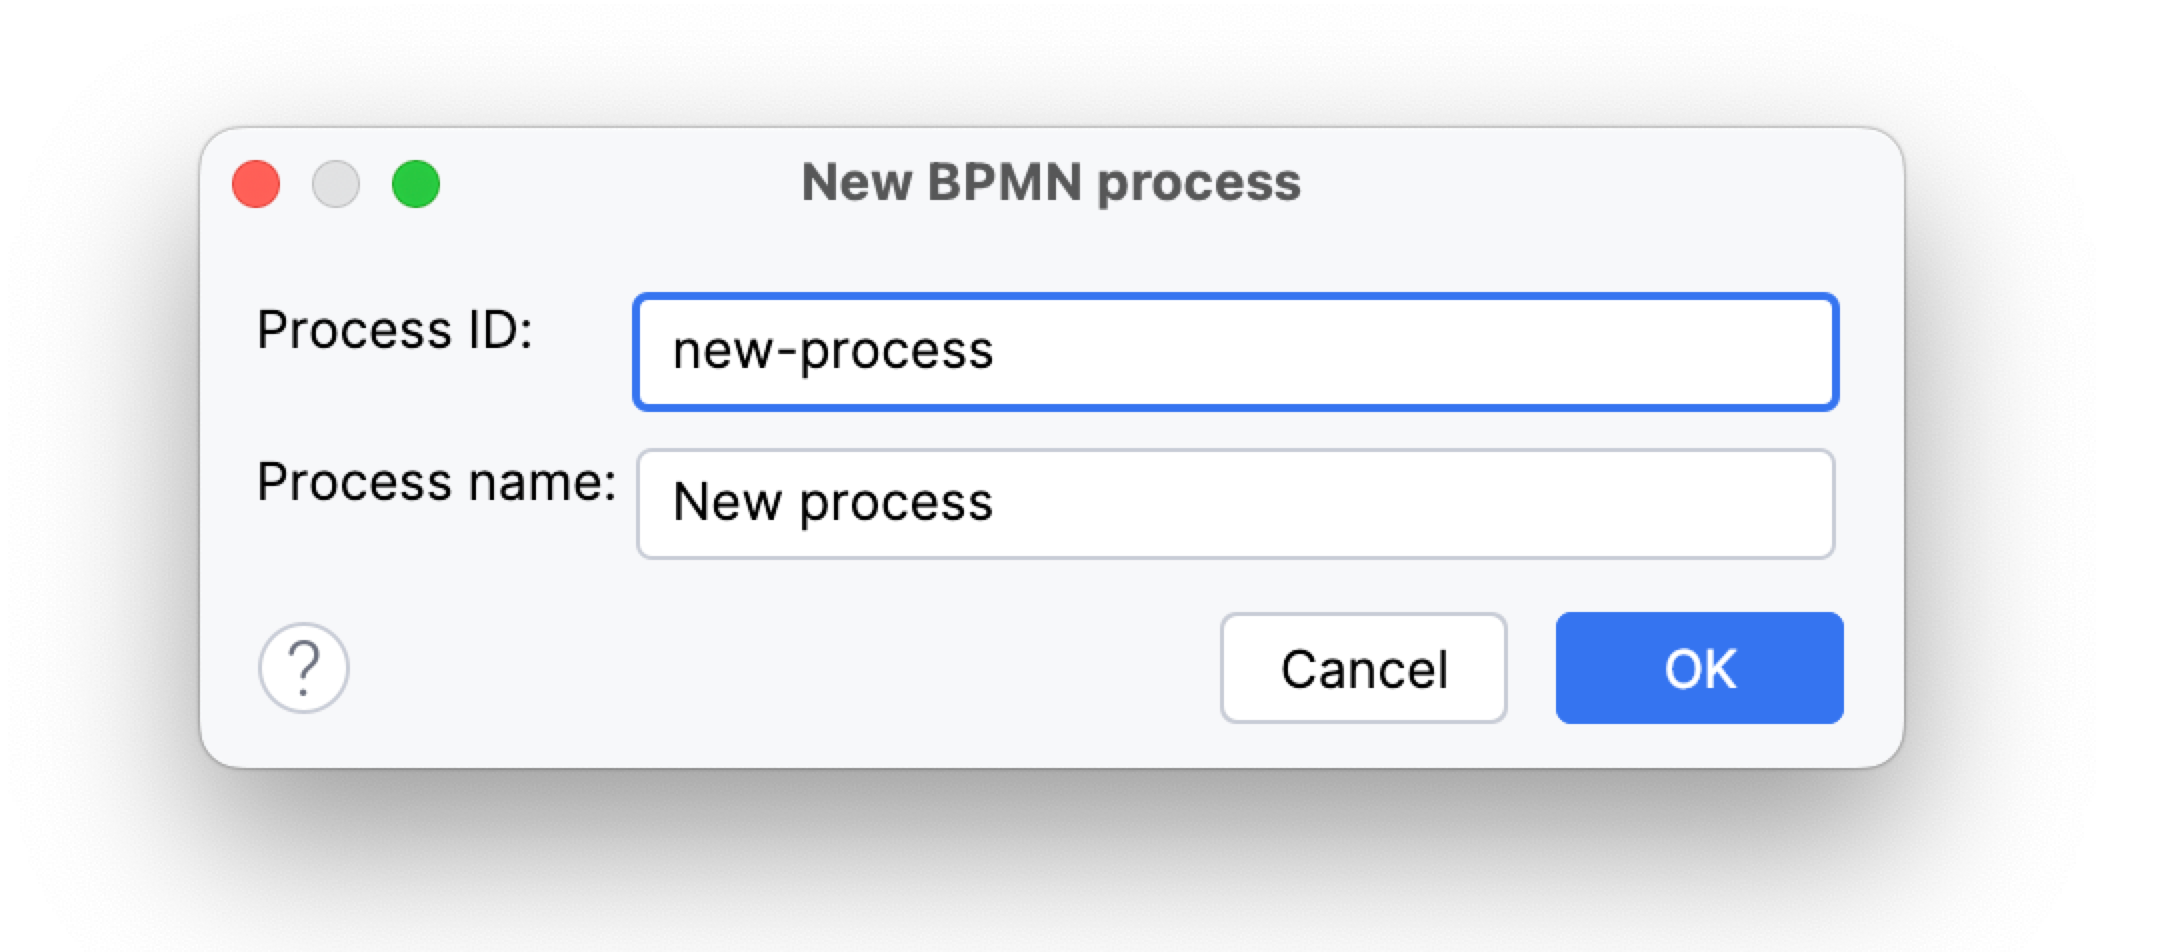
After clicking the OK button, BPMN Modeler will open.
The XML file of this process will be created as a draft and to be placed in the Process Drafts folder.
Uploading Process Models
You can upload process models into your project from external sources. For this purpose, use regular copy/past features provided by operating system.
Switch to the regular Project view in IntelliJ IDEA and
place the copied XML file in the resources/process-drafts or resources/process directory.
|
When placing XML files in drafts, add |
