5. Data Access Control
In our application, we already have roles Employees and HR Managers. In this chapter, we will demonstrate how to modify them by adding new restrictions.
Resource Role for Employees
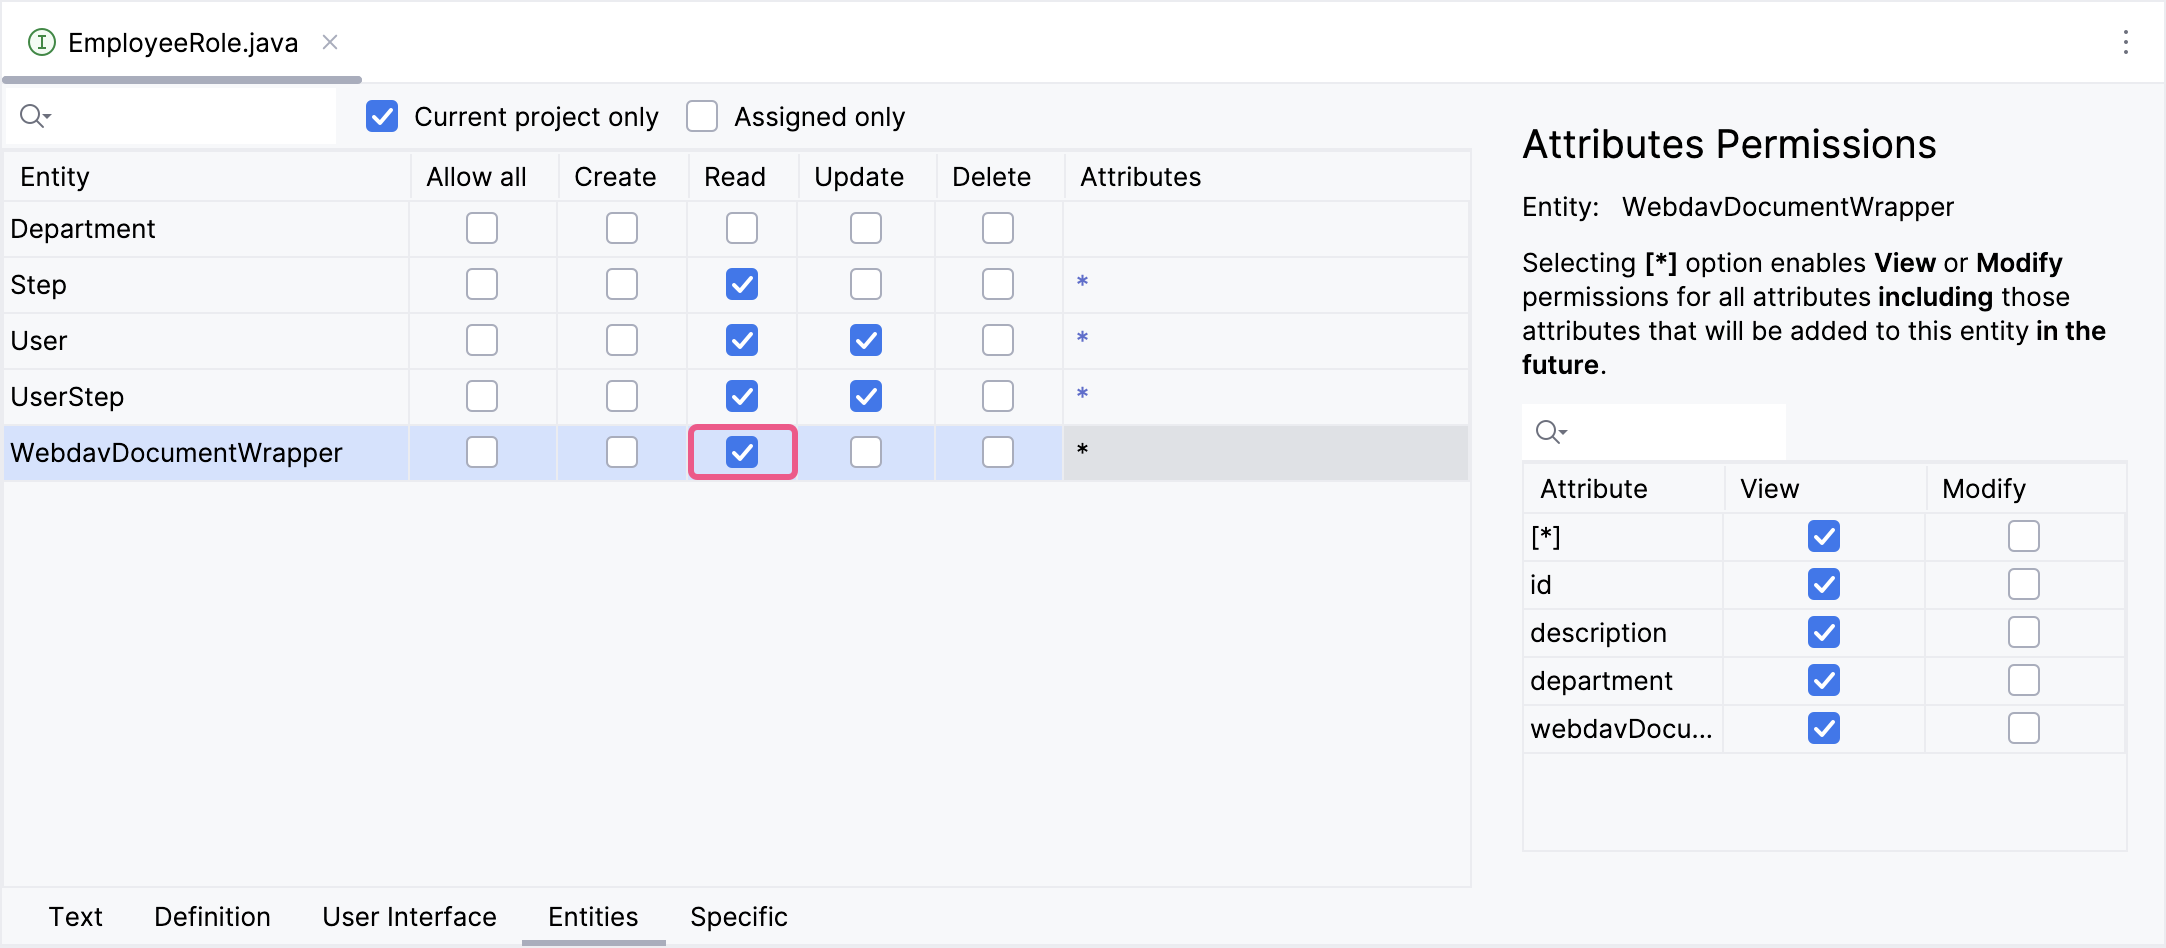
An employee needs to read the WebdavDocumentWrapper entity instances to view them in UI.
Double-click on Security → EmployeeRole resource role in Jmix tool window.
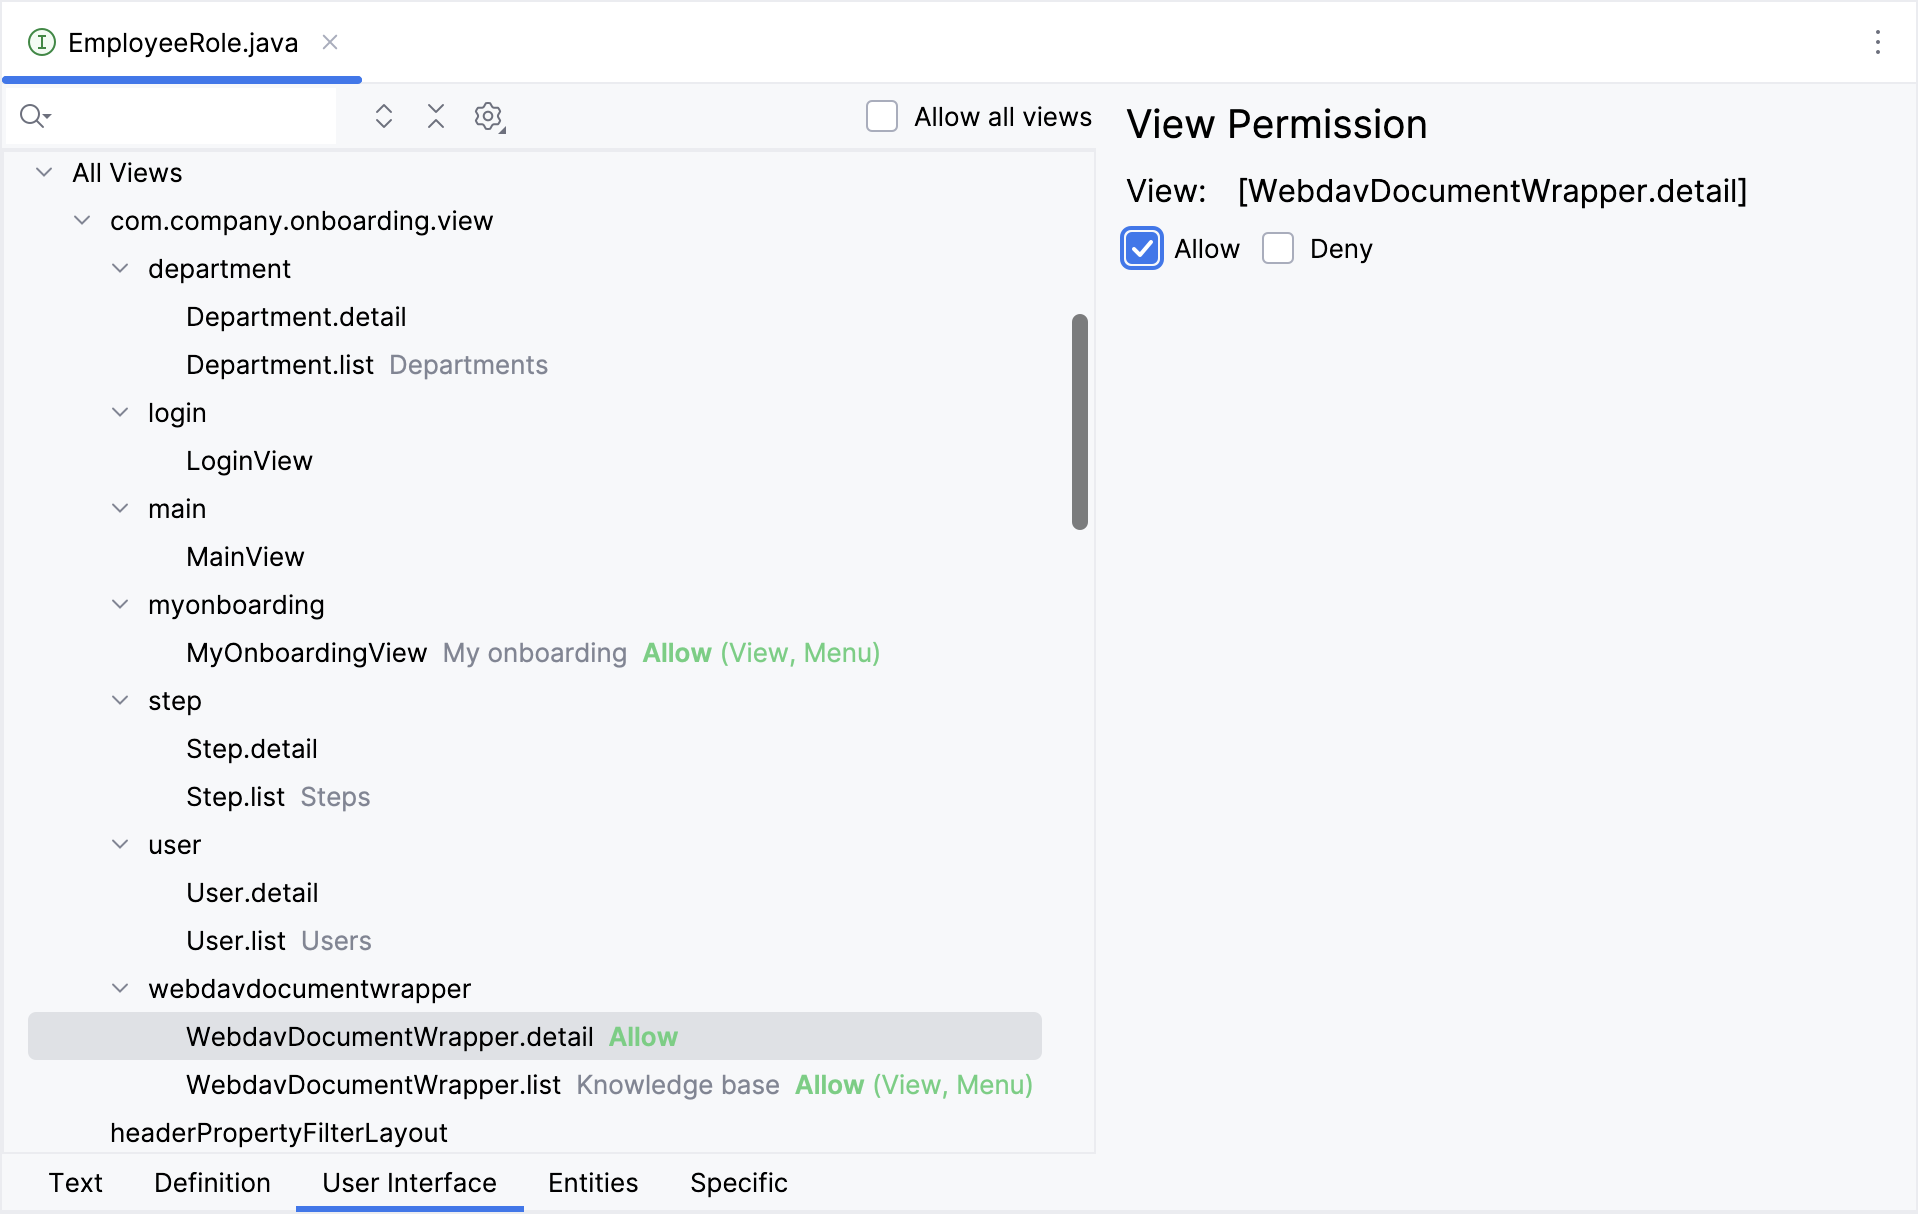
Switch to the User Interface tab to define permissions to views. Select WebdavDocumentWrapper.list and WebdavDocumentWrapper.detail in the menu tree and select Allow checkboxes on the right:
After that, switch to the Entities tab and select the following permissions:
Resource Role for HR Managers
HR managers need to upload documents, delete documents, and edit the content of documents.
Double-click on Security → HRManagerRole resource role in Jmix tool window.
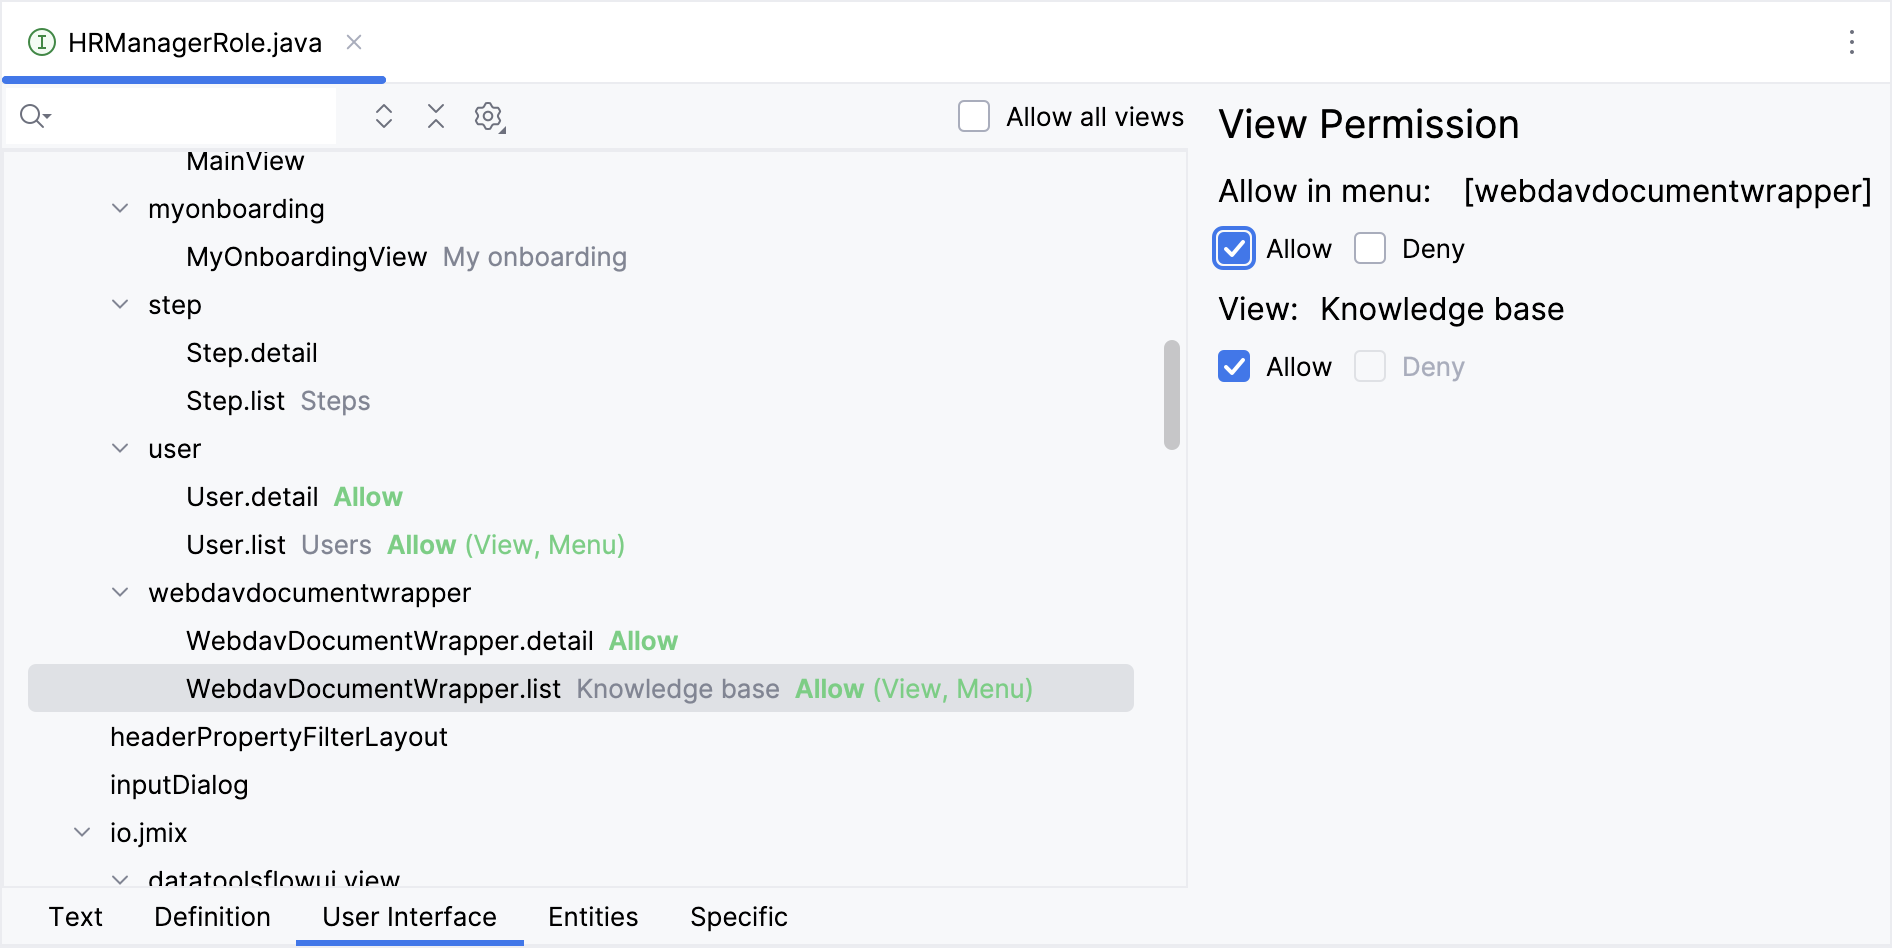
Switch to the User Interface tab and allow WebdavDocumentWrapper.list, and WebdavDocumentWrapper.detail.
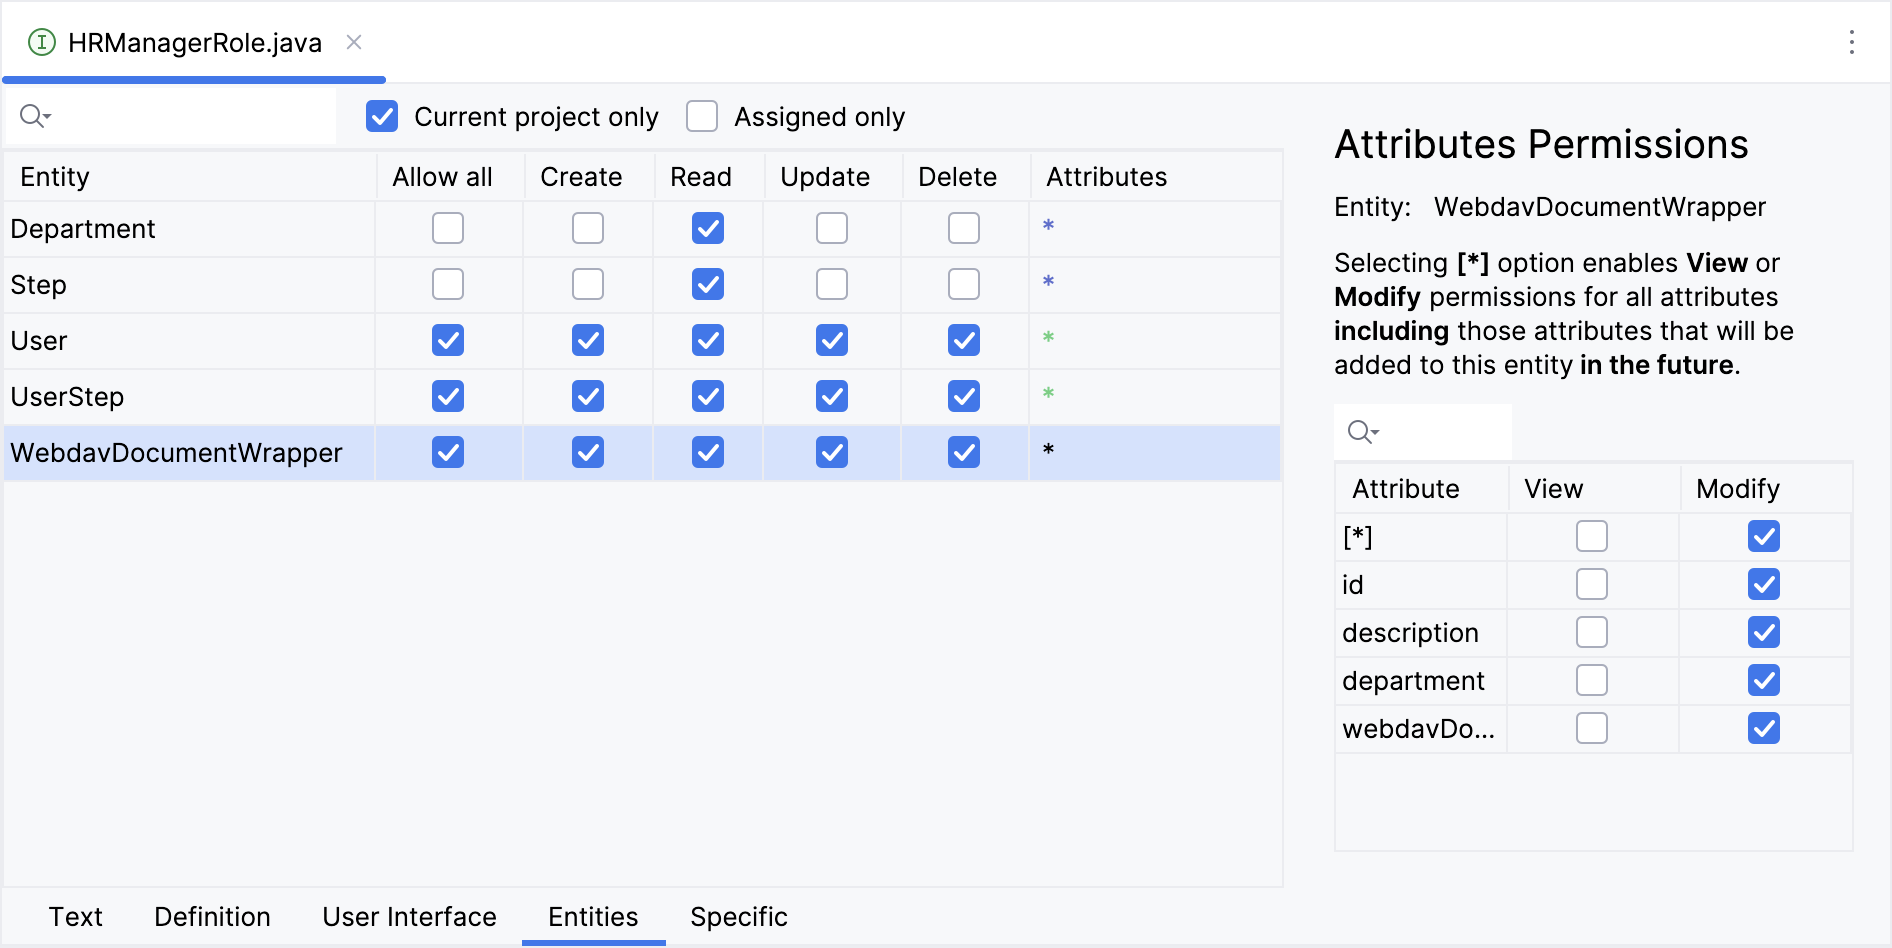
Switch to the Entities tab.
Give all permissions to the WebdavDocumentWrapper entity.
Row-level WebDavDocumentsDepartmentRole
In this section, you will introduce a row-level role which restricts access to WebDAV documents for an employee.
If the employee has the role of HR Manager or Administrator, then display all WebDAV documents.
If the employee has the role of Employee, display only WebDAV documents related to the employee’s department.
In the Jmix tool window, click New () → Row-level Role. In the New Row-level Role dialog, enter:
-
Role name:
WebDav documents department -
Role code:
web-dav-documents-department -
Class:
com.company.onboarding.security.WebDavDocumentsDepartmentRole
Click OK.
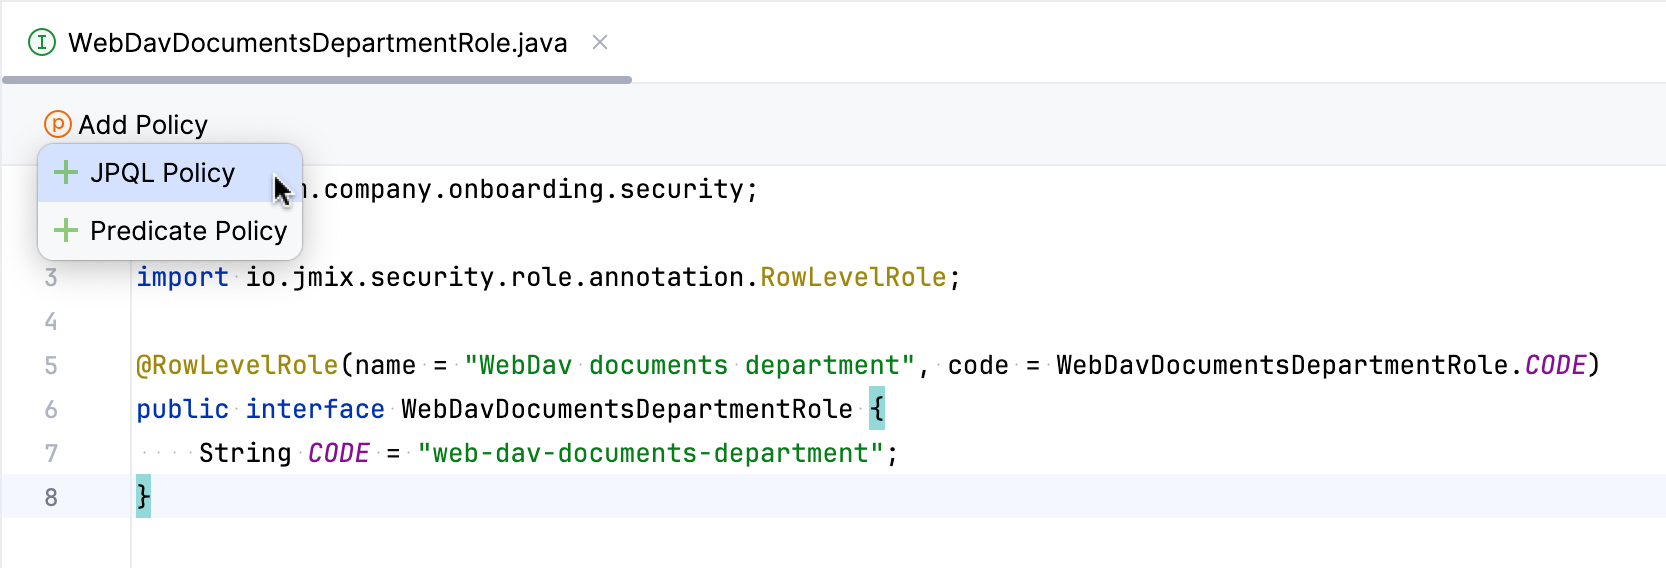
Studio will create and open an annotated interface:
@RowLevelRole(name = "WebDav documents department", code = WebDavDocumentsDepartmentRole.CODE)
public interface WebDavDocumentsDepartmentRole {
    String CODE = "web-dav-documents-department";
}
Click Add Policy → JPQL Policy in the top actions panel:
In the Add JPQL Policy dialog, enter:
-
Entity:
WebdavDocumentWrapper -
Where clause:
{E}.department = :current_user_department
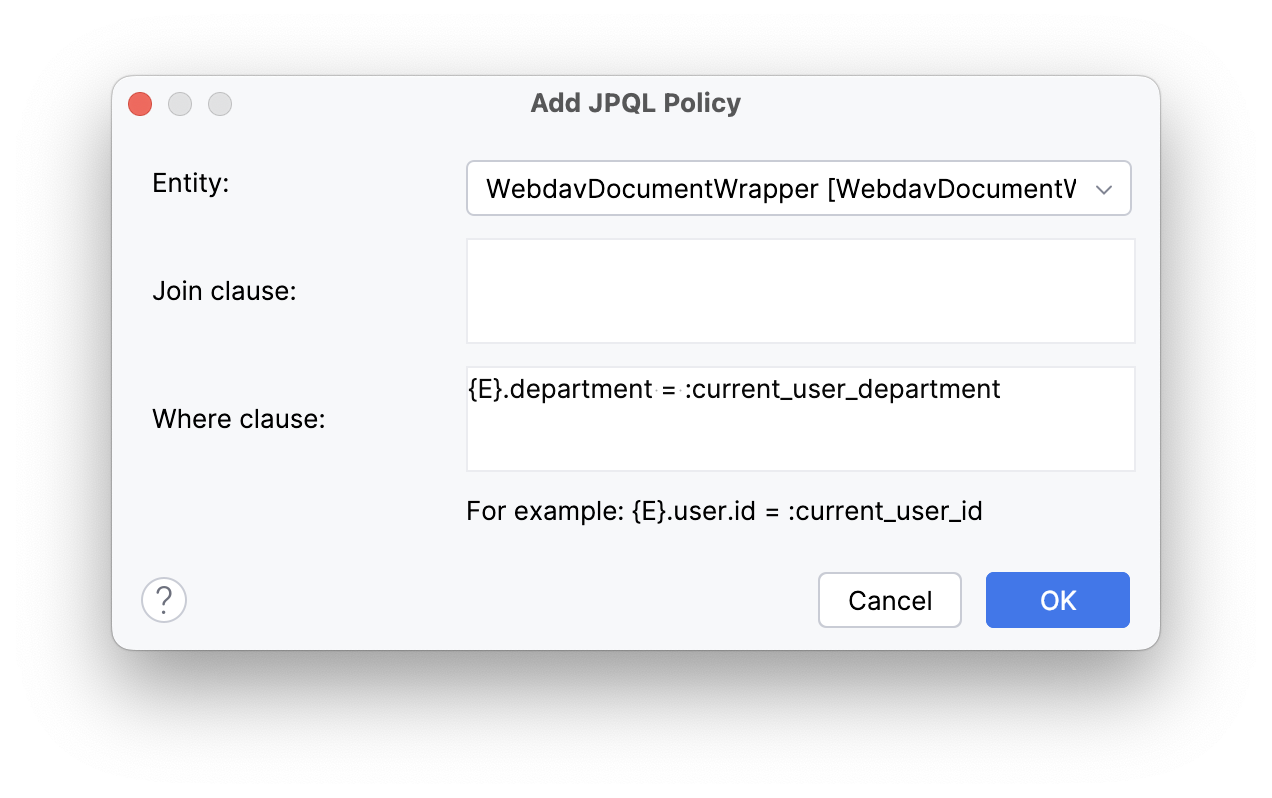
Click OK.
Assigning Roles
Now let’s assign roles to users.
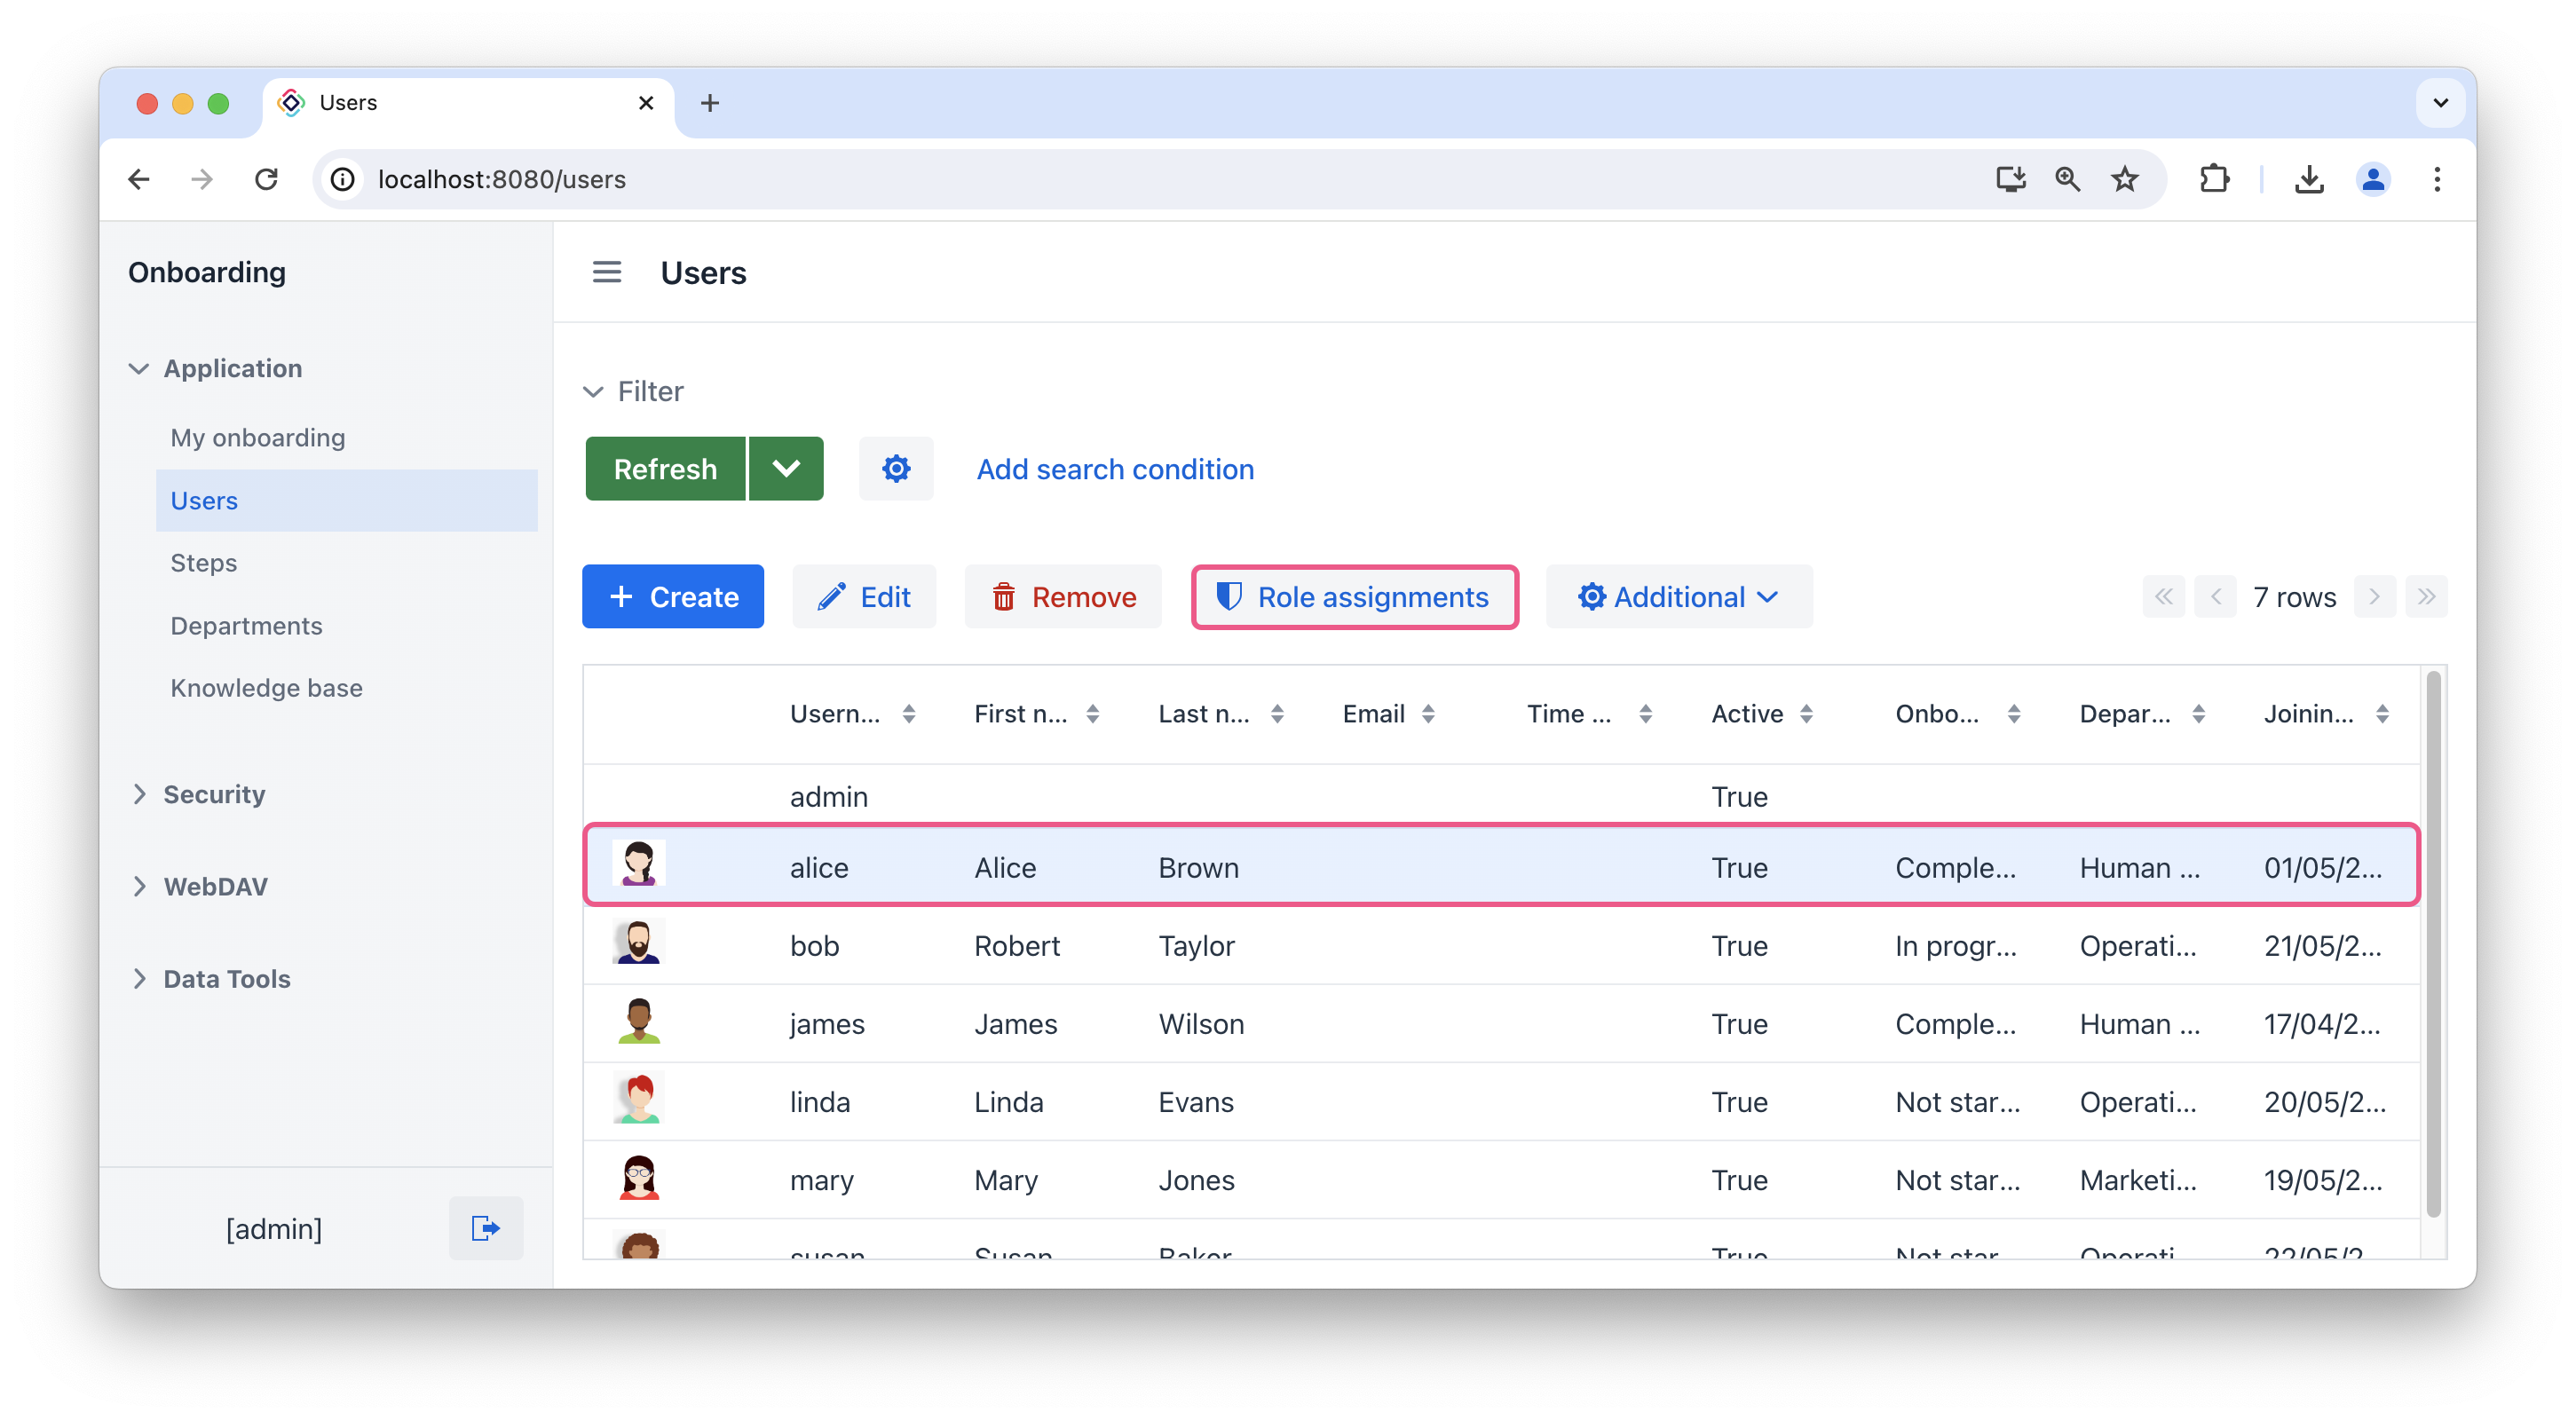
Launch the application and open the Users list view. Select the user alice and click the Role assignments button:
In the Role assignments view, click the Add button in the Resource roles panel.
In the Select resource roles dialog, select WebDAV: minimal access role. Click Select.
The WebDAV: minimal access role is required for all users who require WebDAV functionality. It grants basic access to all WebDAV-related entities within the system.
|
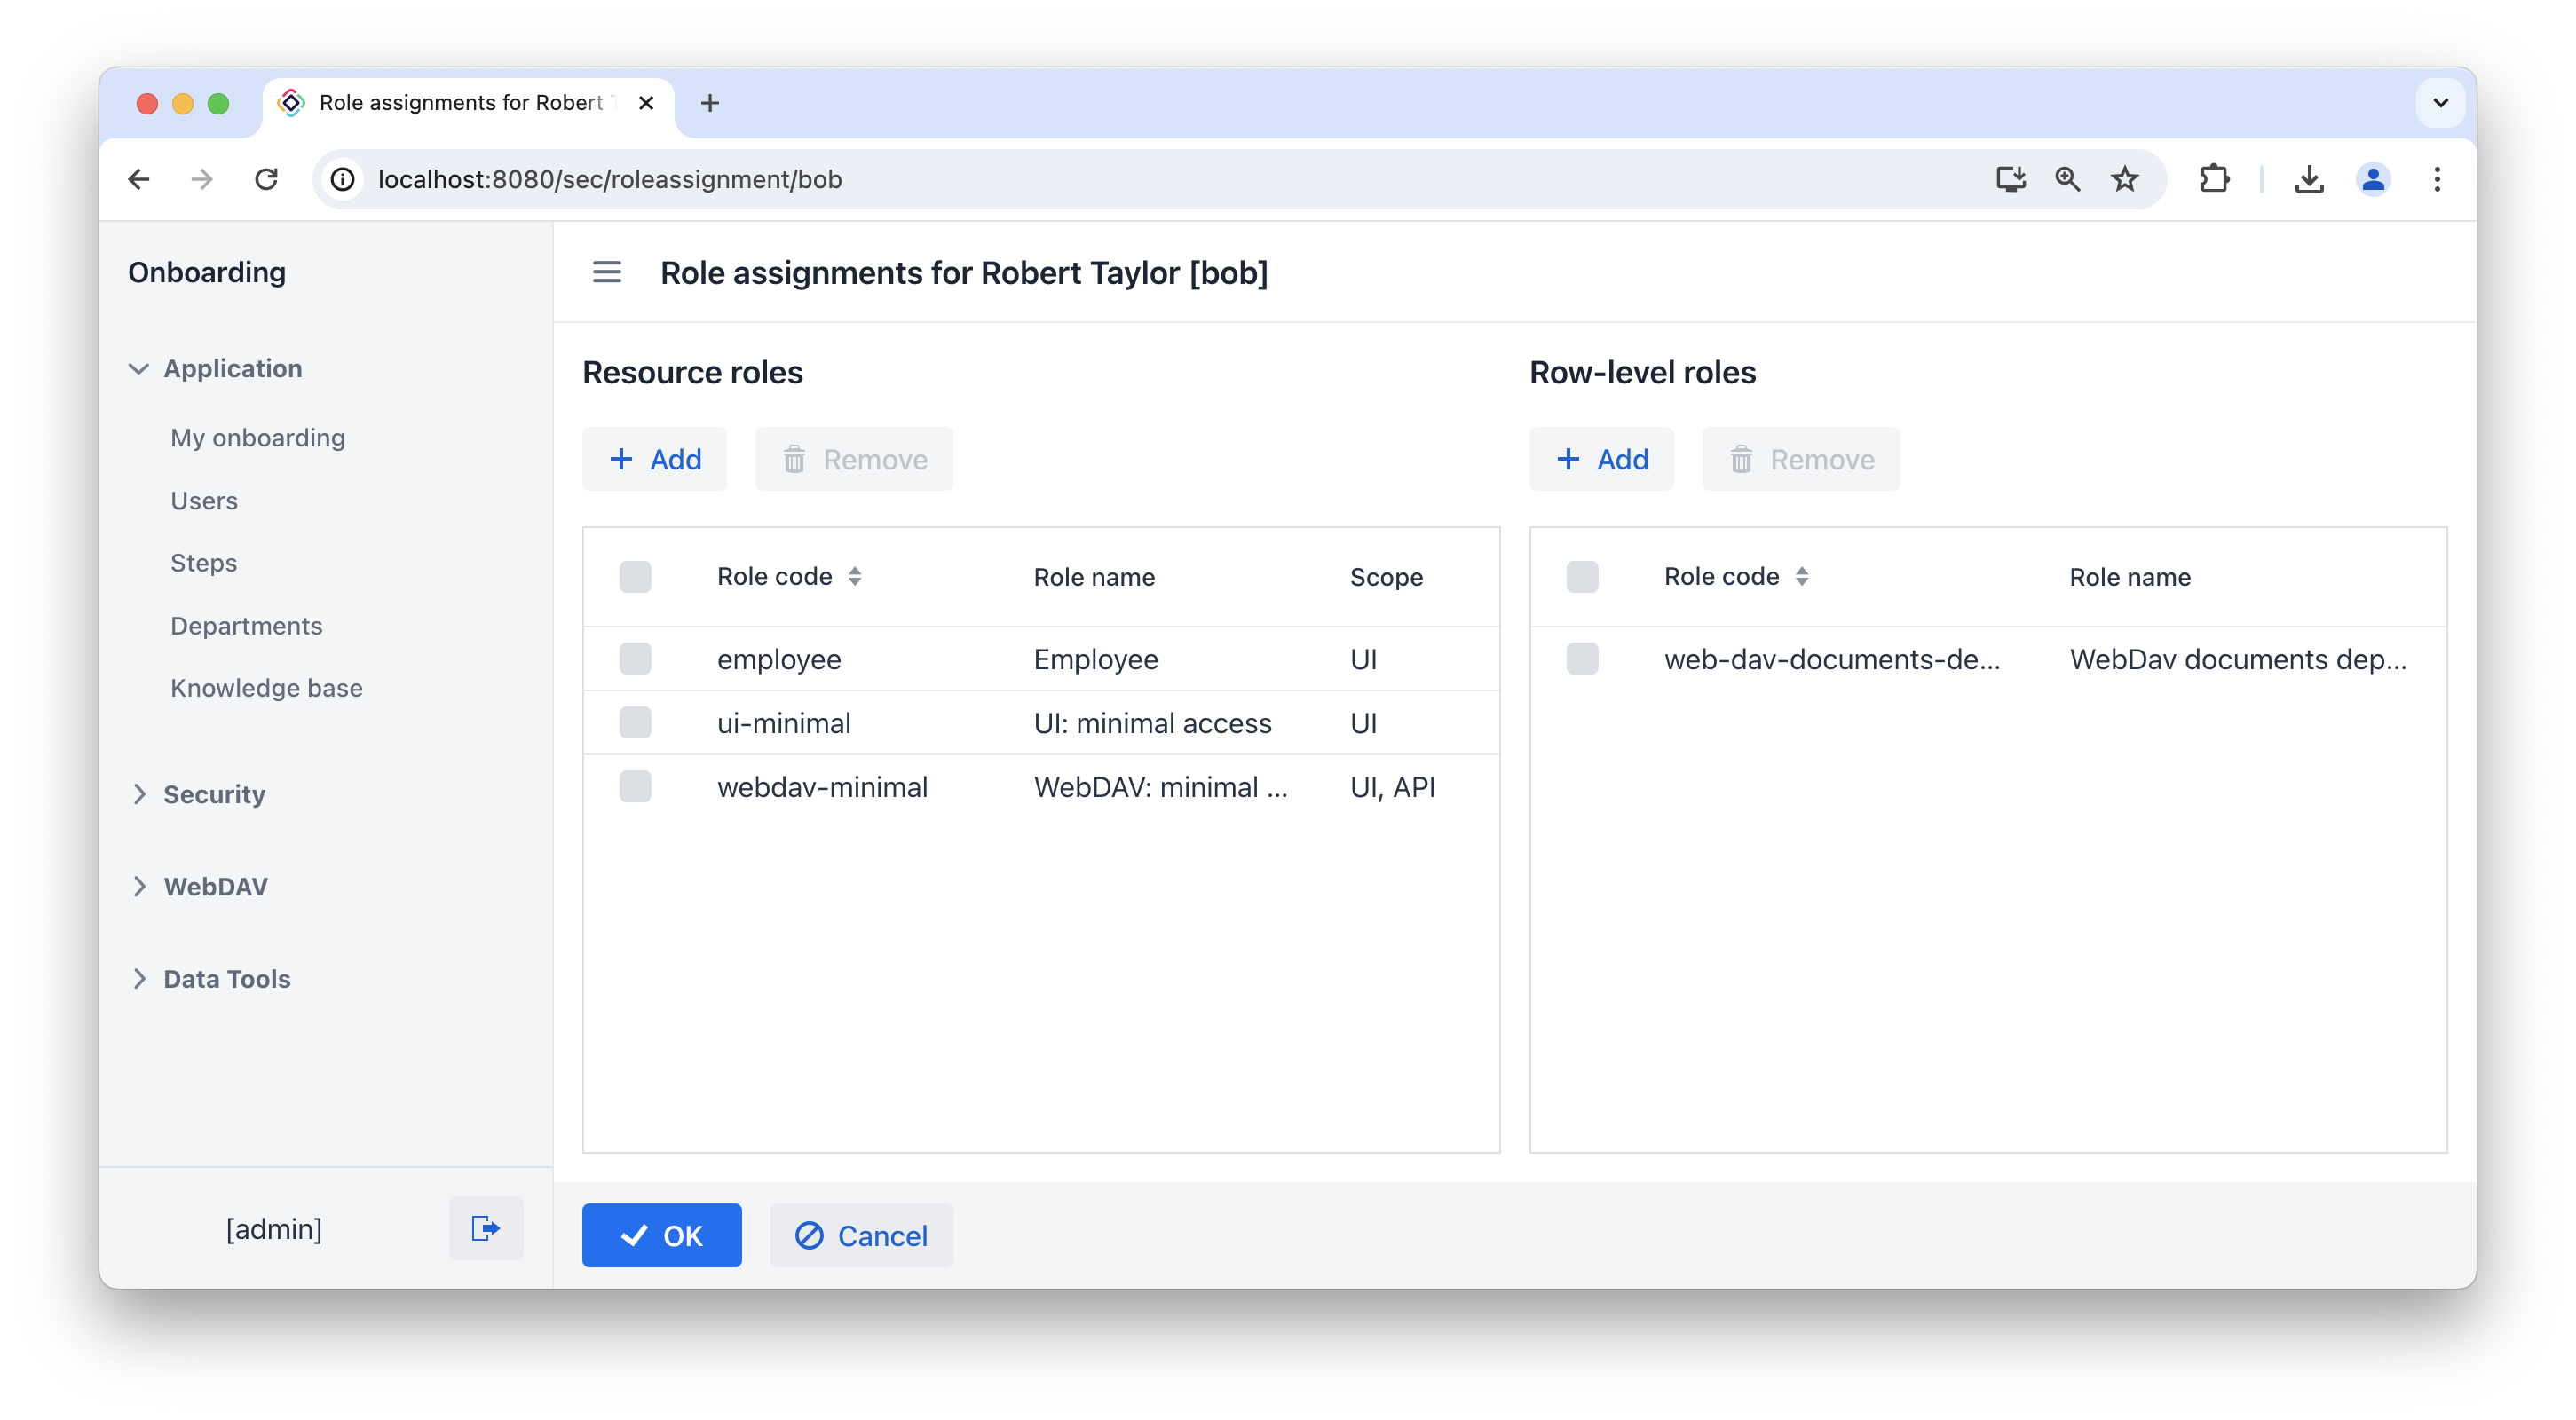
Ensure that the user alice has the following resource and row-level roles:
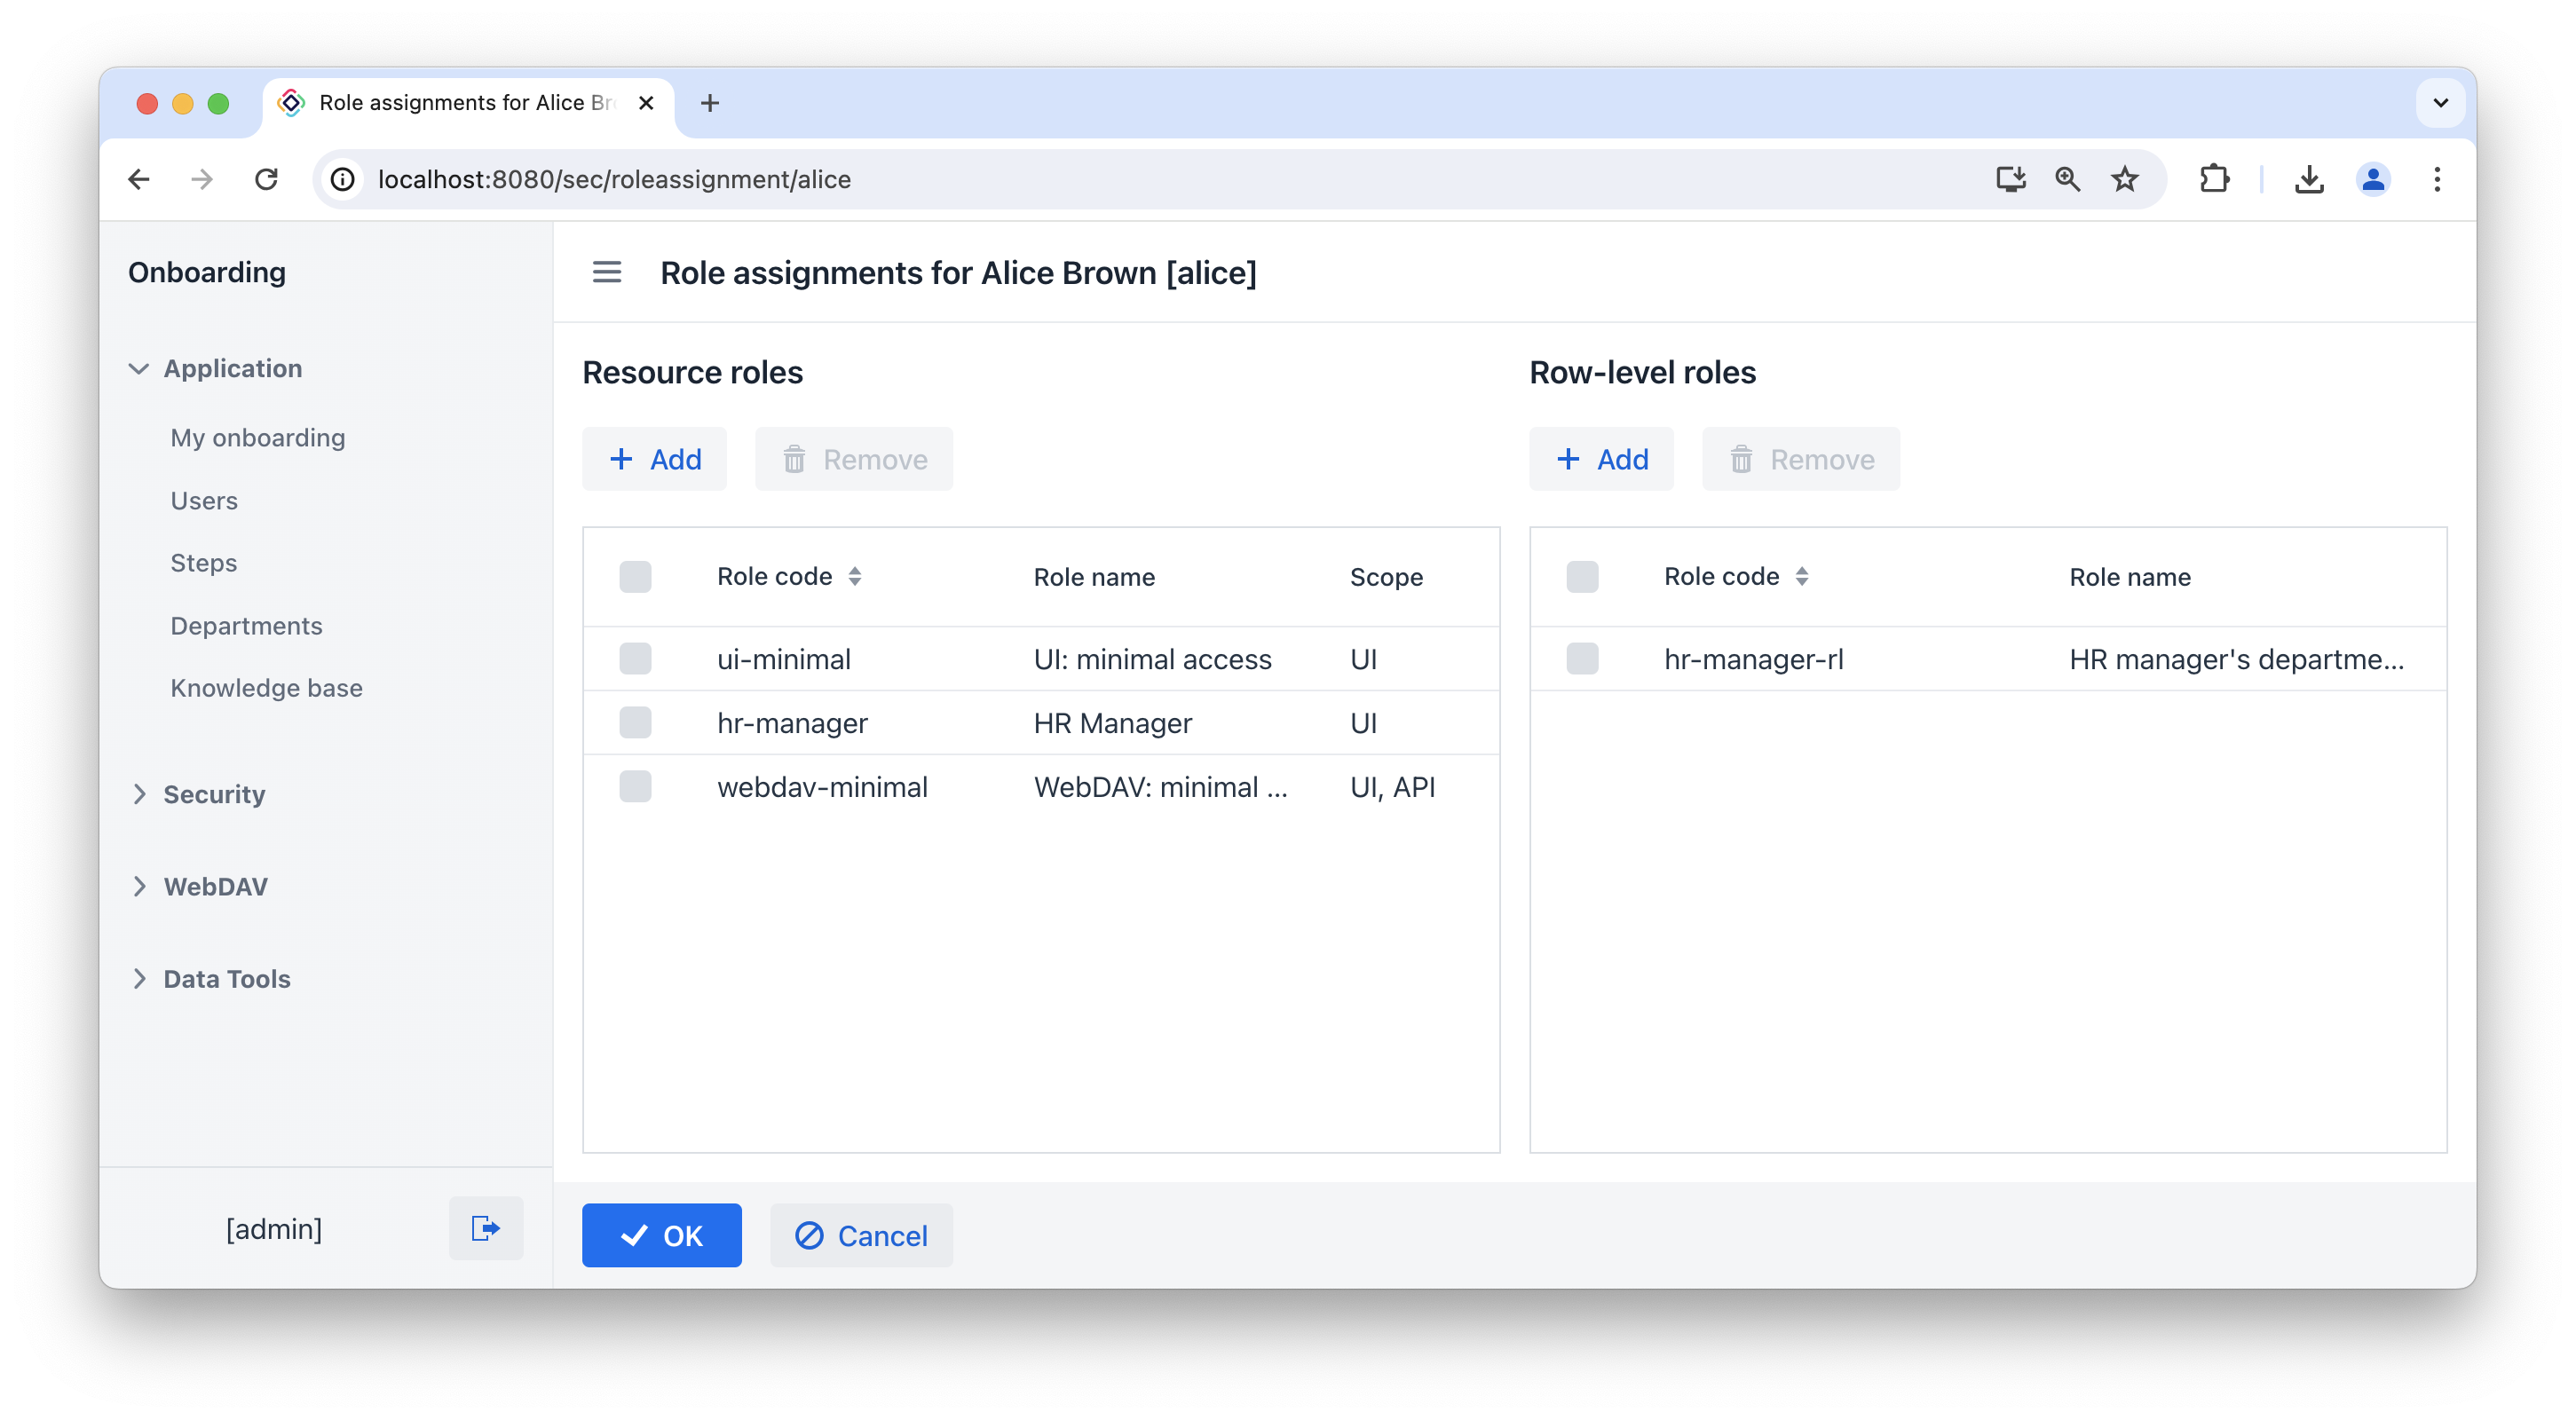
Add WebDAV: minimal access resource role for the user bob.
Click the Add button in the Row-level roles panel.
In the Select row-level roles dialog, select web-dav-documents-department role. Click Select.
Ensure that the user bob has the following resource and row-level roles:
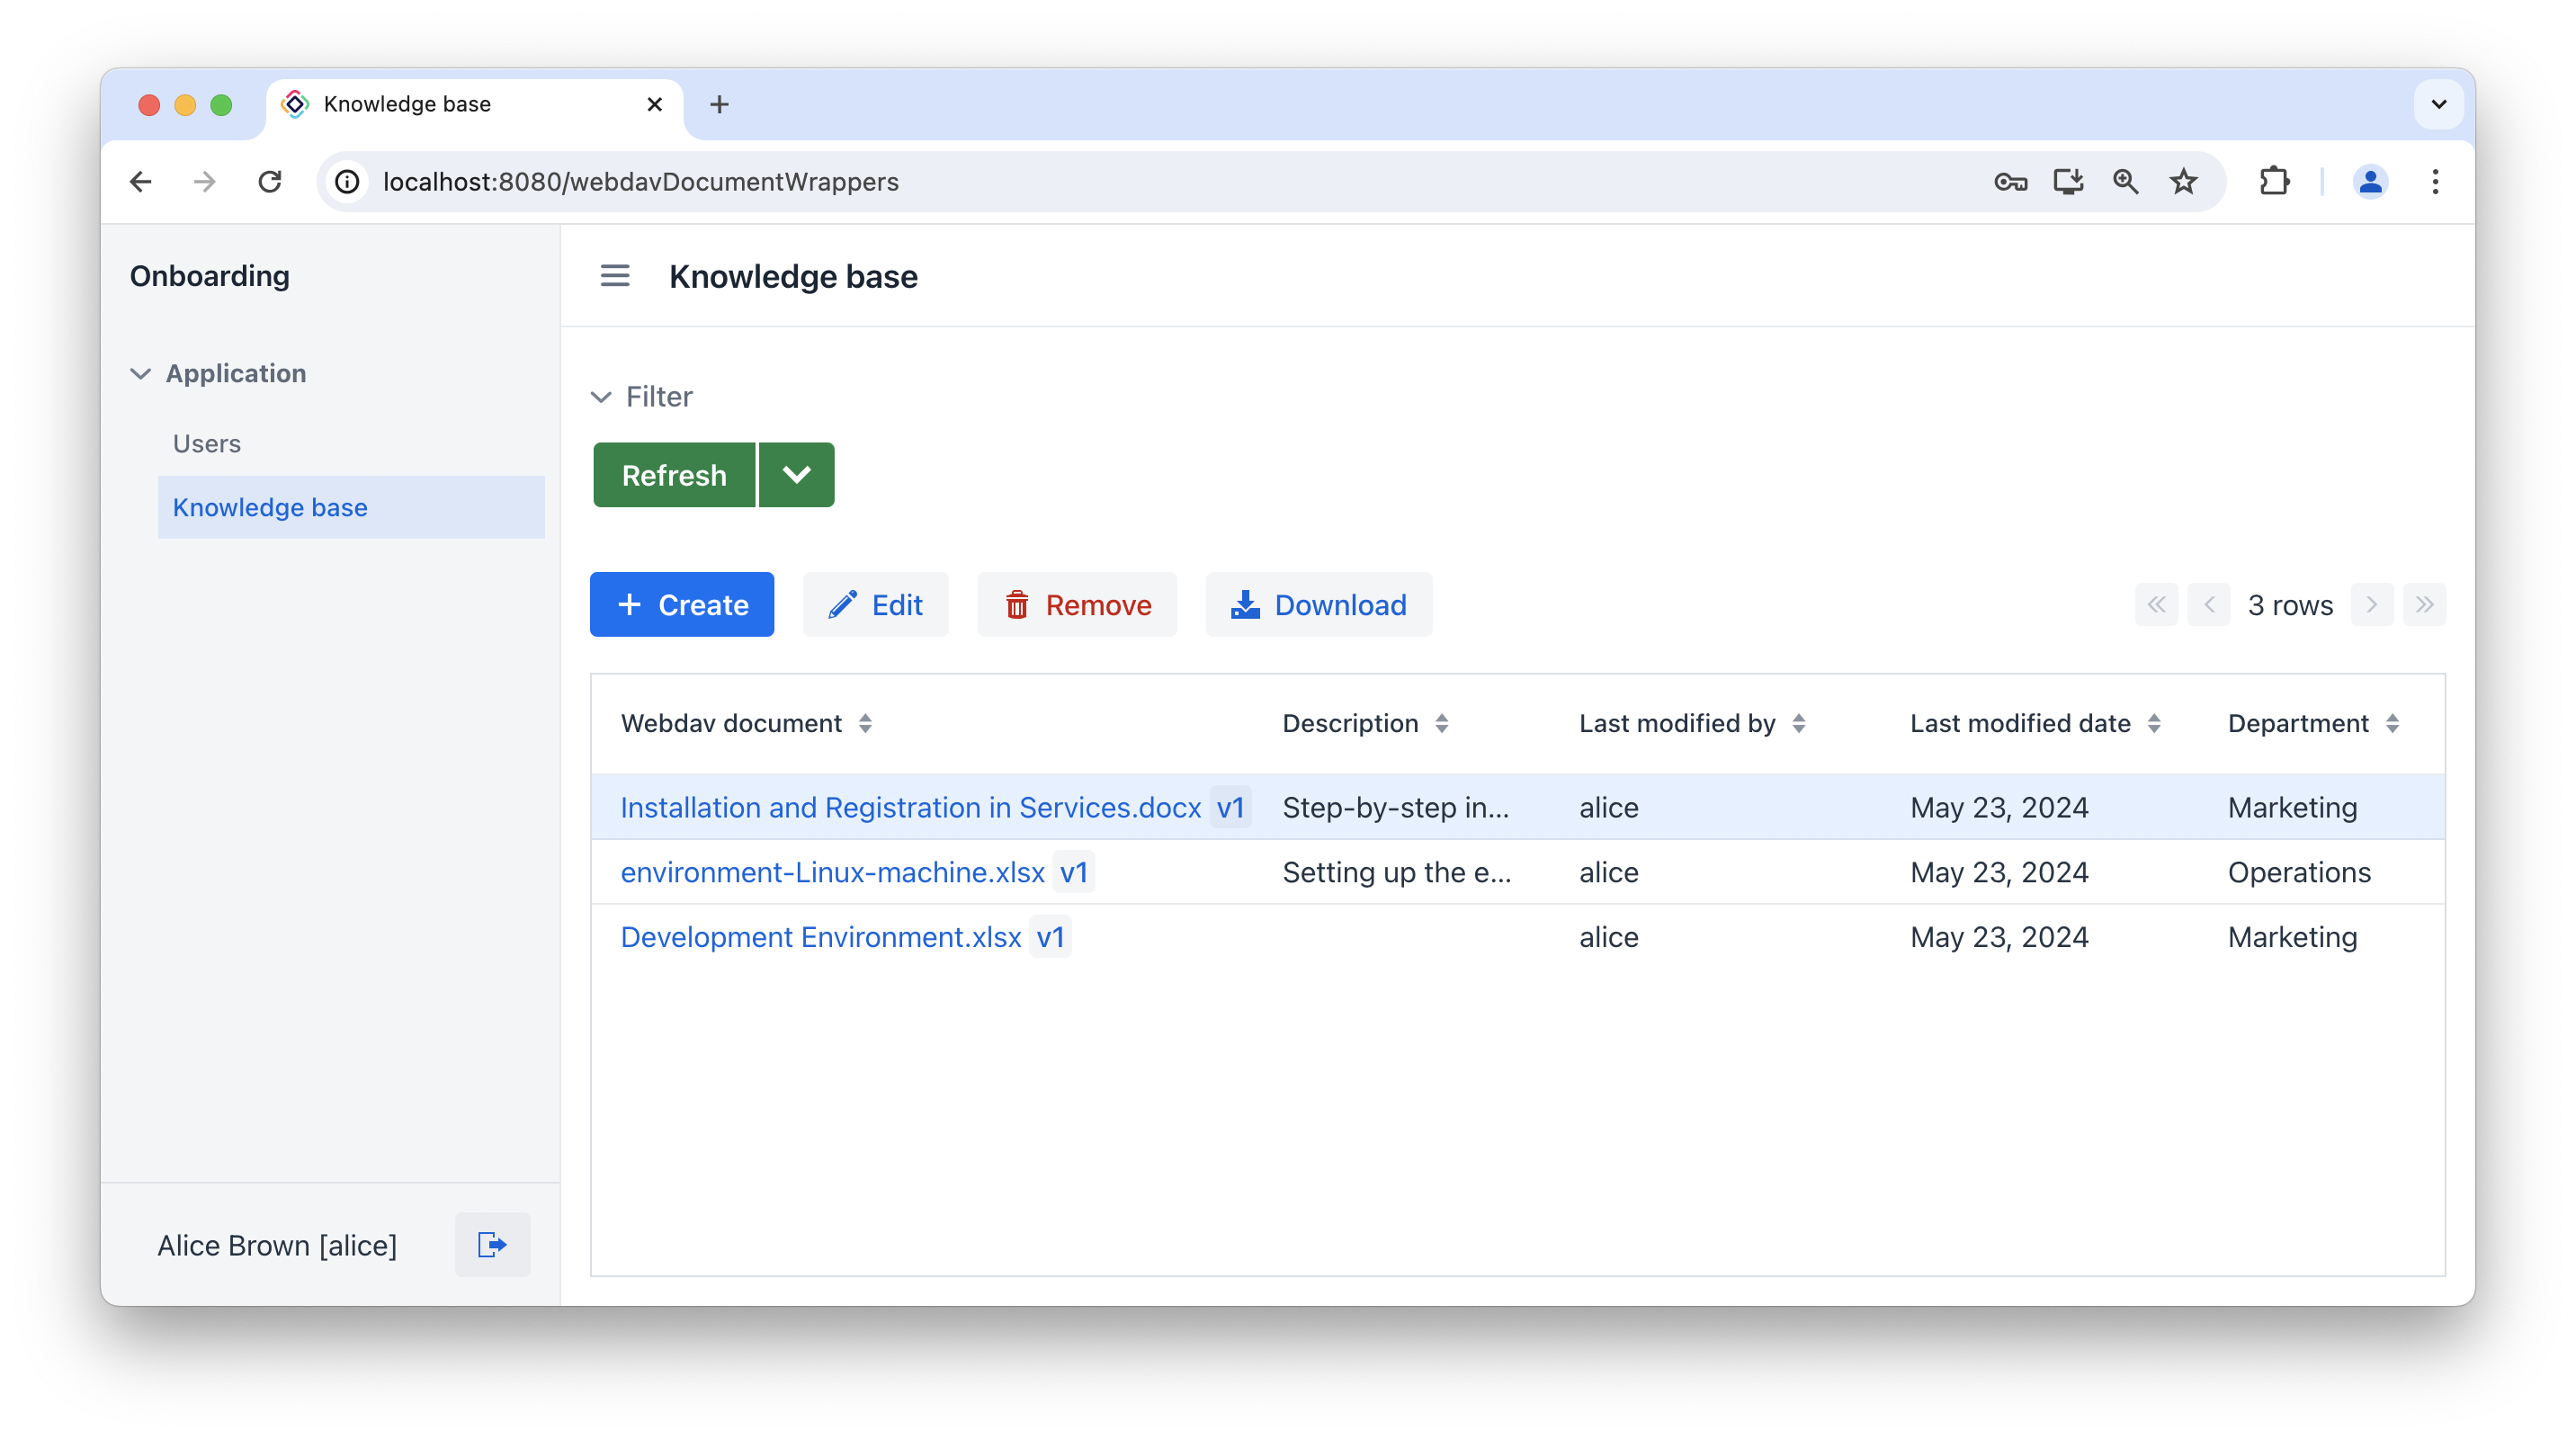
Log in as alice.
alice is HR Manager. So this user can view all WebDAV documents uploaded to the system, upload new documents, delete documents, and edit the content of documents.
Ensure this by accessing the Knowledge base view.
Log in as bob.
bob is Employee. So this user can view only WebDAV documents related to the employee’s department. Such a user can only download Web DAV documents using the Download button, but cannot create or delete them.
Ensure this by accessing the Knowledge base view.
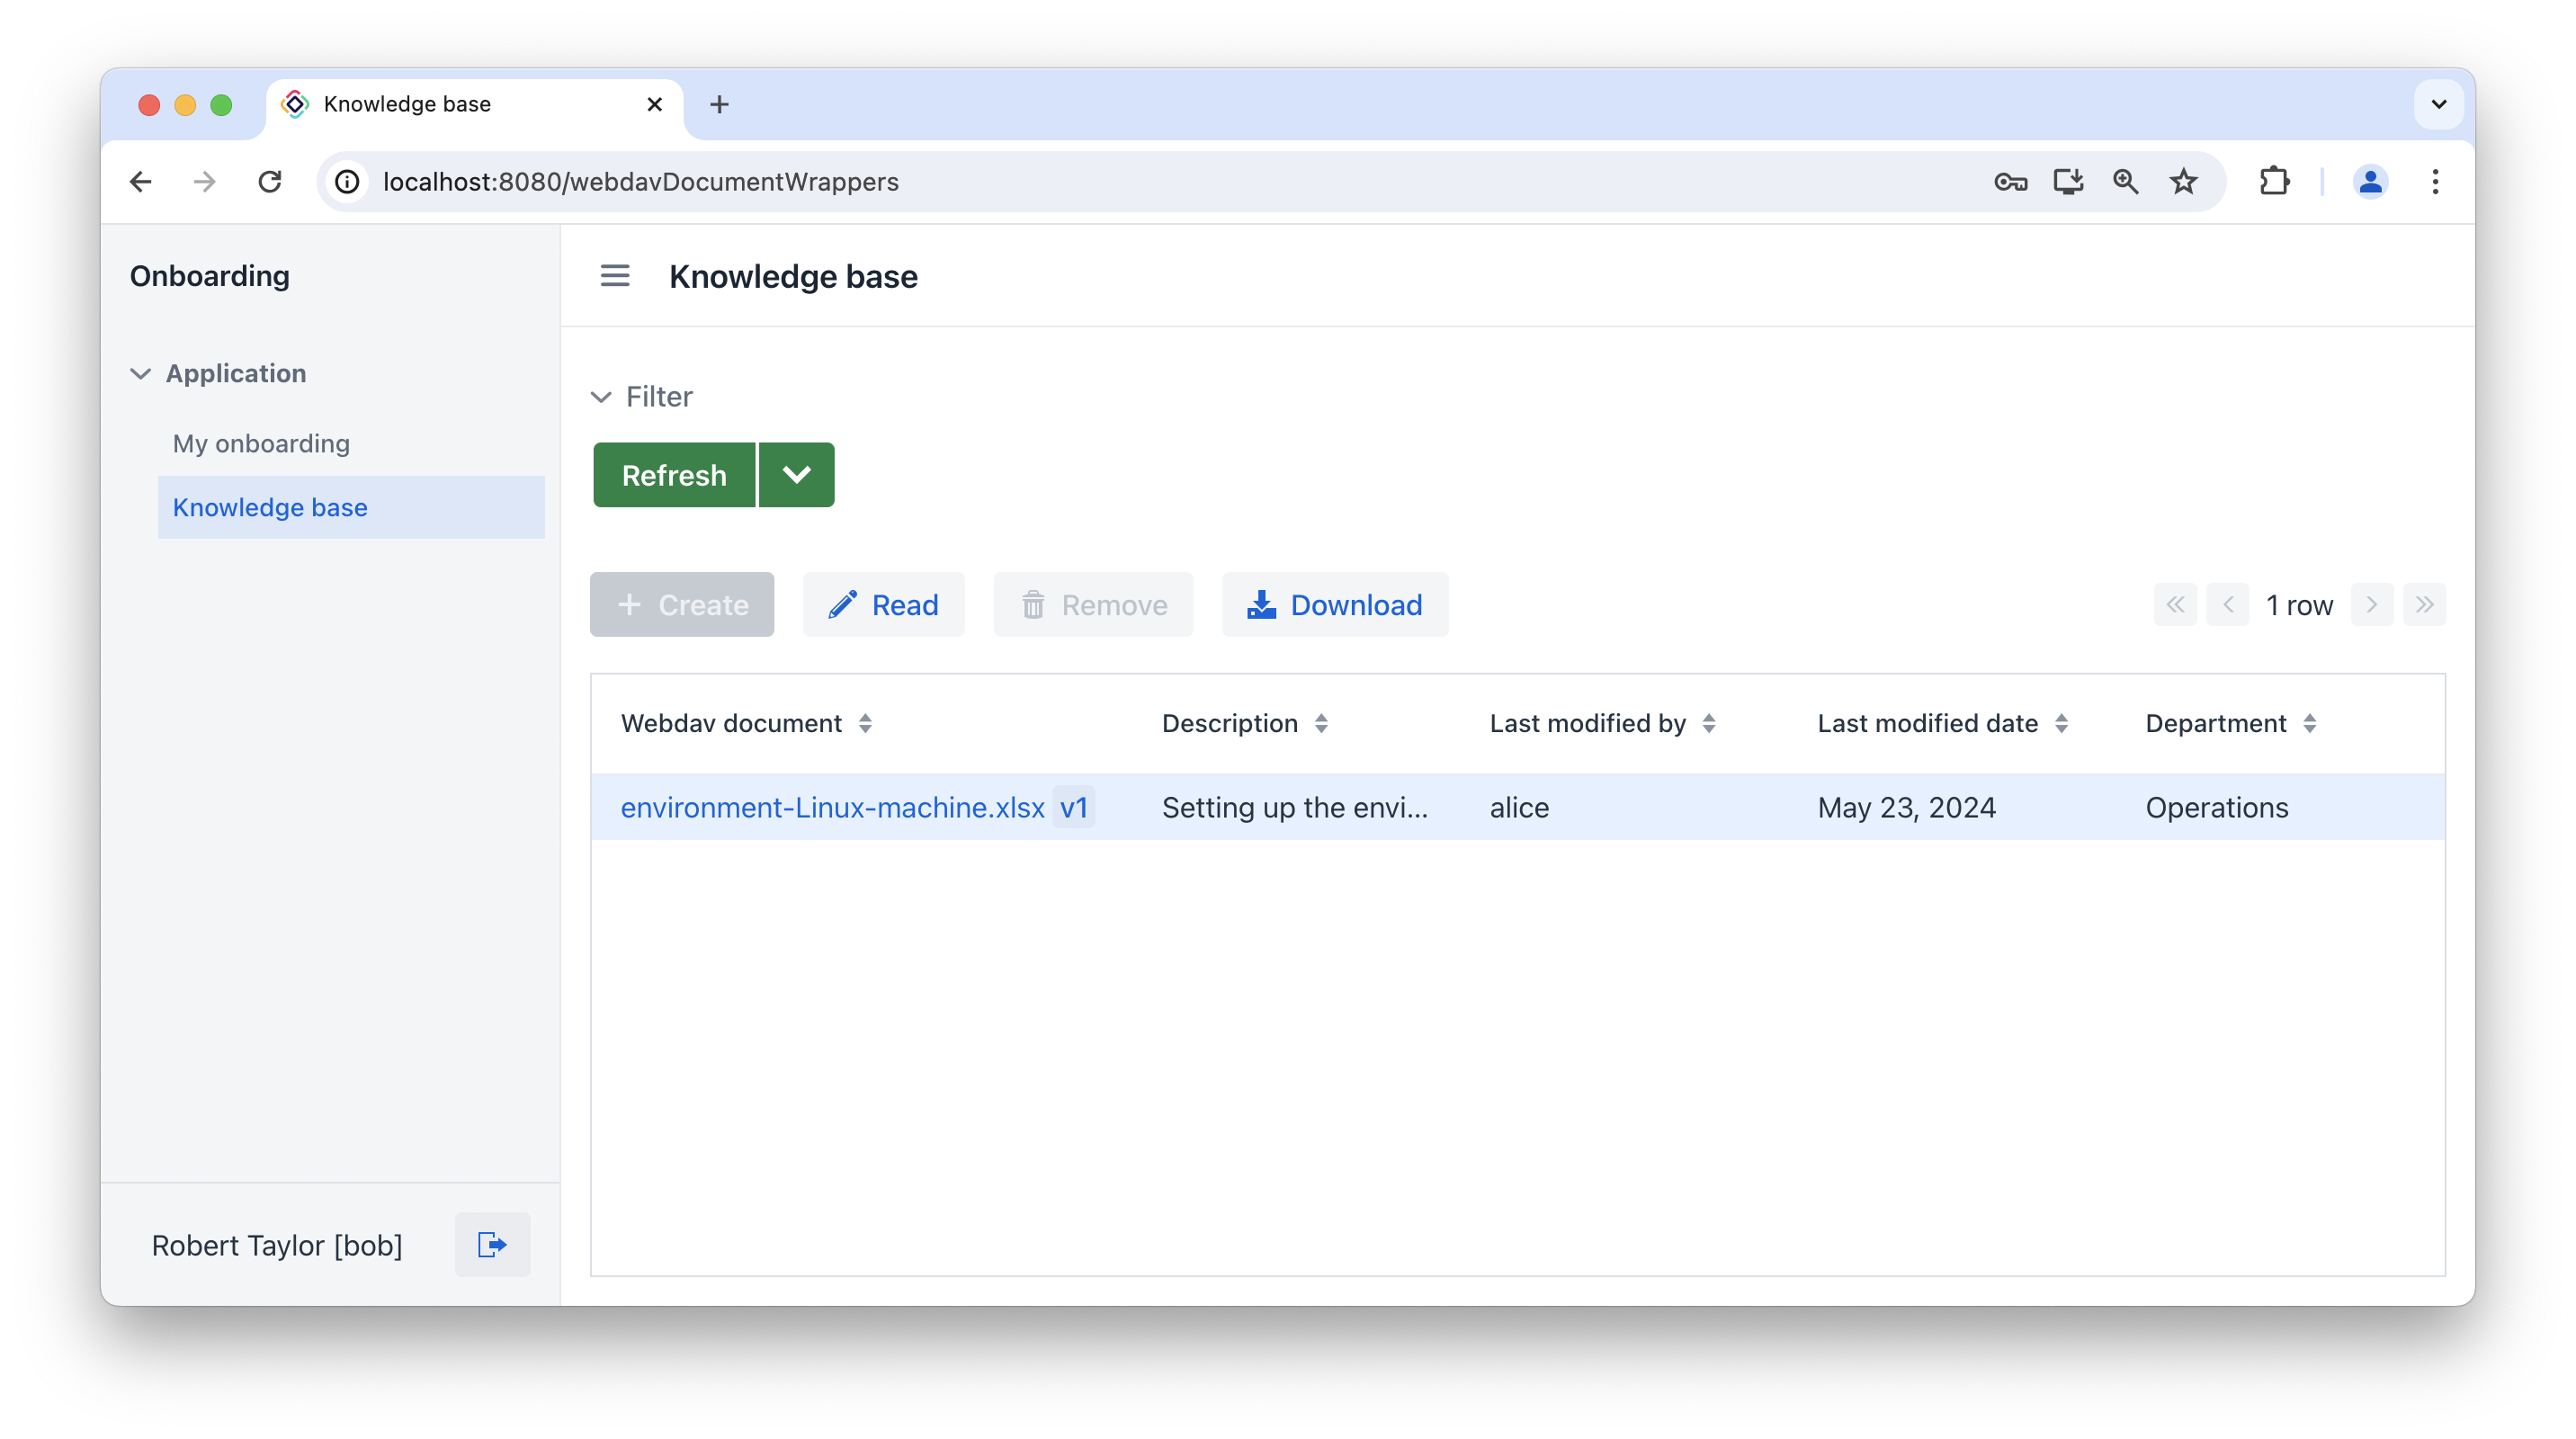
As you can see, the Create and Remove buttons are unavailable for this user.
Summary
In this section, you have modified HR Managers and Employees roles to restrict access to the application for different groups of users.
You have learned that:
-
A resource role grants users the ability to access views and interact with specific entities.
-
A row-level role, in contrast, is used to restrict a user’s ability to read specific rows of data.
-
Roles are assigned to users at runtime using the Role assignment view available from the
User.detailview. -
The
WebDAV: minimal accessrole is required for all users who require WebDAV functionality.
