Managing Dynamic Attributes
You can manage dynamic attributes on the Administration > Dynamic attributes view. This view features a category list on the left and displays attributes associated with the chosen category on the right.
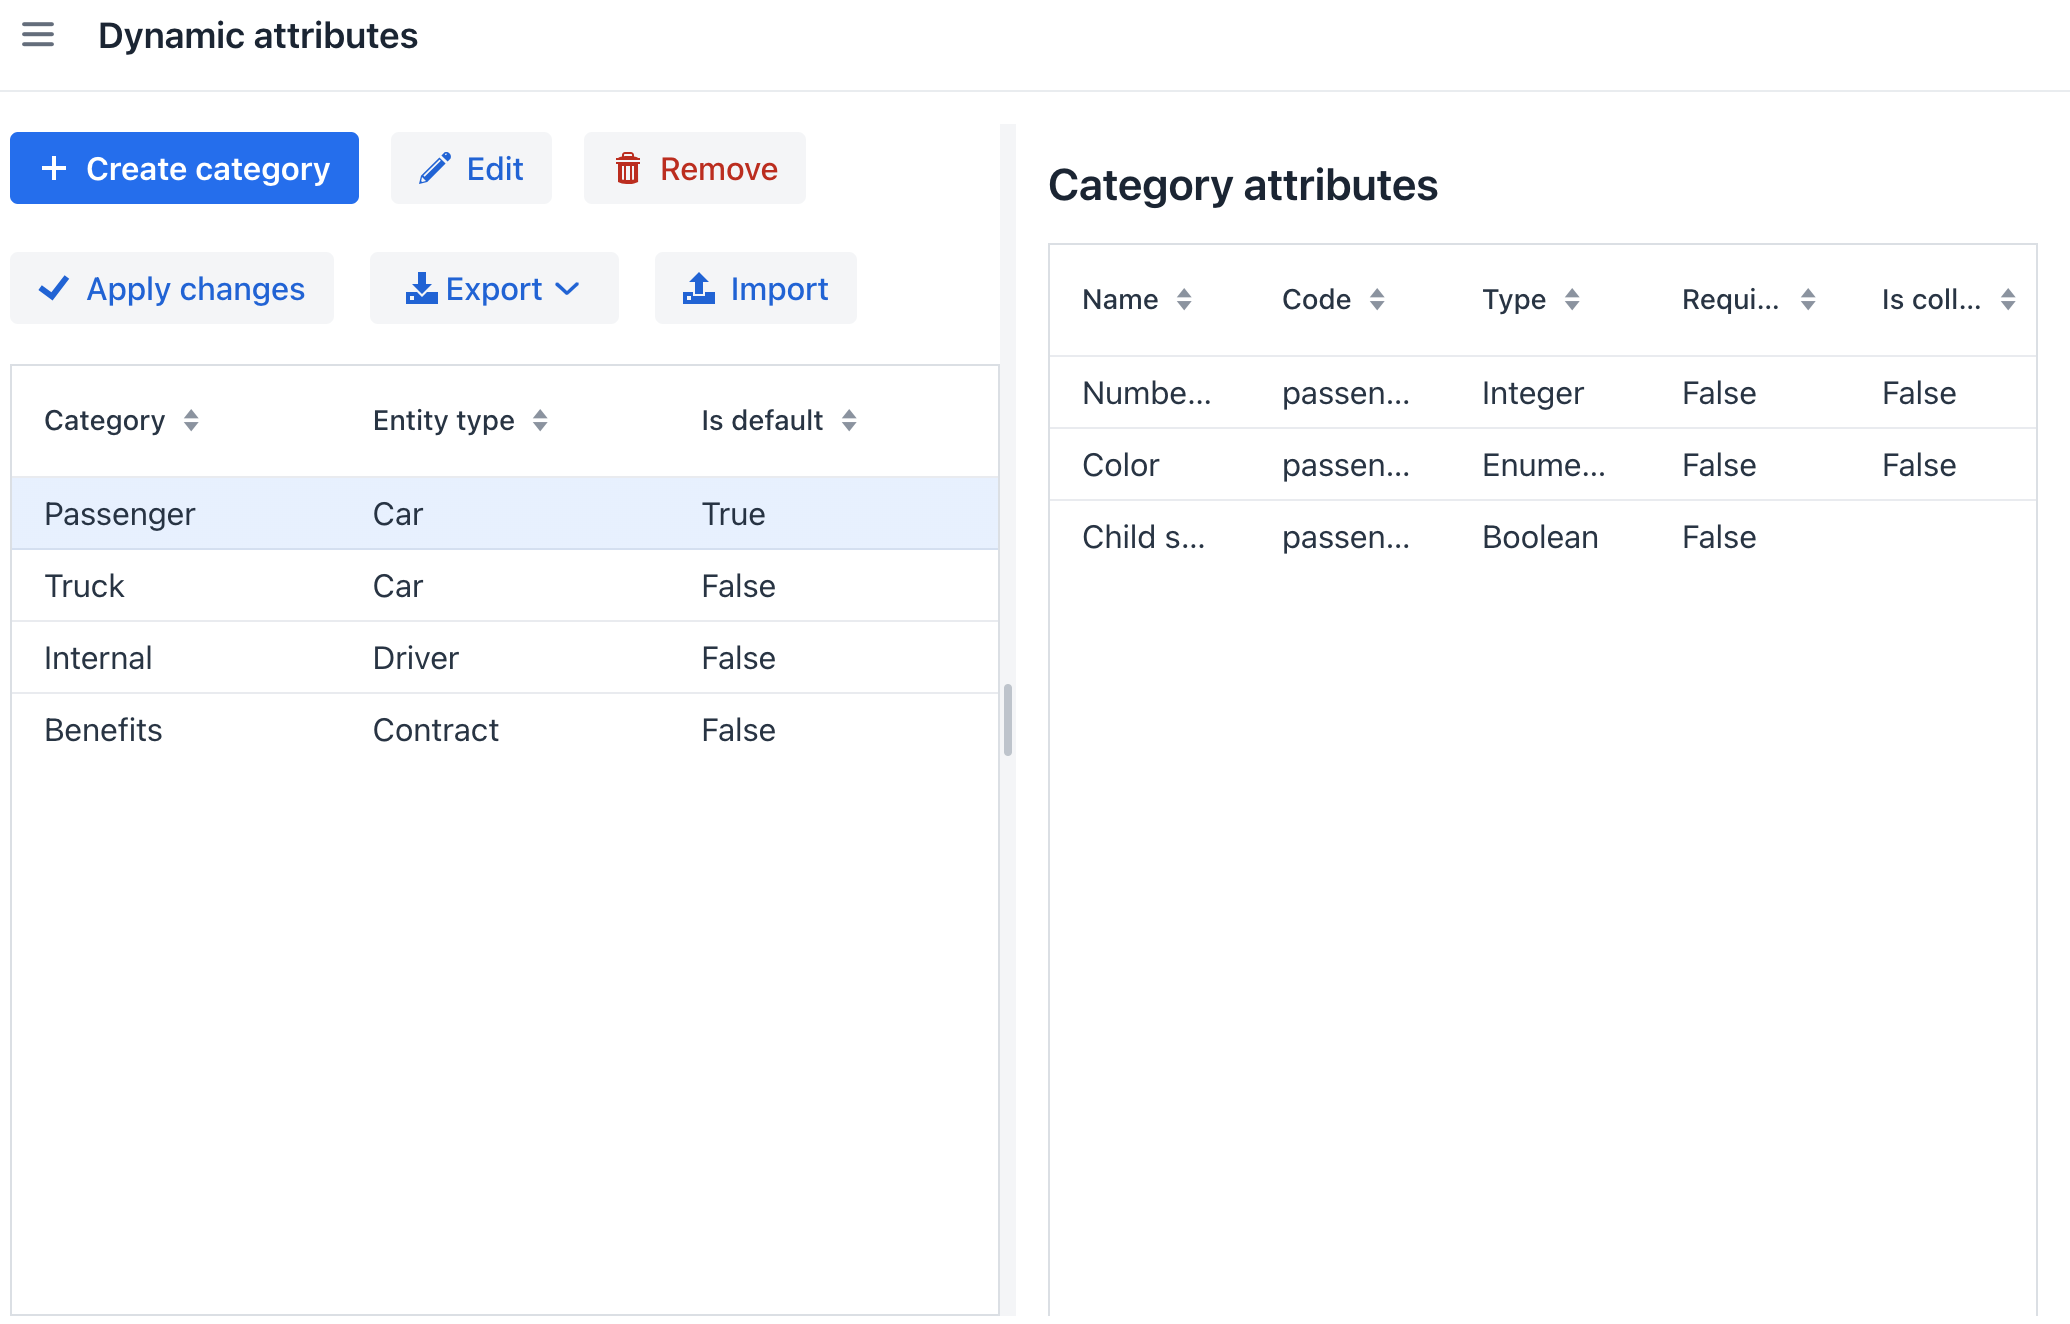
Upon modifying the dynamic attributes setup, remember to click the Apply changes button.
Additionally, the Dynamic attributes view provides functionalities for exporting selected categories as ZIP or JSON files and importing them into the system.
Creating Category
Prior to including a dynamic attribute for an entity, establish a category for it. Specify a name and choose the entity that the category is linked to.
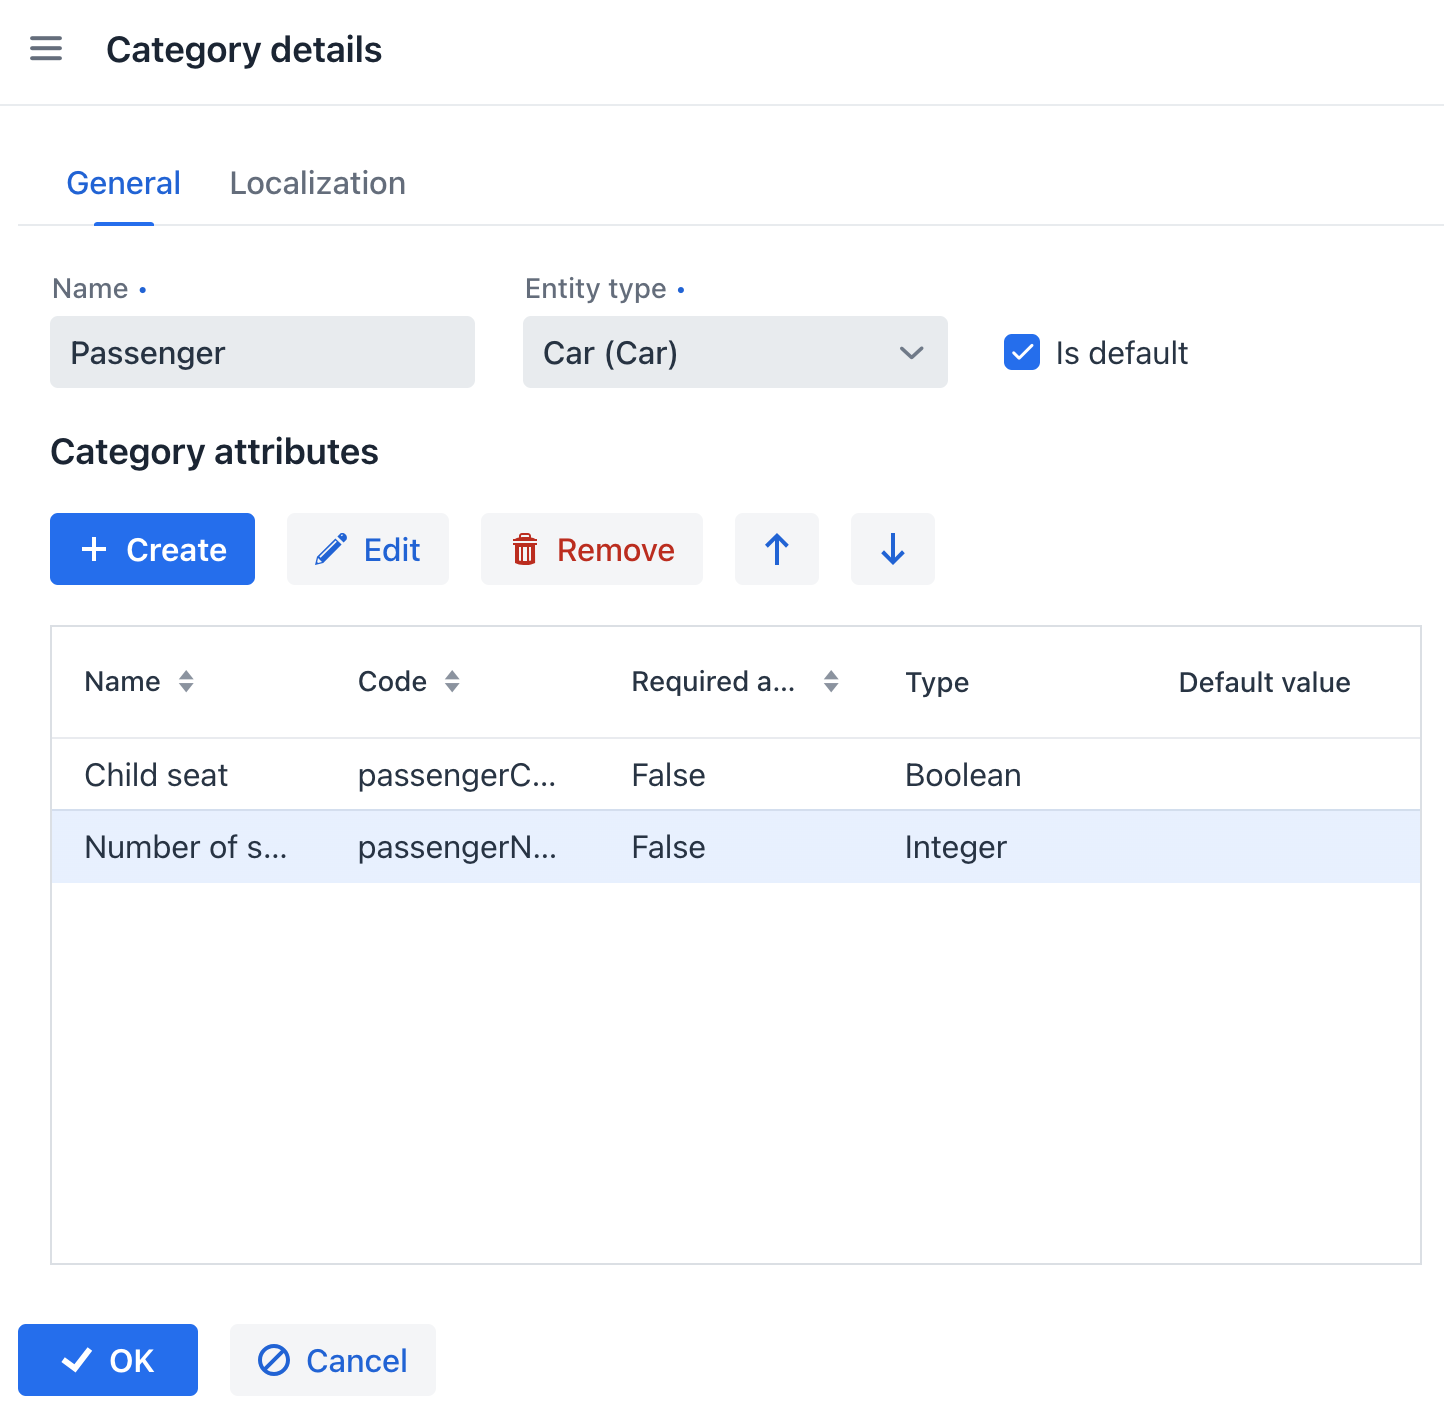
The Is default checkbox signifies that this category will be automatically chosen for a new instance if the entity implements the Categorized interface.
If the entity does not implement Categorized, the checkbox value is irrelevant, and you have the flexibility to create either a single category for the entity or multiple categories. In both cases, the attributes will be showcased based on the visibility settings.
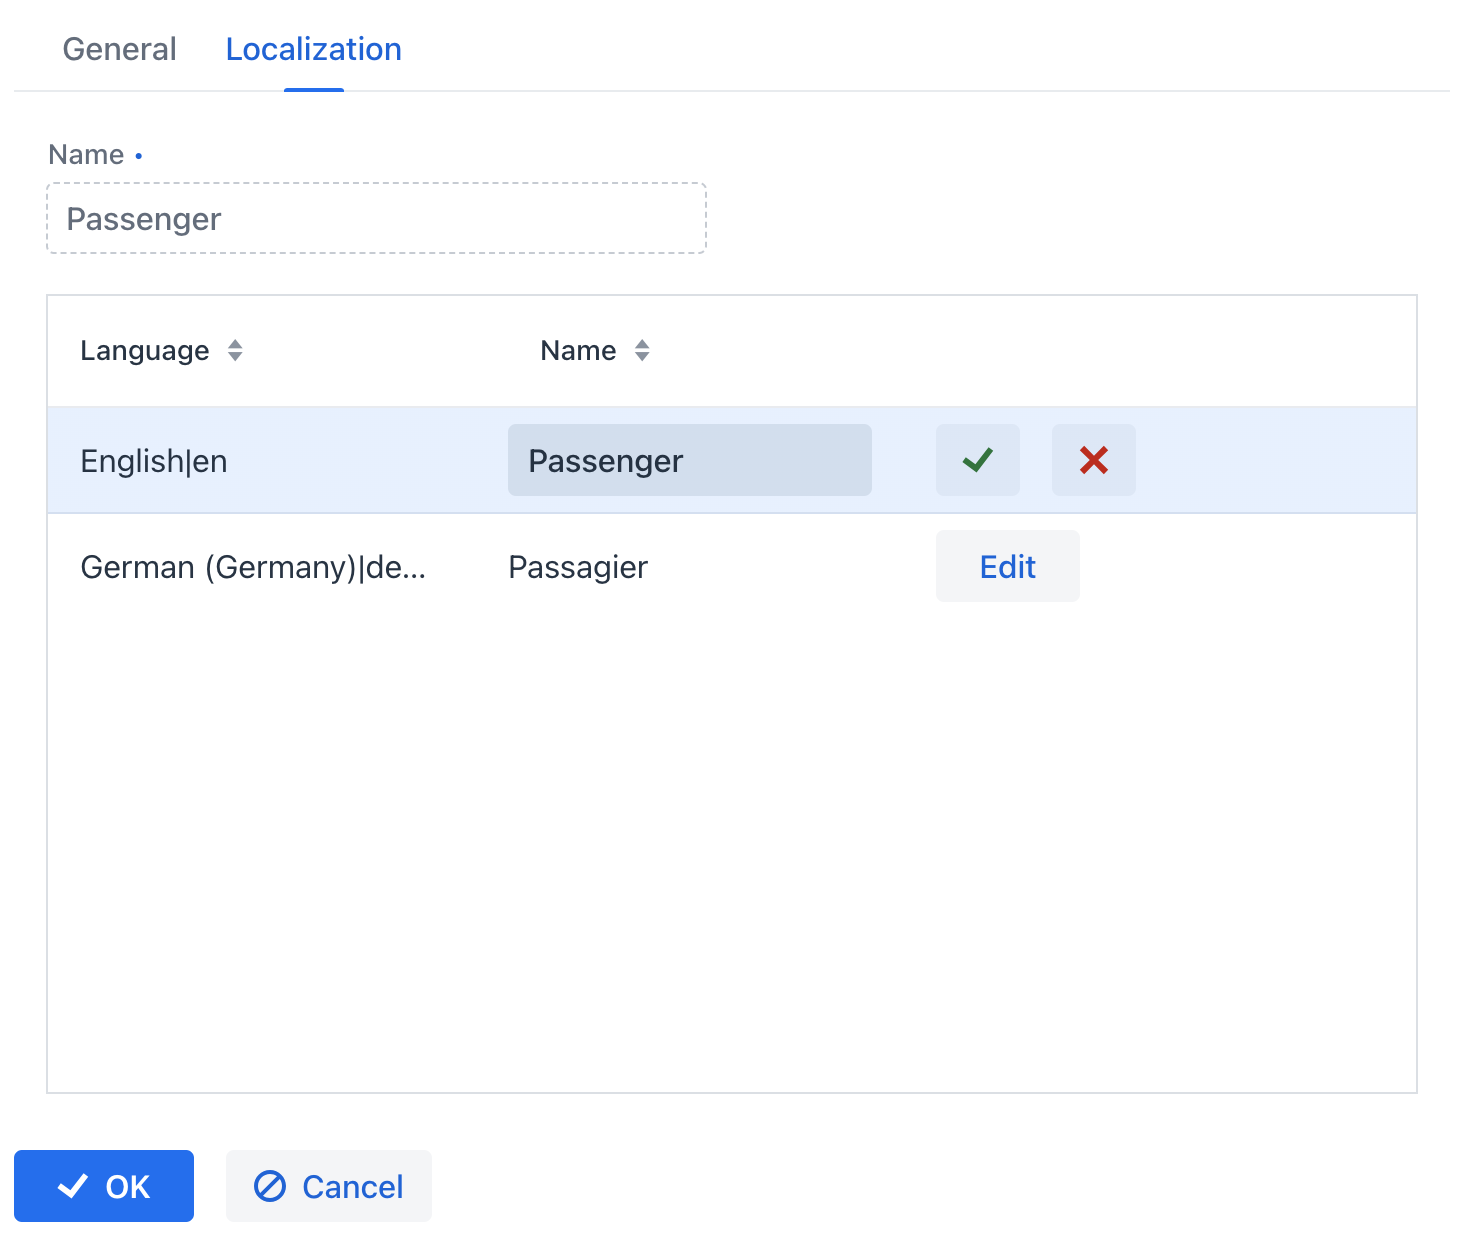
The Localization tab is displayed within the category editor screen when the application is designed to accommodate multiple languages. This tab allows users to define the category name in different languages for each available locale.
Creating Attribute
General Settings
On the General tab of the Category attribute details dialog, you can specify a name, system code, description, value type, default attribute value, and validation script.
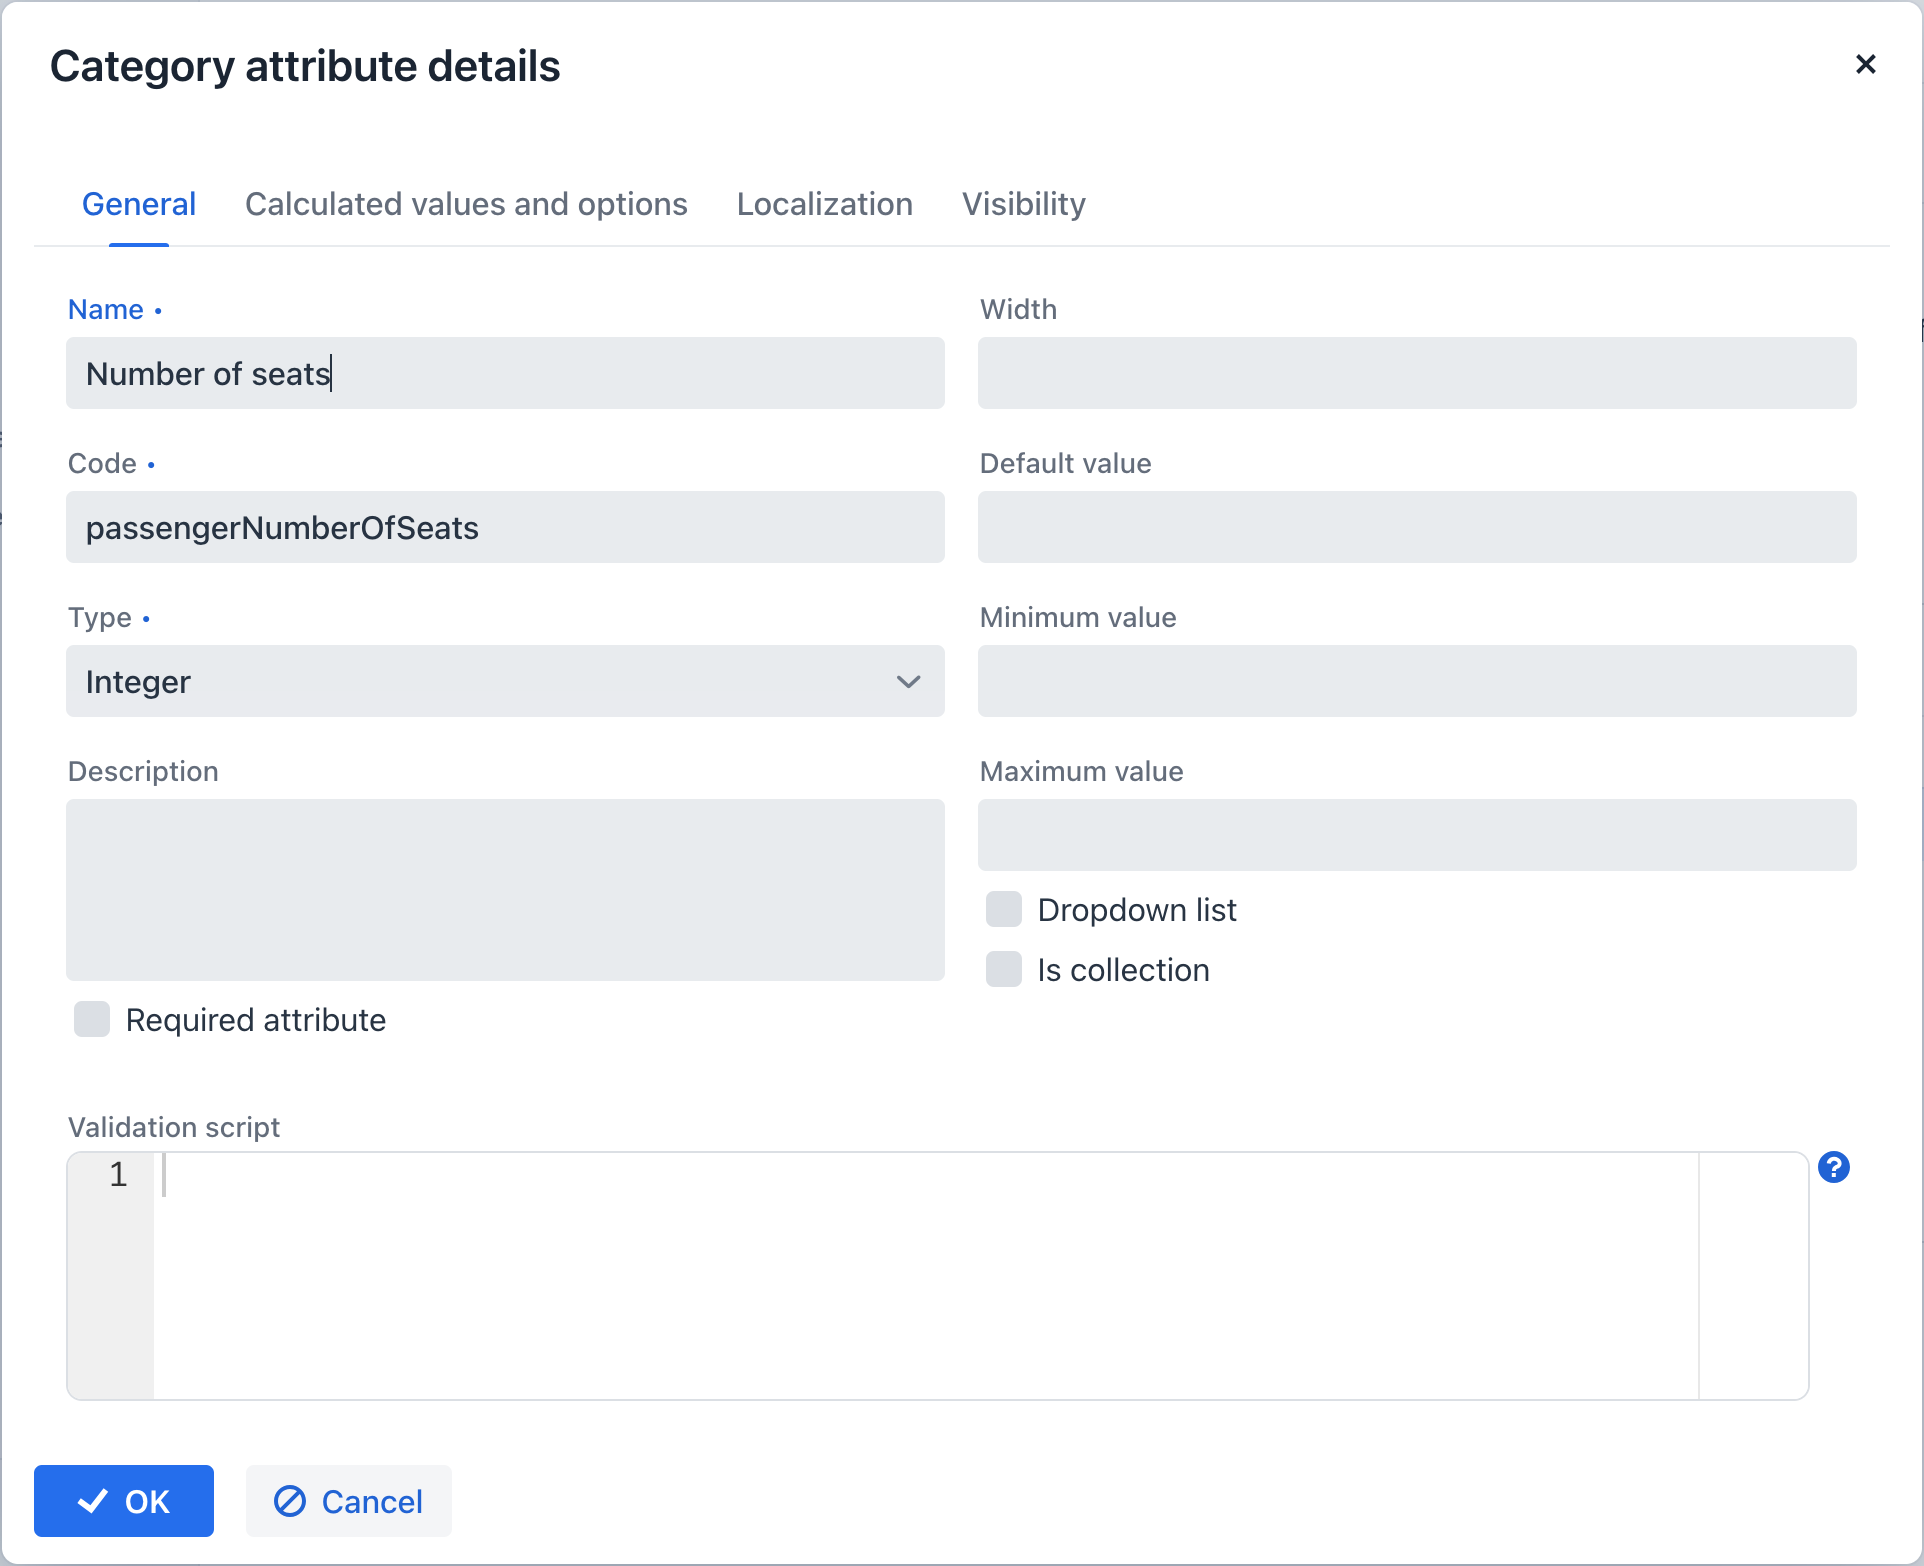
For all value types excluding Boolean, you can configure the width of the formLayout element in pixels or as a percentage. If the Width field is left blank, it is considered to be 100% by default.
The Is collection checkbox, available for all value types except Boolean, permits the creation of multi-valued dynamic attributes of the selected value type.
For the value types Double, Fixed-point number, and Integer, the following fields are provided:
-
Minimum value - ensures that the entered attribute value is equal to or greater than the specified minimum value.
-
Maximum value - ensures that the entered attribute value is equal to or less than the specified maximum value.
When dealing with the Fixed-point number value type, you can define a format pattern in the Number format pattern field. Configure the pattern following the guidelines outlined in DecimalFormat.
For every value type, you have the option to input a Groovy script in the Validation script field for validating the entered value. In case the Groovy validation encounters an issue, the script should return an error message. Conversely, if the validation is successful, the script should return nothing or null. The value being evaluated is accessible in the script through the value variable. Error messages are constructed using a Groovy string format, and you can utilize the $value key within the message to produce the outcome.
Here is an example:
if (!value.startsWith("correctValue")) return "the value '\${value}' is incorrect"For the Enumeration value type, you have the capability to define a collection of named values in the Enumeration field using the list editor. Each of these enumeration values can be localized for the languages supported within the application.
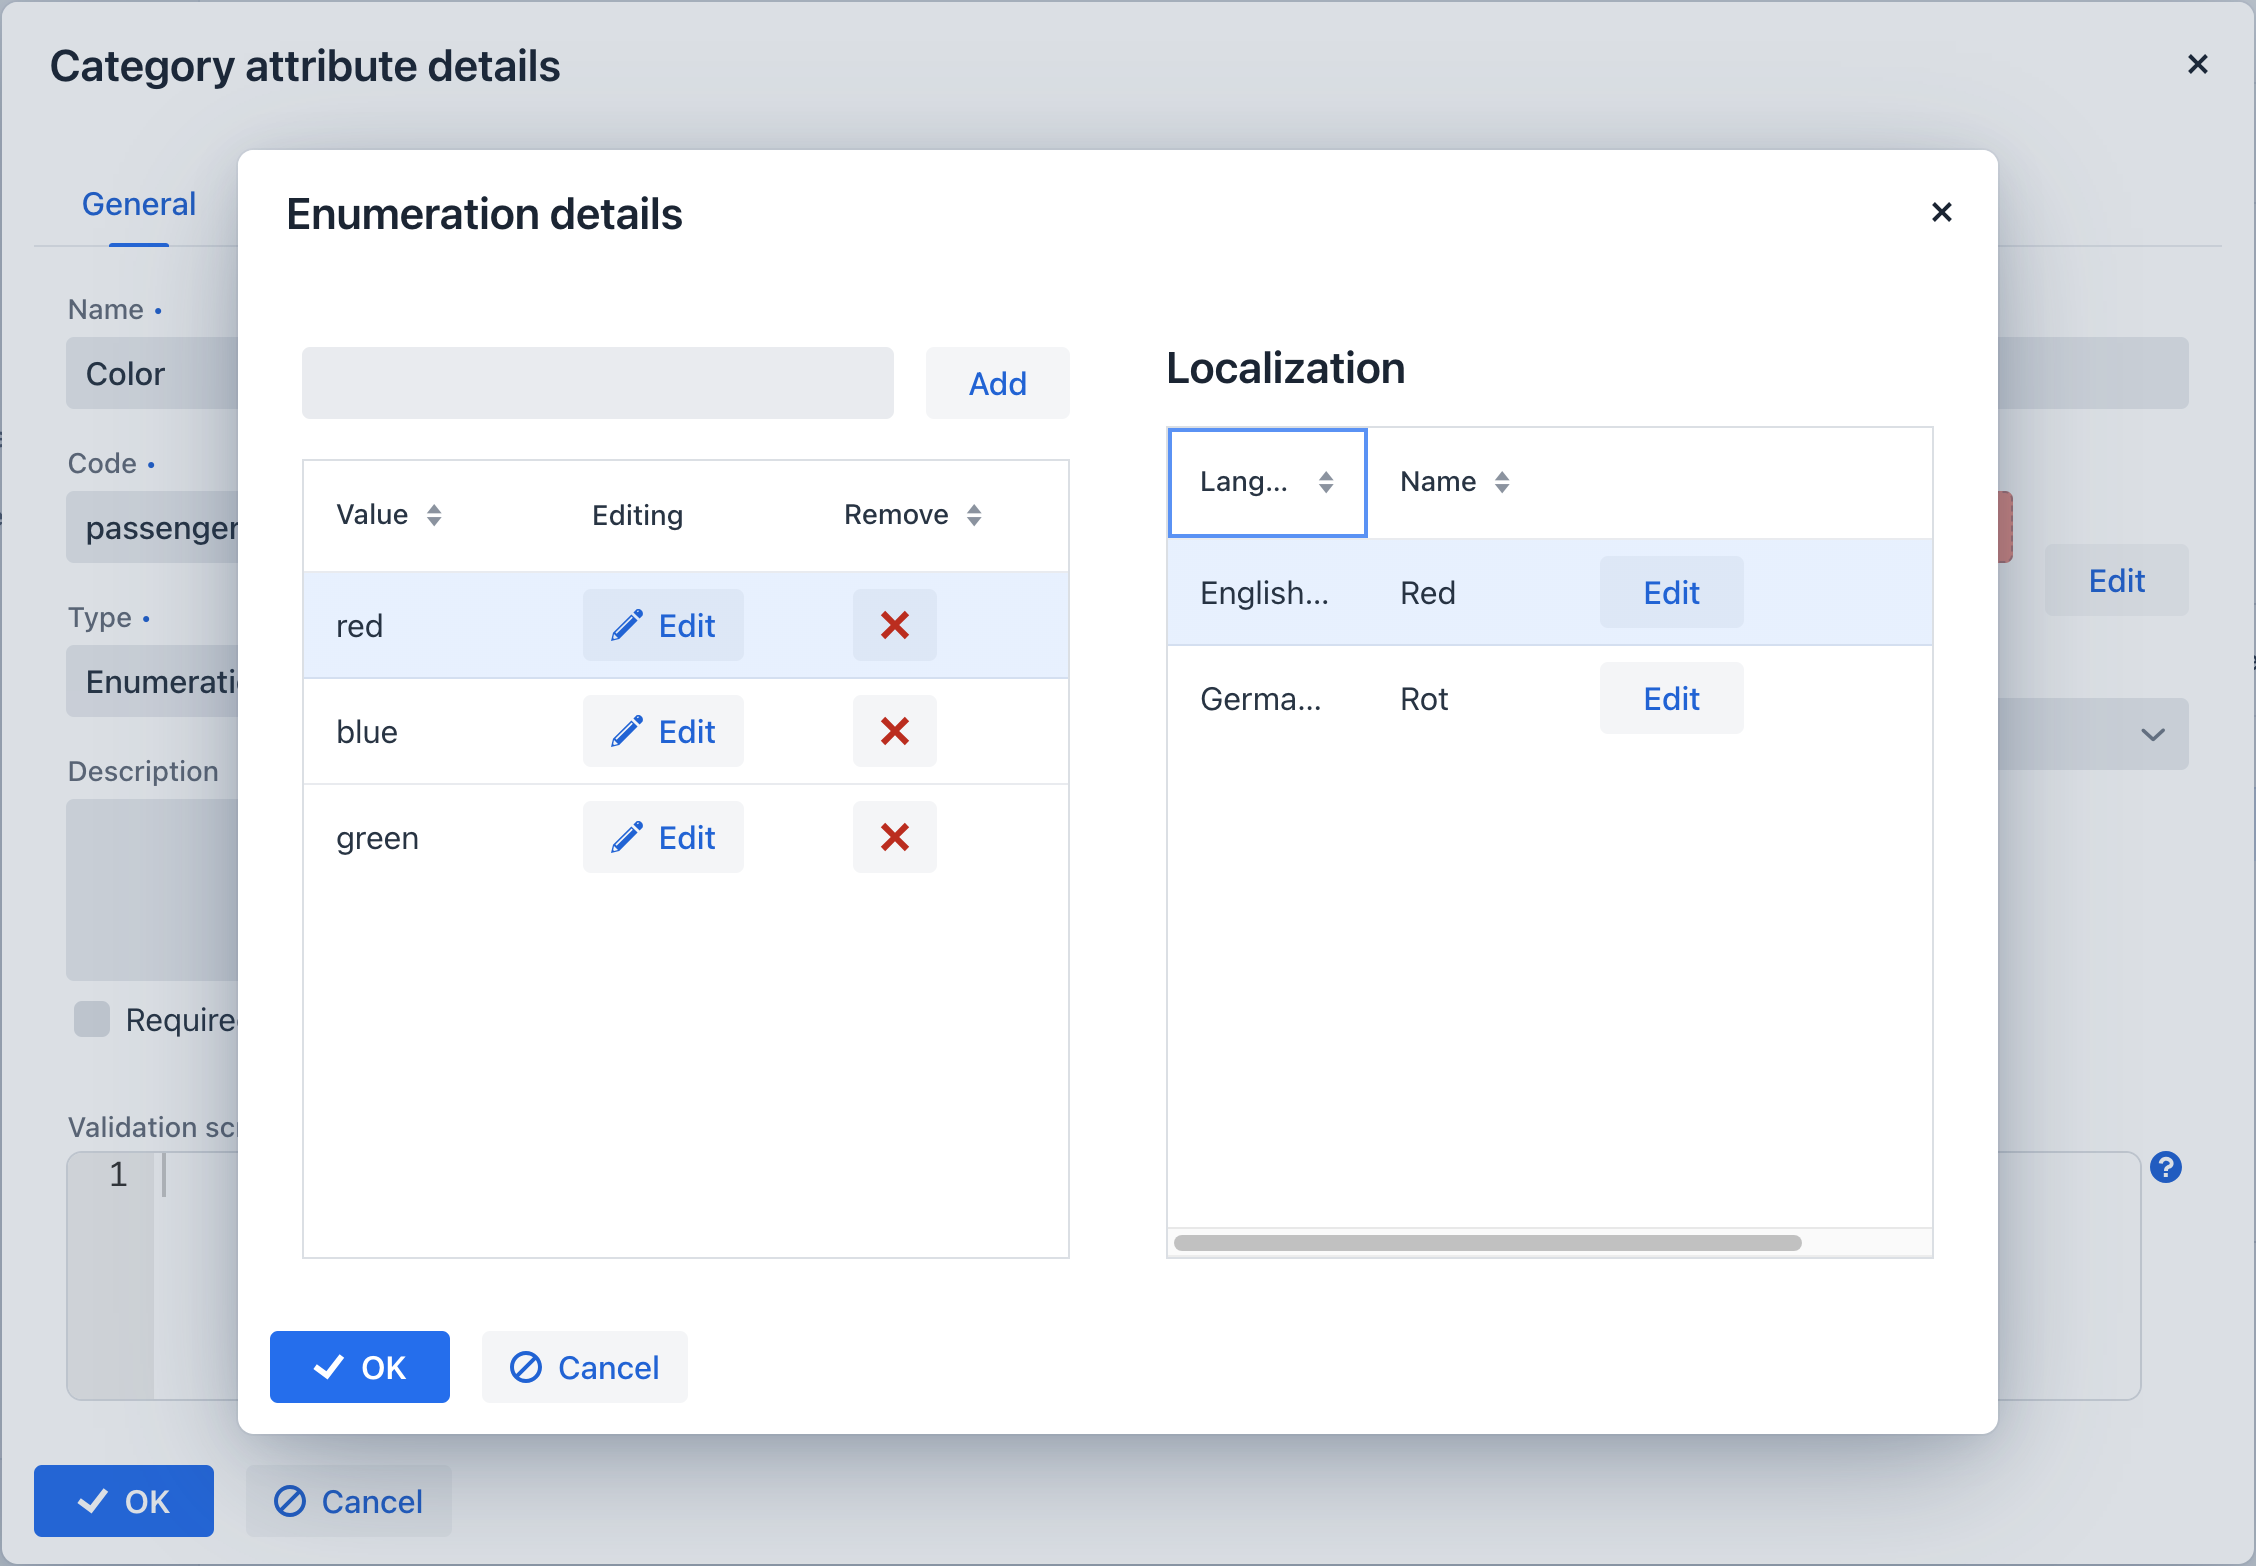
For the String, Double, Entity, Fixed-point number, and Integer data types, there is a Dropdown list checkbox provided. Enabling this checkbox allows users to select the attribute value from a dropdown list. The set of permissible values can be customized on the Calculated values and options tab.
In the case of the Entity data type, the configuration involves setting up Where and Join clauses.
Calculated Values and Options
Within the Calculated values and options tab, you can specify which attributes the current attribute depends on. Whenever one of these attributes is modified, either the script for computing the attribute value or the script for determining the list of valid values will be re-evaluated.
The Groovy script should provide a new parameter value. The script receives the following variables:
-
entity- the entity being currently edited. -
dynamicAttributes- a map where an attribute code acts as thekeyand thevaluerepresents the dynamic attribute’s value.
Here is an illustration of a recalculation script utilizing the EntityValues class:
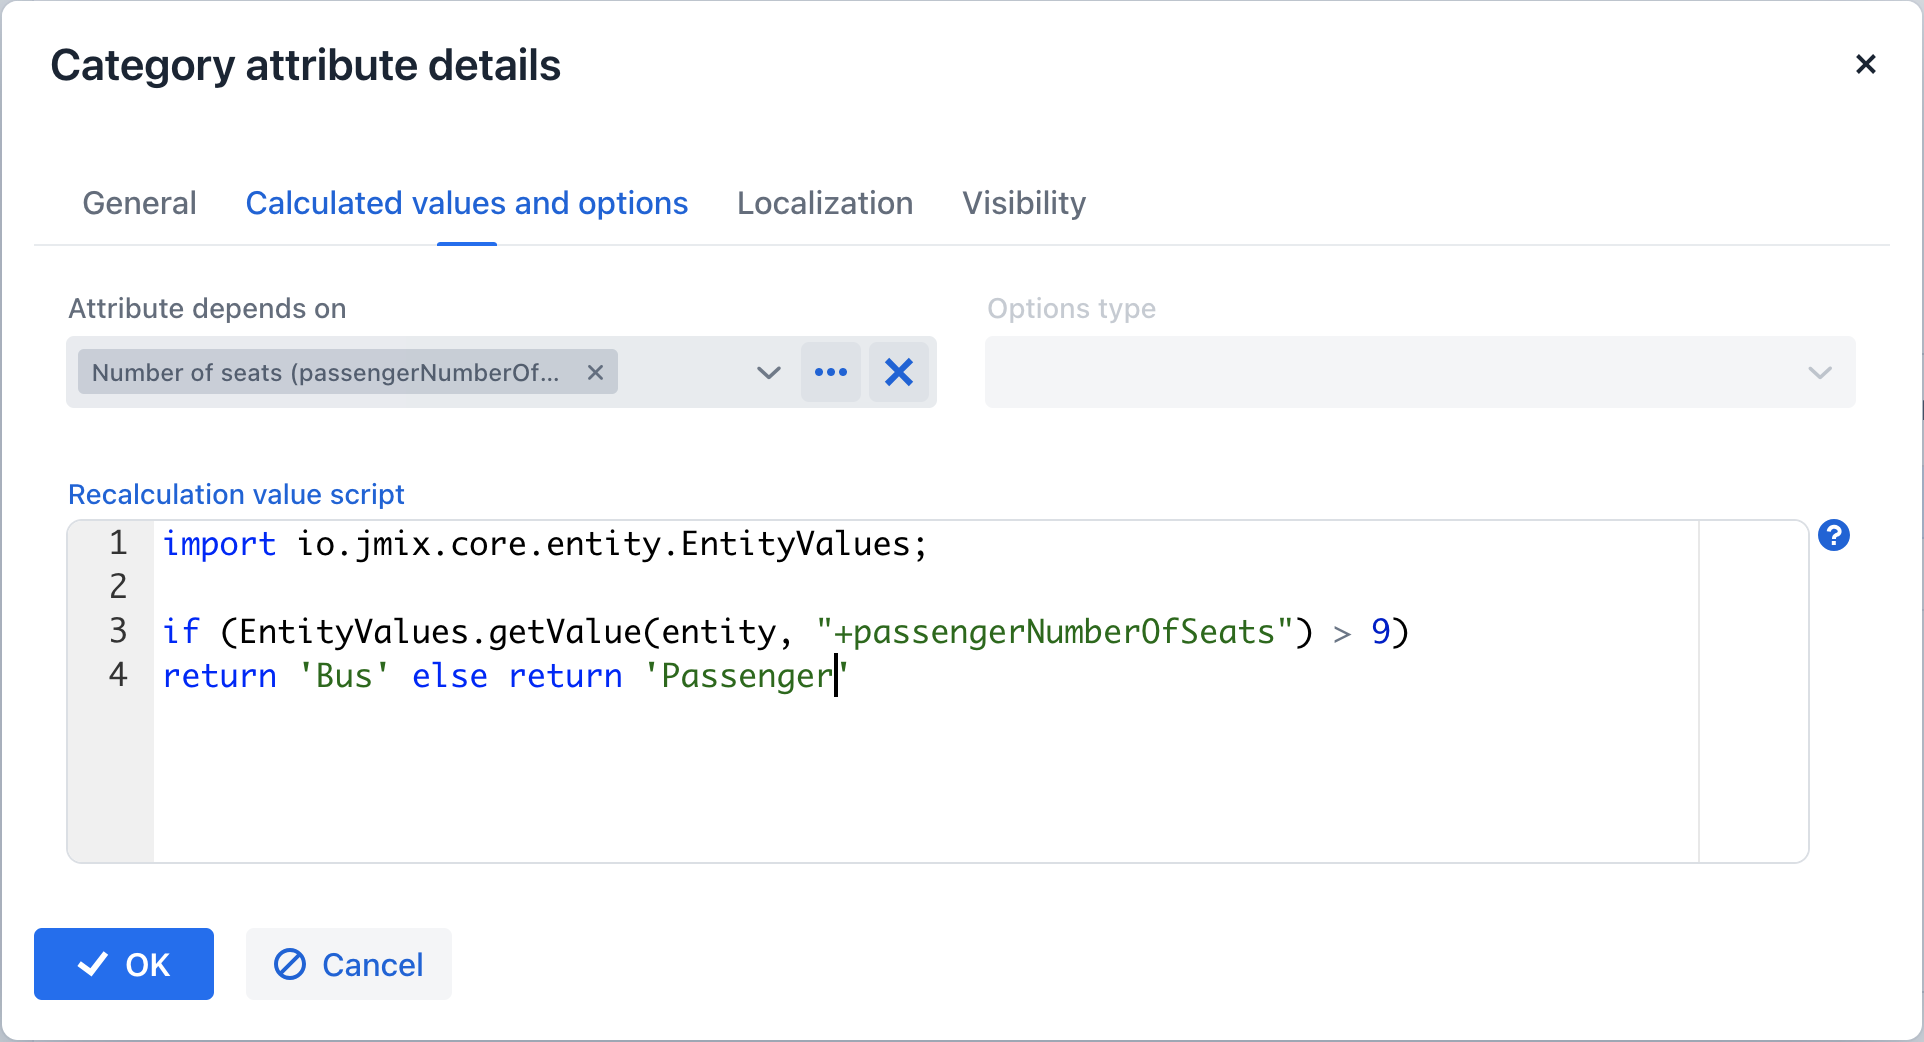
An example of a recalculation script using the dynamicAttributes map:
if (dynamicAttributes['passengerNumberOfSeats'] > 9)
return 'Bus' else return 'Passenger'
Whenever a value within the list of dependent attributes is altered, the script will be triggered for execution.
If the script is specified, the attribute input field will become non-editable.
Recalculation functionality is compatible exclusively with the formLayout and DynamicAttributesPanel UI components.
When the Dropdown list checkbox is checked within the General tab, you can choose the options loader type from the Options type dropdown list.
The available option loader types include Groovy, SQL, and JPQL (exclusive to the Entity data type).
-
The Groovy options loader retrieves a list of values through a Groovy script. The script receives the entity variable, allowing access to the entity’s attributes, including dynamic attributes.
Here is an example script for a String-type attribute:

-
The SQL options loader fetches a set of values utilizing the SQL script. You can access the entity id using the
${entity}variable. To retrieve entity parameters, employ the${entity.<field>}syntax, wherefieldrepresents the entity parameter’s name. Dynamic attributes of the entity can be accessed using the\+prefix, for instance,${entity.+<field>}. Below is an example accessing the entity and the dynamic attributepassengerTypeOfCar:select LAST_NAME from DRIVER where CAR_TYPE = ${entity.+passengerTypeOfCar} -
The JPQL option loader is designed exclusively for a dynamic attribute of the
Entitytype. JPQL conditions are defined in the Join clause and Where clause fields. When working with JPQL parameters, you have access to{entity}and{entity.<field>}variables.The Join clause field’s value is incorporated into the
fromquery clause, typically commencing with a comma,join, orleft join.When interacting with dynamic attribute values in the script, you can utilize the entity variable as follows:
${entity.+<dynamicAttrCode>}, where<dynamicAttrCode>refers to the code of the relevant dynamic attribute.The
{E}placeholder should be used as an alias for the extracted entity. During query execution, it will be substituted with the actual alias designated in the query.For instance:
join {E}.seller sThe value of the Where clause field is integrated into the
wherequery clause using anandcondition. Thewherekeyword is unnecessary as it is automatically included.Dynamic attributes values in the script can also be accessed using the
entityvariable. For example: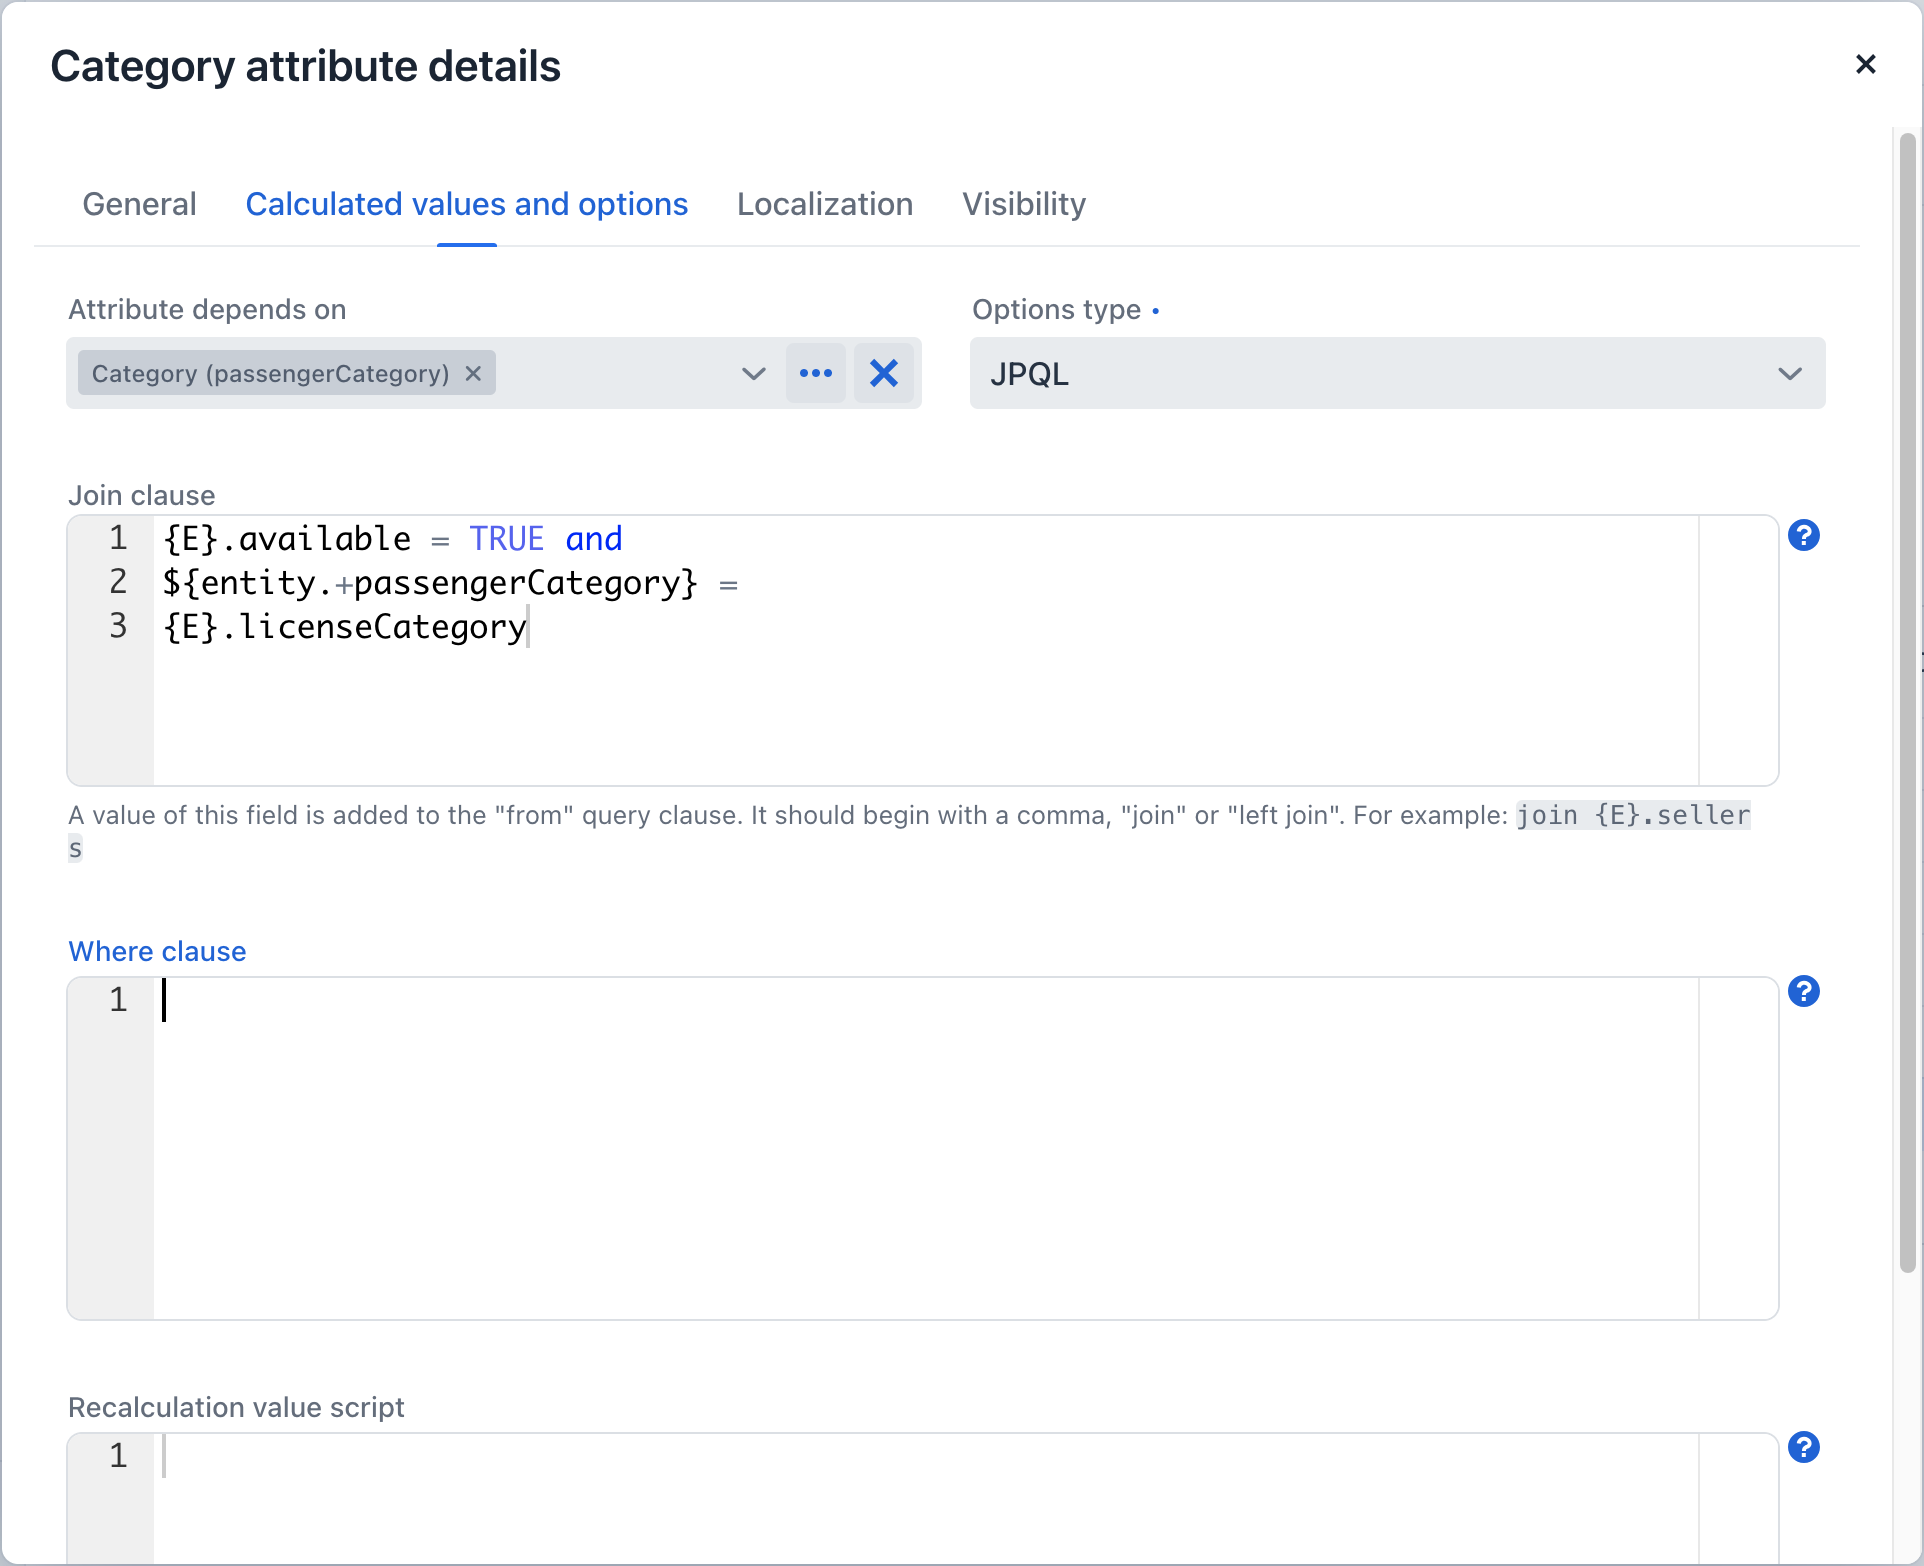
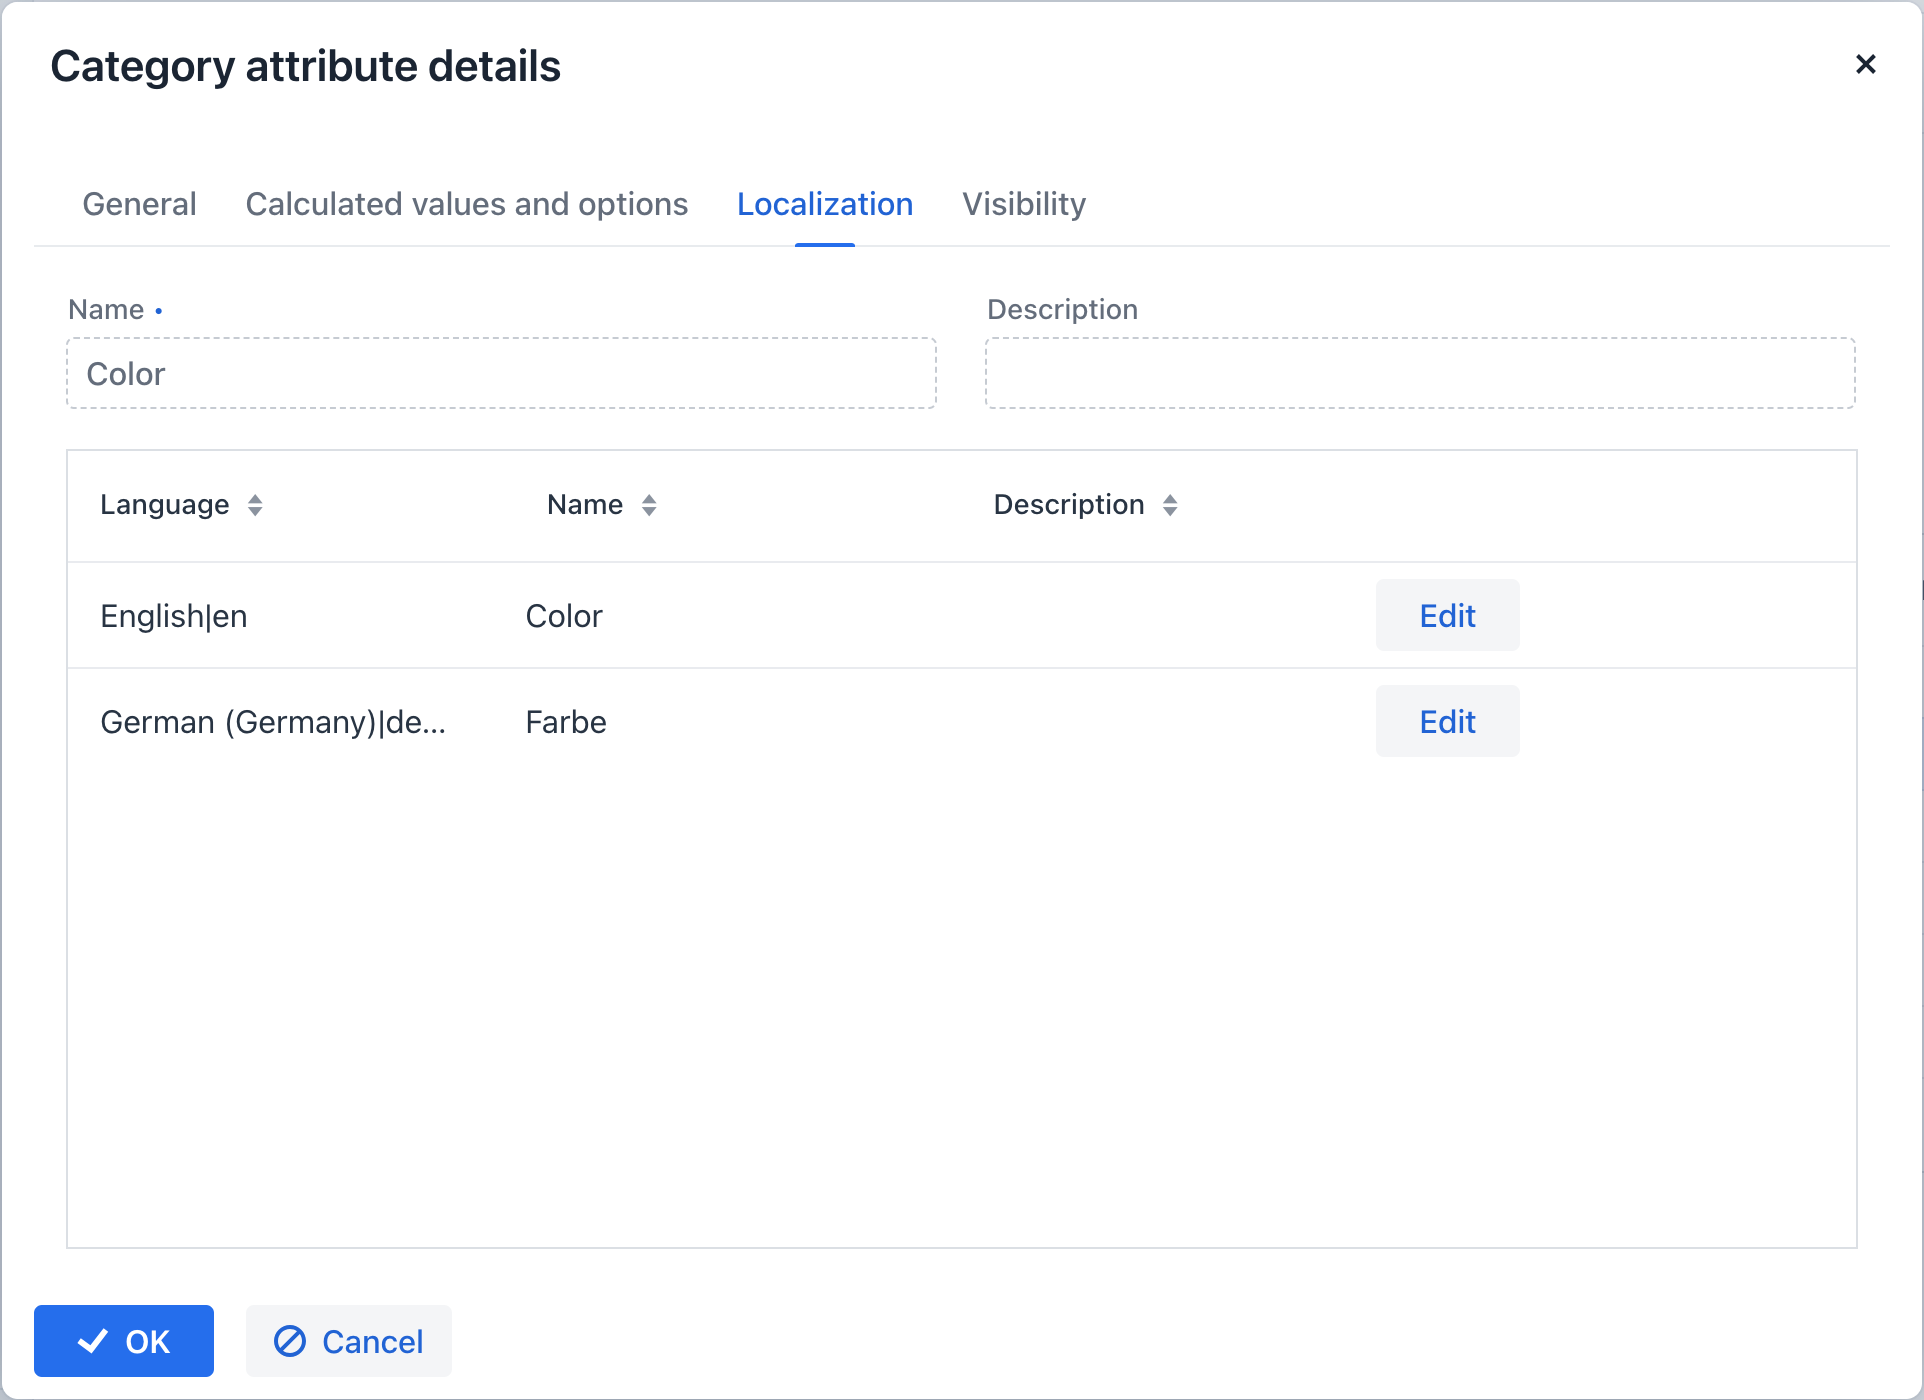
Localization
The Localization tab is displayed when the application provides support for multiple languages. Localization is available for all types of dynamic attributes.
Visibility
You can determine the views where a dynamic attribute will be visible by configuring its visibility settings. By default, the attribute is hidden.
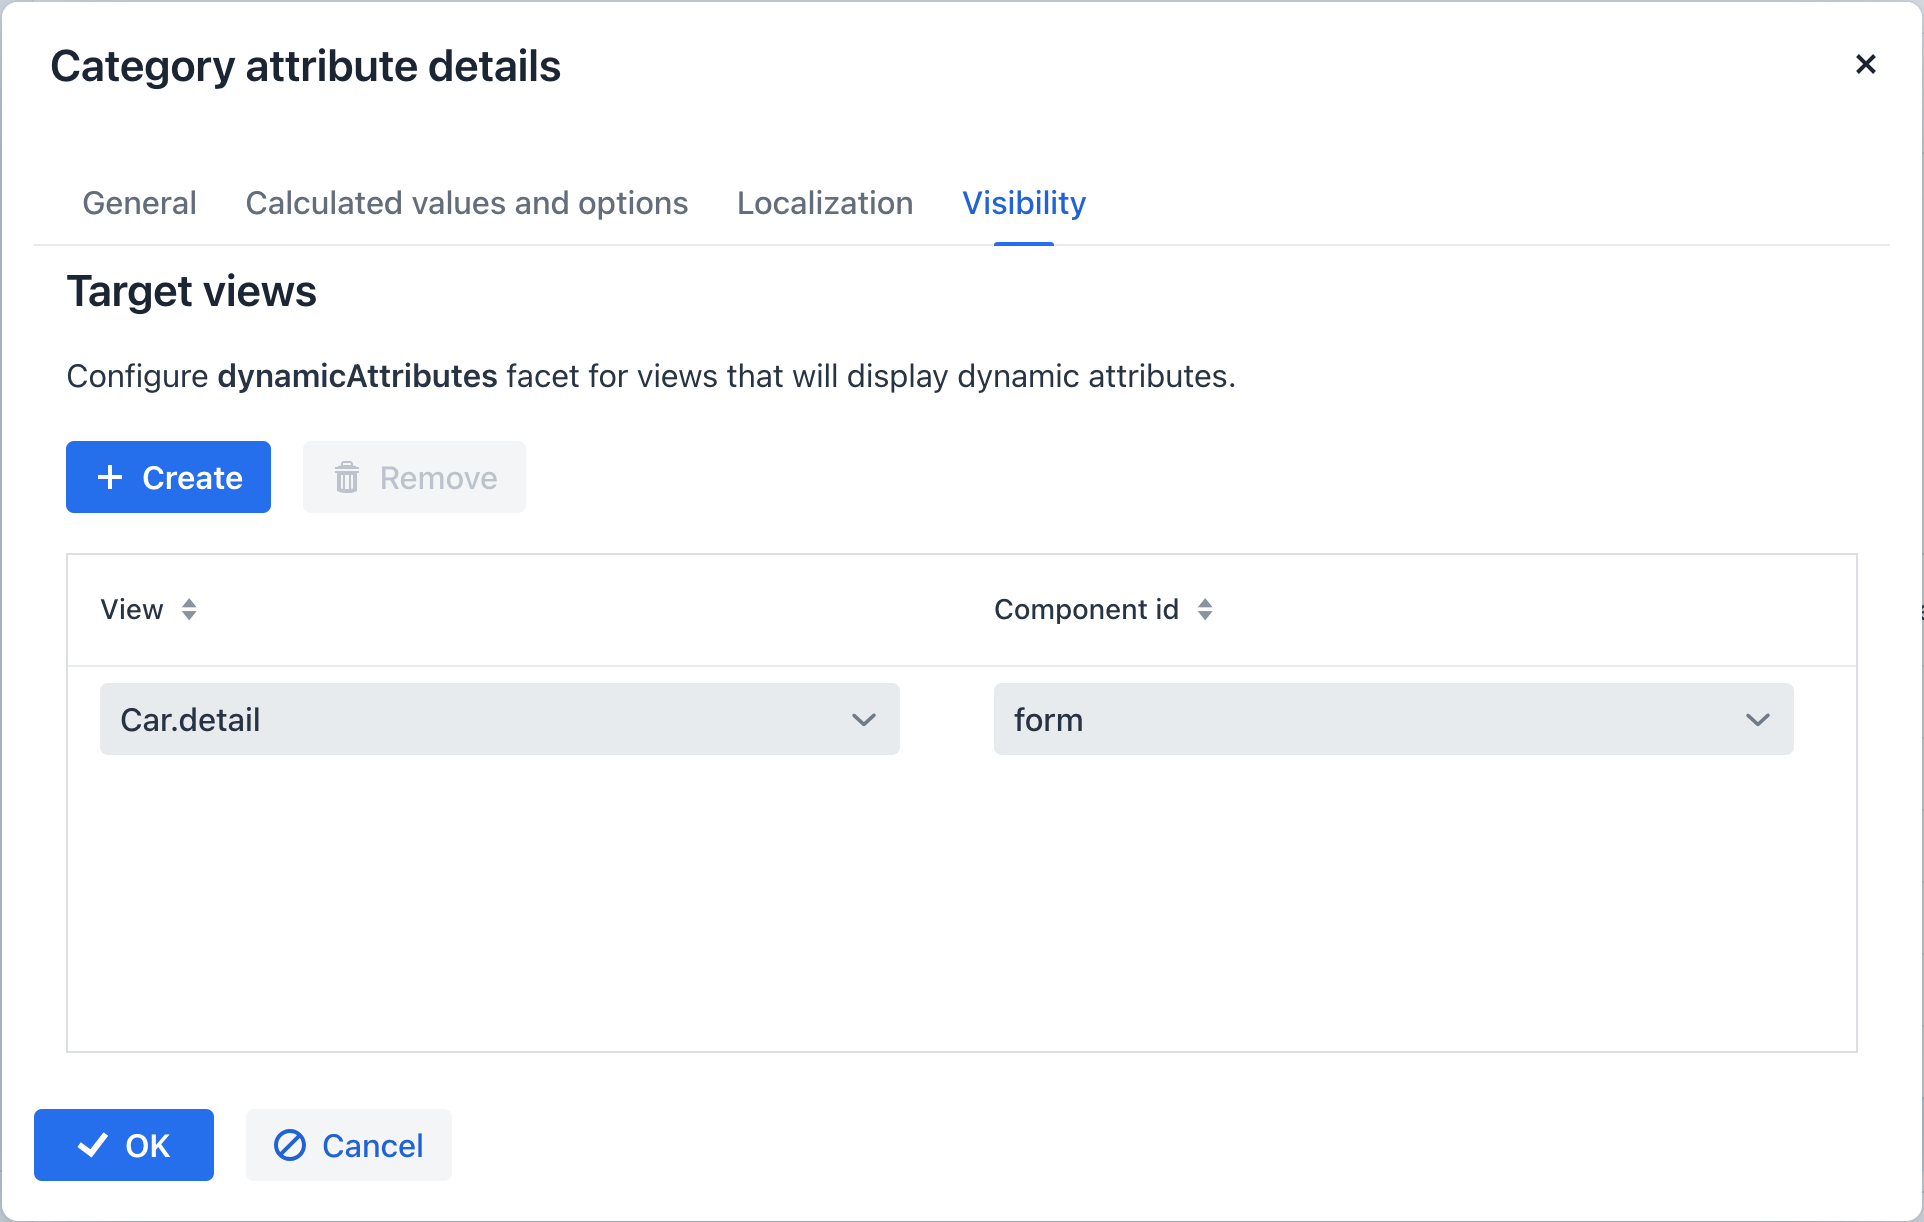
To select the view where the attribute should be displayed, the dynamicAttributes facet must be added to that view, allowing it to be chosen in the Visibility tab.
Beyond specifying the view, you can also designate the component within which the attribute should be visible. For example, views where multiple FormLayout components show the fields of the same entity.
When an attribute is set as visible on a view, it will automatically be visible in all forms and data grids that present entities of the corresponding type on that view.
If an entity incorporates the Categorized interface, the DynamicAttributesPanel can be utilized.
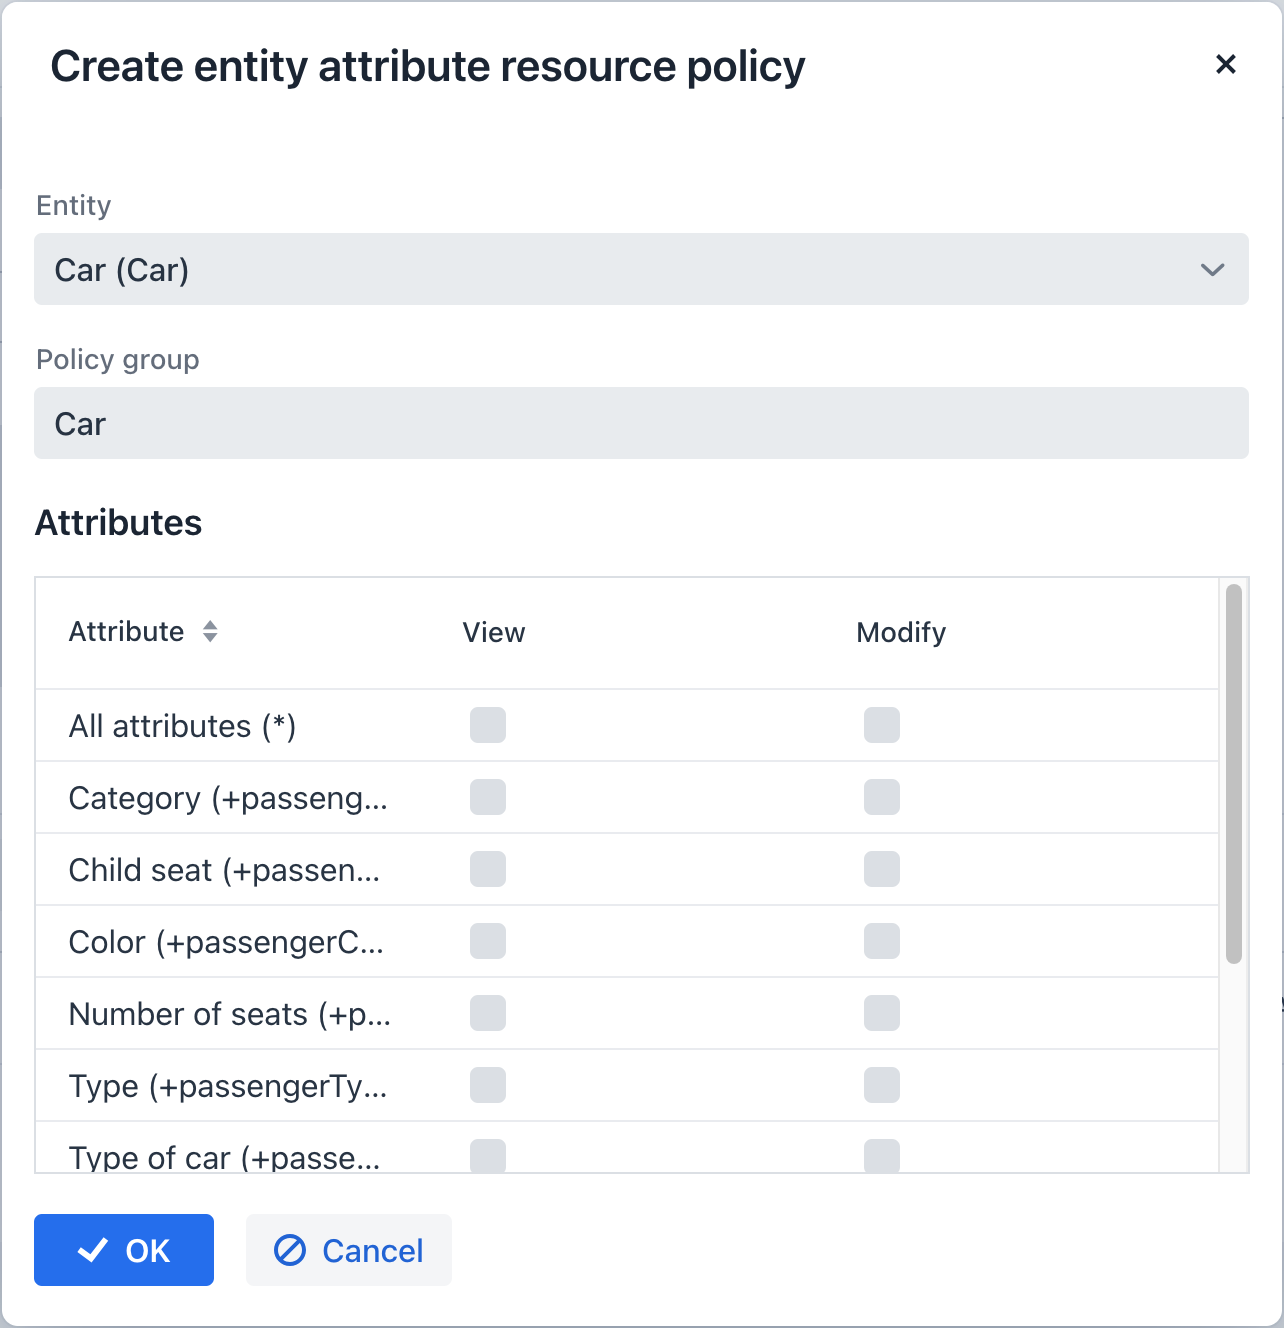
Access to dynamic attributes can be restricted by resource roles. Security settings for dynamic attributes are similar to those for regular attributes.
