Features
The add-on provides the WebdavDocument entity that should be used in your data model to reference files exposed via WebDAV.
Usage Example
Below is a basic example of working with the WebDAV add-on functionality.
-
Create a
Contractentity with thenumberattribute to store the contract number. -
Now let’s create an attribute to refer to an attached file. Open the entity designer and create a new
documentattribute as anASSOCIATIONwith theWebdavDocumententity: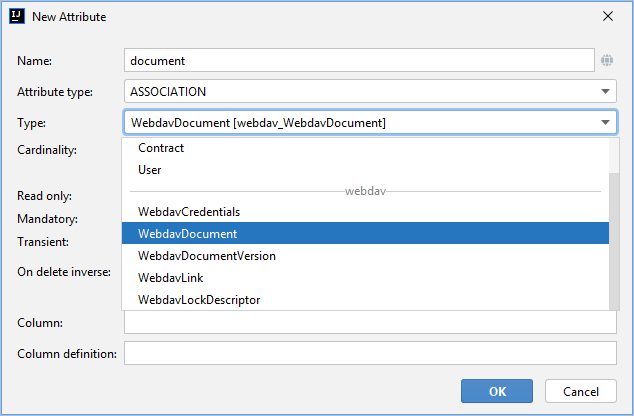
The source code of the
Contractentity will look like this:@JmixEntity @Table(name = "SAMPLE_CONTRACT", indexes = { @Index(name = "IDX_CONTRACT_DOCUMENT_ID", columnList = "DOCUMENT_ID") }) @Entity(name = "sample_Contract") public class Contract { @JmixGeneratedValue @Column(name = "ID", nullable = false) @Id private UUID id; @InstanceName @NotNull @Column(name = "NUMBER_", nullable = false) private String number; @JoinColumn(name = "DOCUMENT_ID", nullable = false) @ManyToOne(fetch = FetchType.LAZY, optional = false) private WebdavDocument document; -
In the editor screen, add
xmlns:webdav="http://jmix.io/schema/webdav/ui"namespace:<window xmlns="http://jmix.io/schema/ui/window" xmlns:webdav="http://jmix.io/schema/webdav/ui" caption="msg://contractEdit.caption" focusComponent="form">and the upload field provided by the WebDAV add-on:
<webdav:webdavDocumentUpload id="documentField"
                             property="document"/>
The figure below shows how the
Documentfield is displayed.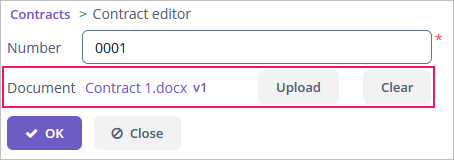
WebDAV Document Browser
The Document browser screen available at Administration → WebDAV document browser allows you to view and manage documents:
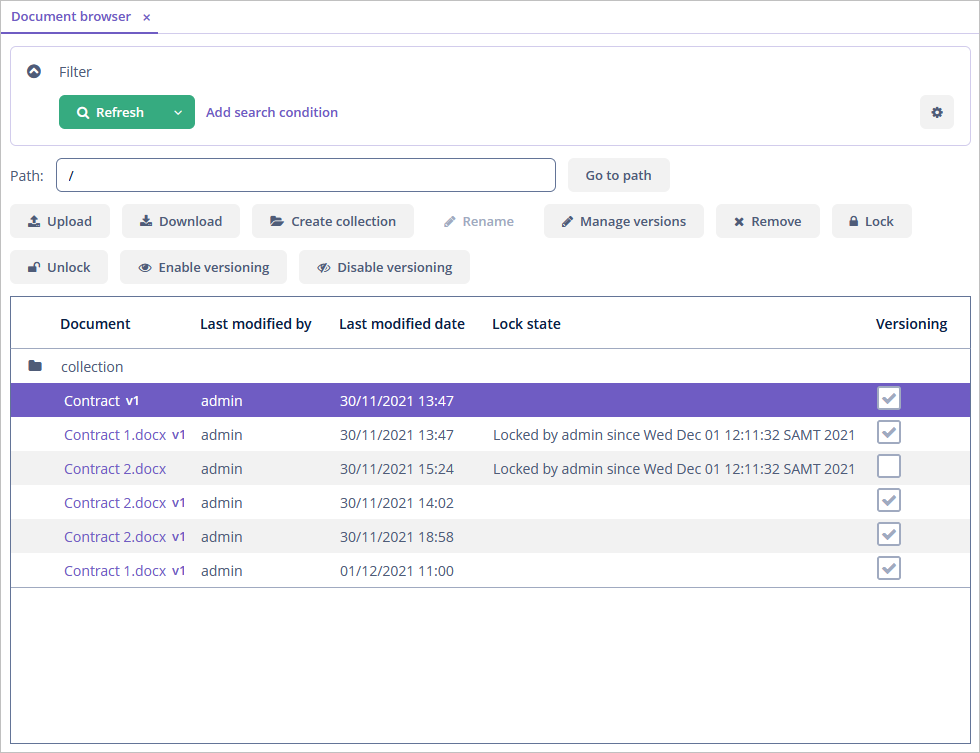
This screen contains a list of documents and supports the operations described below.
The Upload button allows you to select files and upload them to the system. The Download button enables downloading of the latest or preceding document versions.
The Manage versions button opens the WebDAV document versions screen.
Enable versioning and Disable versioning buttons control versioning of a particular document.
To remove a document, you should first lock it by clicking the Lock button.

If other users try to save changes in this document, they will be warned that the document is locked.

The lock expiration timeout can be configured using the jmix.webdav.lock-timeout property.
Collections
A WebdavDocument collection can be created via the Create collection button in the Document browser screen.
A WebdavDocument collection is a special type of WebdavDocument that acts as a container for other documents.
The parent collection of WebdavDocument is specified in the parent attribute. If this attribute is not specified for a document, it is considered that the document belongs to the root (top-level) collection.
By default, users can upload documents with identical names to the same collection (for example, the root collection can contain two separate documents named Contract1.docx). If you want to maintain the document URI uniqueness like in a real file system, set the jmix.webdav.auto-generate-unique-resource-uri property to false. In this case, if a newly uploaded document has the URI that points to an already existing document, the unique constraint violation occurs.
You can rename and remove collections using the Rename and Remove buttons.
Version Control
WebDAV Document Versions
The WebDAV document versions screen allows you to manage versions of a document if versioning is enabled for it.
There are two ways to open the WebDAV document versions screen:
-
Via the WebdavDocumentUploadField component by clicking a link with a document version number.
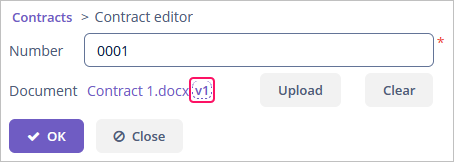
-
Via the Manage versions button in the WebDAV document browser screen.
After that, the WebDAV document versions dialog window is opened:
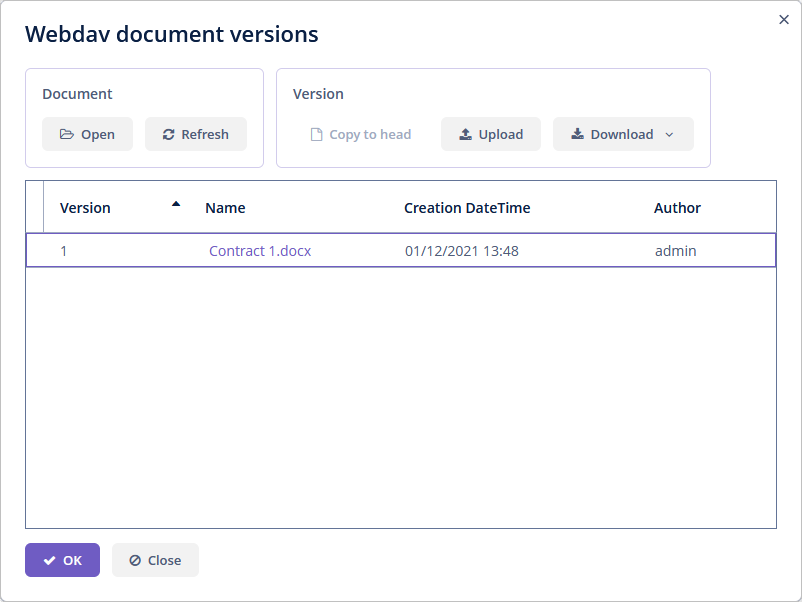
WebDAV document versions screen supports the following operations:
-
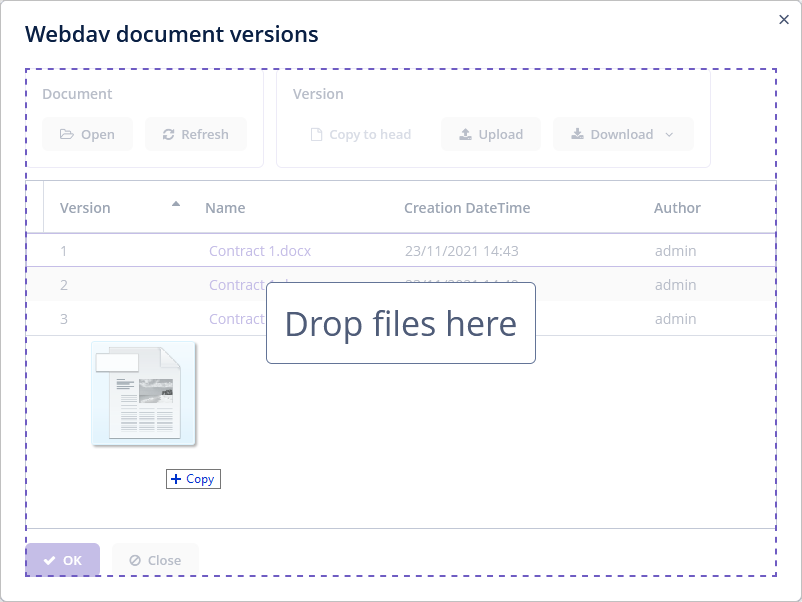
Creating a new document version. Clicking Upload allows selecting files to upload to the system. This can also be done by dragging and dropping a required file to the drop zone. After that, uploaded files are numbered in accordance with the number of the latest document version. Numbers of new versions are tagged with the * symbol. This means that they have been uploaded but are not linked to a document yet. The version numbers are updated after saving the changes. If the dialog window is closed without saving, then all versions tagged with * will be removed after launching WebdavDocumentVersionsCleaningJob.
-
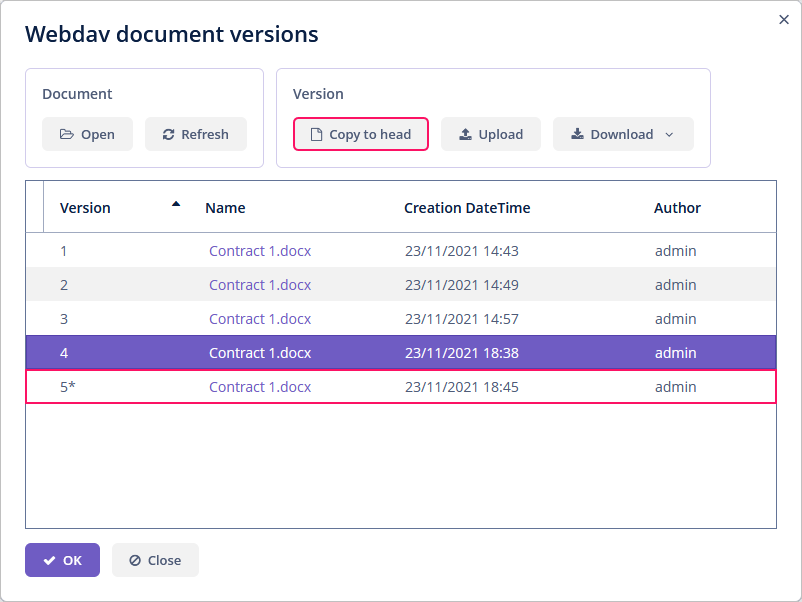
Creating a new document version based on another one. Selecting a document version and clicking the Copy to head button enables copying and numerating it in accordance with the number of the latest document version. Numbers of new versions are tagged with the * symbol. This means that they have been uploaded but are not linked to a document yet. The version numbers are updated after saving the changes. If the dialog window is closed without saving, then all versions tagged with * will be removed after launching WebdavDocumentVersionsCleaningJob.
-
Opening a document for editing. Selecting a document version and clicking the Open button enables opening a document for editing. Every time a document is saved in an external application, its new version is sent to the database. Use the Refresh button to update the list of document versions shown in WebDAV document versions.
Clicking Refresh deletes all unsaved document versions. Thus, if some document version was copied and not saved, then the changes are discarded.
-
Opening a document for reading (read-only). To open a document for reading, click a link with a file name.
-
Downloading a ZIP archive with one or several document versions. The Download button contains two options for downloading selected documents/versions. The first option allows downloading documents as separate files. The Download as ZIP option enables sending all selected documents to the ZIP archive and downloading it. For the sake of convenience, file names contain
-vsuffixes with corresponding version numbers, for example,example-v3.docx,document-v1.docx.
Conflict Resolution Policies
There are several policies intended to resolve conflicts which may occur when multiple users edit the same document at the same time.
For instance, two users simultaneously opened the same document in WebDAV document versions and added a bunch of new versions. The first user finished working with their versions and saved the changes. After that, the second user did the same. Thus, the database contains versions created by both users. However, each user can see only their versions in WebDAV document versions.
This situation may cause issues with ordering and saving these conflicting document versions. To resolve the conflicts, you can use the policies mentioned below.
By default, RejectMergePolicy is applied.
RebaseMergePolicy
RebaseMergePolicy allows putting new versions of a document after the ones already existing in the database. New versions are numbered in accordance with the number of the latest document version existing in the database.
CancelMyMergePolicy
If document versions have changed when working in WebDAV document versions, then all non-persistent versions (marked with * ) are deleted.
Overriding Default Conflict Resolution Policy
To override the default conflict resolution policy, declare a bean of the DefaultMergePolicy type in a Spring configuration class. The bean should return the needed merge policy. For example:
@Bean
public DefaultMergePolicy defaultMergePolicy() {
    return RebaseMergePolicy::new;
}
Security
Predefined Roles
Jmix application with the WebDAV add-on has two built-in resource roles:
-
WebDAV: minimal access - basic WebDAV role which is required for all users who need the WebDAV functionality.
-
WebDAV: view document browser - grants access to WebDAV documents browser.
Restricting Access to Documents
Suppose that some group of users should be able to edit only the documents created by themselves. Below is an example of how to do it using row-level roles.
-
Create a row-level role at runtime using UI screens available at Administration → Row-level roles.
-
Create a row-level predicate policy for the
UPDATEaction andWebdavDocumententity. -
Define a Groovy script for the created policy:
import io.jmix.core.security.CurrentAuthentication def authBean = applicationContext.getBean(CurrentAuthentication) return {E}.createdBy.equals(authBean.user.username) -
Assign the role to the users.
The system will check whether the current user is a document author. If it is not the case, the user will not be allowed to edit a document, and the Access denied message will be displayed.
The OK button intended to save document versions will be inactive. The document itself will be opened in read-only mode.
WebdavSupport Annotation
The @WebdavSupport annotation can be specified for fields of the WebdavDocument type. Using this annotation, you can disable versioning for a particular field. By default, versioning is enabled.
For example:
@ManyToOne(fetch = FetchType.LAZY, optional = false)
@WebdavSupport(versioning = false)
@JoinColumn(name = "DOC_WITHOUT_VERSION_ID")
private WebdavDocument docWithoutVersion;
Document Links
The add-on generates links to documents, which can be published on a website or passed to third parties. A link looks like https://<host>:<port>/webdav/link/82b62377-7fd1-b75e-47fc-9ef4b8d67360. When opening the link, the user’s browser requests credentials for accessing the document. After successful authorization, the document is opened in an appropriate desktop application if there is one installed on the user’s computer.
