Part 2. Advanced
In this chapter, you will create:
-
The
WebdavFolderentity.
Creating WebdavFolder Entity
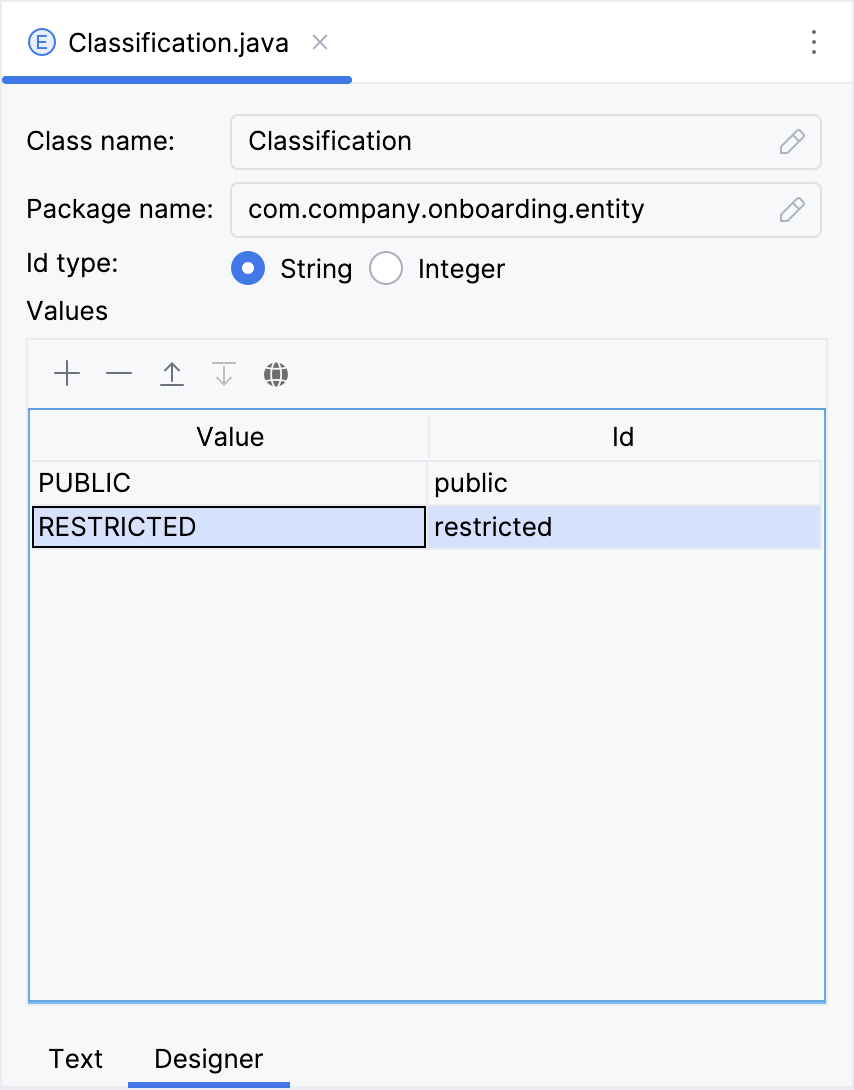
One of the WebdavFolder entity’s attributes is classification, which contains information on the type of folder. Therefore, let’s create a Classification enumeration consisting of two values: Public and Restricted.
The detailed instructions for creating enumerations can be found in the Using Enumerations section of Tutorial.
Next, create the WebdavFolder entity. You can find detailed instructions for creating entities in the Simple CRUD section of the Tutorial.
The WebdavFolder entity has the following attributes:
-
namewithStringtype. Select the Mandatory checkbox. -
classificationwithClassificationenumeration type. -
departmentwithDepartmenttype:-
Attribute type:
ASSOCIATION -
Type:
Department -
Cardinality:
Many to One -
FK constraint action:
DENY
-
-
parentwithWebdavFoldertype:-
Attribute type:
ASSOCIATION -
Type:
WebdavFolder -
Cardinality:
Many to One
-
Adding WebdavFolder Attribute to WebdavDocumentWrapper
Then add the webdavFolder attribute to the WebdavDocumentWrapper entity:
Double-click on the WebdavDocumentWrapper entity in Jmix tool window and select its last attribute (to add the new attribute to the end):
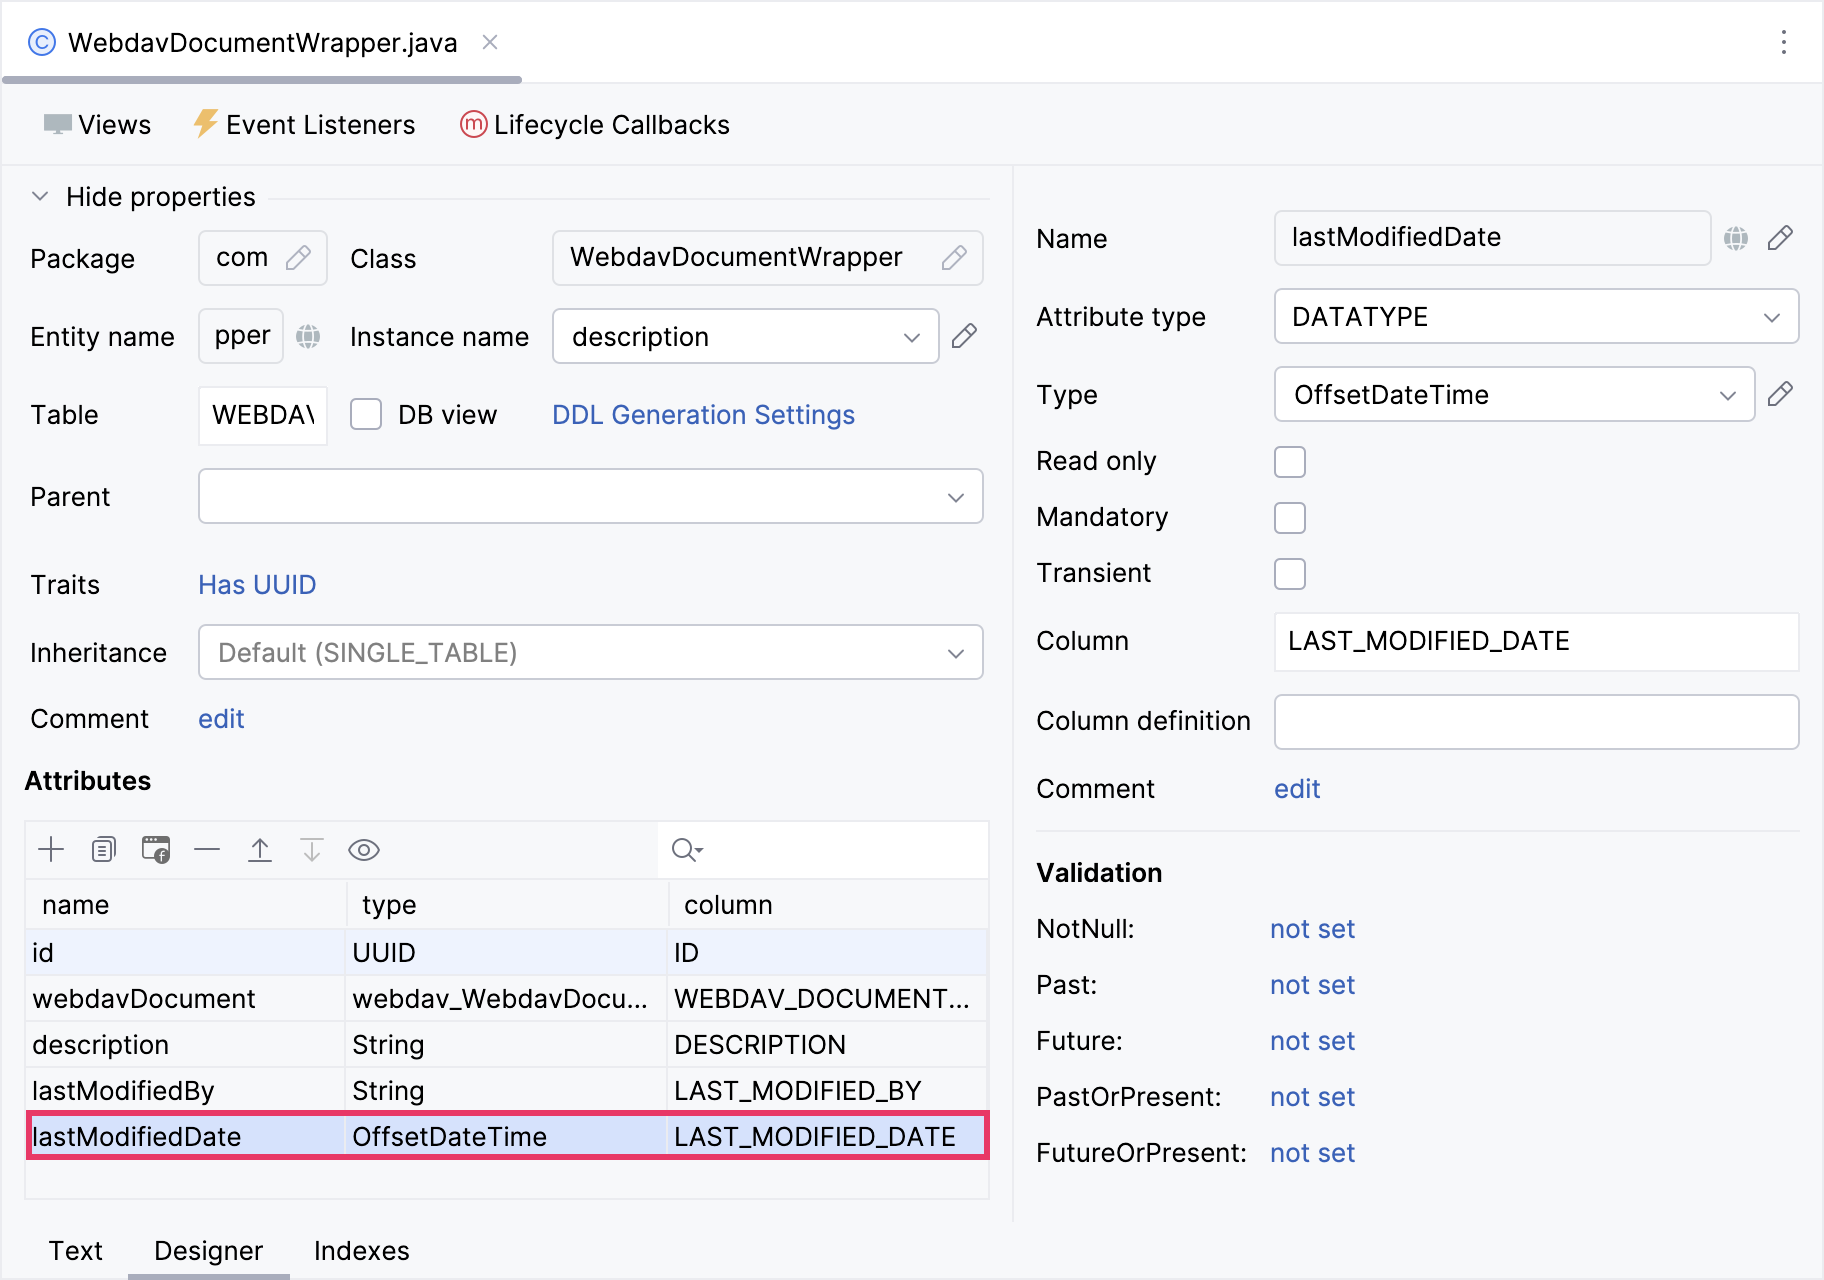
Click Add ( ) in the Attributes toolbar. In the New Attribute dialog, enter
 folder into the Name field, select ASSOCIATION in the Attribute type dropdown and WebdavFolder in the Type dropdown. Select CASCADE in the FK constraint action dropdown.
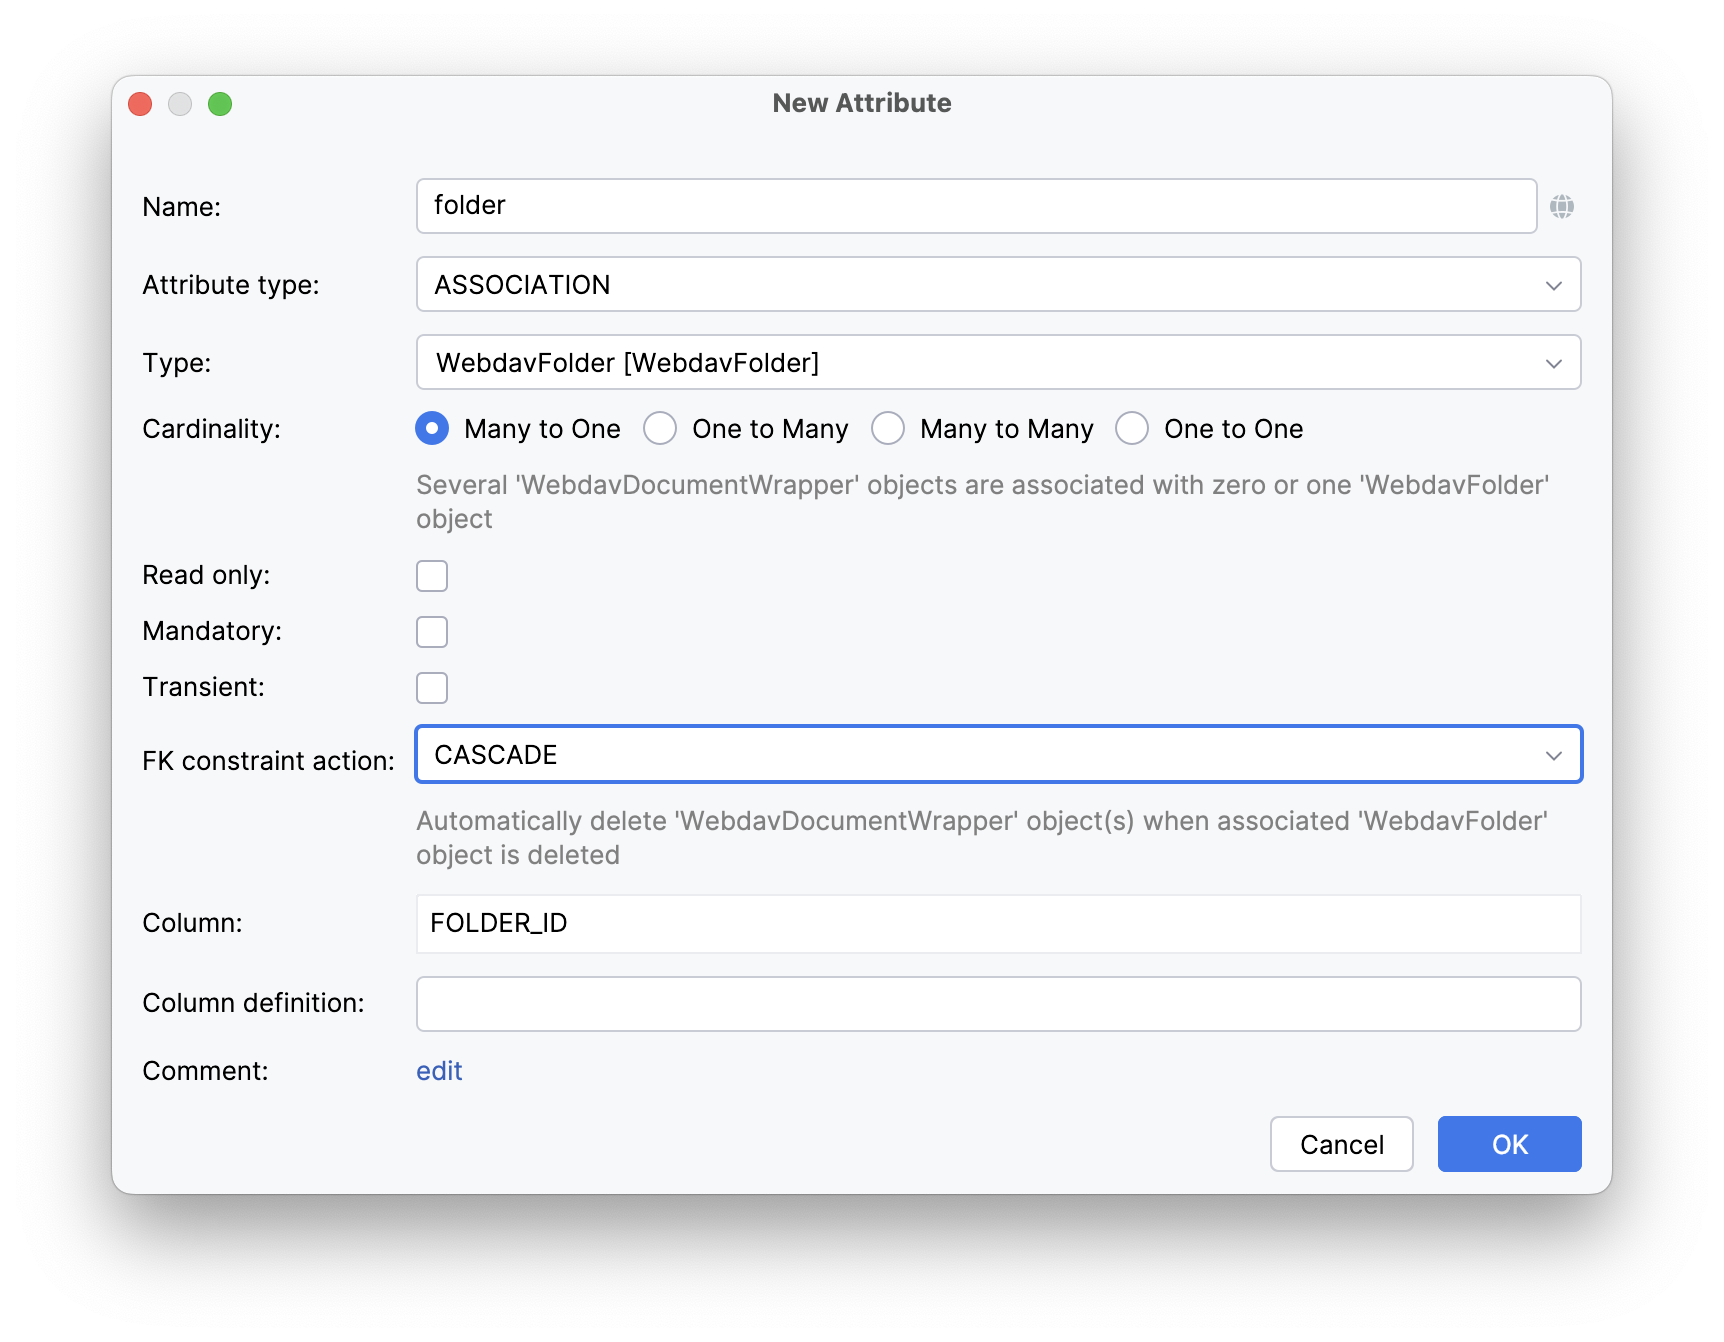
Click OK.
Creating Knowledge Base View
Описать экран
Below is a mockup of the Knowledge base view:

In this chapter, you will create the Knowledge base view from scratch.
If your application is running, stop it using the Stop button ( ) in the main toolbar.
In the Jmix tool window, click New () → View. In the Create Jmix View window, select the Blank view template. Click Next.
On the next step of the wizard, enter:
-
Descriptor name:
knowledge-base-view -
Controller name:
KnowledgeBaseView -
Package name:
com.company.onboarding.view.knowledgebase
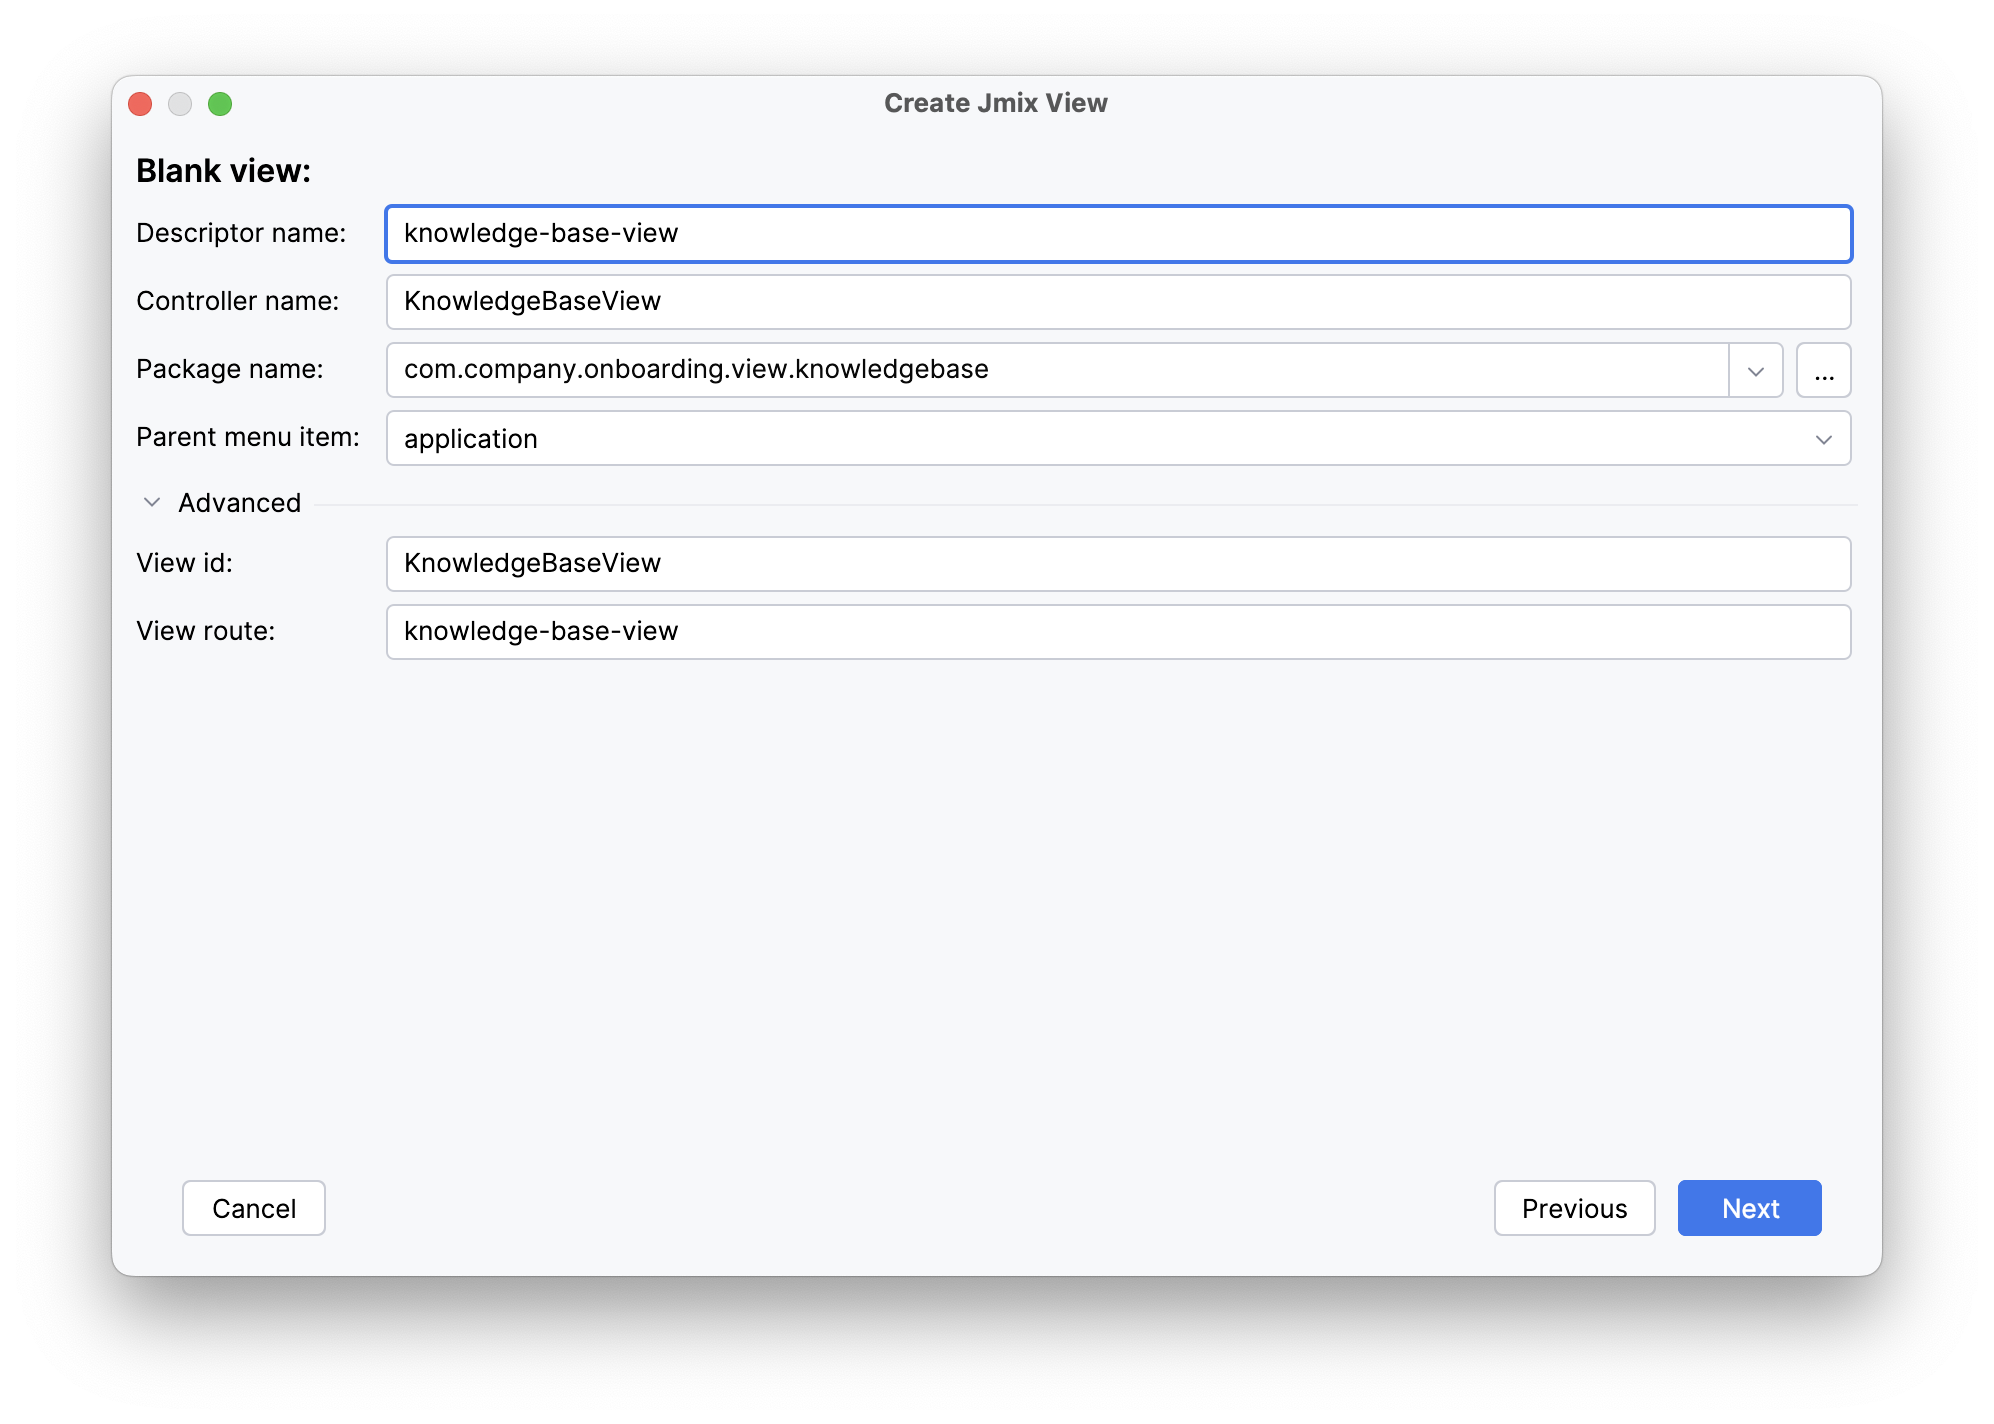
Click Next.
On the next step of the wizard, change the view title to Knowledge base:
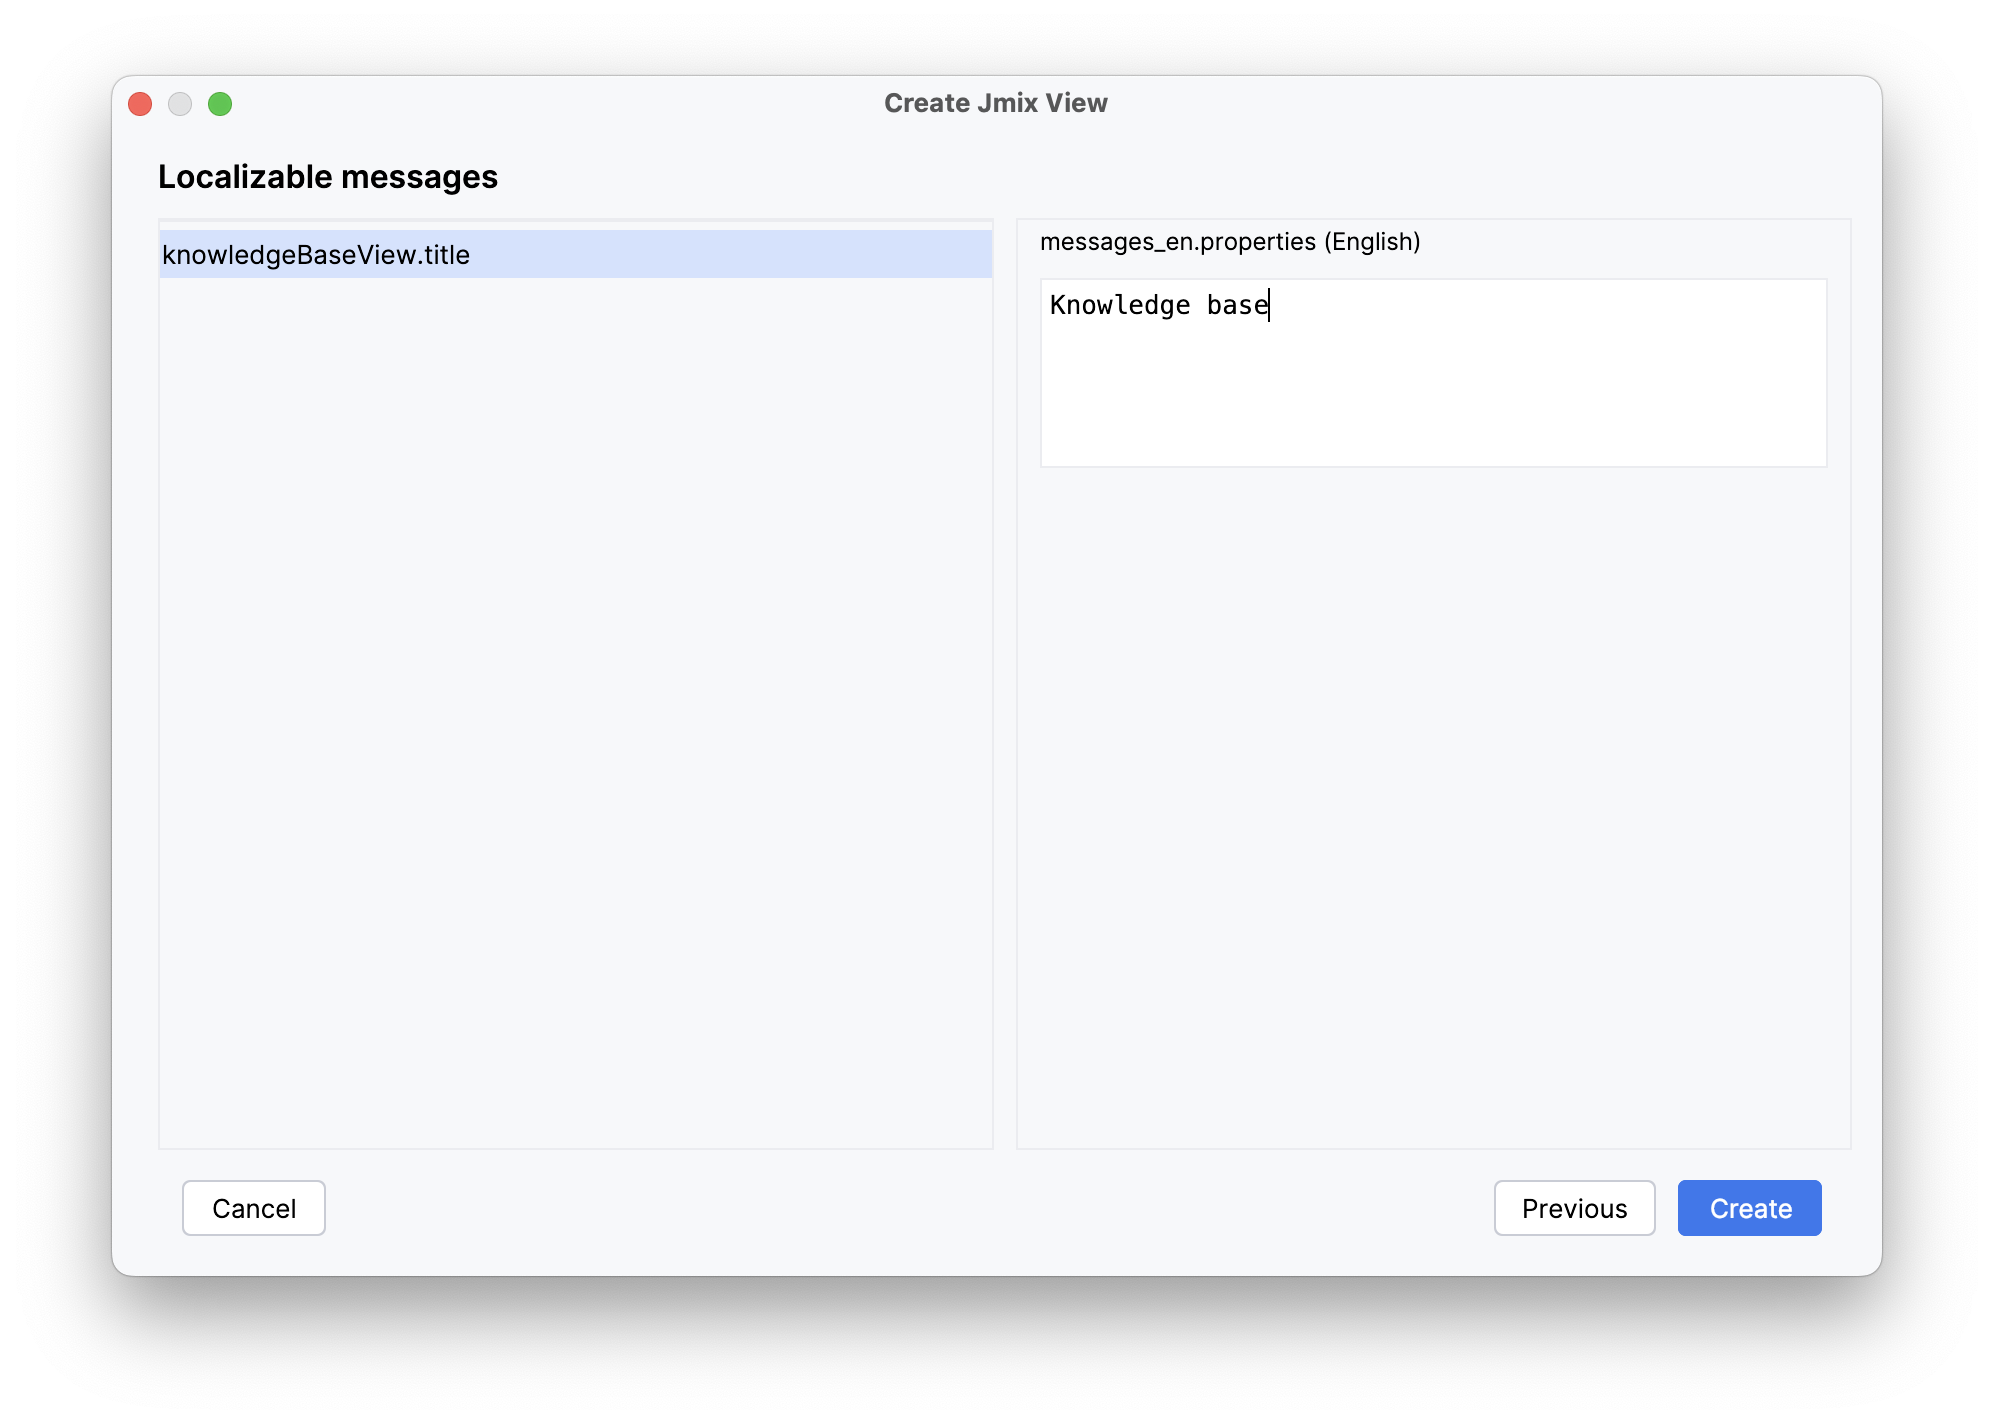
Click Create.
Studio will create an empty view and open it in the designer:
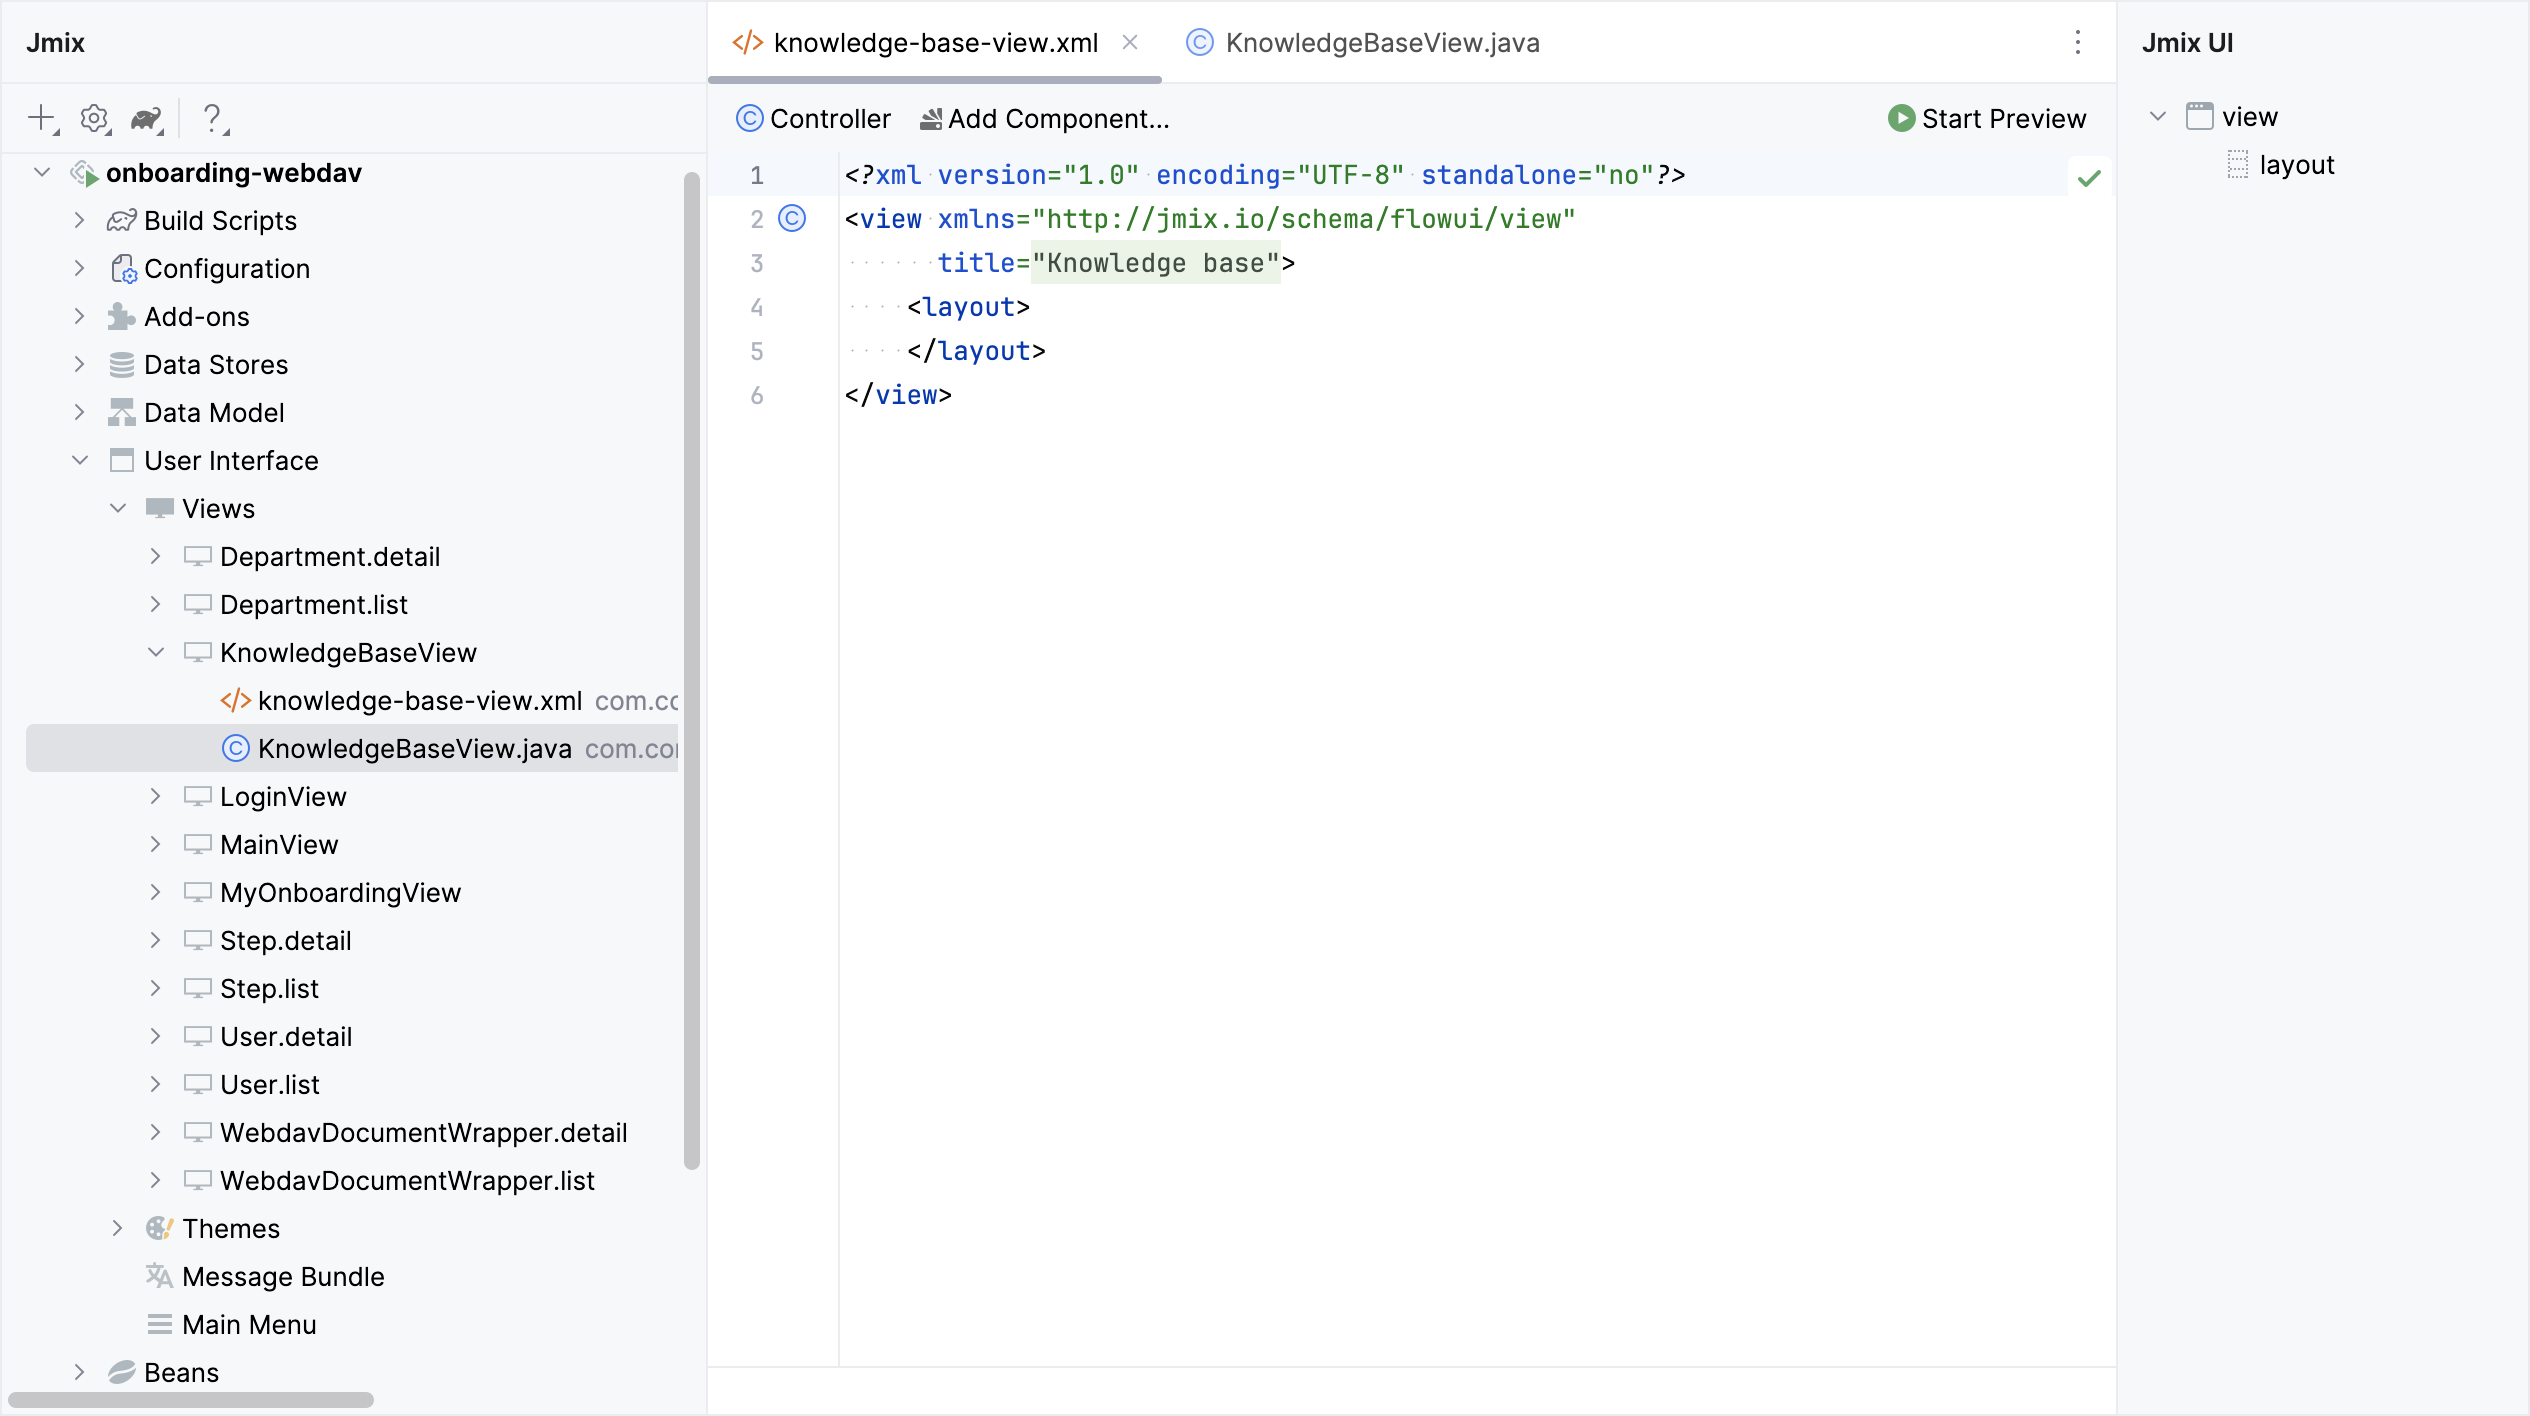
The new view will also be added to the main menu.
Run the application by clicking the Debug button ( ) in the main toolbar.
Prior to application execution, Studio will draft a Liquibase changelog:
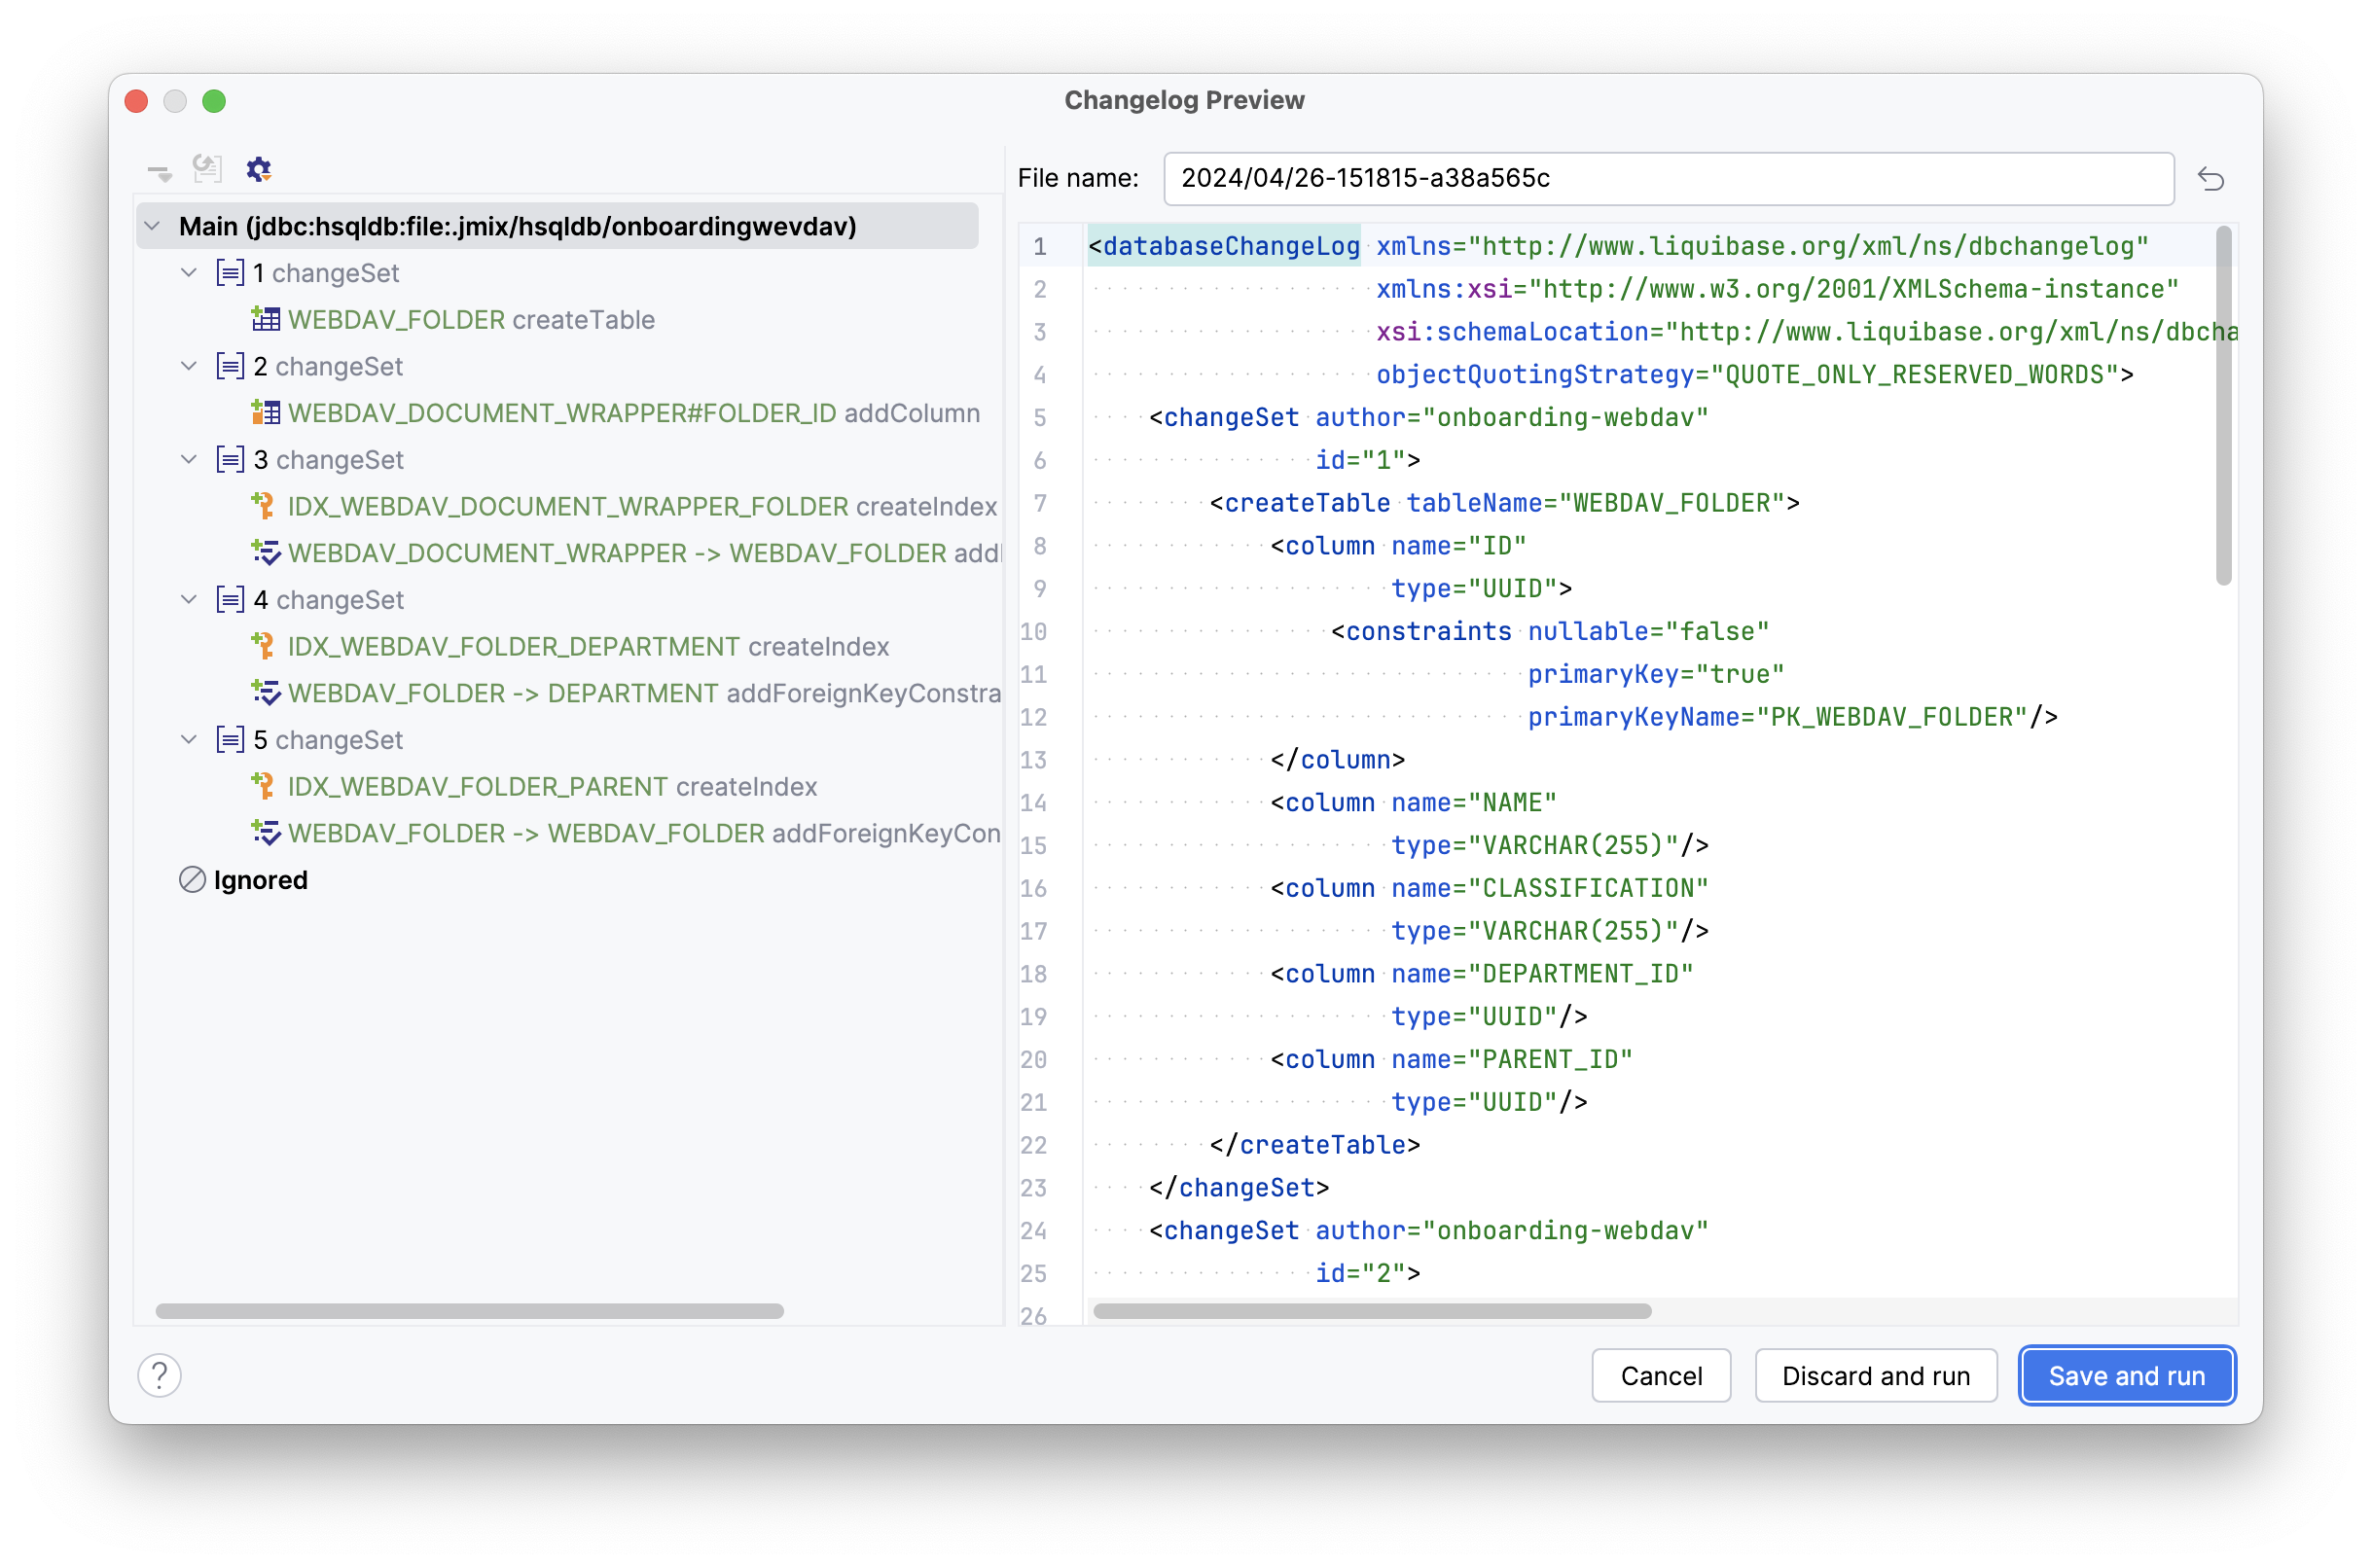
Click Save and run.
Studio will execute the changelog, proceed with building and running the application.
Open the application in your web browser and log in to the application.
Click on the Knowledge base item in the Application menu and make sure your empty view is opened.
Defining Data Section
According to the provided design sketch, there will be two data containers on the view, the data from which will be used to display the folder list and the list of webDAV documents related to the folders.
-
First, add a data container which will provide a collection of
WevdavFolderentities for the tree data grid. Click Add Component in the actions panel, select the Data components section, and double-click the Collection item. In the Collection Properties Editor window, selectWevdavFolderin the Entity field, uncheck the Read only checkbox, and click OK: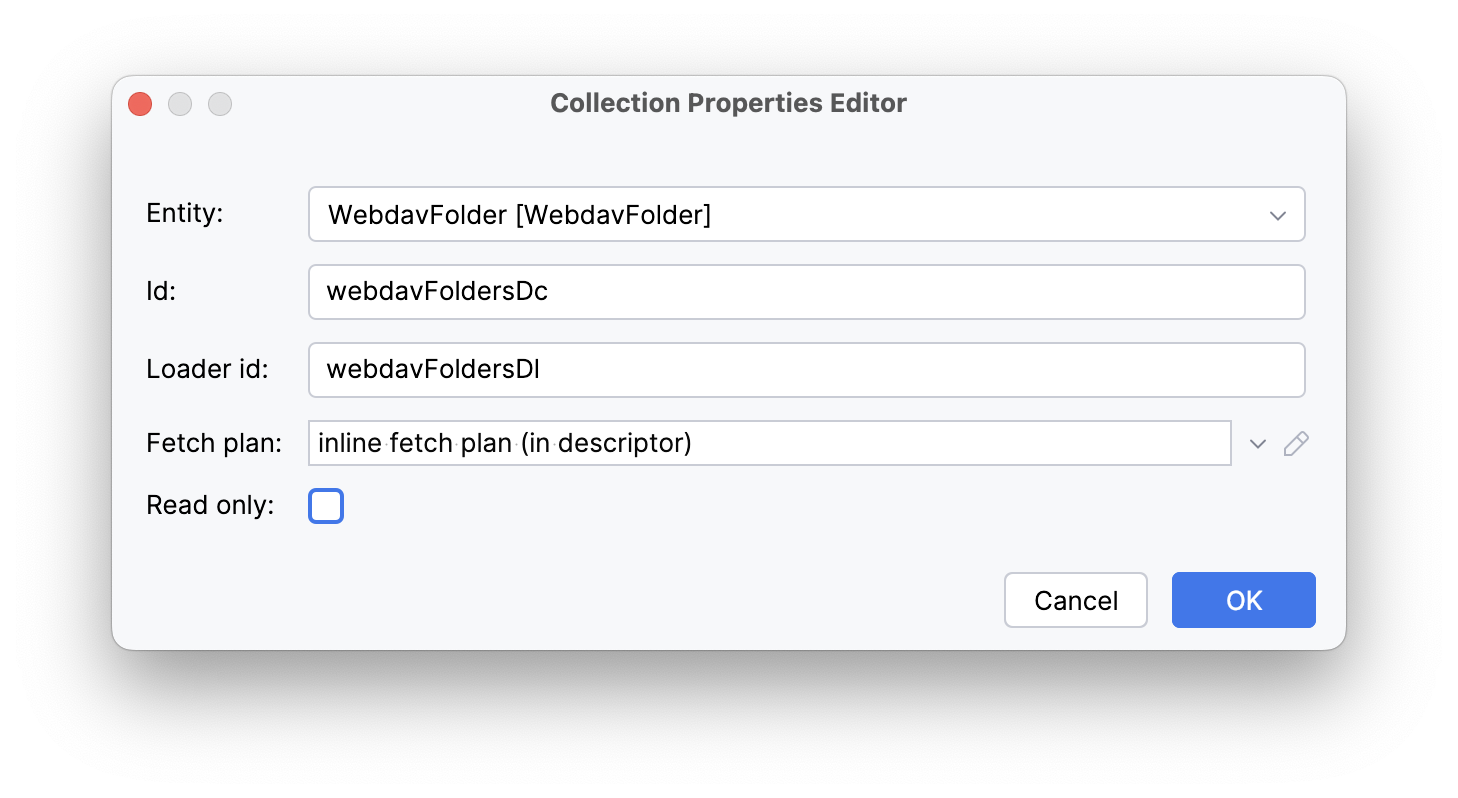
Studio will create the collection container:
<data> <collection id="webdavFoldersDc" class="com.company.onboarding.entity.WebdavFolder"> <fetchPlan extends="_base"/> <loader id="webdavFoldersDl"> <query> <![CDATA[select e from WebdavFolder e]]> </query> </loader> </collection> </data> -
Then, add a data container which will provide a collection of
WebdavDocumentWrapperentities for the data grid. Click Add Component in the actions panel, select the Data components section, and double-click the Collection item. In the Collection Properties Editor window, selectWebdavDocumentWrapperin the Entity field. Click the Edit button ( ) to the right of the Fetch plan field.
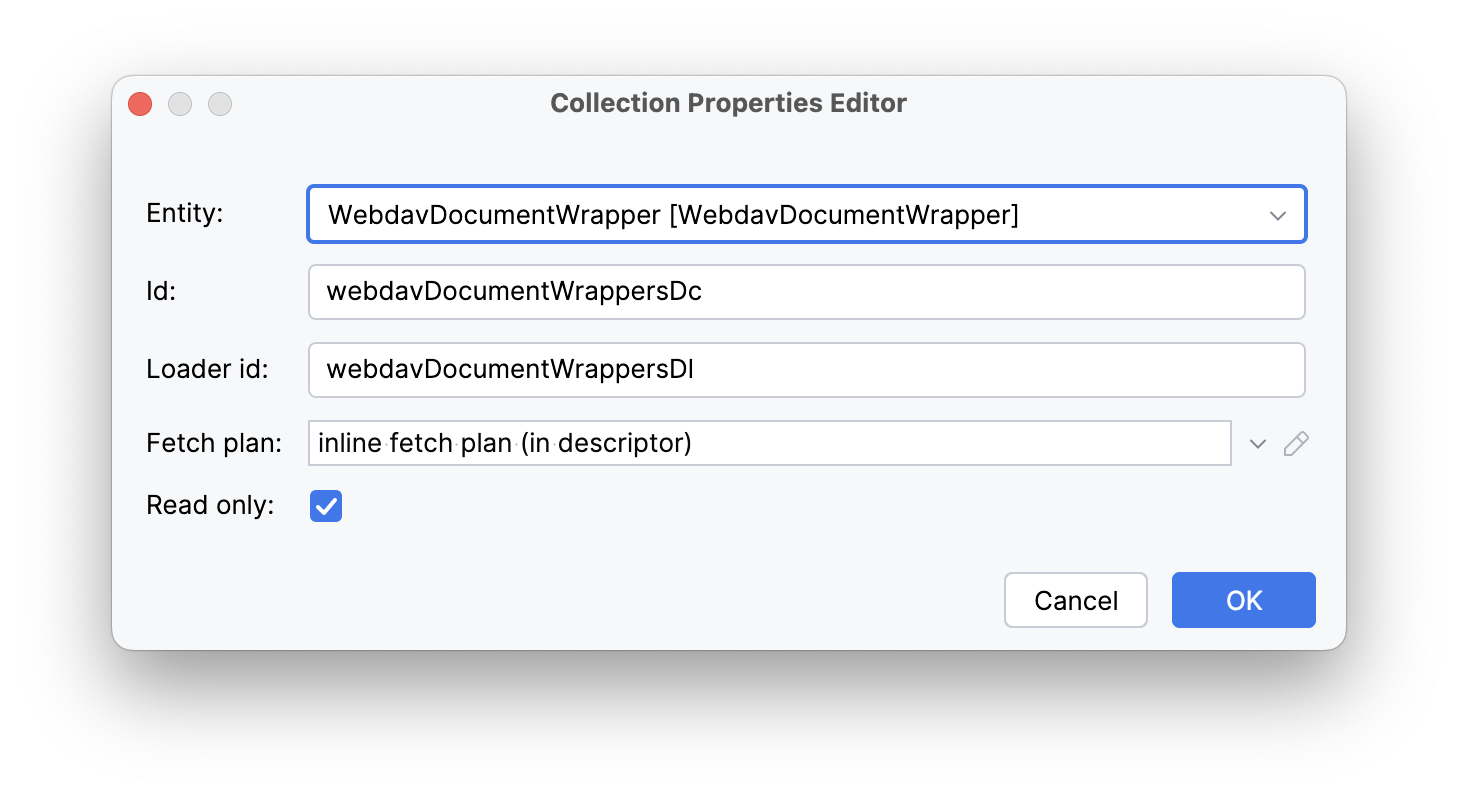
Select the
wevdavDocumentattribute and then thelastVersionattribute for it in the Edit Fetch Plan dialog.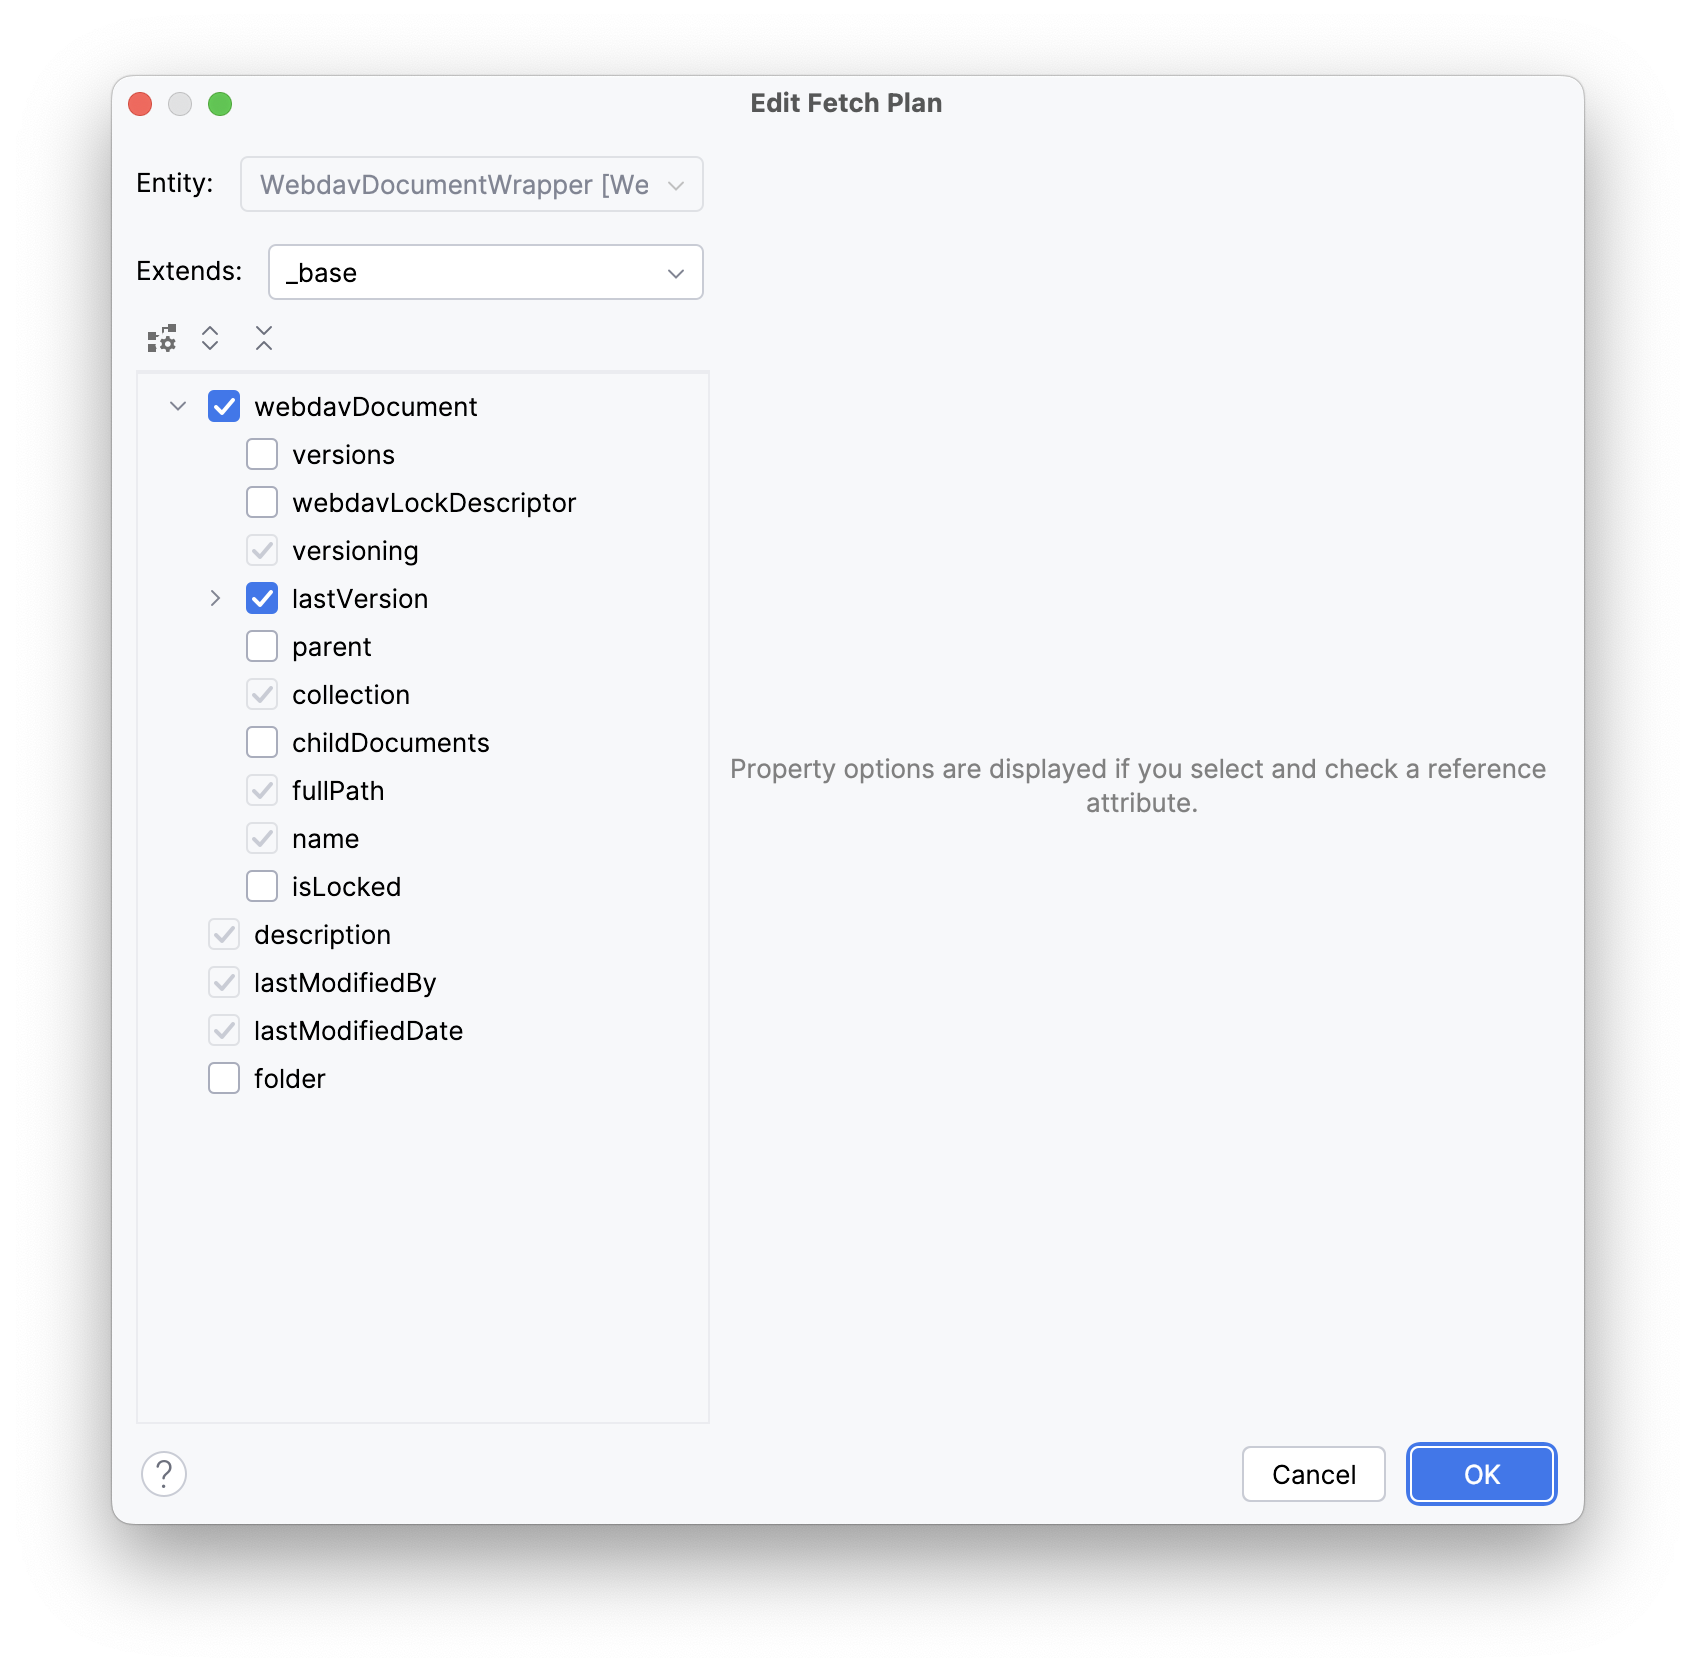
Studio will create the collection container:
<collection id="webdavDocumentWrappersDc"
            class="com.company.onboarding.entity.WebdavDocumentWrapper">
    <fetchPlan extends="_base">
        <property name="webdavDocument" fetchPlan="_base">
            <property name="lastVersion" fetchPlan="_base"/>
        </property>
    </fetchPlan>
    <loader id="webdavDocumentWrappersDl" readOnly="true">
        <query>
            <![CDATA[select e from WebdavDocumentWrapper e]]>
        </query>
    </loader>
</collection>
The default query will load all
WebdavDocumentWrapperinstances, but you need to select only documents of the current webdav folder. Let’s modify the query using JPQL Query Designer. SelectwebdavDocumentWrappersDlin the Jmix UI structure panel and click the value of thequeryattribute. Then add awhereclause by thefolderattribute with the:folderparameter.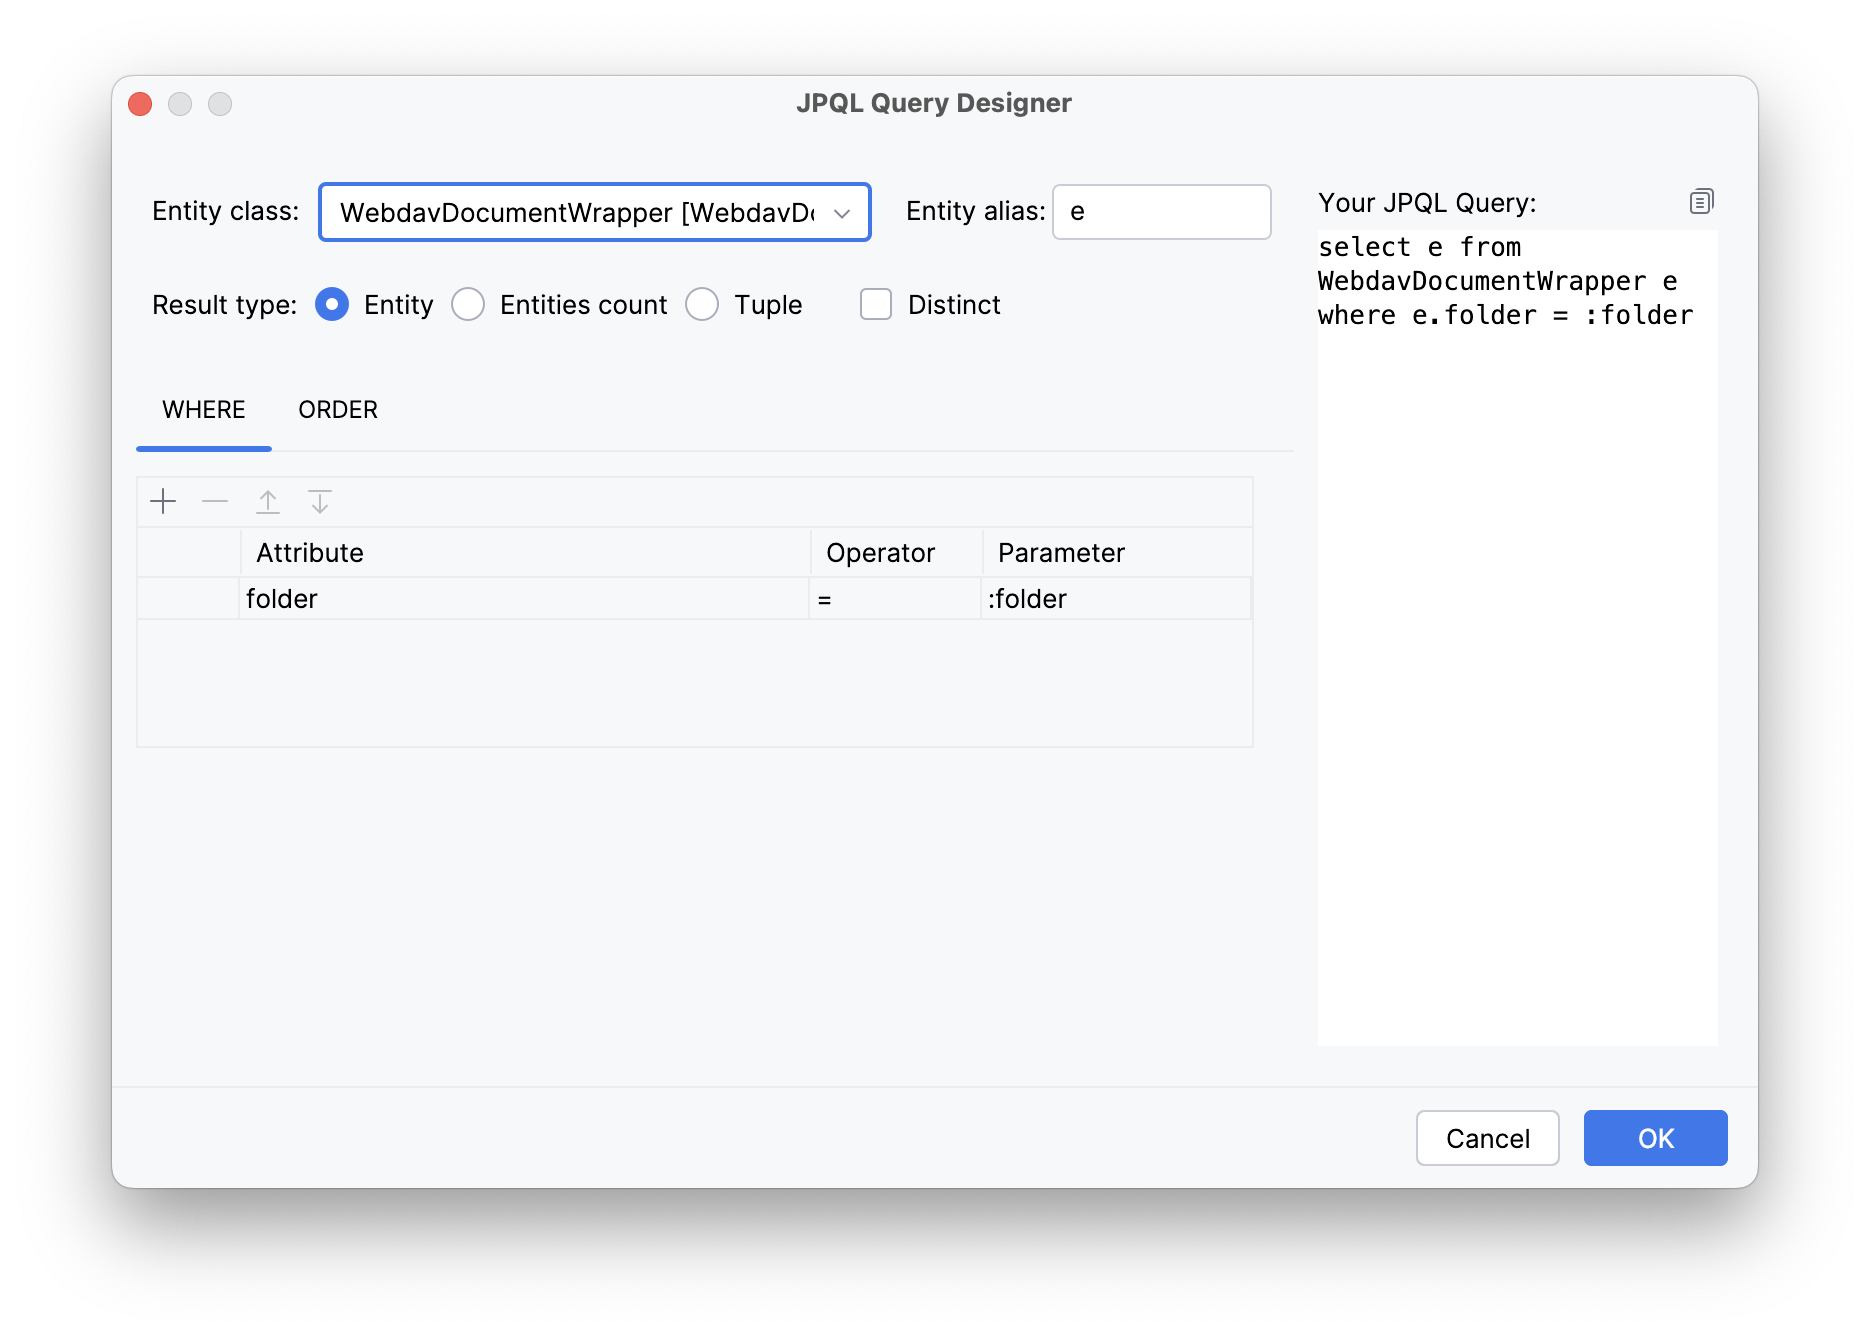
The resulting query should be as below:
<loader id="webdavDocumentWrappersDl" readOnly="true">
    <query>
        <![CDATA[select e from WebdavDocumentWrapper e
        where e.folder = :folder]]>
    </query>
</loader>
We’ll provide passing the :folder parameter into the query a bit later, but for now let’s create the visual components to display the list of folders and documents.
Adding UI Layouts
Since the Knowledge base view is divided into two areas, we will use the split layout. Add the split layout, and then add two vertical boxes (vbox) to it sequentially. In the first vertical box, there is a horizontal box containing the tree data grid control buttons, and a treeDataGrid containing a folder hierarchy. In the second vertical box, there is a horizontal panel containing the data grid control buttons and a dataGrid containing webDAV documents. The template for the view looks like this:
<layout>
    <split width="100%" height="100%" splitterPosition="17">
        <vbox>
            <hbox id="webdavFoldersButtonsPanel"
                  classNames="buttons-panel"/>
            <!--We will later add a folder treeDataGrid here-->
        </vbox>
        <vbox>
            <hbox id="documentsButtonsPanel"
                  classNames="buttons-panel"/>
            <!--We will later add a webDAV document dataGrid here-->
        </vbox>
    </split>
</layout>
Creating WebdavFolder TreeDataGrid
Add the treeDataGrid component into the first vertical box. Select WebdavFolder in the Entity field and webdavFoldersDc data container in the TreeDataGrid Properties Editor dialog:
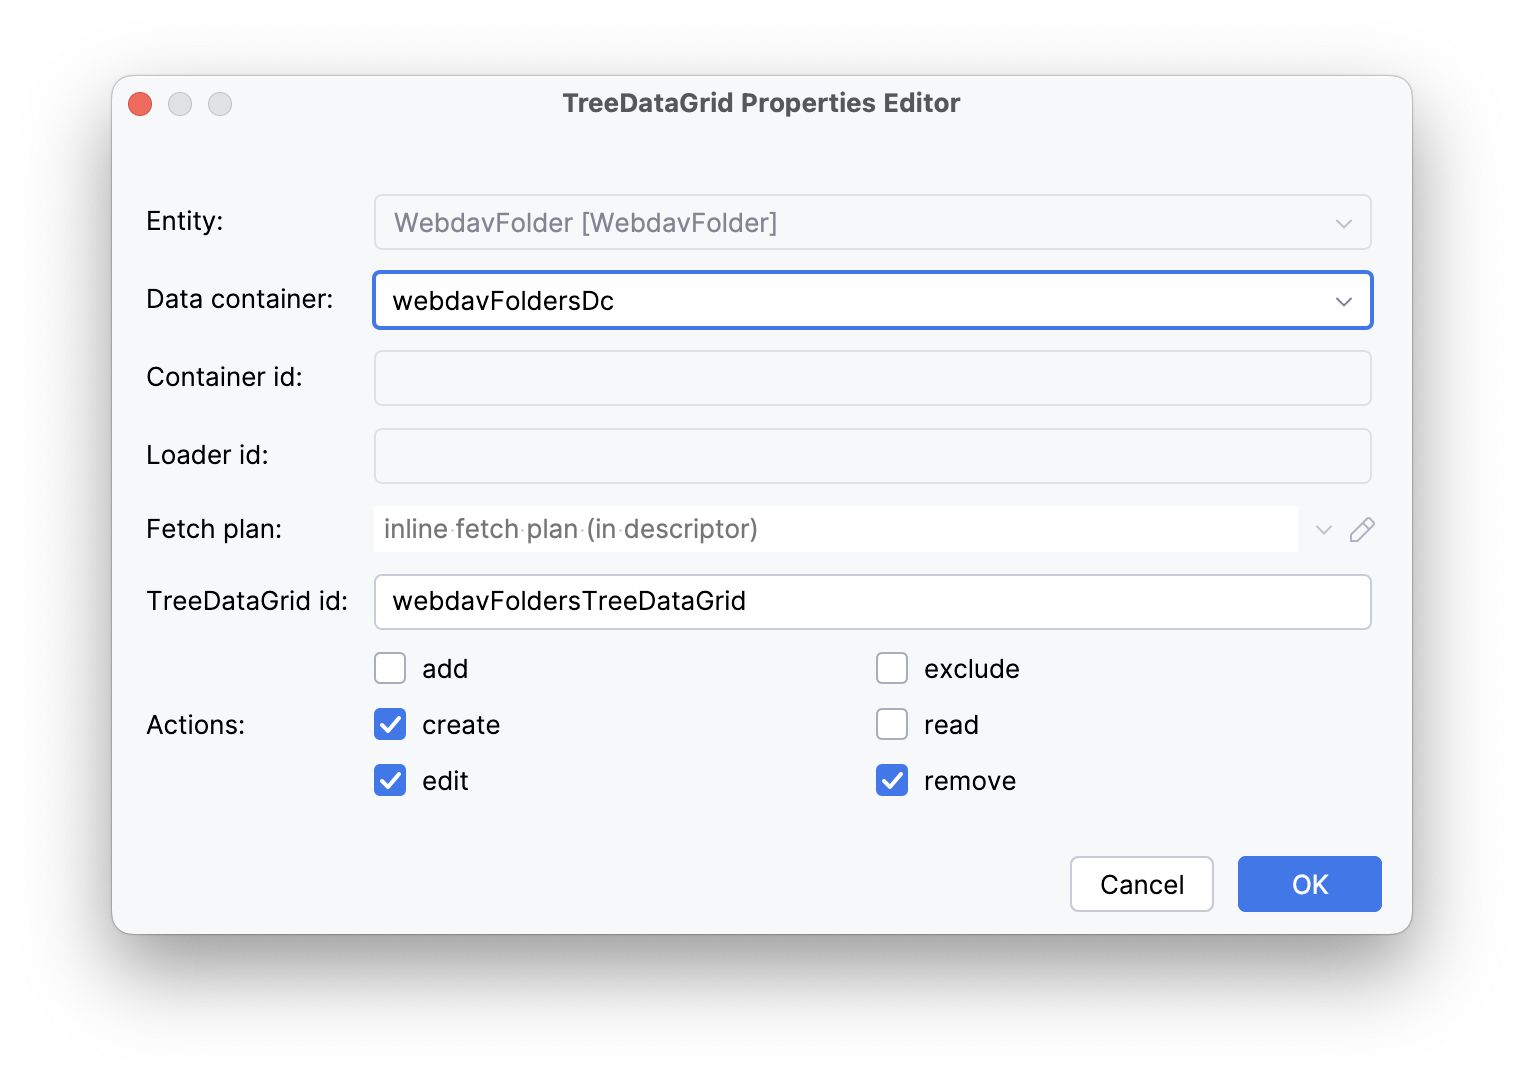
Remove the extra column classification and set the hierarchy property to parent.
<treeDataGrid dataContainer="webdavFoldersDc"
              hierarchyProperty="parent"
              width="100%"
              id="webdavFoldersTreeDataGrid">
    <actions>
        <action id="create" type="list_create"/>
        <action id="edit" type="list_edit"/>
        <action id="remove" type="list_remove"/>
    </actions>
    <columns>
        <column property="name"/>
    </columns>
</treeDataGrid>