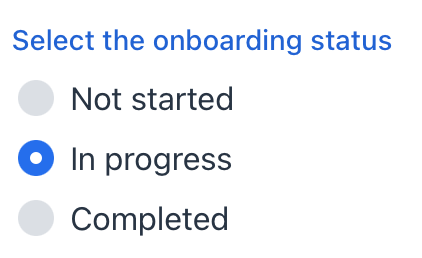
radioButtonGroup
radioButtonGroup allows users to select a single value from a list of options using radio buttons.
-
XML element:
radioButtonGroup -
Java class:
JmixRadioButtonGroup
Basics
The simplest case of using radioButtonGroup is to select an enumeration value for an entity attribute.

<data>
    <instance class="com.company.onboarding.entity.User" id="userDc">
        <fetchPlan extends="_base"/>
        <loader id="userDl"/>
    </instance>
</data>
<layout>
    <radioButtonGroup dataContainer="userDc"
                      property="onboardingStatus"
                      themeNames="vertical"
                      label="Select the onboarding status"/>
</layout>
In the example above, the User entity has the onboardingStatus attribute of the OnboardingStatus type, which is an enumeration.
Attributes
id - alignSelf - classNames - colspan - css - dataContainer - enabled - errorMessage - height - helperText - invalid - itemsContainer - itemsEnum - label - maxHeight - maxWidth - minHeight - minWidth - property - readOnly - required - requiredIndicatorVisible - themeNames - visible - width
Handlers
AttachEvent - ClientValidatedEvent - ComponentValueChangeEvent - DetachEvent - itemEnabledProvider - itemLabelGenerator - statusChangeHandler - validator
|
To generate a handler stub in Jmix Studio, use the Handlers tab of the Jmix UI inspector panel or the Generate Handler action available in the top panel of the view class and through the Code → Generate menu (Alt+Insert / Cmd+N). |
itemEnabledProvider
itemEnabledProvider is applied to each item of this radioButtonGroup to determine whether the item should be enabled (true) or disabled (false). Disabled items are displayed as grayed out and the user cannot select them. All the items are enabled by default.
@Install(to = "radioButtonGroup", subject = "itemEnabledProvider")
private boolean radioButtonGroupItemEnabledProvider(OnboardingStatus onboardingStatus) {
    if (onboardingStatus != null) {
        return onboardingStatus.getId() != 30;
    }
    return true;
}See Also
See the Vaadin Docs for more information.
