Entity Designer
Studio provides a visual designer that simplifies entity creation, so you don’t need to remember all the rules and annotations.
|
This feature requires a RAD or Enterprise subscription. If you don’t have the subscription, see how to get the trial version. |
JPA Entity Designer
To create a JPA entity, use the menu in the Jmix Tool Window.
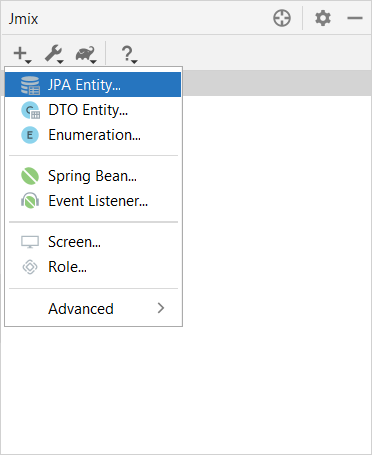
The New JPA Entity dialog appears.
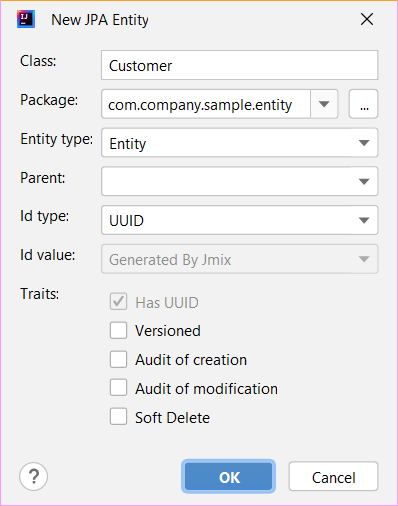
Fill in the fields:
-
Class - the name of the new class. It must comply with Java name requirements.
-
Package - the package that the class will reside in. The default value automatically appears in the field. You can change it, and Studio creates the package after you click OK.
-
Entity type - select the type of entity:
-
Entity - a class to be a data model entity.
-
MappedSuperclass - a base superclass that is not associated with any particular database table. A such entity class is annotated by @MappedSuperclass.
-
Embeddable - an embeddable persistent entity. A such entity class is annotated by
@Embeddable.
-
-
Parent - the class that your new class inherits from.
-
Id type - select the type of the entity primary key:
-
UUID- the identifier of theUUIDtype. -
Long- the identifier of theLongtype. It’s highly recommended to add the UUID trait, as it enables some optimizations and allows you to identify your instances uniquely in a distributed environment. -
Integer- the identifier of theIntegertype. It’s highly recommended to add the UUID trait, as it enables some optimizations and allows you to identify your instances uniquely in a distributed environment. -
String- the identifier of theStringtype. It’s highly recommended to add the UUID trait, as it enables some optimizations and allows you to identify your instances uniquely in a distributed environment. The concrete entity class must have a string field annotated with the@IdJPA annotation. -
Embedded- the primary key is a composite key. In this case, the concrete entity class has a field of the embeddable type representing the key, annotated with the@EmbeddedIdJPA annotation.
-
-
Id value - in the case of the
UUIDid type, this field is enabled and has the Generated By Jmix value. In the general case, the Id value dropdown has the values listed below:-
Generated By Jmix. The id of the entity has the @JmixGeneratedValue annotation.
-
Identity column is suitable only for
IntegerandLongid types. The id of the entity has the@GeneratedValueJPA annotation with theGenerationType.IDENTITYstrategy. The Identity column value is used for the auto-incremented identifiers. It’s highly recommended to add the UUID trait, as it enables some optimizations and allows you to identify your instances uniquely in a distributed environment. -
Assigned by user - the id is set by the user. It is suitable for
Integer,Long,String, andEmbeddedid types.
-
-
Id length appears if the
Stringid type is selected. Specify the maximum number of characters. The default value is255. -
Composite id type appears if the
Embeddedid type is selected. Select the embeddable entity representing a composite key. -
In the Traits checkbox group, select the necessary traits.
Then click OK.
Studio displays three tabs for the created entity. Together they form the visual Entity Designer:
-
Text contains the source code of the entity.
-
Designer shows the entity structure. You can add entity attributes, set an instance name, an inheritance strategy, and validations using a graphical interface instead of writing Java code.
-
Indexes displays indexes and allows you to create new ones.
Actions Panel
The actions panel is located on the top of the entity designer. It provides access to the following actions:
-
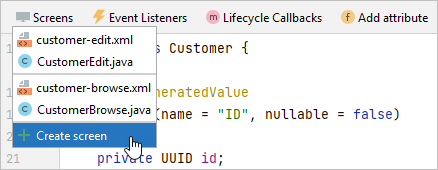
Screens - navigates to existing screens or creates new screens for the current entity.
-
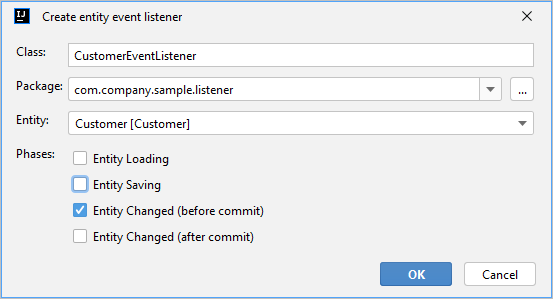
Event Listeners - navigates to existing event listeners or creates a new one for the current entity:
-
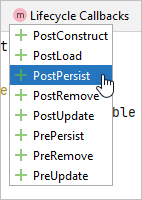
Lifecycle Callbacks - adds lifecycle callbacks method stubs:
Designer Tab
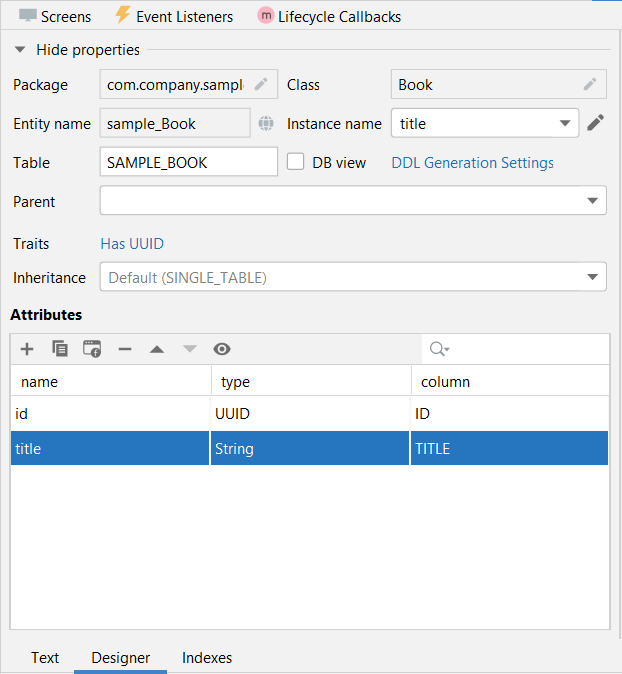
The Designer tab shows the entity structure:
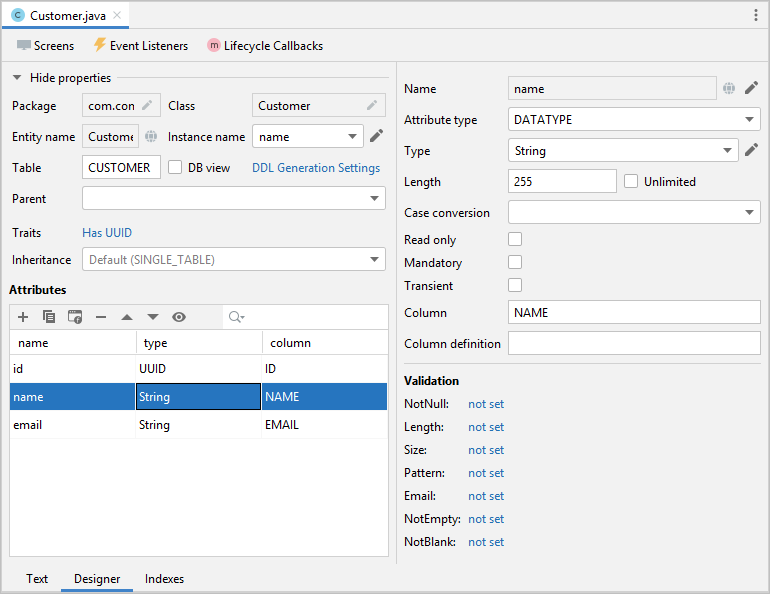
In addition to the fields described in the JPA Entity Designer dialog, the Designer tab contains the following fields:
-
The Instance name dropdown.
-
The DB view checkbox. Using this checkbox you can map a JPA Entity to the database view. A such entity class is annotated by the @DbView annotation.
-
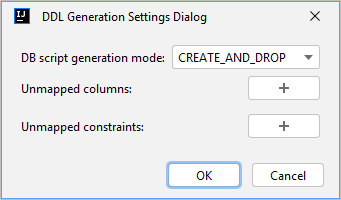
The DDL Generation Settings link button opens the visual constructor of a @DdlGeneration annotation value:
-
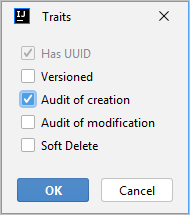
The Traits link button opens the dialog containing traits:
-
In the Inheritance dropdown, you can select the inheritance strategy.
The Attributes panel contains the actions for managing entity attributes:
-
The Add (
 ) button opens the New Attribute dialog.
 -
Click the Copy (
 ) button to create a copy of the existing attribute.
 -
The Add to Screens (
 ) button opens a dialog that shows all screens that display the current entity. Select the screens that will display the selected attribute.
-
Click the Remove (
 ) button to remove the selected attribute.
 -
Use the Up (
 ) / Down (
 ) buttons to reorder the attributes.
The right panel of the entity designer shows the properties of the selected attribute:
-
Use the globe (
 ) button next to the Name field to set a user-friendly name for the attribute.
 -
The Attribute type and Type dropdowns allow you to select the type of entity attribute.
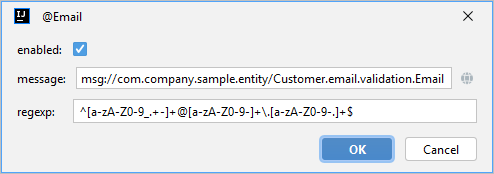
The Validation panel is used for defining the constraints of bean validation. Click on the link button next to the selected constraint. The constraint editor opens:
Text Tab
In the Text tab, you can see the resulting entity class generated by the designer.
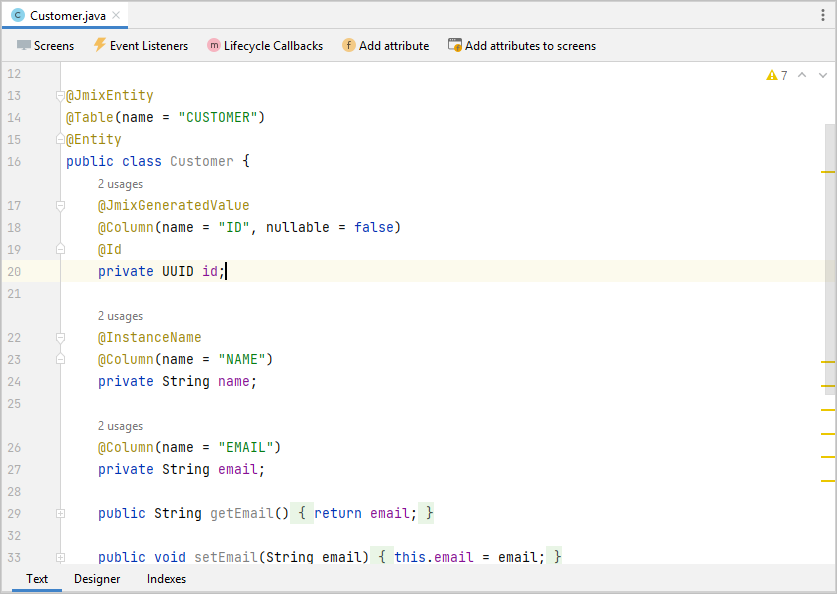
If you have an experience with JPA, you will see familiar annotations: @Entity, @Table, @Column, etc. There are also a few annotations specific to Jmix. The most important one is @JmixEntity on the class header. In general, any POJO can be an entity in Jmix if it is annotated with @JmixEntity.
The entity class can be edited manually, and when you switch back to the Designer tab, it will reflect the changes. For example, if you remove the nullable = false and @NotNull from an attribute, the designer will unselect the Mandatory checkbox for it.
The actions panel is located on the top of the source code editor. The following actions are added to the actions described above:
-
Add Attribute - opens a New Attribute dialog.
-
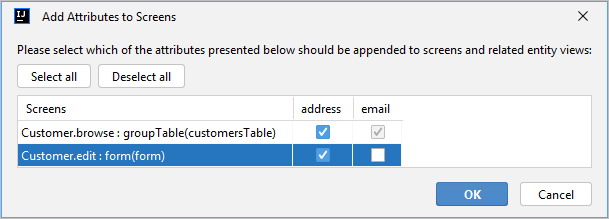
Add Attributes to Screen - opens an Add Attributes to Screen dialog which shows all screens that display the current entity. Select the attributes which should be appended to screens.
Indexes Tab
The Indexes tab is used to define unique indexes.
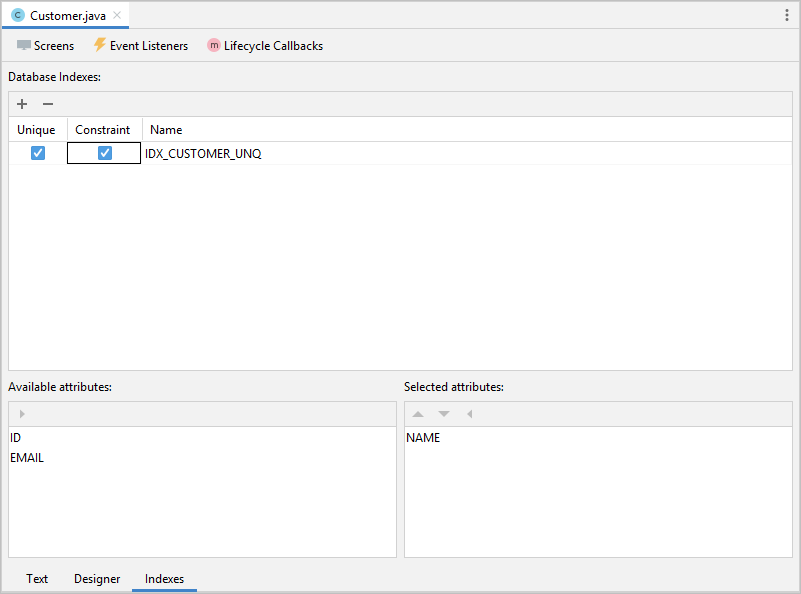
To create a new index, click the New Index () button in the Database Indexes toolbar. Studio will add a row to the indexes list.
Select an entity attribute or a set of attributes in the Available attributes list and click the arrow ![]() to move it to the Selected attributes.
to move it to the Selected attributes.
Select the Unique and / or Constraint checkboxes in the index row.
Adding Attributes
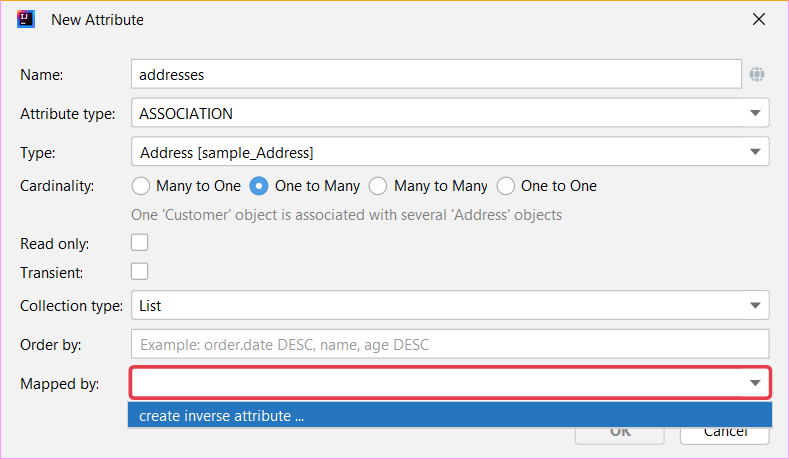
You can add attributes by clicking the Plus button in the Designer tab and configuring the attribute in the appeared dialog. In the example below, the addresses attribute with the Attribute type ASSOCIATION is added. In this case, for one-to-many reference, you need to create an inverse attribute in the Address entity.
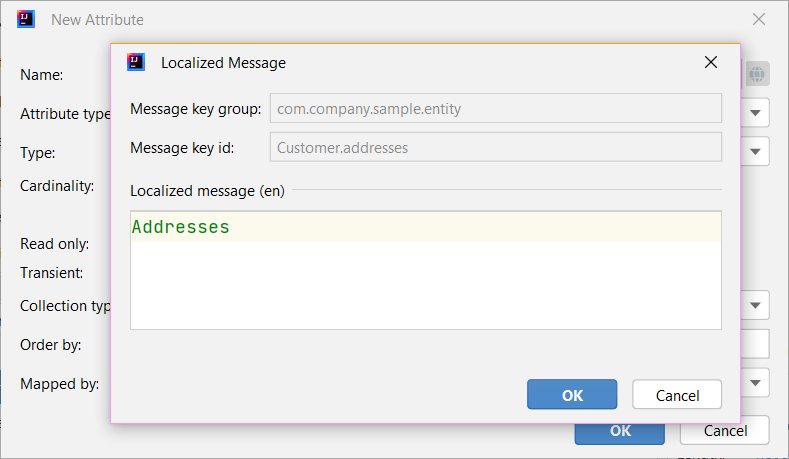
The globe button in the right part of the Name field lets you immediately set a user-friendly name for the attribute. It is stored in the messages.properties file and used by default in UI components.
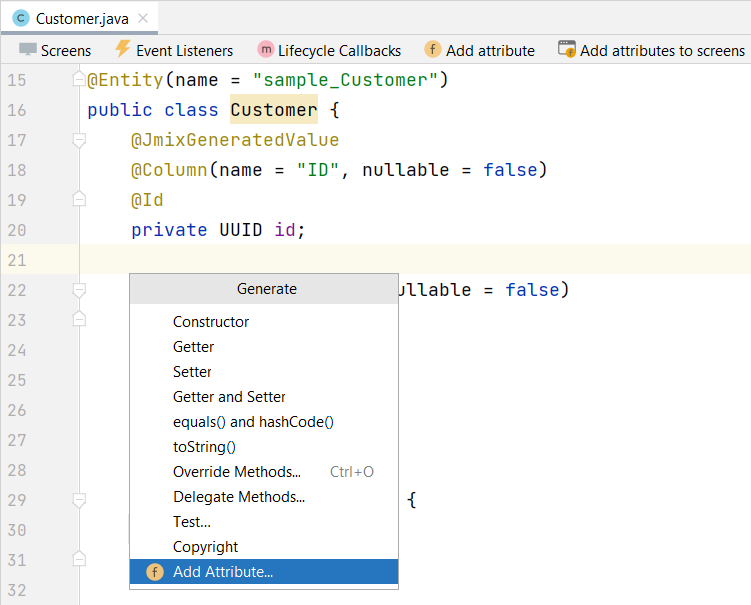
Also, you can call the creation attribute dialog in the Text tab clicking Add attribute on the top panel or in the Generate popup.
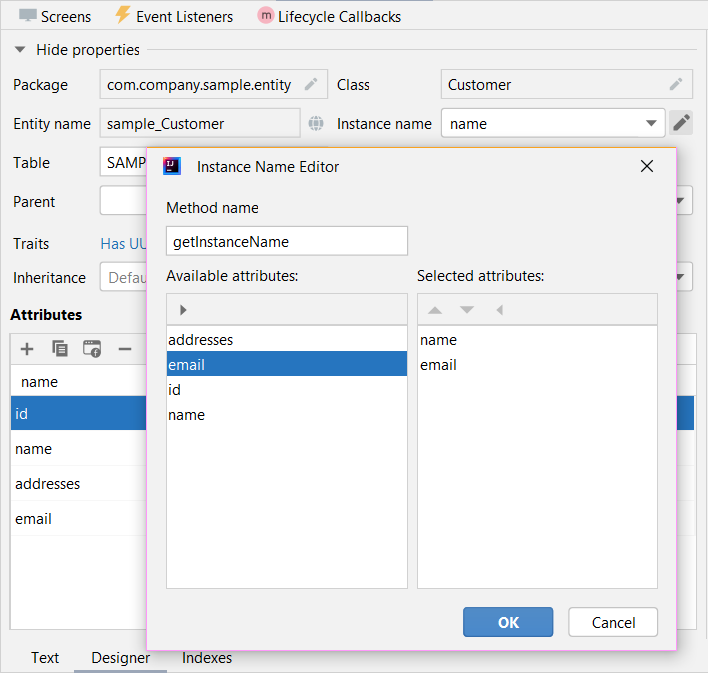
Creating Instance Name
Studio sets an instance name for an entity automatically when an attribute with one of the following names is added to the entity: name, title, caption, label, summary, description, firstName, lastName, middleName.
When you want to set another attribute for generating an instance name, use the visual constructor. You can open it by clicking the pencil button in the Instance name field.
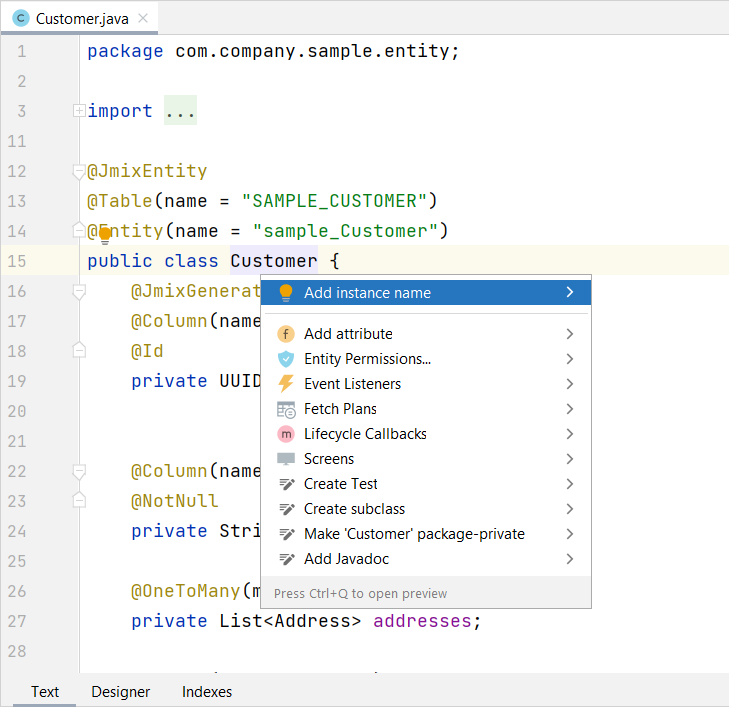
The instance name can also be created in the Text tab. Position the cursor on the class name, click Alt+Enter (⌥↩) and select Add instance name.
DTO Entity Designer
To create a DTO entity, click New () → DTO Entity in the Jmix Tool Window. The New DTO Entity dialog appears.
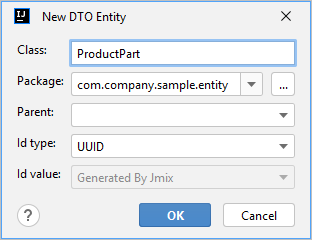
The displayed fields are similar to the JPA entity fields. Fill in the fields and click OK.
Studio displays two tabs for the created entity.
-
Text contains the source code of the DTO entity.
-
Designer shows the entity structure.
Enumeration Designer
Studio helps to work with enumerations by providing a set of actions and the visual designer. Use the menu in the Jmix Tool Window to create an enumeration.
When the enumeration is created, its class will be opened in the editor with two tabs.
-
Text contains the source code.
-
Designer shows the enumeration designer, where you can configure the enumeration and its values using a graphical interface instead of writing Java code.
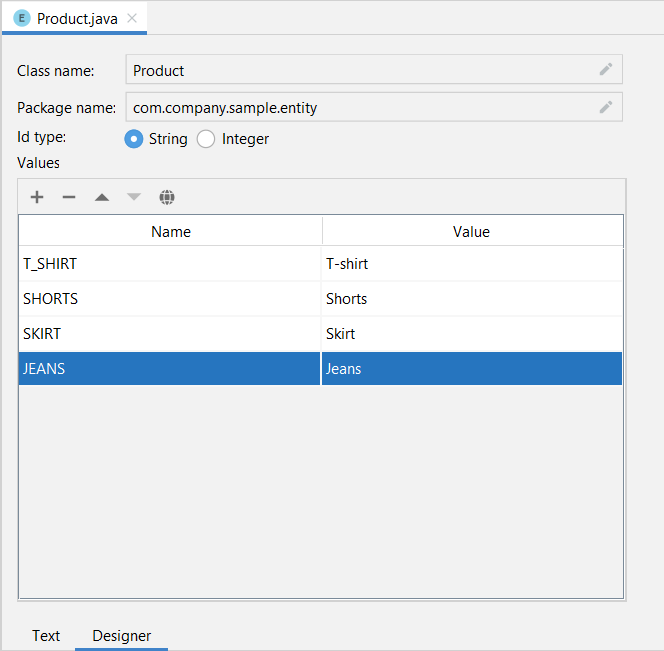
Use the Values table and its associated buttons to set up enumeration constants.
-
Name column allows you to enter the enumeration constant name to be used in the code. It can be renamed later without affecting existing data in the database.
-
Value column allows entering the id of the enumeration constant. This is the actual value stored in the database.
The globe button allows you to set localized captions for the selected enumeration constant.
Designer also provides the ability to change the id type used by the enumeration from String to Integer and vice versa. Studio will migrate usages of the enumeration in the code. After that, you should change the values of the existing enumeration constants.
|
Such migration does not migrate enumeration values already stored in the database tables. You will need to implement such migration yourself. |
