What’s New
This section covers new features of Jmix framework and Studio 1.4, as well as some breaking changes to be aware of when upgrading from a previous version of the framework.
How To Upgrade
|
To create new projects with Jmix 1.4 or to upgrade an existing project, you need Studio 1.4 or later, so update your Jmix Studio plugin first. The minimal supported IntelliJ IDEA version is now 2022.1. |
See Upgrading Project section for how to upgrade your project using Studio. The automatic migration procedure makes the following changes in your project:
-
Updates the version of Jmix BOM which in turn defines versions of all dependencies.
-
Updates the version of Jmix Gradle plugin.
-
Updates the version of Gradle wrapper to 7.5.1 in
gradle/wrapper/gradle-wrapper.properties.
New Features and Improvements
Flow UI
The new Flow UI module based on Vaadin 23 is now available as a solid foundation for creating new projects. Its API is stable enough and will be evolved further by the standard rules: backward compatible patches, possible minor incompatibilities in minor feature releases.
To use Flow UI in a new project, create it with the Full-Stack Application with Incubating FlowUI template.
| We consider Flow UI as incubating module because it’s not yet comparable in features with the classic UI. |
There are a few add-ons ready to be used in a Flow UI project: Data Tools, Audit, as well as all add-ons without UI, like REST or file storage implementations.
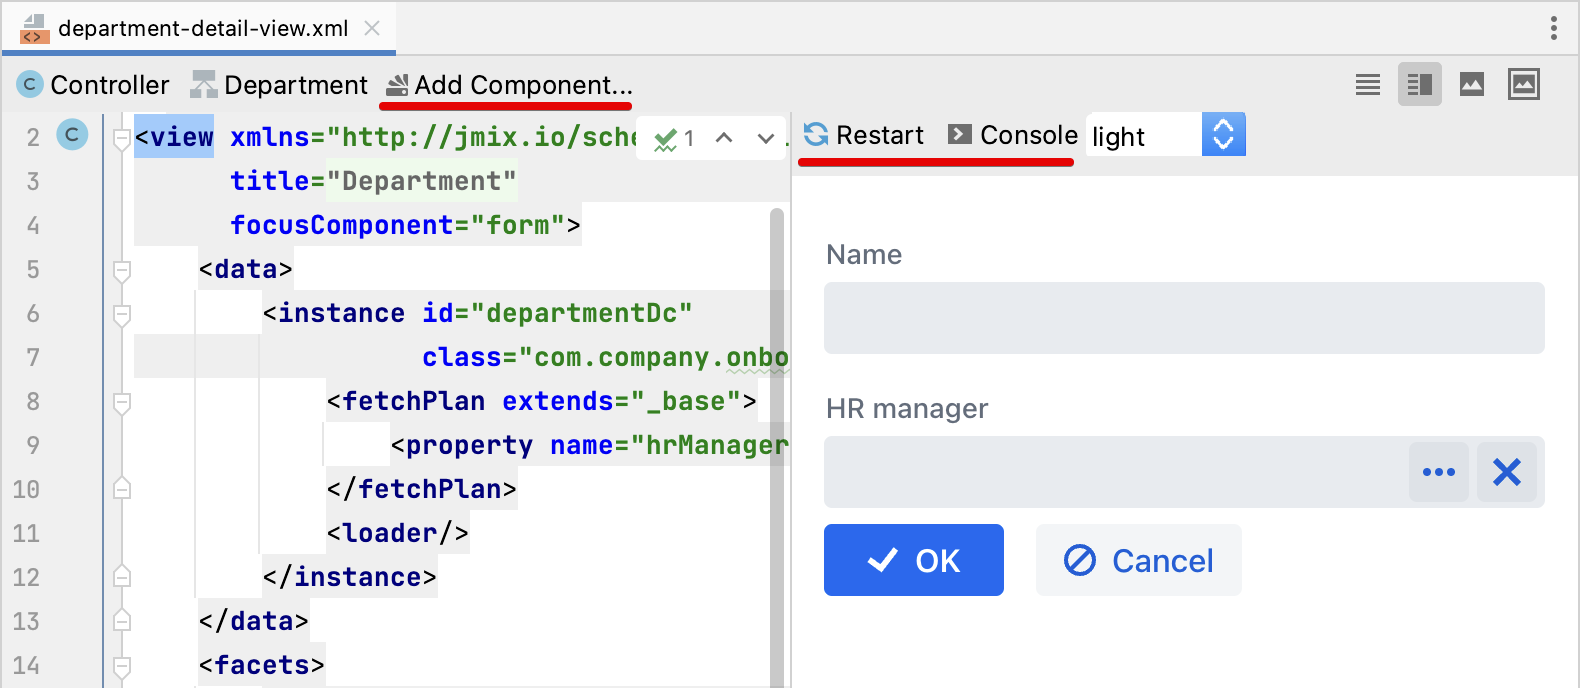
Studio comes with the new visual designer for Flow UI views. It has a significant difference from the classic UI designer: there is no Palette tool window. Instead, use the Add Component action available through the top actions panel, Component Hierarchy context menu and Generate menu (Alt+Ins / Cmd+N).
If you have any trouble with the designer preview window, click Restart button on its top panel. The Console button opens or closes the console showing the frontend build output, which can be helpful in diagnosing problems.
Jmix Tool Window
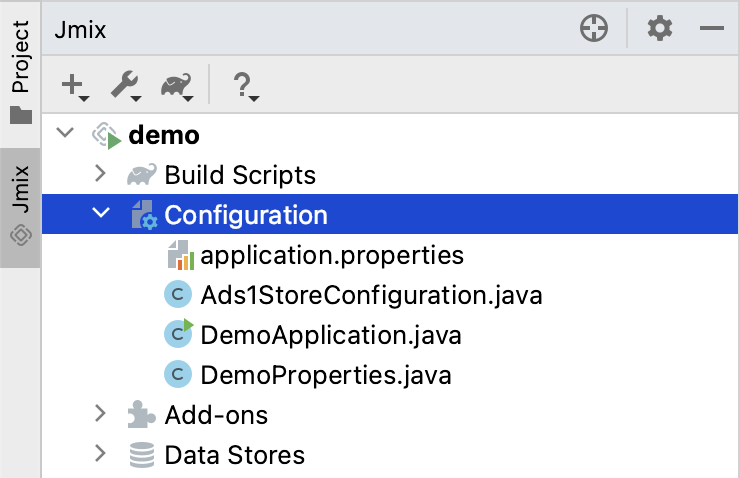
The Configuration section of the Jmix tool window now displays all classes annotated with @Configuration and its derived annotations (e.g. @SpringBootApplication), @ConfigurationProperties classes, as well as REST queries and services configuration files:
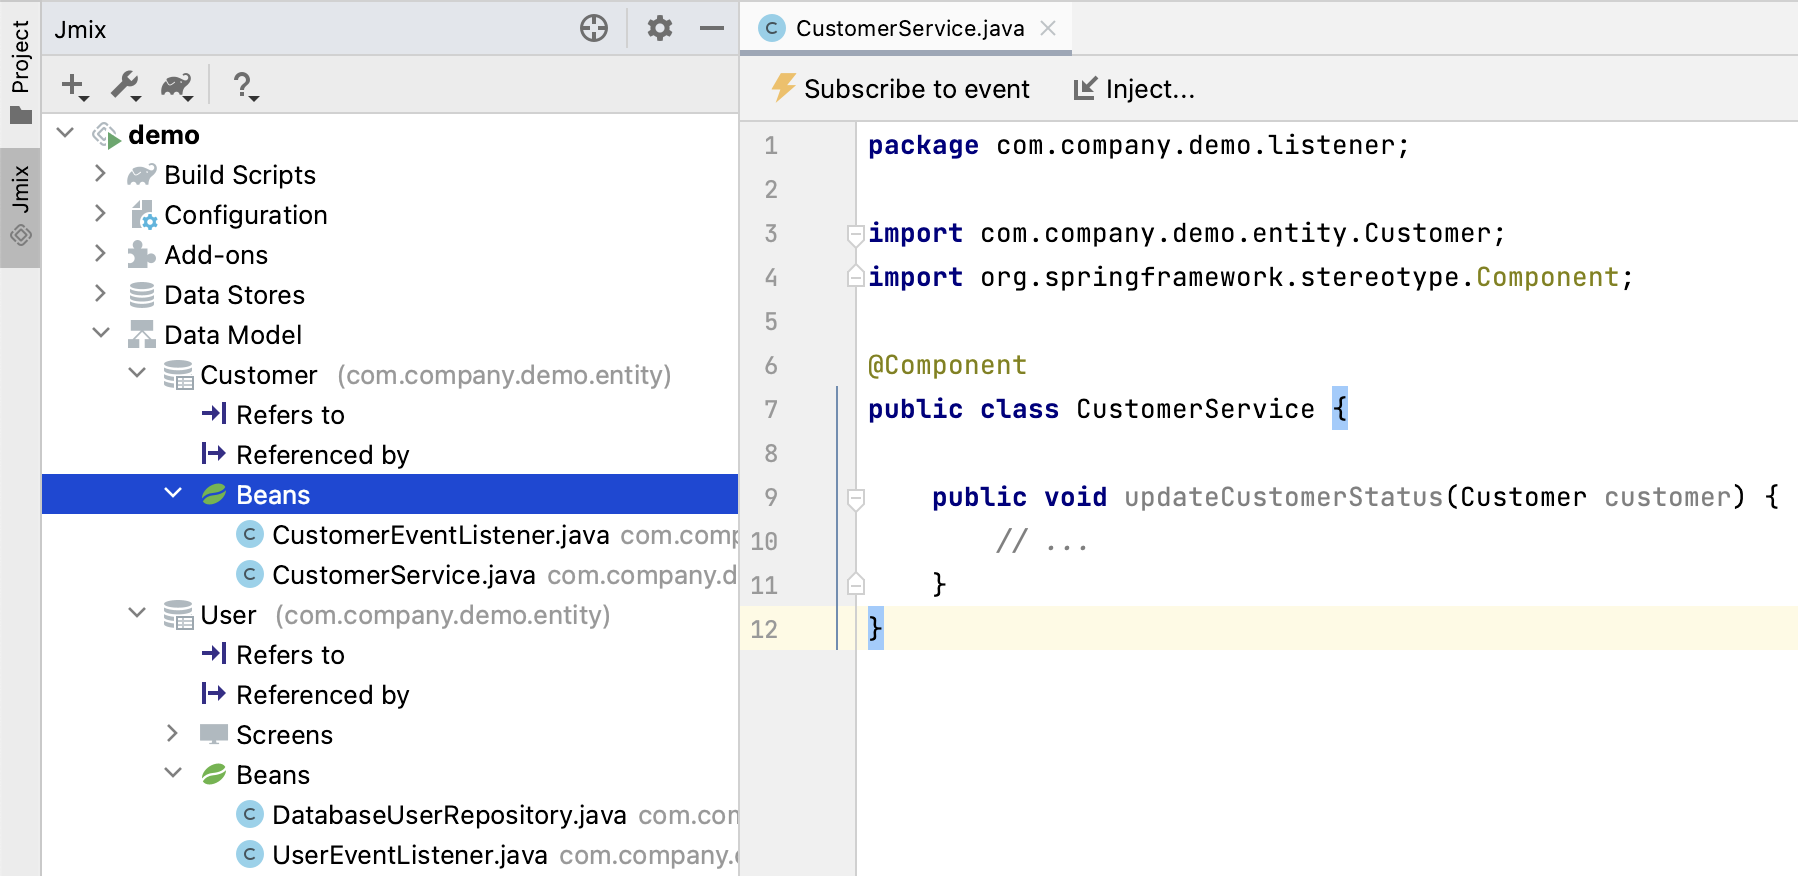
Spring beans having methods with an entity in the arguments or the result are shown in the Beans section of the entity:
You can see items grouped by packages if you select Show Options Menu ( ) → Group by Packages. ) → Group by Packages.
|
Constructor Injection
Studio now supports constructor injection into Spring beans. In the Choose Objects to Inject dialog, select the Use constructor injection checkbox:
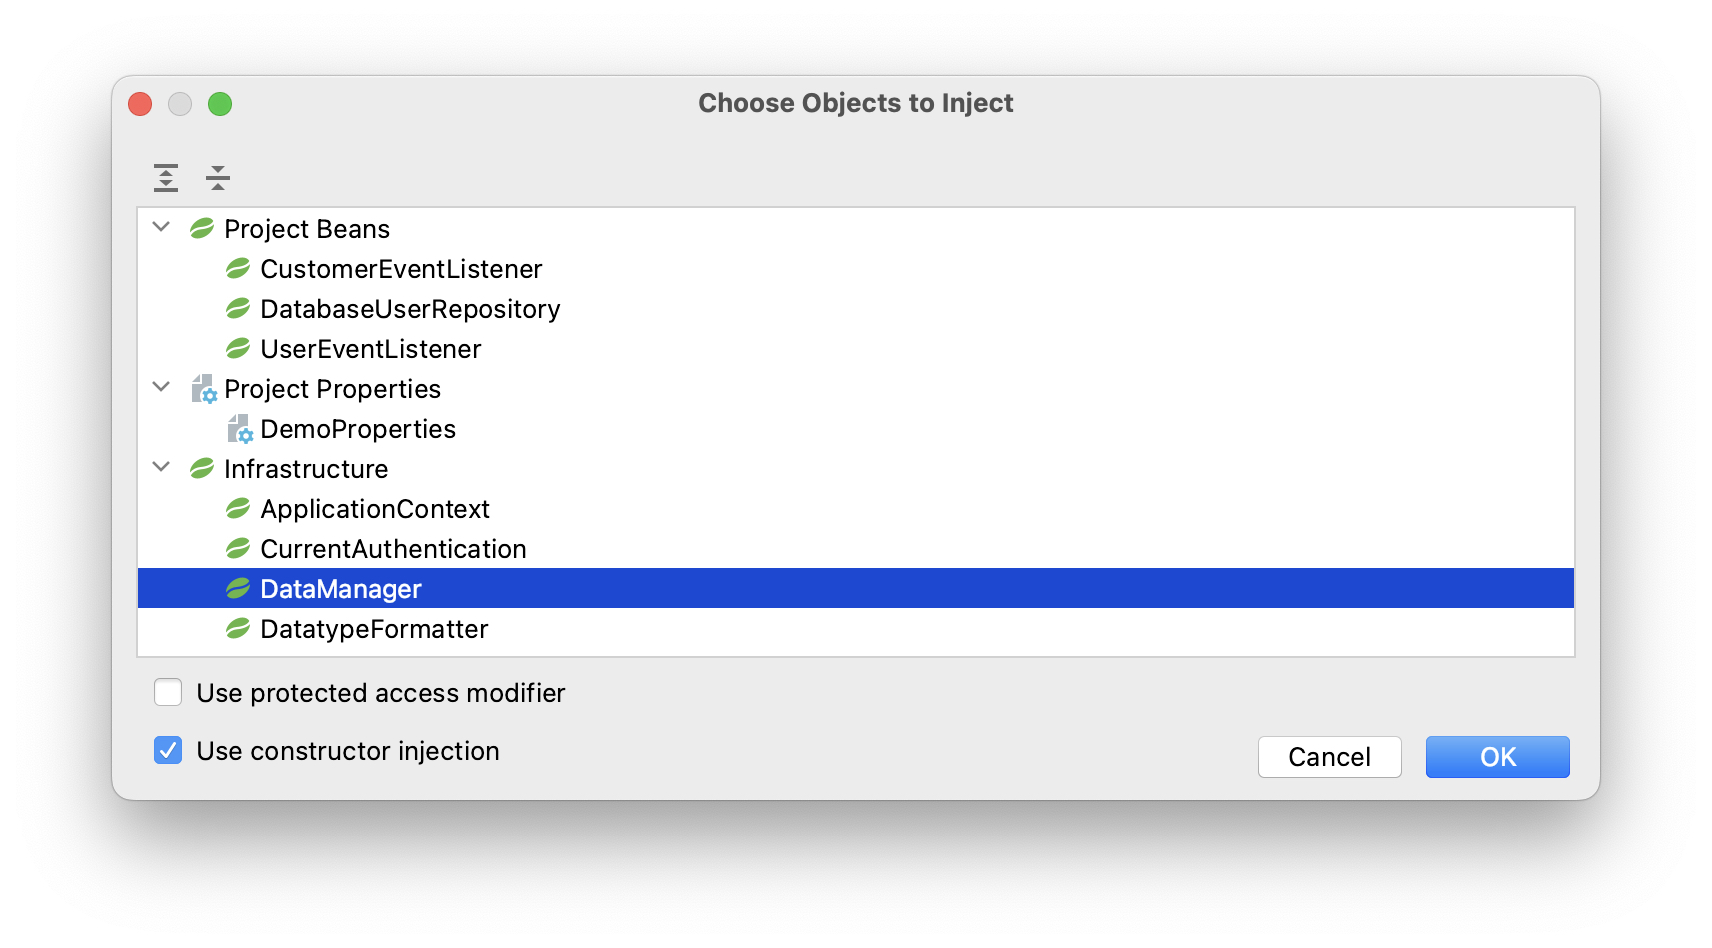
Then Studio will create a final field and a constructor argument:
@Component
public class CustomerService {

    private final DataManager dataManager;

    public CustomerService(DataManager dataManager) {
        this.dataManager = dataManager;
    }
Your choice will be remembered, and you can change it also in the Jmix plugin settings.
Row-level Role Wizard
Now you can create row-level roles and policies using a wizard available via the New → Row-level Role command of the Jmix tool window. See more information in the Row-level Role Wizard section.
Custom Project Templates
Studio now supports custom artifacts containing project templates, so you can provide your own templates for new projects, UI screens and FlowUI views.
See details in the Custom Project Templates section.
Security Configuration Extension Points
Now you can extend security configurations provided by the framework and add-ons instead of replacing them completely.
To adjust a security configuration, define a Spring bean extending the AbstractHttpConfigurer class and annotate it with an appropriate @Qualifier.
Example of extending StandardSecurityConfiguration:
@Component
@Qualifier(StandardSecurityConfiguration.SECURITY_CONFIGURER_QUALIFIER)
public class MySecurityConfigurer extends AbstractHttpConfigurer<MySecurityConfigurer, HttpSecurity> {

    @Override
    public void configure(HttpSecurity http) throws Exception {
        MyFilter myFilter = new MyFilter();
        http.addFilterBefore(myFilter, UsernamePasswordAuthenticationFilter.class);
    }
}
Example of extending security configuration of OIDC add-on:
@Component
@Qualifier(OidcAutoConfiguration.OAuth2LoginSecurityConfiguration.SECURITY_CONFIGURER_QUALIFIER)
public class MyOidcSecurityConfigurer extends AbstractHttpConfigurer<MyOidcSecurityConfigurer, HttpSecurity> {
    @Override
    public void init(HttpSecurity http) throws Exception {
	// any method that adds another configurer must be invoked in the init method
        http.headers(headers -> {
            headers.frameOptions().deny();
        });
    }
}
Custom Password Validation
To implement a custom password validation in the application, create a bean (or multiple beans) implementing the PasswordValidator interface, for example:
@Component
public class MyPasswordValidator implements PasswordValidator<User> {

    @Override
    public void validate(PasswordValidationContext<User> context) throws PasswordValidationException {
         if (context.getPassword().length() < 3)
            throw new PasswordValidationException("Password is too short, must be >= 3 characters");
    }
}
All password validators will be automatically used in the ChangePassword action dialog.
To add the validation to the User edit screen or detail view, use PasswordValidation helper bean:
@Autowired
private PasswordValidation passwordValidation;

@Subscribe
protected void onBeforeCommit(BeforeCommitChangesEvent event) {
  if (entityStates.isNew(getEditedEntity())) {
      // ...
      List<String> validationErrors = passwordValidation.validate(getEditedEntity(), passwordField.getValue());
      if (!validationErrors.isEmpty()) {
          notifications.create(Notifications.NotificationType.WARNING)
                  .withCaption(String.join("\n", validationErrors))
                  .show();
          event.preventCommit();
      }
      getEditedEntity().setPassword(passwordEncoder.encode(passwordField.getValue()));
  }
}
Pessimistic Lock by DataManager
The DataManager fluent loader interface now accepts the javax.persistence.LockModeType enum values in the lockMode() method. When working with JPA entities, it leads to the corresponding pessimistic lock on the database level using the select … for update statement.
For example:
Customer customer = dataManager.load(Customer.class)
        .id(customerId)
        .lockMode(LockModeType.PESSIMISTIC_WRITE)
        .one();
Preview Features
Authorization Server
The Jmix Authorization Server add-on allows you to issue access and refresh tokens and protect API resources (REST API, custom controllers) with these tokens. It supports authorization code grant for web clients and mobile devices and client credentials grant for server-to-server interaction.
The add-on is built on top of Spring Authorization Server. Jmix Authorization Server is a replacement for Jmix Security OAuth2 module which depends on outdated Spring Security OAuth project.
See more details in the project’s README.
Breaking Changes
Migration to SecurityFilterChain
The framework security configurations have been migrated from the deprecated WebSecurityConfigurerAdapter to SecurityFilterChain.
If you have security configurations that extend WebSecurityConfigurerAdapter, rewrite them by following recommendations of this article from the Spring blog.
