Jmix Tool Window
Jmix tool window is designed to represent significant elements of the project. It normally opens on the left side of the IDE. You can change the position of the tool window in the IDE, see IntelliJ IDEA documentation.
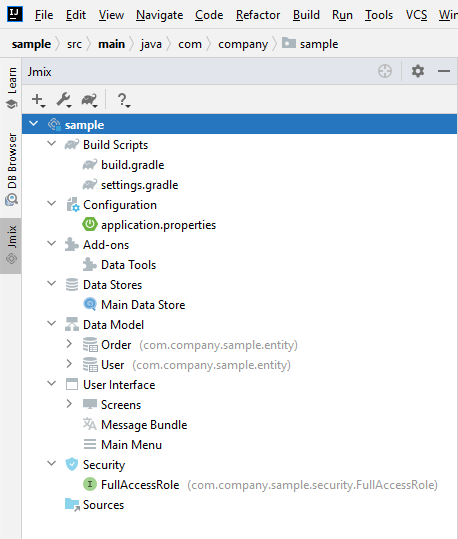
Sections
-
Build Scripts – contains two main project scripts:
-
build.gradledefines the build configuration. -
settings.gradledefines the project name and the set of modules.
-
-
Configuration – includes application configuration files:
-
application.properties– contains application properties of the Spring Boot application. -
fetch-plans.xml– defines shared fetch plans of the project.
-
-
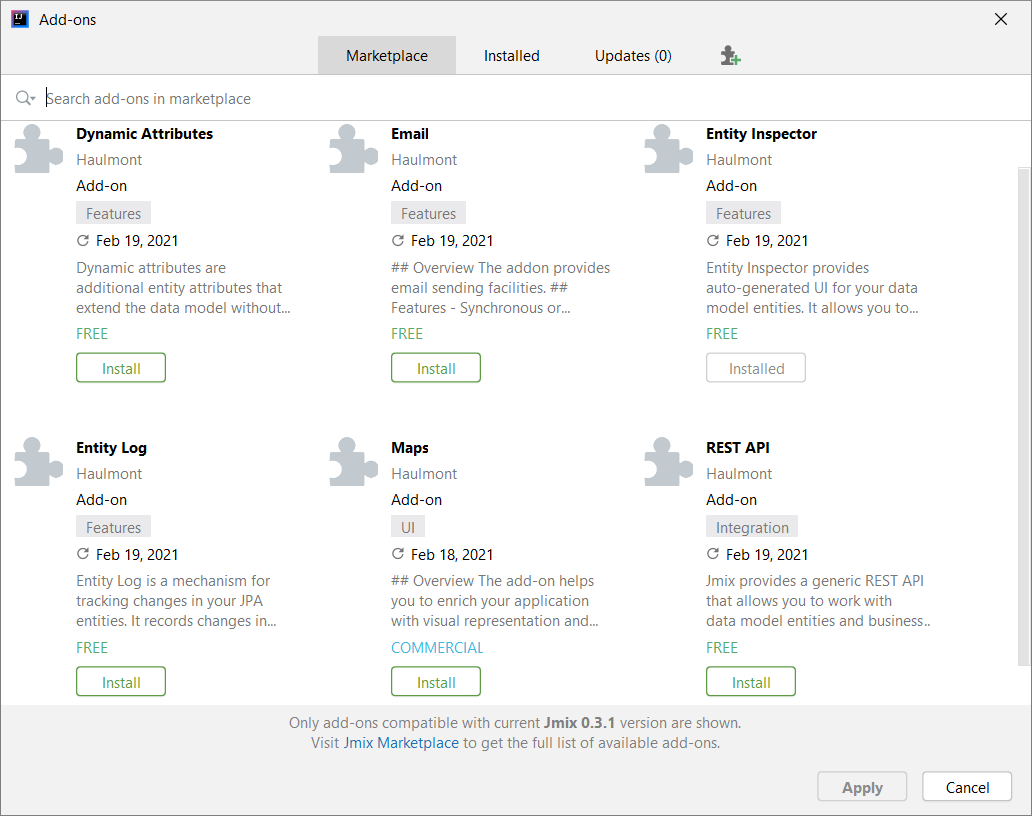
Add-ons - displays the list of Jmix add-ons installed for the project.
-
Data Stores – displays and manages the list of data stores the project is connected to. By default, there is only one Main data store.
-
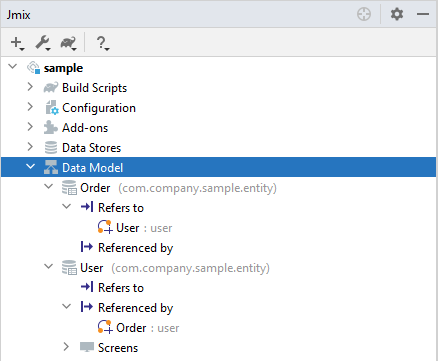
Data Model – displays and manages the data model of the project. It contains entities and their related elements like UI screens.
There are subsections Refers to and Referenced by under every entity. They show dependencies between entities, embedded attributes, and inheritance relationships.
-
Refers to shows references to other entities.
-
Referenced by shows entities that have references to this entity.
These subsections help you to explore the data model and navigate to related entities by using the context menu and Jump to Source actions.
-
-
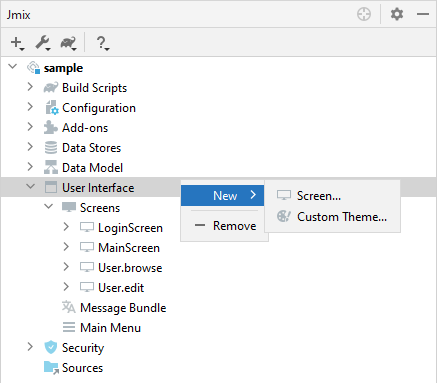
User Interface – contains everything related to Jmix UI, such as main menu structure, themes, and so on.
-
Screens shows the controller and descriptor files of the user interface.
-
Message Bundle opens
messages.propertiesfile containing key/value pairs, where the key is the message identifier referenced by the application code, and the value is the message itself. -
Main Menu opens
menu.xmlfile that defines the structure of the application main menu.
-
-
Security contains everything relate to the project security settings.
-
Sources – lets you switch to the project tree.
Context Menu
Context menu allows you to create new elements. For example, right-clicking on the User Interface calls actions related to the screens and themes of the user interface.
Toolbar
The toolbar provides quick access to commonly used actions and settings.
Creating New Elements
In the New group of actions, you can find the project elements you need to create.
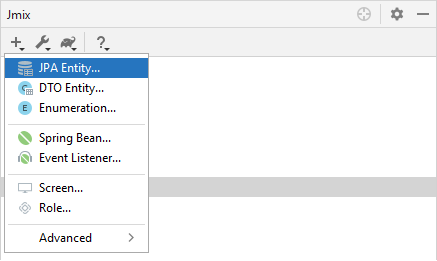
For example, JPA Entity opens the dialog for creating an entity.
Settings
This group of actions provides access to some project settings.
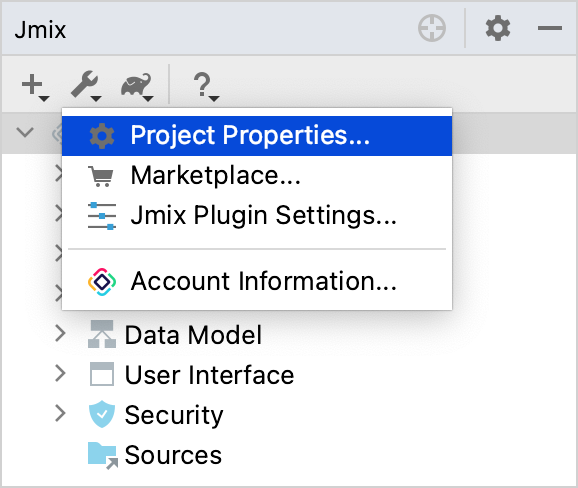
In the Project Properties editor, you can configure your project.
Marketplace action opens the Add-ons window, where you can manage add-ons included in your project.
Account Information action opens Jmix Subscription dialog where you can view details about your account and subscription.
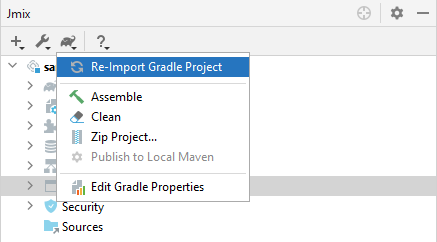
Gradle
-
Re-Import Gradle Project runs Gradle project synchronization which is necessary for Studio functioning. Use this action if the automatic synchronization has failed, for example, due to network inaccessibility or invalid repository configuration.
Also, you should use this action to apply changes that you made manually in the
build.gradle,gradle.propertiesor in some other Gradle settings. -
Assemble and Clean run frequently used Gradle tasks:
assembleandclean. -
Zip Project opens a dialog for the
zipProjectGradle task that can be used for code sharing purposes. -
Edit Gradle Properties opens
~/.gradle/gradle.propertiesfile for editing.
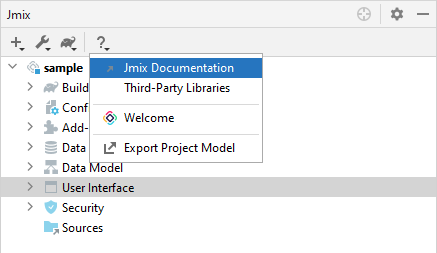
Help
-
Jmix Documentation opens the documentation website in browser.
-
Third-Party Libraries opens a dialog that provides information about third-party libraries.
-
Welcome opens the welcome screen.
-
Export Project Model saves JSON file with the project model. Needed for migrated projects with a frontend module.
Assigning Shortcuts
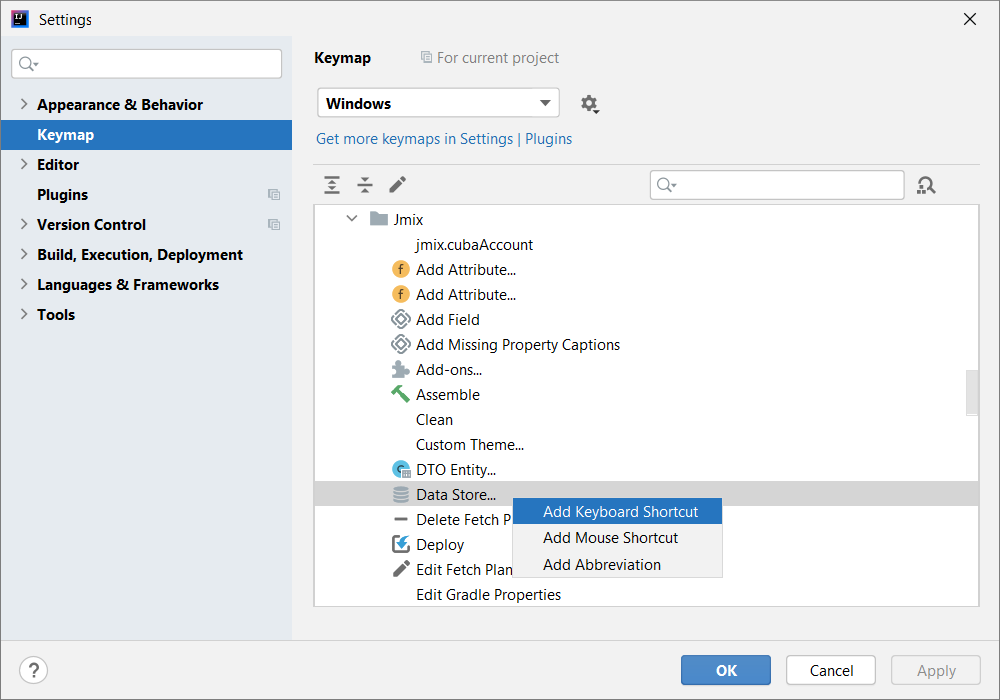
You can assign shortcuts for some frequently used actions. Open File → Settings → Keymap window and find Plugins → Jmix in the tree to assign a shortcut.
For more details, see IntelliJ IDEA documentation.
