Initial Entity Values
In this guide, you will learn how to set up initial values for entities in Jmix. Initial values are a key feature that can streamline data entry processes and ensure consistency across your application. We will explore different approaches to define these values, from simple attribute defaults to more dynamic options using lifecycle events and UI-level initialization.
The guide covers three main methods for setting initial values in entities—direct attribute assignment, lifecycle event handling, and UI-based initialization—using practical examples. By the end of this guide, you will understand how to effectively apply each method in your Jmix applications to improve usability and maintain reliable default data.
Requirements
If you want to implement this guide step by step, you will need the following:
-
Get the completed sample project, which includes all the examples used in this guide. This allows you to explore the finished implementation and experiment with the functionality right away.
-
You can download and unzip the source repository
-
Or clone it and switch to the
release_2_5branch:git clone https://github.com/jmix-framework/jmix-initial-entity-values-sample cd jmix-initial-entity-values-sample git checkout release_2_5
-
-
Alternatively, you can start with the base Jmix Petclinic project and follow the step-by-step instructions in this guide to implement the features yourself.
What We Are Going to Build
This guide enhances the Jmix Petclinic example with practical use cases for setting initial values in entities. The Petclinic application demonstrates various methods for initializing entity attributes throughout their lifecycle—from creation to persistence—using real-world examples such as visit records for pets.
The application includes the following examples:
-
Default Values for Visit Fields: Automatically assign default values, such as setting
paid = falsedirectly in the entity or initializing thetreatmentStatustoUPCOMINGusing@PostConstruct. -
Automatic Pet Health Status in the Pet List View: Use a
Create Action Initializerto set thehealthStatusof new pets toUNKNOWNwhen created from the Pet list view. -
Default Descriptions for Visits Based on Type: In the Visit detail view, generate a structured description (e.g., checklist for a regular check-up) if the user leaves the field blank. This logic is executed during the
BeforeSaveEventin the UI. -
Unique Visit Numbers via Entity Listener: Automatically generate a formatted visit number based on the visit date using an
EntitySavingEventlistener before the record is saved. -
Automatic Nurse Assignment After Visit Creation: Assign an available nurse to a new visit using an
EntityChangedEventlistener triggered after the database commit. This ensures that only nurses without overlapping appointments are assigned.
These examples illustrate the different approaches for setting initial entity values, ranging from simple defaults to complex logic involving user input and database transactions. The guide demonstrates how to structure initialization logic effectively across the entity lifecycle in Jmix applications.
Entity Lifecycle Overview
Before diving into the techniques for setting initial values, let’s first look at the typical lifecycle of an entity in Jmix. The lifecycle spans multiple stages, from creation to persistence, offering various opportunities for initialization logic.

The process begins with 1. System: Entity Instantiation, where basic defaults are applied when Jmix creates a new entity programmatically or through the UI. Next, during 2. UI: View Initialization, UI-level events such as InitEntityEvent or Create Action Initializers allow for setting values based on user context.
As users interact with the form, 3. UI: Dependent Field Updates dynamically adjust fields based on changes in user input, ensuring consistency. The 4. UI: Initialization while Saving phase allows for final modifications before persistence, ensuring necessary adjustments based on the current state.
Finally, 5. System: Persistence Events occur when the entity is saved to the database. System-level events like EntitySavingEvent and EntityChangedEvent provide the opportunity for automatic value assignments and post-save actions.
Now, let’s explore the first example, starting with system-level entity initialization.
System: Entity Instantiation
Entity fields can be initialized in two main ways: by setting default values directly in the field definition or by using a lifecycle callback method with @PostConstruct. These approaches serve different purposes depending on the complexity and requirements of the initialization logic.
Default Values
Simple attributes like Boolean, Integer can be initialized directly in the field declaration of an entity class. In the Petclinic example, the Visit entity has an attribute paid, which is a boolean flag indicating whether a visit has already been paid. This value should, by default, be FALSE. The default value can be set directly in the field definition:
@JmixEntity
@Table(name = "PETCLINIC_VISIT", indexes = {
        @Index(name = "IDX_PETCLINIC_VISIT_ASSIGNED_NURSE", columnList = "ASSIGNED_NURSE_ID"),
        @Index(name = "IDX_PETCLINIC_VISIT_PET", columnList = "PET_ID"),
        @Index(name = "IDX_PETCLINIC_VISIT_VISIT_NUMBER", columnList = "VISIT_NUMBER, DELETED_DATE", unique = true)
})
@Entity(name = "petclinic_Visit")
public class Visit {

    @Column(name = "PAID")
    private Boolean paid = Boolean.FALSE;

}
Even though the paid field is initialized with a default value, this does not mean it is immutable. The value can still be modified programmatically or through the UI as needed. This default simply provides an initial state for the entity, ensuring consistency while allowing flexibility for changes before saving.
|
This approach is simple and efficient for static default values that do not depend on external factors or dynamic calculations.
PostConstruct Initialization
The @PostConstruct annotation allows you to execute custom initialization logic after an entity instance has been created. This method is called once the object is fully initialized, but before it is used. This is particularly useful for initializing fields that depend on more complex logic or external methods.
The @PostConstruct method is invoked in the following scenarios:
-
When an instance is programmatically created using the
create()method of theMetadata,DataManagerorDataContextbeans. For exampledataManager.create(Visit.class). -
When an instance is created by the UI framework during user interaction.
-
When an instance is created by the generic REST API.
|
Because initialization logic like |
Here’s an example of a @PostConstruct method in the Visit entity. This method sets a static default value for the visitStatus field when the entity is created:
@JmixEntity
@Table(name = "PETCLINIC_VISIT", indexes = {
        @Index(name = "IDX_PETCLINIC_VISIT_ASSIGNED_NURSE", columnList = "ASSIGNED_NURSE_ID"),
        @Index(name = "IDX_PETCLINIC_VISIT_PET", columnList = "PET_ID"),
        @Index(name = "IDX_PETCLINIC_VISIT_VISIT_NUMBER", columnList = "VISIT_NUMBER, DELETED_DATE", unique = true)
})
@Entity(name = "petclinic_Visit")
public class Visit {

    @PostConstruct (1)
    public void initTreatmentStatus() {
        if (treatmentStatus == null) {
            setTreatmentStatus(VisitTreatmentStatus.UPCOMING); (2)
        }
    }
}| 1 | The @PostConstruct annotation ensures the method is executed after the entity is fully initialized. |
| 2 | The treatmentStatus field is set to the predefined value UPCOMING if it has not already been initialized. |
|
The name of the method, It is also possible to define multiple methods with the |
At the time the @PostConstruct method is invoked, no values from the user interface or external sources (e.g., REST API inputs) have been set on the entity. This method is executed immediately after the entity instance is created. Therefore, it is not suitable for initialization logic that depends on pre-existing field values.
Dependency Injection
In many cases, it is not sufficient to initialize fields with static values or predefined logic. Initialization often requires dynamic values based on the application’s runtime context, such as the current timestamp, user-specific settings, or other managed components. To support this, Spring-managed beans can be injected directly into the parameters of a @PostConstruct method.
For example, consider initializing a timestamp field in the Visit entity. Using the TimeSource bean provided by the Jmix framework, you can dynamically retrieve the current system time and set it as a default value:
@JmixEntity
@Table(name = "PETCLINIC_VISIT", indexes = {
        @Index(name = "IDX_PETCLINIC_VISIT_ASSIGNED_NURSE", columnList = "ASSIGNED_NURSE_ID"),
        @Index(name = "IDX_PETCLINIC_VISIT_PET", columnList = "PET_ID"),
        @Index(name = "IDX_PETCLINIC_VISIT_VISIT_NUMBER", columnList = "VISIT_NUMBER, DELETED_DATE", unique = true)
})
@Entity(name = "petclinic_Visit")
public class Visit {

    @PostConstruct (1)
    public void initVisitStart(
            TimeSource timeSource (2)
    ) {
        if (visitStart == null) {
            setVisitStart(timeSource.now().toLocalDateTime()); (3)
        }
    }
}| 1 | The @PostConstruct annotation marks the method to be executed after the entity is fully initialized. |
| 2 | The TimeSource bean is injected directly into the method, providing access to the current system time. |
| 3 | If the visitStart field has not been set, it is initialized with the current time. |
Using Spring Bean Injection, you can directly access framework APIs and custom beans in your initialization logic, enabling flexible and dynamic entity initialization with context-specific data handling.
UI: View Initialization
On the UI layer, there are two main ways to initialize an entity during view creation. The first one is external, where the entity is initialized by the code that opens the destination view. The second one is internal, where initialization happens directly within the view controller that manages the entity.
External initialization can be achieved in two different ways, both of which we will explore in this guide. One approach is using the Create Action Initializer, which allows the calling view to set default values before opening the detail view. The other approach leverages the Dialog Windows API, which enables more complex initialization logic, such as selecting related entities in an intermediate step before opening the detail view.
We will now examine these external initialization methods in detail.
External Initialization via Create Action Initializer
One way to initialize entity attributes externally is by using the initializer method of a Create action. This approach allows you to define custom initialization logic for new entities created via standard actions, providing a non-invasive way to set default values.
In contrast to the internal initialization approach, this method offers more flexibility by allowing access to the context of the ListView. For example, you can incorporate user inputs or other dynamic information available in the current view when initializing the entity. At the same time, it avoids the need for extensive modifications to the standard behavior of the Create action, keeping the implementation simple and easy to maintain.
In the example below, the initializer method is used on the Pet List View to set the healthStatus of a Pet entity to UNKNOWN whenever a new Pet is created through the petsDataGrid.create action.
@Route(value = "pets", layout = MainView.class)
@ViewController("petclinic_Pet.list")
@ViewDescriptor("pet-list-view.xml")
@LookupComponent("petsDataGrid")
@DialogMode(width = "50em")
public class PetListView extends StandardListView<Pet> {

    @Install(to = "petsDataGrid.create", subject = "initializer") (1)
    private void petsDataGridCreateInitializer(final Pet pet) { (2)
        pet.setHealthStatus(HealthStatus.UNKNOWN); (3)
    }

}| 1 | The @Install annotation connects this method to the initializer property of the Create action for the petsDataGrid component. The initializer is responsible for customizing the default state of the entity instance when a new entity is created through this action. By using this mechanism, you can ensure specific fields are pre-filled or set with default values at the moment of entity creation. |
| 2 | The Pet entity instance is passed as a parameter to the method. This instance represents the new entity being created, allowing you to modify its initial state. |
| 3 | The setHealthStatus method is used to set the default value for the healthStatus field of the Pet entity to UNKNOWN. |
This method is ideal when the initialization logic is relatively simple and does not require additional user interaction or complex workflows.
External Initialization via Dialog Windows API
In some scenarios, the standard actions like create and edit may not fully accommodate the level of customization required. For example, you might need to present an intermediate dialog for user input or perform additional operations before initializing and displaying the new entity. In such cases, the Dialog Windows API provides a flexible alternative.
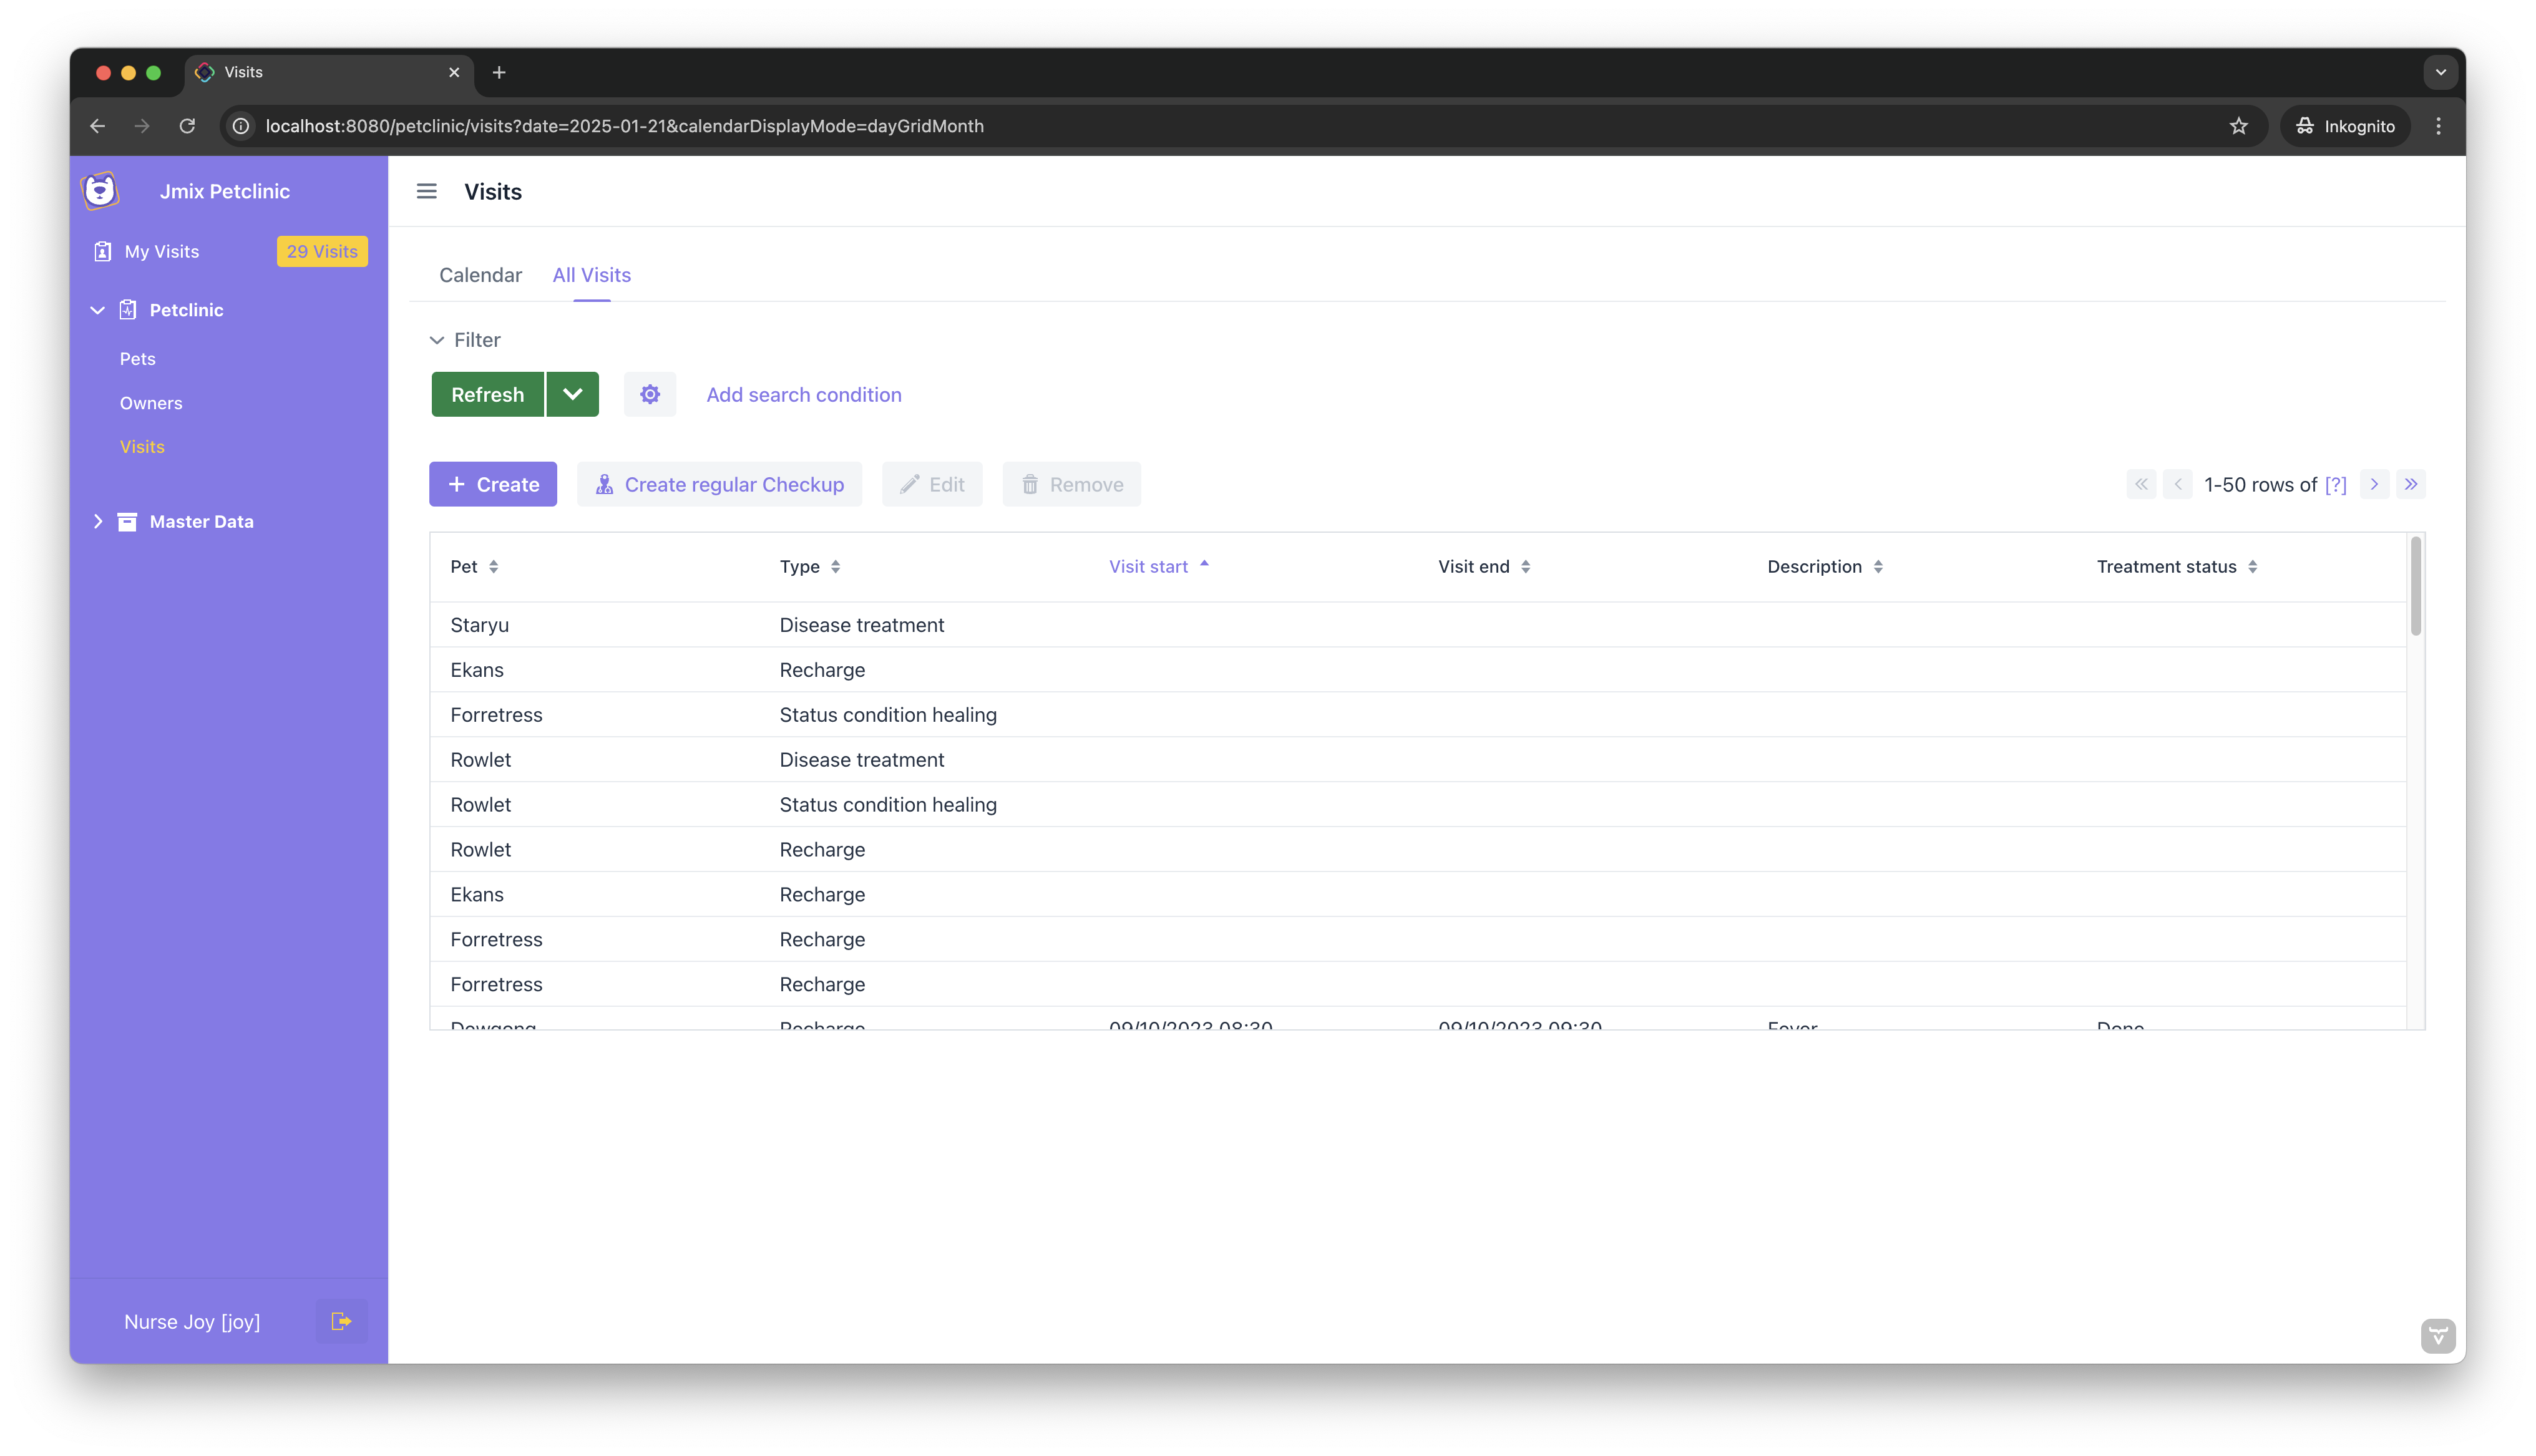
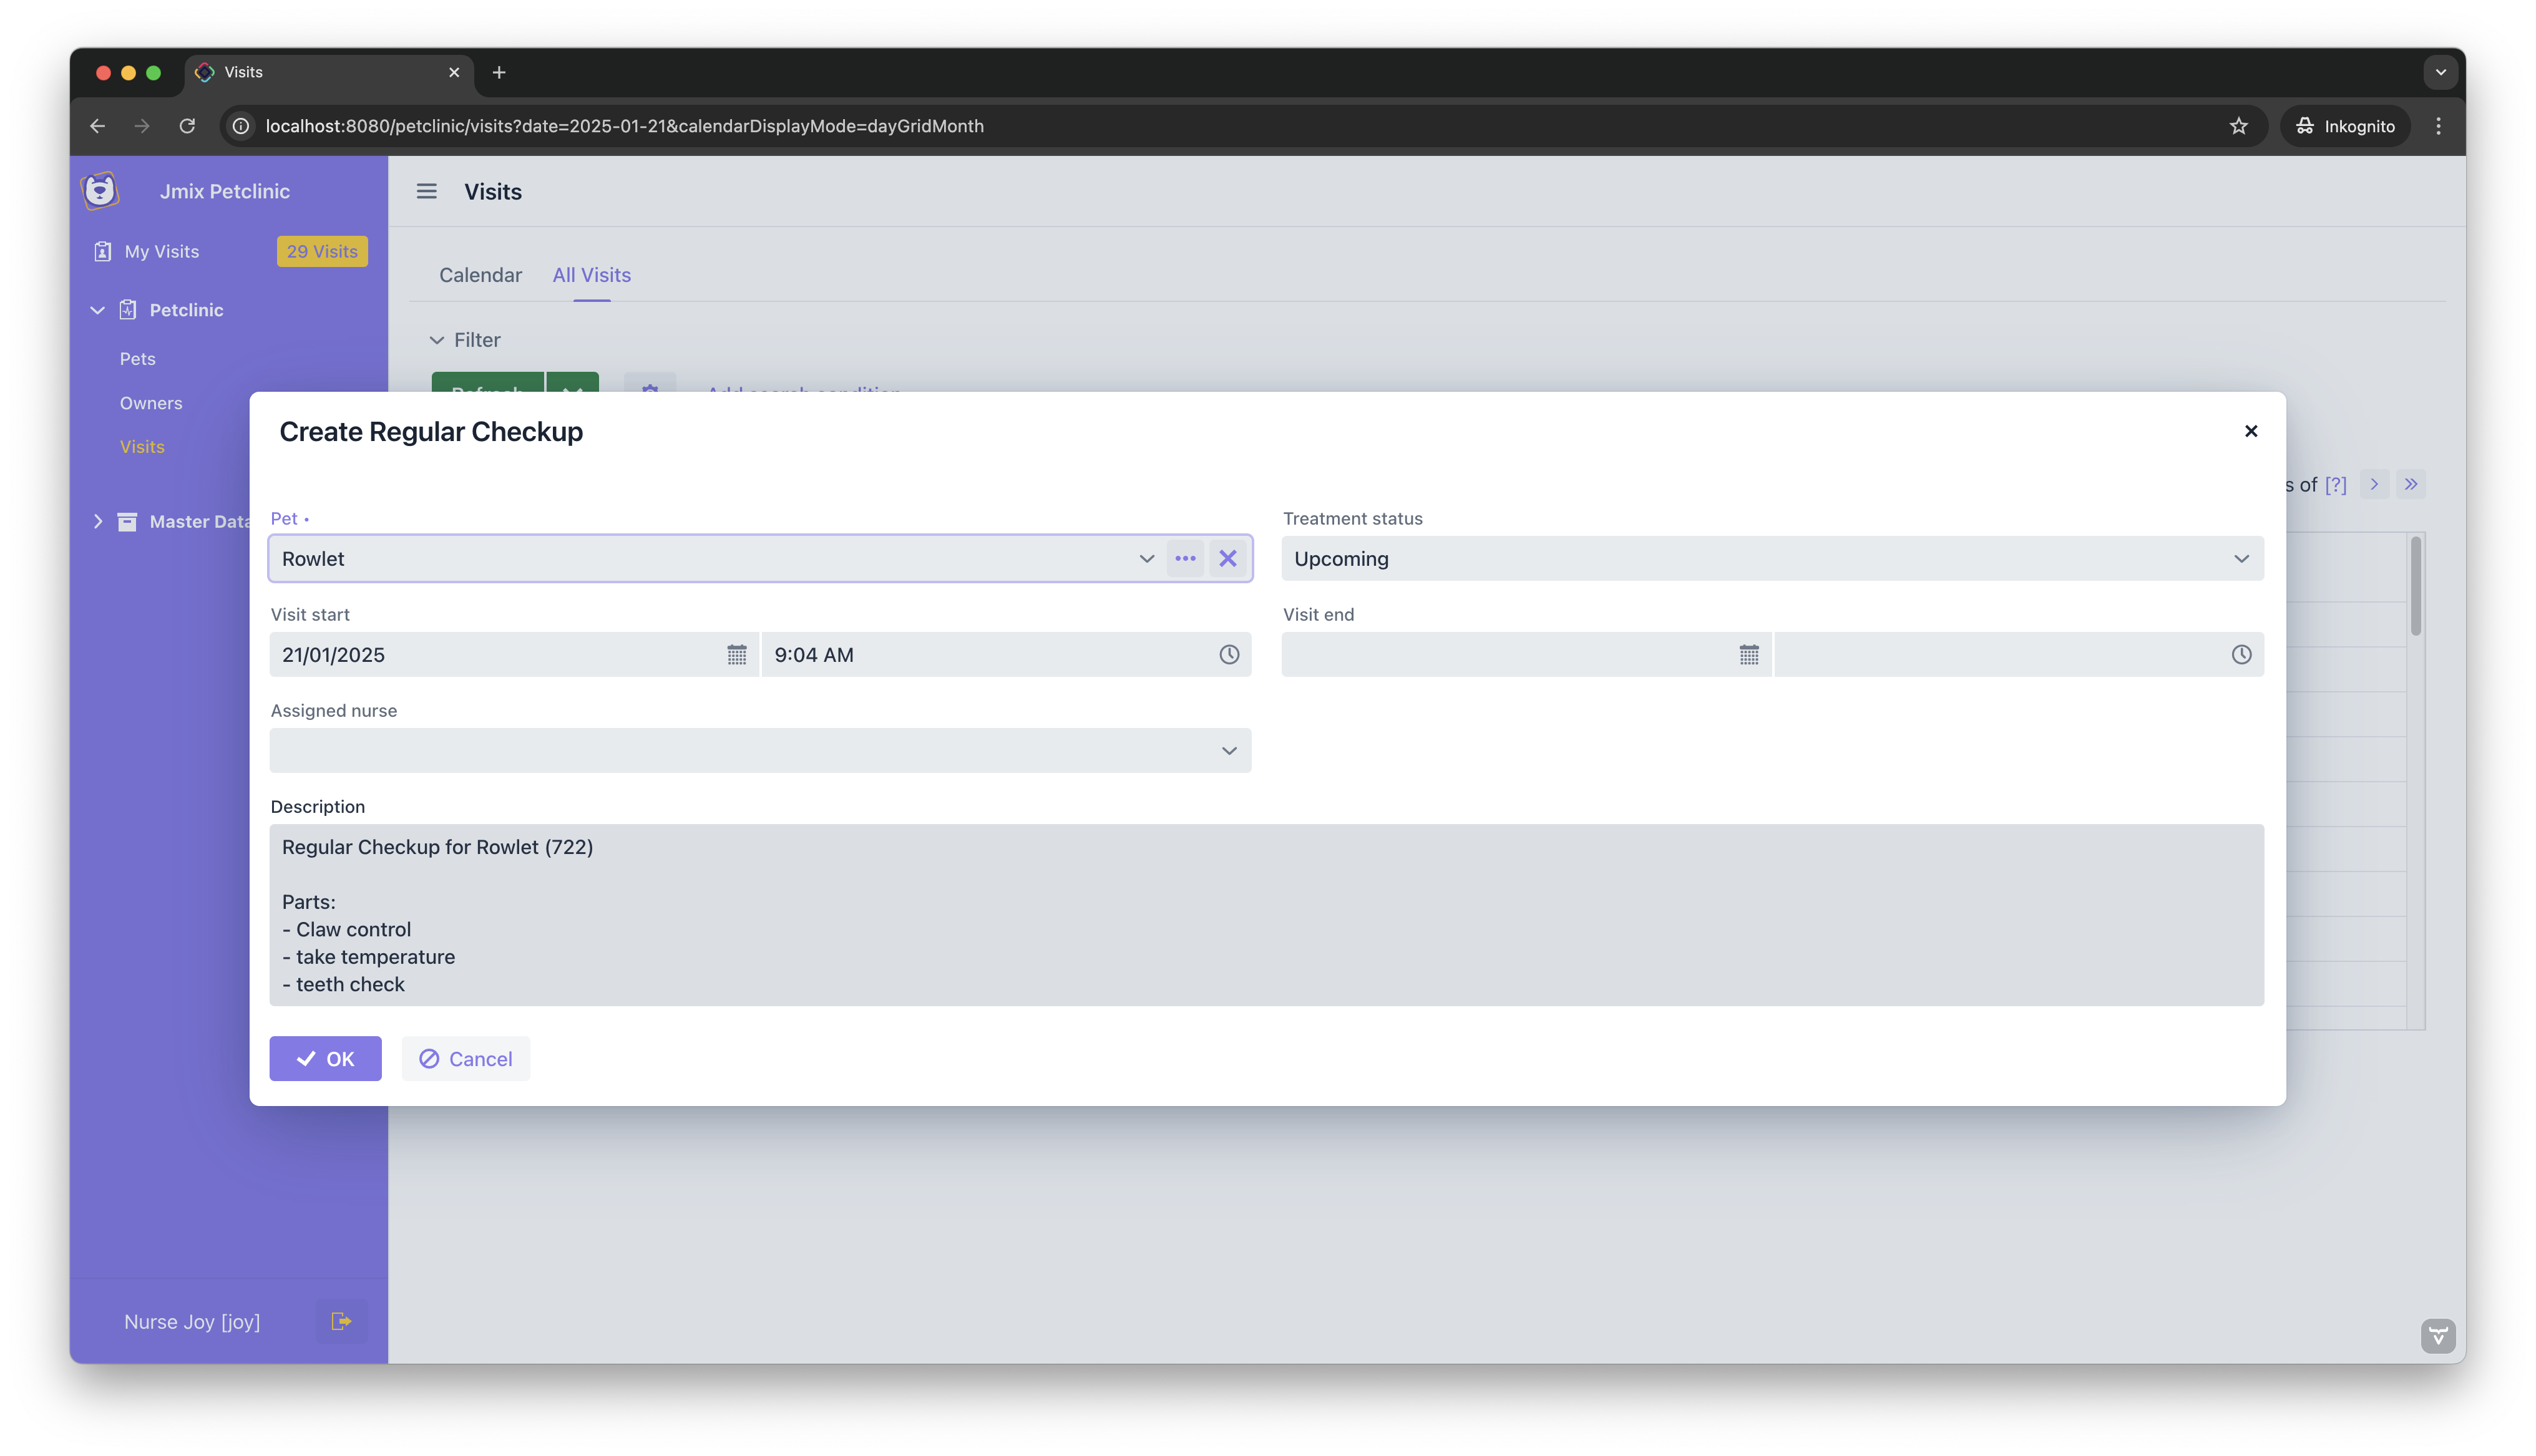
To illustrate this, we will now look at a concrete example where we implement a Create Regular Checkup button in the Visit List View. The goal is to first allow the user to select a pet from a lookup dialog. Once the pet is selected, a new visit creation view is opened automatically, with predefined values such as visit type and a structured description based on the selected pet.
Using the Dialog Windows API, you can programmatically open views and configure their behavior before they are displayed. This includes defining an initializer that sets default values for the entity being created.
In the VisitListView, the Dialog Windows API is used to create a new Visit entity for a "regular checkup". The process involves selecting a Pet first, then passing that selection along with additional initialization logic to the detail view for creating the new Visit:
    @Subscribe("visitsDataGrid.createRegularCheckup")
    public void onVisitsDataGridCreateRegularCheckup(final ActionPerformedEvent event) {
        dialogWindows.lookup(this, Pet.class) (1)
                .withSelectHandler(pets -> createVisitForPet(pets.iterator().next()))
                .open();
    }


    private void createVisitForPet(Pet pet) {
        dialogWindows.detail(visitsDataGrid) (2)
                .newEntity() (3)
                .withInitializer(visit -> {  (4)
                    visit.setType(VisitType.REGULAR_CHECKUP);
                    visit.setDescription(regularCheckupDescriptionContent(pet));
                    visit.setPet(pet);
                })
                .withViewClass(RegularCheckupDetailView.class)
                .open();
}| 1 | A lookup dialog is opened to allow the user to select a pet for the visit. |
| 2 | The dialogWindows.detail API is used to open a detail view for creating the new Visit instance. |
| 3 | The newEntity method ensures that a new Visit instance is created. |
| 4 | The withInitializer method is used to set the default values for the Visit instance, such as type, description, and pet. |
This approach provides greater flexibility and customization for workflows that require more complex interactions or dependencies. It’s an excellent fit for use cases where the initialization logic depends on user input or additional context from other entities.
Now, let’s take a look at the corresponding UI screens for this workflow:

Internal Initialization via InitEntityEvent
The second approach is to perform the entity initialization within the destination view controller itself. In Jmix, this can be achieved using UI events, such as the InitEntityEvent. This event is specifically designed to allow initialization logic for newly created entities. For more details, see: Flow UI: Init Entity Event.
Let’s look at the example where we use this internal initialization to set the type of a Visit to REGULAR_CHECKUP:
@Route(value = "visits/:id", layout = MainView.class)
@ViewController("petclinic_Visit.detail")
@ViewDescriptor("visit-detail-view.xml")
@EditedEntityContainer("visitDc")
public class VisitDetailView extends StandardDetailView<Visit> {


    @Subscribe
    public void onInitEntity(final InitEntityEvent<Visit> event) { (1)
        Visit visit = event.getEntity();
        visit.setType(VisitType.REGULAR_CHECKUP); (2)
    }

}| 1 | The onInitEntity method subscribes to the InitEntityEvent triggered for the newly created Visit instance. |
| 2 | The type field is set to REGULAR_CHECKUP, providing a sensible default value. |
The advantage of this approach is its simplicity and minimal required code changes. It is a good fit for scenarios where specific attributes, which are not dynamic, need to be initialized. However, since it is scoped to the destination view, it is less flexible for reacting to external parameters passed into the view.
UI: Dependent Field Updates
Dependent field updates are not strictly part of entity initialization but play a crucial role in dynamically adjusting default values based on user input. Unlike static initialization, these updates allow values to be recalculated whenever a user modifies a related field, ensuring logical consistency while still enabling manual adjustments.
A common use case is pre-filling related fields based on the user’s selection while keeping the option to override the value afterward. This is useful in scenarios where calculated or context-sensitive defaults should be applied dynamically as users interact with the form.
In the following example, we implement a dependent field update that adjusts the VisitEnd time based on the selected VisitStart value. When a user sets VisitStart, the system automatically calculates VisitEnd based on the VisitType. The default durations are:
-
Regular Checkup: +30 minutes
-
Recharge: +3 hours
-
Status Condition Healing: +1 hour
-
Disease Treatment: +1 hour
-
Other: +1 hour
Each time VisitStart is updated, the VisitEnd field is recalculated accordingly. However, users retain the ability to manually modify the VisitEnd time if needed.
Now, let’s take a look at the implementation.
@Route(value = "visits/:id", layout = MainView.class)
@ViewController("petclinic_Visit.detail")
@ViewDescriptor("visit-detail-view.xml")
@EditedEntityContainer("visitDc")
public class VisitDetailView extends StandardDetailView<Visit> {


    @Subscribe("visitStartField") (1)
    public void onVisitStartFieldTypedValueChange(
            final SupportsTypedValue.TypedValueChangeEvent<TypedDateTimePicker<LocalDateTime>, LocalDateTime> event (2)
    ) {
        LocalDateTime value = event.getValue();

        if (value != null) {
            getEditedEntity().setVisitEnd(calculateVisitEnd(value)); (3)
        }
        else {
            getEditedEntity().setVisitEnd(null);
        }
    }

    private LocalDateTime calculateVisitEnd(LocalDateTime visitStart) {

        int durationInMinutes = switch (getEditedEntity().getType()) {
            case REGULAR_CHECKUP -> 30;
            case RECHARGE -> 180;
            case STATUS_CONDITION_HEALING, DISEASE_TREATMENT, OTHER -> 60;
        };

        return visitStart.plusMinutes(durationInMinutes);
    }
}| 1 | The method is subscribed to changes in the visitStartField, ensuring that any modification to the field triggers an update. |
| 2 | The TypedValueChangeEvent event provides access to both the old and new values of the visitStartField field in a type-safe manner. |
| 3 | If visitStart is not null, the calculateVisitEnd() method is called to determine the appropriate visitEnd time based on the visit type. |
This approach ensures that default values for visitEnd are dynamically applied while allowing users to manually override them when necessary.
|
There are two main types of value change events in Jmix: ComponentValueChangeEvent and TypedValueChangeEvent. The However, when working with components like |
UI: Initialization while Saving
UI-based events such as BeforeSaveEvent allow you to configure default values during the saving process. These events are triggered exclusively within the user interface and apply only to saves performed through a view.
The BeforeSaveEvent is a lifecycle event for view classes that extend StandardDetailView, which is the default base class for all entity detail views generated by Jmix Studio. If your view class does not extend StandardDetailView, you can still apply similar initialization logic by using the PreSaveEvent of the DataContext: DataContext PreSaveEvent.
|
UI-based initialization during saving is useful for setting default values that depend on user inputs or dynamic computations at runtime. It differs from Dependent Field Updates, as it applies values automatically during the save process rather than updating fields dynamically based on user input. It is useful when the user does not need to review or modify the value before saving, ensuring consistency without additional interaction. This approach is particularly effective for completing missing fields, generating values from the current view context, or applying UI-specific logic during the save process.
In the example below, the VisitDetailView automatically generates a structured description for a Visit if the user leaves the description field empty:
@Route(value = "visits/:id", layout = MainView.class)
@ViewController("petclinic_Visit.detail")
@ViewDescriptor("visit-detail-view.xml")
@EditedEntityContainer("visitDc")
public class VisitDetailView extends StandardDetailView<Visit> {


    @Subscribe
    public void onBeforeSave(final BeforeSaveEvent event) { (1)
        if (!StringUtils.hasText(getEditedEntity().getDescription())) { (2)
            getEditedEntity().setDescription(calculateDefaultDescription(getEditedEntity())); (3)
        }
    }

    private String calculateDefaultDescription(Visit visit) {
        String petName = Optional.ofNullable(visit.getPet())
                .map(NamedEntity::getName)
                .orElse("the pet");
        String ownerName = Optional.ofNullable(visit.getPet())
                .map(Pet::getOwner)
                .map(Person::getFullName)
                .orElse("the pet owner");

        return switch (visit.getType()) {
            case REGULAR_CHECKUP -> """
                Regular Check-up Notes:
                - Temperature and heart rate measured from %s: Y/N
                - Vaccination status reviewed with %s: Y/N
                - Teeth and gums inspected from %s: Y/N
                - Overall condition recorded: Y/N
                - Follow-up discussion held with %s: Y/N
                """.formatted(petName, ownerName, petName, ownerName);
            case RECHARGE -> """
                Recharge Visit Notes:
                - Fluids and electrolytes replenished for %s: Y/N
                - Supplements provided as needed: Y/N
                - Post-recharge behavior observed in %s: Y/N
                - Recovery instructions shared with %s: Y/N
                """.formatted(petName, petName, ownerName);
            case STATUS_CONDITION_HEALING -> """
                Healing Progress Notes:
                - Healing progress assessed for %s: Y/N
                - Signs of infection or inflammation checked: Y/N
                - Treatment plan adjusted if necessary: Y/N
                - Condition progress discussed with %s: Y/N
                """.formatted(petName, ownerName);
            case DISEASE_TREATMENT -> """
                Disease Treatment Notes:
                - Prescribed medications administered to %s: Y/N
                - Vital signs monitored for %s: Y/N
                - Side effects and patient response recorded: Y/N
                - Treatment outcomes reviewed with %s: Y/N
                """.formatted(petName, petName, ownerName);
            case OTHER -> """
                General Visit Notes:
                - Concerns discussed with %s: Y/N
                - Unusual observations about %s recorded: Y/N
                - Follow-up recommendations provided: Y/N
                """.formatted(ownerName, petName);
        };

    }
}| 1 | Subscribe to BeforeSaveEvent: The onBeforeSave() method listens for the BeforeSaveEvent fired just before saving. |
| 2 | Check if description is empty: If no description is provided, the system calculates a default description. |
| 3 | Dynamic Description Generation: The calculateDefaultDescription() method constructs a default visit description based on the visit type and patient information. |
The BeforeSaveEvent only triggers within the view and applies only to UI-based saves. It is not triggered by programmatic saves or generic REST API calls.
|
System: Persistence Events
Persistence events are system-level entity lifecycle events that occur when data is saved to the database. These events apply to all save operations, including those from the UI, REST API, or programmatic operations. They are commonly used for initialization logic that must be consistent across different entry points. This section covers events that occur before and after an entity is persisted, showing how they can be used to handle initialization and follow-up actions.
Entity Saving Event
The EntitySavingEvent is a lifecycle event triggered before an entity is saved to the database. This includes newly created entities as well as updates to existing entities. It is a universal event that applies to all save operations, whether from the UI, generic REST API, or programmatic calls (dataManager.save()).
|
Persistence events only work when using the regular Jmix persistence APIs, such as Data Manager or Data Repositories. If you bypass these mechanisms and interact directly with the database using JPA’s Entity Manager or custom JDBC calls (by leveraging Spring’s |
In this example, an EntitySavingEvent listener is used to automatically generate a unique visit number for every new Visit entity in the form of: V-<visit-year>-<auto-increment-number>. This number is assigned during the save process and cannot be modified by the user.
The generated visit number depends on the user’s input—specifically, the year from the visitStart date. Since the number is constructed based on a field that the user sets, it cannot be assigned earlier, such as during entity creation or UI initialization. Instead, it is calculated only when the record is saved to ensure that it reflects the correct year.
Additionally, this approach prevents issues with concurrent users. If the visit number were assigned while the view is open using dependent field updates, it could cause numbering conflicts or gaps in the sequence when multiple users create visits simultaneously.
By generating the number just before saving, this approach ensures that the numbering is unique and continuous, even under concurrent usage.
import io.jmix.data.Sequence;
import io.jmix.data.Sequences;
import io.jmix.core.event.EntitySavingEvent;
import org.springframework.context.event.EventListener;
import org.springframework.stereotype.Component;

@Component("petclinic_VisitNumberGeneratorEntityListener")
public class VisitNumberGeneratorEntityListener {

    private final Sequences sequences;

    public VisitNumberGeneratorEntityListener(Sequences sequences) {
        this.sequences = sequences;
    }

    @EventListener
    public void calculateVisitNumber(final EntitySavingEvent<Visit> event) { (1)

        if (!event.isNewEntity()) { (2)
            return;
        }

        long sequenceNumber = sequences.createNextValue(Sequence.withName("visit_number")); (3)
        int visitYear = event.getEntity().getVisitStart().getYear();

        String visitNumber = "V-%s-%06d".formatted(visitYear, sequenceNumber); (4)

        event.getEntity().setVisitNumber(visitNumber);
    }
}| 1 | Event Listener: The method listens to EntitySavingEvent to assign a unique number before saving. |
| 2 | To ensure that the visit number is only generated for new visits, the method first checks event.isNewEntity() and returns early in case it is not. |
| 3 | Sequence Generator: A unique number is generated using Jmix’s built-in Sequences API. |
| 4 | Formatted Number: The visit number is formatted with the year and a zero-padded sequence number. |
For more information on Entity Saving Events see: Data Access: Entity Events - EntitySavingEvent.
Entity Changed Event
The EntityChangedEvent is triggered whenever an entity is modified and persisted in the database. It occurs in two distinct phases of the transaction lifecycle: before the commit and after the commit. Understanding this distinction is essential when implementing business logic that depends on entity changes.
By default, EntityChangedEvent can be handled:
-
Before the transaction commit: In this case, the event is fired while the transaction is still open, meaning any changes made within the event handler are included in the same transaction. This allows modifying additional entities, enforcing validations, or canceling the transaction if necessary.
-
After the transaction commit: Here, the event is triggered only after the database commit has been successfully completed. This ensures that the entity changes are fully persisted and visible to other transactions, making it a suitable place for actions like sending notifications, triggering asynchronous processes, or executing external API calls.
See also Data Access: Entity Events - Entity Changed Event. To understand database transactions and their significance in ensuring data consistency, refer to this general explanation: Wikipedia: Database Transactions.
This example handles the EntityChangedEvent after commit to ensure that the entity changes are fully persisted before executing follow-up actions. By handling the event in a separate transaction, we avoid interfering with the main persistence process.
Running this logic post-commit ensures that if no available nurse is found, the assignedNurse field simply remains empty without affecting the transaction. Additionally, since the nurse assignment is not critical to storing the visit, it should not block or delay the main database operation.
@Component("petclinic_AssignNurseToVisitAutomatically")
public class AssignNurseToVisitAutomaticallyEventListener {

    private static final Logger log = LoggerFactory.getLogger(AssignNurseToVisitAutomaticallyEventListener.class);

    private final DataManager dataManager;
    private final EmployeeRepository employeeRepository;

    public AssignNurseToVisitAutomaticallyEventListener(DataManager dataManager, EmployeeRepository employeeRepository) {
        this.dataManager = dataManager;
        this.employeeRepository = employeeRepository;
    }

    @TransactionalEventListener (1)
    @Transactional(propagation = Propagation.REQUIRES_NEW) (2)
    public void assignNurseToVisitAutomatically(final EntityChangedEvent<Visit> event) {
        try {
            if (event.getType().equals(EntityChangedEvent.Type.CREATED)) { (3)

                Visit visit = dataManager.load(event.getEntityId()) (4)
                        .fetchPlan(visitWithAssignedNurse())
                        .one();

                if (visit.getAssignedNurse() != null) {
                    log.info("Nurse already assigned to visit: {}. No automatic assignment needed.", visit.getAssignedNurse());
                    return;
                }

                Optional<User> availableNurse = findAvailableNurse(visit);

                availableNurse.ifPresent(nurse -> {
                    log.info("Available nurse found: {}. Assigning Nurse to Visit: {}", nurse, visit.getVisitNumber());
                    visit.setAssignedNurse(nurse);
                    dataManager.save(visit); (5)
                });
            }
        } catch (Exception e) {
            log.error("Error automatically assigning nurse to Visit: %s".formatted(event.getEntityId()), e);
        }
}| 1 | @TransactionalEventListener: Listens for EntityChangedEvent after the transaction is committed, ensuring that the visit record is already stored in the database. |
| 2 | @Transactional(propagation = Propagation.REQUIRES_NEW): Opens a new transaction for loading and saving data. This is necessary because the current transaction has already been closed after the commit. Without this, dataManager.load() or dataManager.save() would fail due to the lack of an active transaction. |
| 3 | Event Type Check (event.getType()): Ensures that the logic only runs when a new visit is created (Type.CREATED). |
| 4 | dataManager.load() with @Transactional: Loads the Visit entity from the database in the new transaction. This is possible because of @Transactional(propagation = Propagation.REQUIRES_NEW). |
| 5 | The assignment is saved in case an available nurse is found. |
For more information, see: Data Access: Entity Events - Handling Changes After Commit
Comparison Matrix
The table below summarizes the main differences between the initialization approaches based on their stage in the entity lifecycle:
| Stage | Scope | Characteristics |
|---|---|---|
System-wide |
Applied at entity creation for static defaults, independent of creation method. |
|
View-specific |
Sets initial values when opening a view. |
|
View-specific |
Updates fields dynamically based on user input, ensuring calculated default values while still allowing manual adjustments. |
|
View-specific |
Allows last-moment adjustments before persisting an entity, ensuring consistency based on user inputs. |
|
System-wide |
Ensures critical entity values are finalized while / after saving to the database. |
Summary
This guide explored various techniques for setting initial values in Jmix entities, ensuring consistency and efficiency across applications. We covered direct attribute assignment for static defaults, @PostConstruct for dynamic logic, and UI-based approaches such as InitEntityEvent, Create Action Initializer, and Dialog Windows API, demonstrating their strengths with practical examples from the Petclinic application.
Beyond initialization, we examined Dependent Field Updates, which dynamically adjust values based on user input while still allowing modifications. Additionally, we explored Persistence Events like EntitySavingEvent and EntityChangedEvent, which enforce business rules and ensure final data integrity before and after database commits.
By understanding these approaches and their trade-offs, you can design robust and maintainable entity initialization processes tailored to your application’s needs. Whether applying static defaults, handling user input dynamically, or enforcing rules at the persistence level, these techniques provide a scalable foundation for data consistency and usability.
