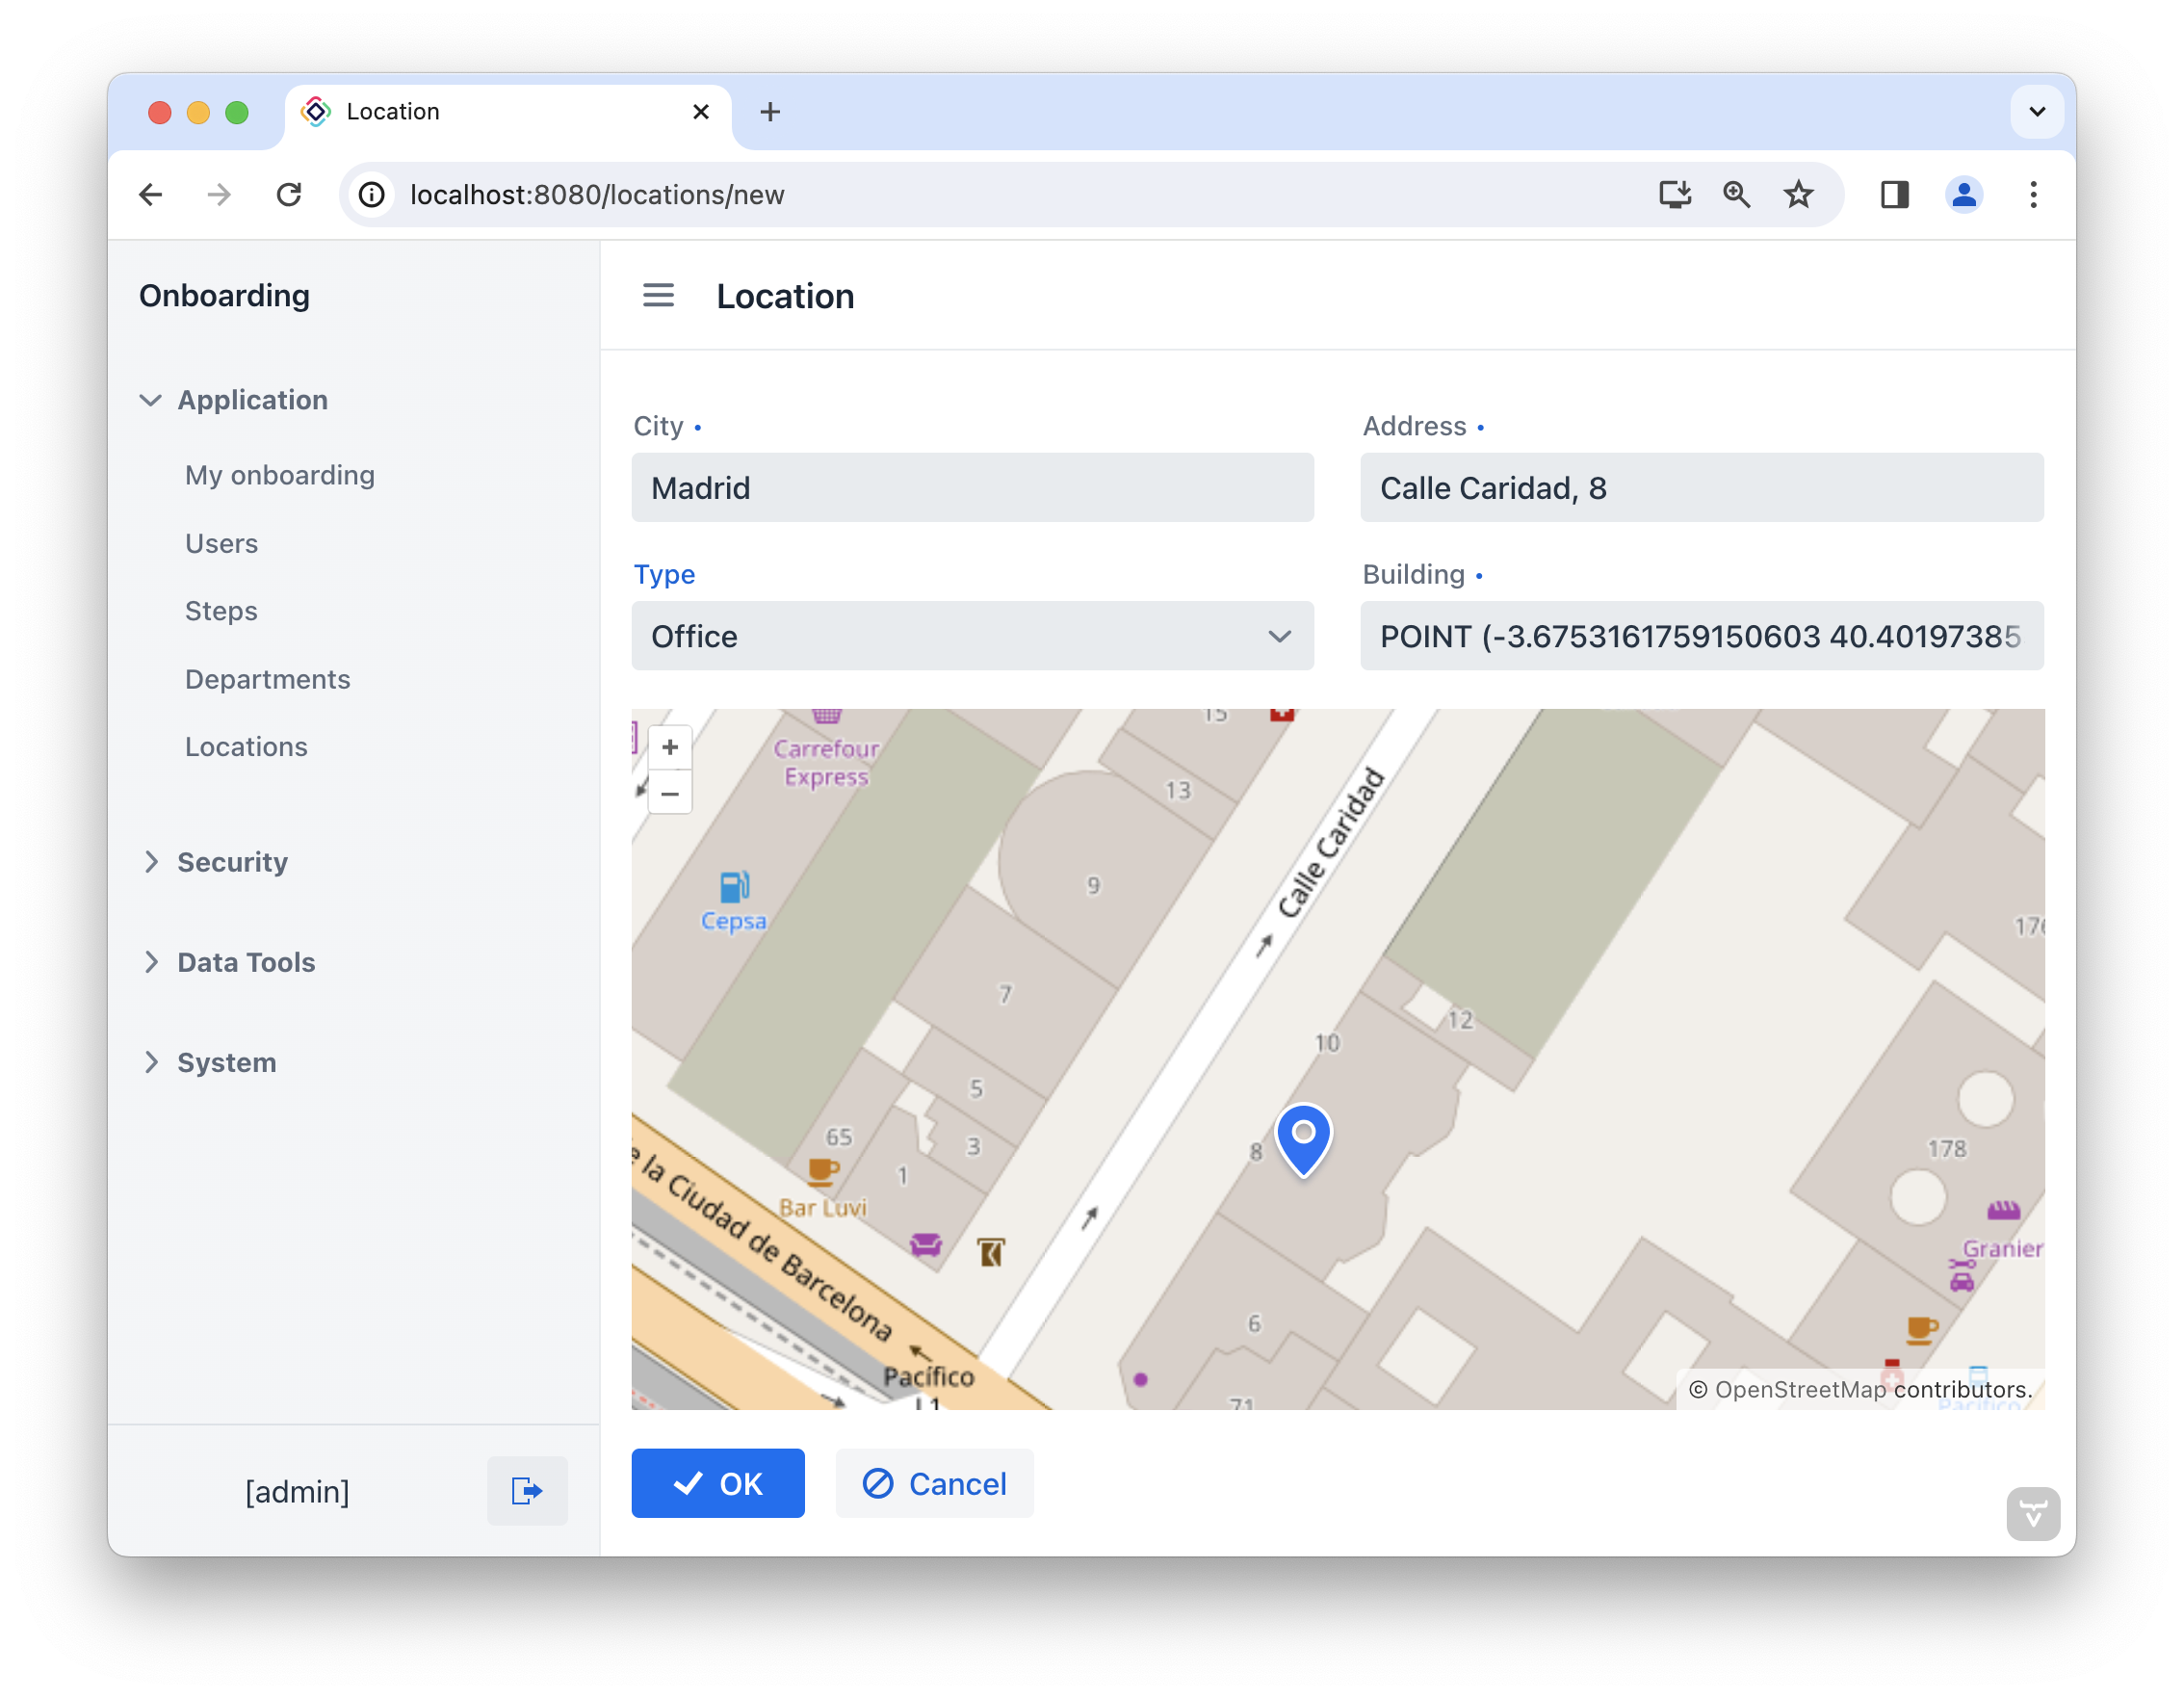
1. Bind Map to Data
In this chapter, you will create:
-
The
LocationTypeenumeration. -
The
Locationentity with theGeoPointattribute type. -
CRUD views with a map on the
Location.detailview.
Create Location Entity and Views
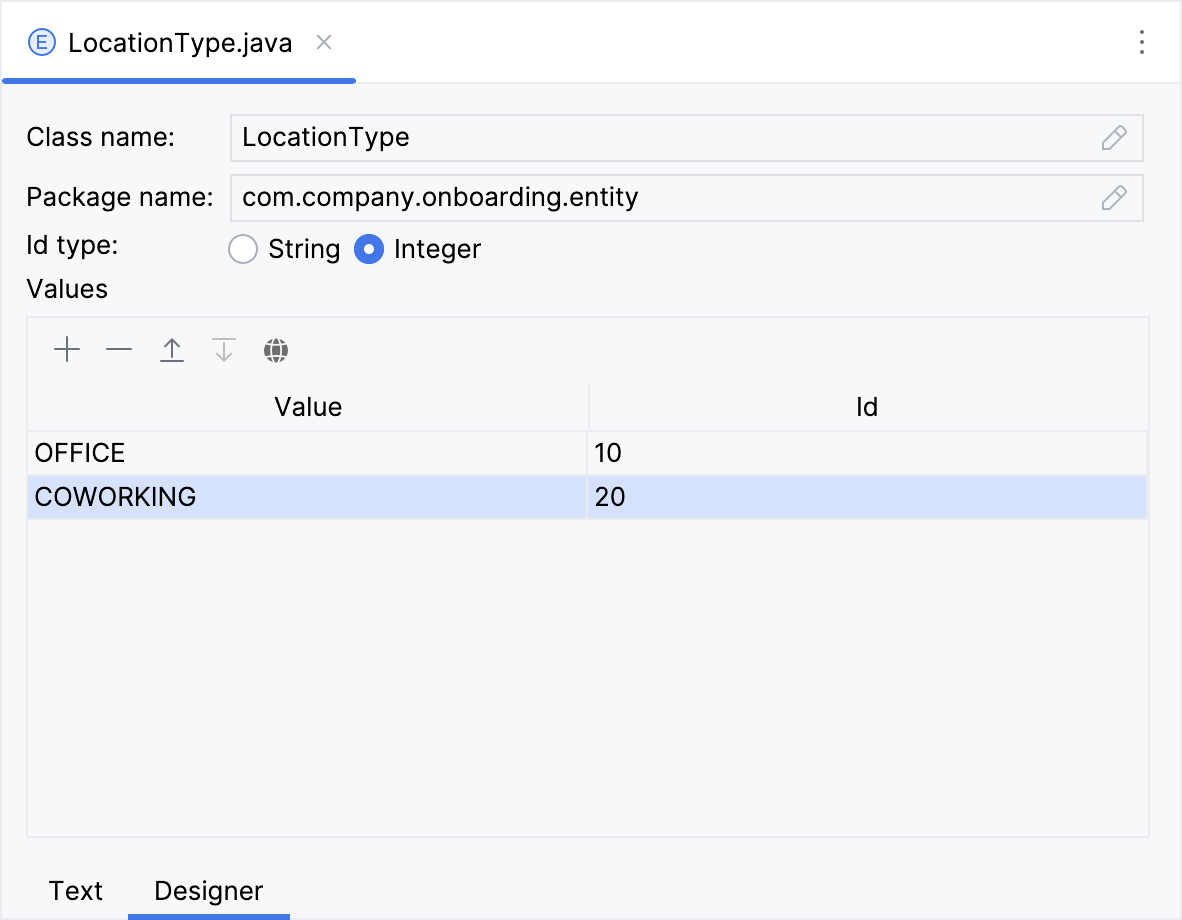
To start, we’ll generate a LocationType enumeration consisting of two values: Office and Coworking. The detailed instructions for creating enumerations can be found in the Using Enumerations section of Tutorial.
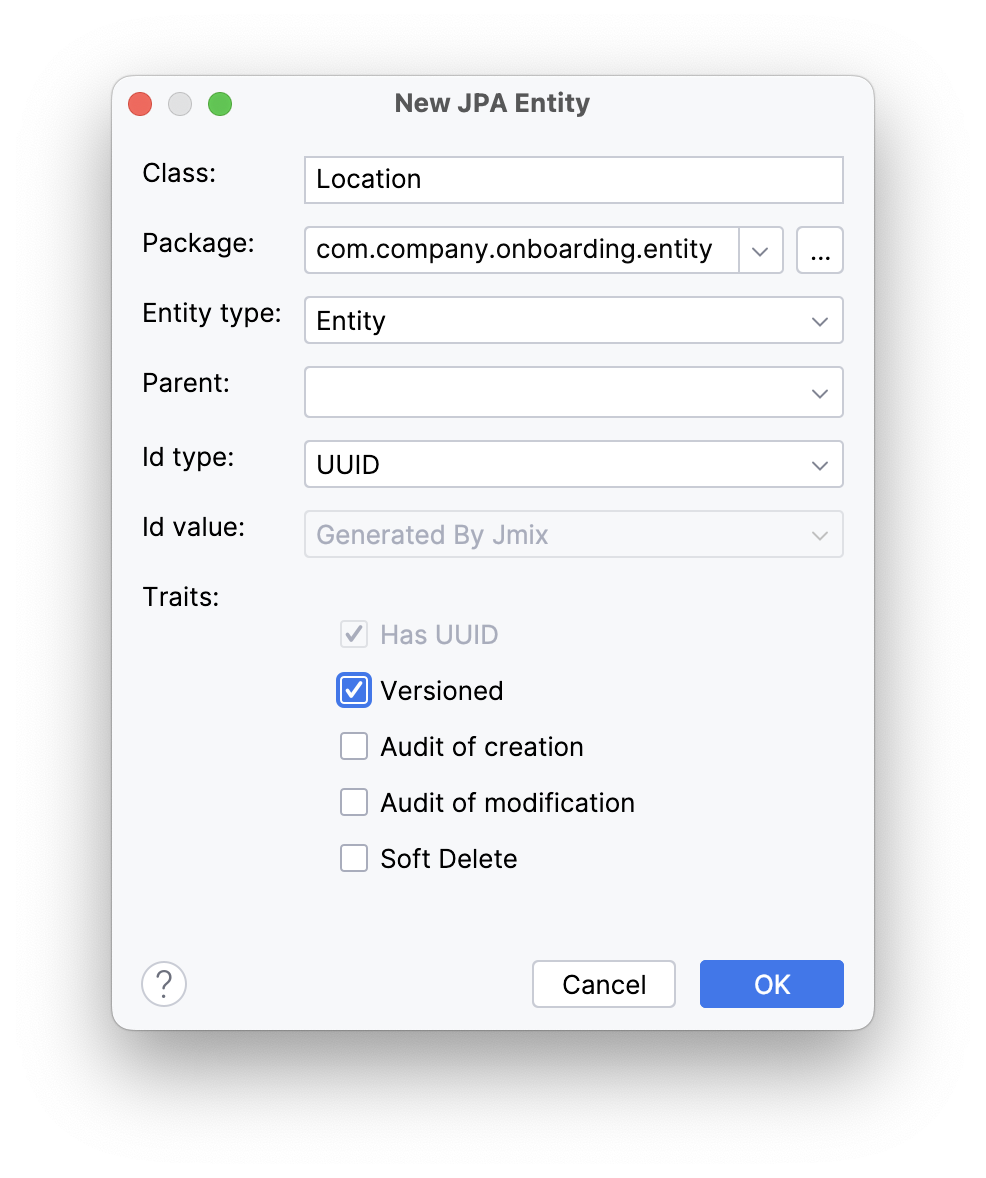
Next, create the Location entity. You can find detailed instructions for creating entities in the Simple CRUD section of the Tutorial.
Select the Traits → Versioned checkbox in the New JPA Entity dialog.
The Location entity has the following attributes:
-
citywithStringtype. Select the Mandatory checkbox. -
addresswithStringtype. Select the Mandatory checkbox. -
typewithLocationTypeenumeration type. -
buildingwithGeoPointtype. Select the Mandatory checkbox: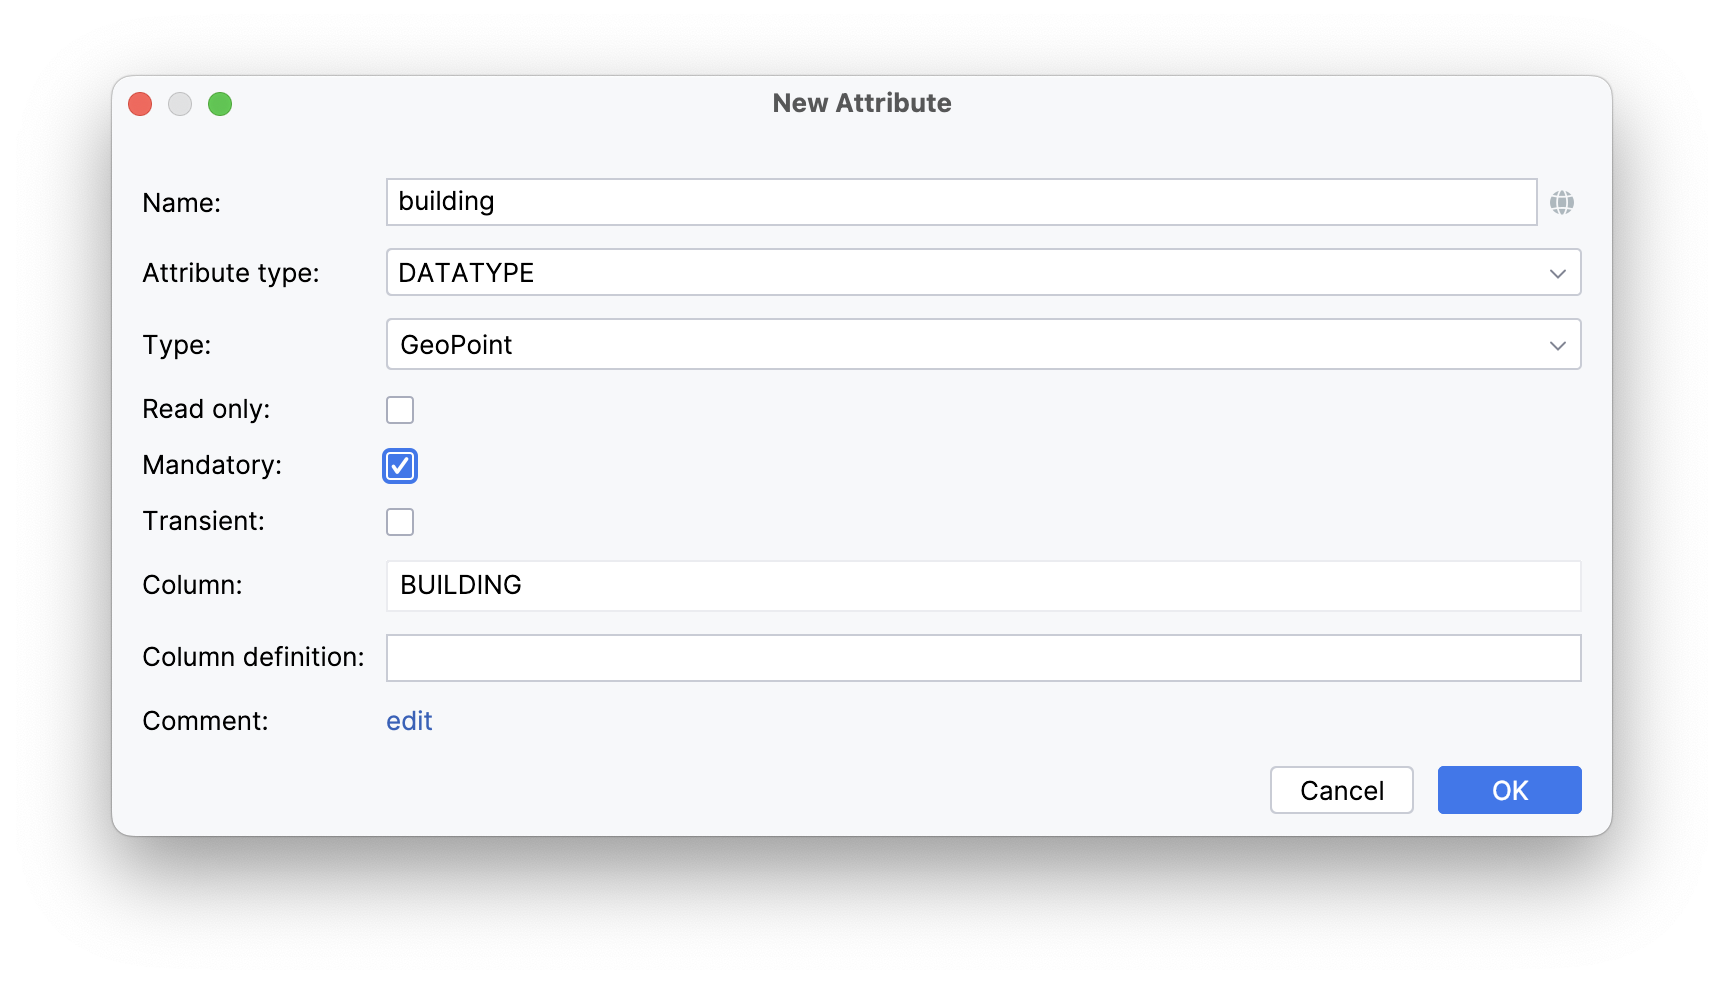
Define the address attribute for generating an instance name.
Create CRUD views for the Location entity. You’ll find the detailed steps for generating entity list and detail views in the Creating CRUD Views section of the Tutorial.
Follow the suggested values at each step of the view creation wizard.
Studio will automatically generate two views: Location.list and Location.detail, and open their corresponding source code.
Add Map on View
Locate location-detail-view.xml in the Jmix tool window and double-click it. The view designer will appear:
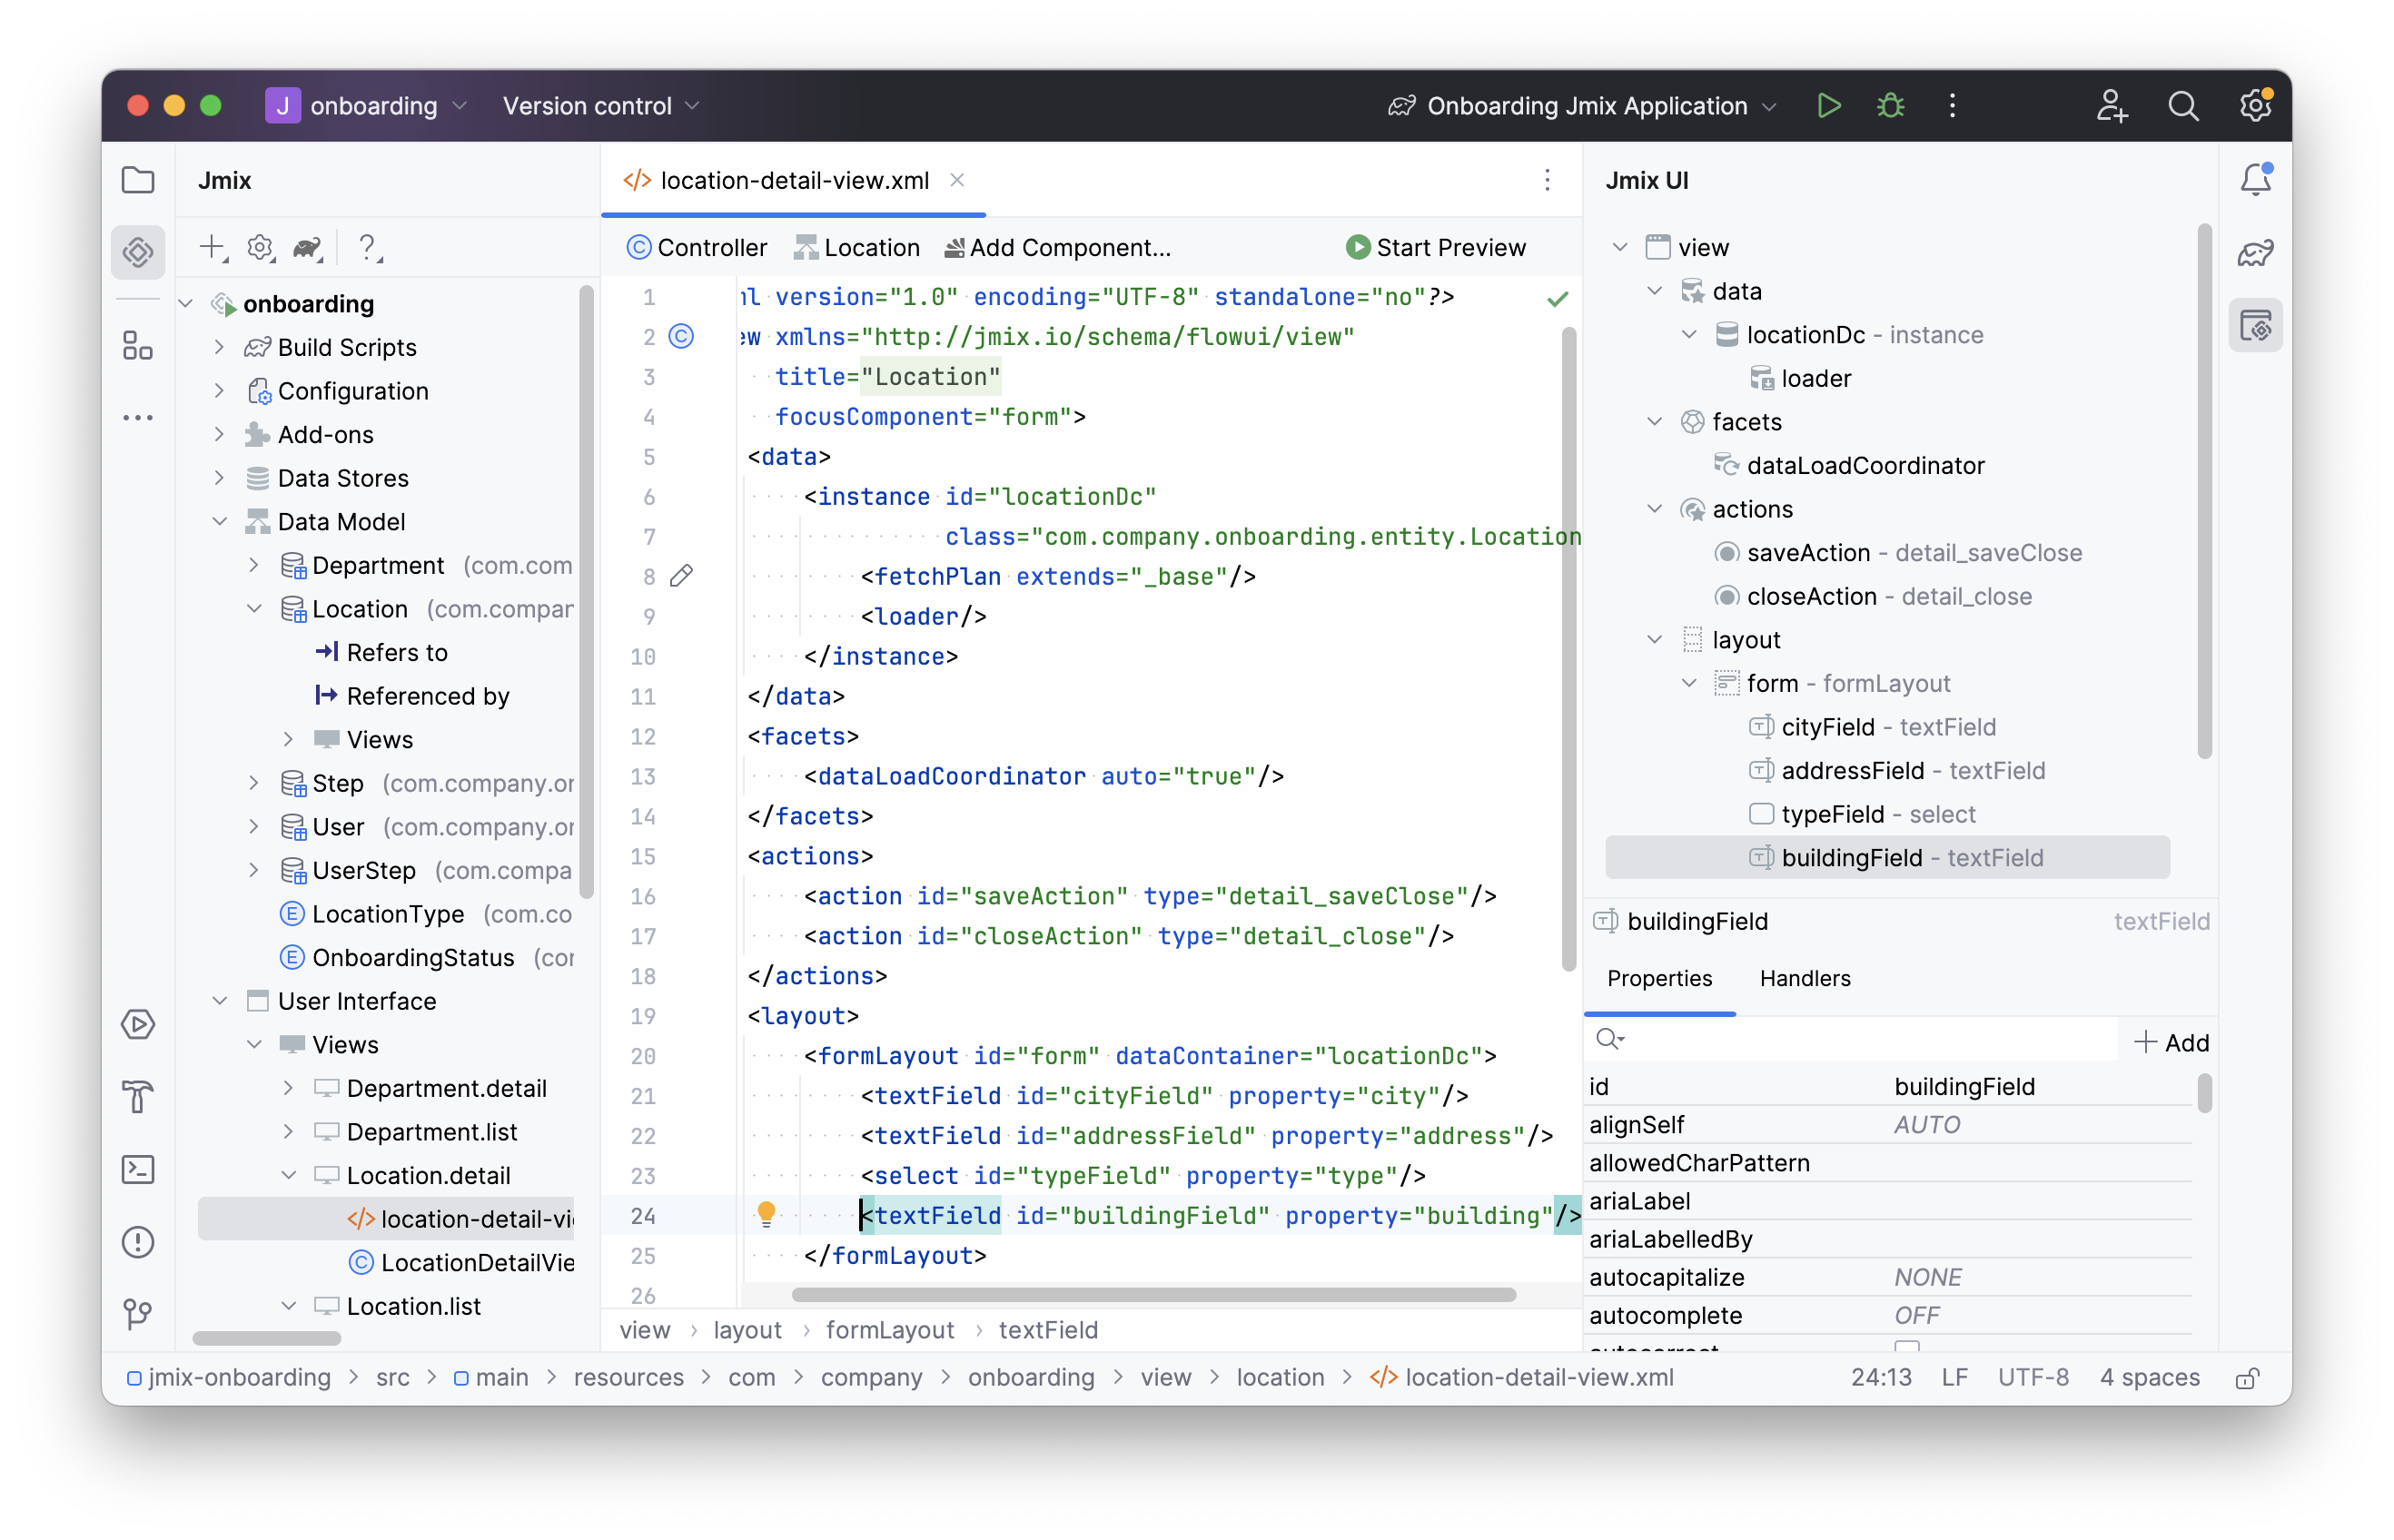
You’ll notice that the textField component is being used to show the building attribute.
If you want to display a map on the view, you should include the geoMap UI component in the XML descriptor.
Place the cursor after the formLayout element.
Next, click Add Component in the actions panel, then find the GeoMap item and double-click it.
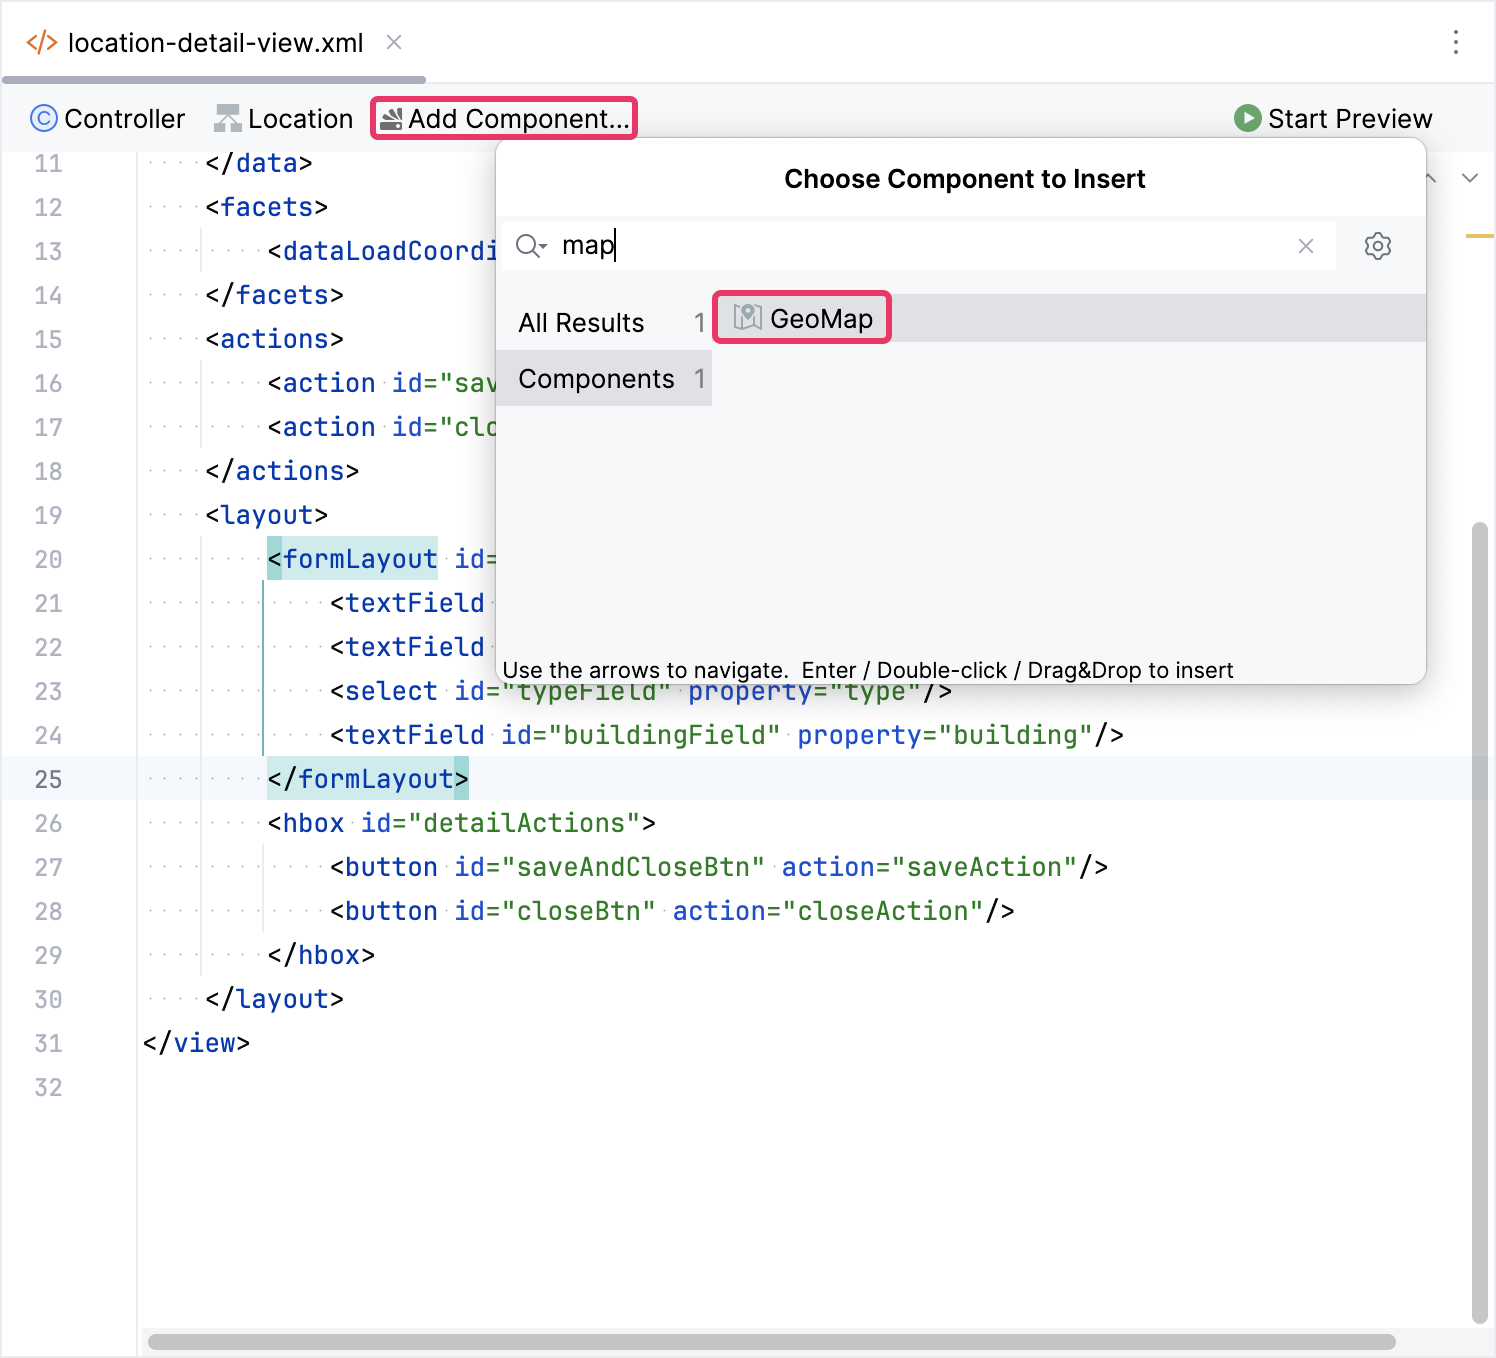
The new geoMap element will be added beneath the formLayout element in both the Jmix UI hierarchy panel and in the XML. Configure the id, height and width attributes as shown below.
<maps:geoMap id="map" height="100%" width="100%"/>Add Tile Layer with OsmSource
We’re going to utilize a raster layer as the base background layer of the map. For this, we’ll use OsmSource, a pre-defined source for displaying OpenStreetMap tiles.
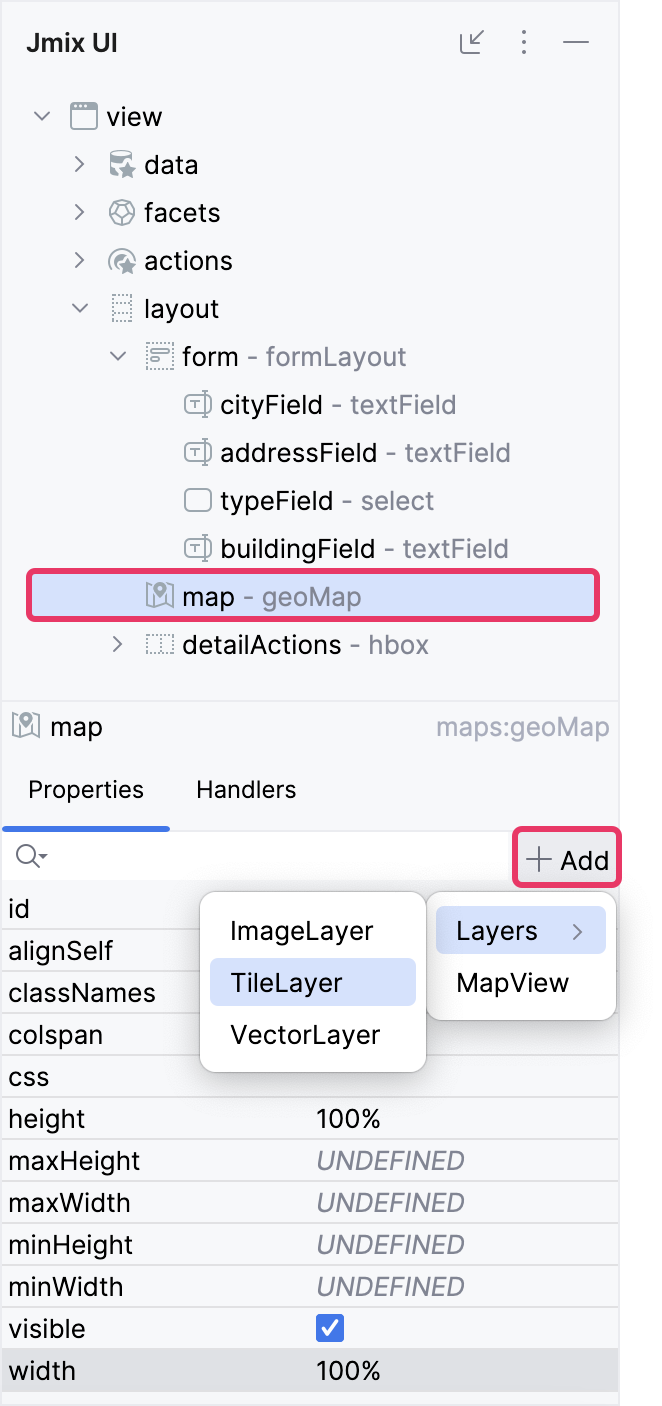
Select map in the Jmix UI hierarchy panel or in the view XML descriptor, then click the Add button in the inspector panel. From the drop-down list, choose Layers → TileLayer.
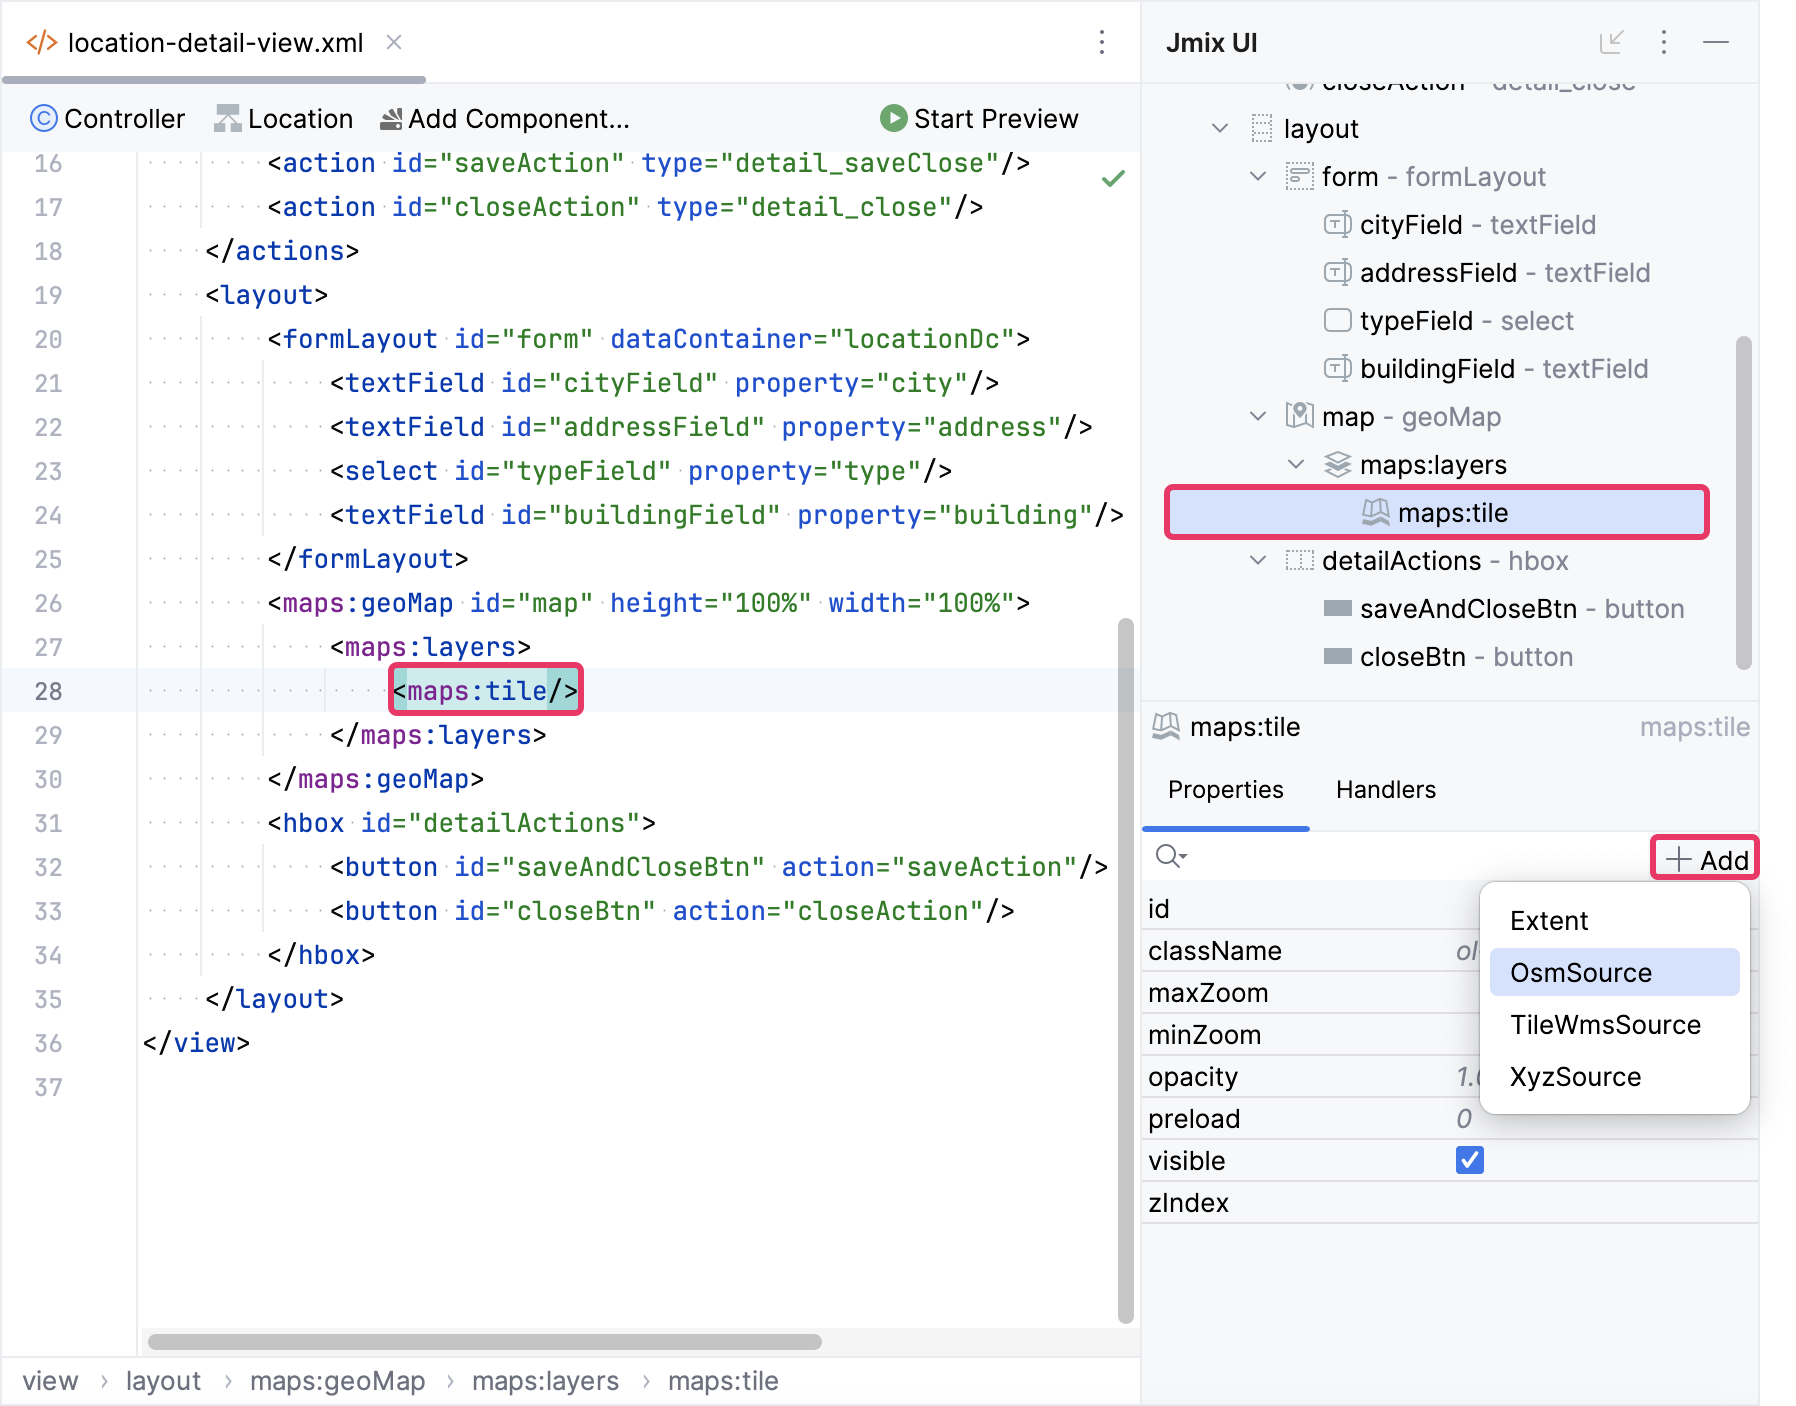
Select maps:tile in the Jmix UI hierarchy panel or in the view XML descriptor, and then click the Add button in the inspector panel. From the drop-down list, choose OsmSource.
Now, let’s run the application to see the new feature in action.
Click the Debug button () in the main toolbar.
Prior to launching the application, Studio compares the project data model with the database schema. When you’ve created a new entity, Studio automatically generates a Liquibase changelog to reflect the relevant database modifications (such as creating the LOCATION table):
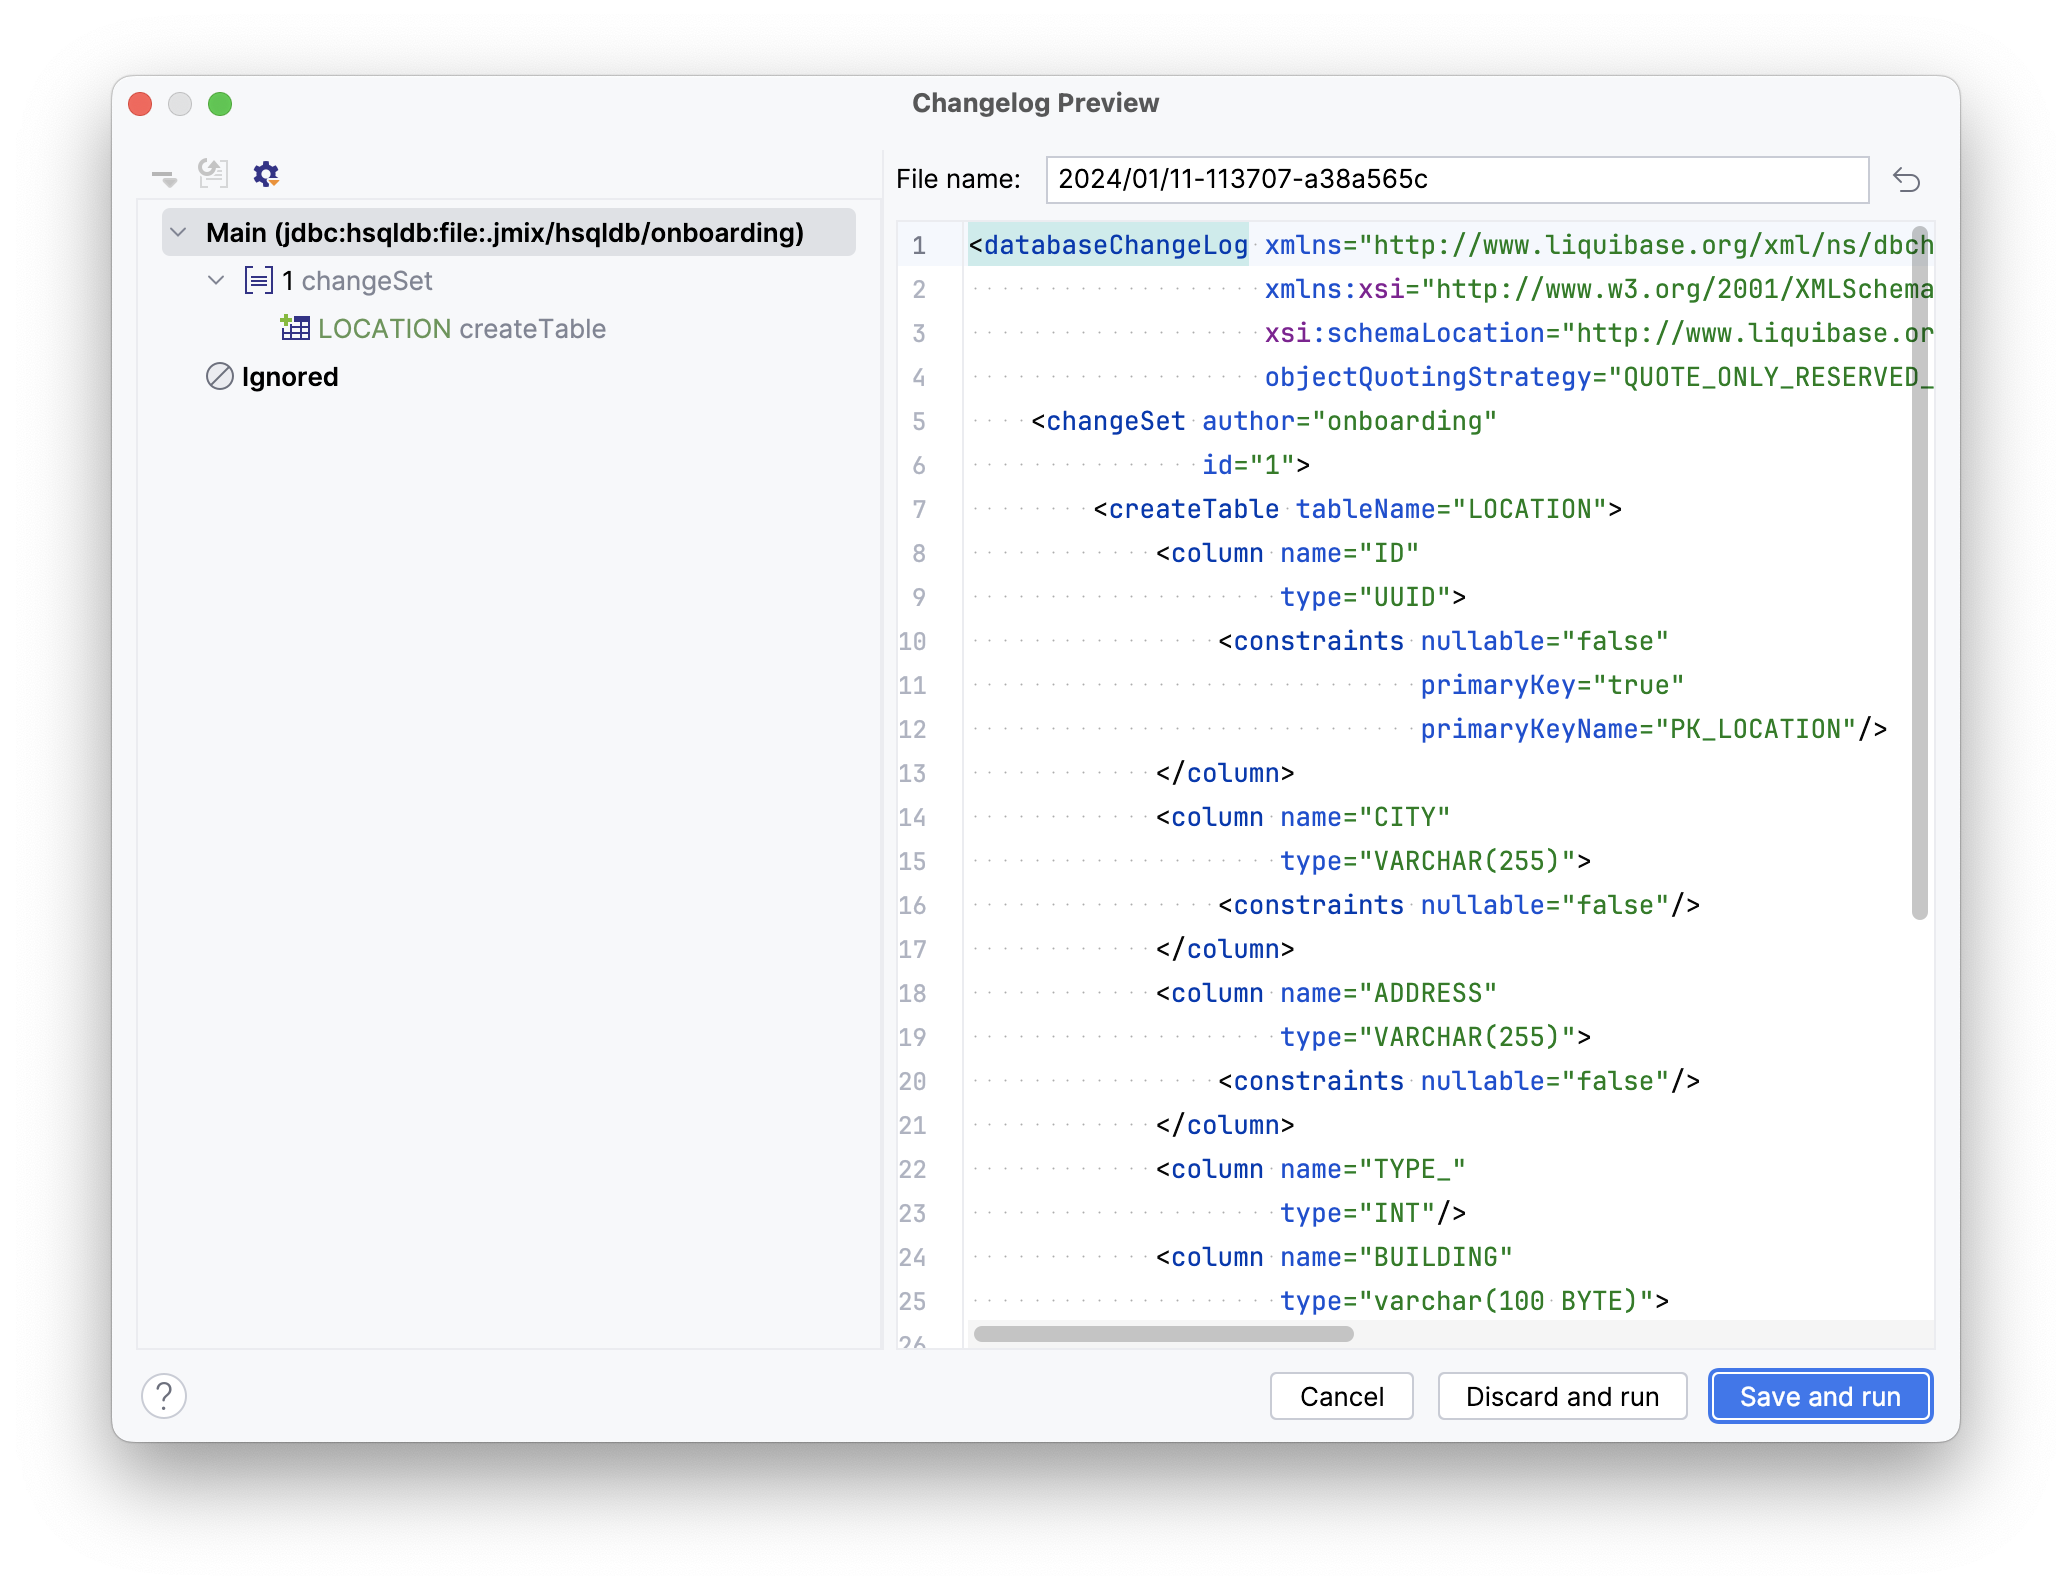
Once the application is up and running, navigate to http://localhost:8080 using your web browser and sign in to the application with the credentials admin/admin.
Click Save and run.
Studio will carry out the changelog on your database, followed by building and running the application:
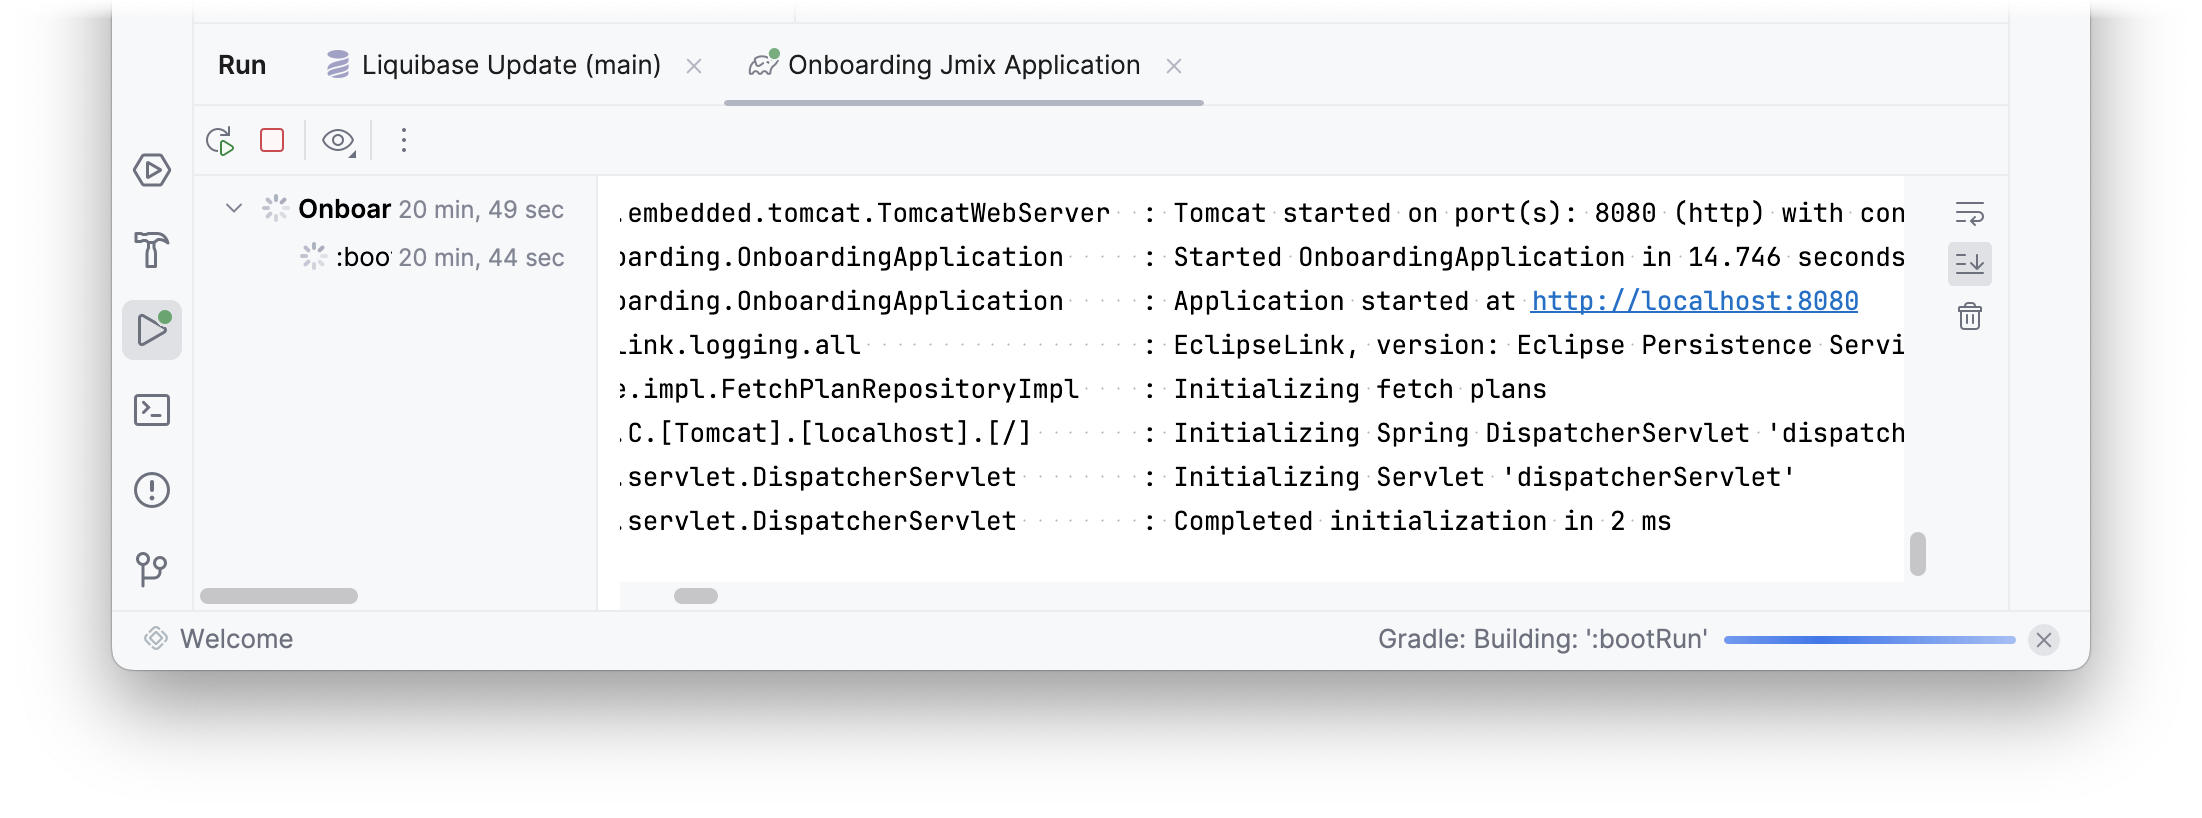
Once the application is up and running, navigate to http://localhost:8080 using your web browser and sign in to the application with the credentials admin/admin.
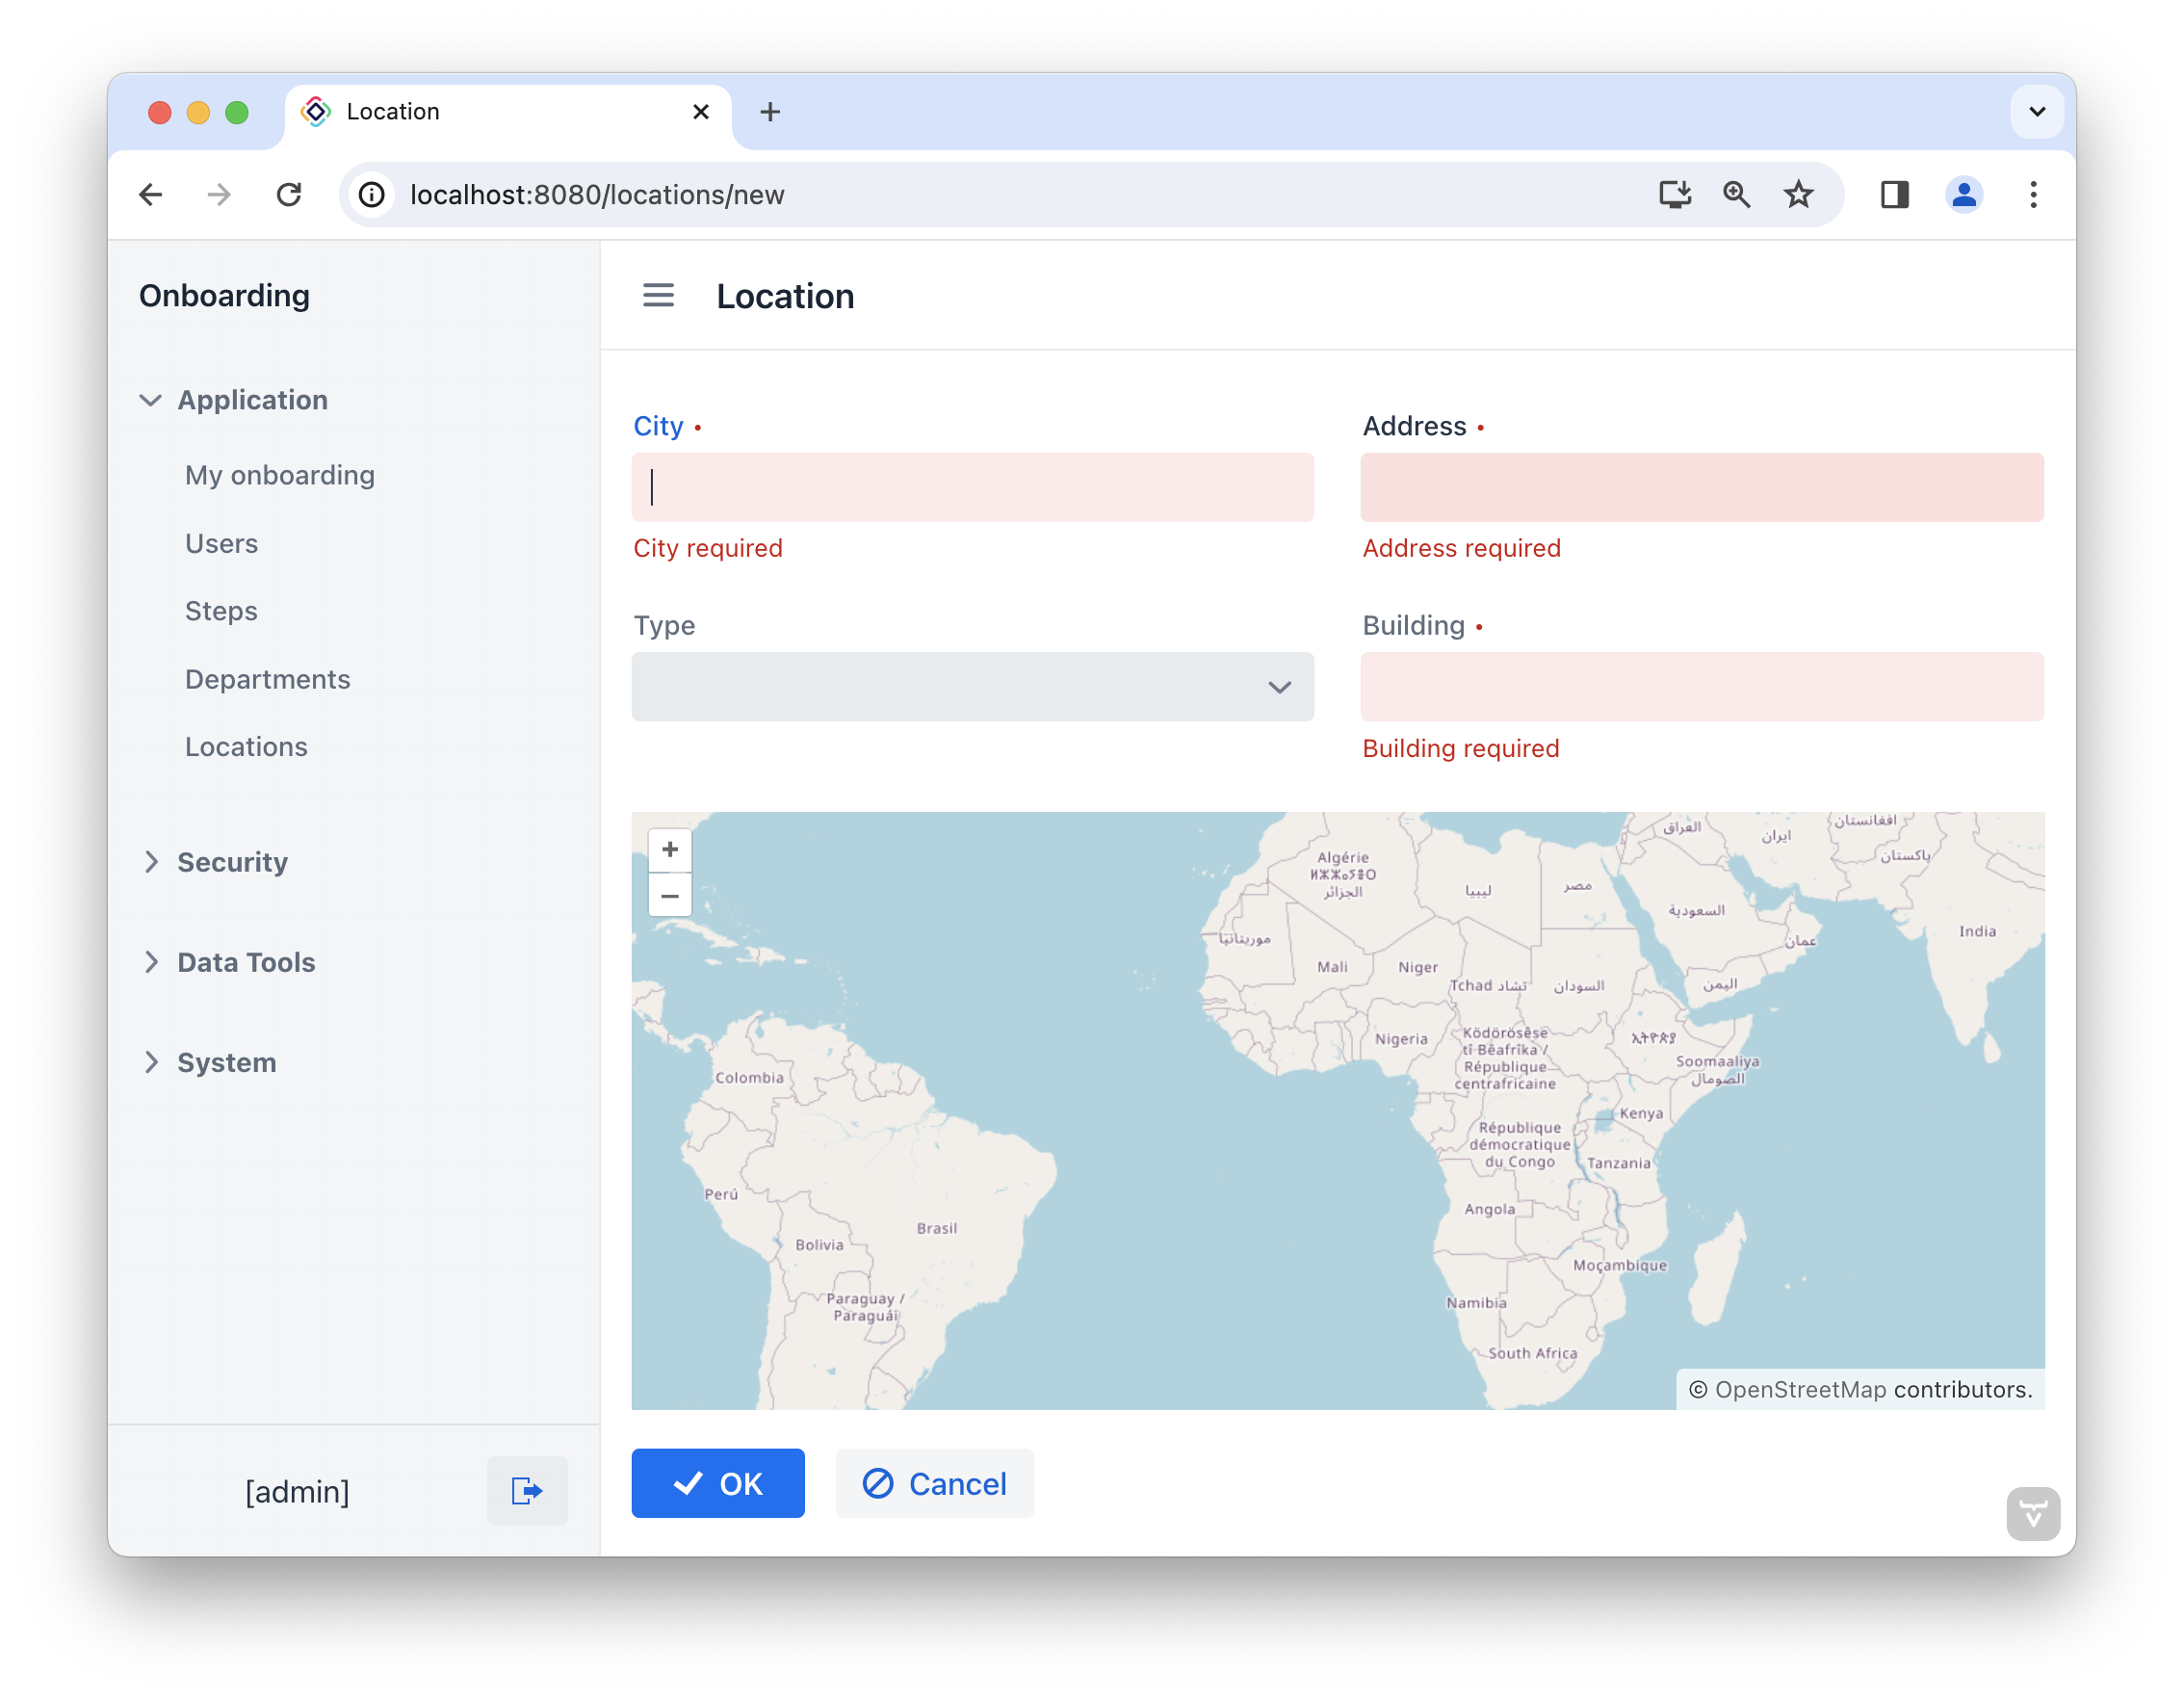
Choose the Locations item from the Application menu. You will see the Location.list view. Click Create. The Location.detail view will open:
Set Map View
By default, the geoMap component displays a world map with an initial geographical center at (0,0).
We will employ the map view to configure the location displayed on the map.
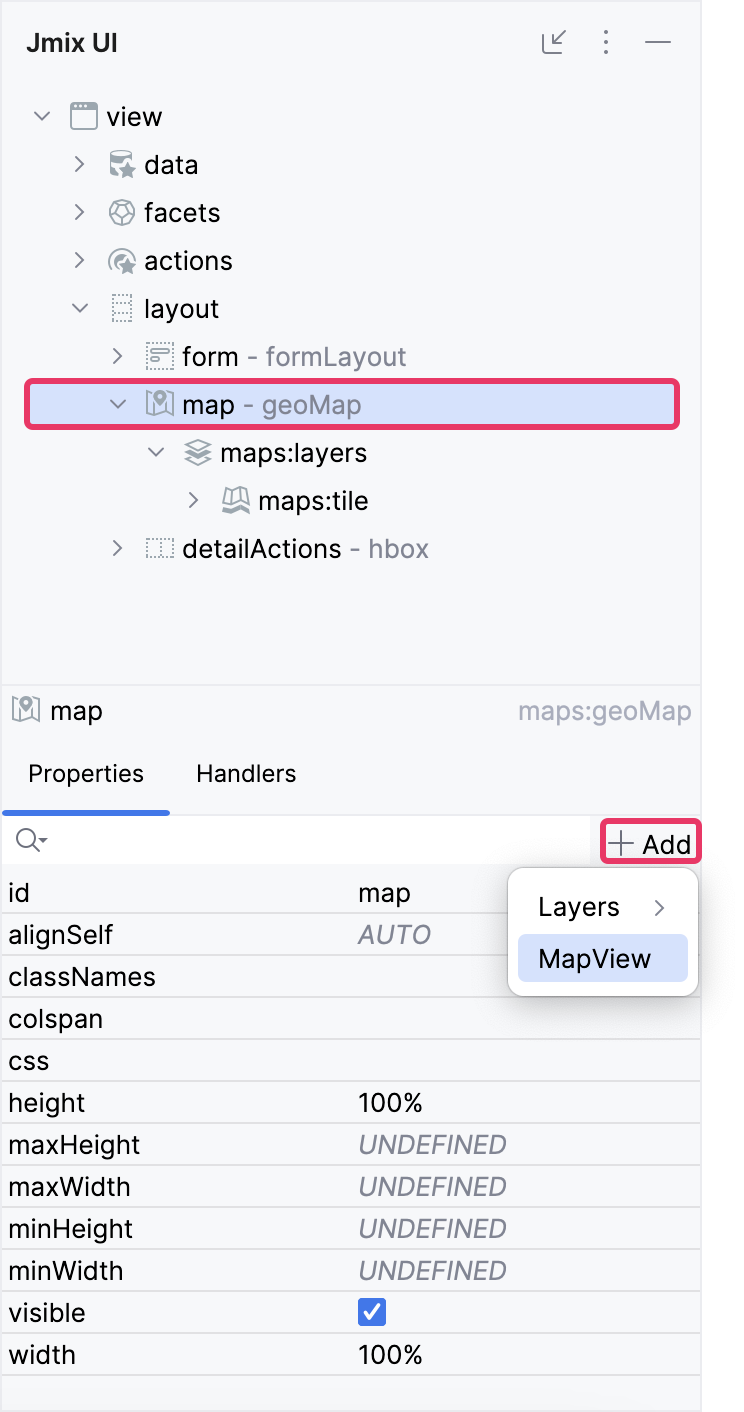
Choose map within the Jmix UI hierarchy panel or in the view XML descriptor, and then click the Add button in the inspector panel. From the drop-down list, opt for MapView.
Specify the centerY attribute:
<maps:mapView centerY="51.0"/>Choose maps:mapView in the Jmix UI hierarchy panel or in the view XML descriptor, and then click the Add button in the inspector panel. From the drop-down list, select Extent, and configure the minX, minY, maxX and maxY attributes as indicated below.
<maps:extent minX="-15.0"
             minY="30.0"
             maxX="40.0"
             maxY="60.0"/>
The extent limits the view, meaning that nothing beyond this extent will be visible on the map.
Launch the application to see the new feature in action.
Add Vector Layer with DataVectorSource
To handle geo-objects, we’ll incorporate a vector layer.
Navigate to maps:layers in the Jmix UI hierarchy panel or in the view XML descriptor, and click the Add button in the inspector panel. From the drop-down list, opt for VectorLayer. Specify the id attribute as follows: id="vectorLayer".
We’ll utilize DataVectorSource, which supports data binding with Jmix data containers.
Choose vectorLayer in the Jmix UI hierarchy panel or in the view XML descriptor, and then click the Add button in the inspector panel. From the drop-down list, opt for DataVectorSource. Configure the dataContainer attribute for it:
<maps:vector id="vectorLayer">
    <maps:dataVectorSource dataContainer="locationDc"
                           property="building"/>
</maps:vector>
Let’s take a look: the complete description of our map is as follows:
<maps:geoMap id="map" height="100%" width="100%">
    <maps:layers>
        <maps:tile>
            <maps:osmSource/>
        </maps:tile>
        <maps:vector id="vectorLayer">
            <maps:dataVectorSource dataContainer="locationDc"
                                   property="building"/>
        </maps:vector>
    </maps:layers>
    <maps:mapView centerY="51.0">
        <maps:extent minX="-15.0"
                     minY="30.0"
                     maxX="40.0"
                     maxY="60.0"/>
    </maps:mapView>
</maps:geoMap>
Save Coordinates to Building Attribute
When HR manager creates a location, they click on a spot on the map, which is then stored in the Location entity as a Point with coordinates.
Let’s proceed to add a ClickEvent for our map.
Choose map in the Jmix UI hierarchy panel or in the view XML descriptor, switch to the Handlers tab, and create a MapClickEvent handler method:
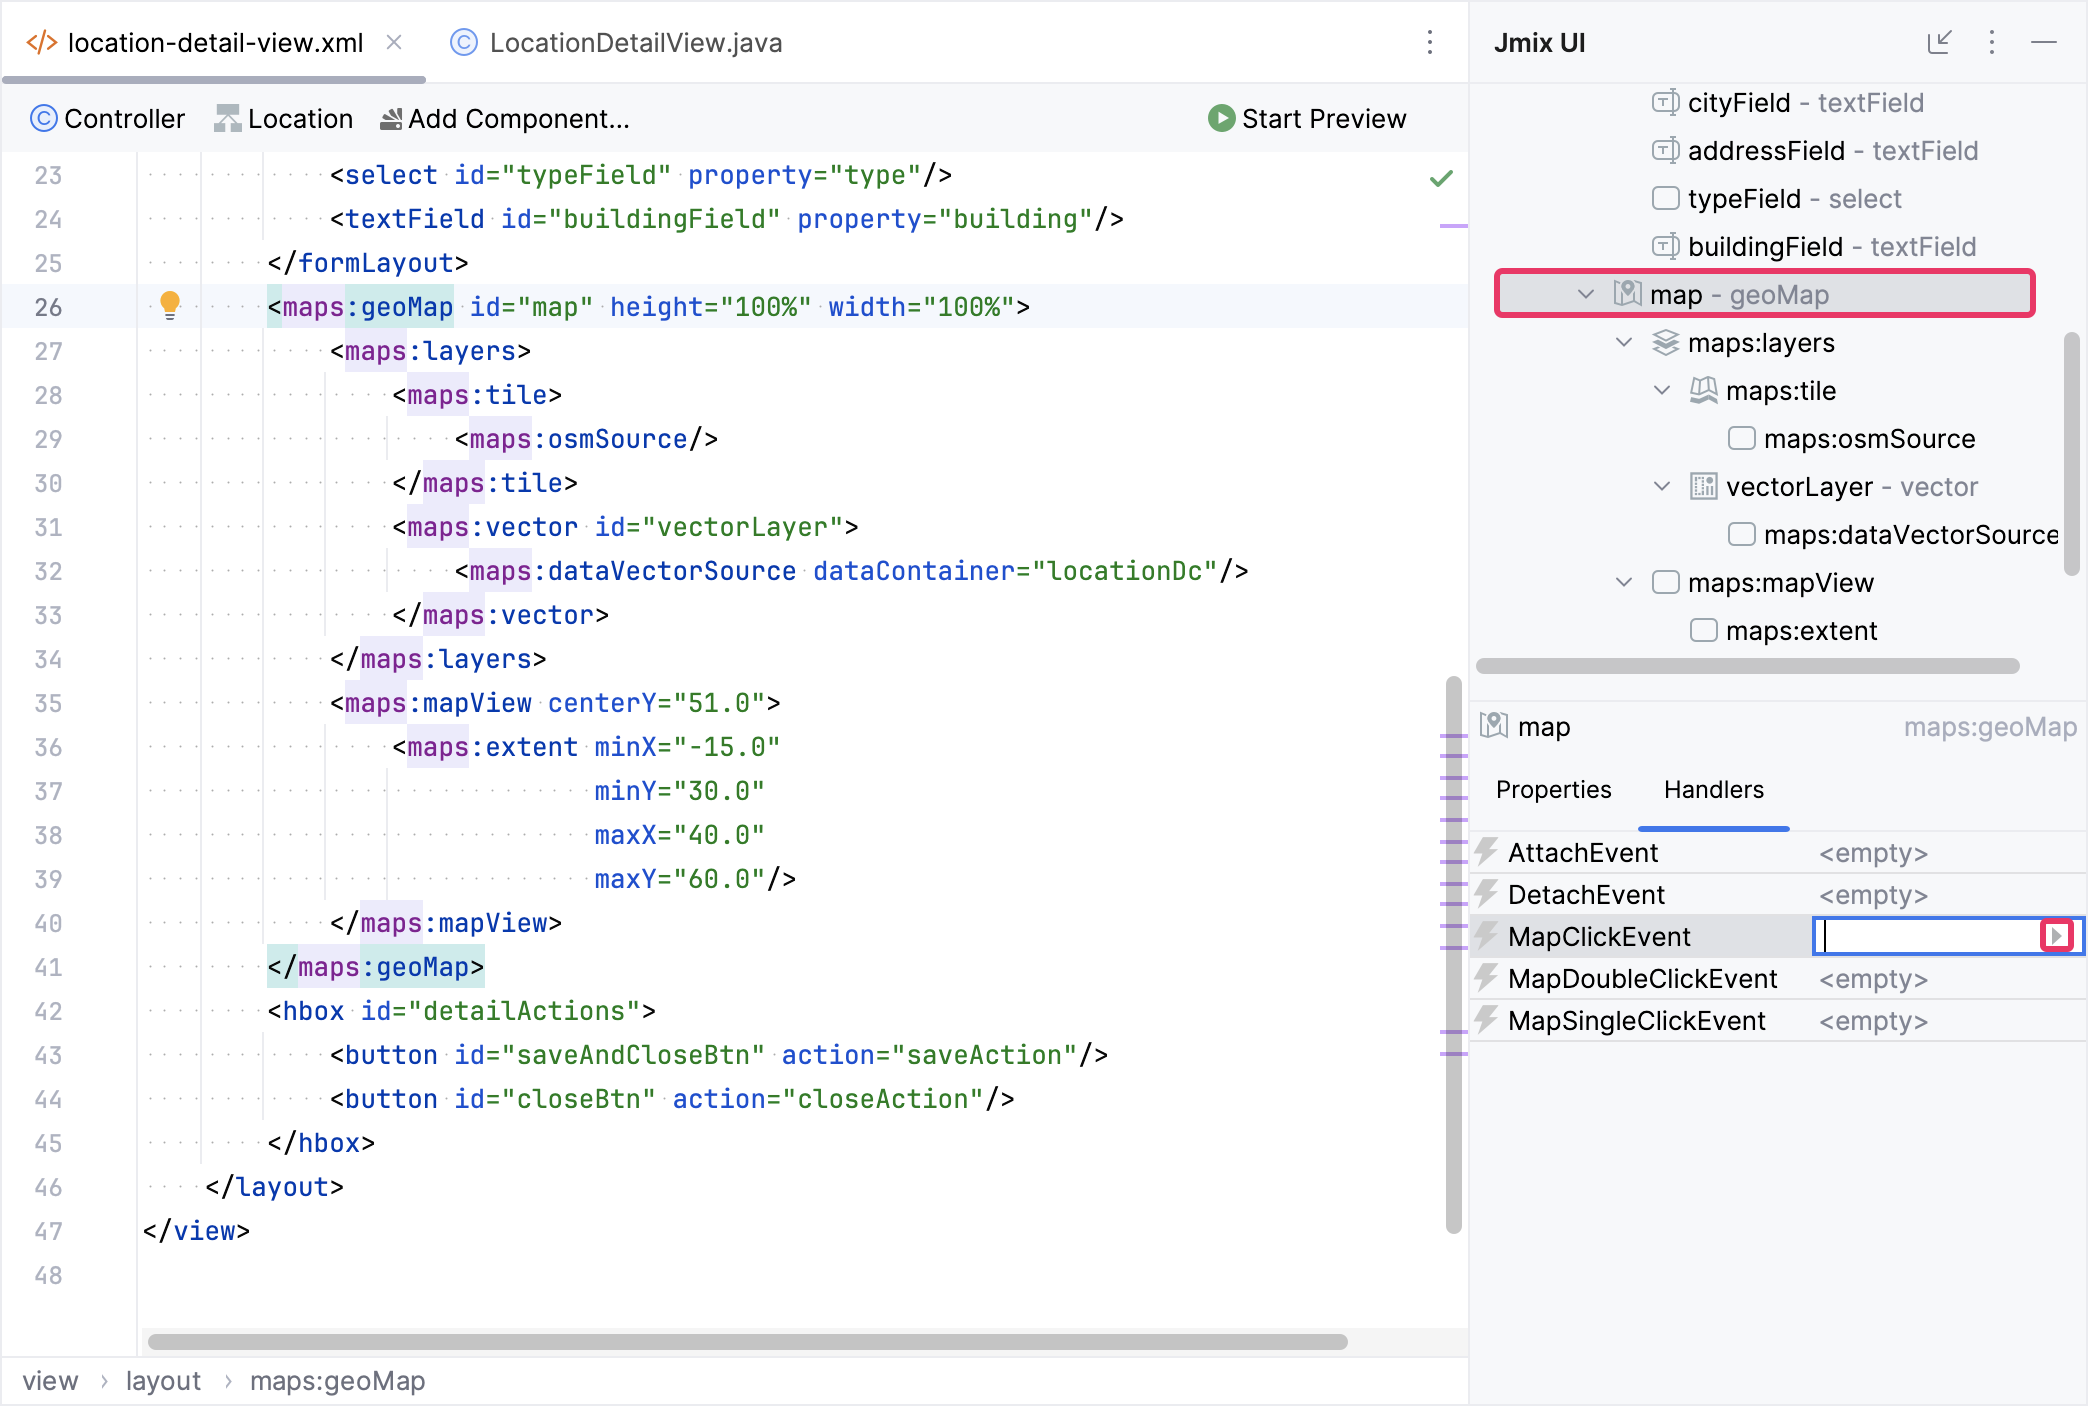
Add the logic of obtaining and storing the user’s selected coordinates to the map click handler method:
public class LocationDetailView extends StandardDetailView<Location> {
    protected GeometryFactory geometryFactory = GeometryUtils.getGeometryFactory(); (1)

    @Subscribe("map")
    public void onMapMapClick(final MapClickEvent event) {
        Point point = geometryFactory.createPoint(event.getCoordinate()); (2)
        Location location = getEditedEntity(); (3)
        location.setBuilding(point);
    }
}| 1 | To obtain GeometryFactory use GeometryUtils - a specialized utility class with functions related to the JTS library. |
| 2 | Convert the coordinates obtained from an event into a Point object by employing the GeometryFactory method. |
| 3 | Use the getEditedEntity() method of the base StandardDetailView class to get the Location being edited. |
Launch the application. Select the Locations item in the Application menu to access the Location.list view. Click Create to open the Location.detail view. Fill in the City, Address and Type fields with the relevant information. Click on the map at the specified address location. The value for the Building field will be automatically populated based on the coordinates of the selected point on the map. Save the location by clicking OK.
