Working with Project
This section describes how to create a new project, open an existing one, and start the application.
Creating New Project
Studio provides a wizard to create new Jmix projects from scratch.
-
Open New Project wizard from the main menu: File → New → Project. Also, you can click New Project in the welcome screen of IDE.
-
Select Jmix Project in the dialog.
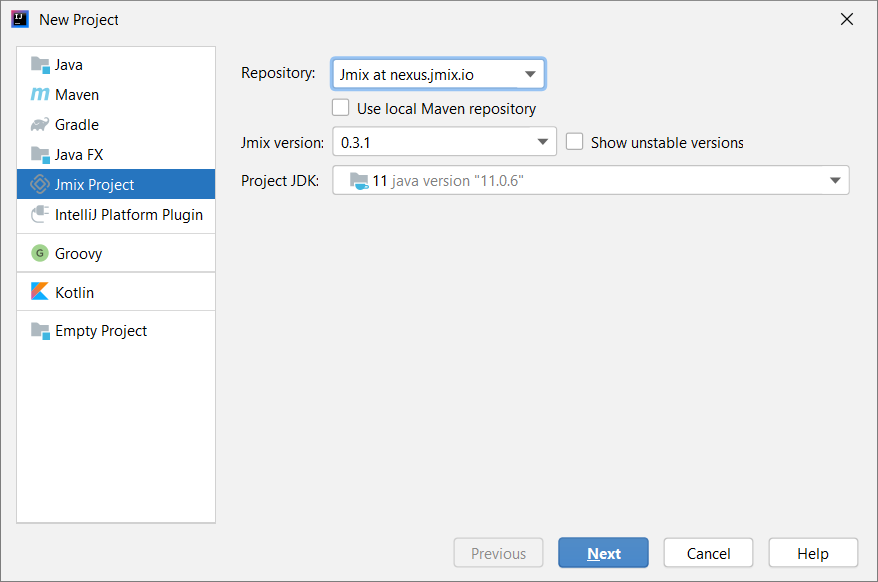
Configure the main project settings on this step:
-
You can accept the default repository that is specified in the Repository field, or select Custom repository and configure it.
-
Select Use local Maven repository if you want to use artifacts from the local repository.
-
Select the Jmix version to be used in the project. If you do not have any specific requirements, use the latest released version.
For beta-testing or early accessing new Jmix framework features, you might want to use one of unstable Jmix framework versions, ones that end with BETA or SNAPSHOT suffixes. To see them in the Jmix version drop-down list, you need to select the Show unstable versions checkbox.
-
In the Project JDK field, select JDK corresponding to
JAVA_HOMEwhich is set in your environment. If you see the<No JDK>value, click Add JDK in the list and select the folder, where JDK is installed, for example,C:\Java\jdk8u202-b08on Windows or/Library/Java/JavaVirtualMachines/jdk8u202-b08/Contents/Homeon macOS.
-
-
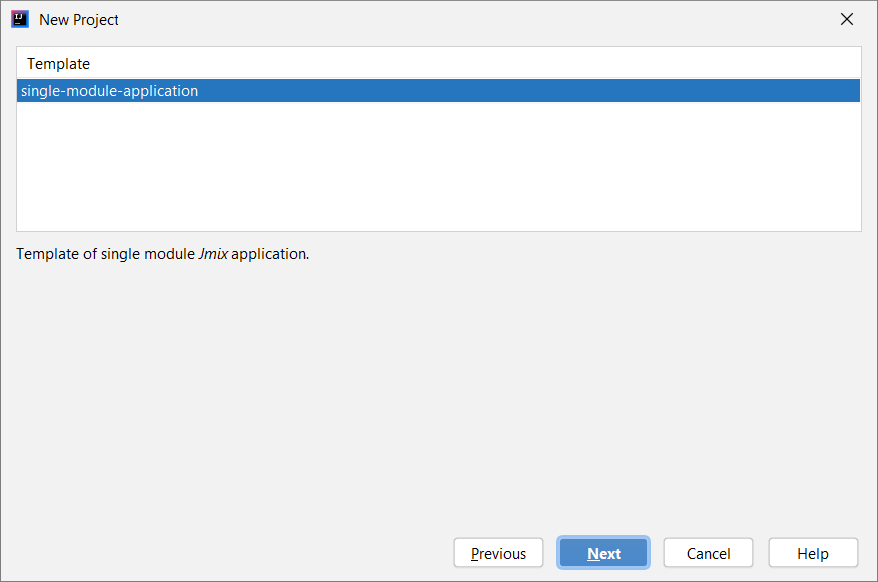
On the next wizard step, select a template to be used for creating an empty project.
-
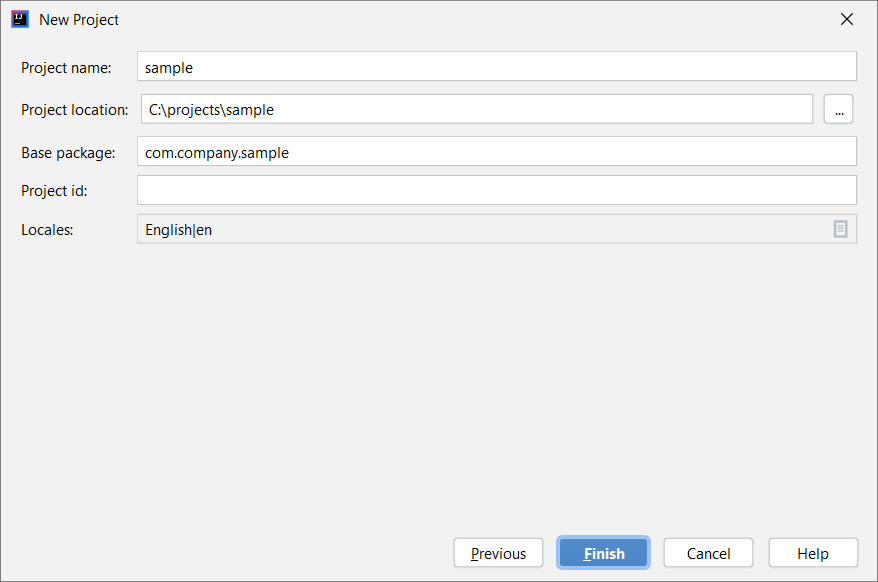
In the next window, you can set the project’s name, location, and localization.
-
Change value of the Project name field, if required. The name should contain only Latin letters, numbers, and underscores.
-
Project location is the path to the new project directory. You can select another directory by typing it in the field or clicking the button next to the field.
-
Base package is the base package for Java classes and resources. Choose the name of the package carefully. Later, you will be able to change the name and move classes and resources only manually.
-
Project id is optional. If it is set, Studio will use it as a prefix for entity, table and bean names. The project id must not be longer than 7 characters.
-
Use the Locales field to open an editor and add more supported locales to the project. You will be able to change them later if required.
-
-
Click Finish. The empty project will be created in the specified directory, and Studio will start building the project information from Gradle files and indexing the project.
When the project synchronization and indexing process is completed, you will see the Jmix project tree in the Jmix Tool Window.
Now you can start working on the project.
Opening Existing Project
To open the project, do the following steps:
-
Click Open in the welcome window of the IDE.
If another project is already opened, go File → Open from the main menu.
-
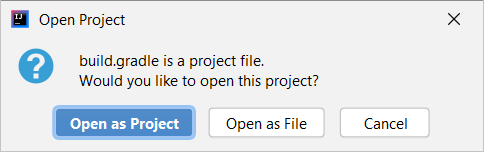
In the file system dialog, select the project’s root folder containing the
build.gradlefile, select it and click OK.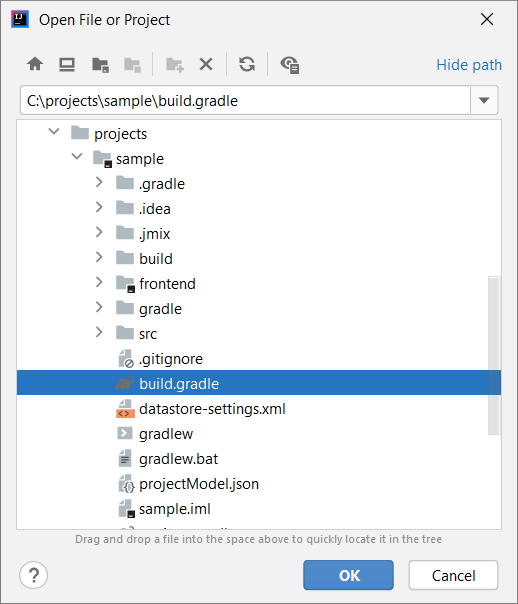
-
In the appeared dialog, select Open as Project.
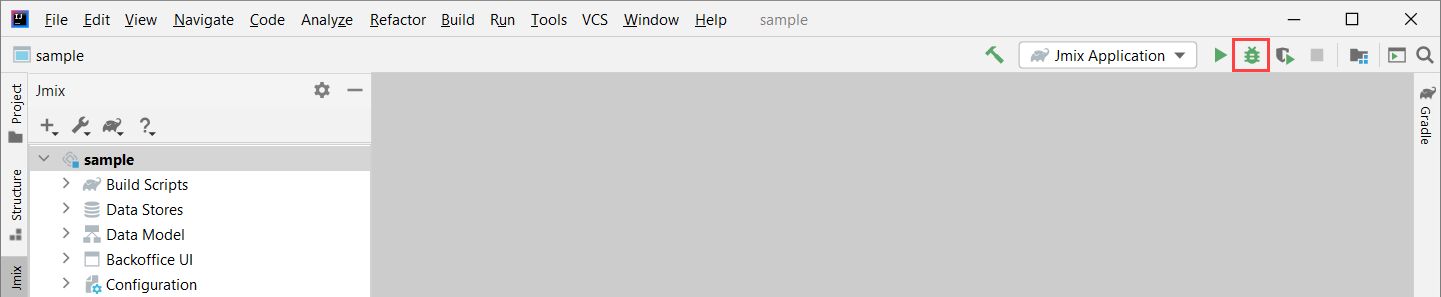
Wait for Gradle synchronization and project indexing process to complete. The Jmix project tree should appear in the Jmix Tool Window.
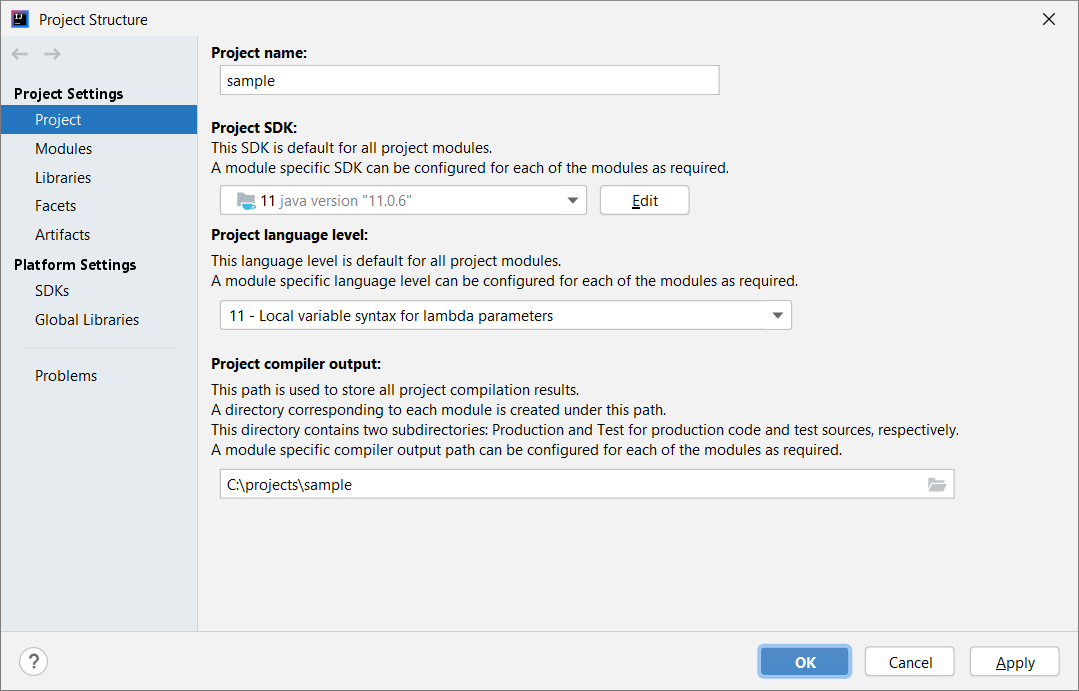
If the project has been opened for the first time, open File → Project Structure from the main menu.
-
Make sure that the Project SDK field has a value corresponding to
JAVA_HOMEwhich is set in your environment. If you see the<No SDK>value, select Add SDK from the list and select the folder where the JDK is installed, for example,C:\Java\jdk8u202-b08on Windows or/Library/Java/JavaVirtualMachines/jdk8u202-b08/Contents/Homeon macOS. -
Make sure that the Project language level field has a value corresponding to the JDK version. For example, if the JDK is
1.8, the language level must be8 - Lambdas, type annotations, etc.
Also, you can open a project from recent projects. You can do it in the welcome window of the IDE or open File → Open Recent from the main menu.
Starting Application
When Studio imports Jmix project, it creates Run/Debug Configuration. You can use buttons in the main toolbar to run and stop your application.
To run the application and connect to it with the debugger, just click the debug button next to the selected Jmix Application configuration.
See the status in the Console tab of the Debug tool window.
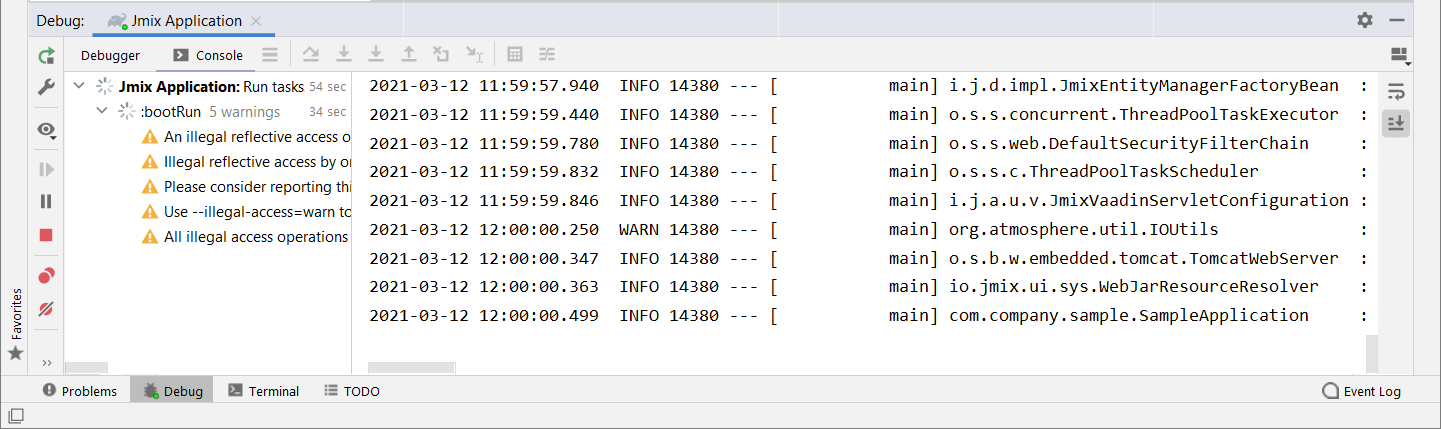
After some time you can access the application using the browser. By default, the URL will be http://localhost:8080/ .
You can stop the application server in the main toolbar or by clicking the button in the Debug tool window.
Run/Debug Configuration Settings
You can adjust settings of the embedded Tomcat server which is used by the Jmix Application Run/Debug configuration.
You can open the settings dialog by clicking the Jmix Application element in the toolbar and choose Edit Configurations… in the context menu.
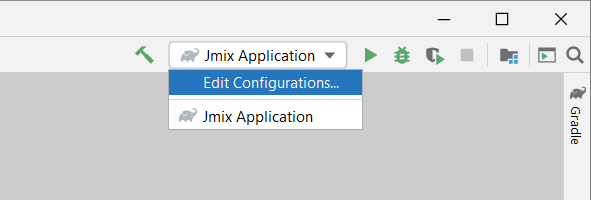
Also, you can open it from the main menu: Run → Edit Configurations….
The Run/Debug Configuration dialog appears.
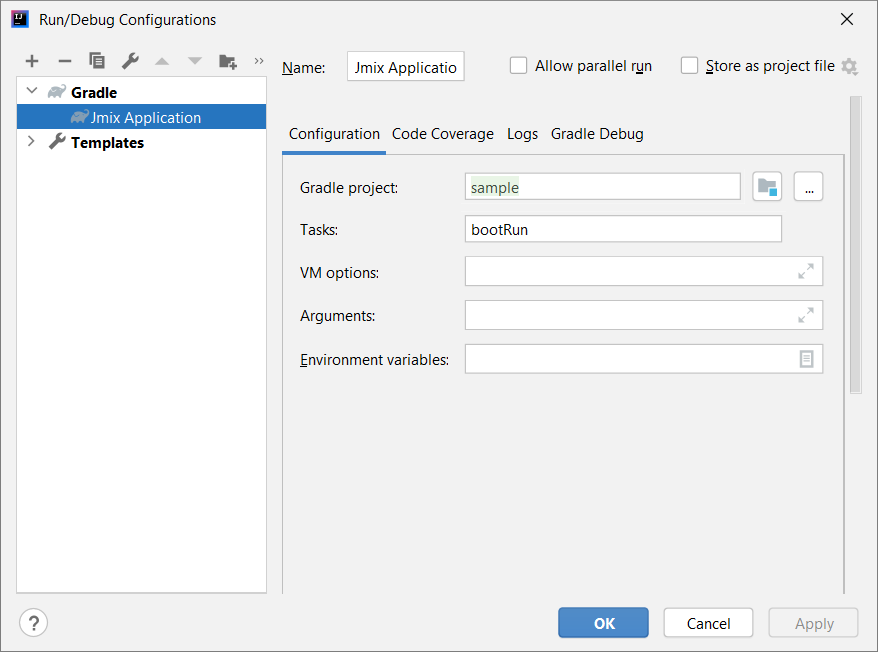
You might be interested in editing the following settings:
-
Arguments – JVM options to be passed to the debug server. For example, specify
-Xmx1500mto increase maximum allowed memory usage for the server. -
Environment variables – environment variables that should be available to the debug server process.
Using Non-Default JDK
Both IntelliJ IDEA and Gradle by default use Java Development Kit (JDK) defined by the JAVA_HOME environment variable to assemble and run Java projects. In order to use the non-default JDK in your project without touching global system settings, you need to perform several steps.
Let’s consider that JAVA_HOME environment variable points to the JDK 8 and you want to use JDK 11 in your project.
You need to perform the following steps:
-
Open File → Project Structure from the main menu.
-
Select SDKs in the left menu. Press + button and select Add JDK.
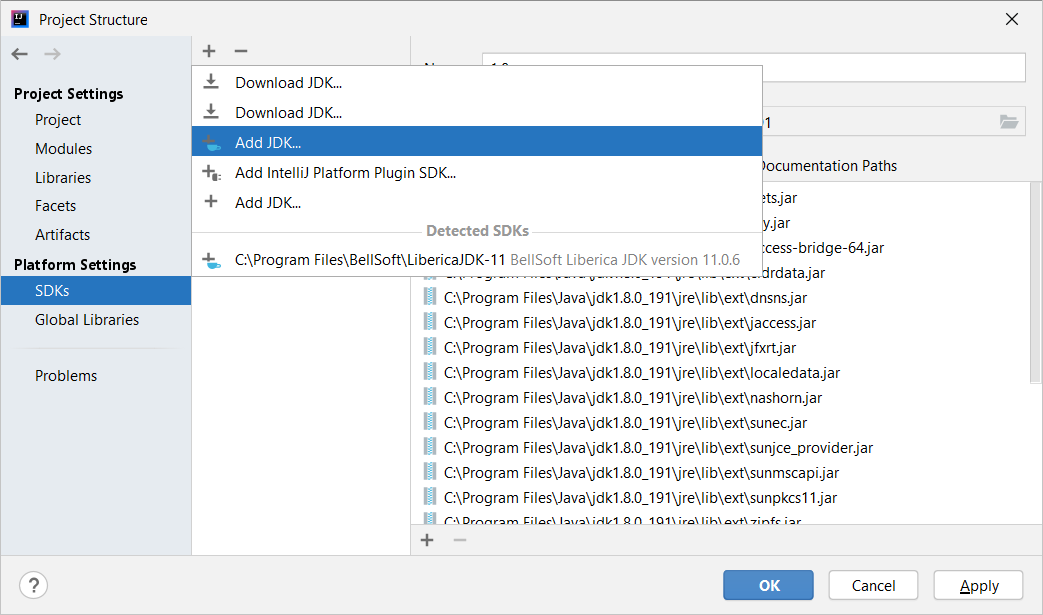
-
Select JDK 11 installation folder. Press OK to save changes.
-
If you create a new Jmix project, select "11" for the Project SDK field.
For existing projects open File → Project Structure from the main menu and change the Project → Project SDK value.
-
Navigate to the project root folder and create
gradle.propertiesfile with the following text:# Path to JDK 11 org.gradle.java.home = C:/Java/jdk-11.0.5.10-hotspot -
Modify the
build.gradlefile located in the project root folder. Add the following statements:group = '...' version = '...' sourceCompatibility = '11' targetCompatibility = '11' -
In the Gradle tool window click Reload All Gradle Projects to refresh the Gradle project configuration.
When these changes are performed, the project is going to be compiled and run with JDK 11, without changing global system settings.
