3. Display Features on Map
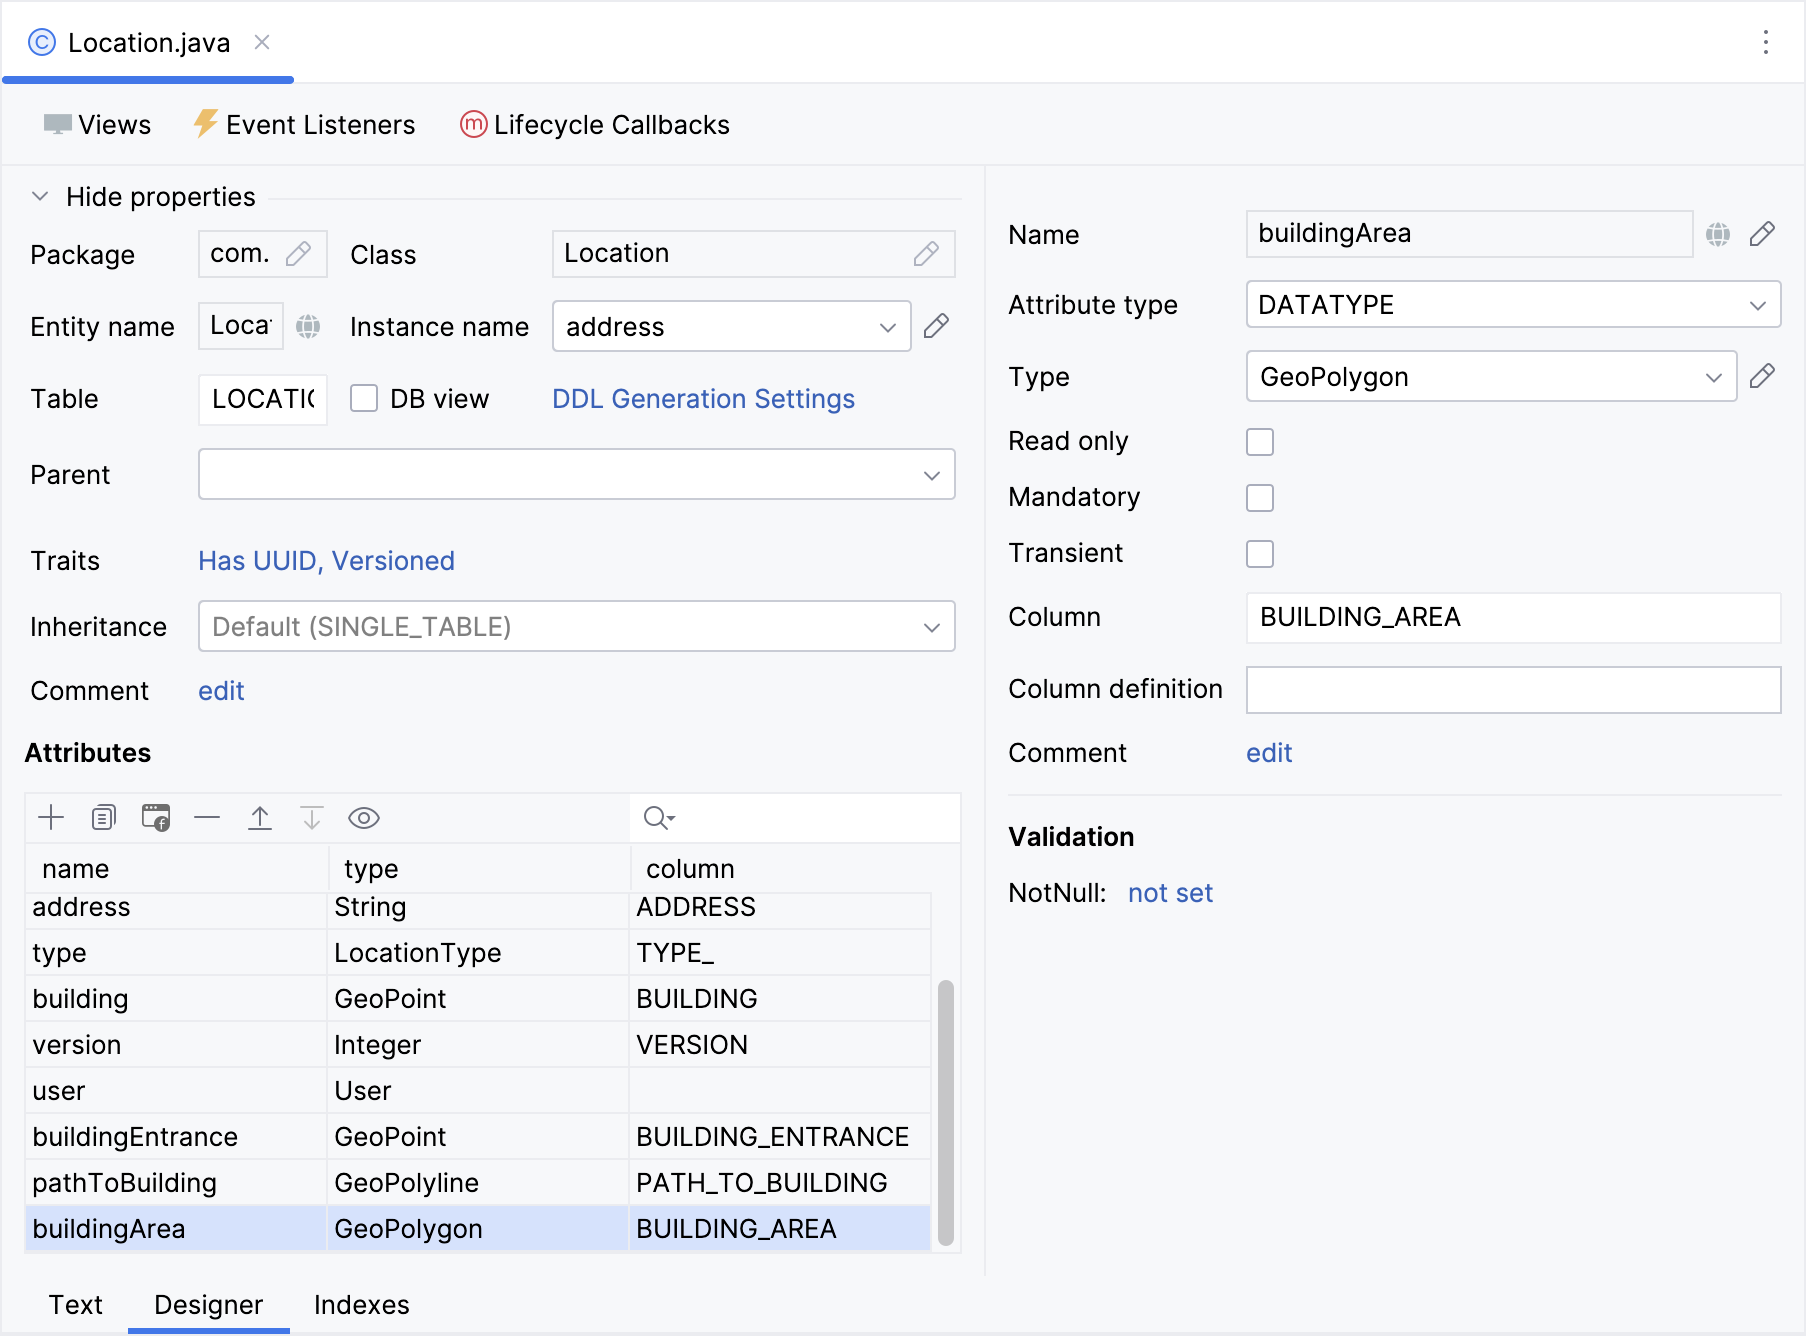
Let’s go back to the Location entity and include the following attributes to it:
-
buildingEntrancewithGeoPointtype. This attribute stores the coordinates of the building’s entrance. -
pathToBuildingwithGeoPolylinetype. This attribute stores the path to the building. -
buildingAreawithGeoPolygontype. This attribute is utilized to depict the building on the map using a geometric shape.
Include these attributes to the Location.detail view.
To simplify our tutorial, we’ll use text fields for the newly added fields. You can add map event handlers to extract coordinates from the map, just like we did in Saving Coordinates to the Building Attribute. To achieve this, utilize the methods provided by GeometryUtils.
Below are examples demonstrating how to fill in the fields:
-
Building:
POINT (13.347796079315284 52.55344847222085) -
Building entrance:
POINT (13.347860653822895 52.553536712270784) -
Path to building:
LINESTRING (13.346886063248354 52.553529790121985,
13.347394863347068 52.5532539371346, 13.347837668453902 52.55355180648286,
13.347860653822895 52.553536712270784)
-
Building area:
POLYGON ((13.347878609736783 52.553551482547135,
13.34795260252847 52.55350646966119,
13.347713548893793 52.55334632728869,
13.347640979040412 52.553390474703775,
13.347878609736783 52.553551482547135))
Add Vector Layers
A vector layer is utilized to work with geometries. It’s possible to add multiple vector layers to a map.
To showcase polygons, polylines, and points, you need to append vector layers onto a map.
Open location-lookup-view.xml and create a separate vector layer and vector data source for each geo-specific attribute of the geo-object. Specify the dataContainer and property attributes for data vector sources:
<maps:geoMap id="map" ...>
    ...
    <maps:layers>
        <maps:tile>
            <maps:osmSource/>
        </maps:tile>
        <maps:vector id="dataVectorLayer">
            <maps:dataVectorSource id="buildingSource"
                                   dataContainer="locationsDc"
                                   property="building"/>
        </maps:vector>
        <maps:vector id="vectorLayerArea">
            <maps:dataVectorSource id="areaSource"
                                   dataContainer="locationsDc"
                                   property="buildingArea"/>
        </maps:vector>
        <maps:vector id="vectorLayerPath">
            <maps:dataVectorSource id="pathSource"
                                   dataContainer="locationsDc"
                                   property="pathToBuilding"/>
        </maps:vector>
        <maps:vector id="vectorLayerEntrance">
            <maps:dataVectorSource id="entranceSource"
                                   dataContainer="locationsDc"
                                   property="buildingEntrance"/>
        </maps:vector>
    </maps:layers>
</maps:geoMap>
Add Point on the Map
Navigate to the LocationLookupView view controller and append a new method:
@ViewComponent("map.vectorLayerEntrance.entranceSource")
private DataVectorSource<Location> entranceSource;

private void initBuildingEntranceSource() {
    entranceSource.setStyleProvider((location -> (1)
            new Style()
                    .withImage(new CircleStyle()
                            .withRadius(4)
                            .withFill(new Fill("#000000"))
                            .withStroke(new Stroke()
                                    .withWidth(2d)
                                    .withColor("#ffffff")))));
}| 1 | Set up a styleProvider to display Point as a point feature with a custom point style. |
Add Polyline on Map
Add the initPathToBuildingSource() method in the LocationLookupView view controller:
@ViewComponent("map.vectorLayerPath.pathSource")
private DataVectorSource<Location> pathSource;

private void initPathToBuildingSource() {
    pathSource.setStyleProvider(location -> (1)
            new Style()
                    .withStroke(new Stroke()
                            .withWidth(2d)
                            .withColor("#000000")
                            .withLineDash(List.of(0.2, 8d, 0.8d))));
}| 1 | Set up a styleProvider to display LineString as a polyline feature with a customized linestring style. |
Add Polygon on Map
Add the initBuildingAreaSource() method in the LocationLookupView view controller:
@ViewComponent("map.vectorLayerArea.areaSource")
private DataVectorSource<Location> areaSource;

private void initBuildingAreaSource() {
    areaSource.setStyleProvider(location -> { (1)
        String fillColor = location.getType() == LocationType.COWORKING
                ? "rgba(52, 216, 0, 0.2)"
                : "rgba(1, 147, 154, 0.2)";
        String strokeColor = location.getType() == LocationType.COWORKING
                ? "#228D00"
                : "#123EAB";
        return new Style()
                .withFill(new Fill(fillColor))
                .withStroke(new Stroke()
                        .withWidth(2d)
                        .withColor(strokeColor));
    });
}| 1 | Set up a styleProvider to display Polygon as a polygon feature with a customized polygon style. The fill color and the polygon border color are established in variables and are dependent on the location type. |
Invoke the created methods from onInit():
@Subscribe
public void onInit(final InitEvent event) {
initBuildingAreaSource();
initBuildingEntranceSource();
initPathToBuildingSource();
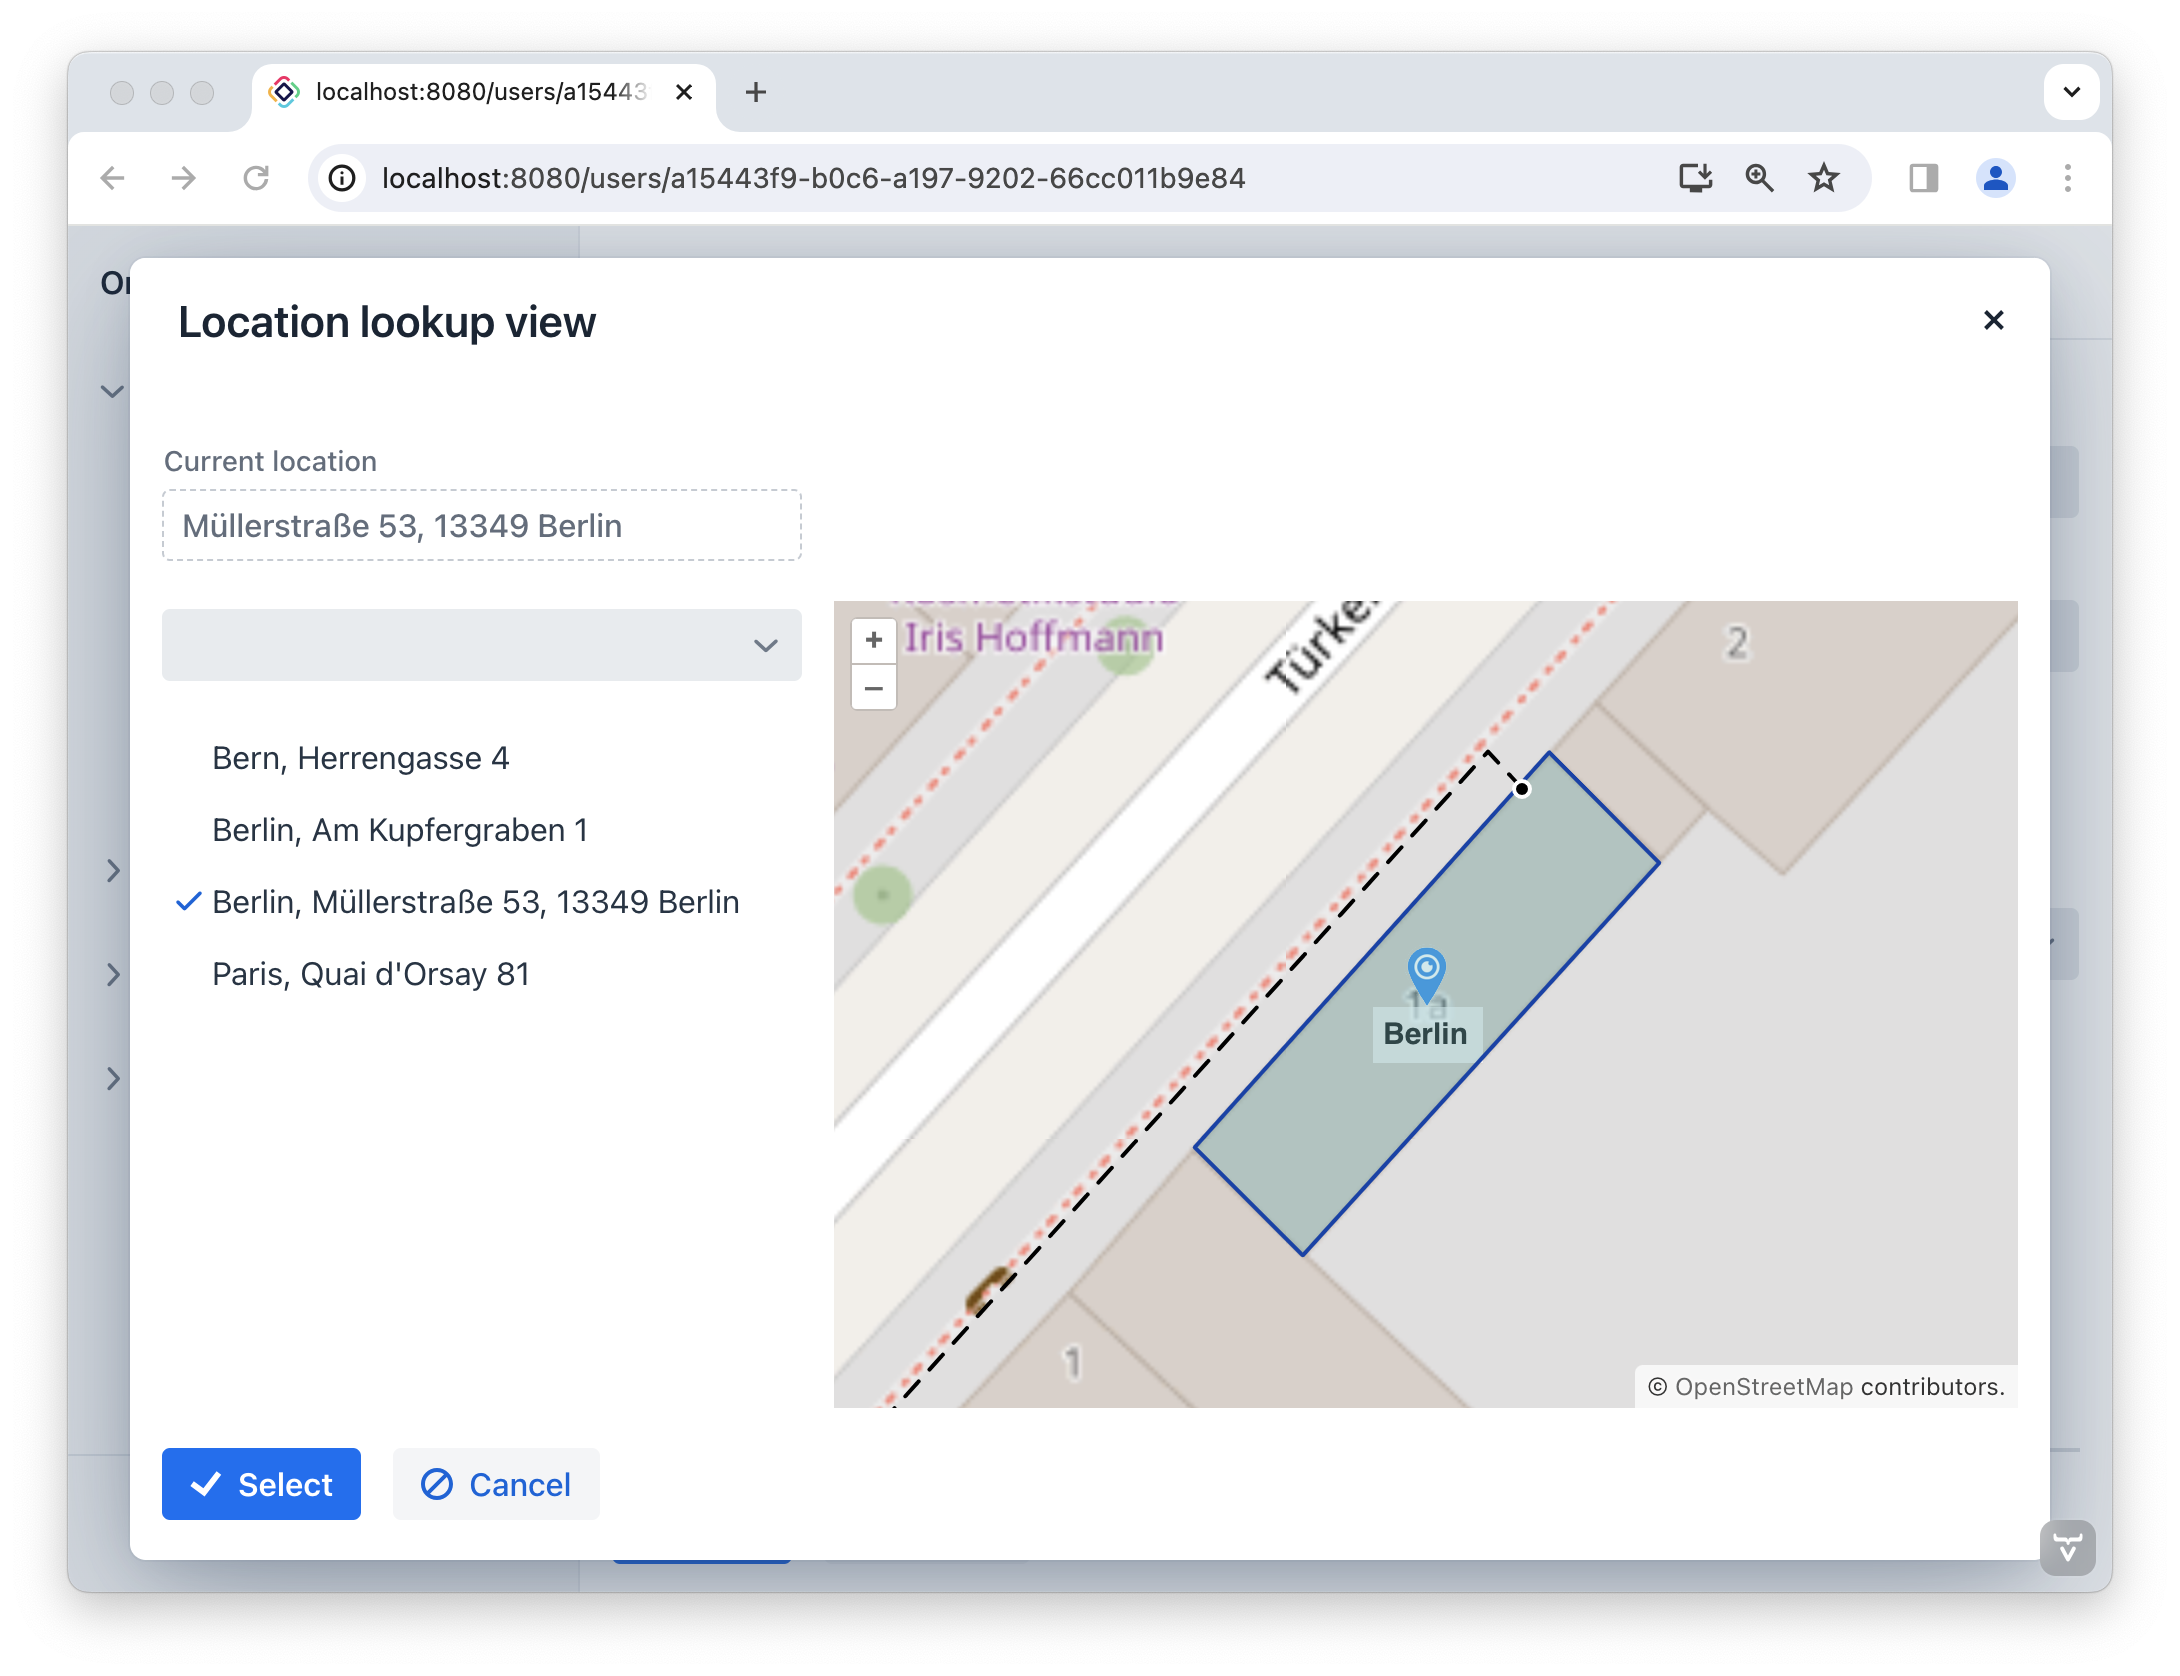
}Let’s launch the application to see the new feature in action. Now, when you choose the location, the map will zoom in and center itself according to the location’s coordinates.
The building’s entrance is exhibited as a black dot on the map. The path to the building is depicted as a dashed line, while the polygon demonstrates the building’s boundary.