Fetch Plan Designer
Studio provides a visual designer for managing fetch plans.
|
This feature requires a RAD or Enterprise subscription. If you don’t have the subscription, see how to get the trial version. |
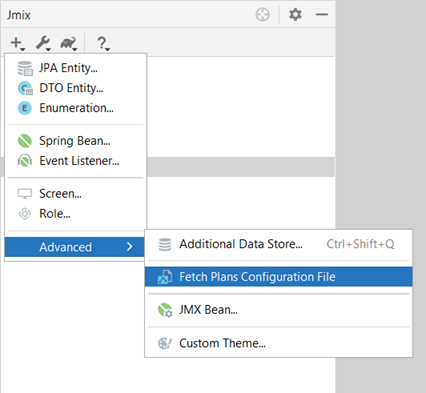
First, you need to create a configuration file using the menu in Jmix Tool Window.

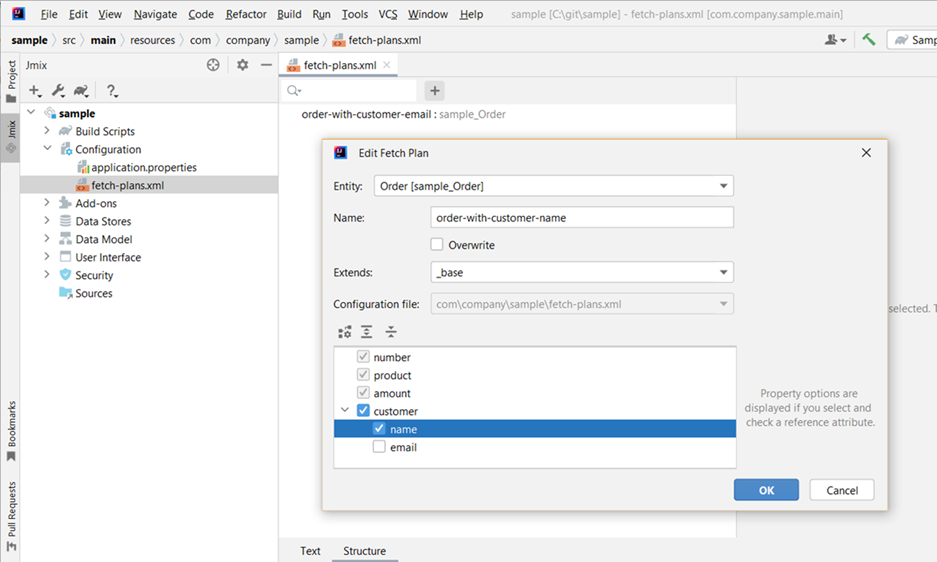
After that, the fetch-plans.xml file will be created and opened in the designer. The Structure tab displays the list of fetch plans defined in this configuration file and allows you to visually construct fetch plans definitions.
To create a new fetch plan, you can use the New →Advanced menu of the Jmix Tool Window that will contain the Fetch Plan item. Also, use the plus button in the Structure tab.

The fetch plan creation dialog contains the following fields:
-
Entity - a name of the entity the fetch plan is created for.
-
Name - a name of the new fetch plan.
-
Extends - a built-in or custom fetch plan which attributes are extended by the fetch plan.
The full list of attributes of the current entity is displayed in the tree below the fields. You can select which attributes will be included in the fetch plan.
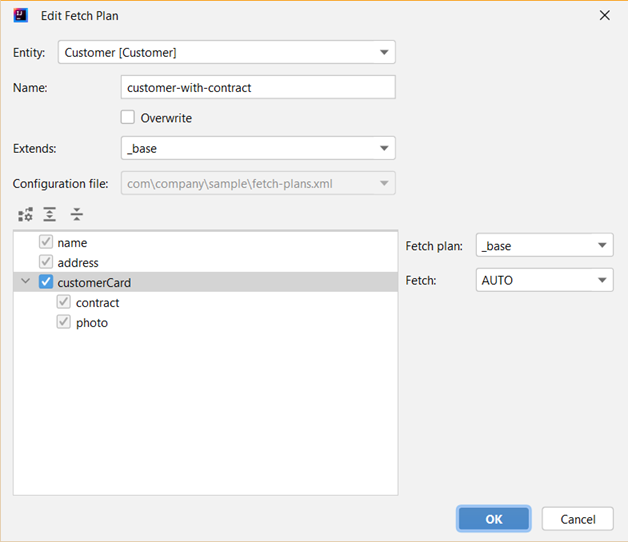
If your fetch plan extends another fetch plan, all inherited attributes are selected and disabled. When you select a reference attribute, the following properties will appear in the right panel:

-
Fetch plan - an optional fetch plan to load the referenced entity. We recommend to use references to named fetch plans, as it makes it easier to maintain complex fetch plans.
-
Fetch - an optional property of reference attributes that specifies how to fetch the related entity from the database.
-
AUTO- an optimal mode will be chosen depending on the relation type. -
UNDEFINED- fetching will be performed according to JPA rules that effectively means loading by a separate select. -
JOIN- fetching in the same select by joining with referenced table. -
BATCH- queries of related objects will be optimized in batches.If the fetch attribute is not specified, the
AUTOmode is applied.
-
