Maps
The add-on helps you to enrich your application with visual representation and intuitive manipulation for spatial data. You can use a preferable map provider that meets your needs.
The component integrates spatial types (point, polyline, polygon) from JTS Topology Suite (JTS) — the most popular Java library for working with spatial data.
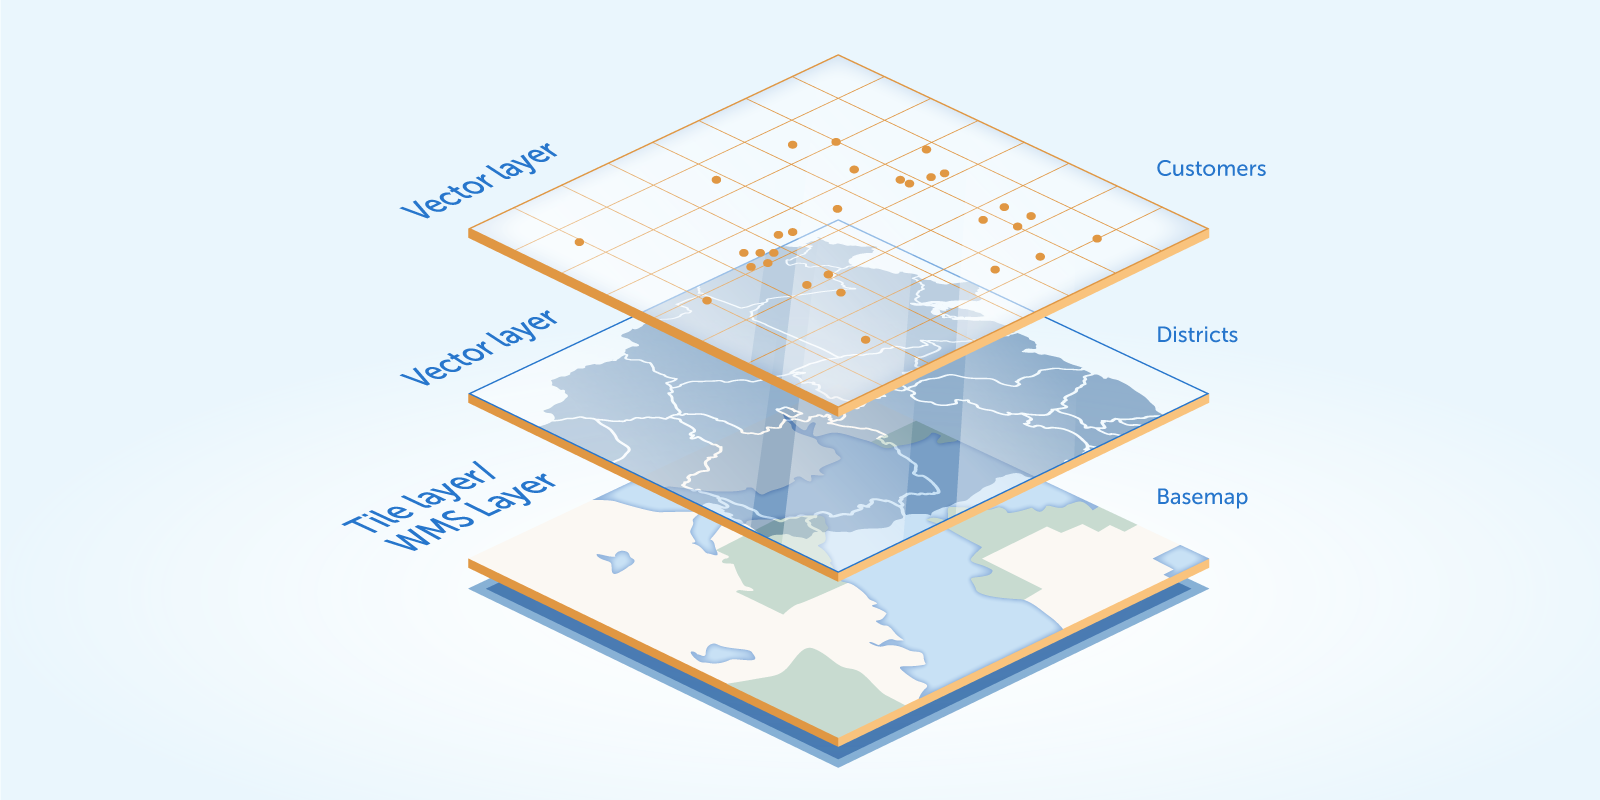
The add-on supports a traditional multi-layer structure commonly used in professional GIS systems. The layers are represented as structural units of maps.
You can use the following types of layers:
-
Raster layers that consist of raster images. Can be provided by XYZ tiles services or Web Map Services.
-
Vector layers that contain geo-objects — entities with geometry attributes.
The add-on supports drawing and interactive editing of geo-entities and provides features for geoanalysis: heatmaps and clustering.
Installation
| This add-on requires the Enterprise subscription. If you don’t have the subscription, see how to get the trial version below. |
For automatic installation through Jmix Marketplace, follow instructions in the Add-ons section.
For manual installation, follow the steps below.
-
Configure access to the premium repository.
-
Add the premium repository to your
build.gradle:repositories { // ... maven { url = 'https://global.repo.jmix.io/repository/premium' credentials { username = rootProject['premiumRepoUser'] password = rootProject['premiumRepoPass'] } } } -
Add premium repository credentials to
~/.gradle/gradle.properties:premiumRepoUser=123456123456 premiumRepoPass=abcdefabcdefGet the repository credentials from your license key: the first part of the key before dash is the repository user name, the part after dash is the password. For example, if your key is
123456123456-abcdefabcdef, then the user name is123456123456and the password isabcdefabcdef.
-
-
Add dependencies to your
build.gradle:implementation 'io.jmix.maps:jmix-maps-starter' implementation 'io.jmix.maps:jmix-maps-ui-starter' widgets 'io.jmix.ui:jmix-ui-widgets' widgets 'io.jmix.maps:jmix-maps-ui-widgets' -
Remove
implementation 'io.jmix.ui:jmix-ui-widgets-compiled'dependency. -
Add
compileWidgetstask (change paths according to your application base package):compileWidgets { generate 'maps.ex1.widgets.CustomWidgetSet' } -
Add
jmix.ui.widget-setproperty to yourapplication.propertiesfile (adjust location according to thecompileWidgetstask above):jmix.ui.widget-set = maps.ex1.widgets.CustomWidgetSet
Trial Version
You can get a trial version of the add-on by visiting the add-on page on the Jmix Marketplace website.
The trial add-on is available for 28 days after the first request. You can install it and use in a test project during this period.
| After the trial period is expired, the application using the add-on will not run. |
Trial add-ons can be used only with the latest Jmix framework version. We recommend creating a new test project and installing the trial add-on into it.
