2. Simple CRUD
Let’s start from implementing the simplest feature of your Onboarding application: management of onboarding Steps.
Essentially, an onboarding Step is an action that needs to be done within certain period of time by a new hire. The application stores the name of the action and its maximum duration. A user with admin access rights will manage the list, create new Steps, edit or remove them using dedicated screens. Once created, a Step can be assigned to employees (User) by HR manager.
The feature will include the following:
-
The
Stepentity. -
A database table for the entity.
-
CRUD screens for working with the entity.
Creating Step Entity
The entity has just a few simple attributes:
If your application is running, stop it using the Stop button ( ) in the main toolbar.
In the Jmix tool window, click New ( ) → JPA Entity:

The New JPA Entity dialog appears. Enter Step into the Class field and select the Traits → Versioned checkbox:
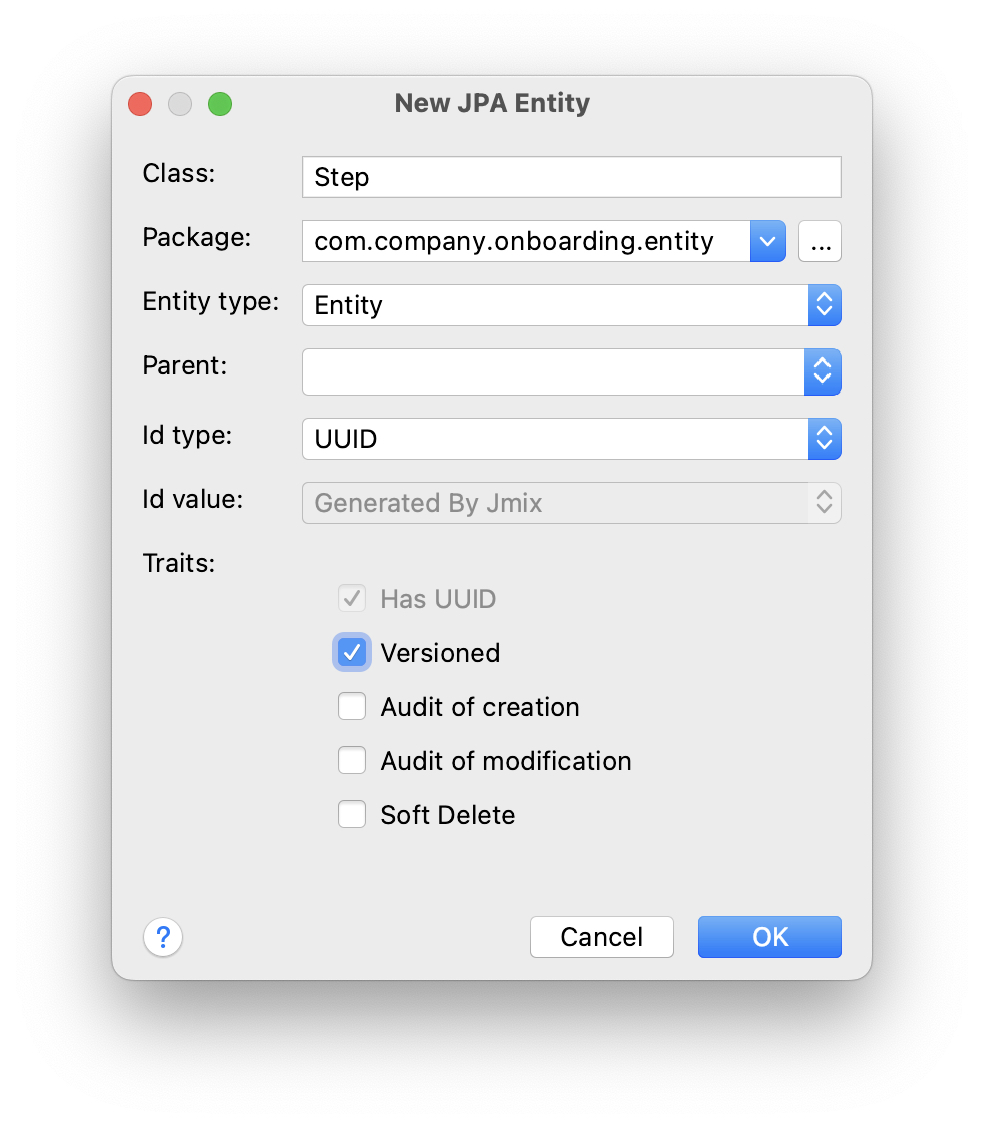
Click OK.
Studio will create the entity class and open the entity designer:
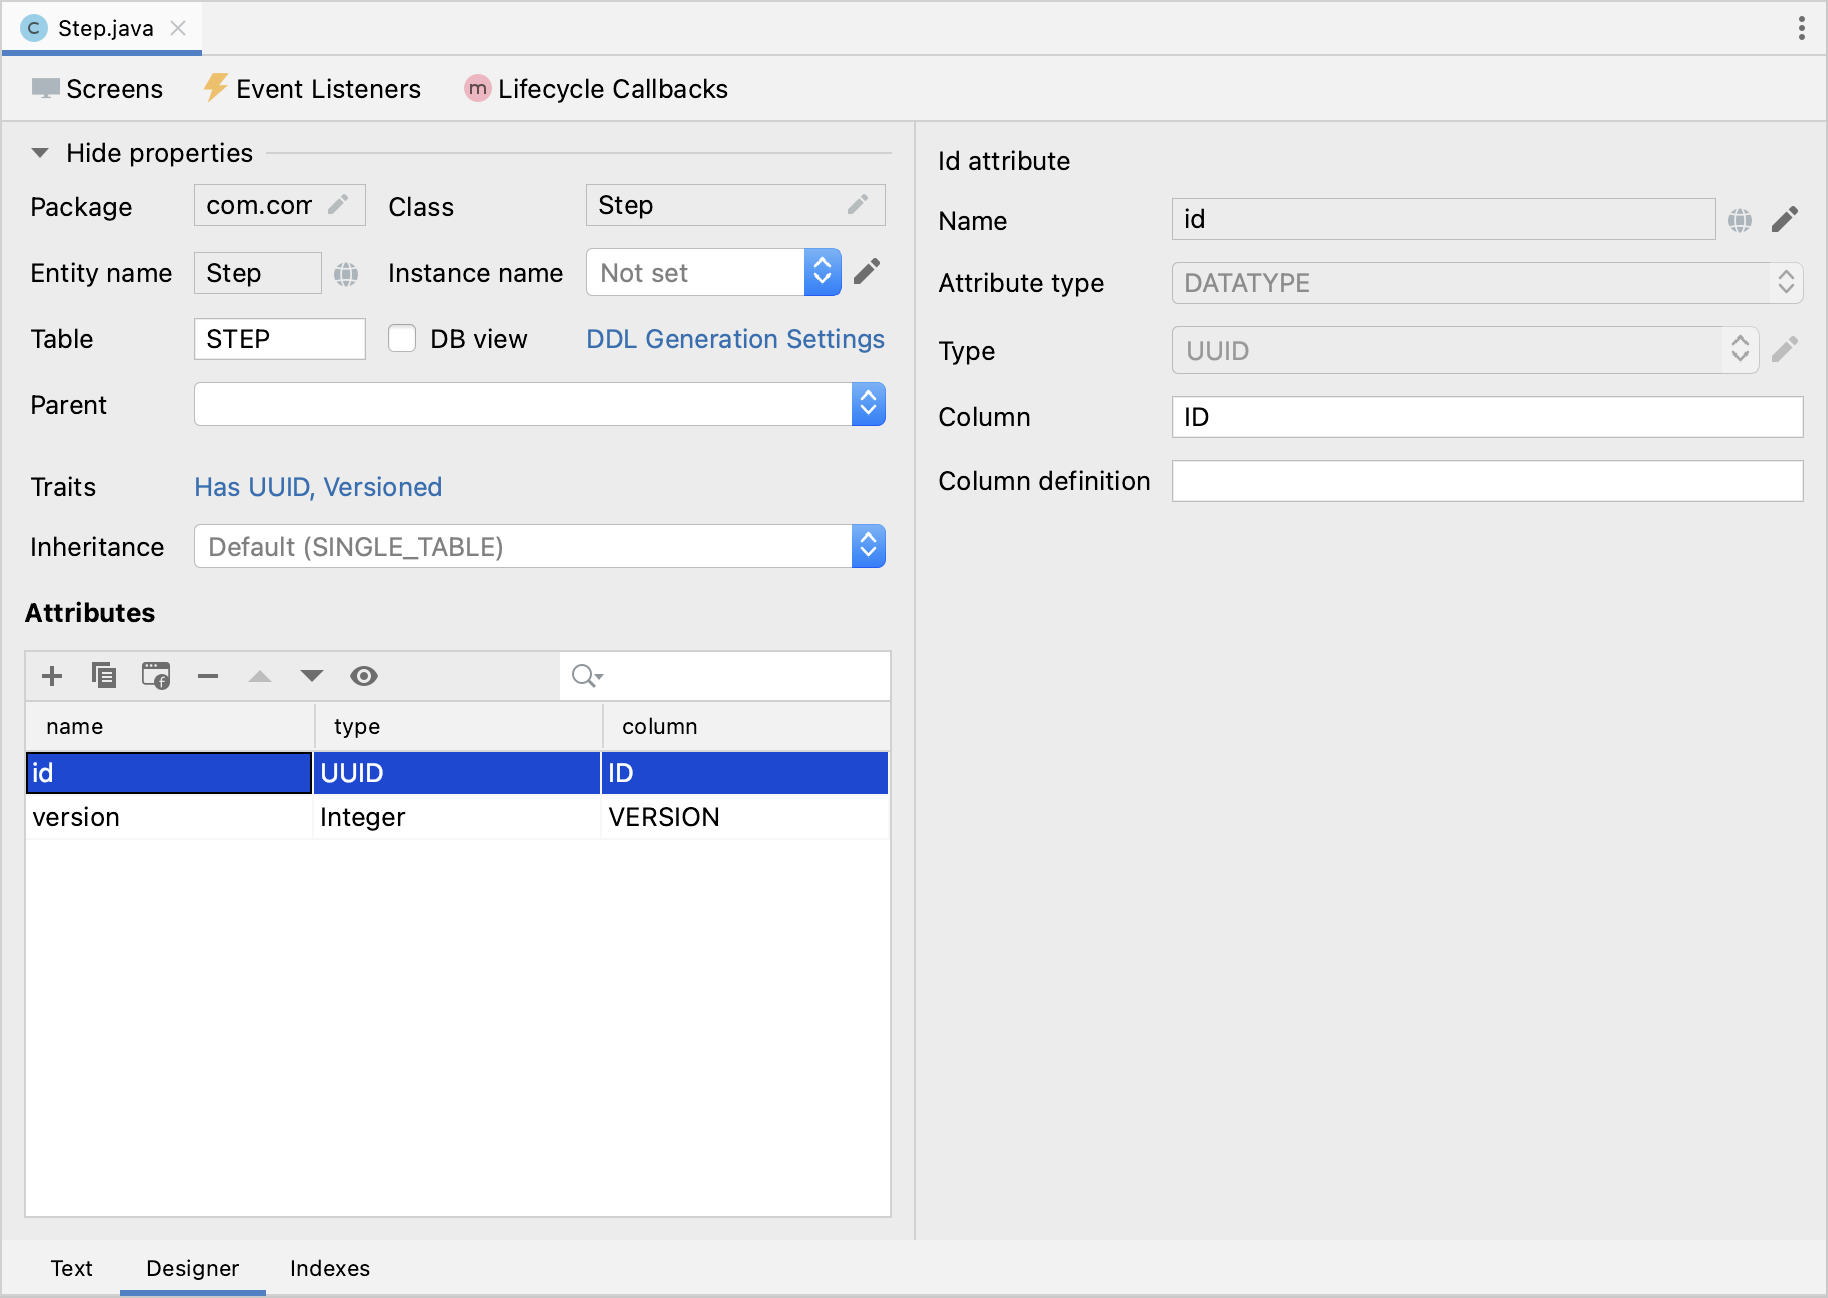
As you can see, the new entity has two attributes:
-
idis the identifier required for any entity. It is mapped to theIDcolumn, which is the primary key of the database table. -
versionattribute is added because you have selected the Versioned trait for the entity. With the help of this attribute, the framework provides optimistic locking of entity instances. We recommend always using optimistic locking for entities unless you have a good reason not to do it.
Let’s add the name attribute to the entity.
Click Add () in the Attributes toolbar.
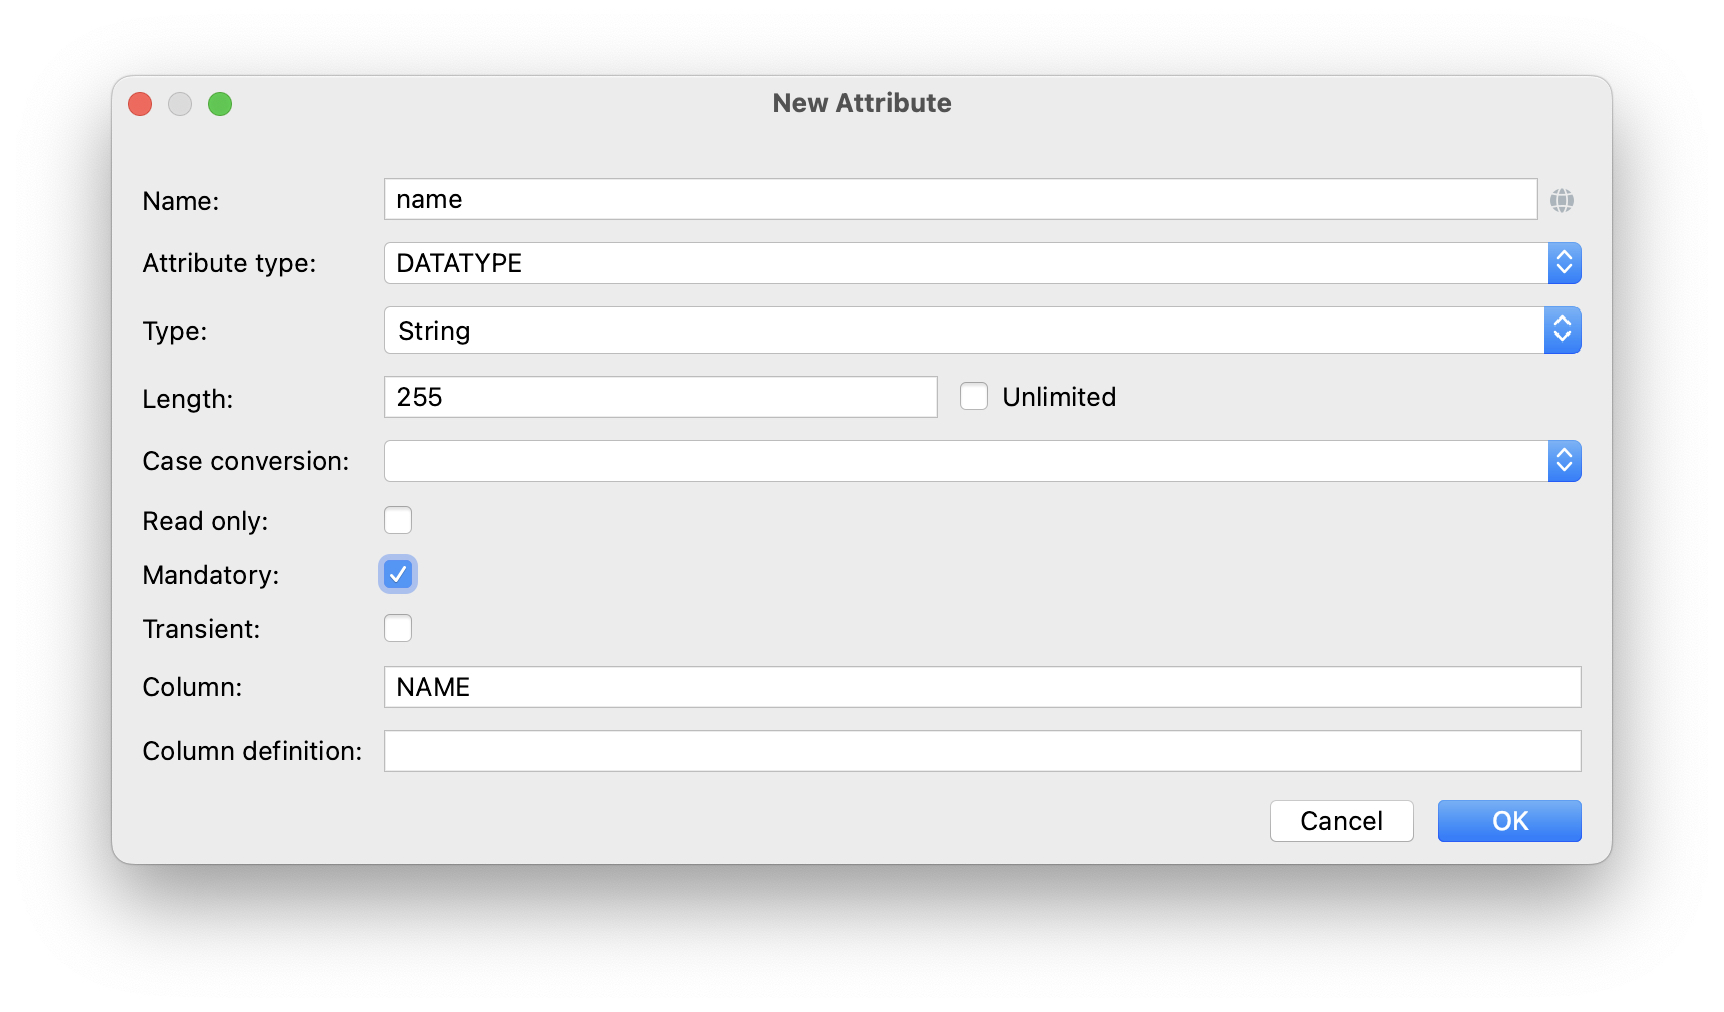
The New Attribute dialog appears. Enter name into the Name field and select the Mandatory checkbox:
Take a look at the most important parameters of the attribute:
-
Attribute type - the
DATATYPEvalue means that the attribute is of a simple type like String, Integer, etc. -
Type defines the Java type of the attribute.
-
Length specifies the length of the database column and, in the case of String attributes, the maximum number of characters a user can enter to a corresponding text field in UI.
-
When Mandatory checkbox is selected, the database column will be created with a non-null constraint and a UI field will require a value.
-
Column defines a name for the mapped database column.
Click OK. The name attribute will be added to the attributes list.
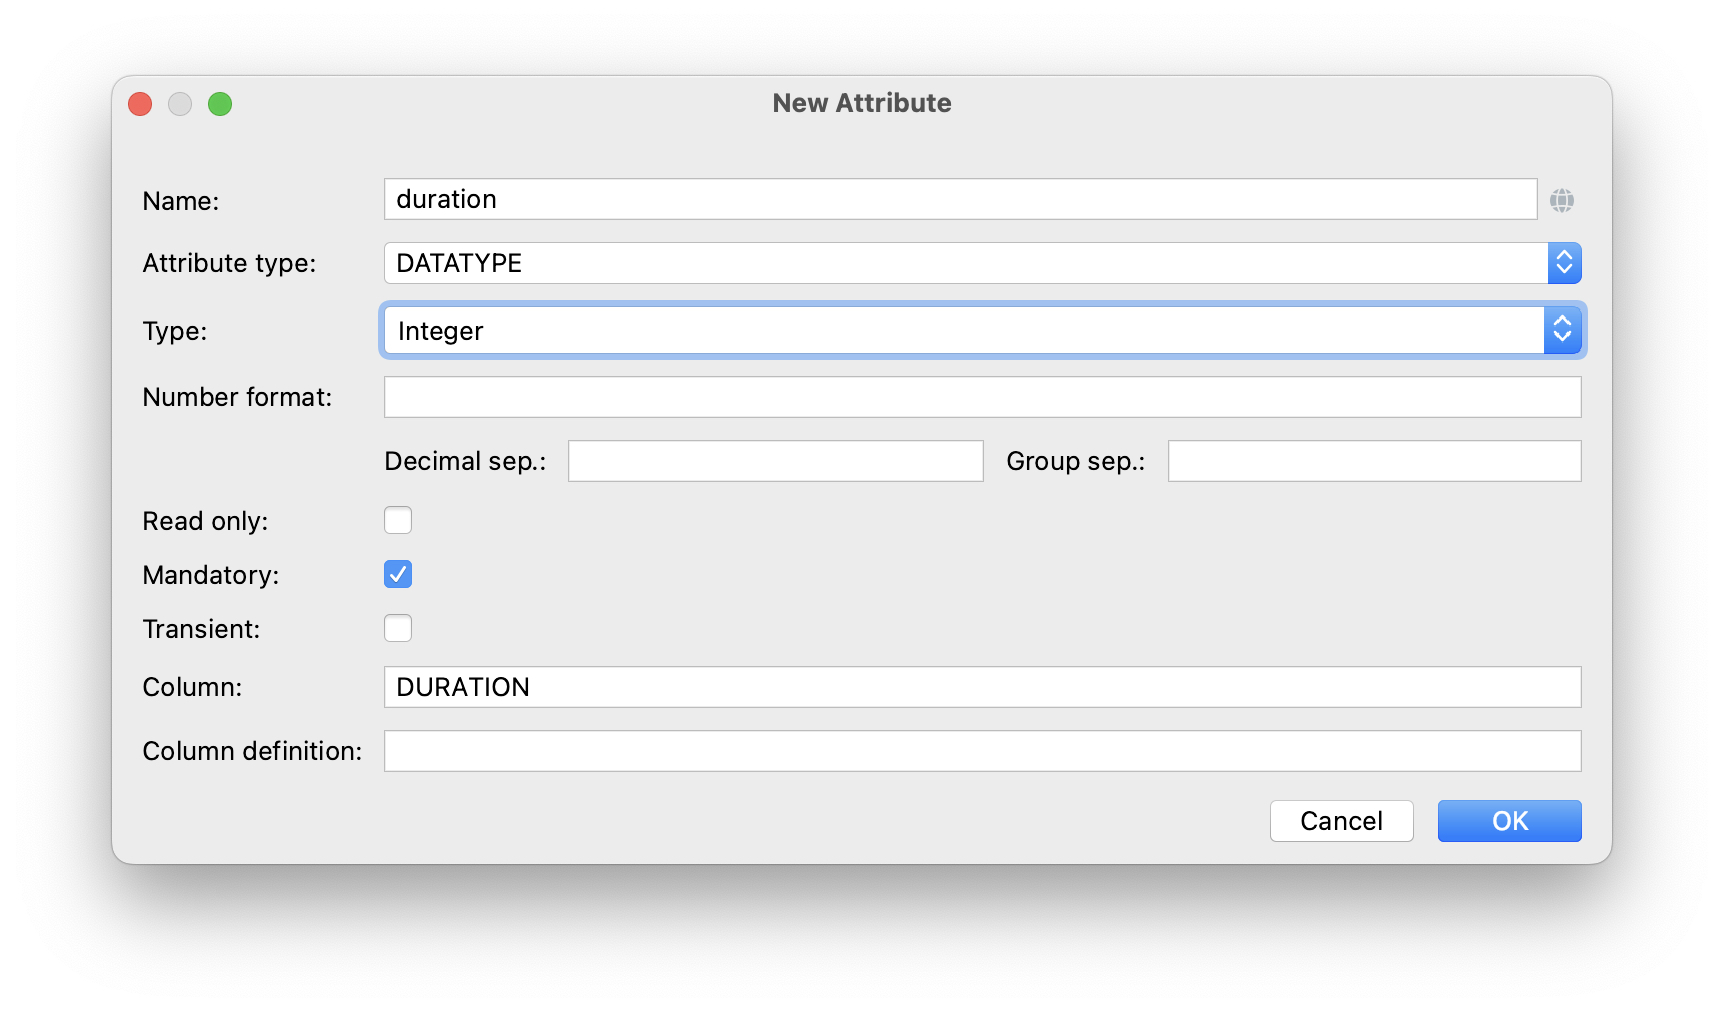
Now let’s add the duration attribute which represents the maximum number of days to complete the step.
Click Add () in the Attributes toolbar. In the New Attribute dialog, enter duration into the Name field, select Integer in the Type field and select the Mandatory checkbox:
Click OK. The duration attribute will appear in the attributes list.
Finally, add the sortValue attribute which will be used for ordering steps. Select Integer in the Type field and select the Mandatory checkbox:
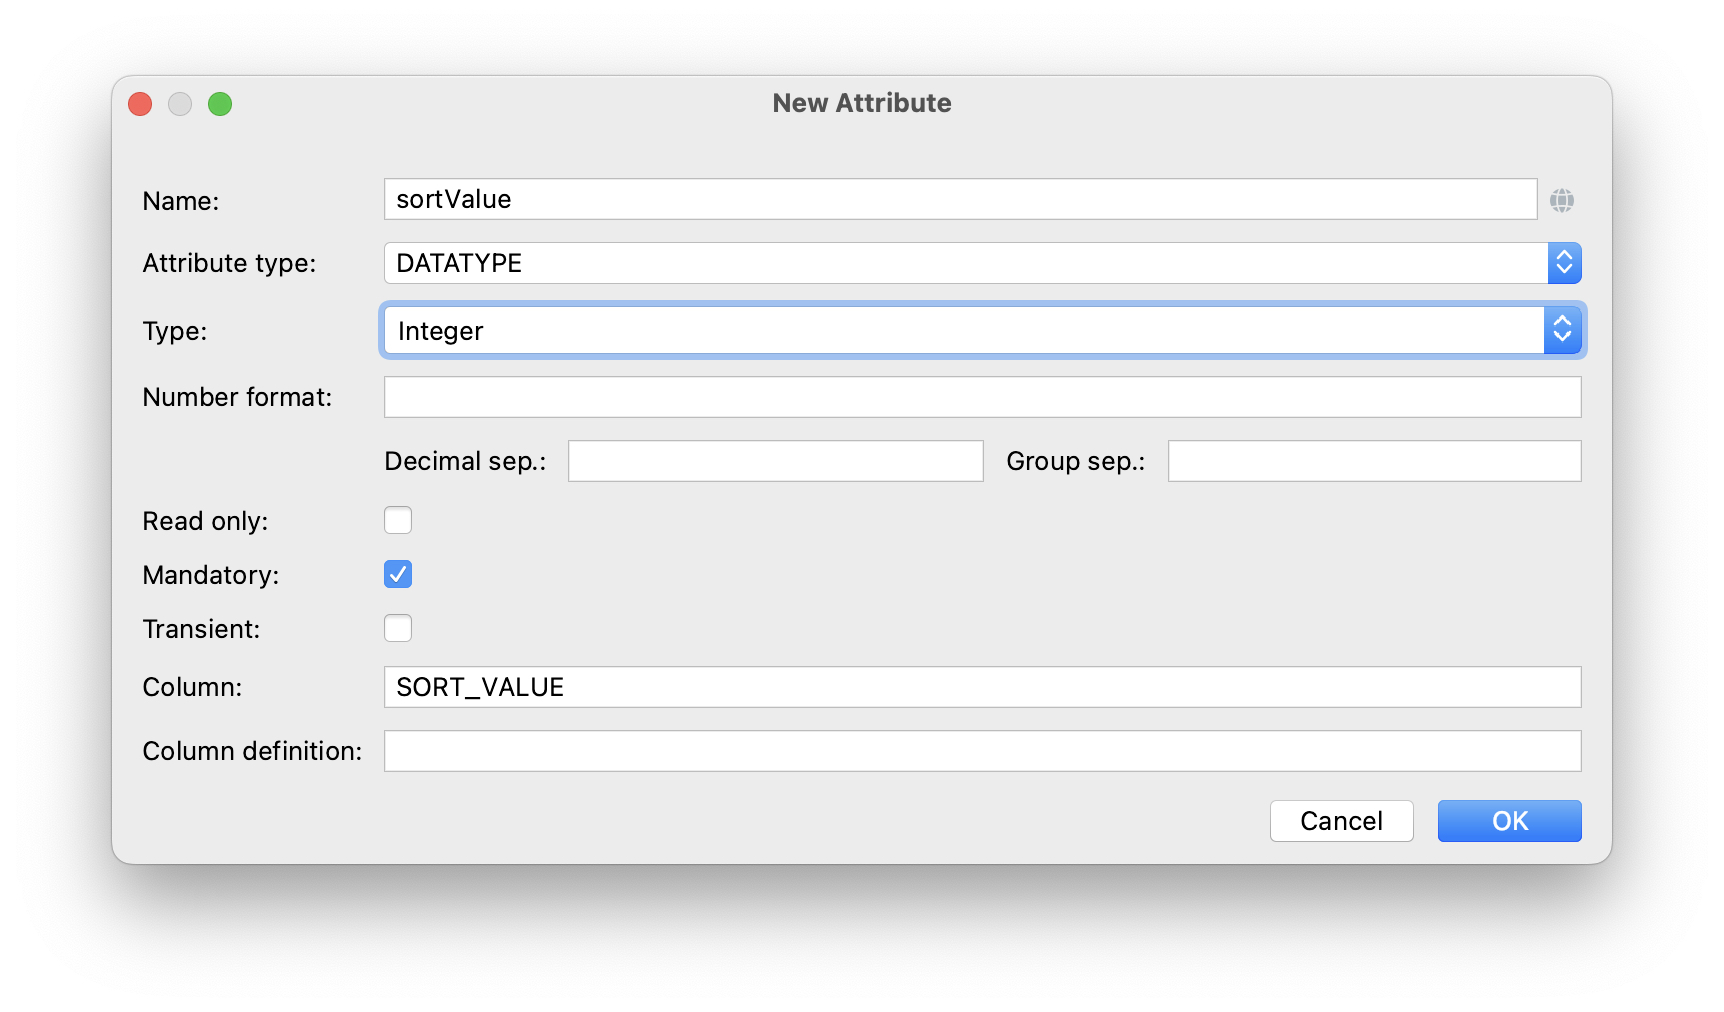
The final state of the entity should look like this:
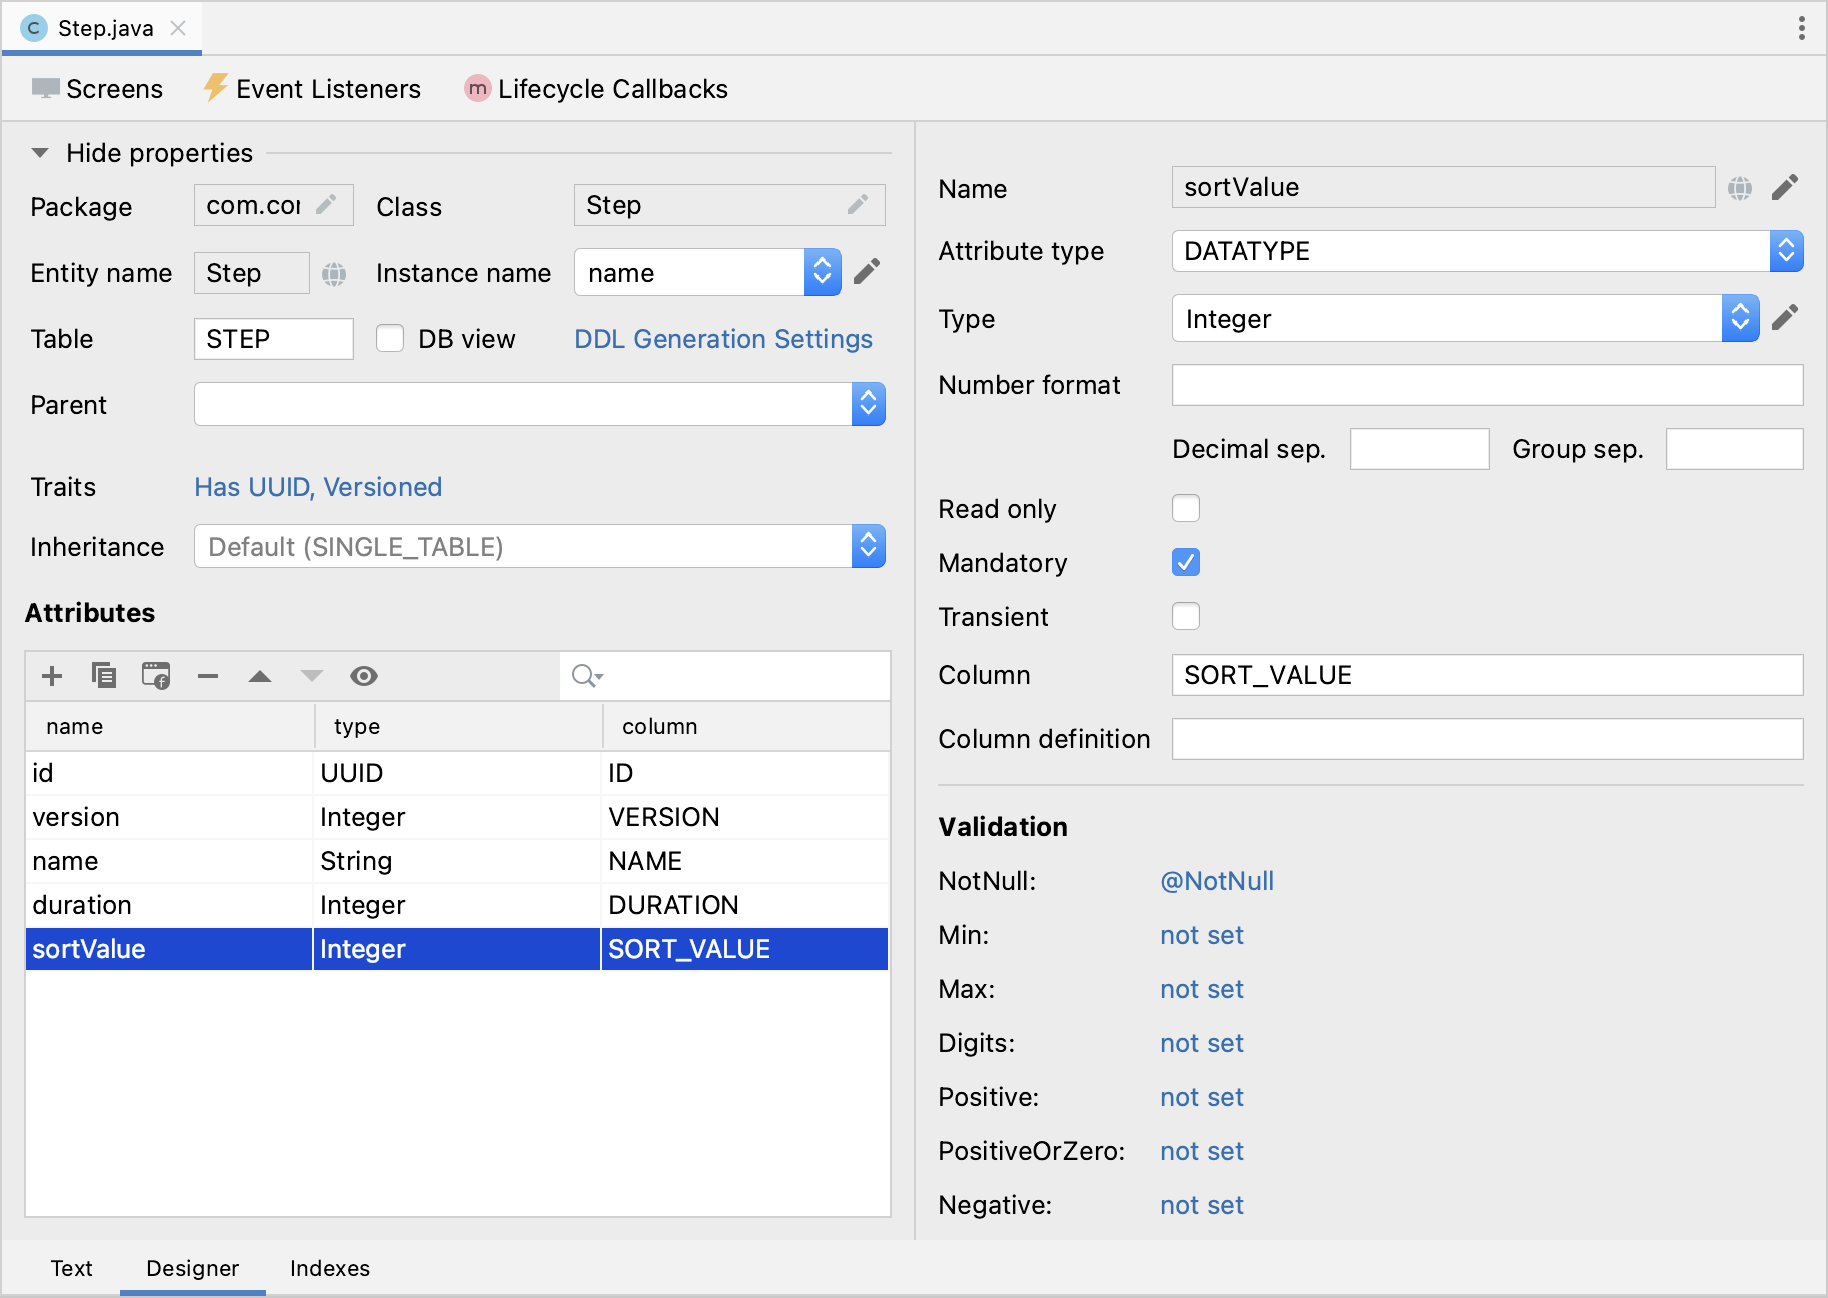
You can use the Up ( ) / Down (
 ) buttons in the Attributes toolbar to reorder the attributes.
Let’s look at the resulting entity class generated by the designer. Switch to the Text tab at the bottom:
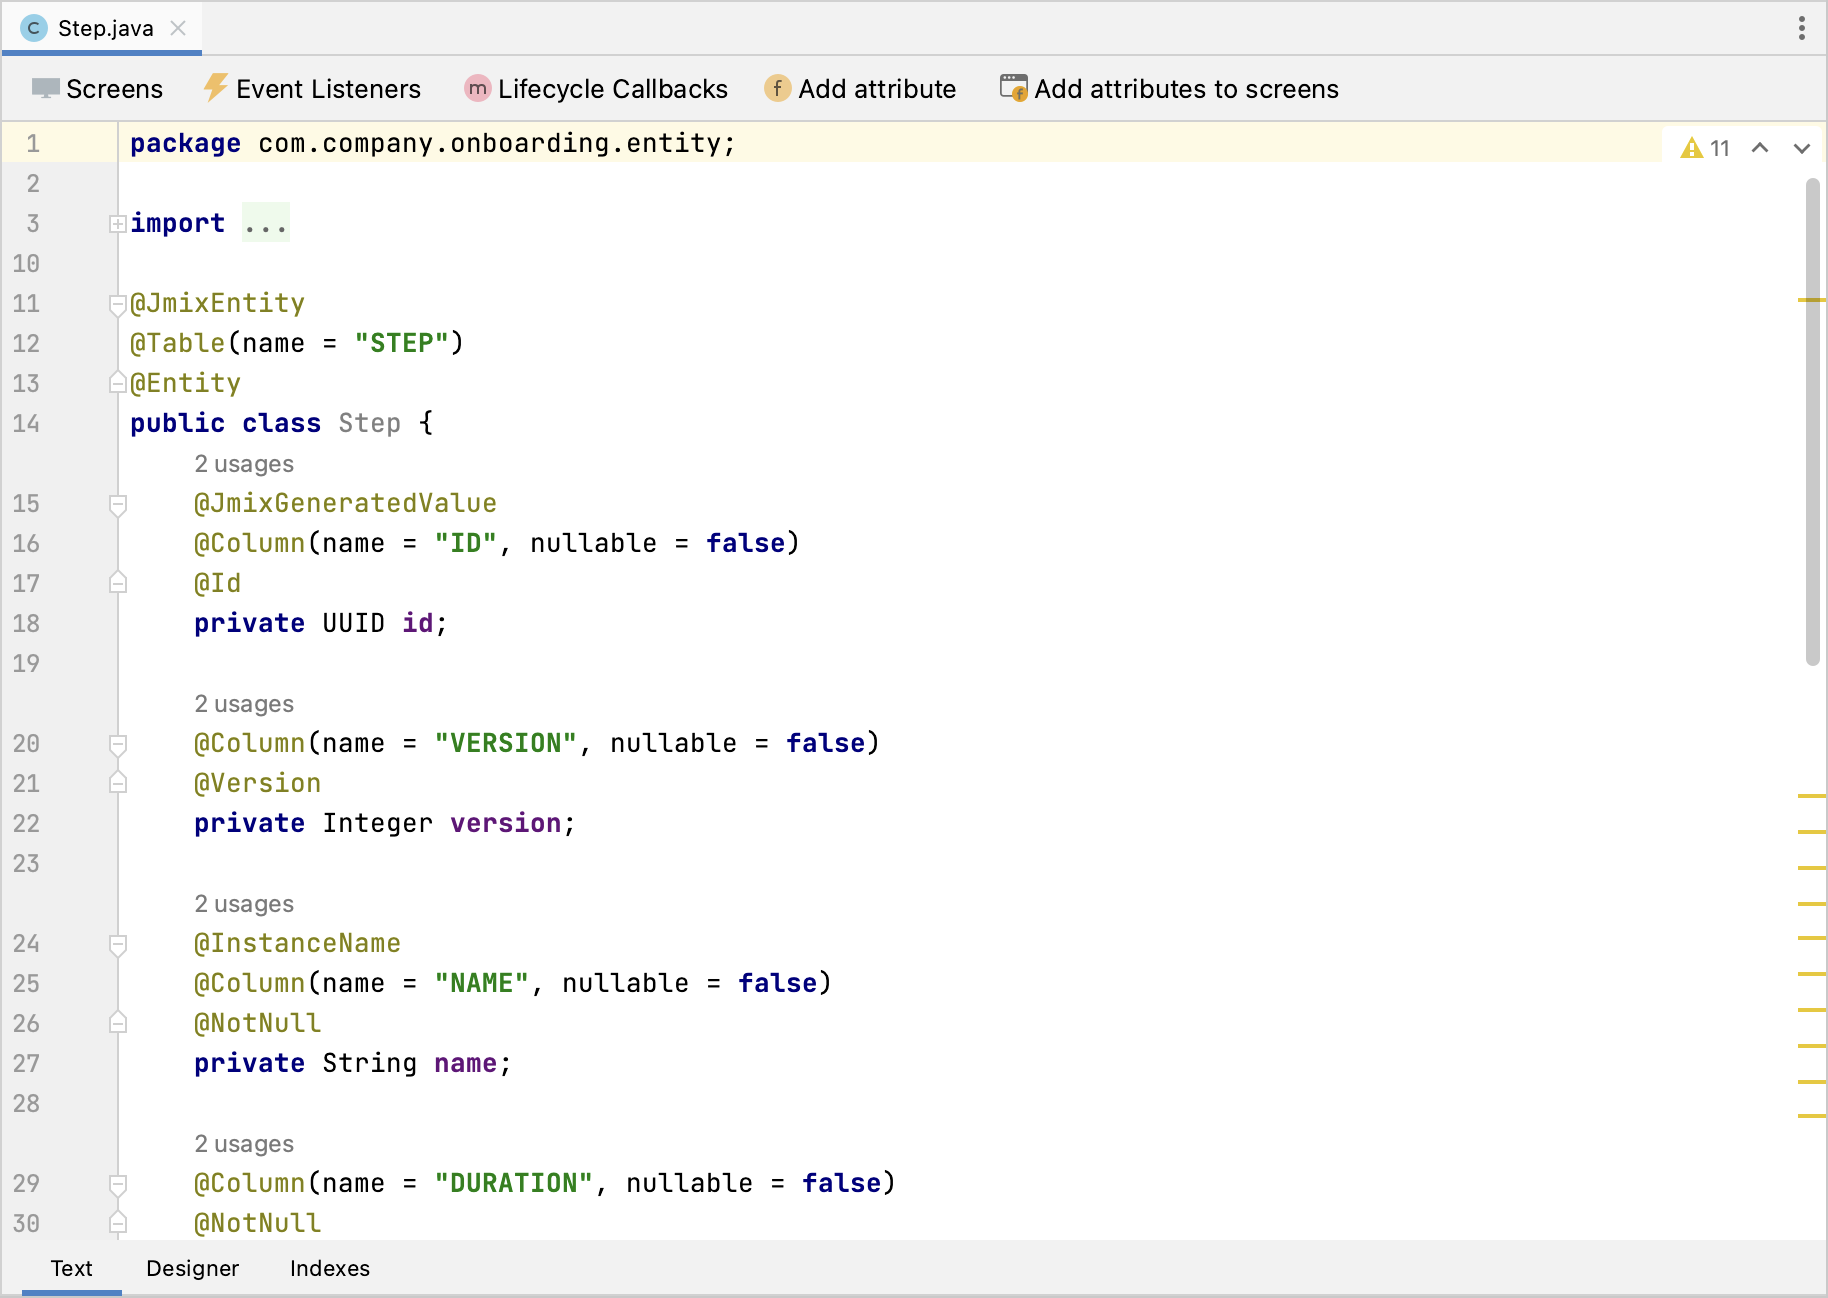
If you have an experience with JPA, you will see familiar annotations: @Entity, @Table, @Column, etc. There are also a few annotations specific to Jmix. The most important one is @JmixEntity on the class header. In general, any POJO can be an entity in Jmix if it is annotated with @JmixEntity.
The entity class can be edited manually, and when you switch back to the Designer tab, it will reflect the changes. For example, if you remove the nullable = false and @NotNull from an attribute, the designer will unselect the Mandatory checkbox for it.
Creating CRUD Screens
When the entity class is ready, you can generate CRUD screens for it.
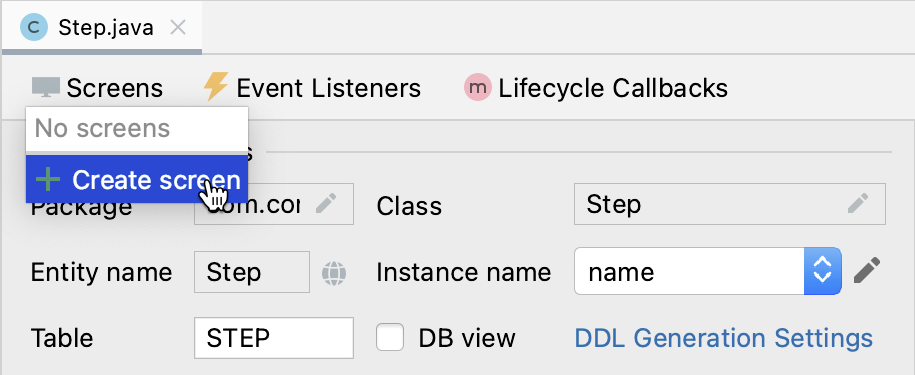
In the actions panel at the top of the entity designer, click Screens → Create screen:
On the first step of the screen creation wizard, select the Entity browser and editor screen template:
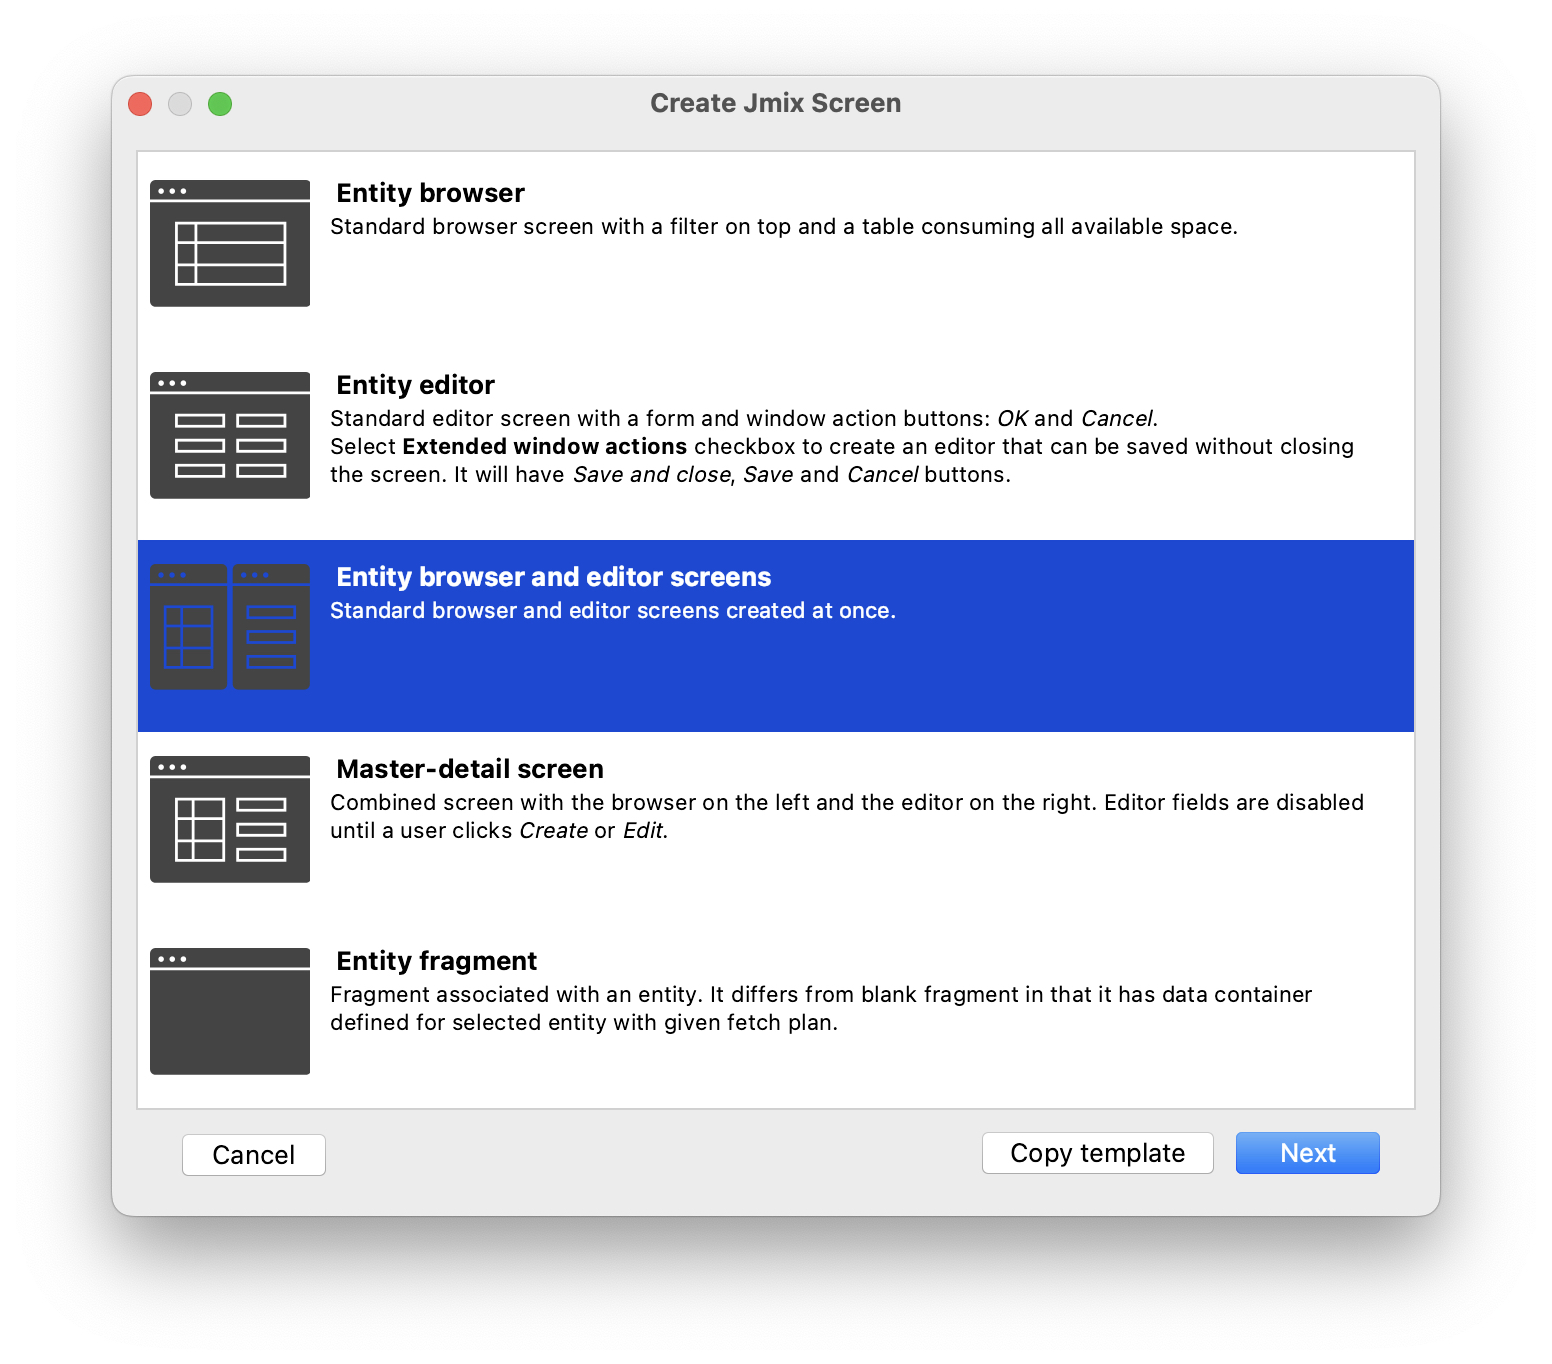
In Jmix, "browser" means a screen displaying a list of entities, "editor" means a screen for editing a single entity.
Click Next.
On the second step, the wizard lets you select the package and names for the generated screens:
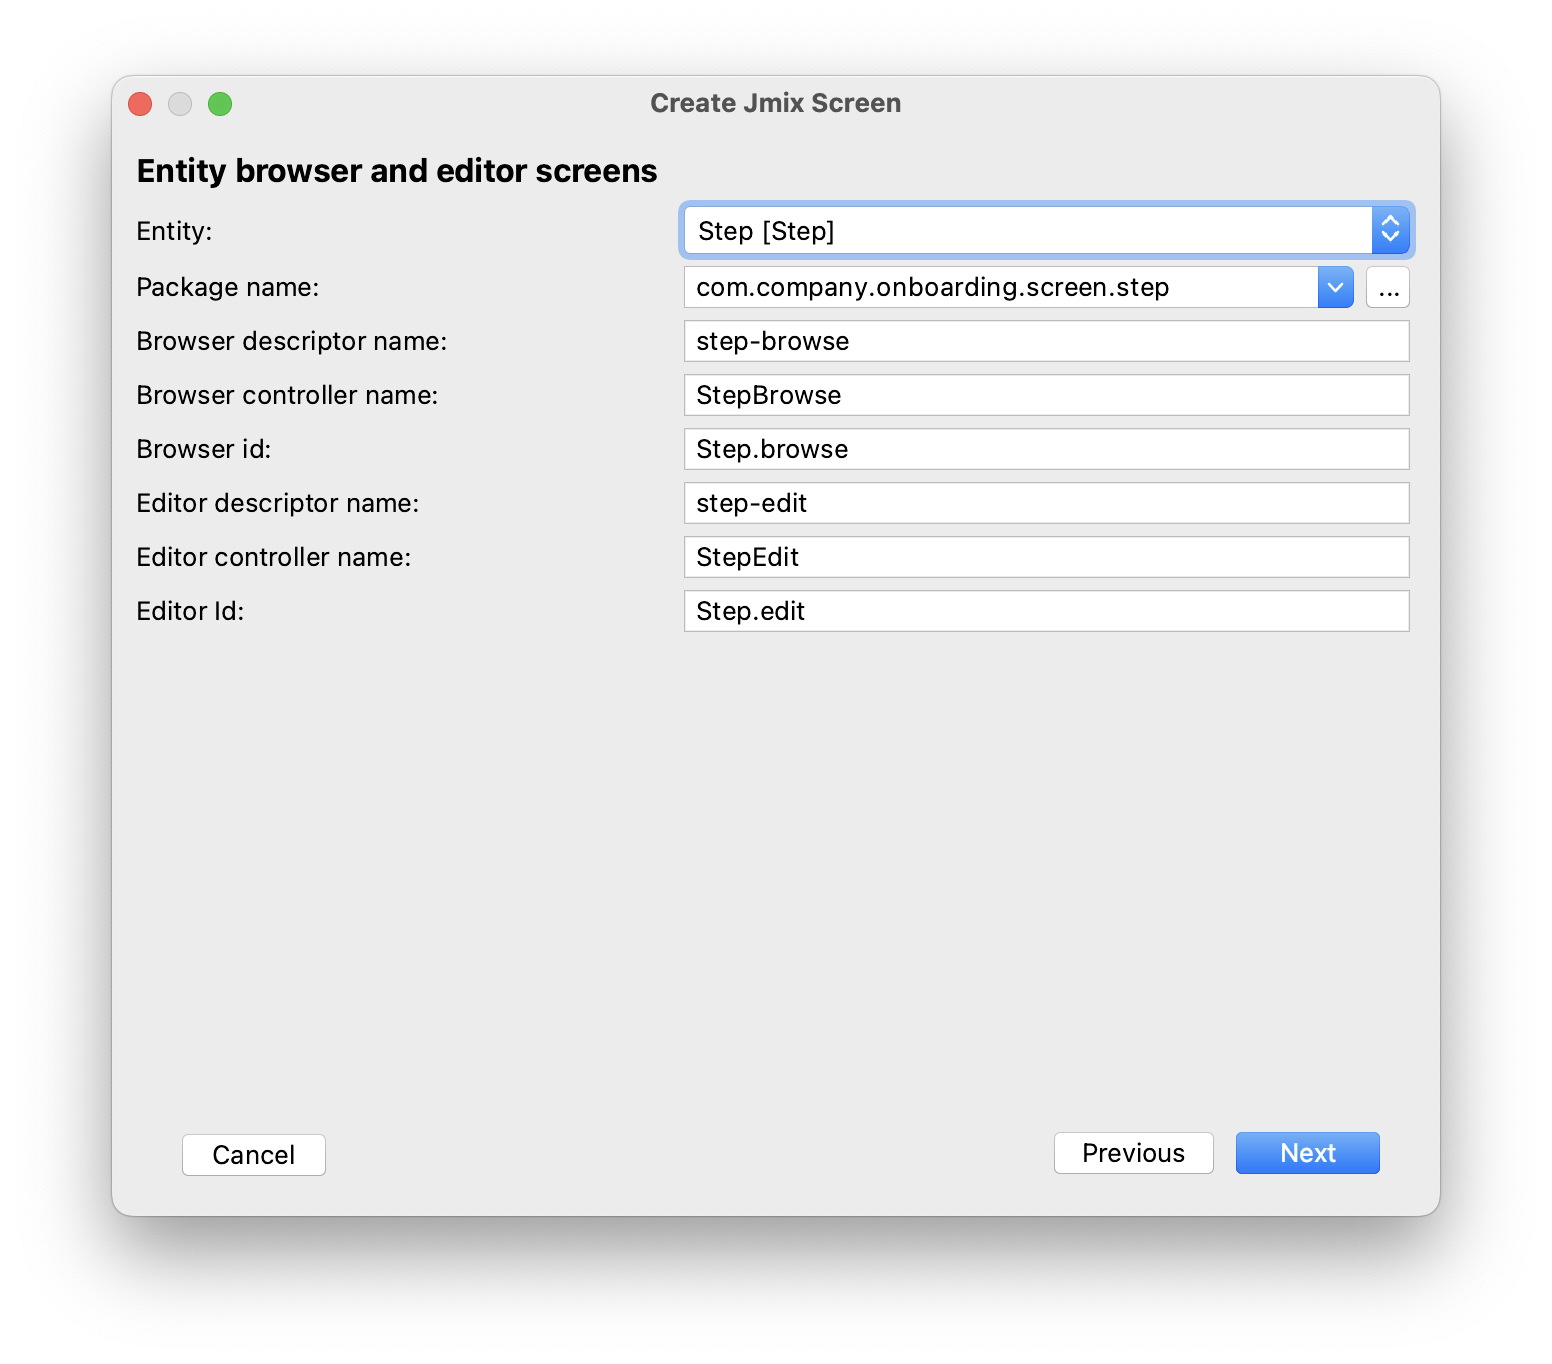
Accept the suggested values and click Next.
On the next step, you can set some options for the screens:
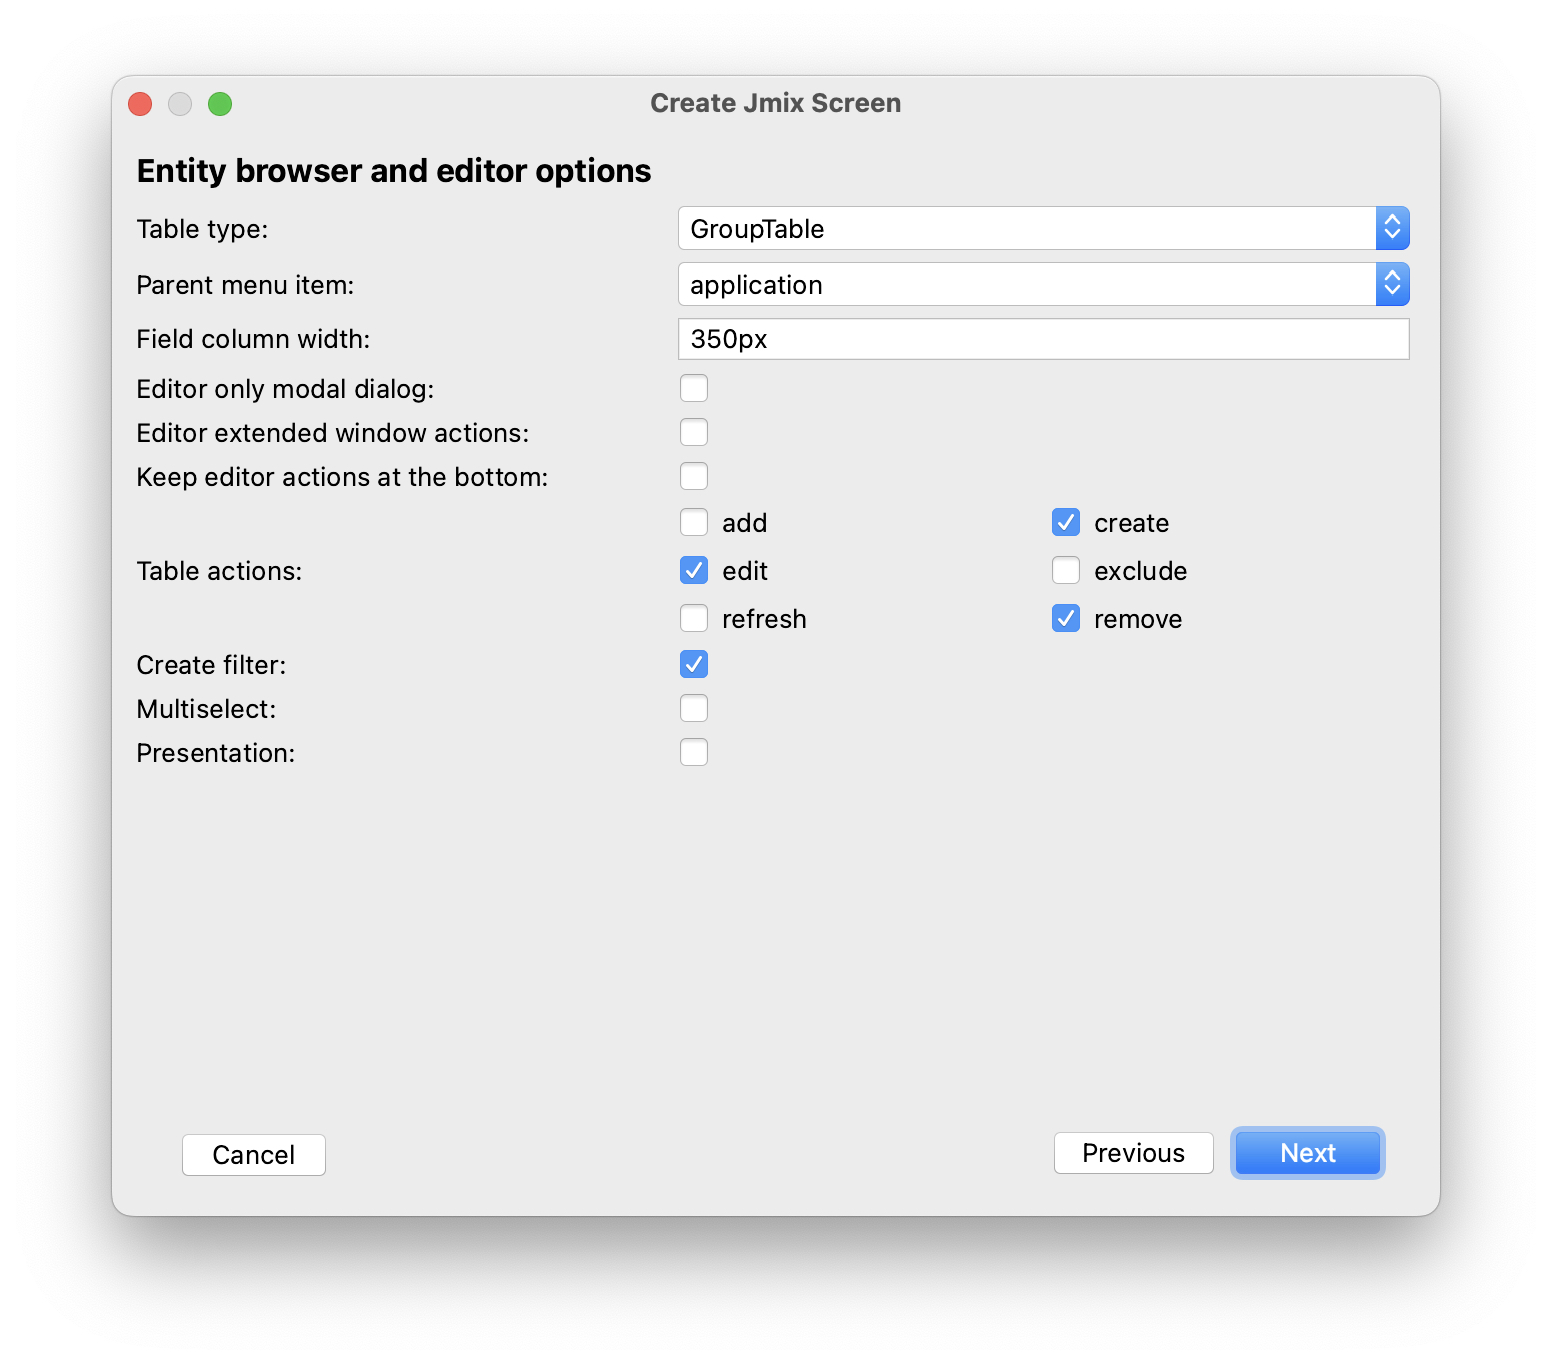
All these options can be modified later in the created screens, so just accept the suggested values and click Next.
On the next step, the wizard lets you set up the fetch plan for the browse screen:
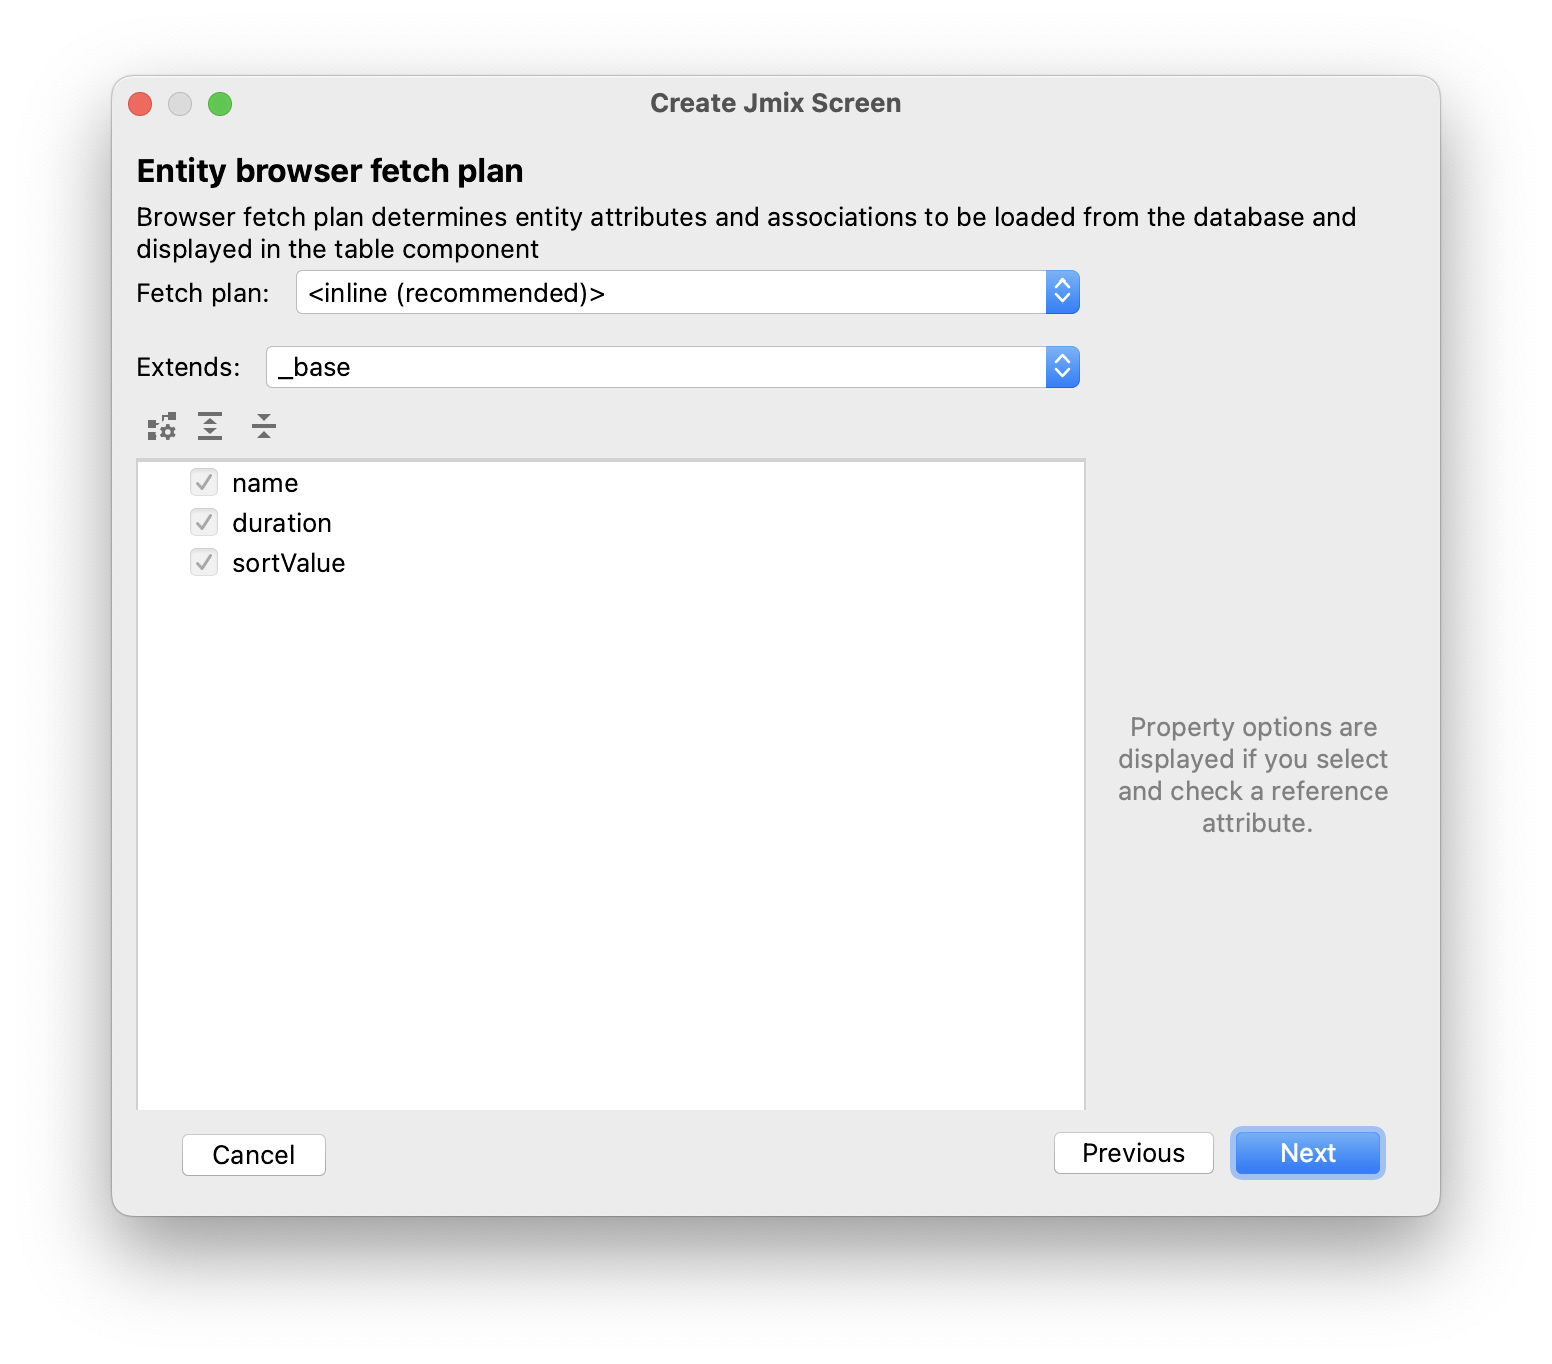
| In short, a fetch plan determines what attributes and referenced entities must be loaded for the screen. |
The Step entity is very simple, so there is no need to adjust the fetch plan for it. We will take a closer look at fetch plans later when we deal with more complex entities and screens.
Click Next.
Now the wizard lets you set up the fetch plan for the editor screen:

Again, there is no point in changing the suggested fetch plan - it just includes all attributes.
Click Next.
At the final step of the wizard, it lets you set captions for the screens:
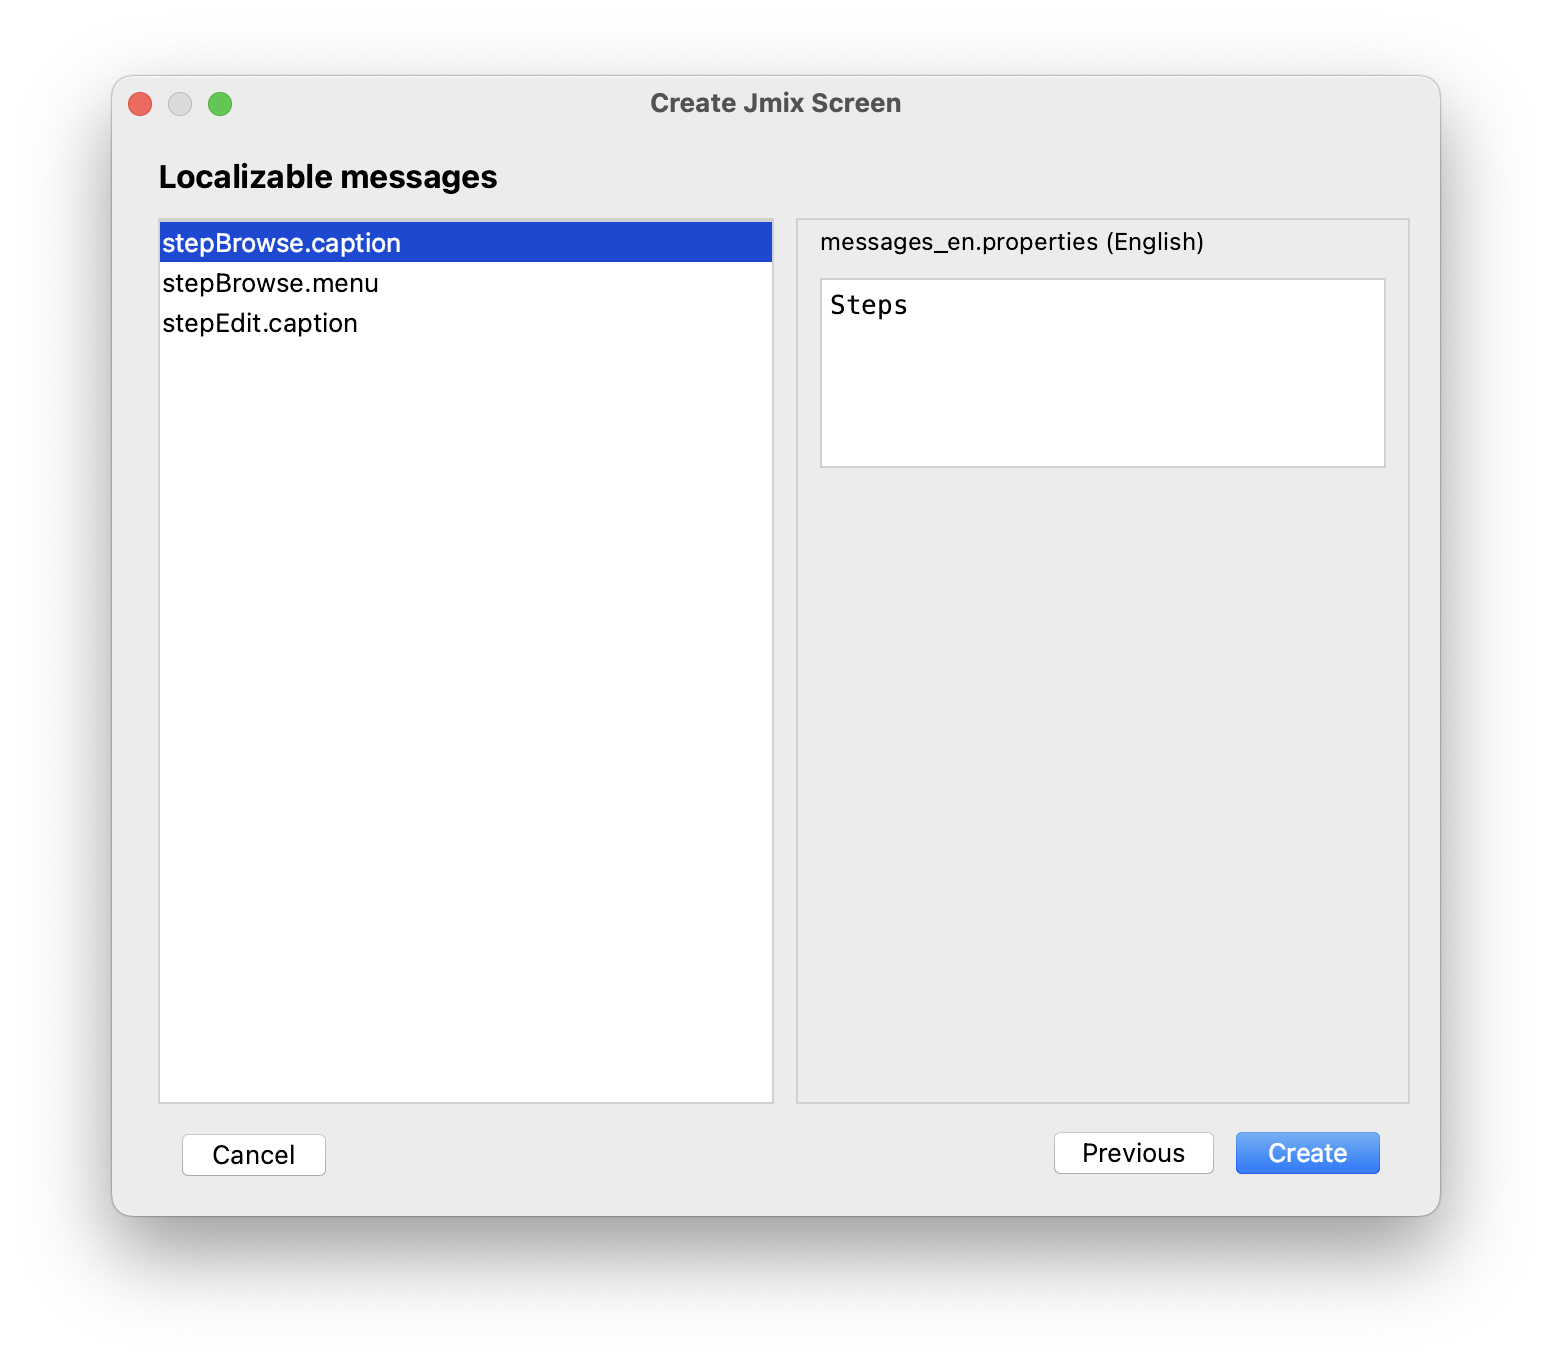
Accept the suggested values and click Create.
Studio will generate two screens: Step.browse and Step.edit and open their source code.
| Each screen consists of two parts: descriptor and controller. The descriptor is an XML file defining screen components and layout. Controller is a Java class that can contain event handlers and other logic. |
The XML descriptor of the generated Step.browse screen will be displayed in the Studio screen designer:
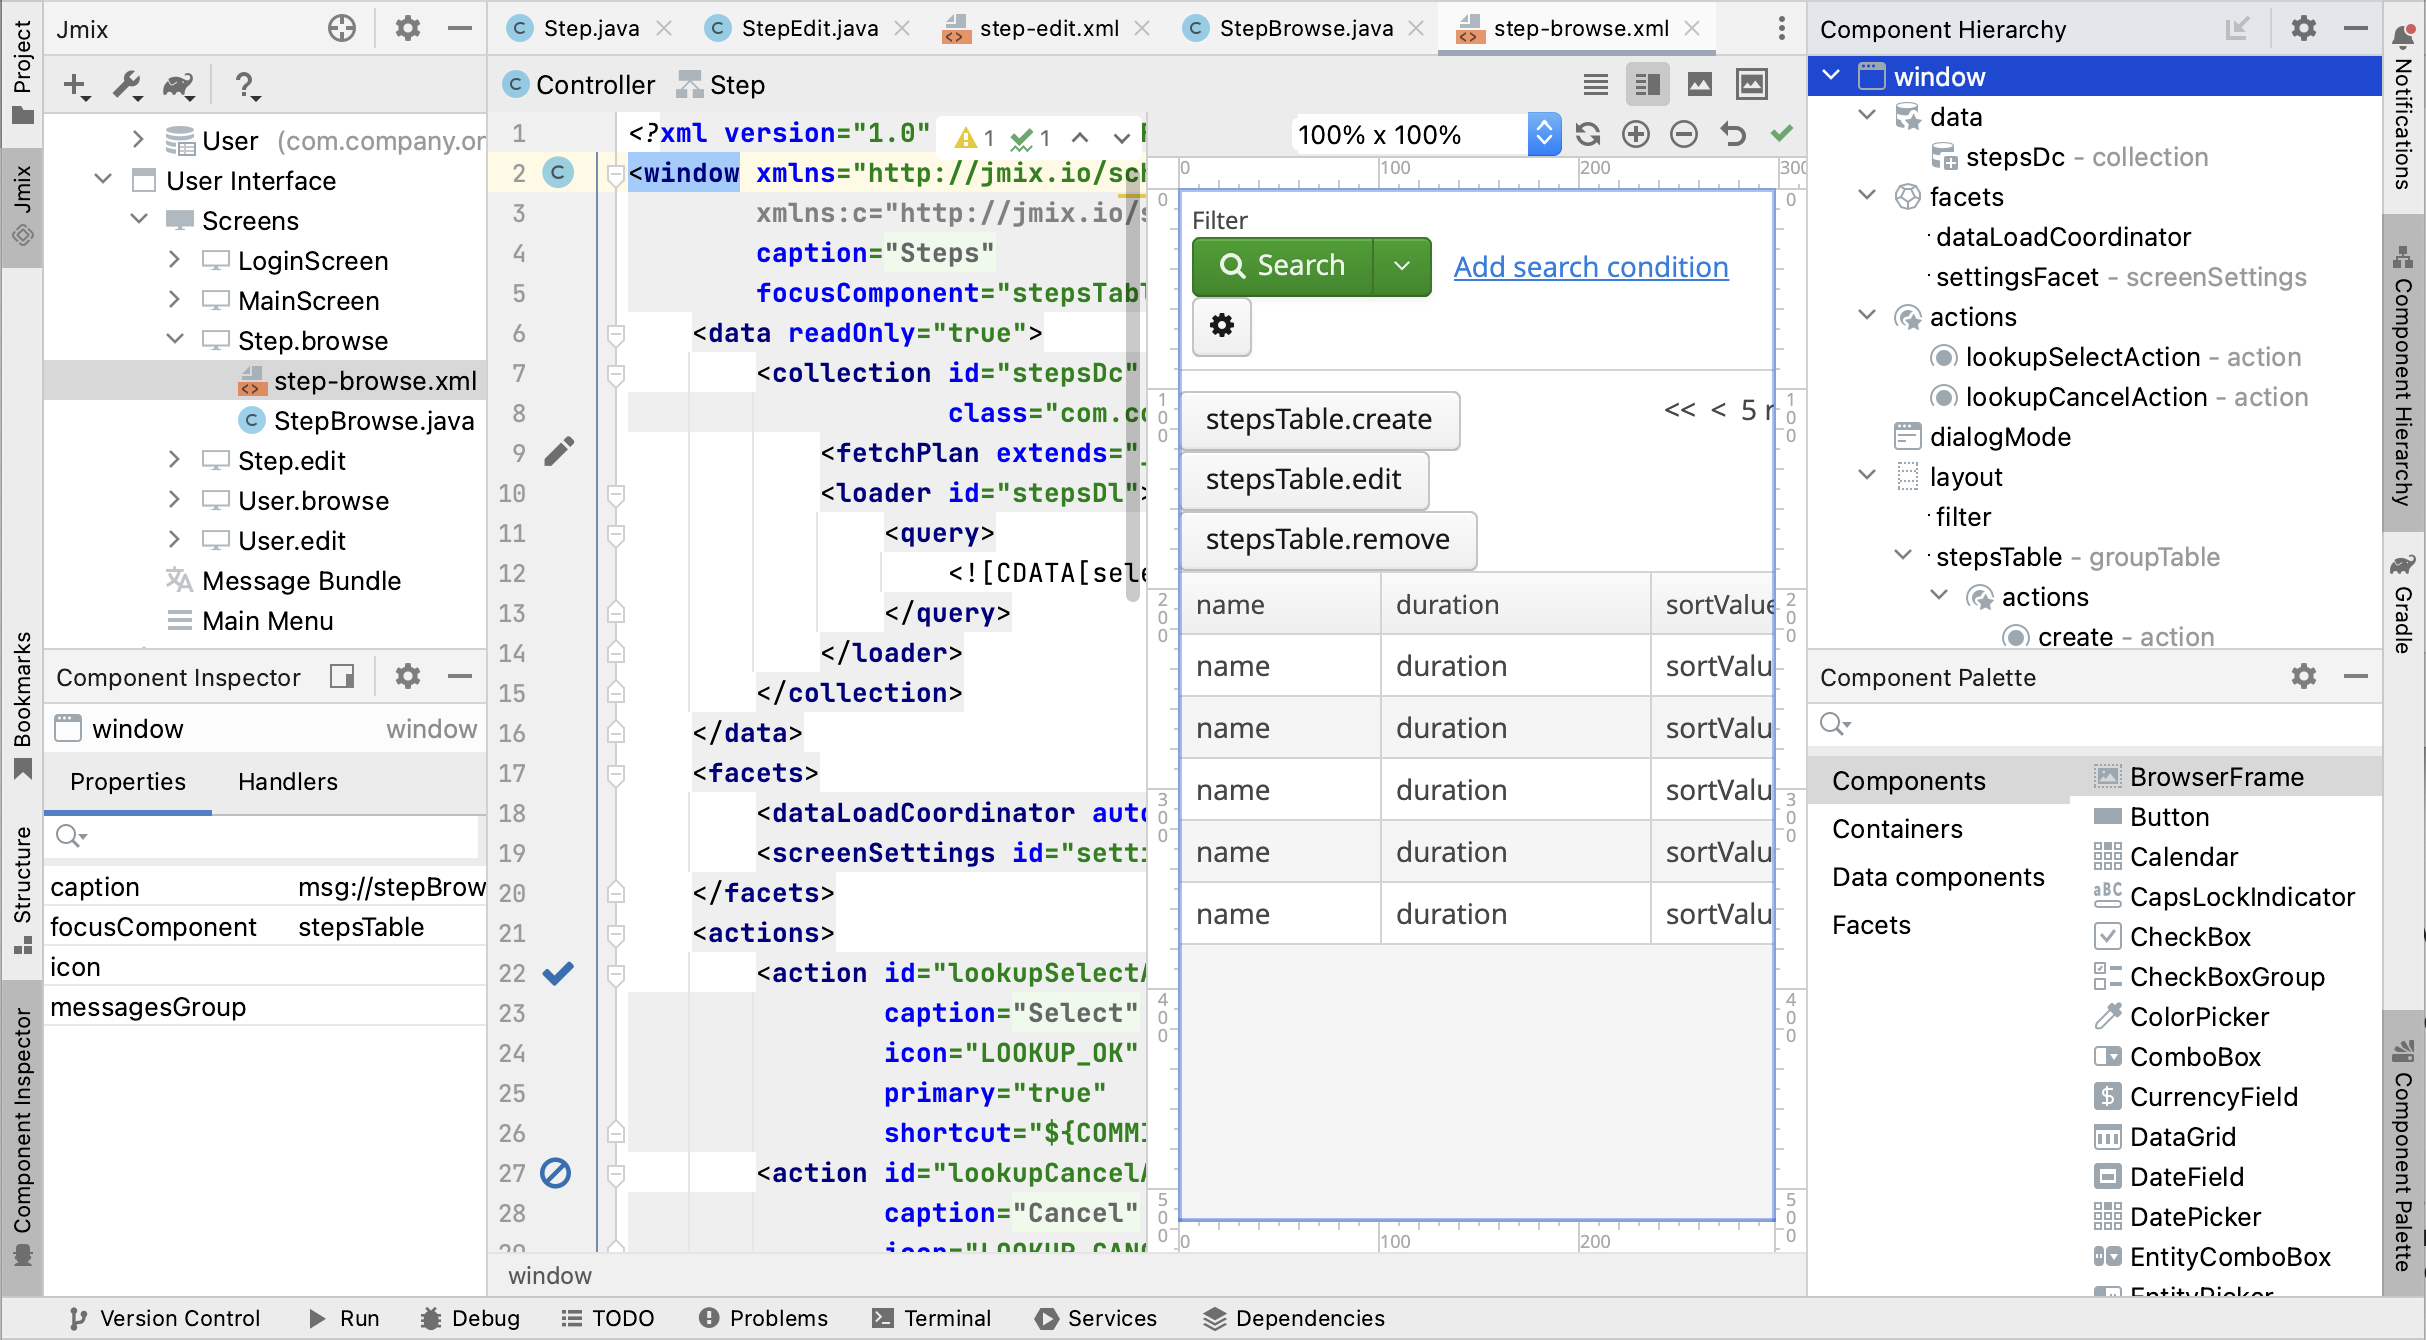
Looks overwhelming at first glance, but don’t worry - you don’t need to dive deeper at the moment. Just close all the tabs at the top and move on.
Running the Application
After creating the entity and CRUD screens for it, you can run the application to see the new feature in action.
Click the Debug button ( ) in the main toolbar as you did in the previous section.
Before running the application, Studio checks the difference between the project data model and the database schema. As long as you have created a new entity, Studio generates a Liquibase changelog for the corresponding changes in the database (creating the STEP table):
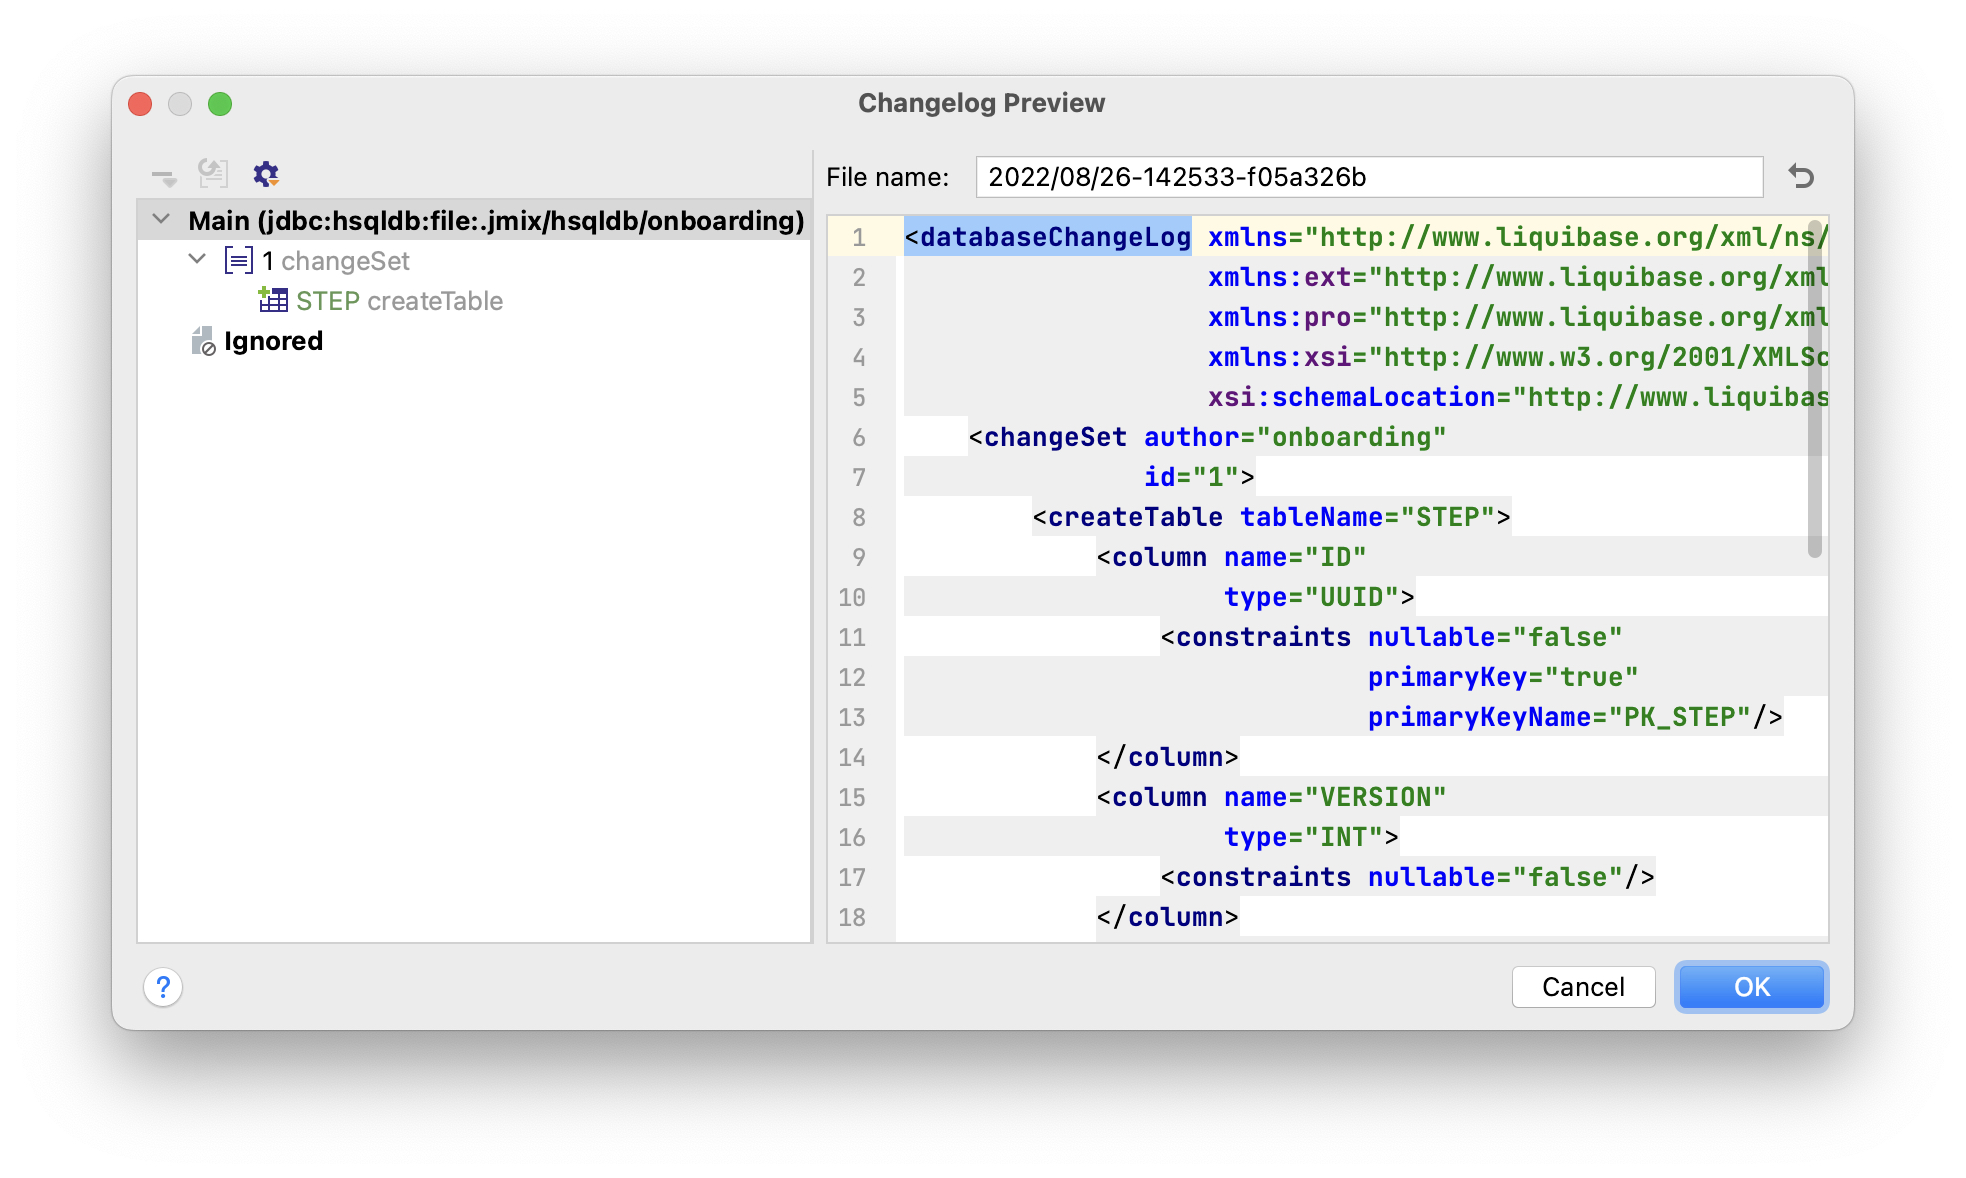
Click OK.
Studio will execute the changelog against your database:

After that, Studio builds and runs the application:
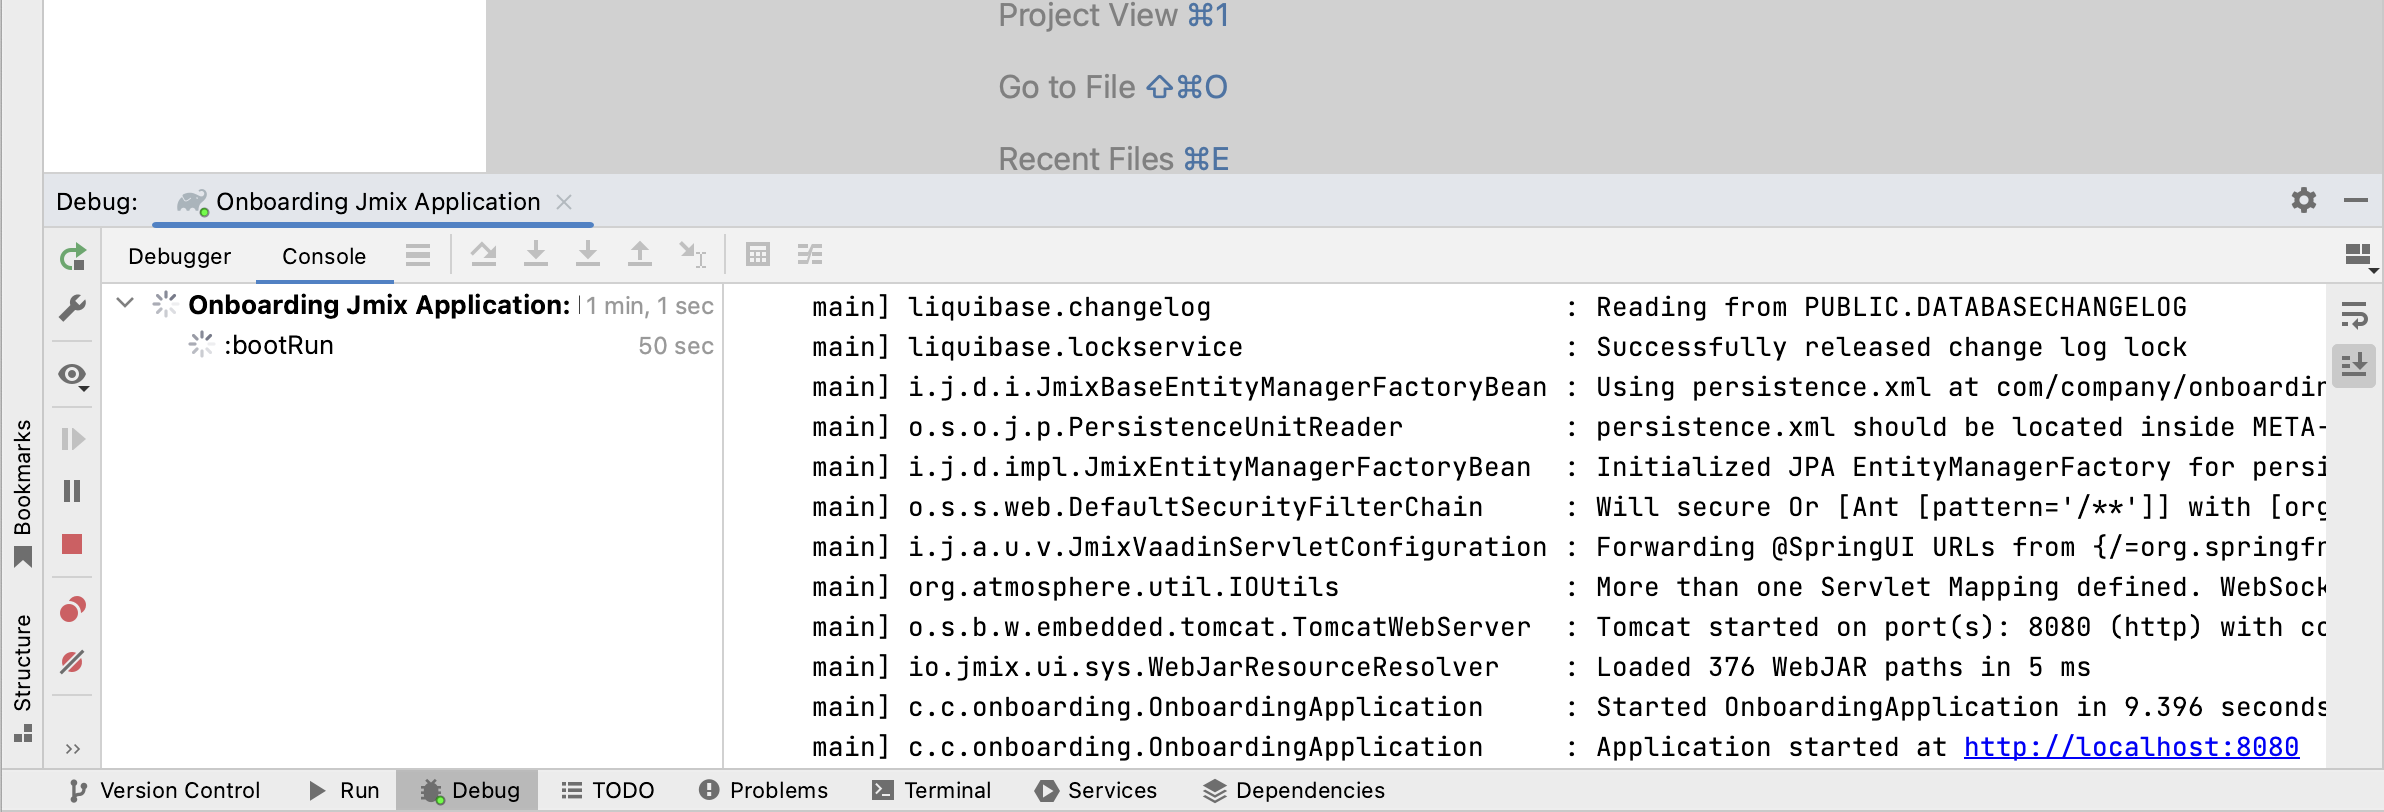
When the application is ready, open http://localhost:8080 in your web browser and log in to the application with admin / admin credentials.
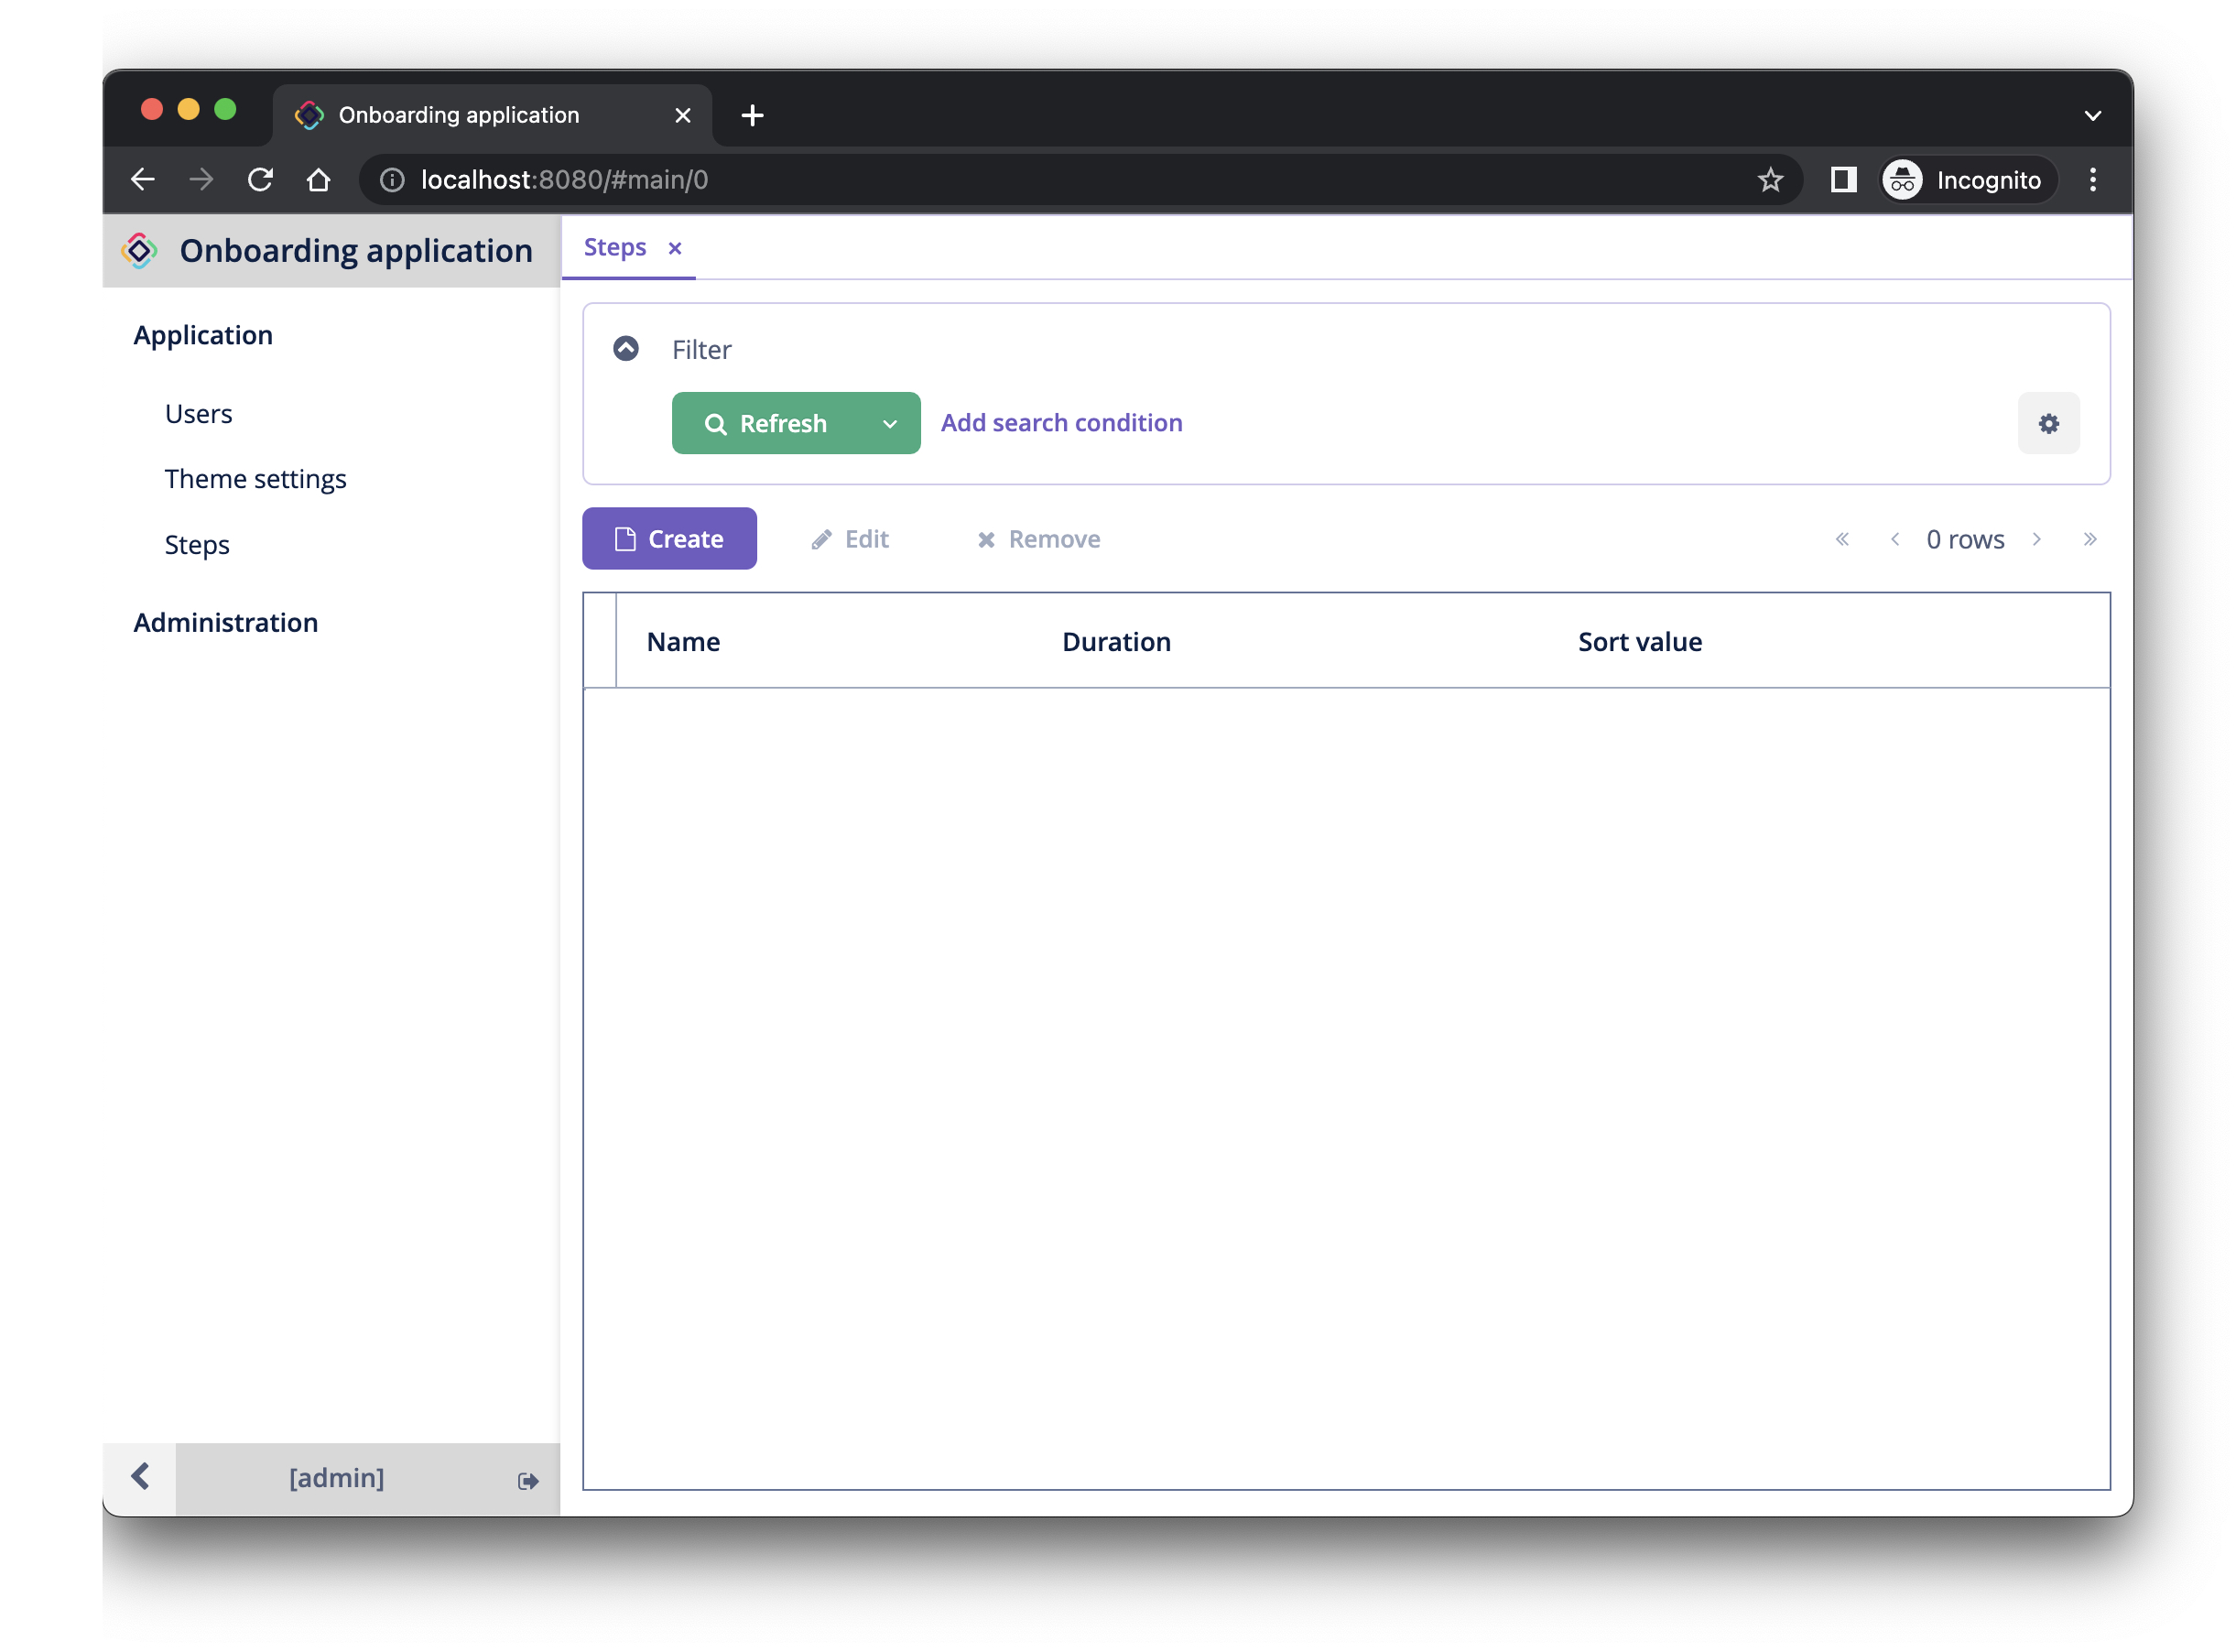
Click on the Steps item in the Application menu. You will see the Step.browse screen:
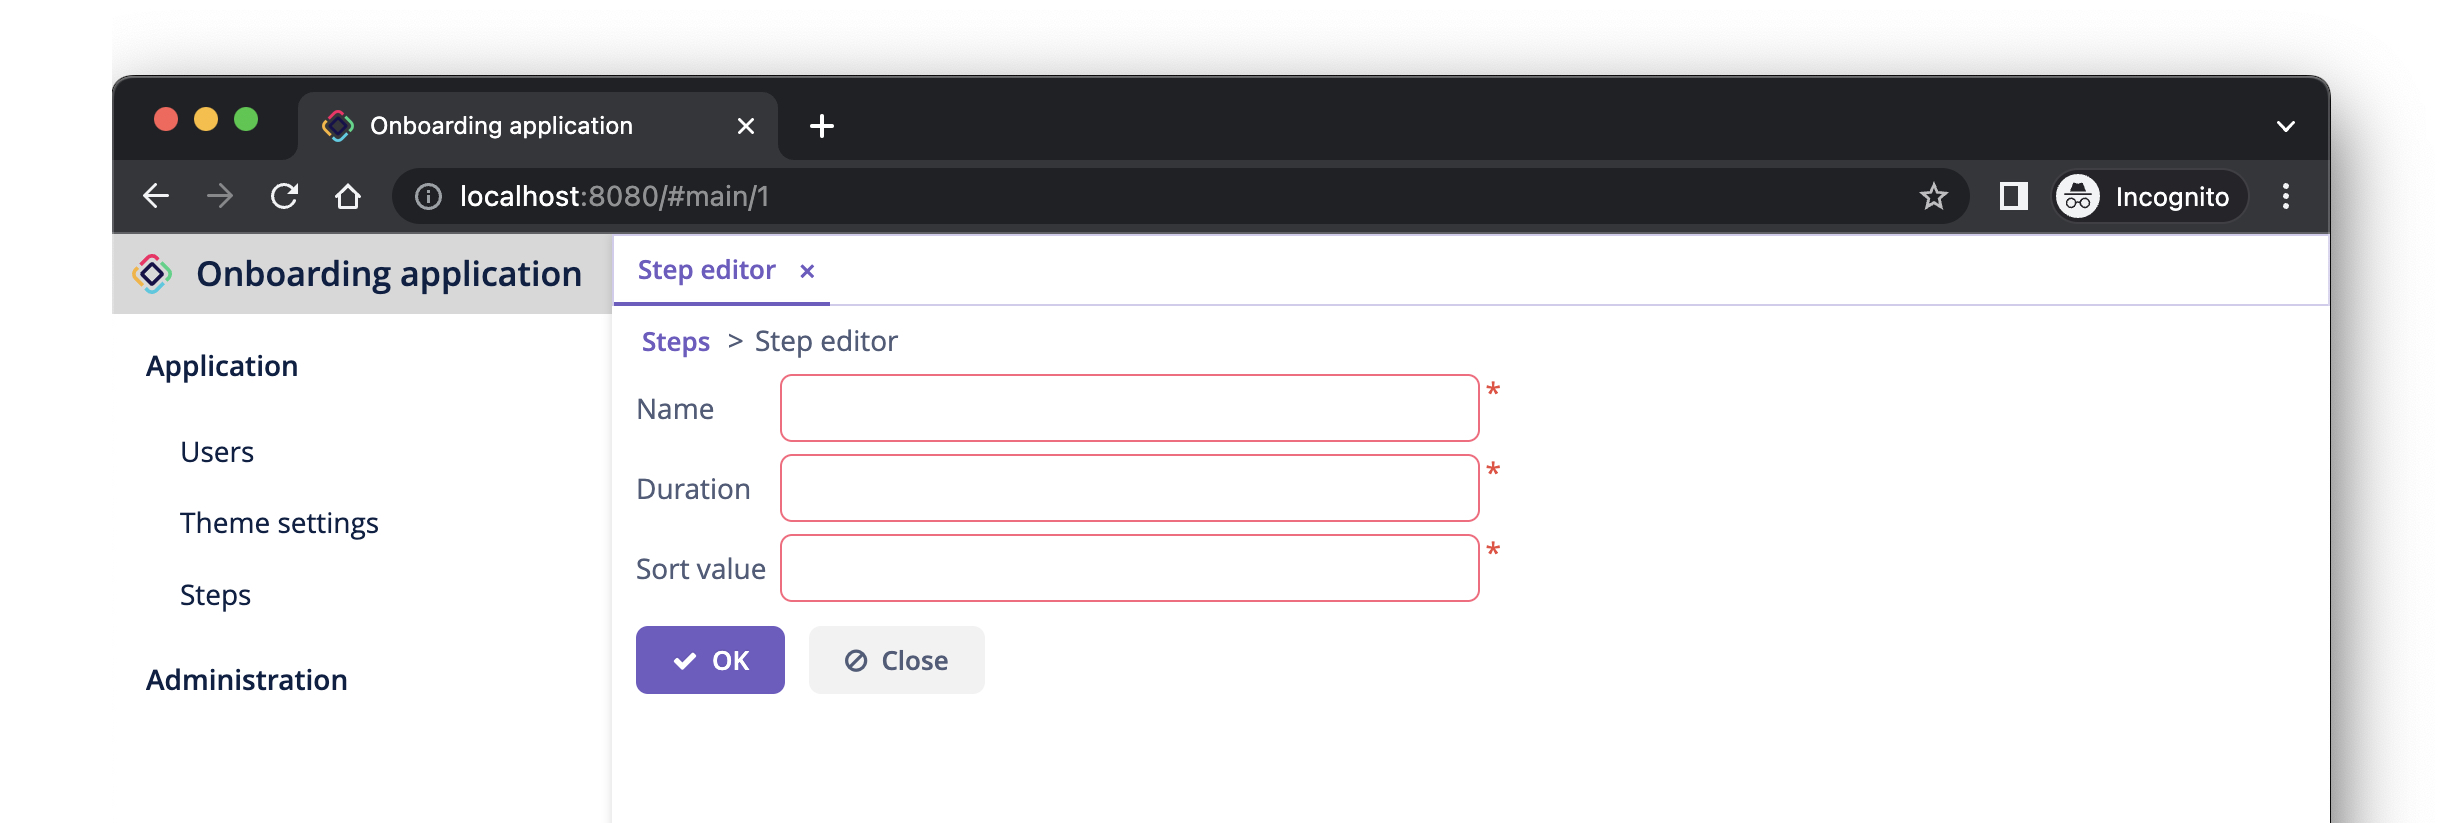
Click Create. The Step.edit screen will open:
Using the browser and editor screens, create a few onboarding steps with the following parameters:
| Name | Duration | Sort value |
|---|---|---|
Safety briefing |
1 |
10 |
Fill in profile |
1 |
20 |
Check all functions |
2 |
30 |
Information security training |
3 |
40 |
Internal procedures studying |
5 |
50 |
Summary
In this section, you have created the simplest feature of the application: onboarding steps management.
You have learned that:
-
Studio has a visual designer for creating and editing entity classes and attributes.
-
Optimistic locking is recommended for most entities. It is used if you select the Versioned trait for the entity.
-
Studio can generate CRUD screens for an entity by templates.
-
A browse screen is added to the main menu of the application.
-
Before running the application, Studio compares the data model and the database schema. If there is a difference, it generates and executes a Liquibase changelog.
