3. References and Unique Attributes
The next feature of your Onboarding application is the management of Departments.
New hire belongs to a Department. Each department has a unique name and a reference to HR Manager.
In this chapter, you will create:
-
The
Departmententity with the link toUser. -
A database table with a foreign key and a unique constraint.
-
CRUD screens including UI component for selecting the related entity.
Creating Department Entity
The Department entity has the name (unique) attribute and the hrManager attribute which is a reference to the User entity:
If your application is running, stop it using the Stop button ( ) in the main toolbar.
In the Jmix tool window, click New ( ) → JPA Entity as you did in the previous chapter. In the New JPA Entity dialog, enter
 Department into the Class field and select the Traits → Versioned checkbox:

Click OK.
Studio will create the entity class and open the entity designer:
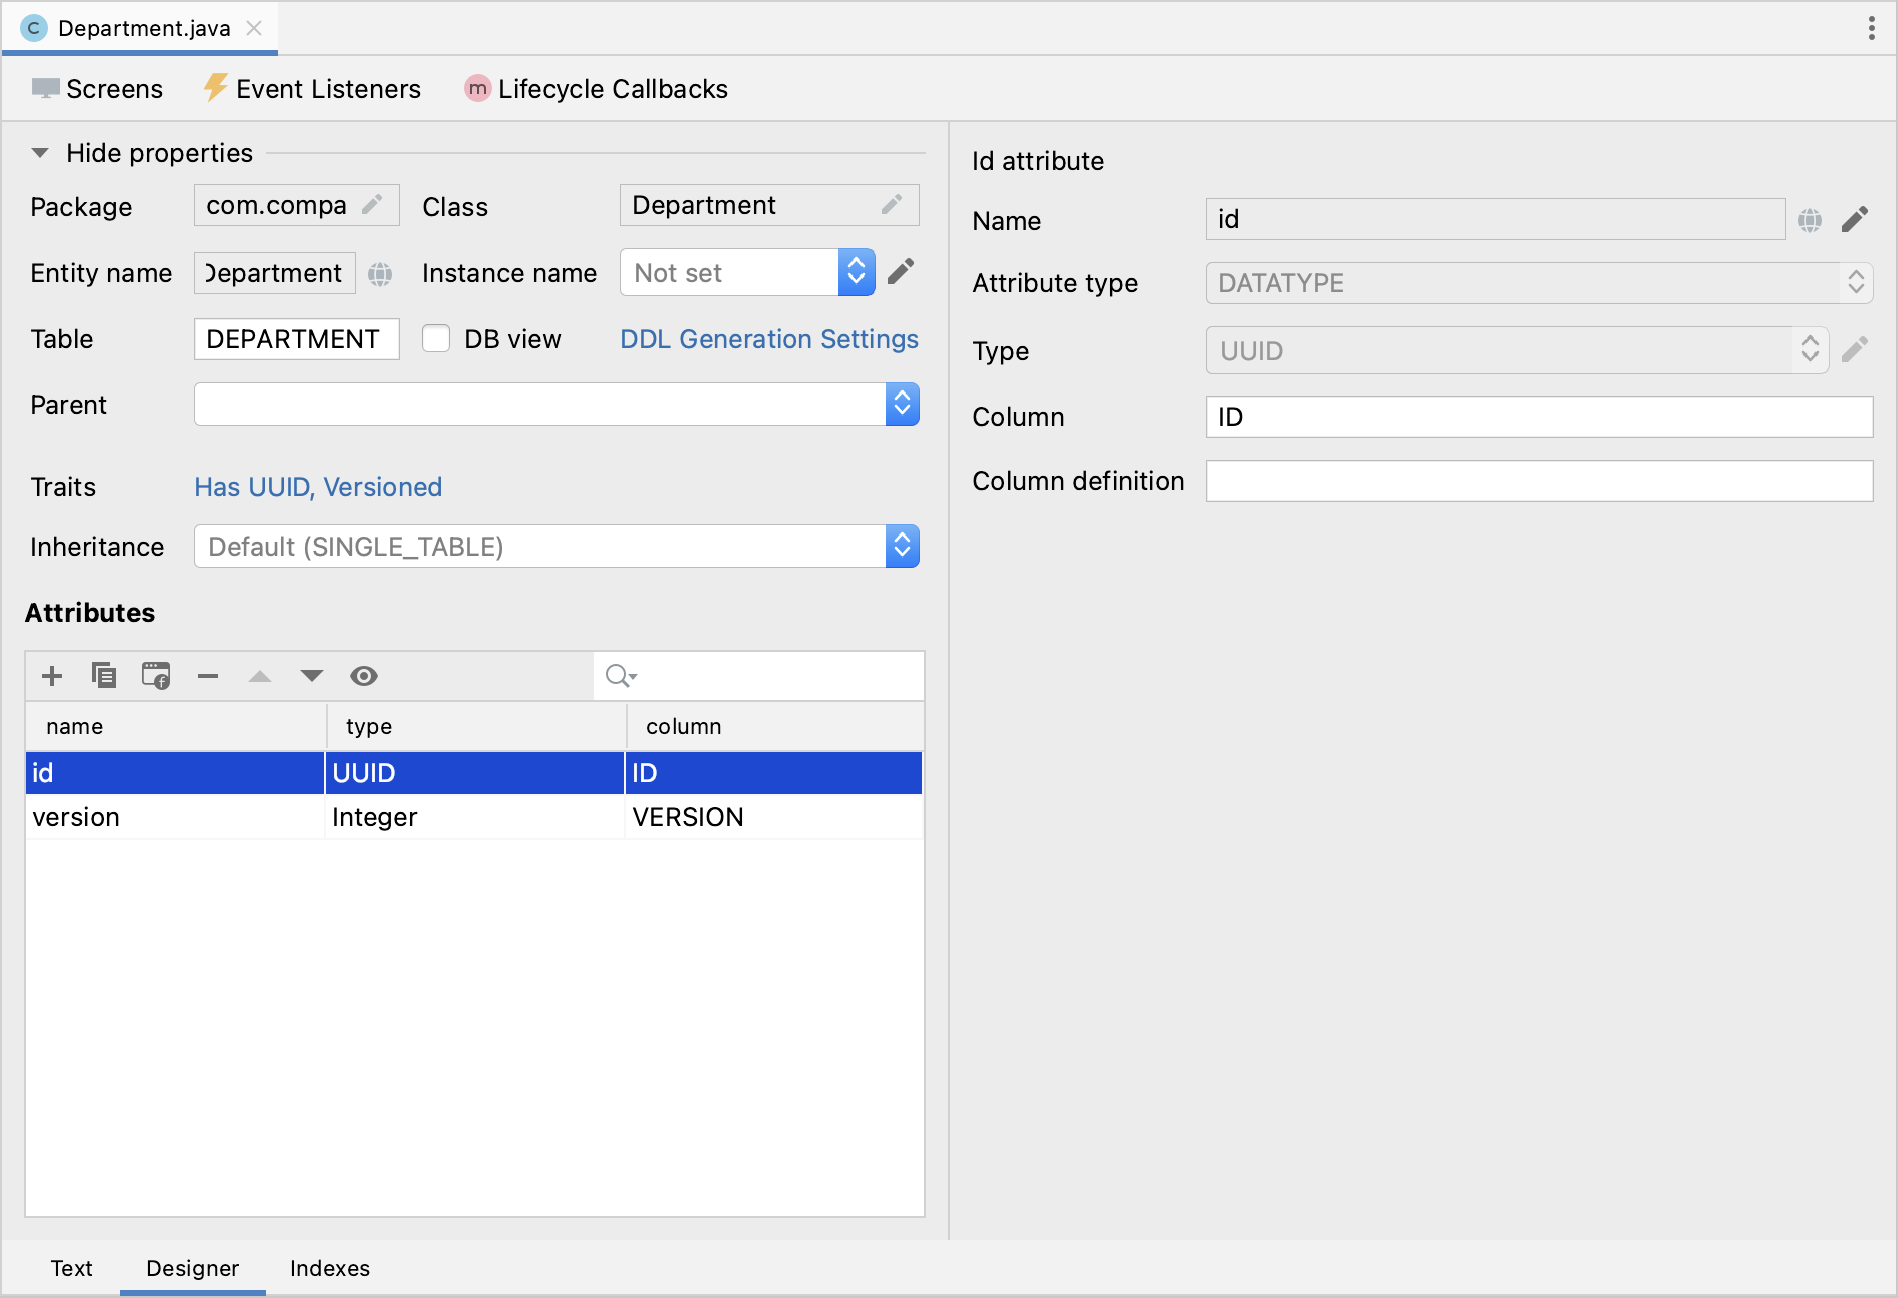
Creating Unique Attribute
Let’s add the name attribute to the entity.
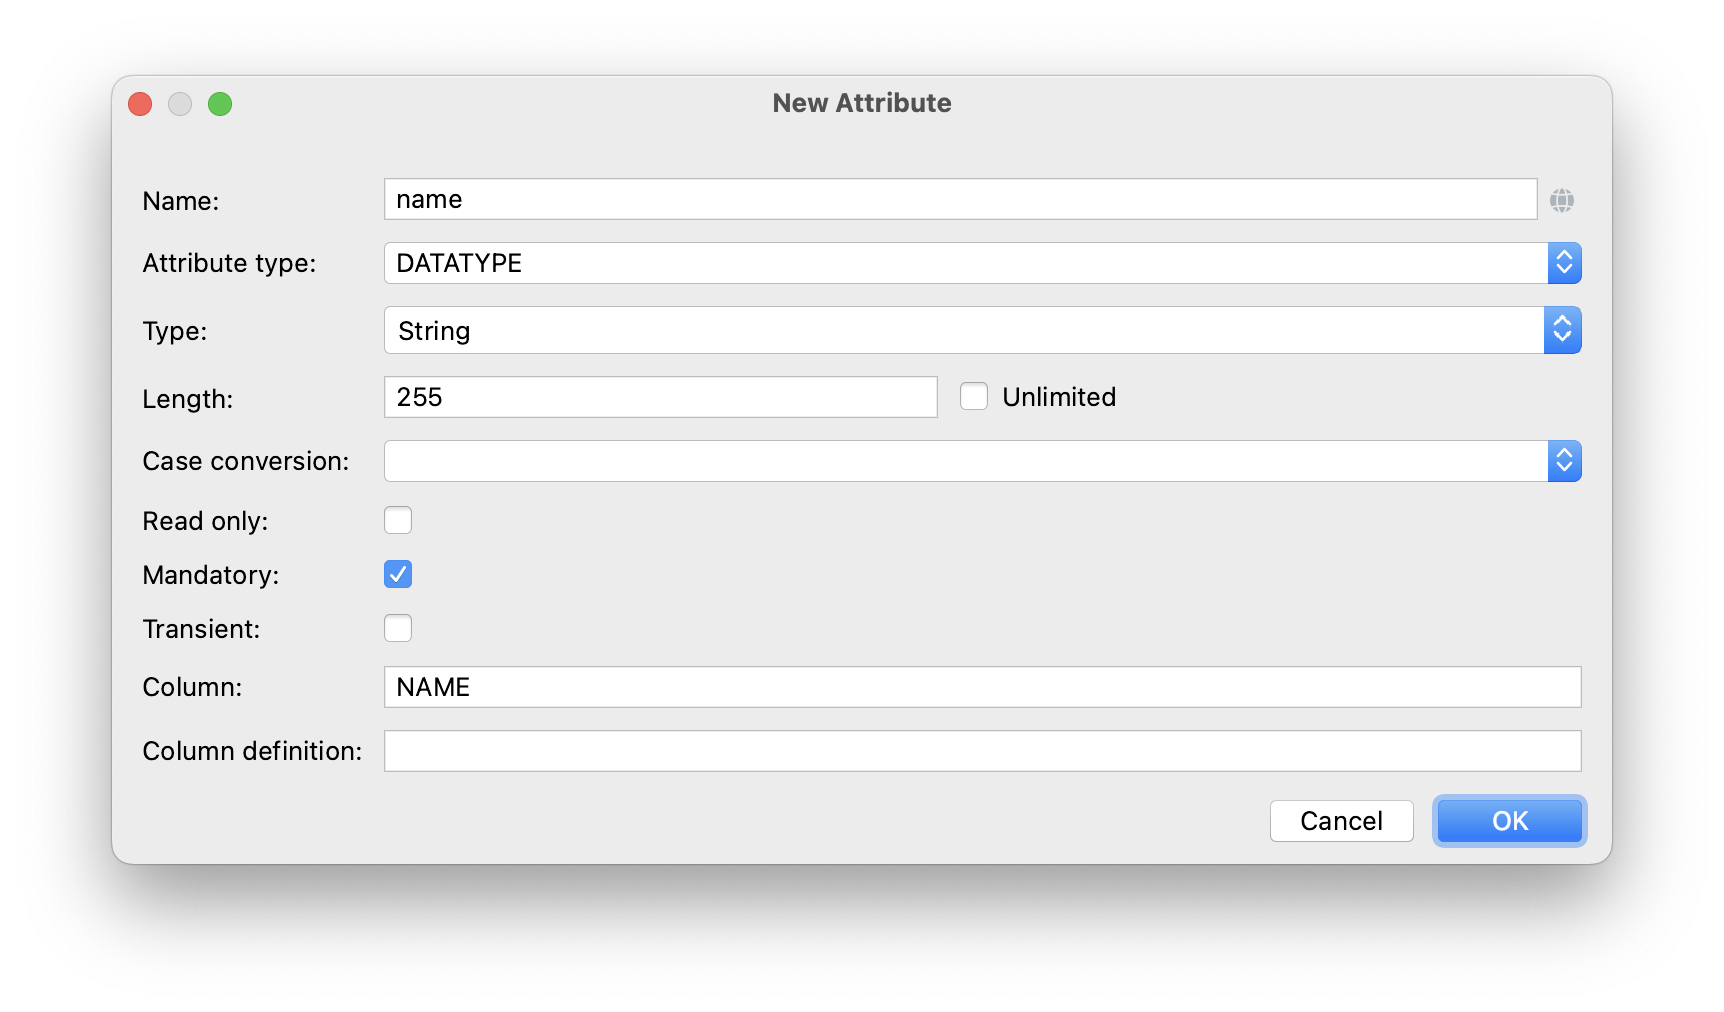
Click Add () in the Attributes toolbar. In the New Attribute dialog, enter name into the Name field and select the Mandatory checkbox:
Now let’s define a unique constraint for the NAME column in the database. It will ensure there will be no departments with the same name.
Switch to the Indexes tab at the bottom and click New Index () in the Database Indexes toolbar. Studio will add a row to the indexes list:
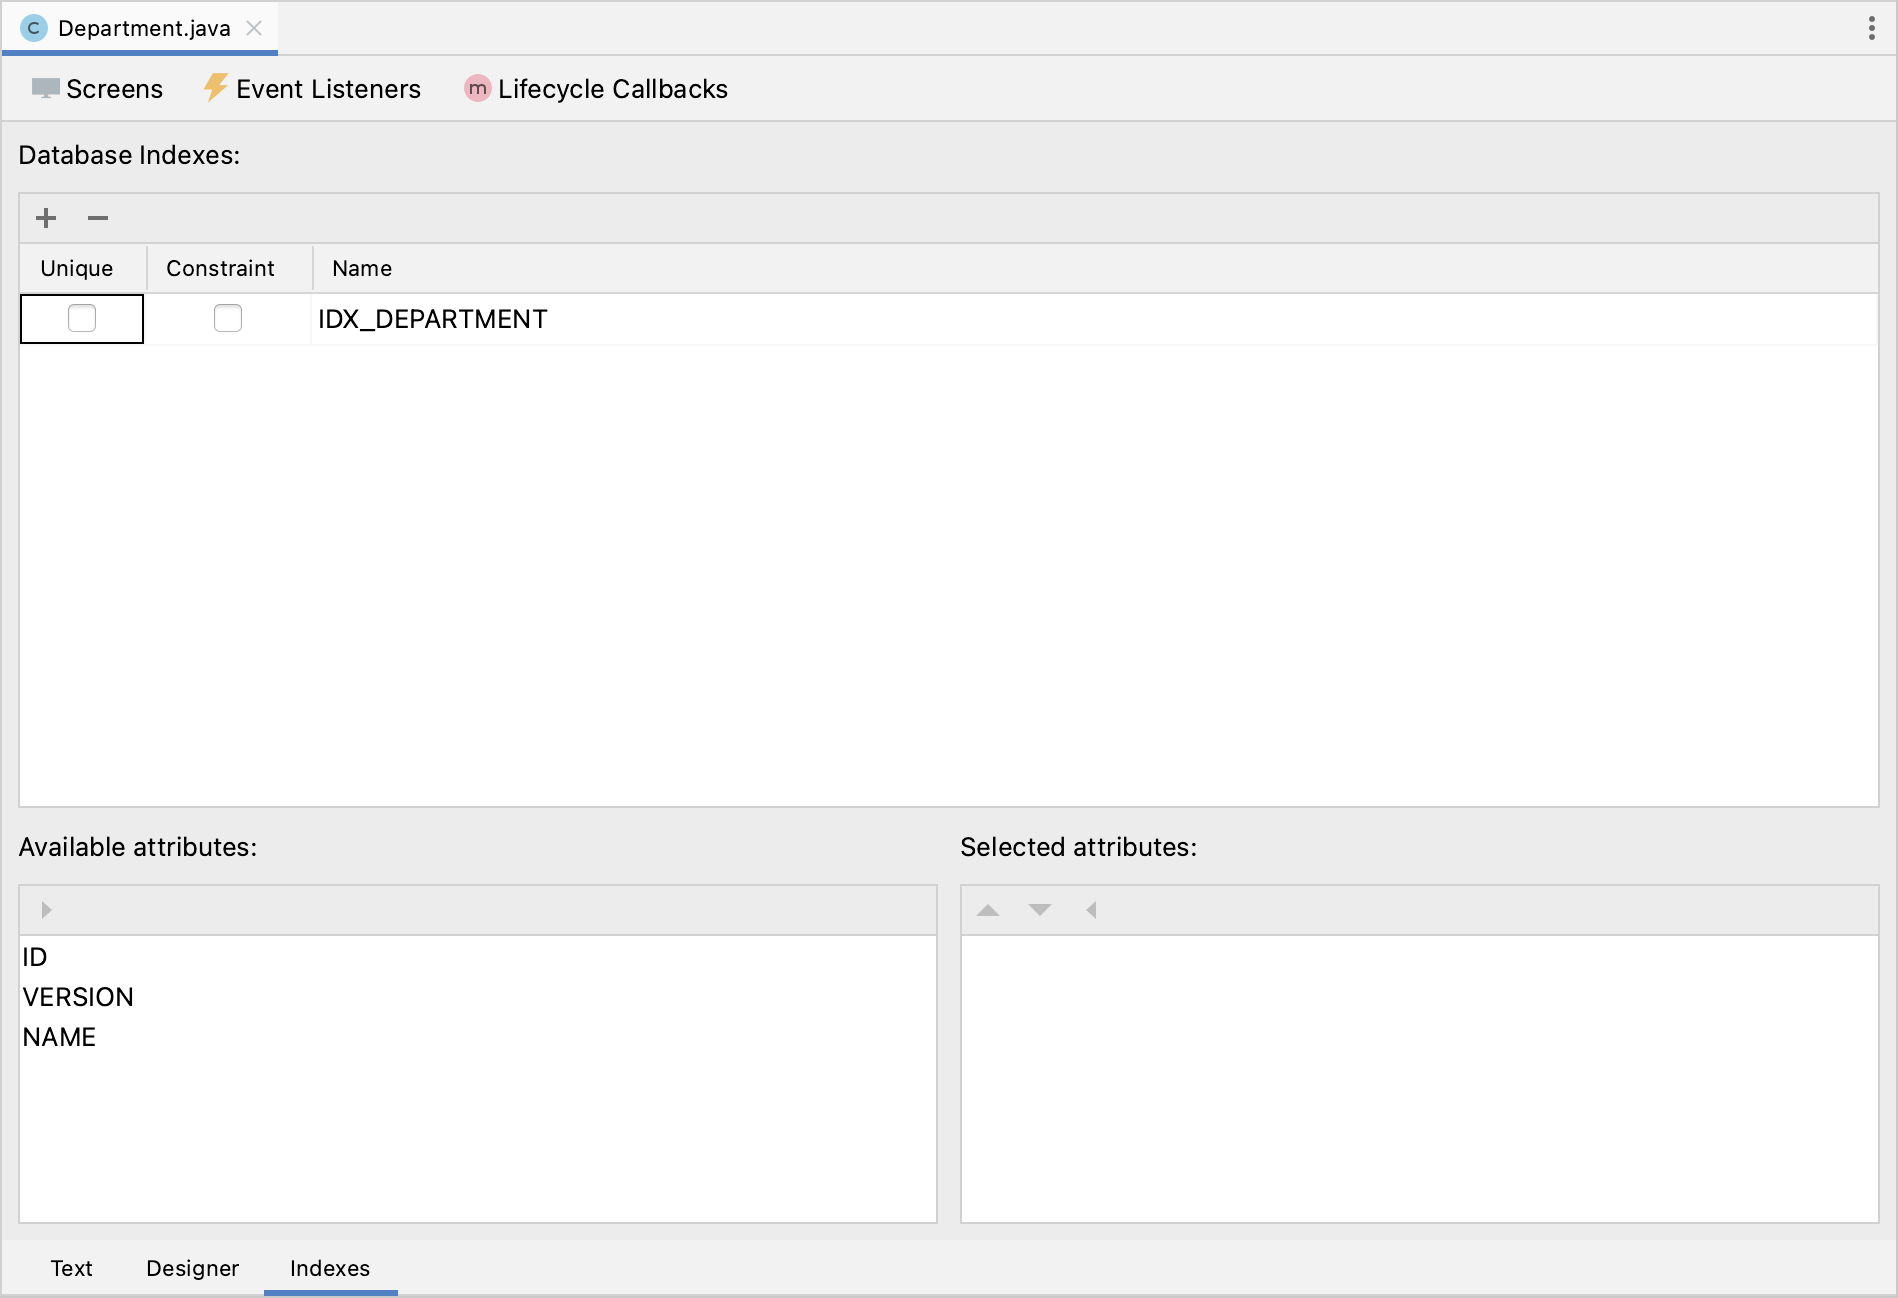
Select NAME in the Available attributes list and click ![]() in the toolbar to move it to the Selected attributes.
in the toolbar to move it to the Selected attributes.
Select the Unique and Constraint checkboxes in the index row and change the name to IDX_DEPARTMENT_UNQ_NAME:
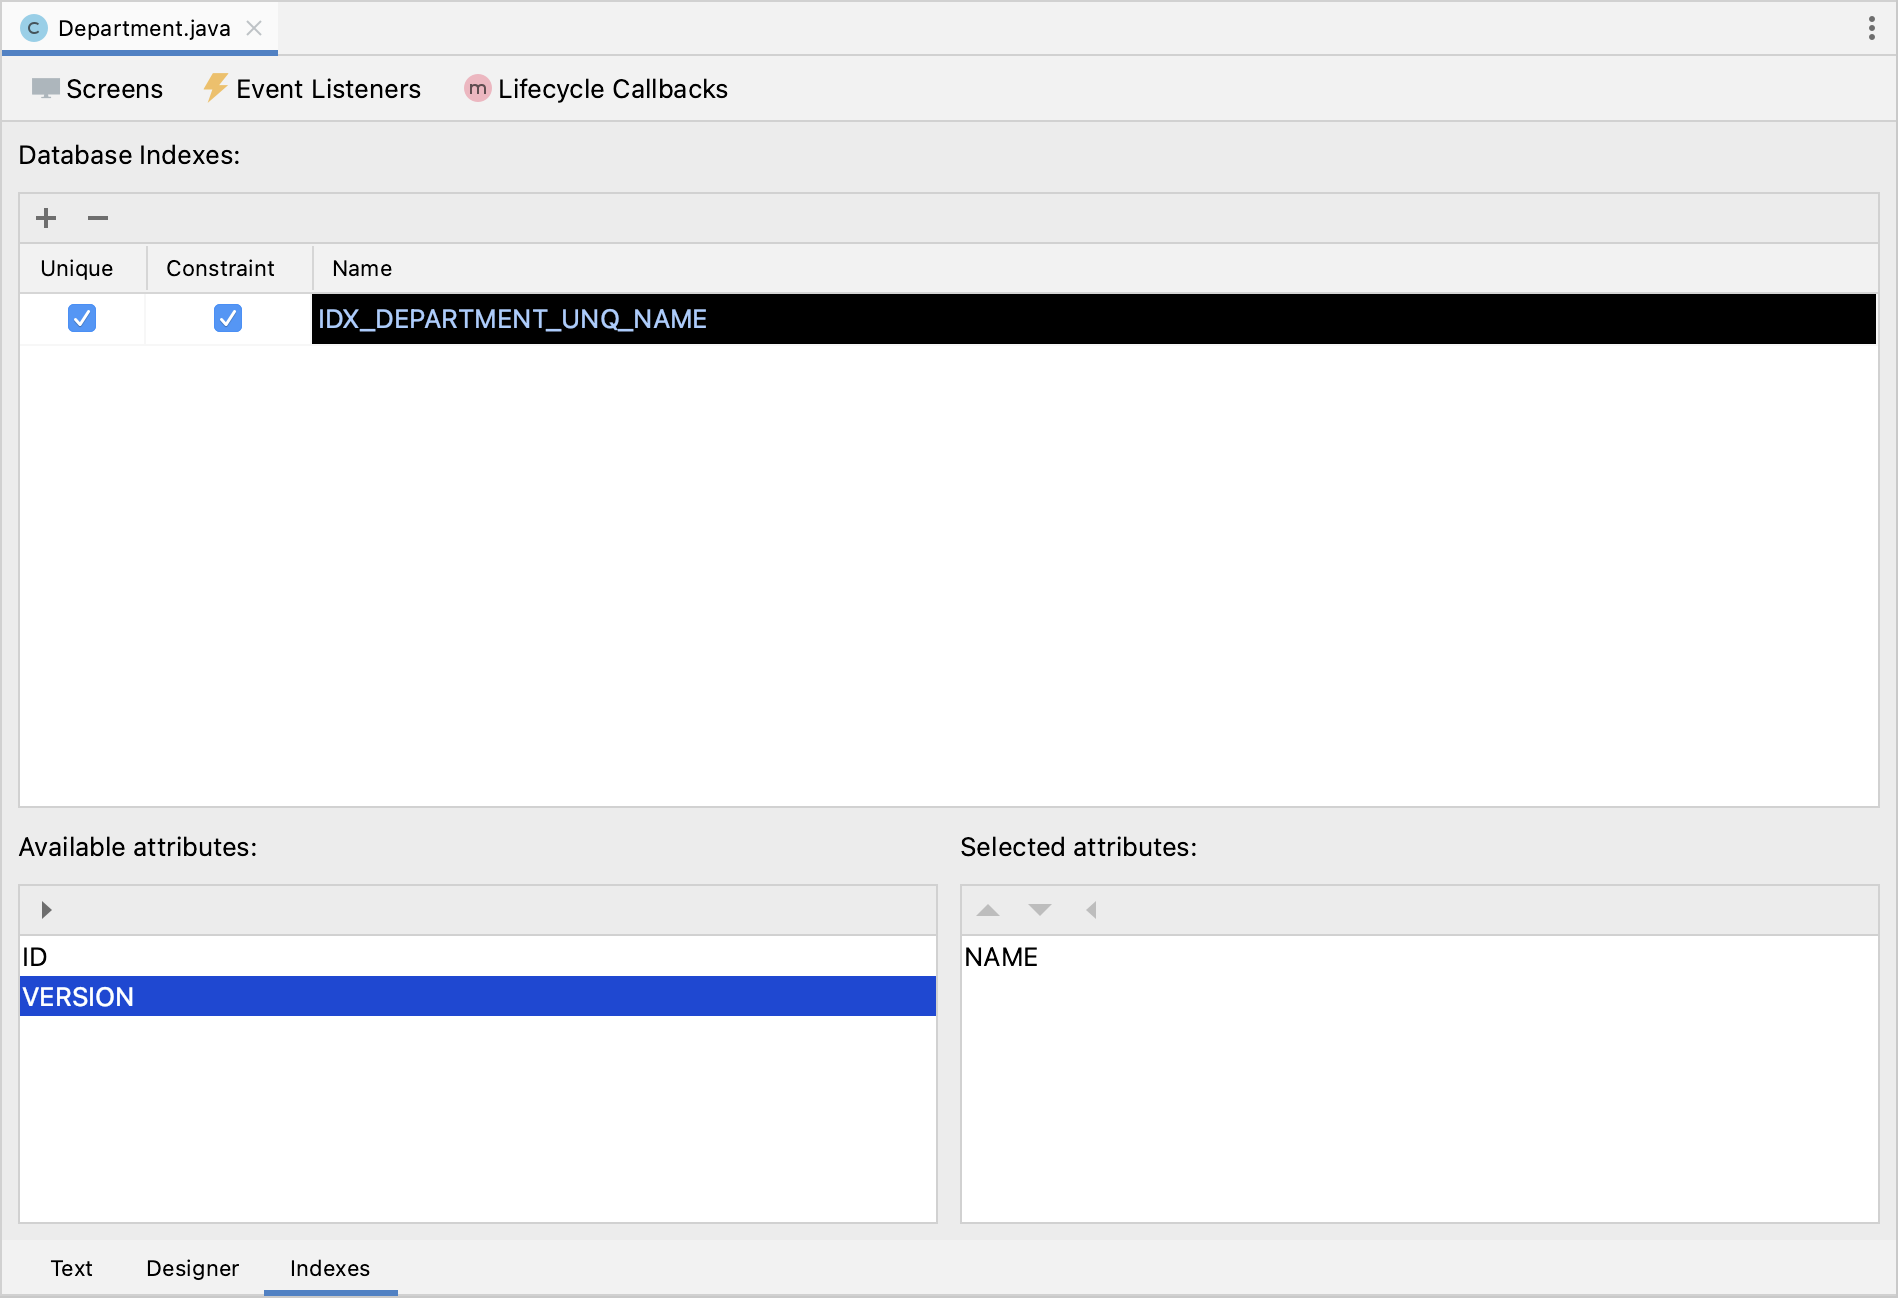
If you switch to the Text tab of the entity designer, you will see the unique constraint added to the @Table annotation:
@JmixEntity
@Table(name = "DEPARTMENT", uniqueConstraints = {
        @UniqueConstraint(name = "IDX_DEPARTMENT_UNQ_NAME", columnNames = {"NAME"})
})
@Entity
public class Department {
    // ...
Using this annotation, Studio will add a unique constraint for the database table to the Liquibase changelog.
Creating Reference Attribute
Now create a reference to an HR Manager of the department.
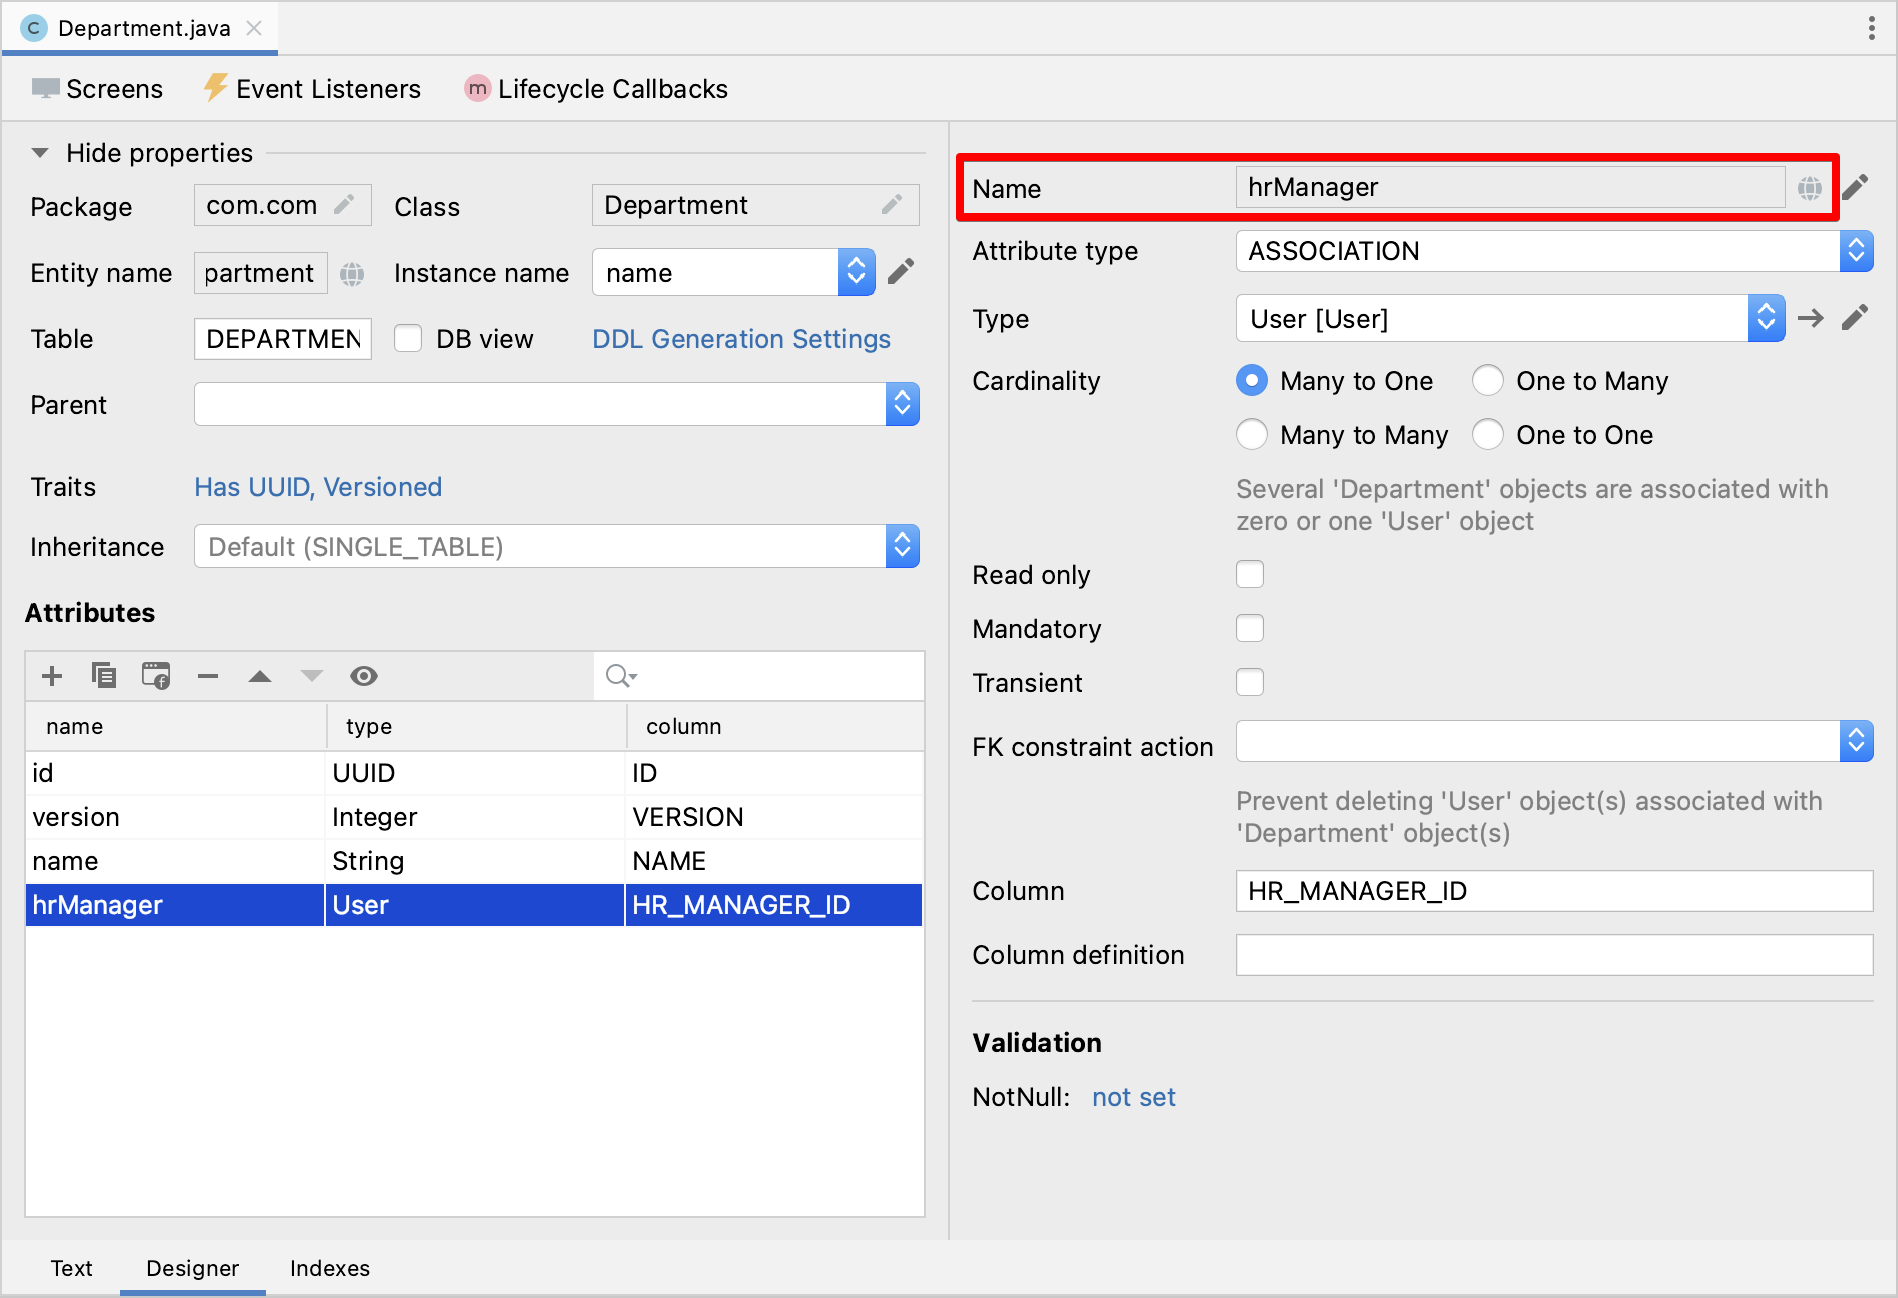
In the New Attribute dialog, enter hrManager into the Name field. Then select:
-
Attribute type:
ASSOCIATION -
Type:
User -
Cardinality: Many to One
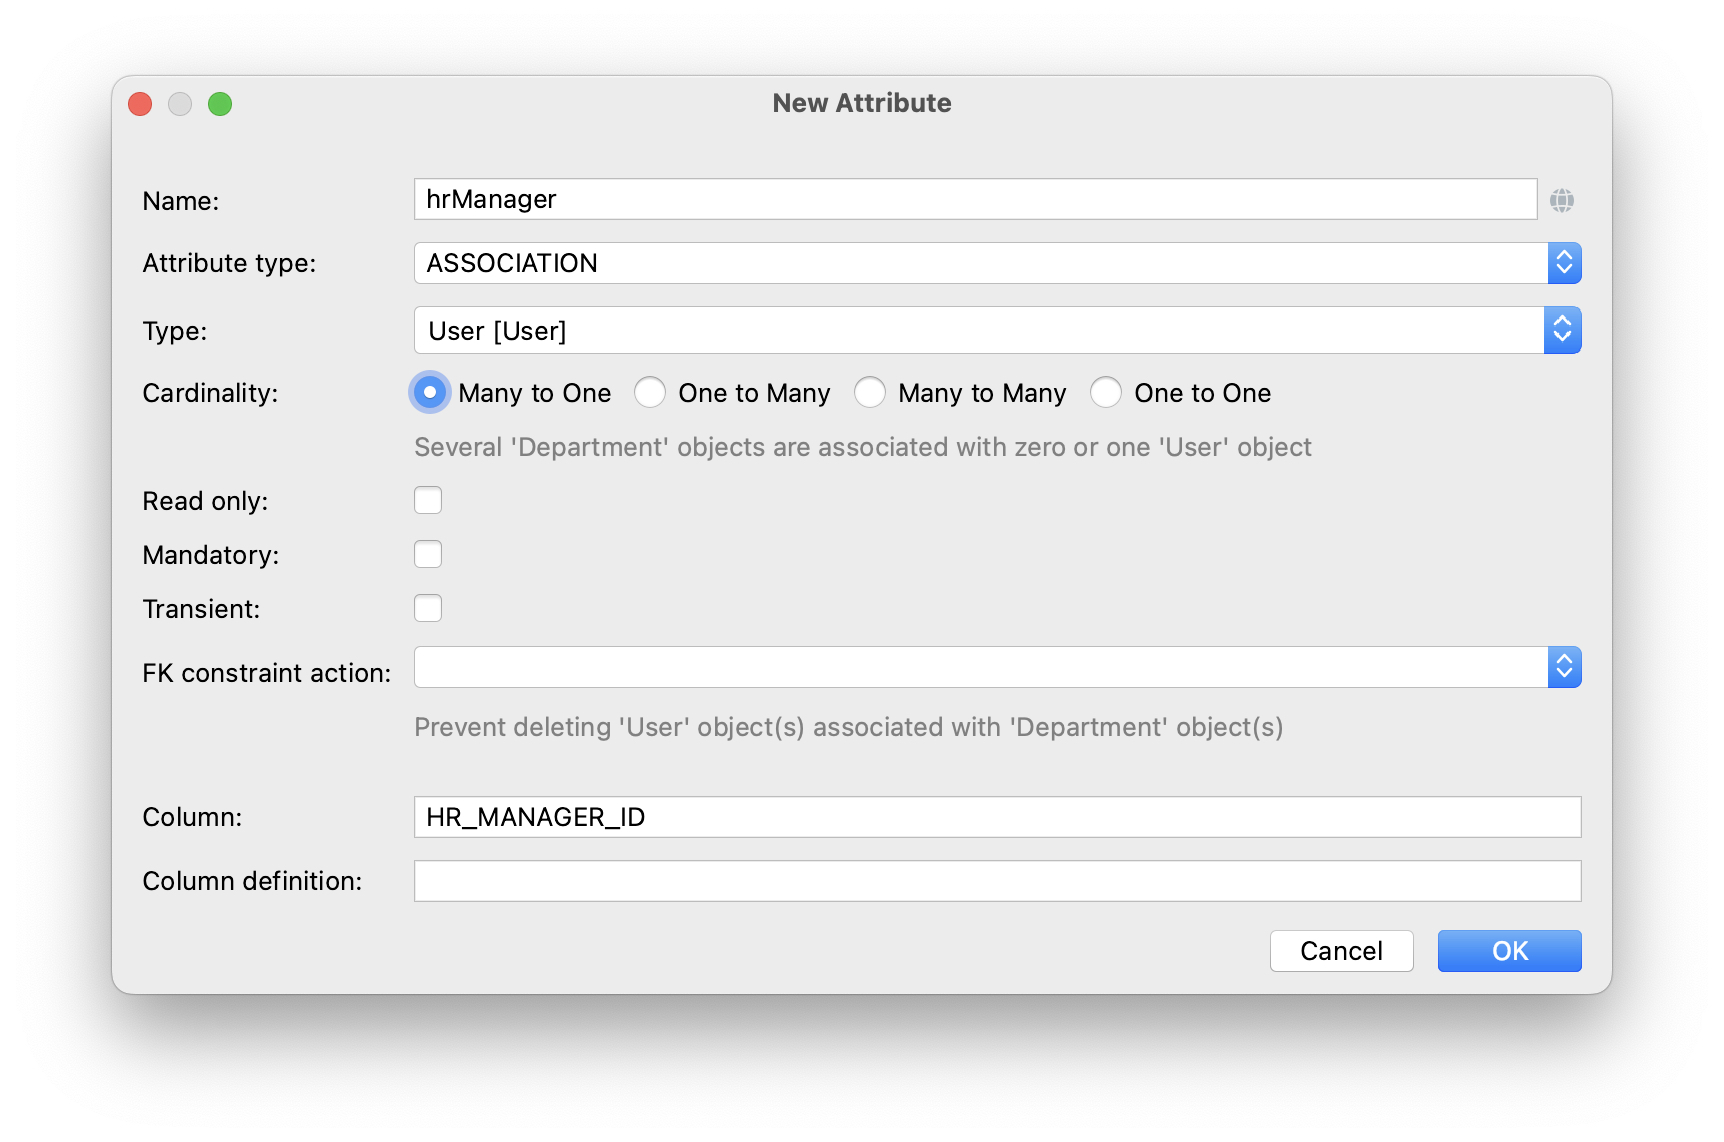
Click OK.
You can find the new attribute on the Text tab:
@JoinColumn(name = "HR_MANAGER_ID")
@ManyToOne(fetch = FetchType.LAZY)
private User hrManager;
Also, the @Table annotation on the class header now defines the index for the foreign key column:
@JmixEntity
@Table(name = "DEPARTMENT", indexes = {
        @Index(name = "IDX_DEPARTMENT_HR_MANAGER", columnList = "HR_MANAGER_ID")
    },
    // ...
You can see it on the Indexes tab too.
Creating CRUD Screens
Let’s generate CRUD screens for the Department entity.
Click Screens → Create screen in the actions panel at the top of the entity designer:

On the first step of the screen creation wizard, select the Entity browser and editor screen template:
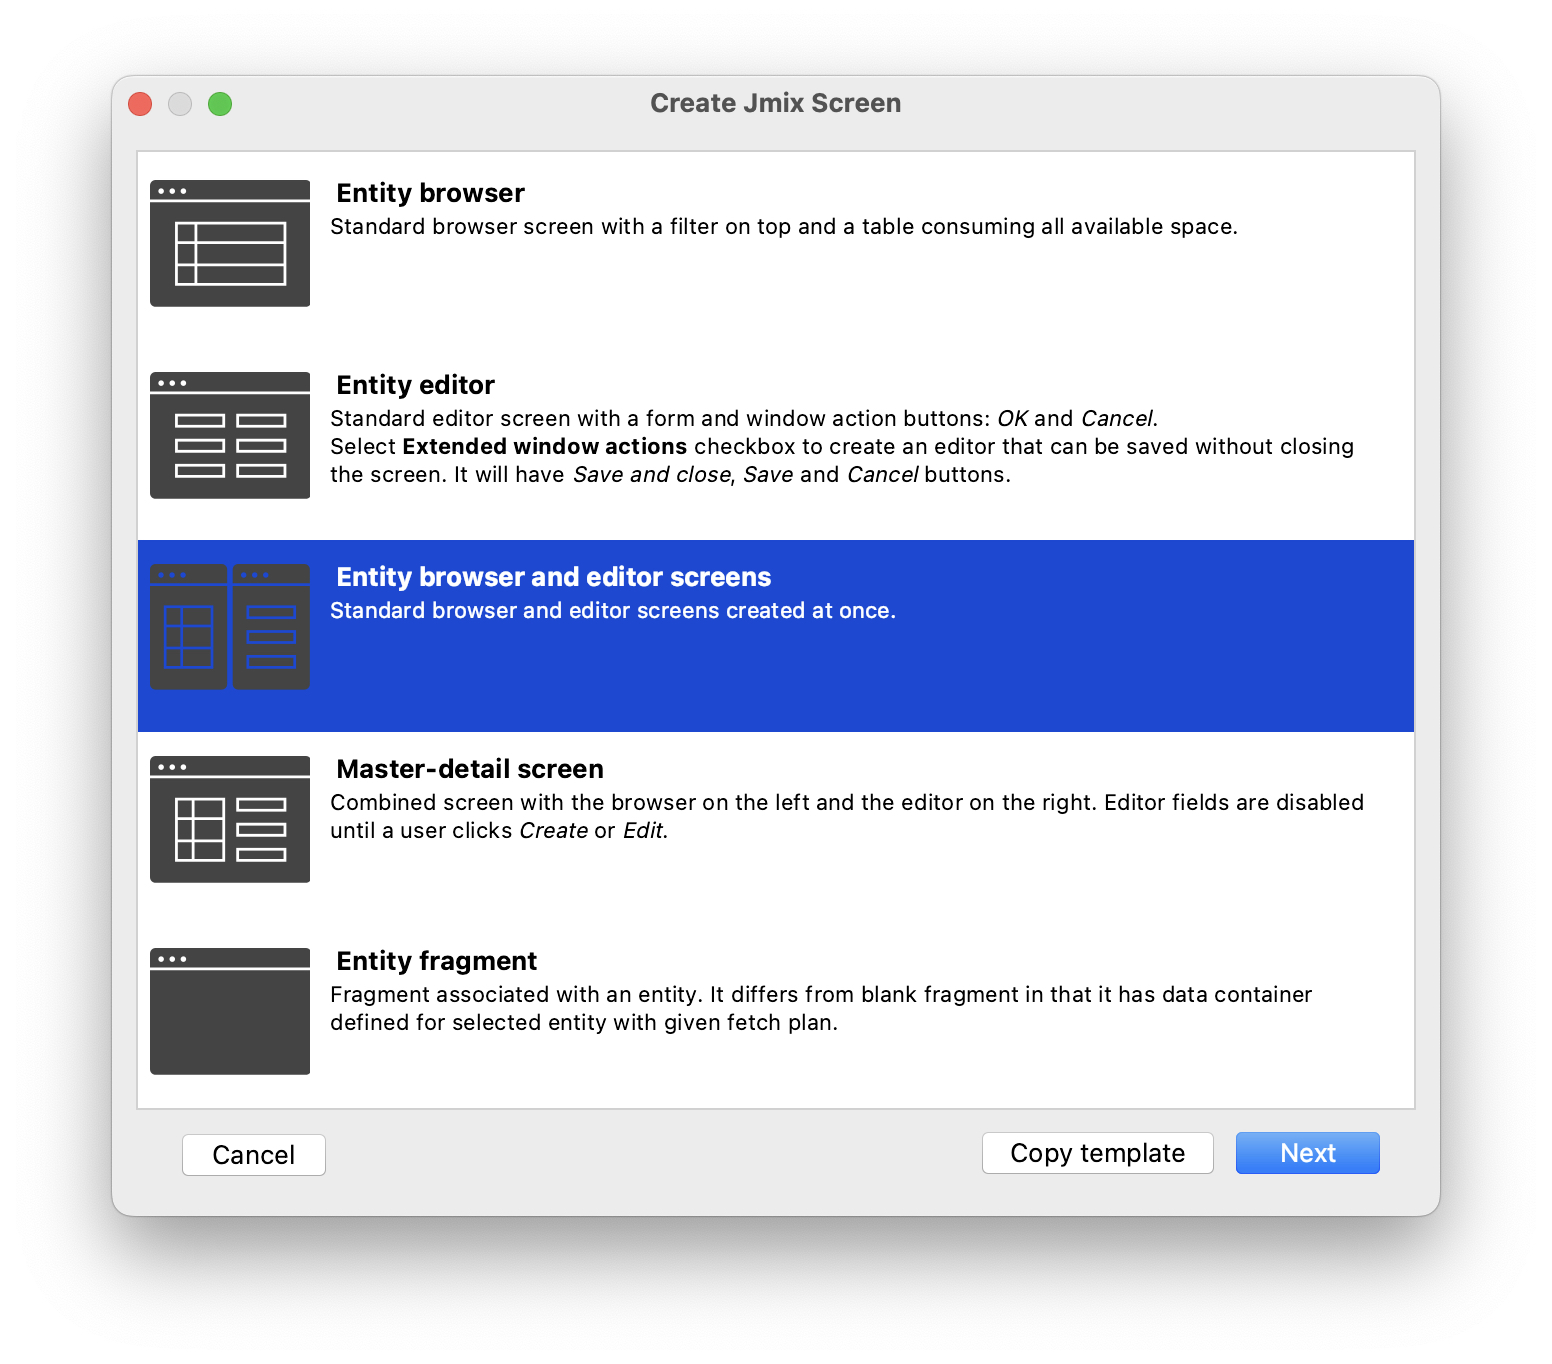
Click Next.
Accept the suggested values on the first two steps of the wizard.
On the Entity browser fetch plan step, add the hrManager attribute to the selection:
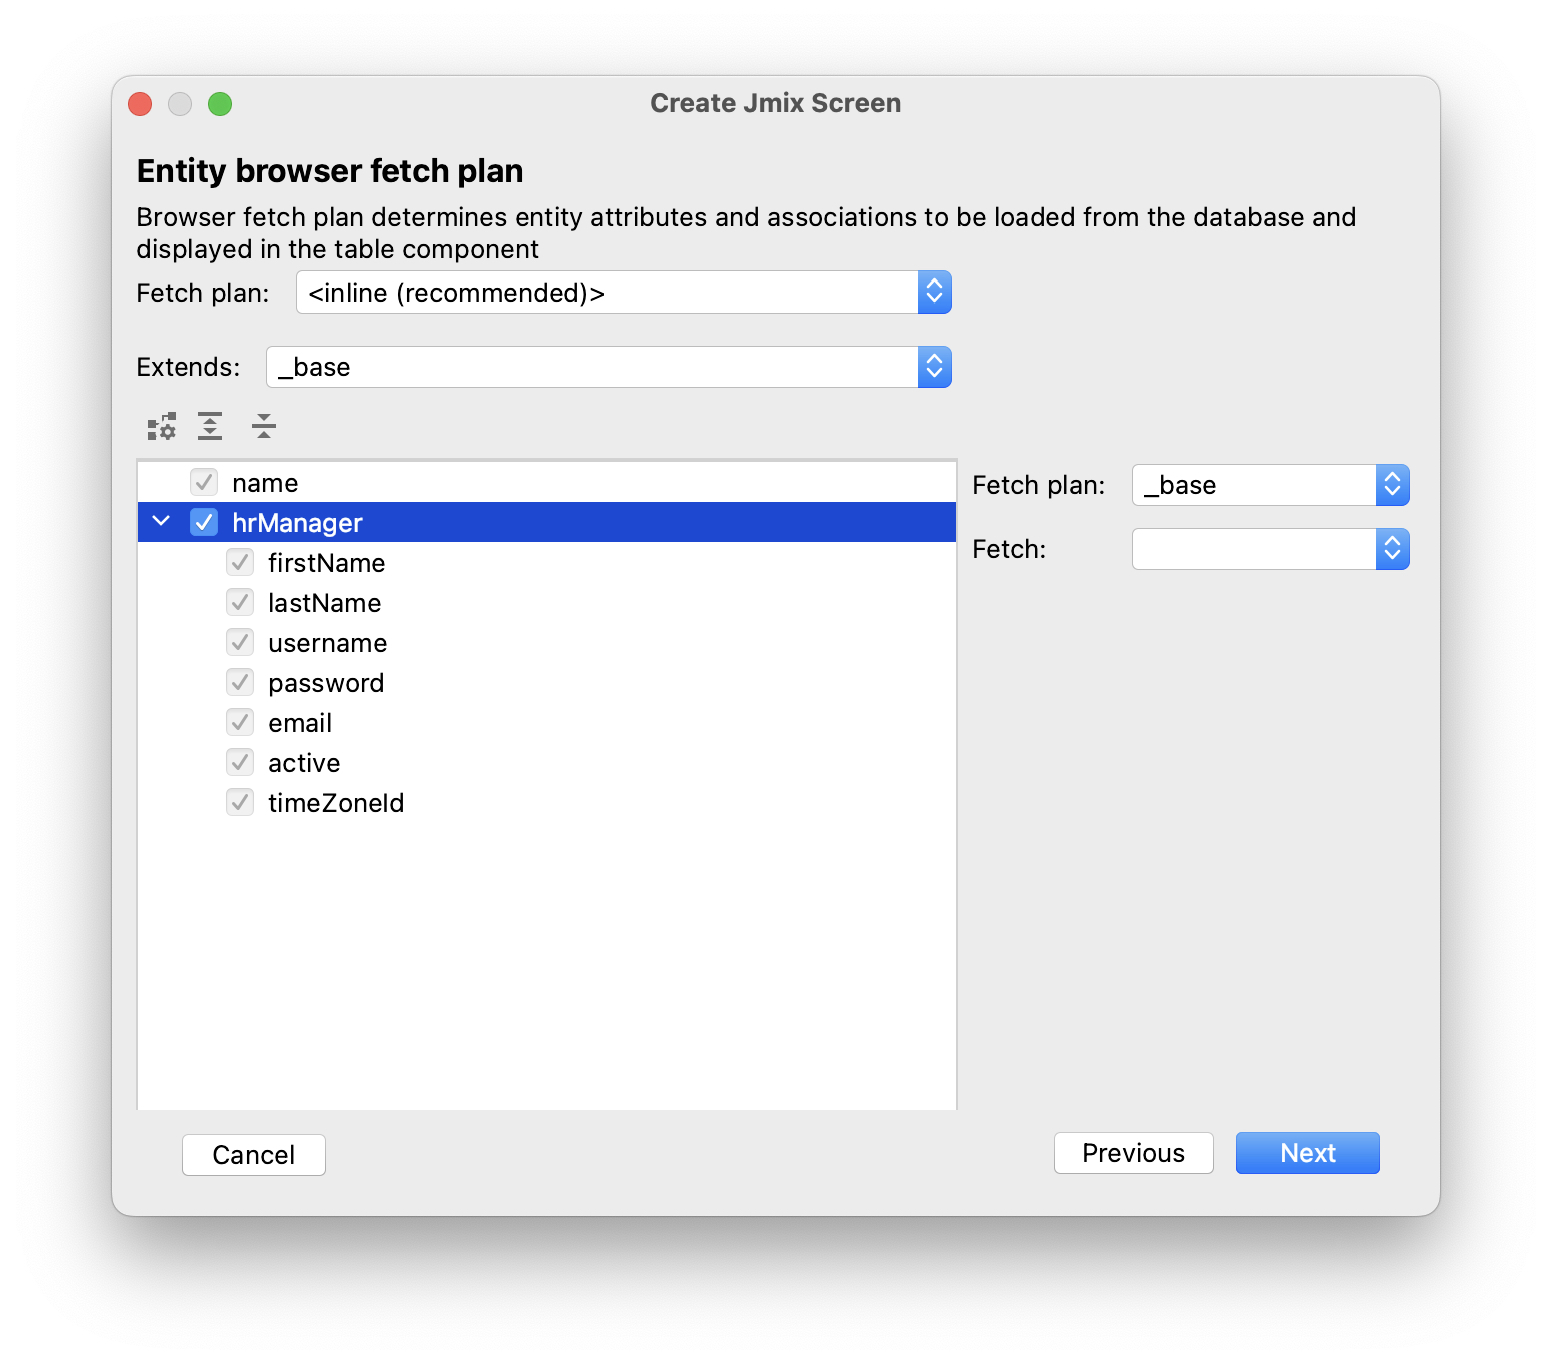
Now you can be sure that the referenced User entity will be loaded together with the root Department entity and displayed in the browse screen.
Click Next.
On the next Entity editor fetch plan step, this attribute will be selected automatically:
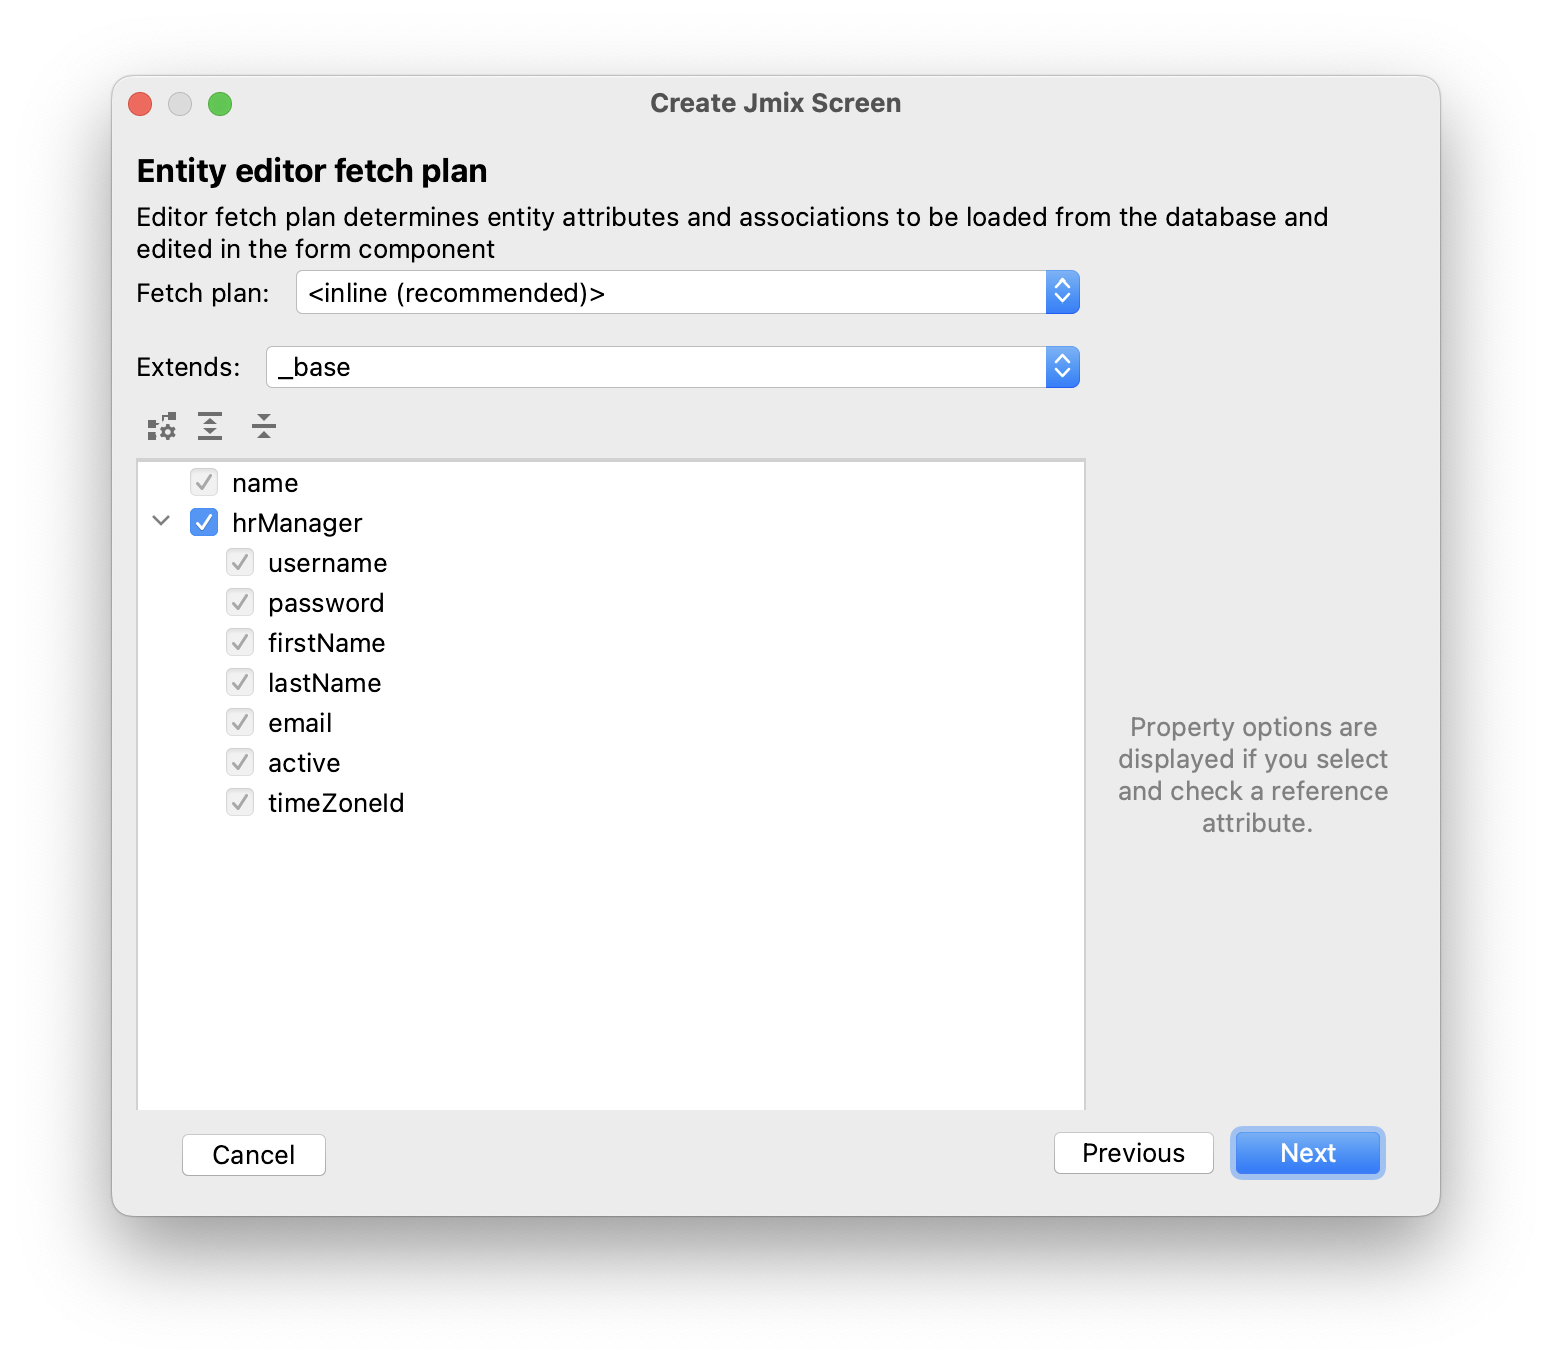
Click Next.
Accept the values on the Localizable messages step and click Create.
Studio will generate two screens: Department.browse and Department.edit and open their source code. Close all editor tabs for now - you will make some changes in the generated screens later in this chapter.
Running the Application
Click the Debug button ( ) in the main toolbar.
Before running the application, Studio will generate a Liquibase changelog:
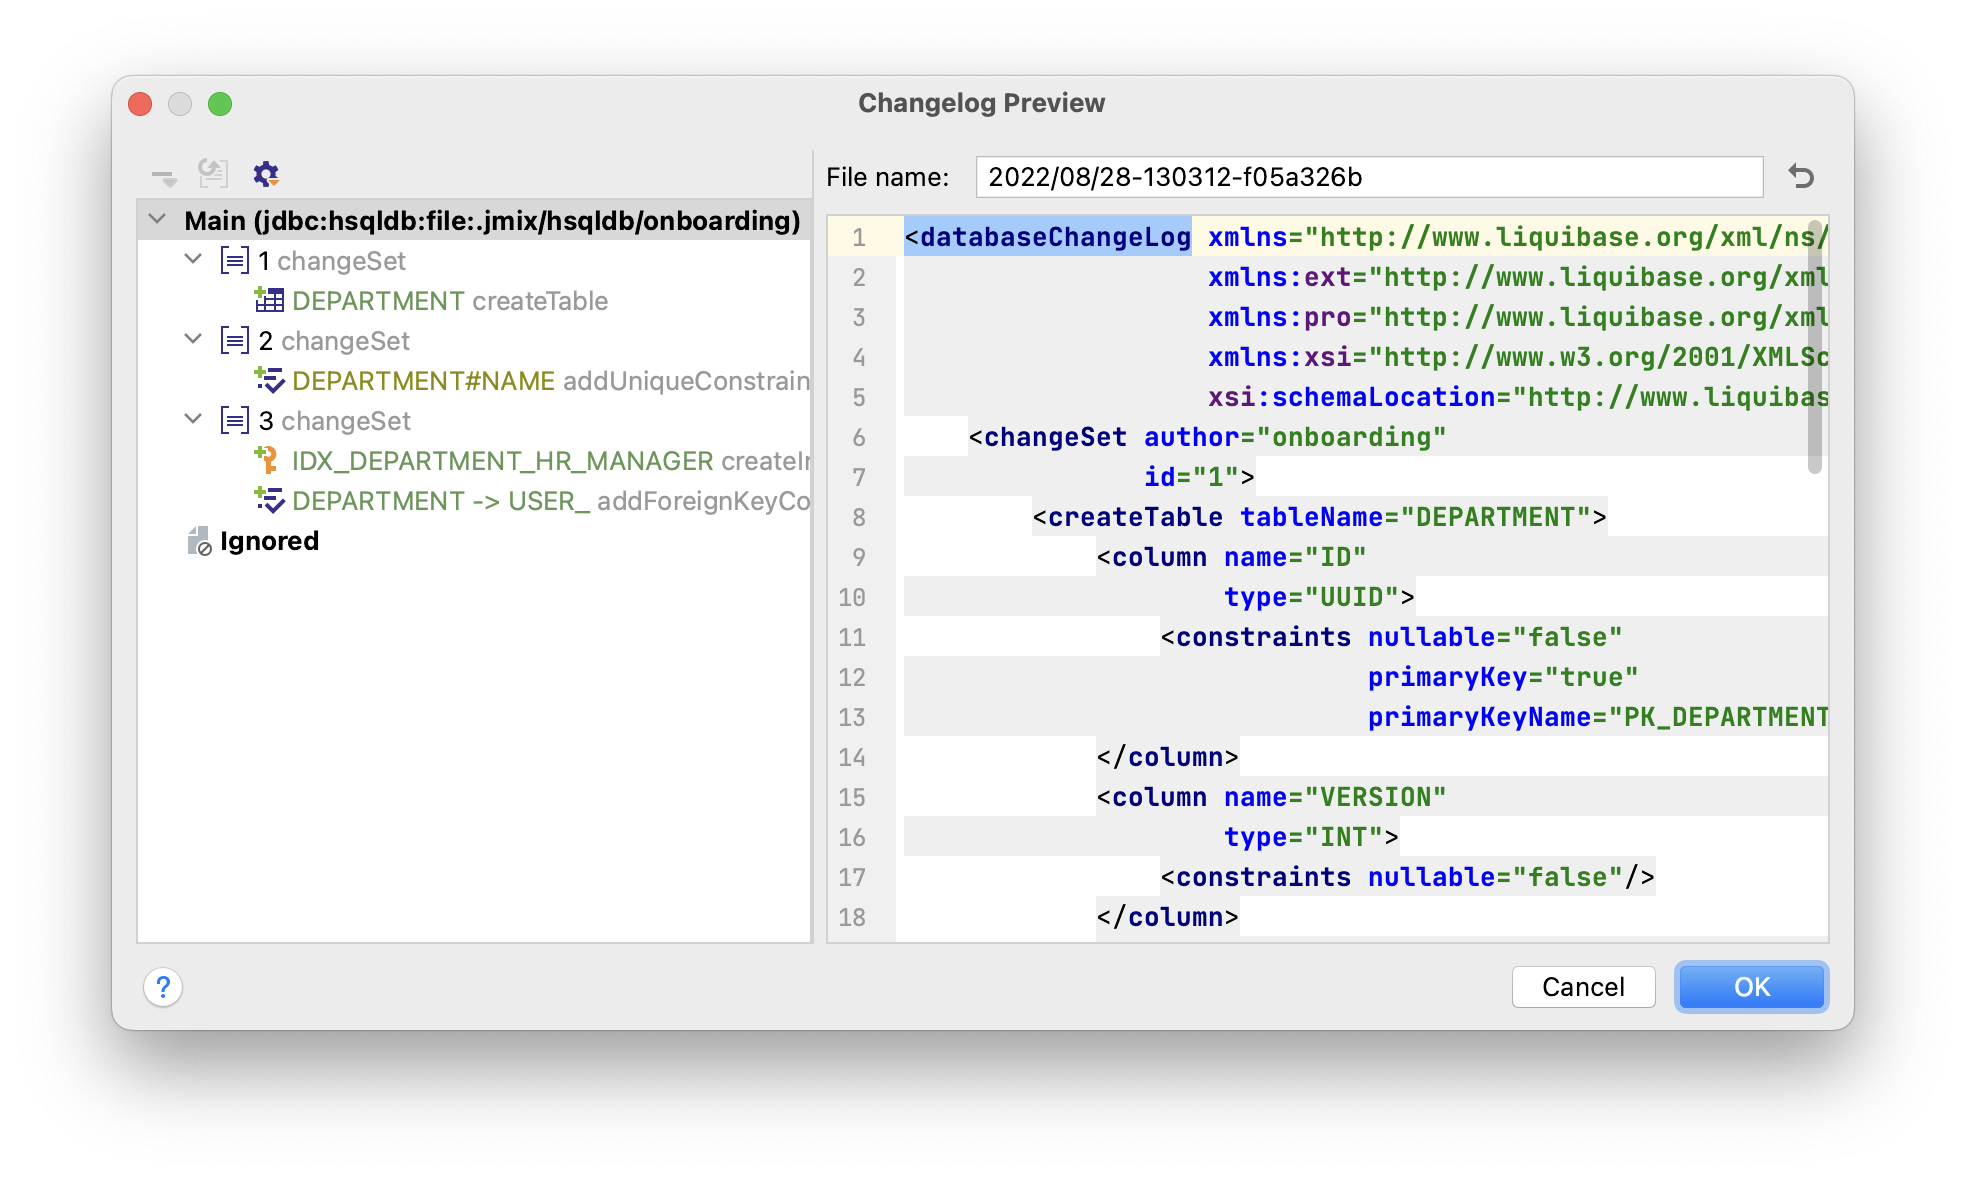
As you can see, the changelog contains commands for creating the DEPARTMENT table, a unique constraint for the NAME column and the foreign key and the index for the HR_MANAGER_ID column.
Click OK.
Studio will execute the changelog, then build and run the application.
Open http://localhost:8080 in your web browser and log in to the application with admin / admin credentials.
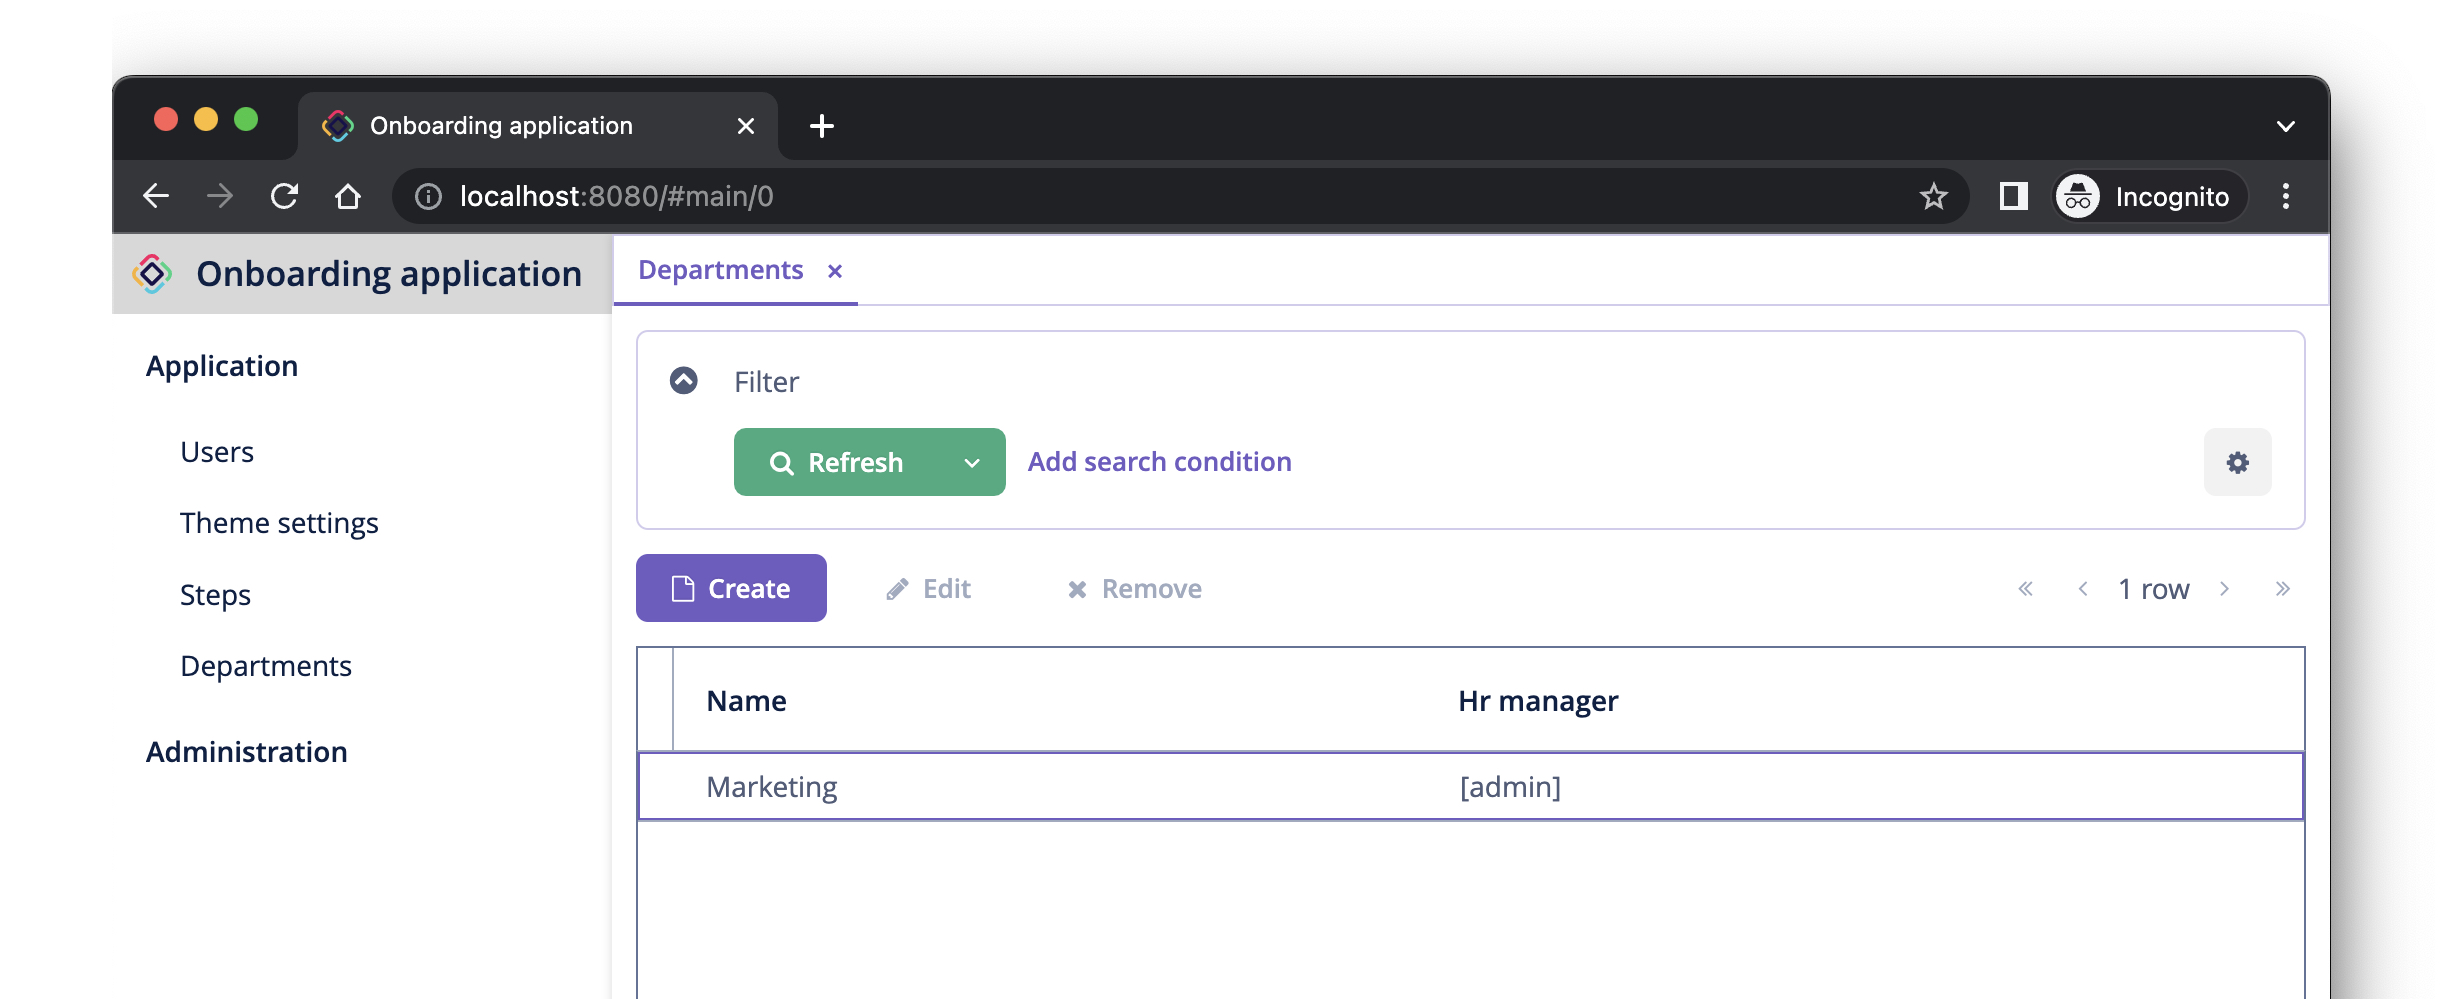
Click on the Departments item in the Application menu. You will see the Department.browse screen:
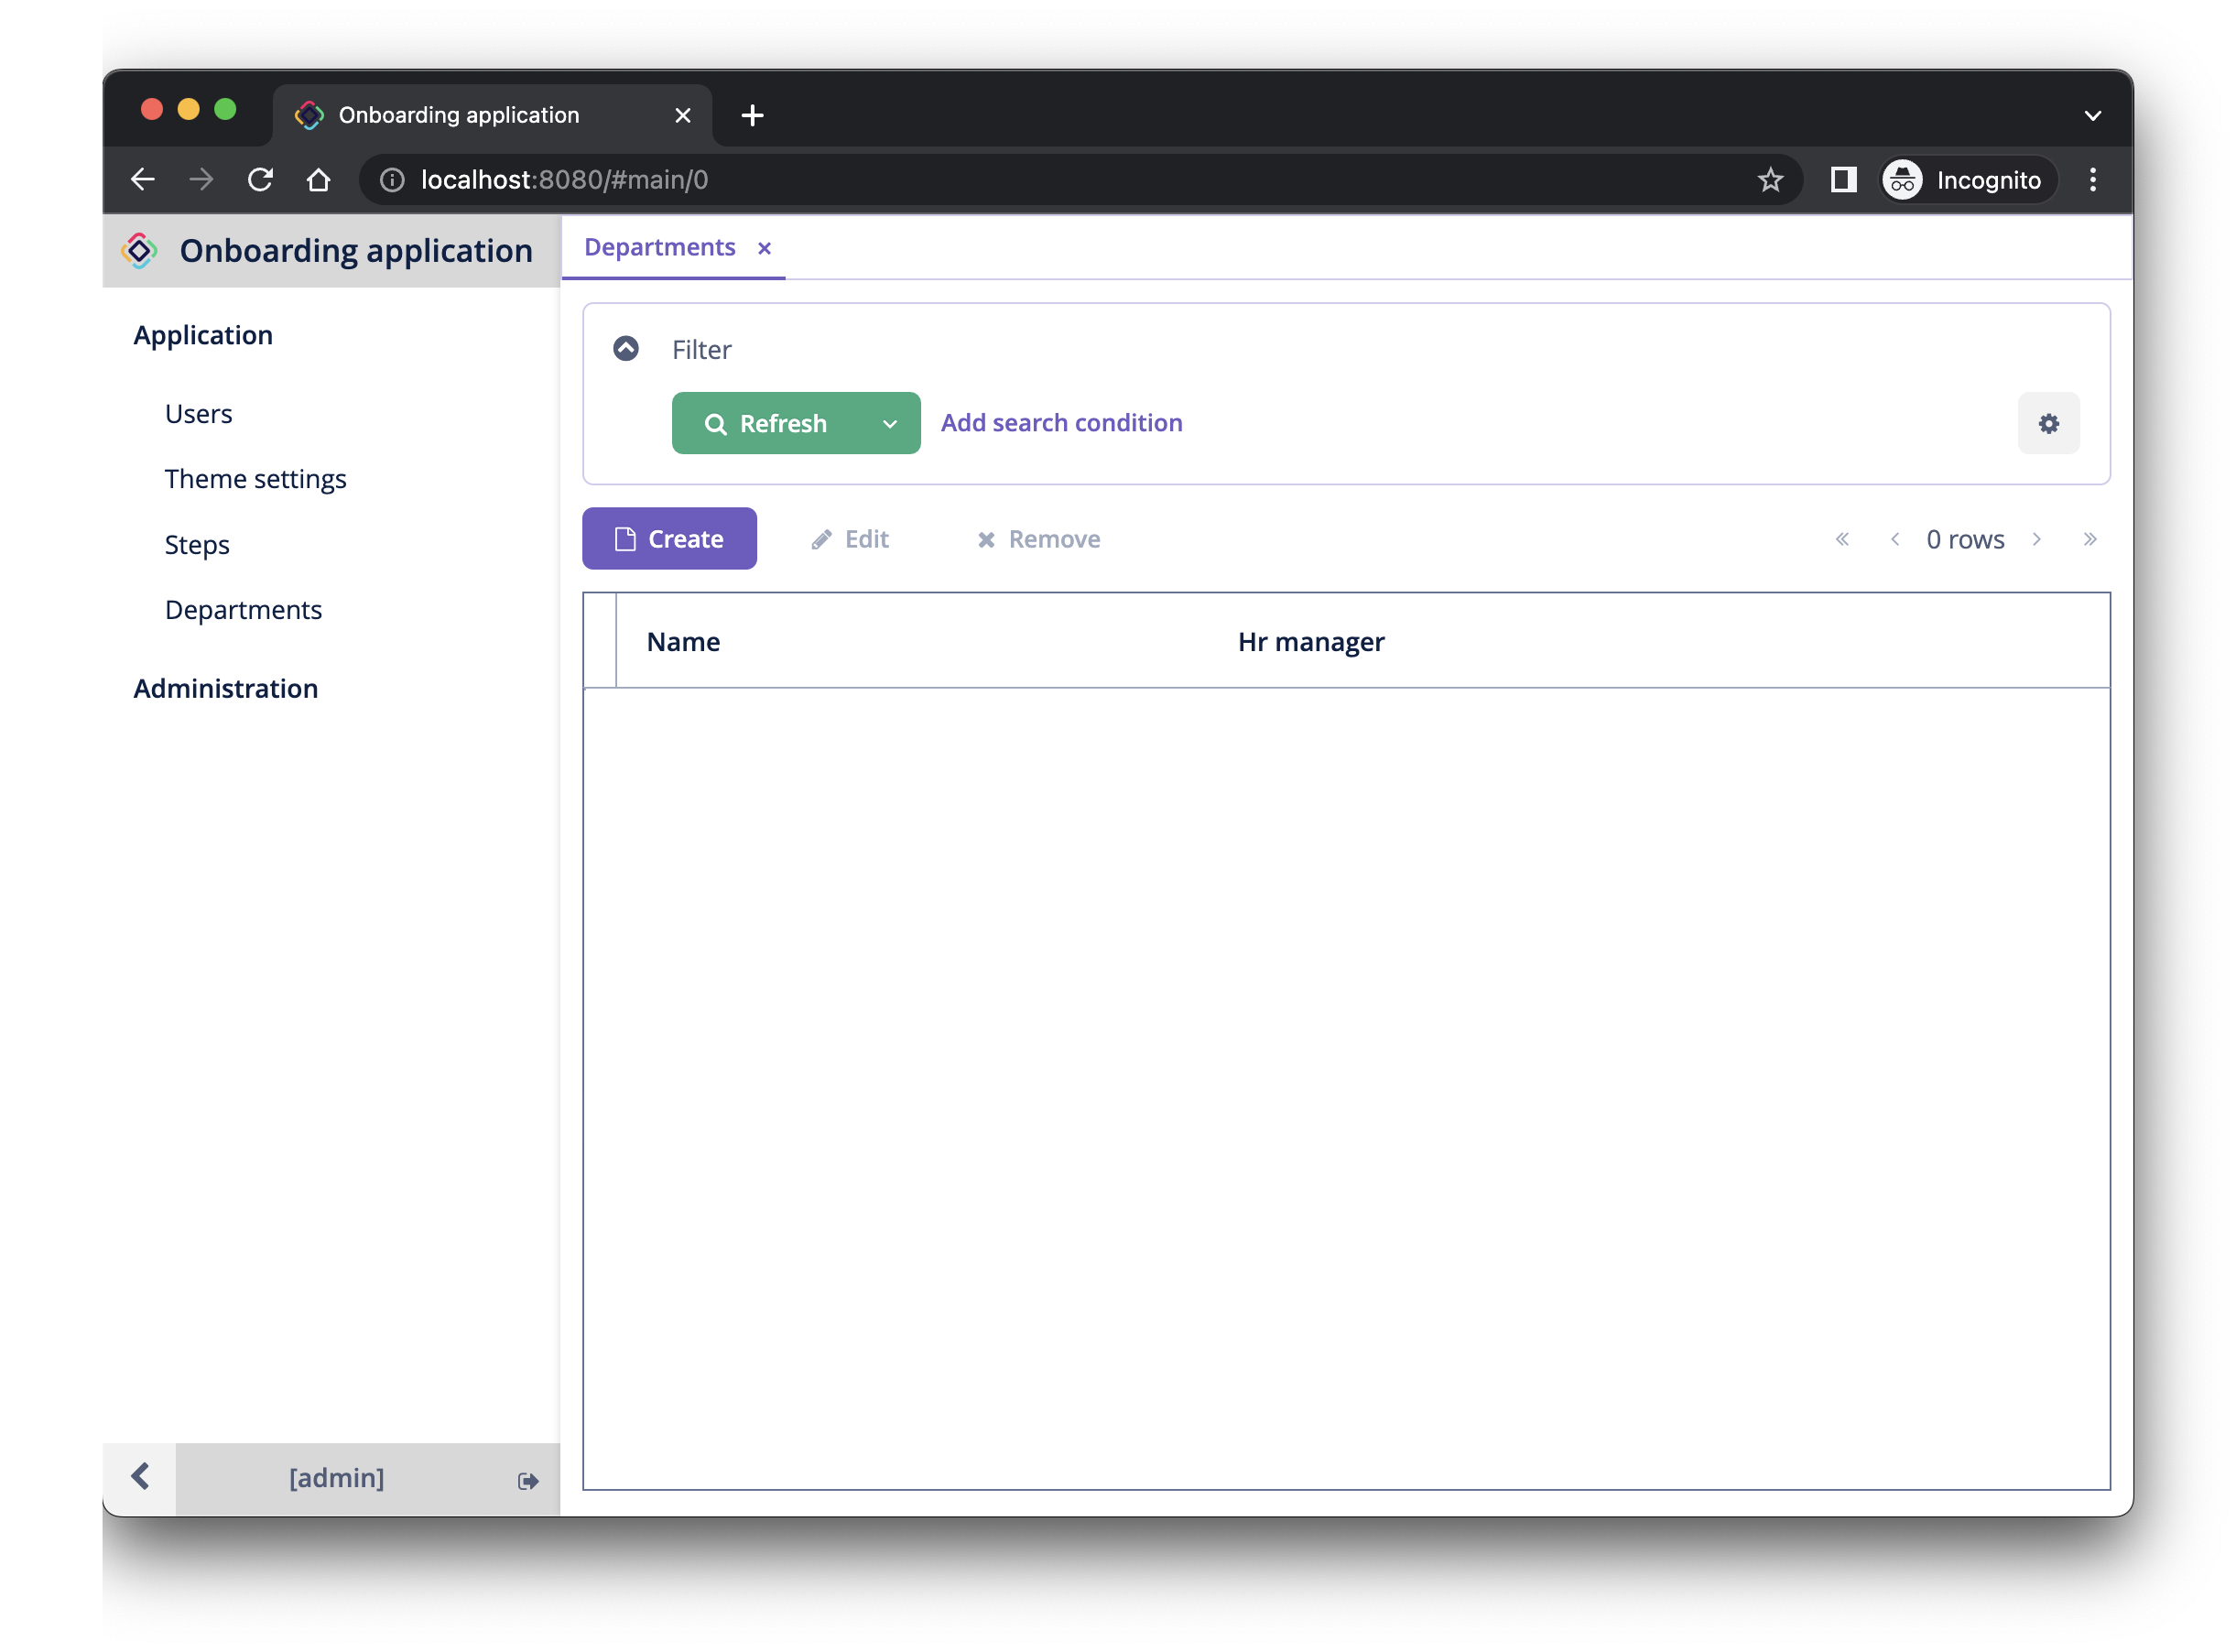
Click Create. The Department.edit screen will open:
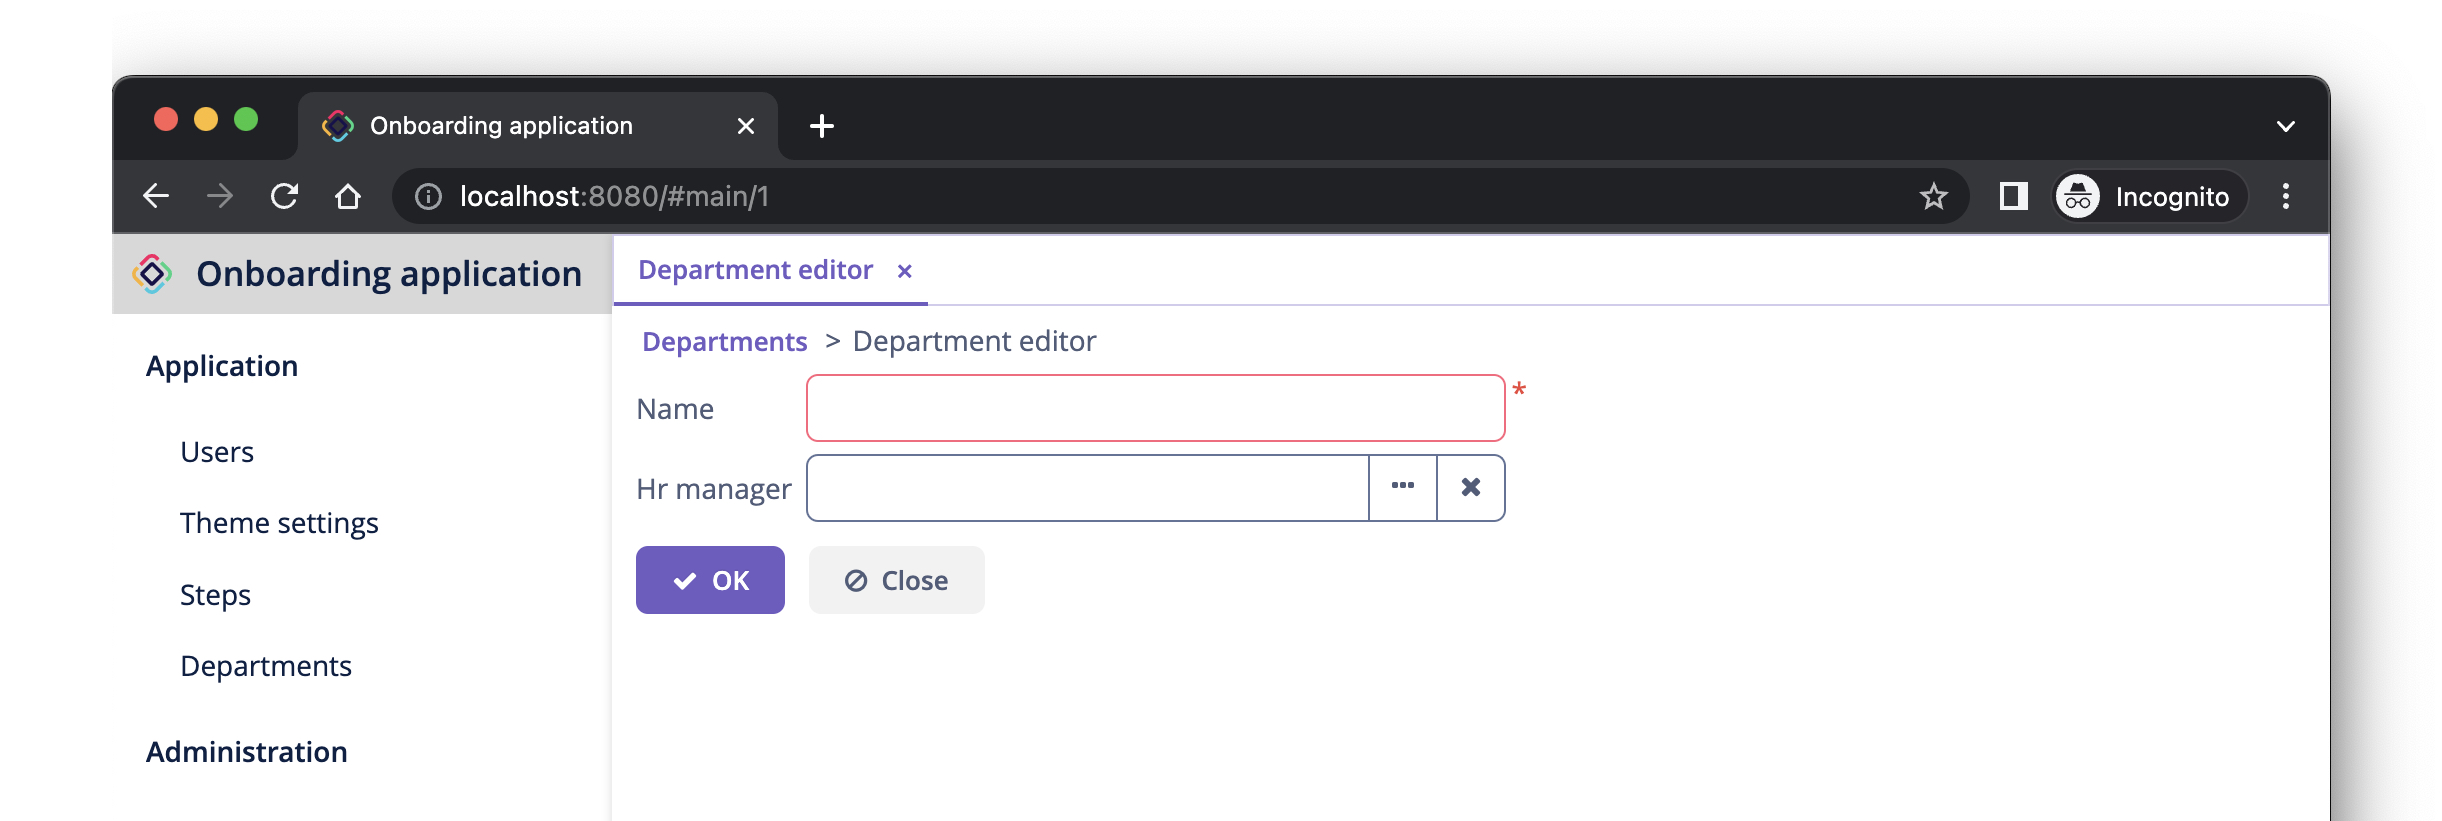
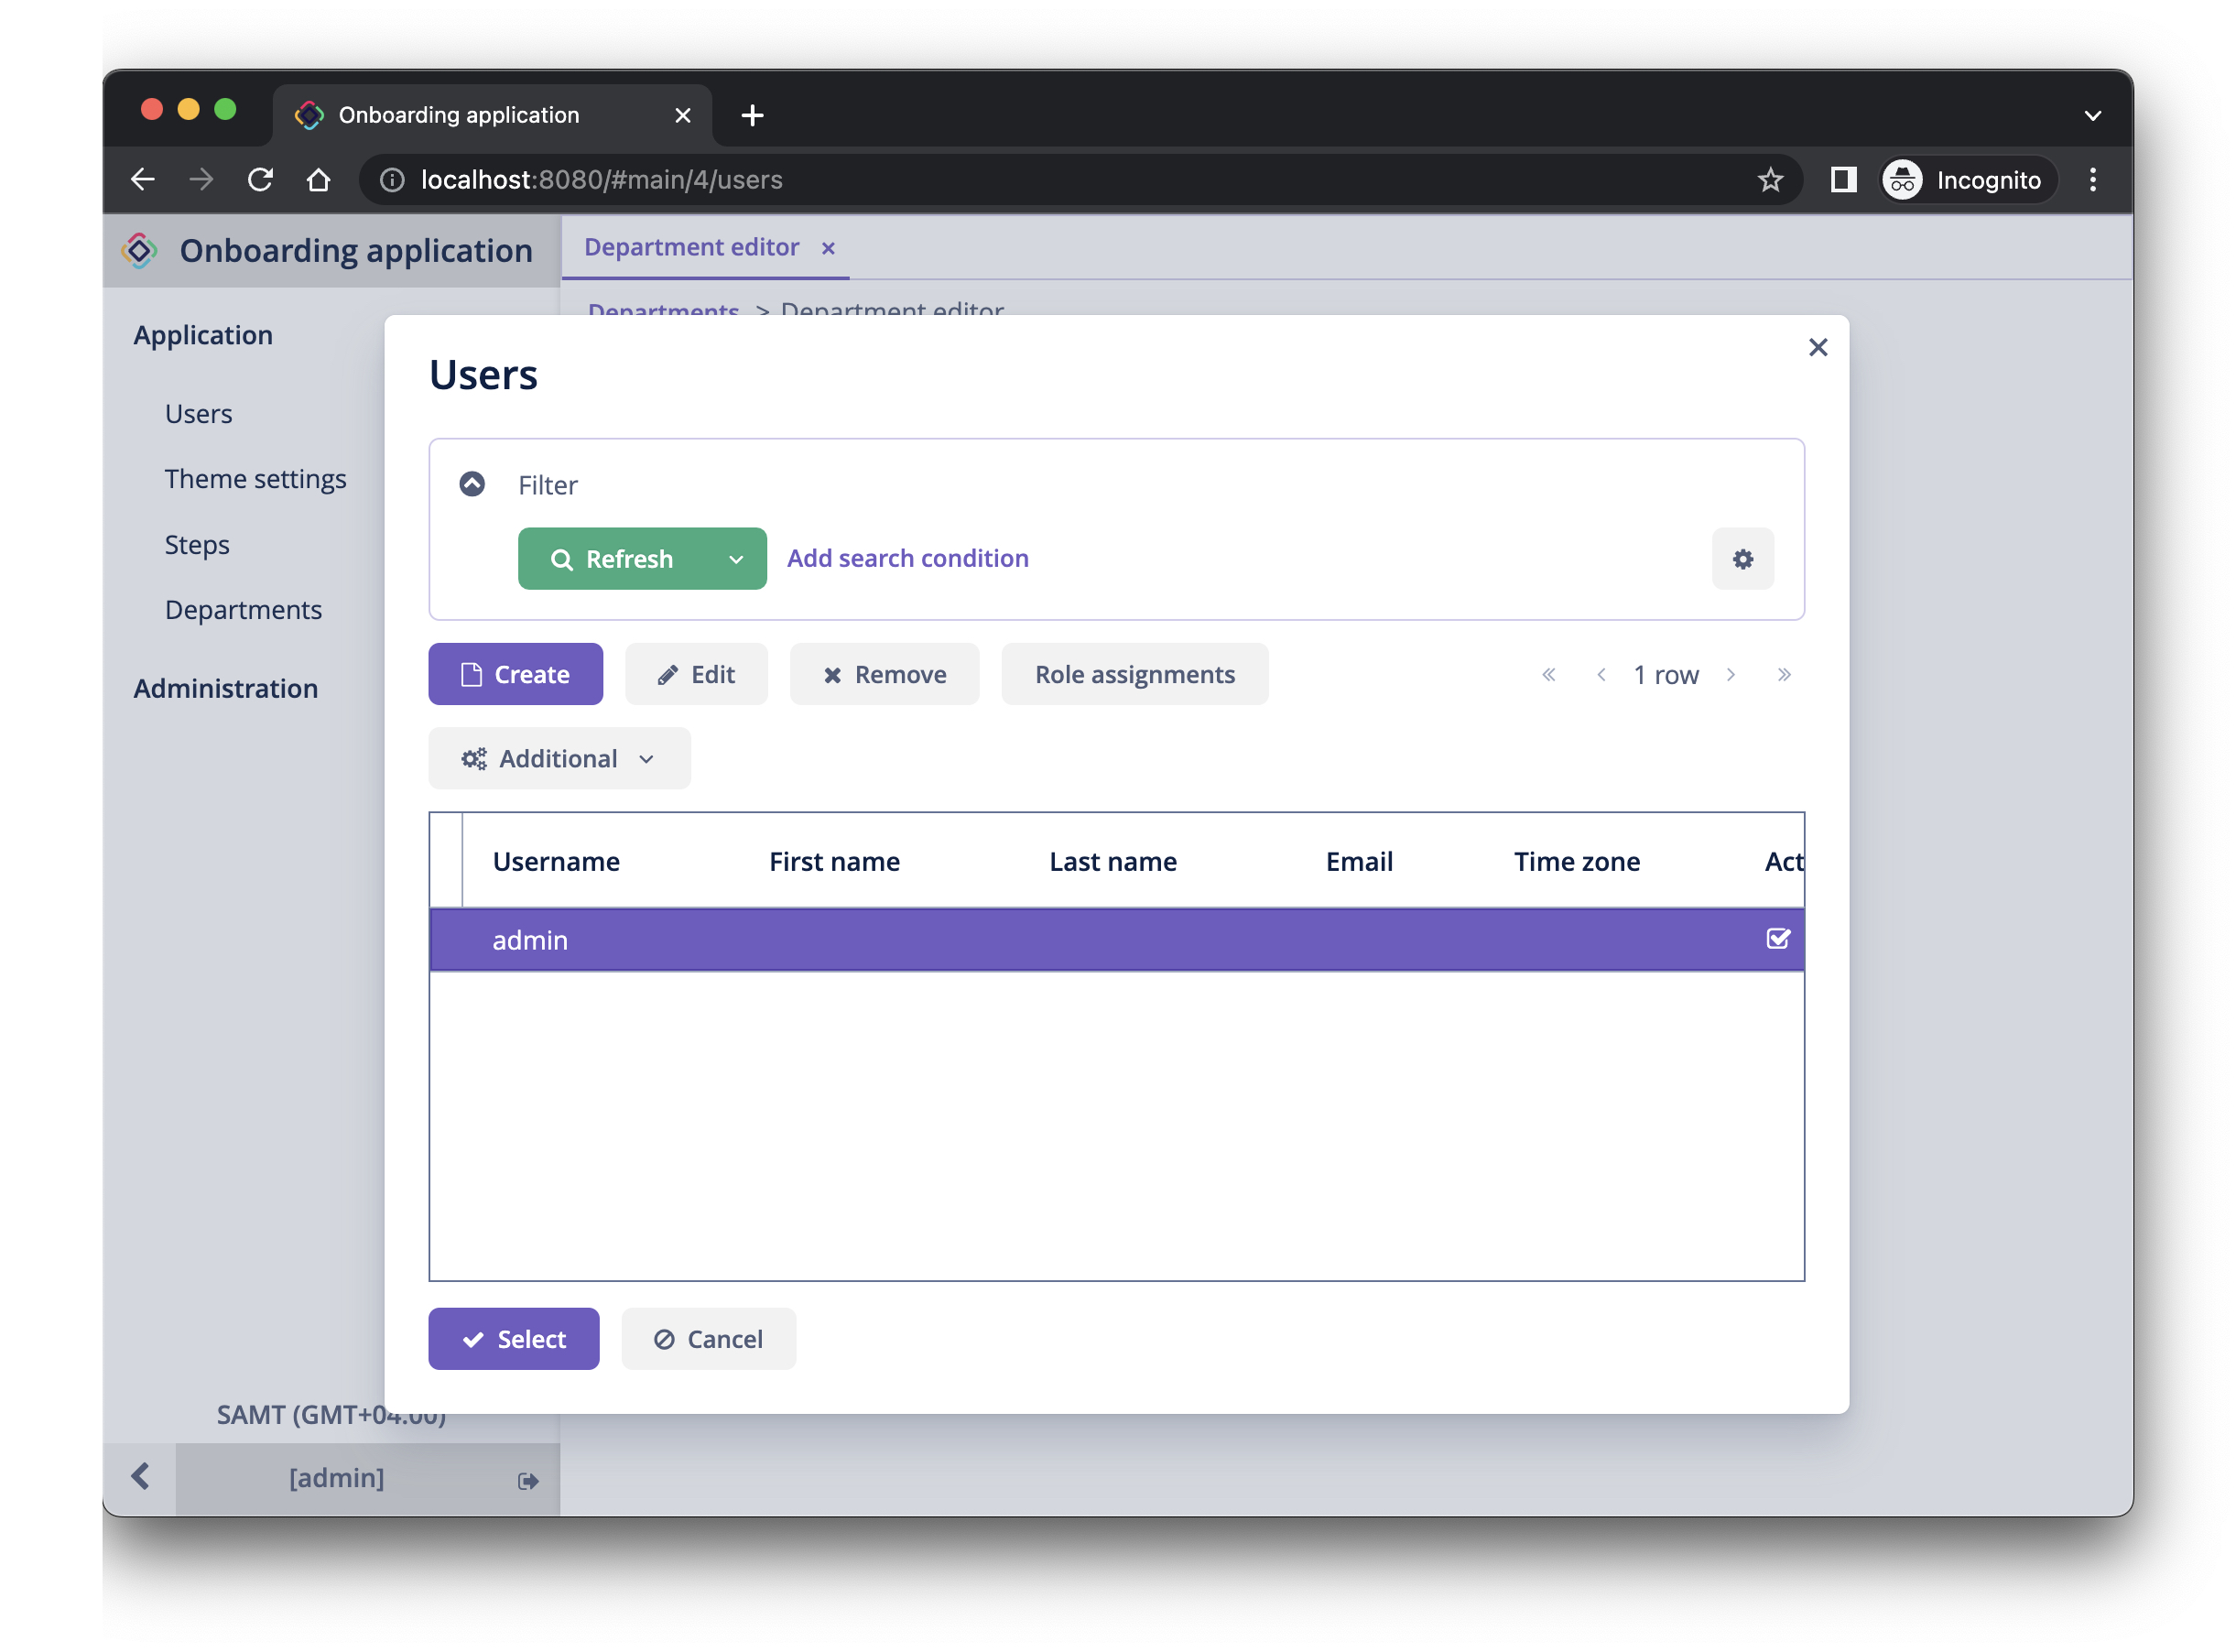
You can select an HR Manager for the department by clicking the ellipsis button in the picker field. The users browse screen will open over the department editor, which will be indicated by the breadcrumbs. The Select button will become active when you select a row in the users table:
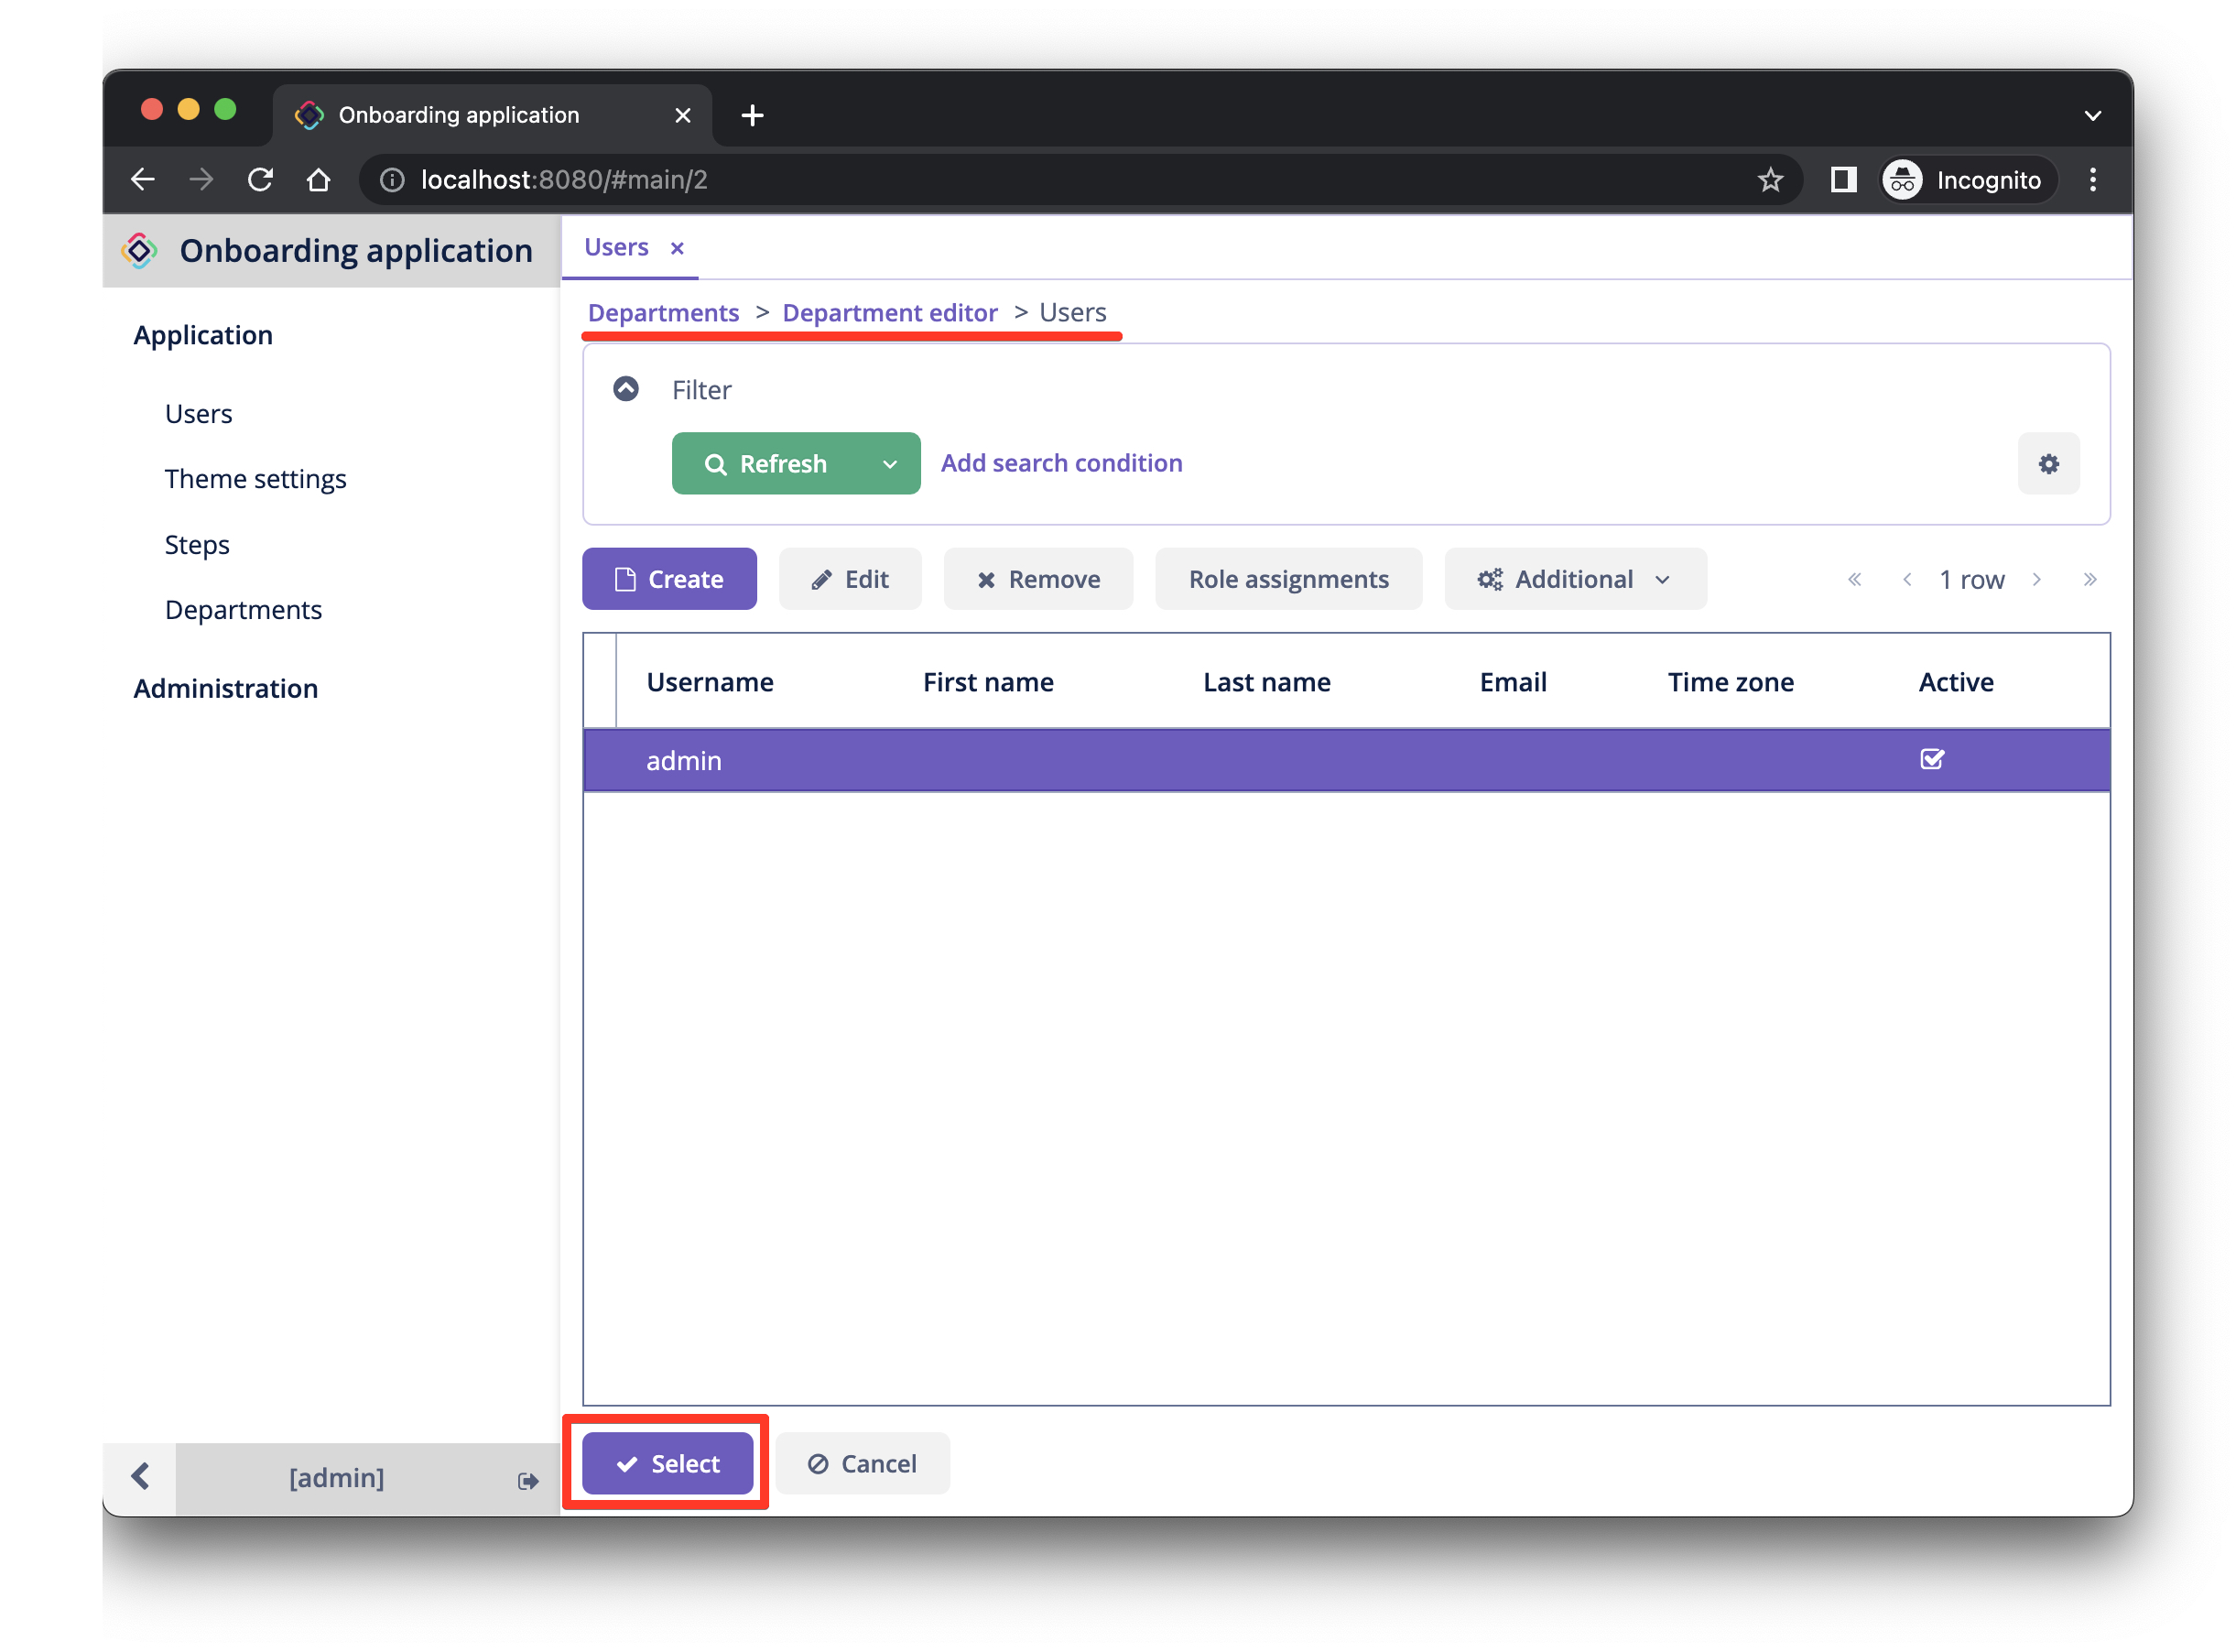
Select a user and click Select. The user will be displayed in the picker field:

Click OK. The referenced user will be displayed in the table too:
Observing the Instance Name
You may wonder why the picker field and the table show the [admin] string for the selected user?
Jmix has a concept of instance name: a human-readable text that represents an entity instance. It can be defined for any entity using the @InstanceName annotation on a field or a method.
The User entity generated by the project template has the following method defining the instance name:
public class User implements JmixUserDetails, HasTimeZone {
    // ...

    @InstanceName
    @DependsOnProperties({"firstName", "lastName", "username"})
    public String getDisplayName() {
        return String.format("%s %s [%s]", (firstName != null ? firstName : ""),
                (lastName != null ? lastName : ""), username).trim();
    }
So when the firstName and lastName are empty, the User instance name is username in square brackets, which is what you see in the application at the moment.
The Studio entity designer automatically generates the @InstanceName annotation if it encounters an appropriately named attribute: name, description, etc. For example, your Department entity has @InstanceName on its name attribute:
public class Department {
    // ...

    @InstanceName
    @Column(name = "NAME", nullable = false)
    @NotNull
    private String name;
So the department’s name will be displayed in UI if you use a department as a reference in another entity. You will see it later in the tutorial.
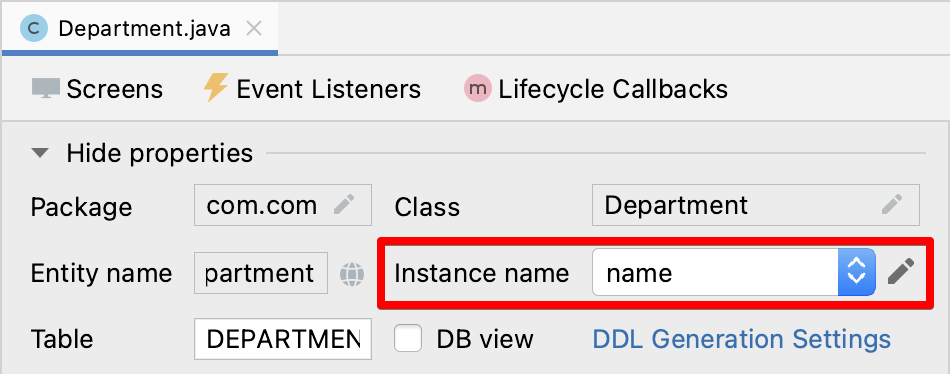
The entity designer also helps you to define the instance name manually. You can select an attribute for it or generate a method using the Instance name field and the button next to it:
Simple UI Customizations
The automatically generated CRUD UI for departments looks acceptable, but there are some rough edges that should be fixed.
Changing Attribute Caption
Perhaps you have noticed that the generated caption for the hrManager attribute is not quite correct: it reads Hr manager. Let’s change it to HR Manager.
Select the hrManager attribute in the entity designer and click the globe ( ) button next to the attribute name:
The Localized Message dialog will appear:
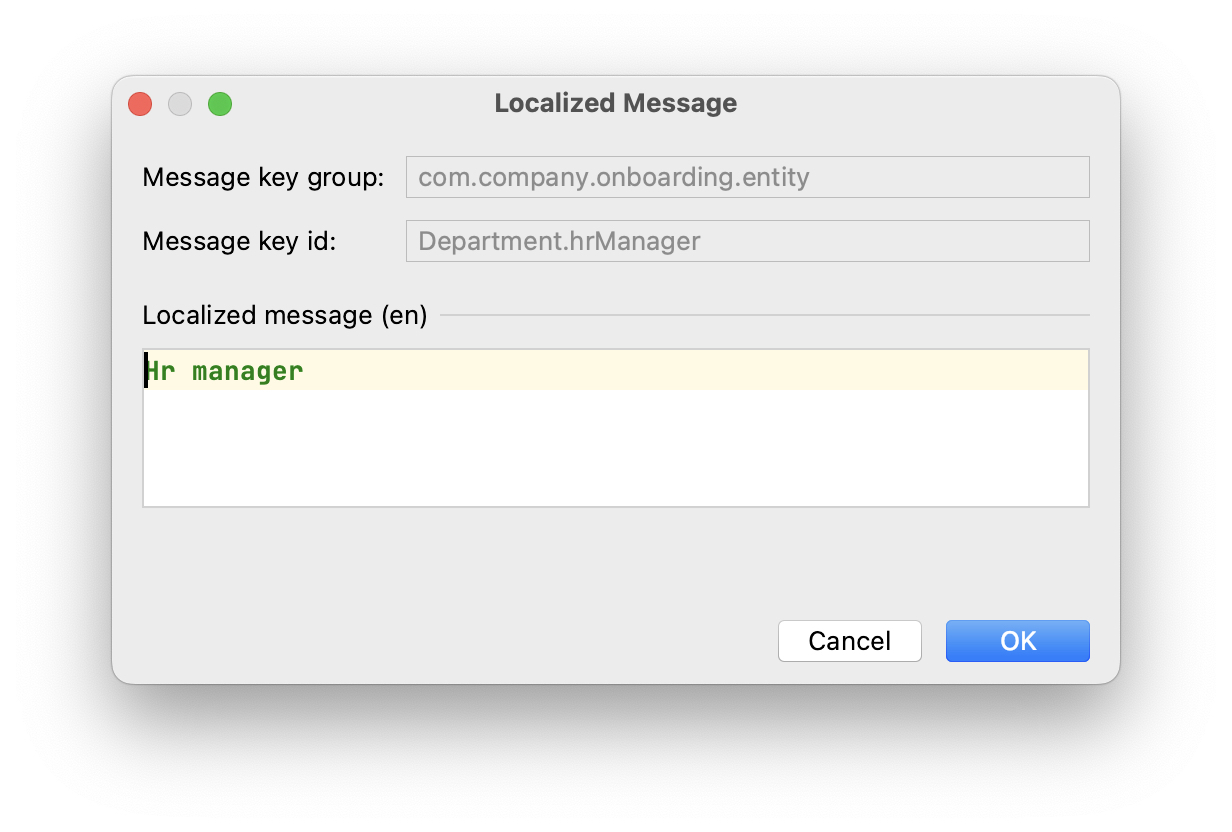
Change the text and click OK.
You can view and edit all messages of your project if you double-click the User Interface → Message Bundle node in the Jmix tool window. The message that you have just changed is highlighted below:
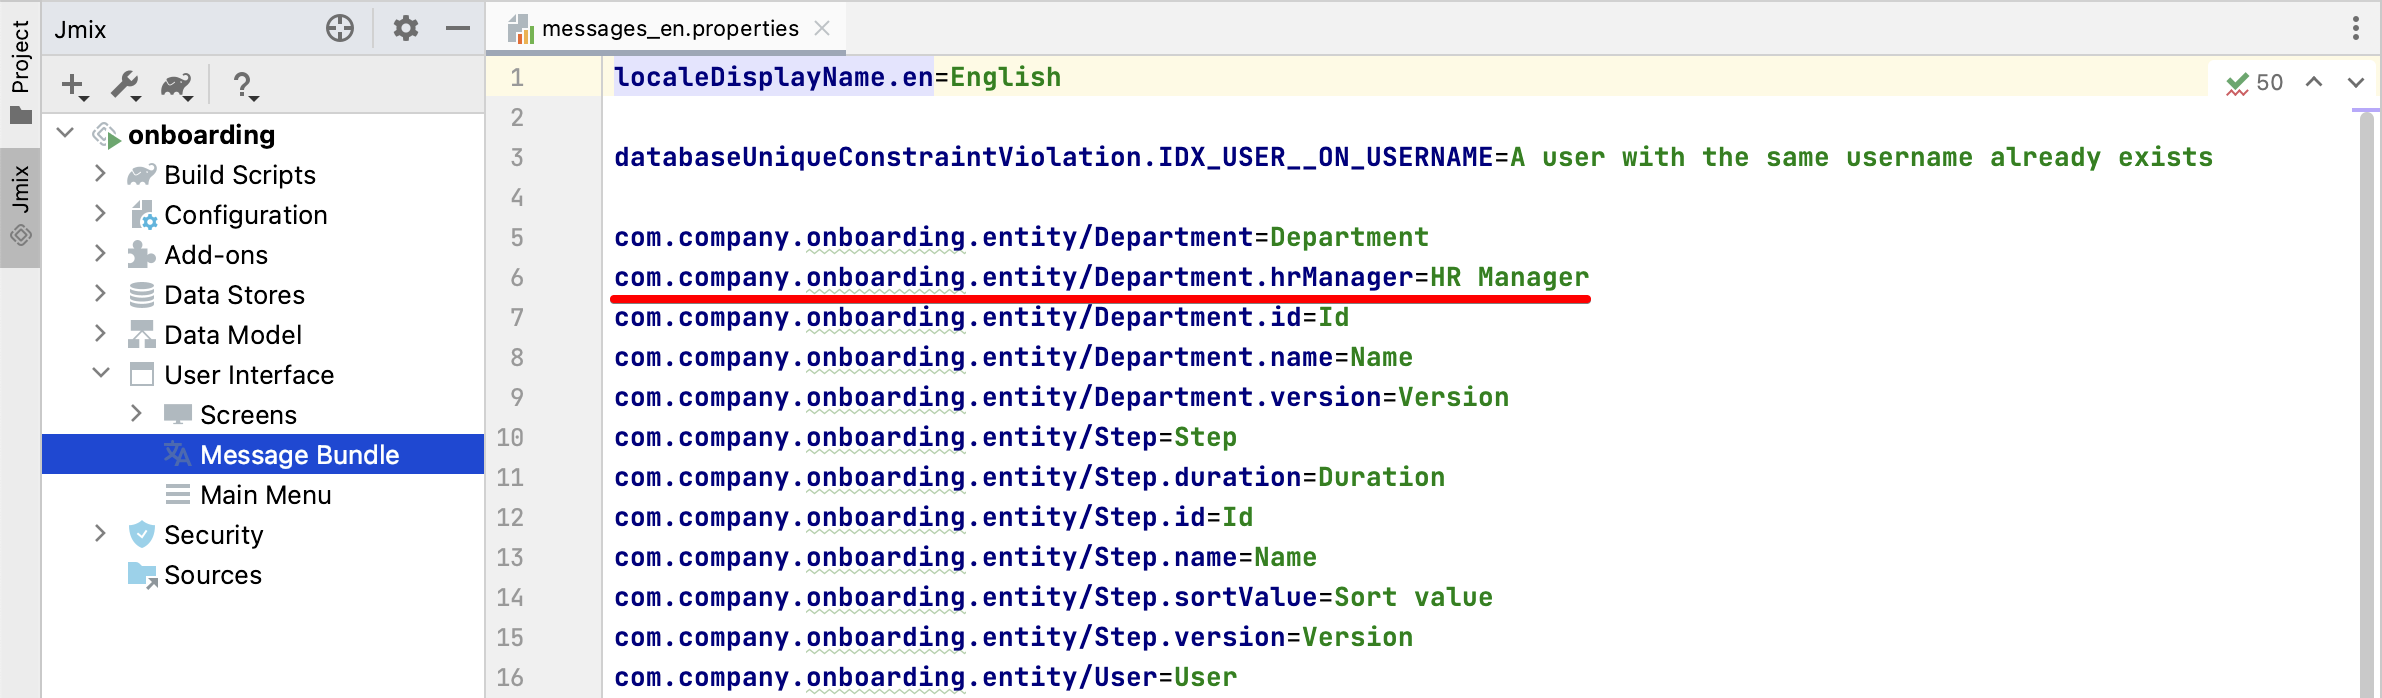
Switch to the application running in your web browser. Close the department CRUD screens and open them again. You will see the new caption for the hrManager attribute.
|
Thanks to the Studio hot deploy feature, you don’t have to restart the application when making changes in the UI. Just save the changes in the IDE (press |
Customizing EntityPicker Actions
By default, when you click the ellipsis button of the HR Manager picker field, the screen for selecting a user completely covers the department editor. Let’s change the picker behavior to display the users screen in a dialog window.
Find department-edit.xml in the Jmix tool window and double-click it. The screen designer appears:
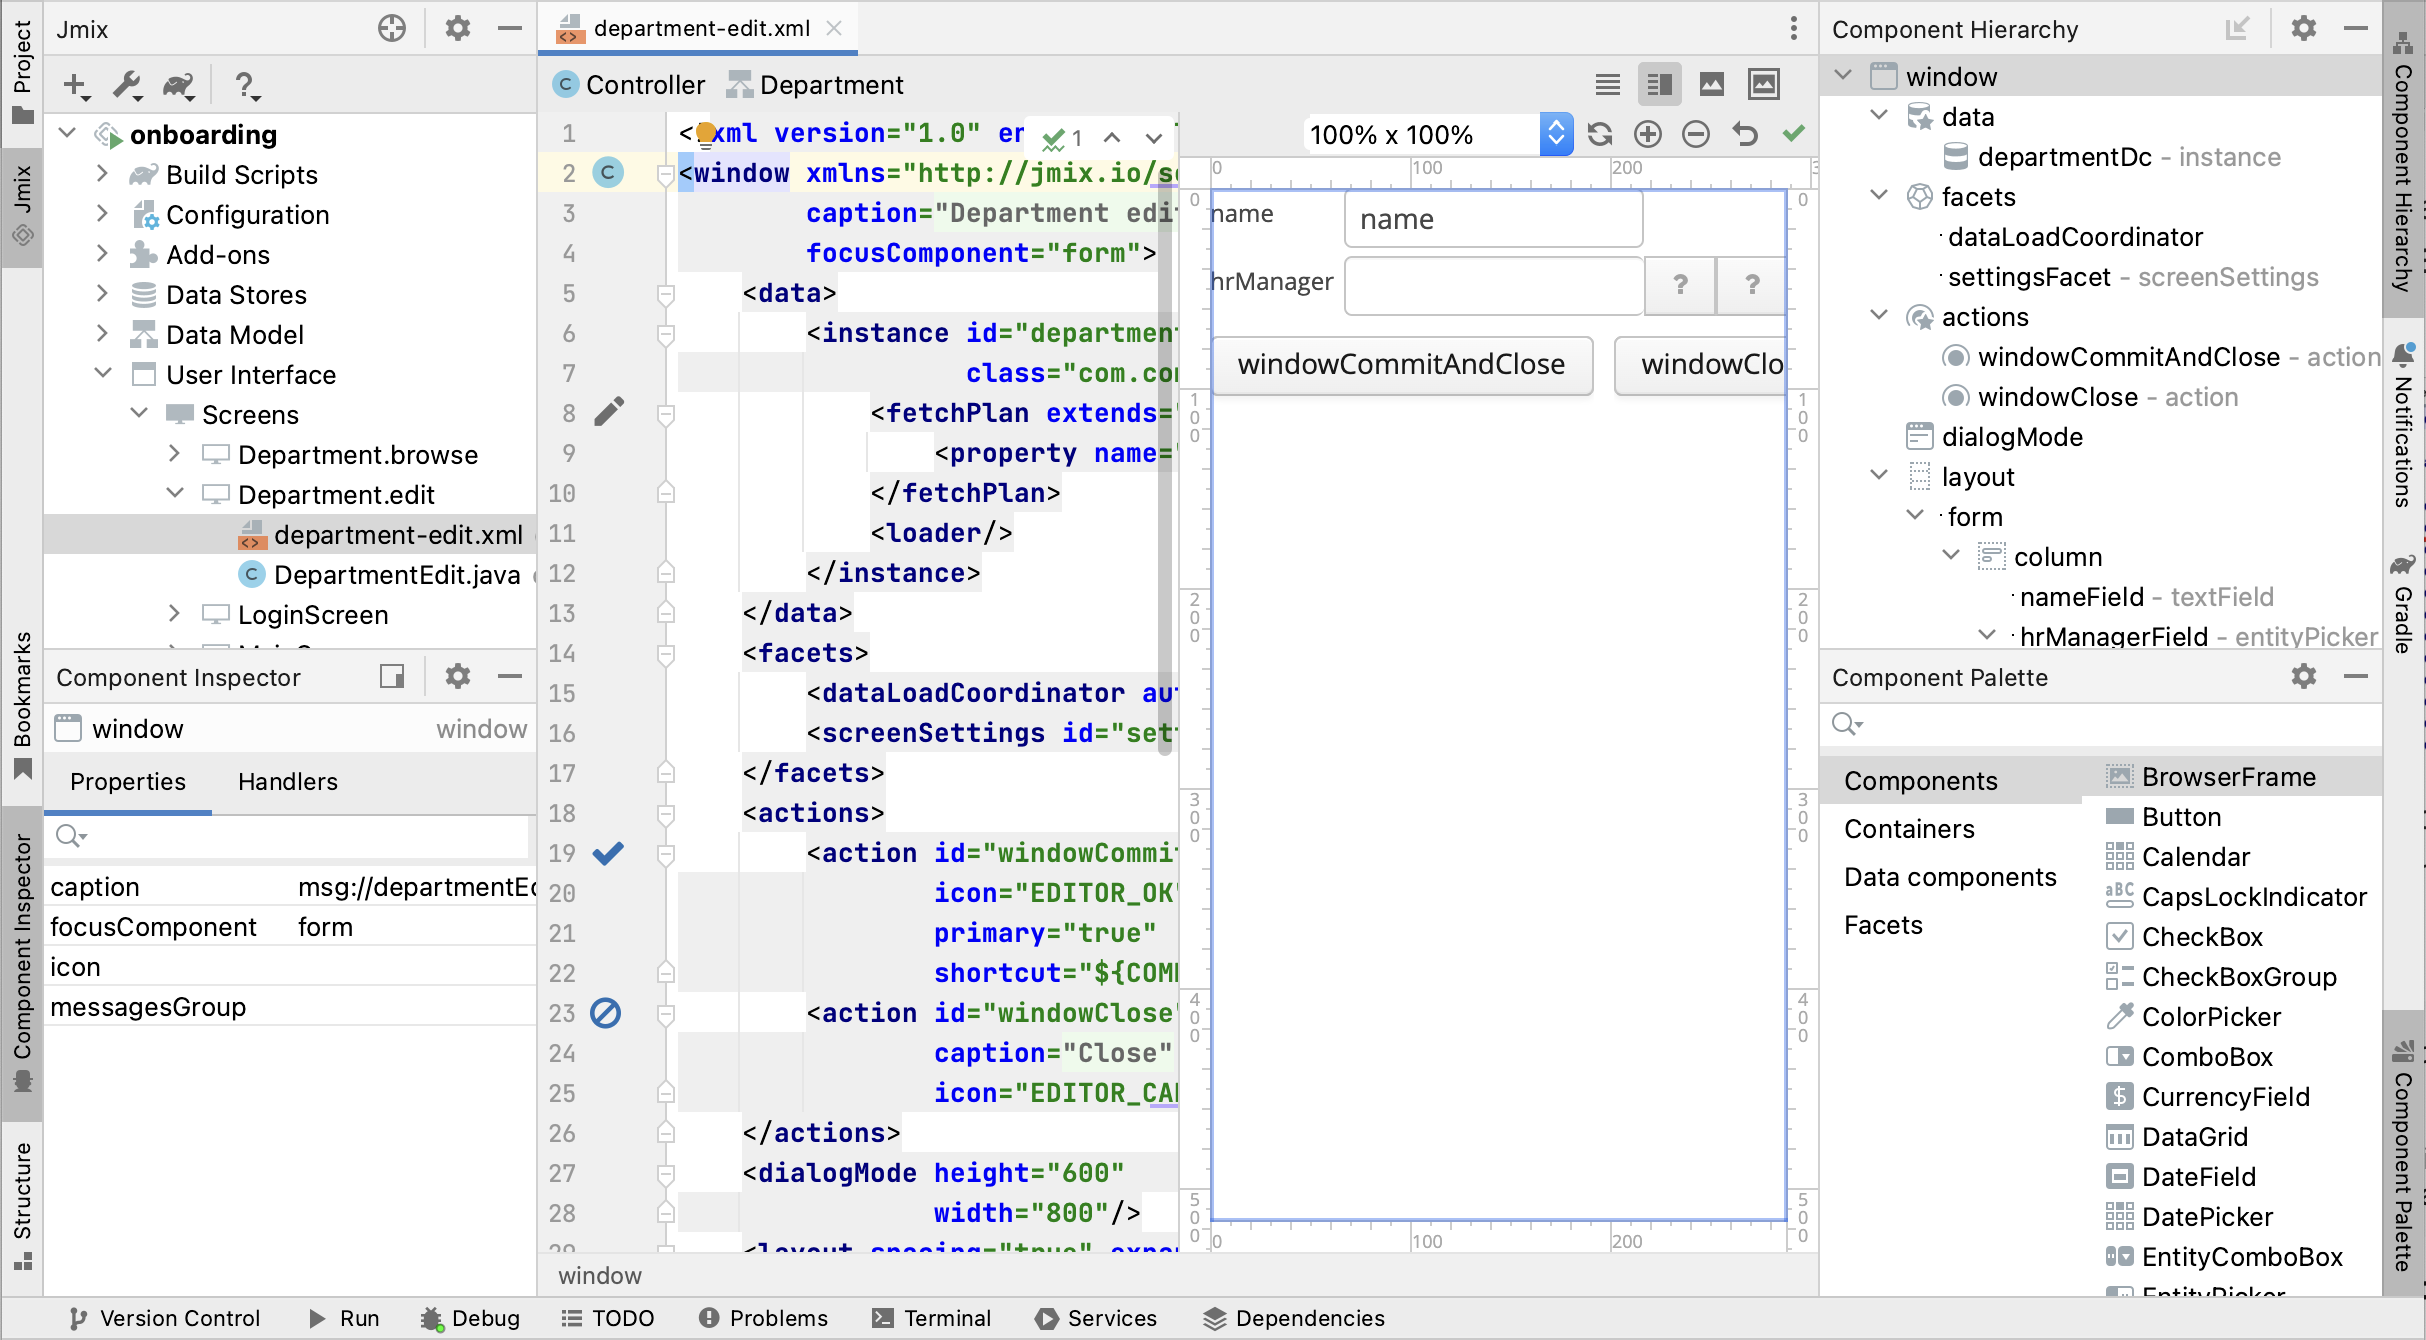
Depending on your display resolution, you may want to show only the XML editor or the preview at a time. Use the buttons on top of the editor panel to switch the mode:

Locate hrManagerField in the Component Hierarchy panel. The component will be selected in the preview, in the XML editor and in the Component Inspector panel on the left:
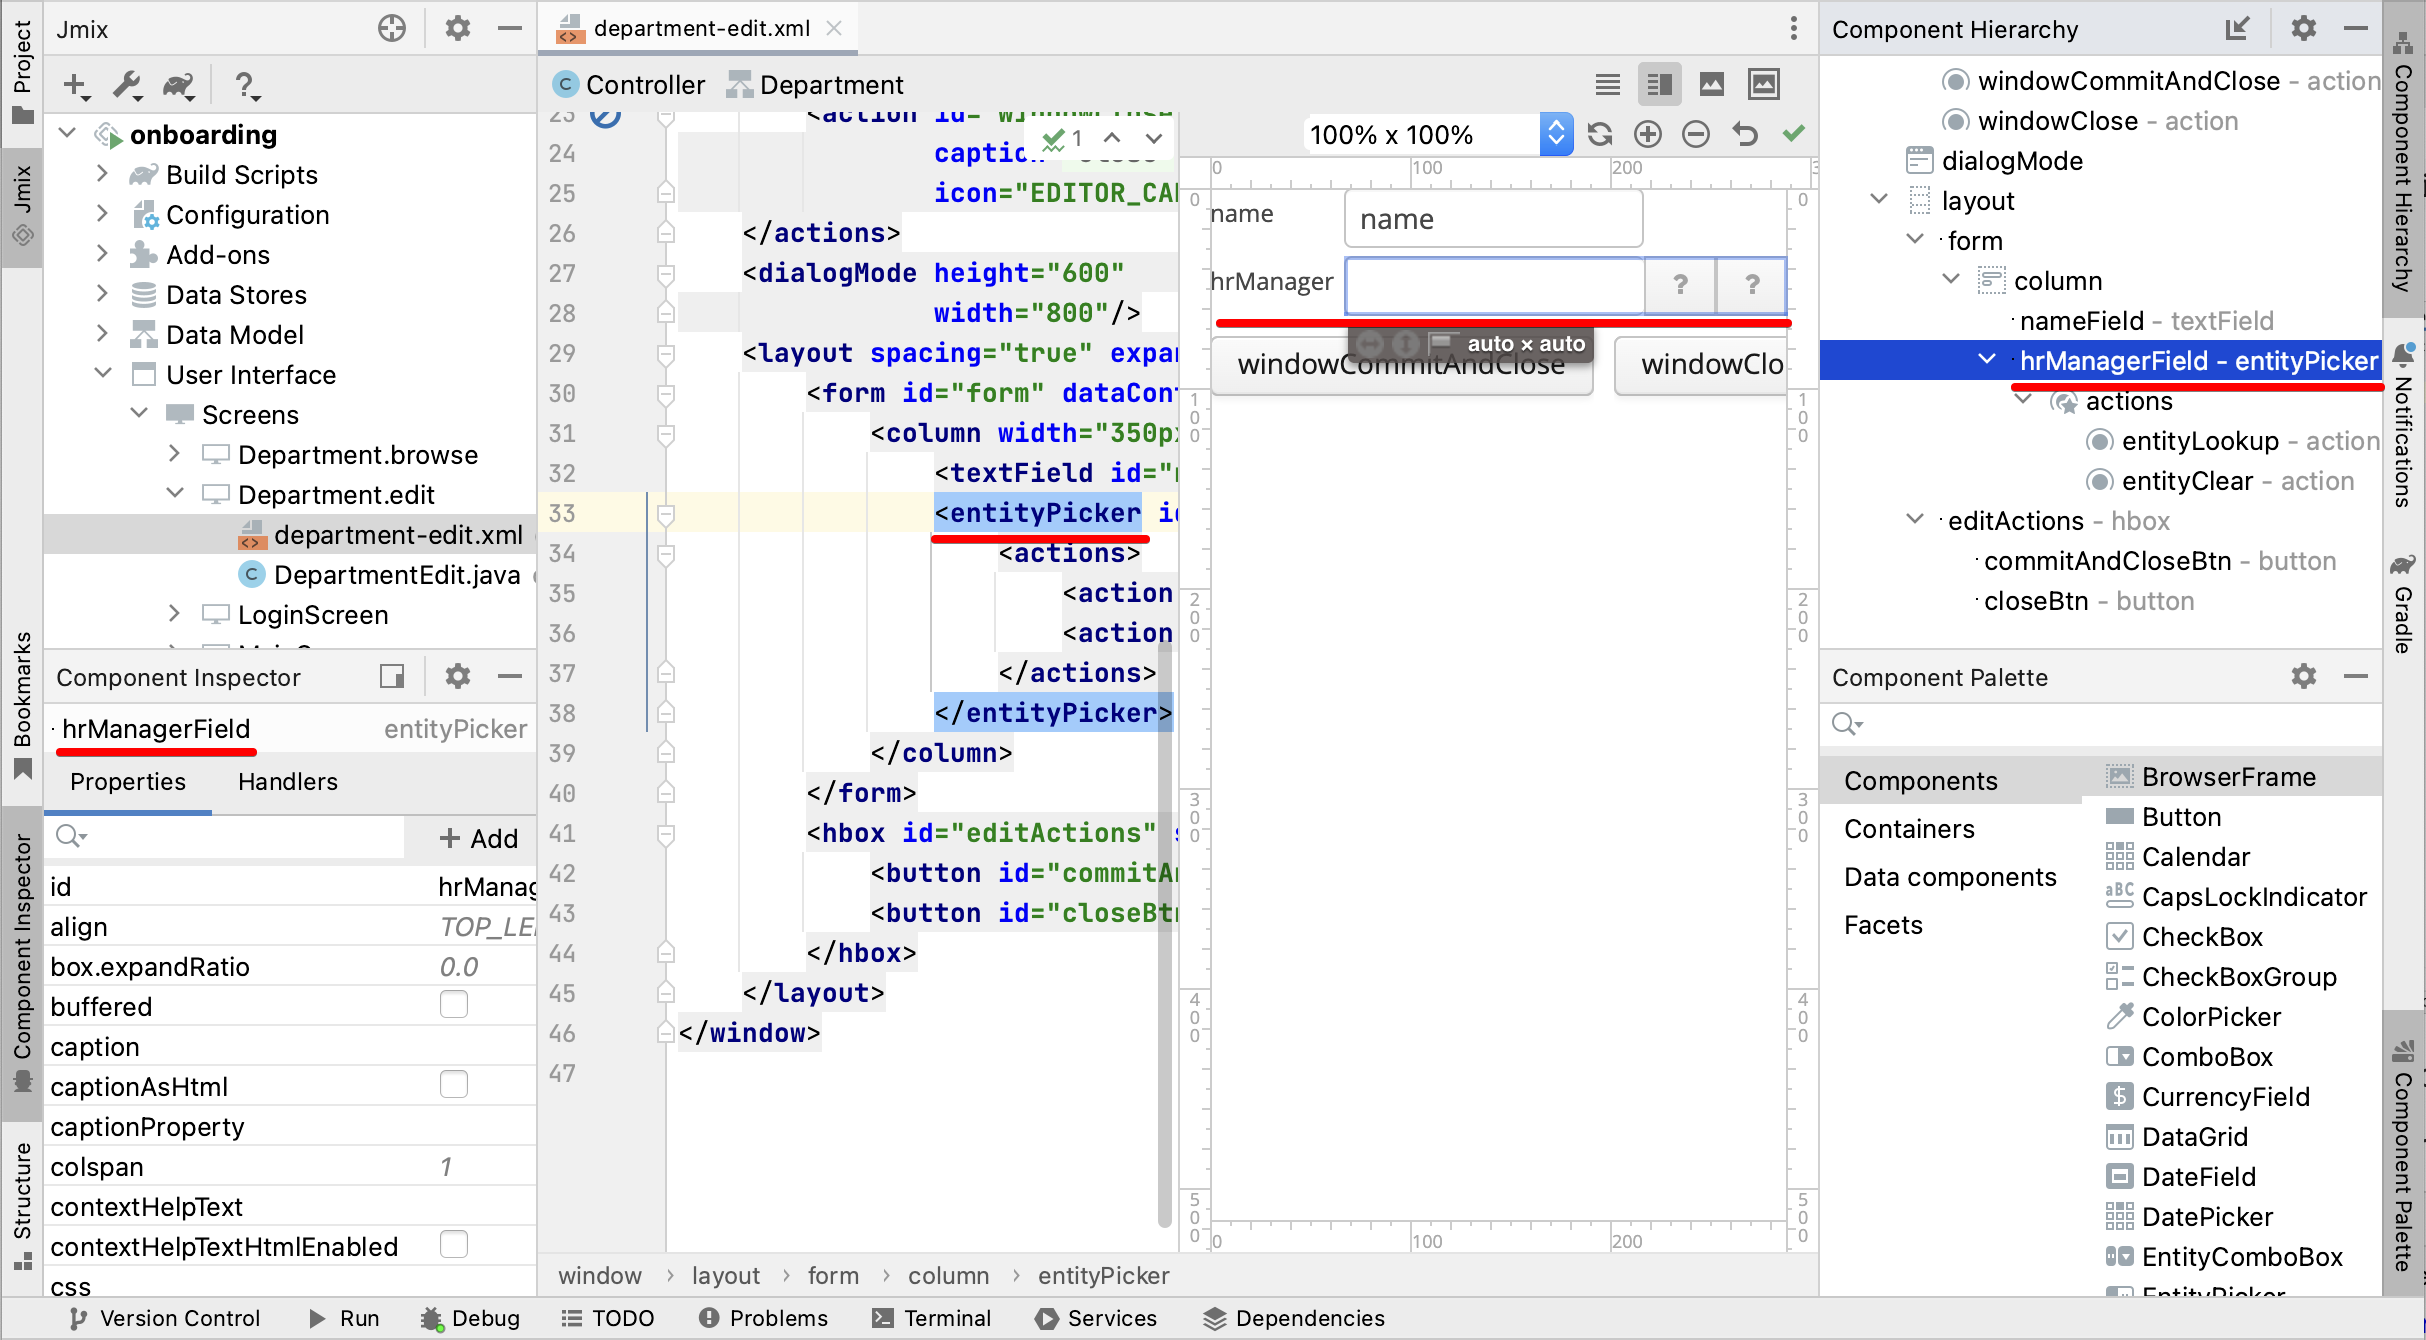
You can see that the entityPicker element has the actions nested element with two actions. Each action corresponds to a button of the picker field: the entityLookup action shows a screen for selecting the referenced entity, the entityClear action clears the current picker value.
The actions can be customized by specifying properties.
Select the entityLookup action in Component Hierarchy, then select the DIALOG value from the drop-down list of the openMode property in the Component Inspector:
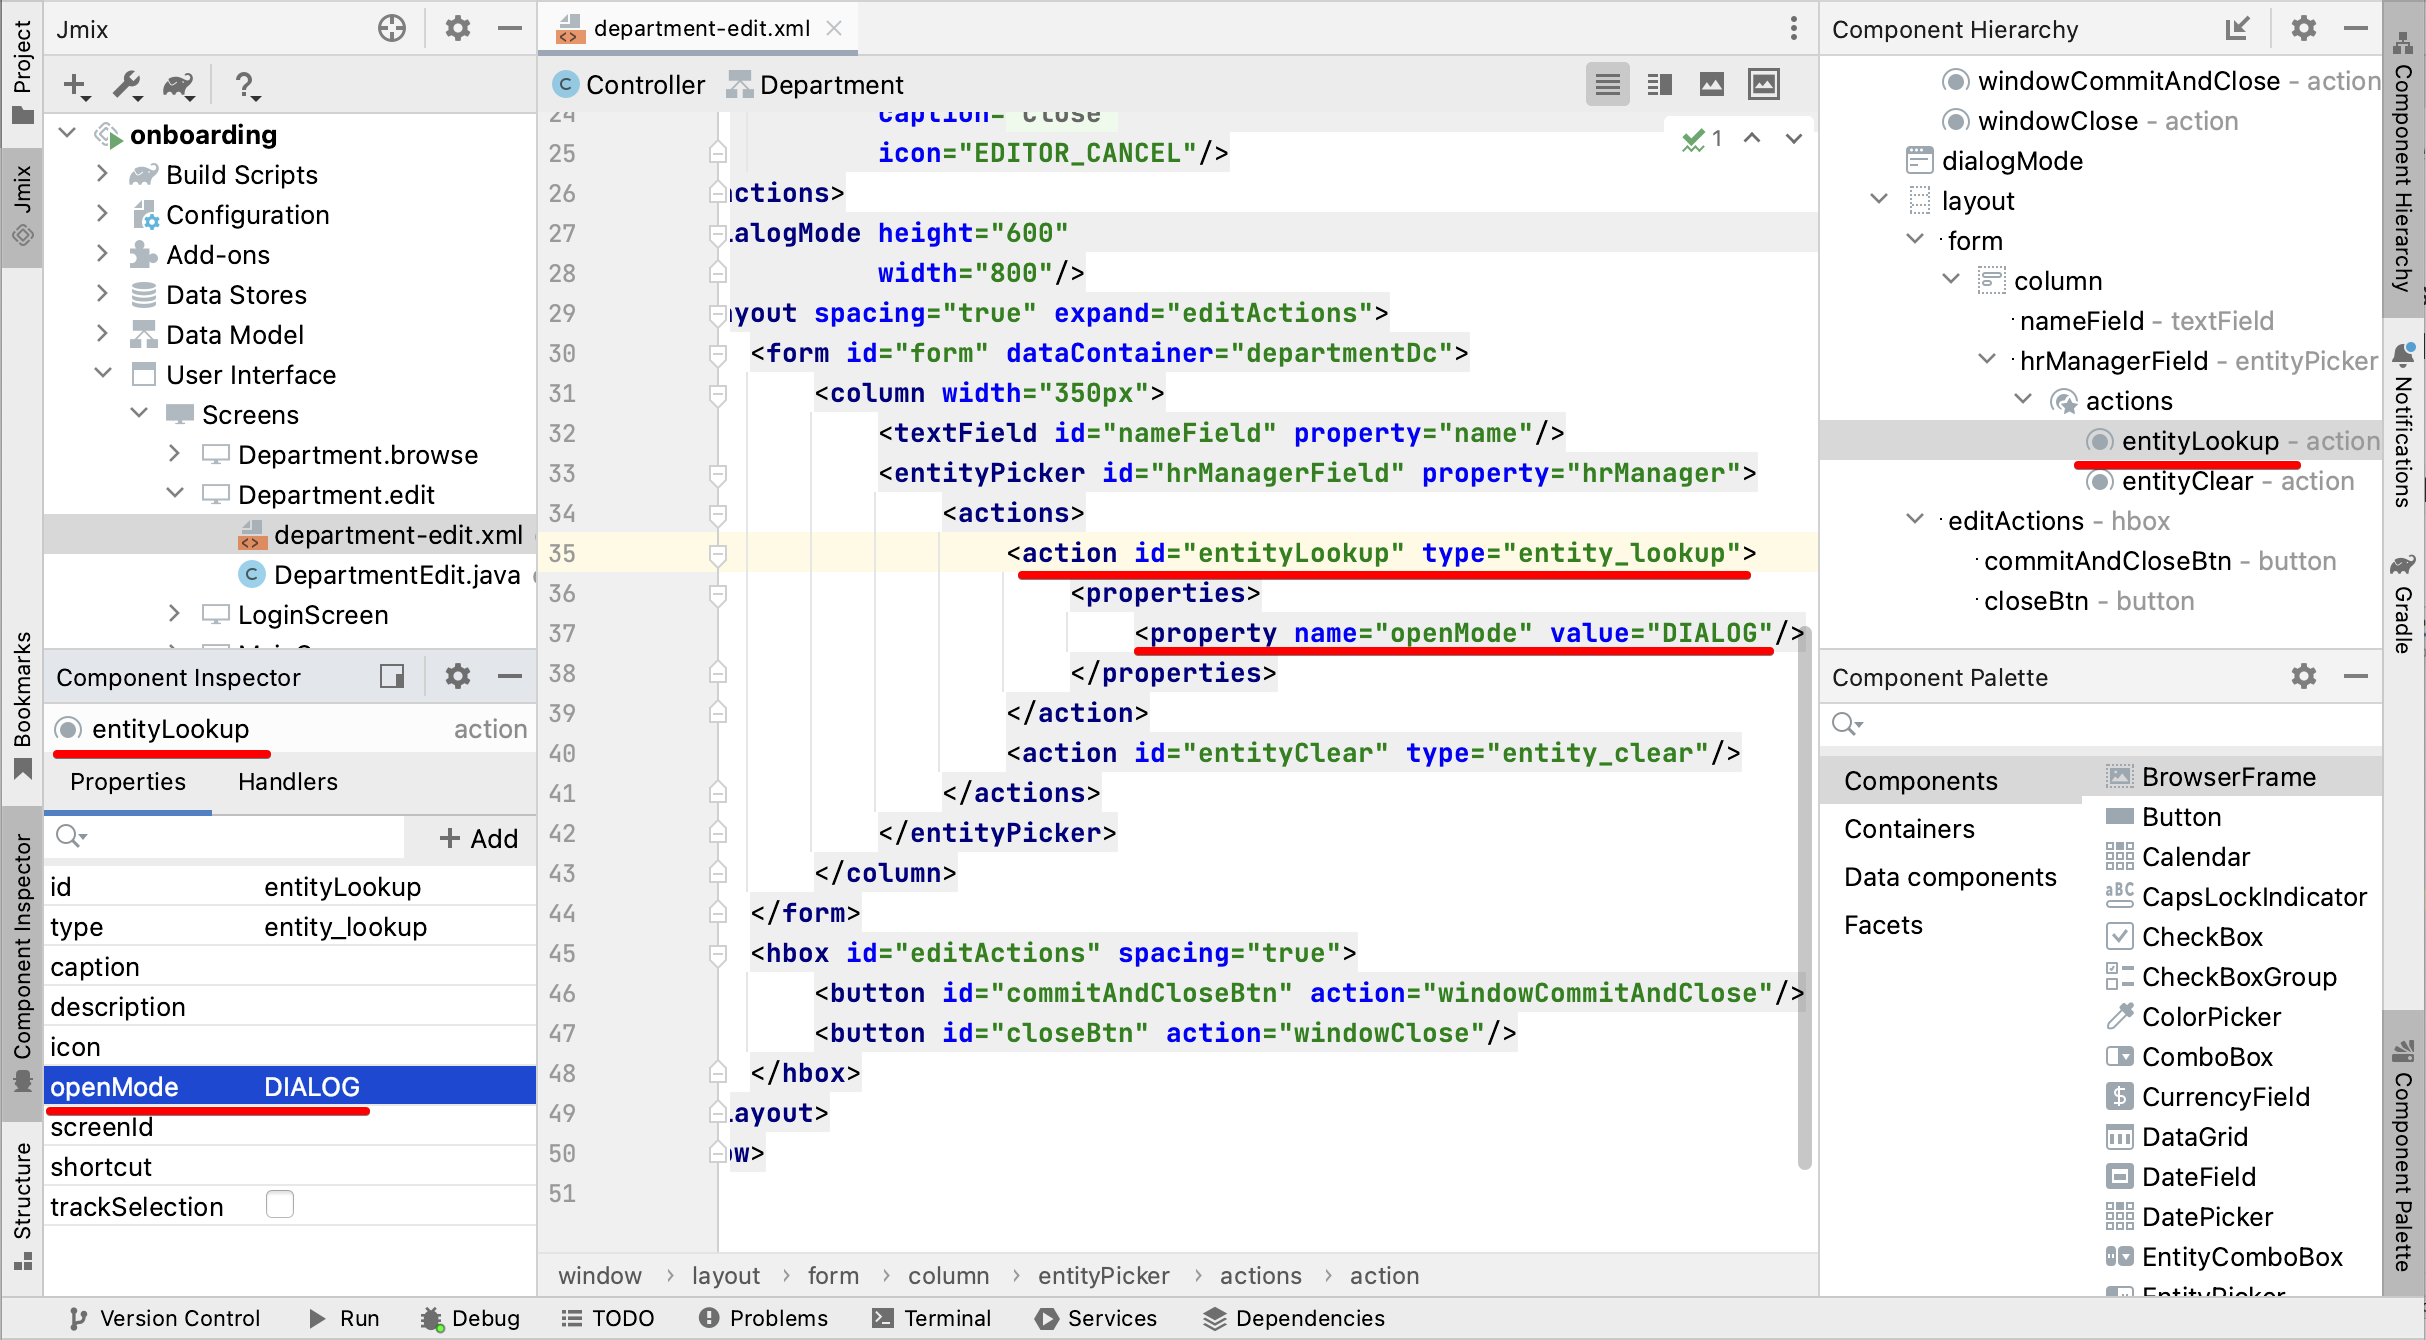
Your changes will be reflected in XML.
| It works in the opposite direction too. You can edit the XML directly and view the results in the designer panels and Preview. |
Switch to the running application and reopen the Department editor screen. Click the ellipsis button in the HR Manager field. The users lookup screen will open in the movable dialog:
Hiding ButtonsPanel
The set of buttons (Create, Edit, etc.) on the users lookup screen shown above looks excessive. If you think that these buttons are unnecessary when looking up related entities, you can hide them when the users browser is opened for lookup.
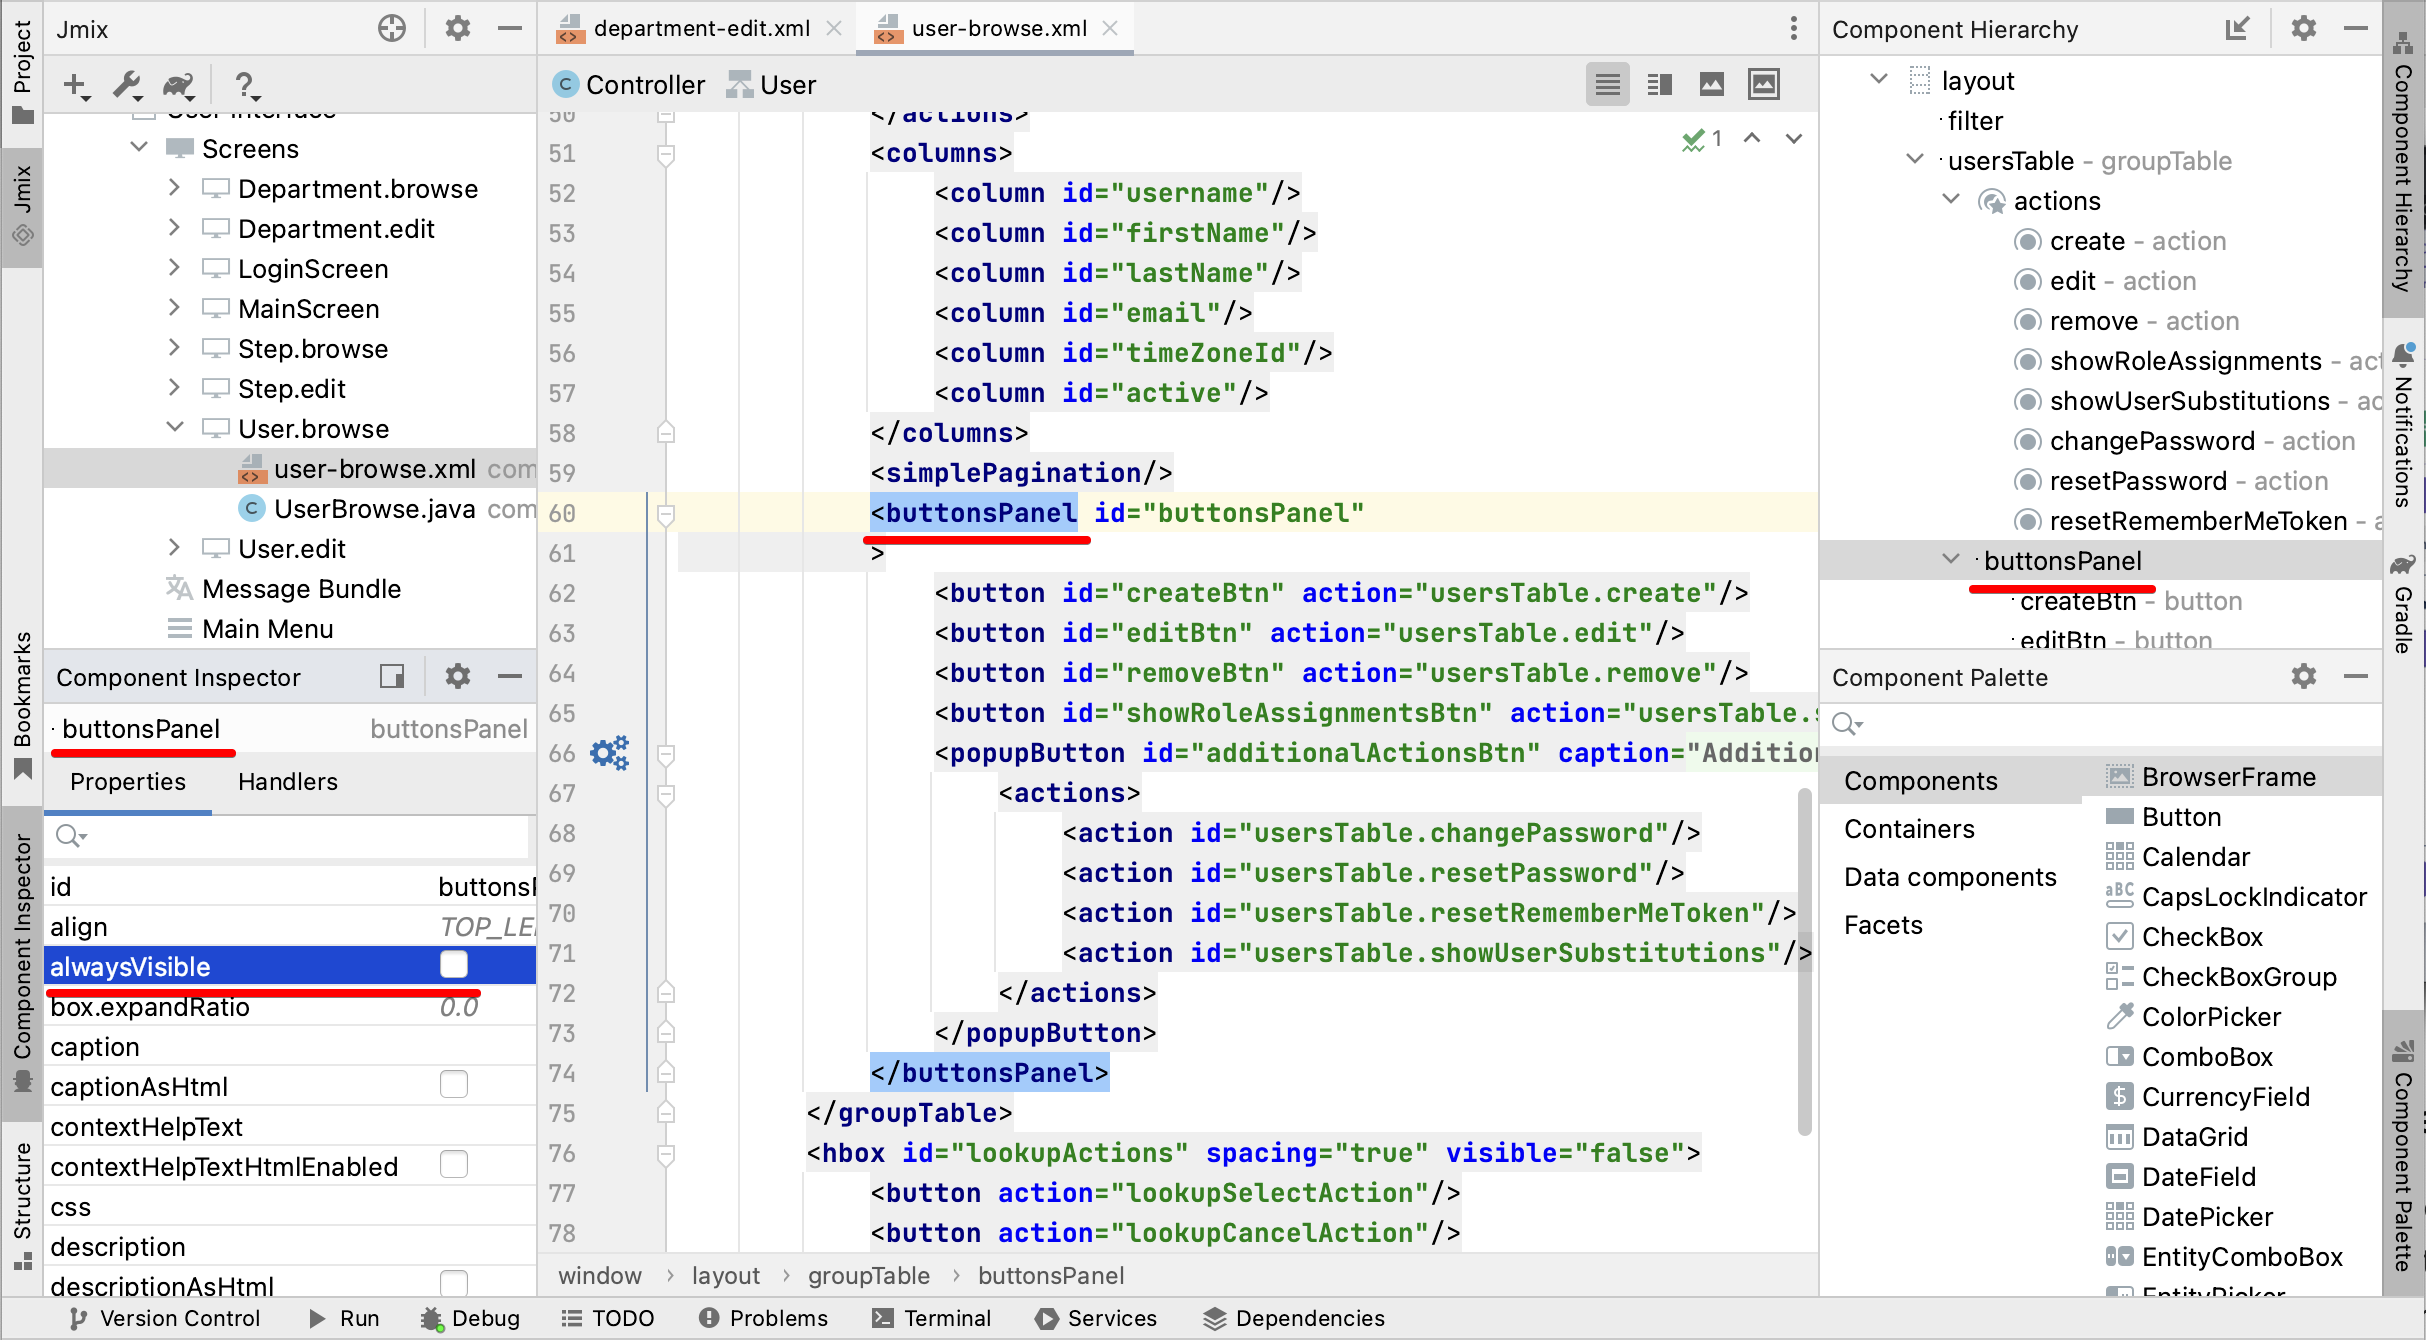
Find user-browse.xml in the Jmix tool window and double-click it.
Locate buttonsPanel in the Component Hierarchy panel and unselect the alwaysVisible property checkbox in the Component Inspector:
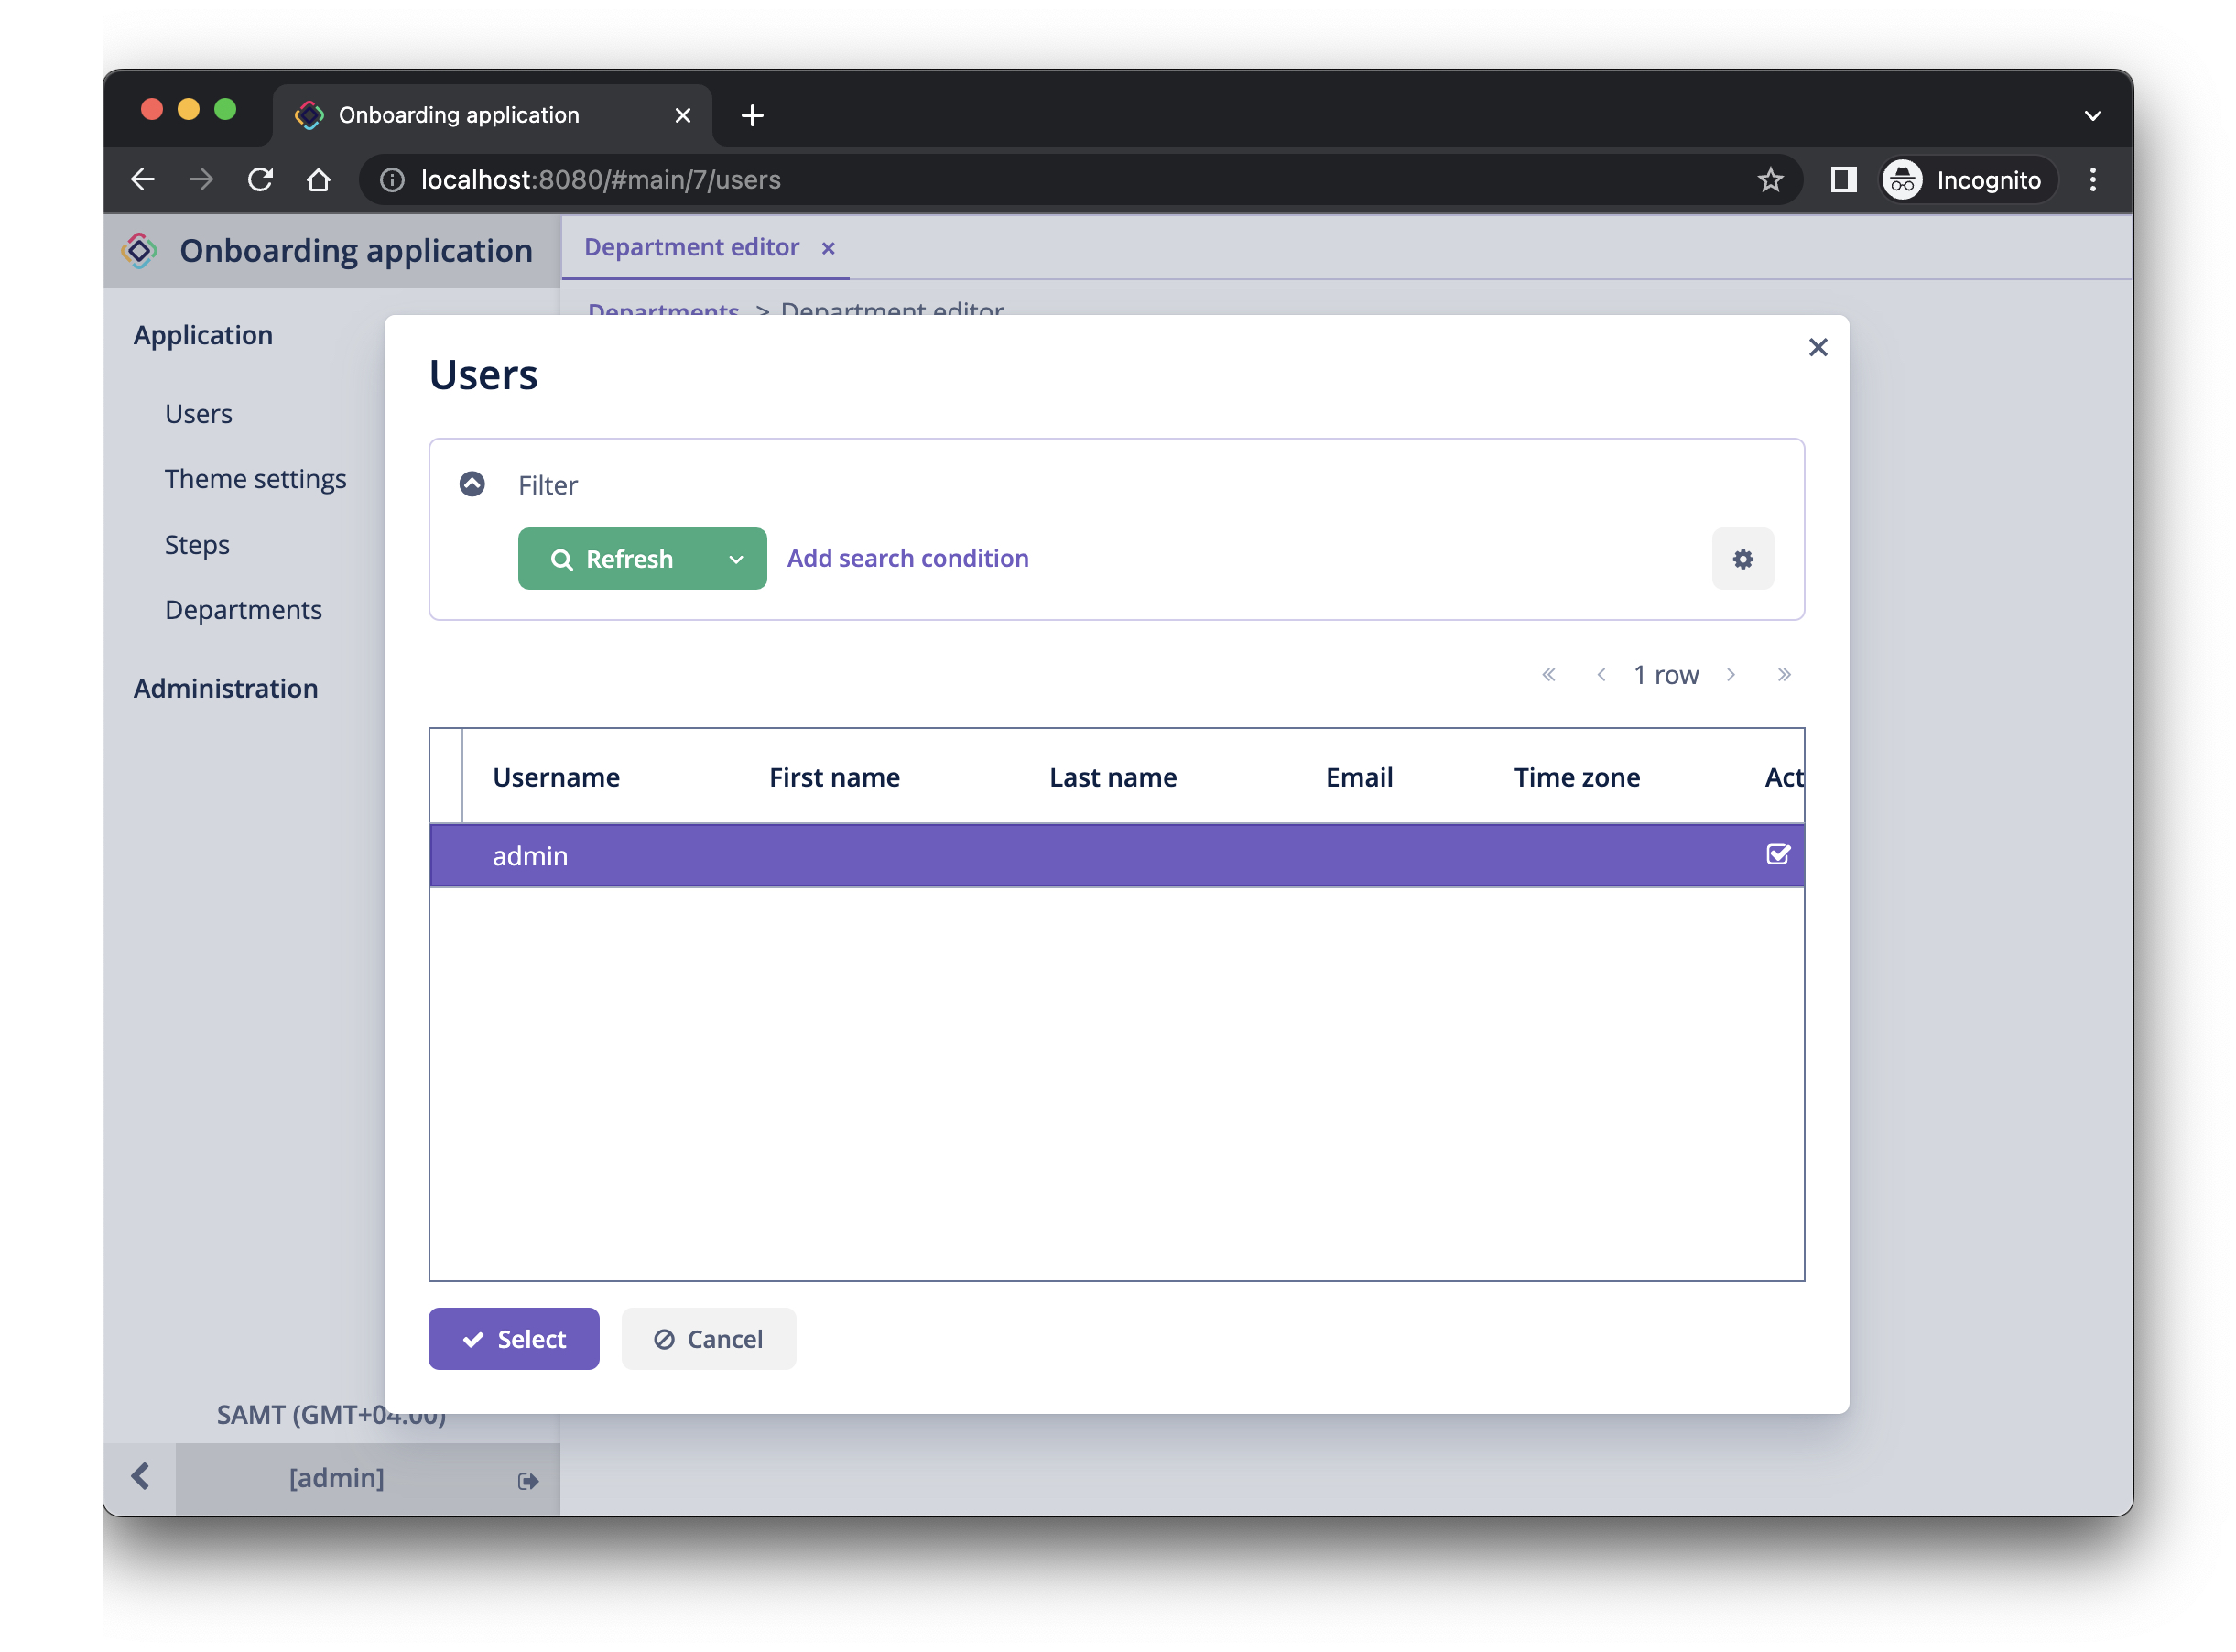
Switch to the running application and reopen the users lookup screen through the HR Manager picker. The screen looks cleaner now:
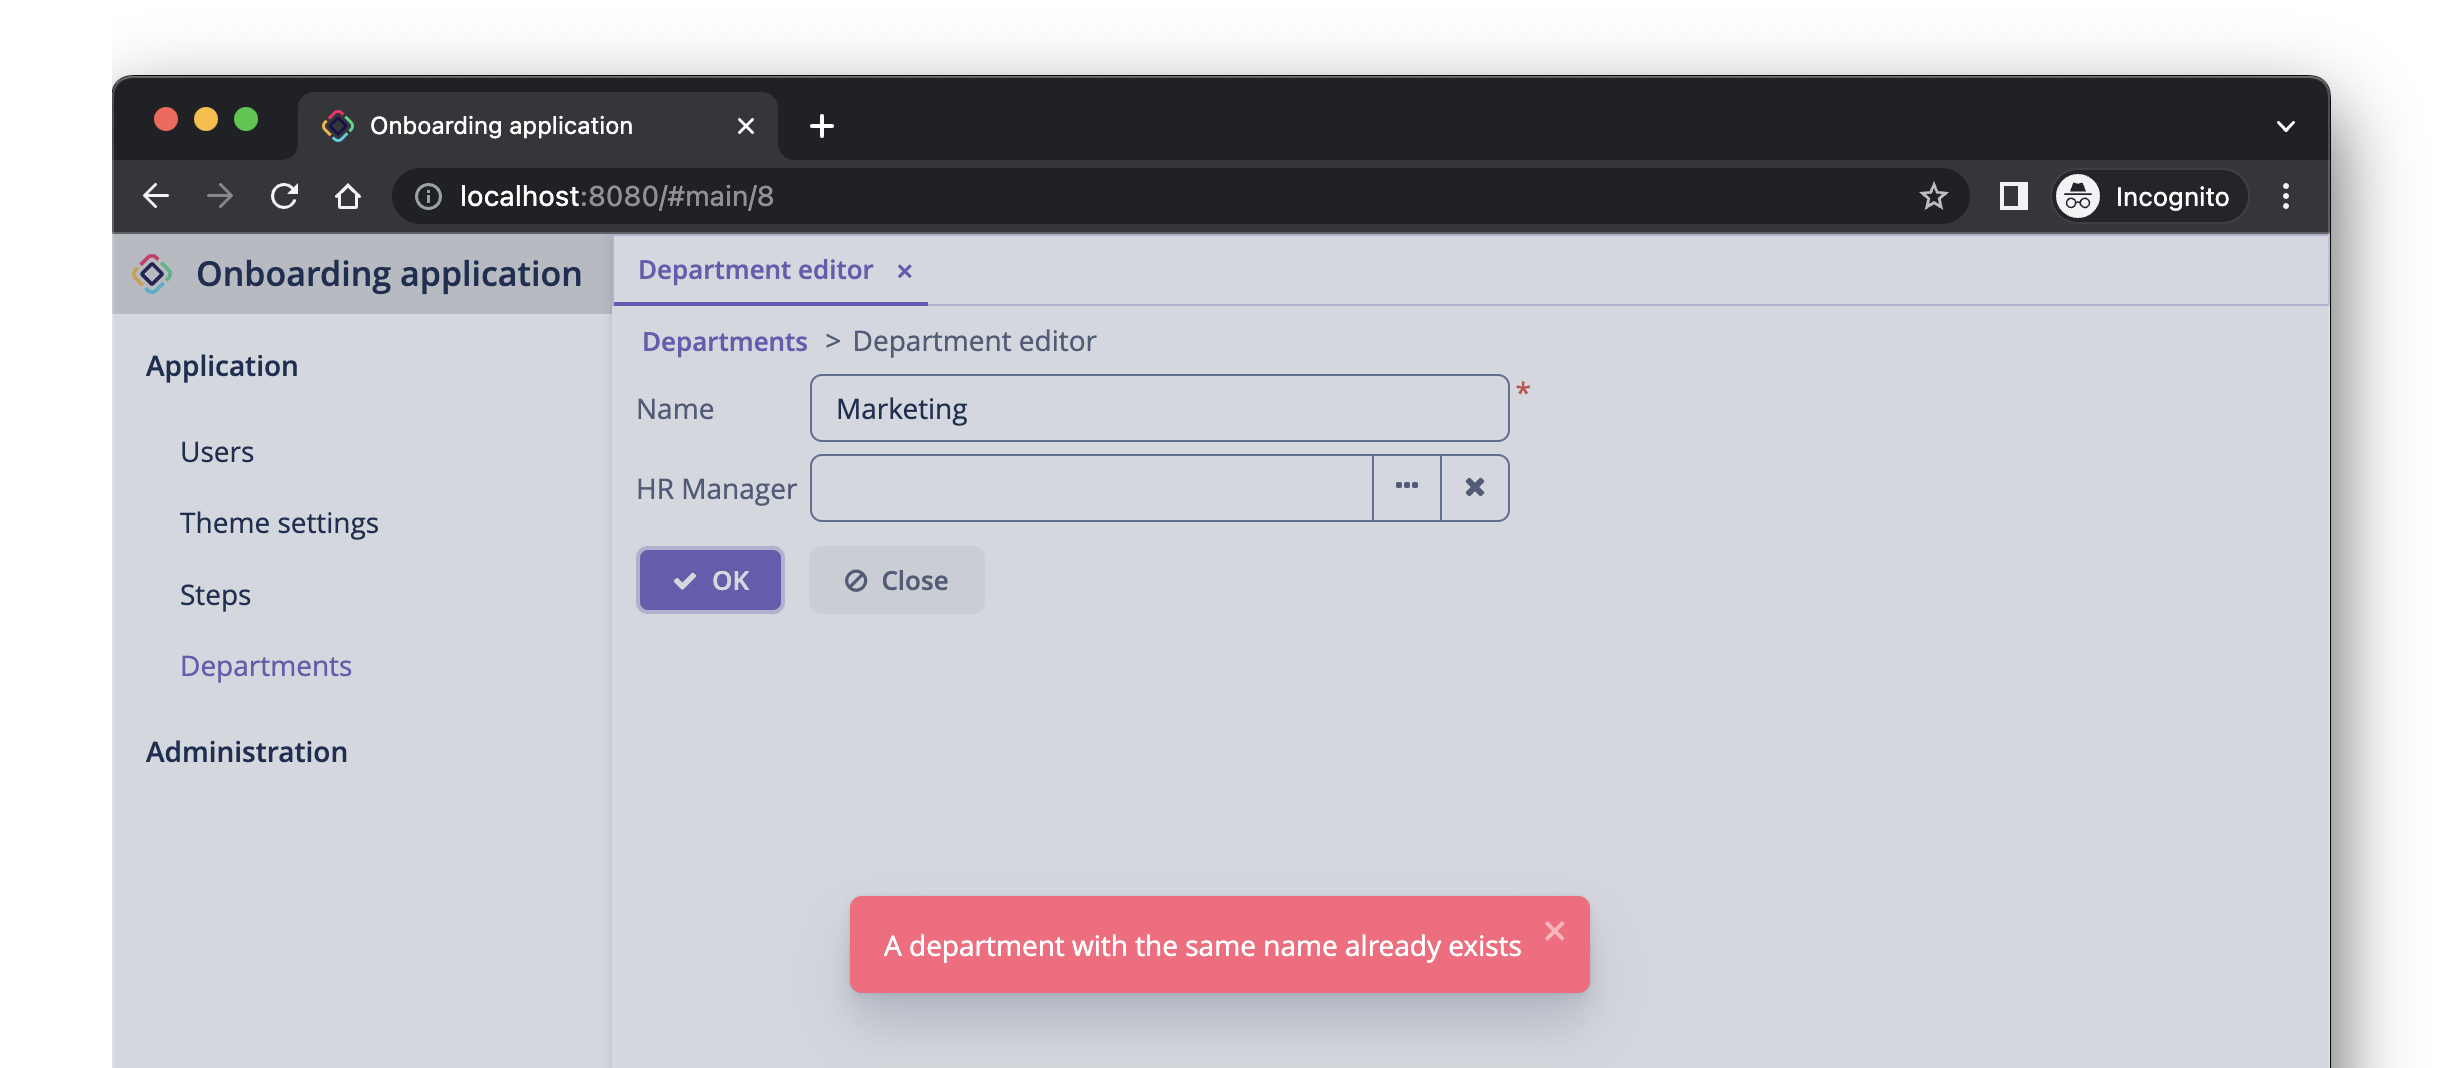
Changing Unique Constraint Violation Message
If you try to create another department with the same name, you will see the error message about the unique constraint violation:
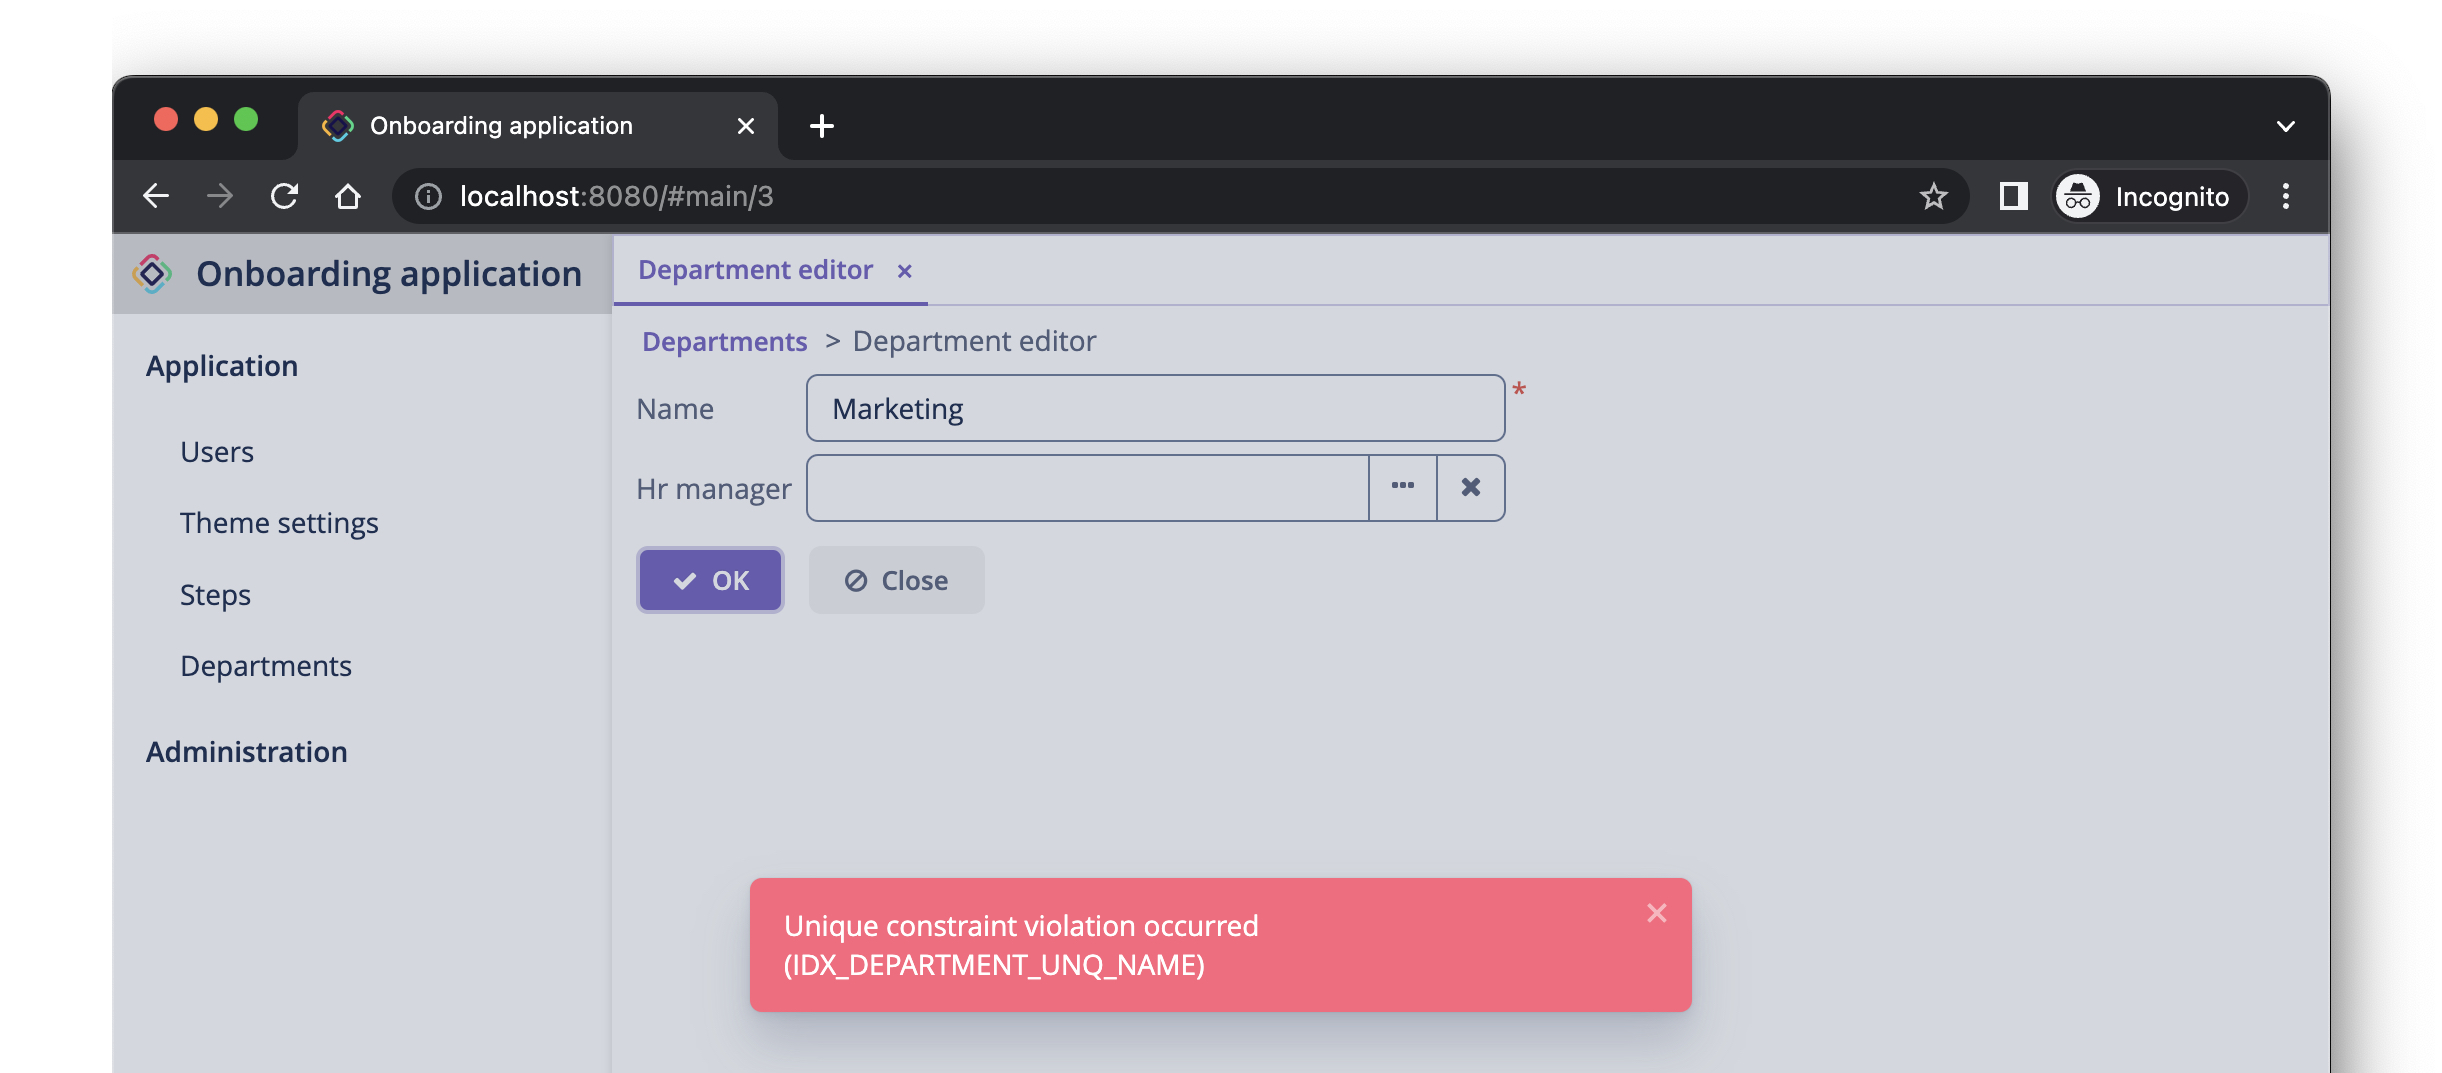
The default message is not very user-friendly, but you can easily change it.
Double-click the User Interface → Message Bundle node in the Jmix tool window and add the following line:
databaseUniqueConstraintViolation.IDX_DEPARTMENT_UNQ_NAME=A department with the same name already existsThe message key should start with databaseUniqueConstraintViolation. and end with the name of the database unique constraint. You may notice that the file already contains a similar message for the unique constraint on the username attribute of the User entity.
Switch to the application and test your changes. Now the error shows your message:
Summary
In this section, you have built the second feature: management of departments.
You have learned that:
-
Studio helps to create reference attributes and generates Liquibase changelogs with a foreign key and an index.
-
To show a reference attribute in a browse or edit screen, it should be included in the fetch plan of the screen.
-
The instance name is used to show a reference in UI.
-
The EntityPicker component is used by default to select a reference in a generated edit screen. Its actions can be customized, for example to show a lookup screen in a dialog window.
-
The uniqueness of entity attributes is maintained on the database level by defining unique constraints.
-
A unique constraint violation message can be easily customized.
-
Captions and messages generated by Studio are stored in the message bundle of the application.
-
Studio hot deploys changes in screens and messages to the running application, which saves from restarting the application when developing UI. Changes in entities are not hot deployed.
