Report Execution History
The Reports add-on provides a mechanism of a report execution history management with the following features:
-
Save execution history for each report. The system administrator can use the report execution history to find out how often a report is executed, how much processing time is spent on a report, by which user and when a report was run, what errors occurred during the execution.
-
Clean outdated report execution history.
The report execution history is disabled by default and can be enabled by setting the jmix.reports.history-recording-enabled application property to true.
The execution history screen is considered administrative and was not added to the main menu. To view the execution history, go to the reports browser (the Reports → Reports menu item) and click on the Execution history button.
If any report was selected in the Reports table, then the execution history is additionally filtered by the selected report. If no reports were selected in the Reports table, the execution history of all system reports is displayed on the execution history screen.
Execution History Action
You can open execution history in any screen using ExecutionHistoryAction and an associated button or a component context menu item.
io.jmix.reportsui.action.list.ExecutionHistoryAction – a standard action for displaying the report execution history. It should be defined for a Button or a list component (Table, DataGrid, etc.).
Below is an example of using the declarative action for the Table:
<actions>
    <action id="history" type="executionHistory"/> (1)
</actions>
<buttonsPanel id="buttonsPanel"
              alwaysVisible="true">
    <button id="historyBtn" action="literatureTypesTable.history"/> (2)
</buttonsPanel>| 1 | The type attribute defines a specific executionHistory action type, provided by the framework. |
| 2 | Add a button with report history action. |
Example of programmatically creating the action together with a button declared in the screen XML descriptor:
@Inject
protected Actions actions;

@Inject
protected Button execHistoryBtn;

@Subscribe
public void onInit(InitEvent event) {
    ExecutionHistoryAction action = actions.create(ExecutionHistoryAction.class, "execHistoryReport");
    execHistoryBtn.setAction(action);
}
When the action is performed, a modal Execution history dialog will open where reports related to the current screen will be displayed. After clicking on the Execution History button, the execution history for the selected reports will be displayed. If no reports have been selected, then execution history will be displayed for all reports associated with the screen.
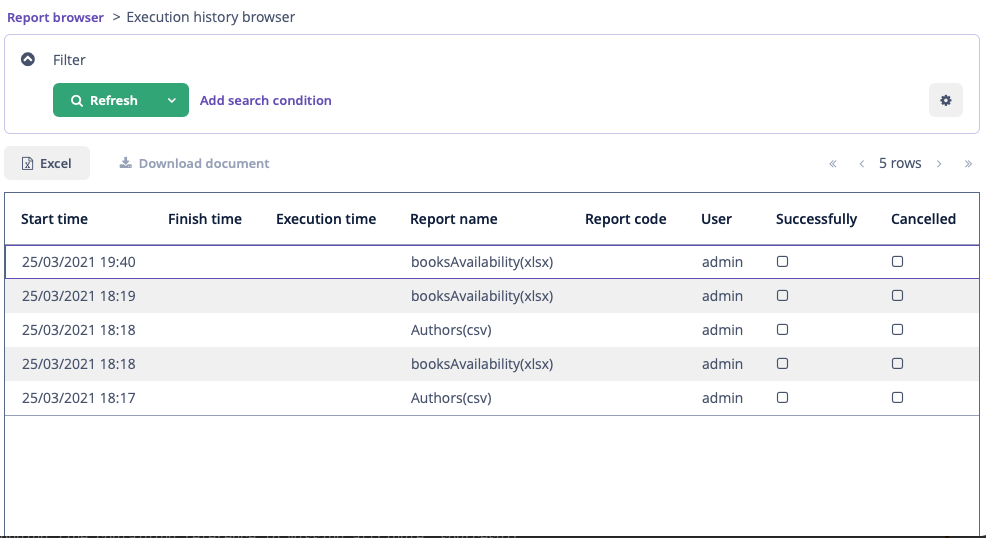
"Cancelled" flag means that the user launched the report as a background task, and then canceled it.
Execution history is also recorded even for reports which are not yet saved to the database, but launched from the report editor (by clicking the Run button).
Output Documents
The mechanism provides an ability to save output documents – report results files – in the file storage. This feature consumes a file storage disk space; it is configured separately and is disabled by default. To enable it, define the jmix.reports.save-output-documents-to-history application property to true:
jmix.reports.save-output-documents-to-history = trueNow, if you select an item in the execution history table, the Download document button becomes available. Click the button to download a document that is a report result file.
Reports with output types chart, pivot table, and table do not have result files, so the execution history of such reports does not save any output documents.
If you run the report programmatically using the createAndSaveReport() method, it saves another copy of the same result document to the file storage. These two files are put to the file storage independently.
History Cleanup
You can use Quartz Job Scheduler to clean up the report execution history periodically.
-
Include Quartz in your project as described in the Quartz Job Scheduler Setup section.
-
Create job class and call
ReportExecutionHistoryRecorder.cleanupHistory():@Component("jmxrpr_ReportHistoryCleaner") public class ReportHistoryCleanJob implements Job { @Autowired private ReportExecutionHistoryRecorder reportExecutionHistoryRecorder; @Override public void execute(JobExecutionContext context) throws JobExecutionException { reportExecutionHistoryRecorder.cleanupHistory(); } } -
Add the following beans to the main application class:
@Bean
JobDetail reportHistoryCleanJob() {
    return JobBuilder.newJob()
            .ofType(ReportHistoryCleanJob.class)
            .storeDurably()
            .withIdentity("reportHistoryClean")
            .build();
}

@Bean
Trigger reportHistoryCleanTrigger() {
    return TriggerBuilder.newTrigger()
            .forJob(reportHistoryCleanJob())
            .startNow()
            .withSchedule(CronScheduleBuilder.cronSchedule("0 0 1 * * ?")) (1)
            .build();
}
1 Schedule for nightly, for example, 0 0 1 * * ? -
Set up the report history cleanup configuration properties:
-
jmix.reports.history-cleanup-max-days – 730 days by default.
-
jmix.reports.history-cleanup-max-items-per-report – 1000 by default.
-
When the report execution history is cleaned up, the associated output document is also deleted from the file storage.
